Sammy Davis Jr. In ‘porgy & Bess’ Canvas Traditional 1 5/8″ Natural Espresso Wood Grain 22×31 Photo On Canvas

Sammy Davis Jr. In ‘porgy & Bess’ Canvas Traditional 1 5/8″ Natural Espresso Wood Grain 22×31 Photo On Canvas


Sammy Davis Jr. In ‘Porgy & Bess'” is an art print by Gjon Mili from The Life Picture Collection. Get photo prints of “Sammy Davis Jr. In ‘Porgy & Bess'” in a variety of frames, styles, and materials. Photographer Bio Emigrating to the United States from Albania in 1923, Gjon Mili is regarded as the first photographer to use electronic flash and stroboscopic light to create photographs outside of a scientific context. A true pioneer of the artform, Mili’s photographs of dancers, athletes, and pictures or performances have shaped our understanding of how movement too rapid or too complex for the eye to discern is captured in the still image. Mili’s career as a photographer for Life Magazine spanned four decades and saw the publication of thousands of his photographs, taking him around the world; from collaborations with Pablo Picasso, to the incarceration of Adolph Eichmann, to original photos from Broadway plays. The Life Picture Collection From one of the most iconic magazines ever to hit the shelves comes The Life Collection – an archive of some of the most recognizable imagery of the 20th Century. Documenting events in politics, culture, celebrity, the arts and the American experience, these compelling and provocative photographs include the works of some of the greatest photographers capturing some of the greatest moments in history.

Price: $
Sold by Photos.com by Getty Images

Posted in How To Photograph | Tagged , , , , , , , , , , , | Leave a comment

Too dark in your home? Here’s 6 ways to find the natural light!

Once the mercury starts to dip, my desire to stay indoors starts to rise. Plus, with my kids not getting home from school till late afternoon, that ends up leaving little time to get some shots outside before the sun sets.

Since I don’t own a flash, nor do I know how to use one (it’s on my list of things to learn!), I have to utilize either natural or artificial light when shooting indoors.

1. Find the light for that time of day

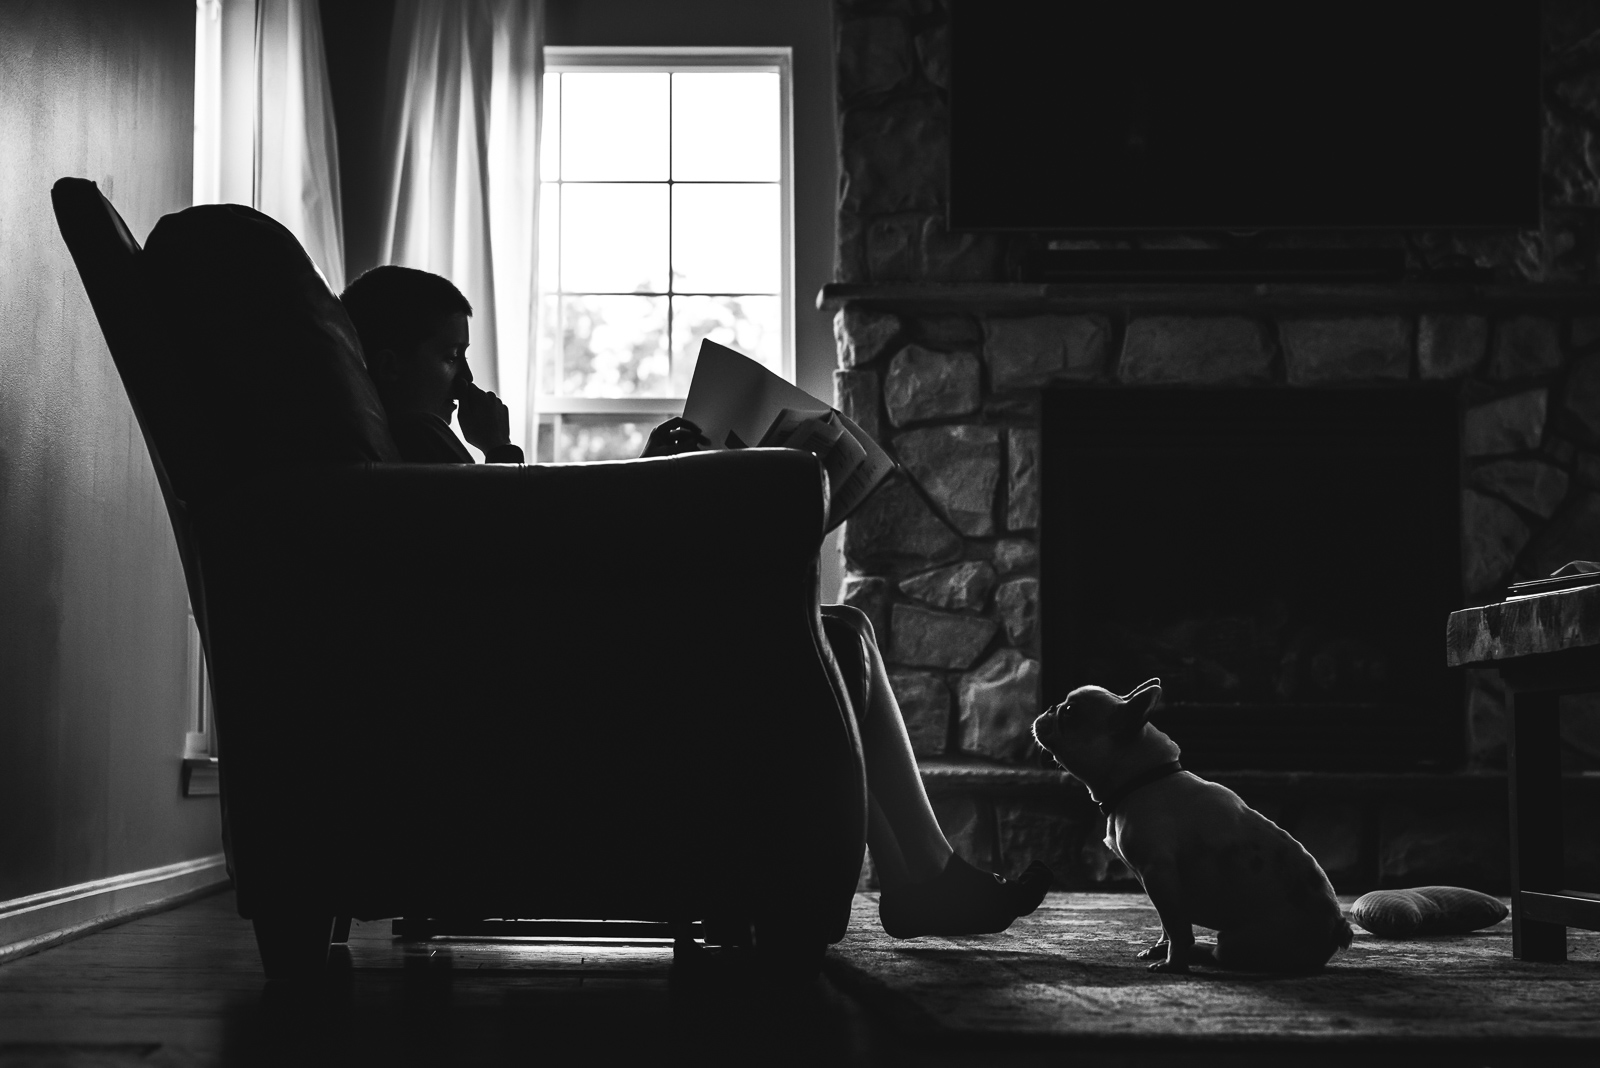
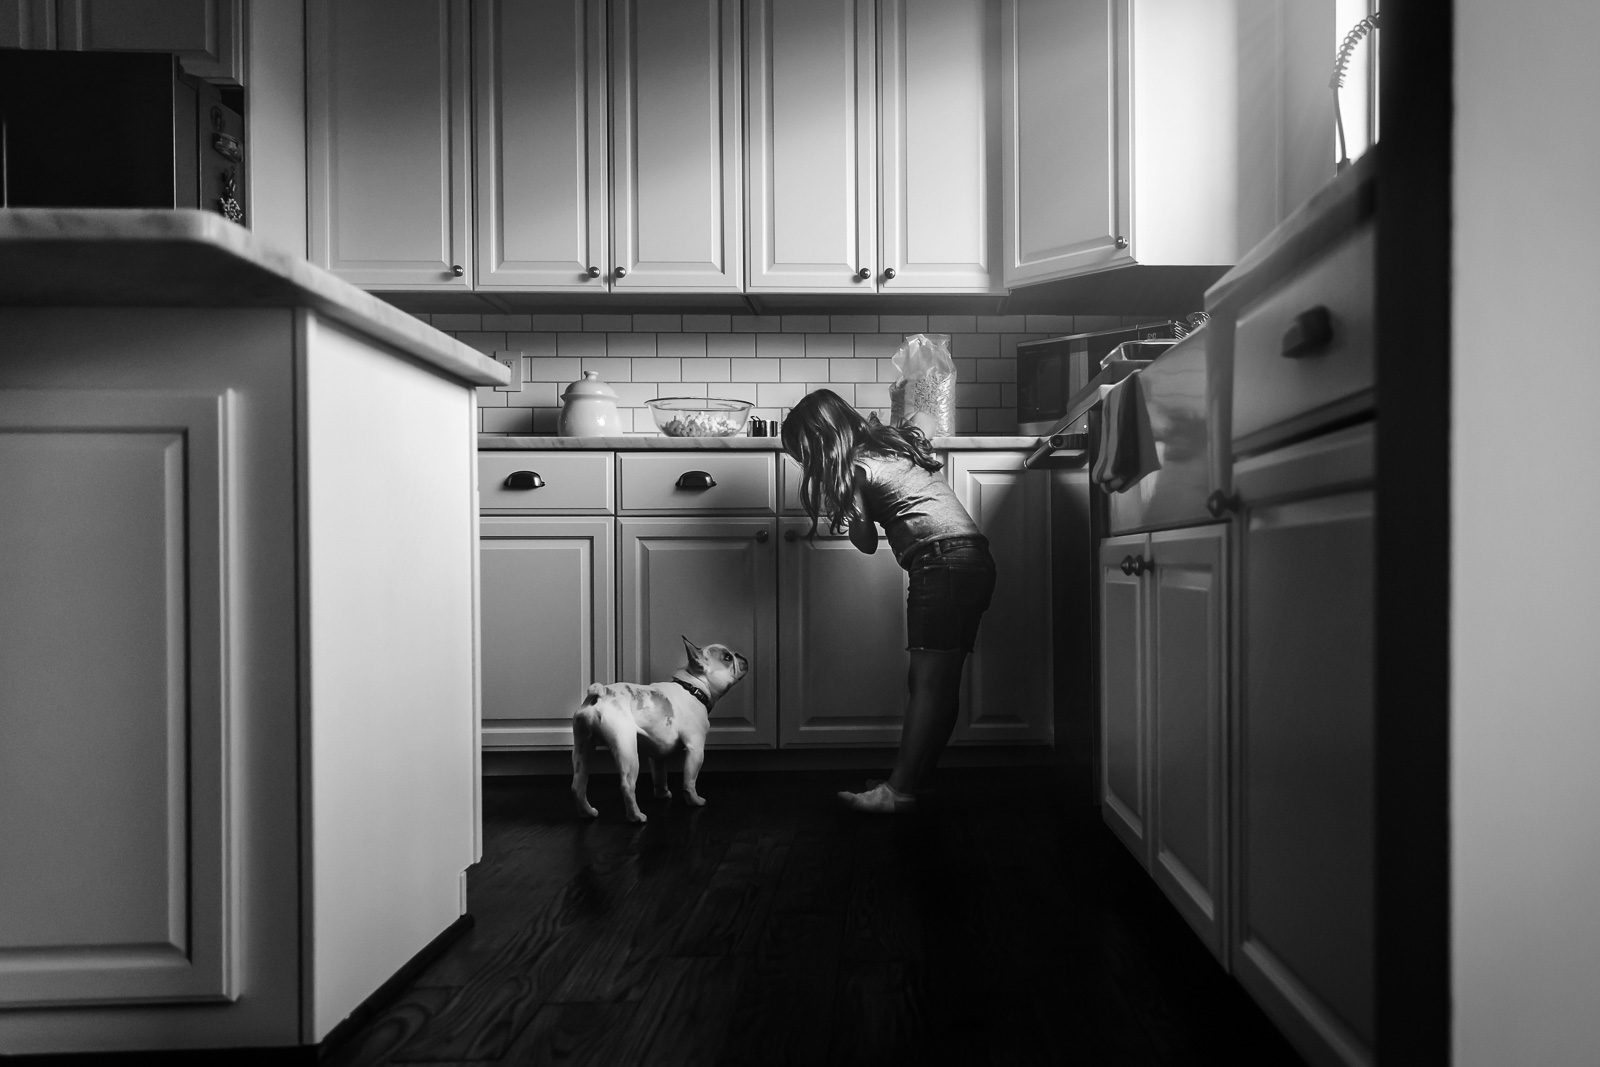
First things first, I normally try to shoot using natural light 99% of the time. In my home, we have a pretty decent amount of windows, so during different times of the day you’re bound to find at least one part of the house that has ample light.

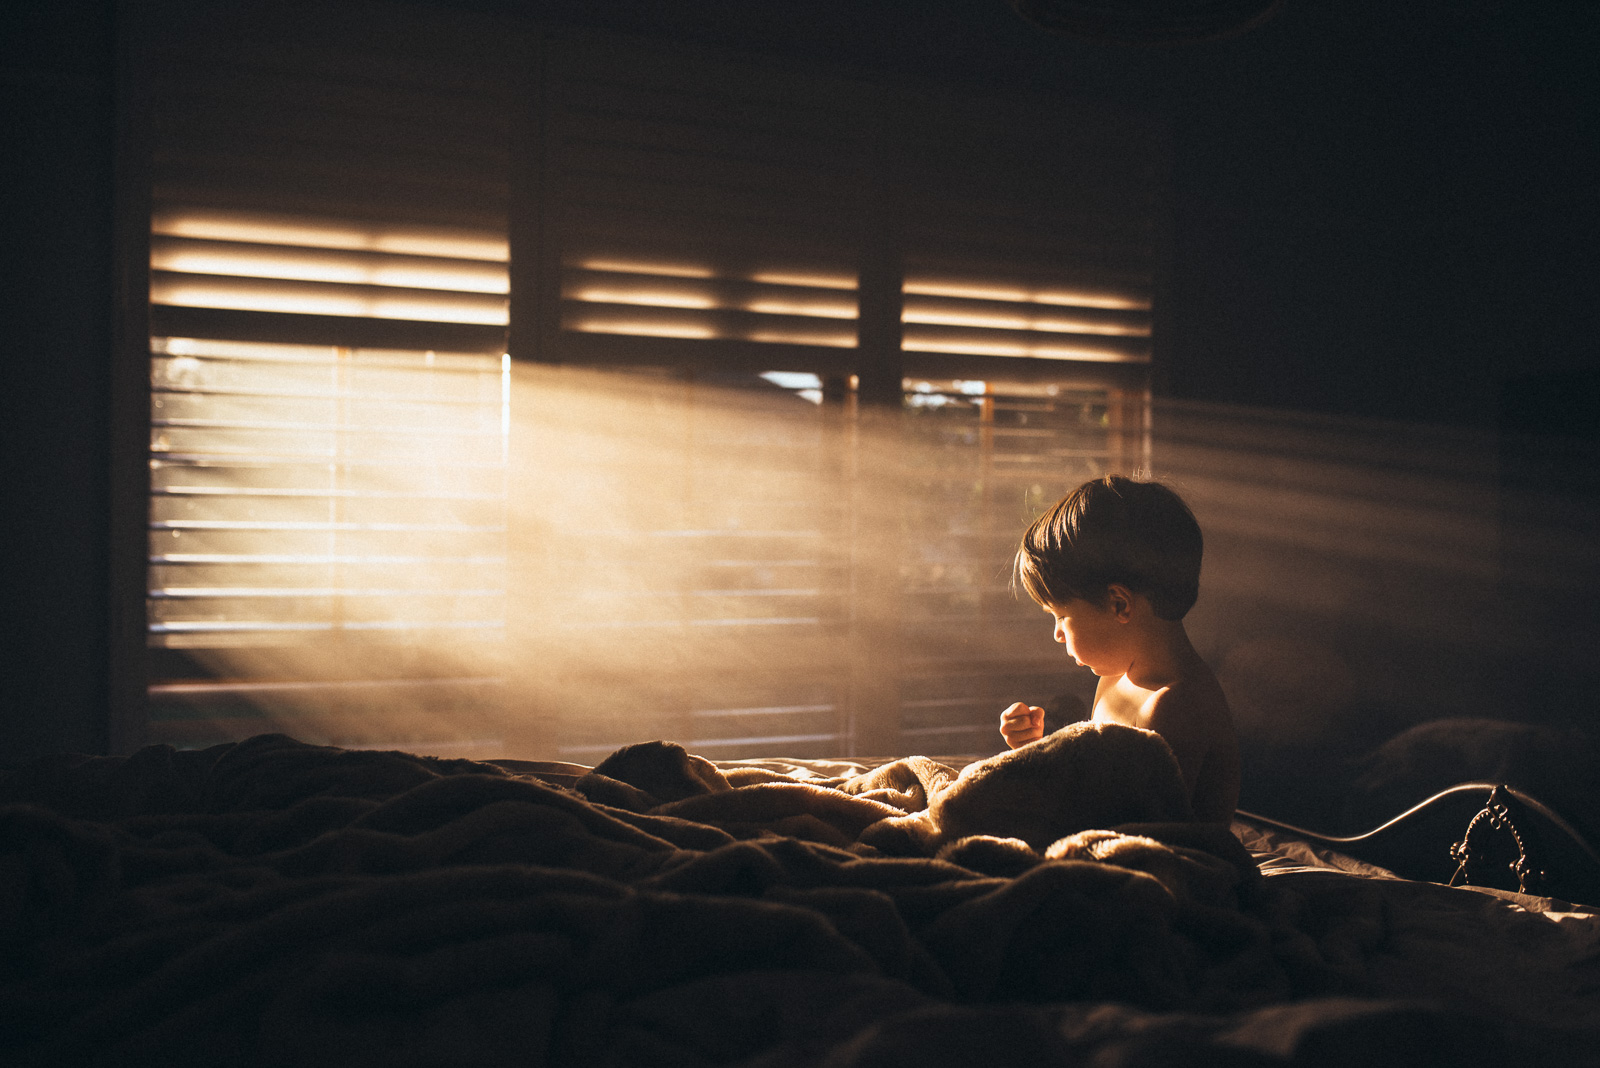
Figure out where the light hits at different times of the day. I’m sure you’ve heard that before, but it bears repeating. Really, get to know the light in your home. Become good friends. I know that in the late afternoon, the light is amazing at the back of our house. The late afternoon sun just comes streaming in. So, if I’m in need of a shot, that’s where I’ll make sure to place my subject, or at least encourage them to do their playing/writing/photo-worthy activity there.

toddler reaching onto kitchen cabinets by Jennifer Nobriga

2. Ask your kids to play in a certain spot

Our windows are on the larger side, so I’ll often have my kids do their activity right in front of them. It’s not like I just happen upon them sitting in the amazing light – I wish! What will generally happen is I will see them doing something and ask them if they’d mind moving to a different spot (with better light!) so I can take their picture. They normally go along with this without any fuss and that’s when I will direct them towards the better light around our windows.

NOTE: If they don’t want me to take their picture, I do not force it. I respect their wishes and try another time.

pic of girl singing by Jennifer Nobriga

3. Use the windows and light to frame your kids

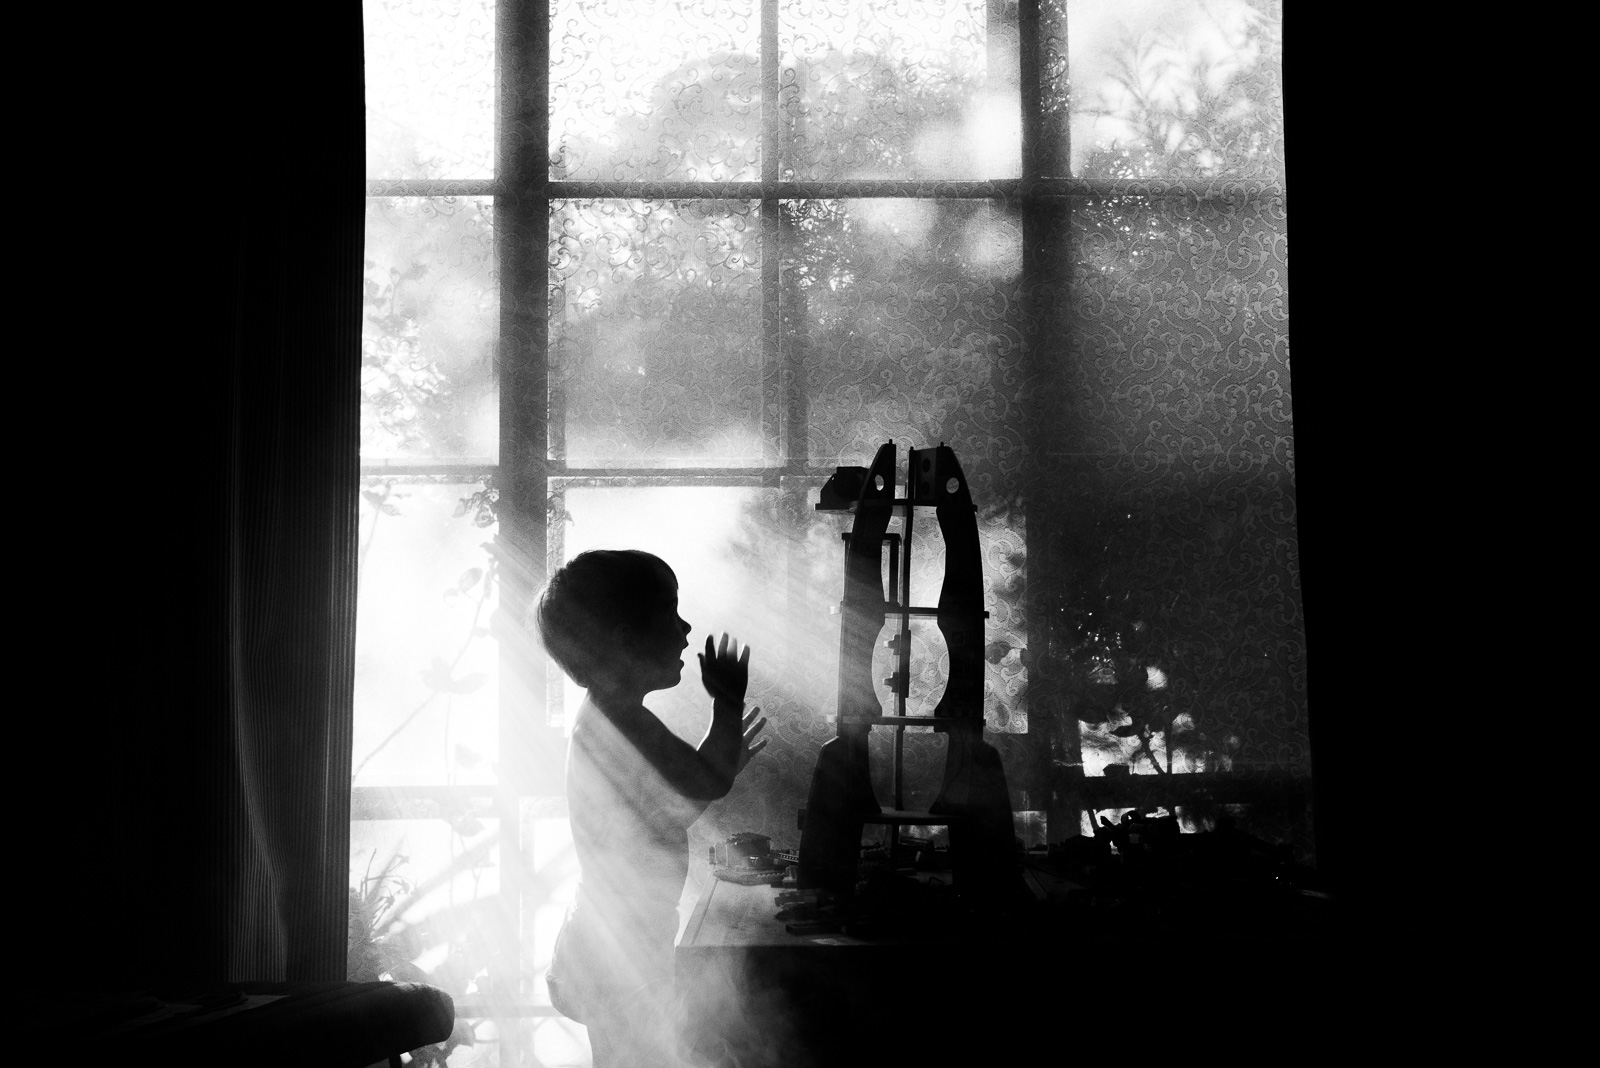
I use the light from the windows in different ways, although backlight is probably one of my favorite ways to light my kiddos. In fact, I love to create a moodier look with backlight by creating a bit of a silhouette by exposing for the highlights on my subject.

Just having my kids in close enough proximity to a window, I can use the surrounding elements in the room to frame the light that’s coming through and create a story.

photo of girl looking out a window by Jennifer Nobriga

picture of girl in a white kitchen by Jennifer Nobriga

Clickin Moms photography forum

4. Open the curtains and/or blinds

When I’m using natural light in my indoor images, I make sure to open up any curtains, blinds, etc that I’ll be needing for my light source. Depending on the image, I might want to flood the room with light, or not. I also make sure to turn off any overhead lights since I don’t want any weird color casts or any change in color temperature to affect my final image.

black and white photo of dog watching boy read by Jennifer Nobriga

5. Use the existing artificial light

That’s not to say that you can’t use any artificial light you might have around your home! You can use so many artificial sources like computers, the tv, the fridge, etc to cast just enough light on your subject. When using a light source like this, I will also turn off any other lights that I don’t want to use. I just make sure to have that one light source and make sure that one, or both, of my kiddos is near it in some way.

A big help when using the artificial light around your home is to manually adjust your white balance. I will either use Kelvin or an ExpoDisc to make sure that I get my color just right. Learning how to do this changed my photography and made it so much easier for me to edit my images.

night photo of baby sleeping by Jennifer Nobriga

picture of boy getting food out of the fridge by Jennifer Nobriga

6. Grab a wider angle lens

One last thing, for indoor shooting, I tend to reach for either my 35mm or my 24-70 to let more light into the frame. The available light, the size of the room, and the effect that I am trying to create with my final image will determine which lens I end up going with. I really like including as much as the scene as I can so wider is the way I normally go. I also don’t mind pushing my ISO if need be. I love a little grain in an image, but I can always get rid of it in post processing if I want to.

black and white pic of girl and dog in the kitchen by Jennifer Nobriga

photo of baby in walker by Jennifer Nobriga

That’s it! There are so many ways to use the available light in your home to create amazing images. Now go look around your home and see what you can find, I think you’ll be really surprised!

The post Too dark in your home? Here’s 6 ways to find the natural light! appeared first on Clickin Moms.


Clickin Moms

Posted in Photograpy How To | Tagged , , , , , , | Leave a comment

Throwback Thursday – WPPI 1992 With “Big Daddy” Blair

It’s 1992 in the Hasselblad booth at WPPI and “Big Daddy” is doing a live shoot of a model on a motorcycle. As with every program, he would have taught non-stop all day if we let him. I wonder how many photographers today once sat in a Don Blair program? 

The fun of this image has nothing to do with Don, but the owner of the bike. At this point in my career I’d had a little experience with gas tanks, having battled it out with the crew at Javits in NYC when we had Ansel Adam’s Cadillac as part of the exhibit on the trade show floor. So, knowing the challenge in Vegas with the Fire Marshall, I very politely asked the owner of the bike to make sure his gas tank was empty.

I’m not exactly petite, but this guy was huge and made me feel like a little kid. He just looked at me and said, “Don’t worry about it!” Well, I wasn’t going to give up and again said as nicely as I could, “Come on, work with me. We don’t want a problem with the Fire Marshall.” His response, “Don’t worry about it, I got it covered!”

Okay, now I don’t know what to do next, but took one last shot at it. He was the model’s boyfriend and was doing all of this as a favor to her and “Big Daddy.” So, one more time, “Look, the last thing I want is a scene, but we’re going to be in hot water if you don’t get that tank emptied!”

He looked at me and just grinned – then pulled out his wallet and showed me his badge. He was with the Las Vegas Police Department. Still smiling he said, “Who do you think you’re going to have a problem with?”

He gave me a slap on the back and the prospect of having a problem with the Fire Marshall was history – all was right in the world once more.

Obviously this is just a grab shot, but often, it’s not the images that are fun, but the stories and memories they bring to the surface. Don Blair and I shared one adventure after another. Throw in Terry Deglau and Tony Corbell, and for a decade it was the industry’s equivalent of the Four Musketeers!

Wishing everybody a Happy Throwback Thursday – loaded with great memories and stories to share.

SkipCohenUniversity – SCU Blog

Posted in Photograpy How To | Tagged , , , , , | Leave a comment

How to capture light rays indoors with these 4 tricks

Long before I called myself a photographer, I was struck by the beauty of light seeping into buildings.

Street scenes such as Afternoon Chat by Fan Ho or Grand Central Terminal by Hal Morey have been etched in my mind, and as much as the scene is interesting in itself, it is the dramatic shafts of light that contribute to the striking beauty of the portrait. I love to dream about how this light must have been a regular occurrence in olden days, when cities were filled with smog or buildings were thick with smoke from cigarettes, which I’m imagining are the types of environment in which Fan Ho and Hal Morey created their beautiful pieces of work.

So how can we create the perfect conditions in our own homes for capturing life’s moments in some magical shafts of light?

1. The Light

For any image, light is everything. For images with dramatic rays, it helps to seek light with special qualities.

Look for hard light shining through windows and creating harsh shadows on floors and walls. Note how the light changes around your house, depending on the time of day and season. Capturing this type of dramatic light will be easier towards the start or end of the day, when the sun is lower and will be shining directly through your windows.

Light changes so much in my own house as the seasons evolve. I captured many of the images shown in this article around autumn and winter. Now we are entering spring and summer here in Australia and the sun rises so quickly in the morning that it’s hard for me to capture the morning rays in this room now. However, the rooms at the back of my house receive some gorgeous golden sunset light at this time of year, so I turn my focus to that part of the house.

photo of boy looking out a window with streaks of light coming through the blinds by Amy Shire

photo of boy sitting on bed with light shining in windows by Amy Shire

2. The Haze

There are many ways to create the haze that helps to capture these beautiful rays. For these images I used a little fog machine, which I bought from a local homeware store for $ 40. These machines give off quite a bit of smoke fairly quickly, so I let it puff away with the door shut for a little while, and then I wait for the wispy smoke to settle into a soft haze. Once I am happy with the haze, I ask the kids to come in and play! Here’s a fun behind-the-scenes video I recorded to show you…

I have also seen images where the photographer has burned food, sometimes accidentally and others intentionally! Make some pancakes, burn toast or sizzle some bacon in the morning and watch as the stunning early light of the day is captured in shafts of hazy light. I’ve seen other images where the photographer has shaken dusty old rugs or thrown flour into the air so that the particles sparkle in the path of the rays. There’s also water spray, so if your bathroom window catches some beautiful rays, get your kids (or yourself!) in the shower/bath at the right time of day for the light and capture it in water droplets and steam.

backlit picture of boy sitting on a bed by Amy Shire

Clickin Moms photography forum

3. The Shadows

You will also need to consider the shadows. Capturing shafts or rays of light is more effective when the light is contrasted against a darker background. Shooting straight on to a window won’t result in an abundance of dramatic light rays as they will blend with the general light from the window. You need to position your camera at an angle that will capture light on dark.

black and white photo of mom and boys by Amy Shire

4. Getting Playful with Patterns

Playing with different shapes in front of the light source can be fun. I used shutters for most of my images shown in this article, as I loved the long rays created through the slats. However, I used a patterned blind for the below image of my son playing with a rocket as it added more texture and interest to the image. Play around with different patterned net curtains/fabric in front of the window. Venetian blinds with thin strips will give a different effect to the wide slats on my plantation shutters.  One large window with no inner grid will produce one large shaft of light, spotlighting your subject.

black and white picture with light rays by Amy Shire

Above all, have fun!

My kids loved playing in the fog (although it can get a bit thick so I didn’t let them play in it for too long), and I fell in love with the dramatic light that it captured, so we all made some sweet memories together!

Would you like to win a 16×20 Acrylic Print from Color Inc.?

a Rafflecopter giveaway

Long before I called myself a photographer, I was struck by the beauty of light seeping into buildings. But how can we capture that light at home?

The post How to capture light rays indoors with these 4 tricks appeared first on Clickin Moms.


Clickin Moms

Posted in Photograpy How To | Tagged , , , , , | Leave a comment

Giant Oak Tree On Martha’s Vineyard. Canvas Gallery Wrap 27×18 Photo Canvas

Giant Oak Tree On Martha’s Vineyard. Canvas Gallery Wrap 27×18 Photo Canvas


Giant oak tree on Martha’s Vineyard.” is an art print by Alfred Eisenstaedt from The Life Picture Collection. Get photo prints of “Giant oak tree on Martha’s Vineyard.” in a variety of frames, styles, and materials. Photographer Bio Alfred Eisenstaedt (1898-1995), or Eisie to those who knew him, received his first camera as a gift from his uncle at 14, a few years after moving to Berlin from Poland with his family. At 17, he was drafted to the German army. His interest in photography blossomed while recovering from a shrapnel wound. He became a regular at museums, studying light and composition. By 31, he was a full-time photographer. In 1933 he was sent to Italy where he shot the first meeting between Hitler and Mussolini. Two years later, when Hitler came to power, Eisie immigrated to America. Soon after arriving in New York, he was hired along with three other photographers-Margaret Bourke-White, Thomas McAvoy and Peter Stackpole-by Time Inc. founder Henry Luce for a secret start-up venture known as “Project X.” Six months later, Life magazine premiered on November 23, 1936. The first issue sold for 10 cents and featured five pages of Eisie’s pictures. His most famous photo was the kiss in Times Square on V-J day, about which he said, “I was running along the street grabbing any and every girl in sight. Whether she was a grandmother, stout, thin, old, didn’t make any difference. None of the pictures that were possible pleased me. Then, suddenly in a flash I saw something white being grabbed. I turned and clicked the moment the sailor kissed the nurse.” Over his career, Eisie shot a total of nearly 100 covers for Life magazine and some 10,000 prints. The Life Picture Collection From one of the most iconic magazines ever to hit the shelves comes The Life Collection – an archive of some of the most recognizable imagery of the 20th Century. Documenting events in politics, culture, celebrity, the arts and the American experience, these compelling and provocative photographs include the works of some of the greatest photographers capturing some of the greatest moments in history.

Price: $
Sold by Photos.com by Getty Images

Posted in Camera Photography | Tagged , , , , , , , , | Leave a comment