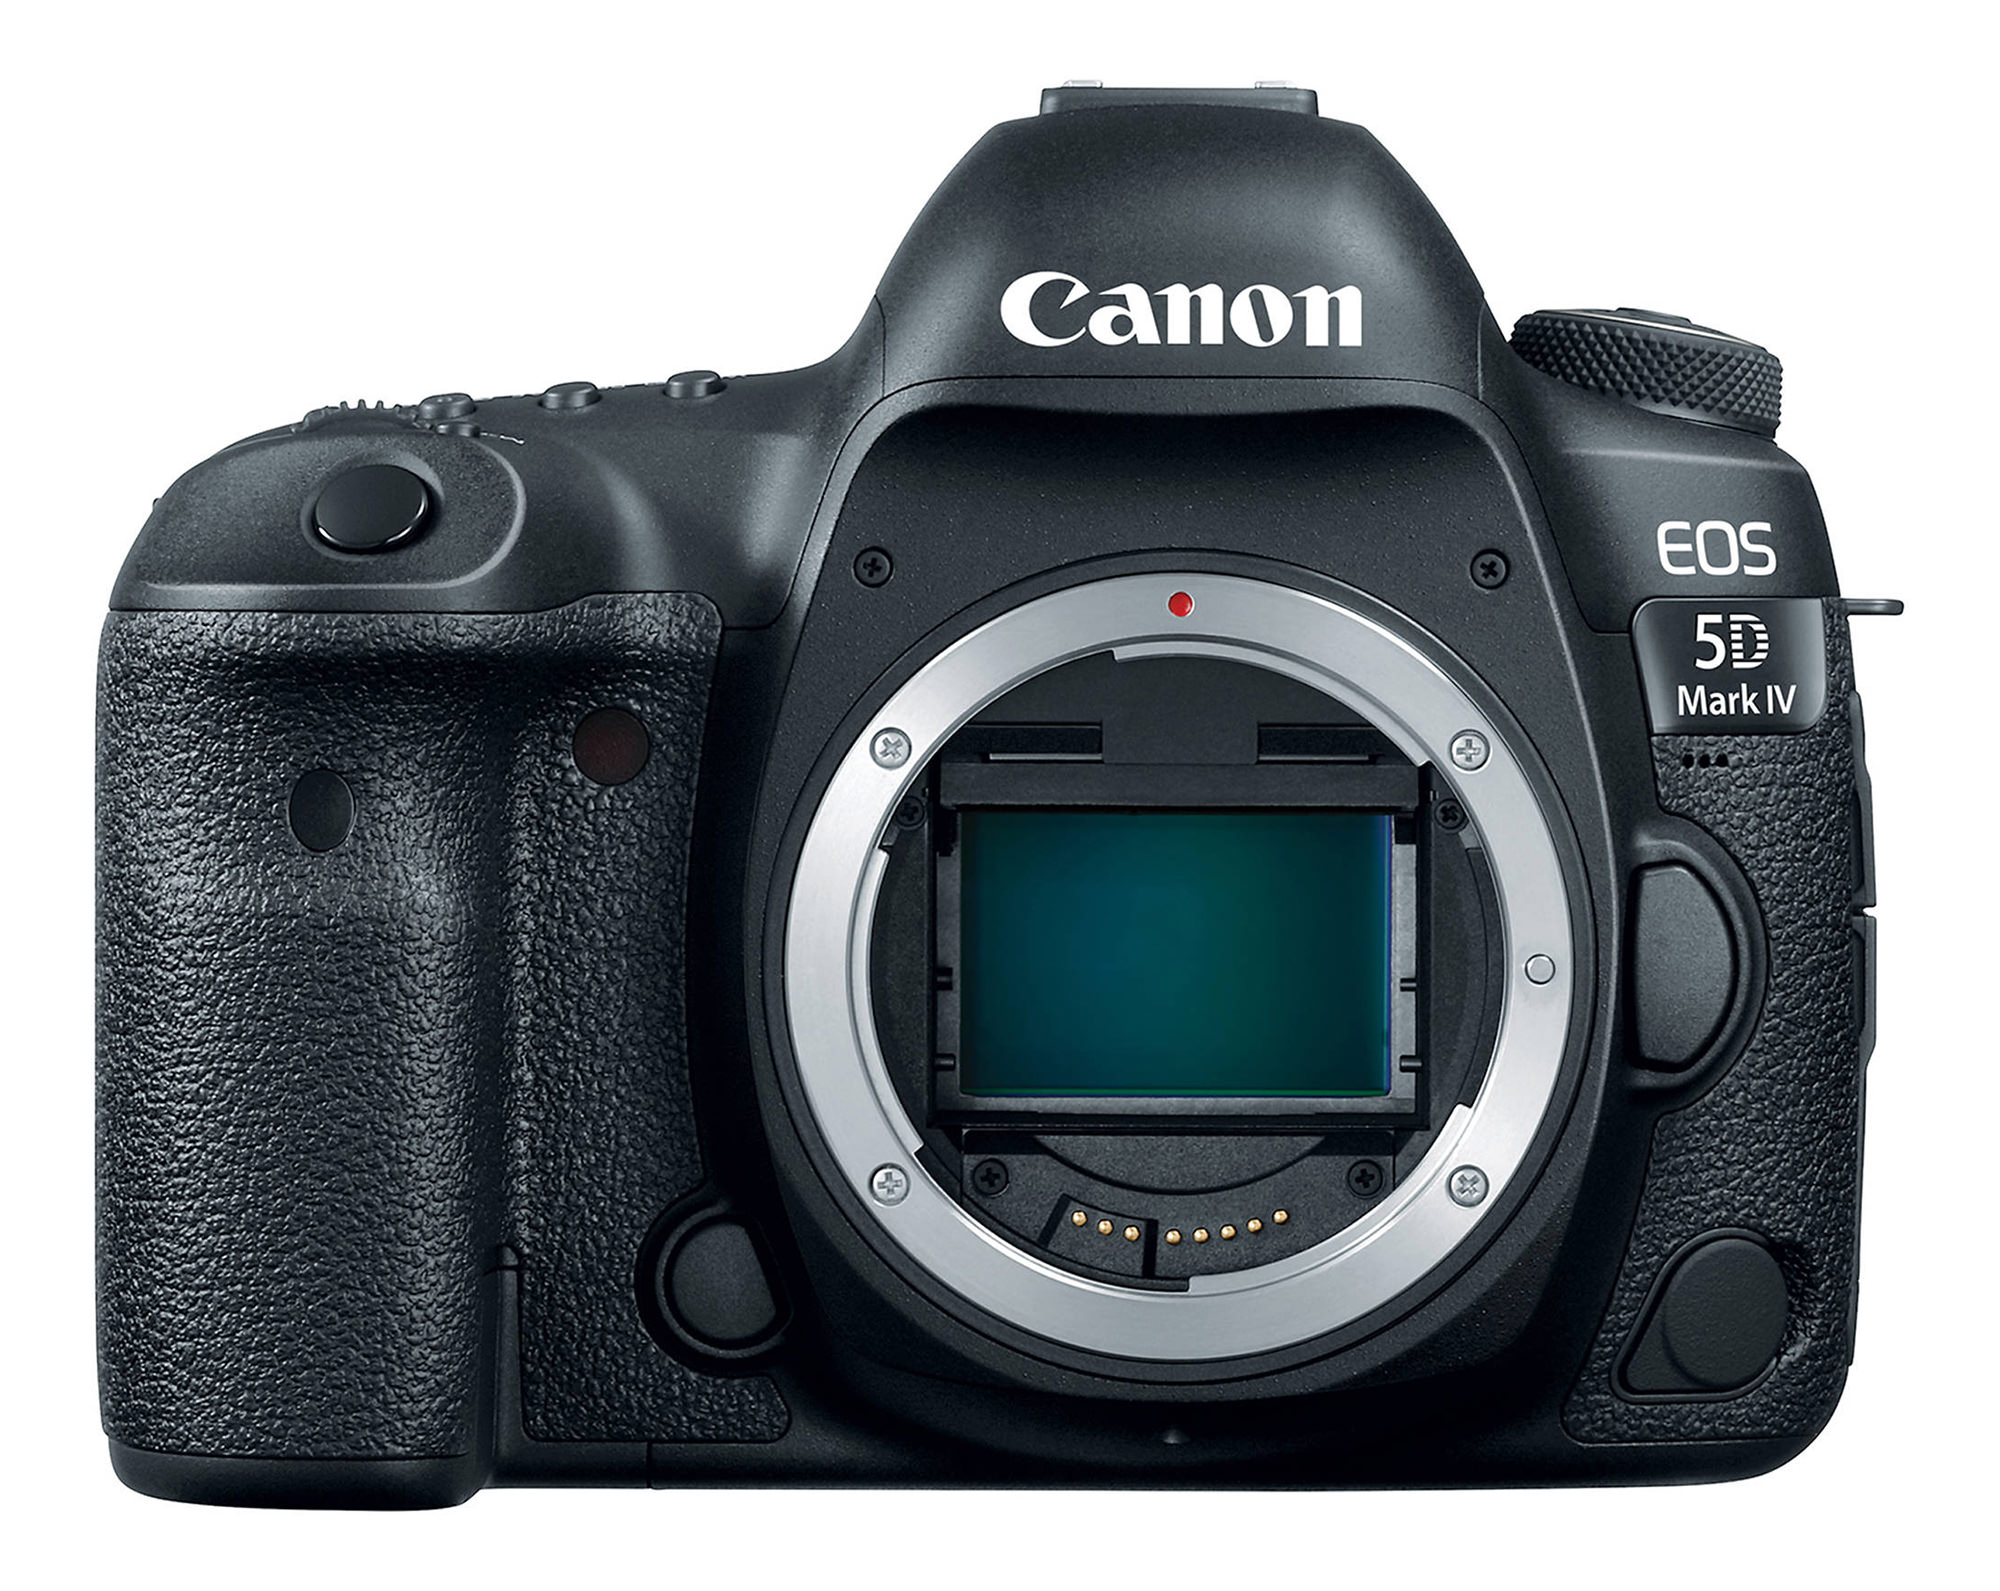
With the arrival of the much-anticipated Canon 5D Mark IV, many photographers might be either moving up to, or upgrading their existing Canon 5D-line cameras to this latest and greatest tool. The 5D line has always been Canon’s stronghold for most types of photography, particularly because of its amazing low-light performance, reliable autofocus, superb ergonomics, solid build and overall stability, making it a preferred DSLR among most professionals. Due to the numerous buttons and the sophisticated menu system of the camera, understanding the functionality of the camera can be rather overwhelming for even intermediate-level photographers. To help guide our readers through these features and menus, we decided to share the settings our team has been using on the camera during the past 2 months while testing out the camera. Please keep in mind that the below information is provided as a guide for those that struggle with the camera. While this particular configuration has been working great for our needs, it does not mean that it is the only way to properly setup and configure the camera.
Before going into the camera menu, let’s first get started on the exterior controls. The Canon 5D Mark IV has a lot of menu options, but there are some things that you can only control with the external controls. In addition, even if menu settings provide options to change particular settings, using external buttons / controls is simply faster and more intuitive.
Autofocus, Drive Modes and Metering
Just like most other Canon DSLRs, the 5D Mark IV has a very simple and uncluttered front, with a single programmable button that is by default used for exposure preview. The top of the camera, however, has a number of dual function buttons that make it easy and convenient to switch between different camera modes and settings. Here they are, to the right of the flash hotshoe:
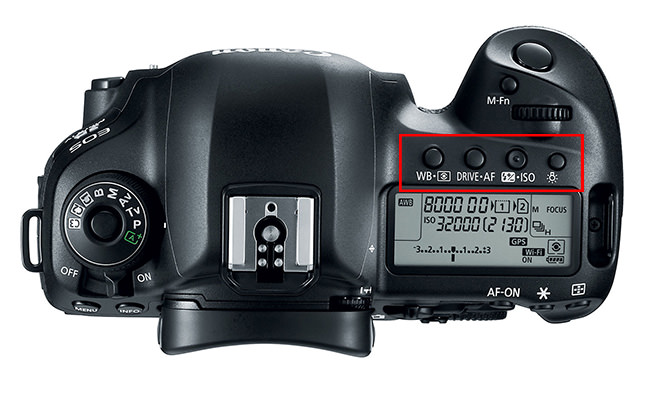
Let’s go through each of these one by one:
- The first dual function button is used for setting up either White Balance or Metering Mode. Press this button once and you can use the rotary dial on the back of the camera to toggle between different white balance presets, such as AWB (Auto White Balance), Daylight, Shade, Cloudy, Tungsten Light, White Fluorescent Light, Flash, Custom and Color Temp in Kelvin. I won’t go over these in detail, as you can read about these in my What is White Balance? and John Bosley’s excellent Understanding White Balance articles. You can also change white balance using the camera menu, as shown below. The second function of the button lets you switch between different metering modes by rotating the dial on top of the camera. The metering modes you will see are: Evaluative, Partial, Spot and Center-Weighted Average. Once again, I won’t go over each mode in detail, as you can read my Camera Metering Modes article, where each metering mode is covered in detail. If you do not know where to start, keep your metering mode in the default “Evaluative” mode, which is the one that looks like an eye. Metering can only be set through this button and there is no place to change it in the camera menu.
- The second “DRIVE * AF” button is used for setting different drive and autofocus modes. Once again, you will need to rotate the rear dial to switch between different drive modes, while the top rotary dial is used to switch between autofocus modes. When you going through the drive modes, you will see the following options:
- Single Shooting – pressing the shutter release button will only fire one shot. If you continue to hold, nothing will happen.
- High-Speed Continuous Shooting – pressing and holding the shutter release button will continuously fire the camera at a speed of 7 frames per second.
- Low-Speed Continuous Shooting – pressing and holding the shutter release button will continuously fire the camera at a lower speed of approximately 3 frames per second.
- Silent Single Shooting – similar to the first setting, but the mirror is raised slower for less noise.
- Silent Continuous Shooting – similar to the second setting, but the mirror is raised slower for less noise when firing continuously.
- 10 second Self-Timer / Remote Control – after you press the shutter release button or engage a remote trigger, the camera waits for 10 seconds before taking a picture.
- 2 second Self-Timer / Remote Control – similar as above, except the wait time is reduced to 2 seconds.
Depending on what you are planning to shoot, you will probably toggle the most between Single Shooting and High Speed Continuous Shooting modes. By default, I keep mine at Single Shooting mode, but if I need to capture fast action (such as wildlife or sports), I switch to High Speed Continuous Shooting mode.
When toggling between different autofocus (AF) modes, you will see the following choices:
- One Shot – is used only for stationary subjects that do not move. When you half-press the shutter button, autofocus locks on the subject and if the subject moves, the focus will not change, resulting in a blurry picture. Only use this mode for photographing stationary subjects (landscapes, architecture, etc).
- AI Focus – this mode is a combination of both One Shot and AI Servo (below) modes in one setting. The camera evaluates the subject/scene and automatically switches between the above two modes depending on what you are photographing.
- AI Servo – this setting is used for photographing moving subjects. When you half-press the shutter button and your subject moves, the camera will re-acquire focus. I usually keep my camera in AI Servo autofocus mode when photographing people, especially my kids running around.
For most stationary subjects, keeping the camera on AI Focus mode works really well. However, if you are planning to shoot a moving subject, then the AI Servo mode is what you want to switch to.
The above is a quick summary, but if you are looking for detailed information on autofocus modes, see my DSLR autofocus modes article.
- The next button is used to dial Flash Exposure Compensation and change ISO. If you shoot flash, rotating the rear dial will allow you to either increase or decrease flash power. Changing ISO is accomplished with the top dial and you can toggle between Auto ISO to regular ISO levels like 100, 200, 400, etc. all the way to ISO 102,400 (Hi 2). Personally, I am a fan of the Auto ISO setting, as it automatically selects the right ISO for me depending on the brightness of the scene. If you are a beginner, I recommend using the Auto ISO setting, the behavior of which can be fine-tuned in the camera menu (as explained in detail further down below).
- The last button is used to light up the top LCD of the camera, which can be useful when photographing in the dark.
There is an extra button called “M-Fn” on the top of the camera right next to the top dial. By default, this one is set to “FEL” (Flash Exposure Lock), which I personally find to be rather useless on the 5D Mark IV. I went ahead and changed mine to “AE lock (hold)” for situations when I need to lock and hold my exposure. This can be achieved by going to Menu -> Camera Menu 3 (Camera Icon with dots) -> Custom Controls -> M-Fn -> AE lock (hold). The Custom Controls are explained further down below.
Camera Shooting Mode Dial
On the top left side of the camera you will find a camera shooting mode dial (often referred to as the “PASM” dial). I have my dial set to “Av” (Aperture Priority Mode) 90% of the time, because the camera does a great job in giving me good exposures. Once you get to know the camera better, I would recommend to explore the “C1” – “C3” settings (more on this below under Setup Menu), because they could save you a lot of time when switching between different shooting environments (say when switching between photographing sports / wildlife and landscapes).
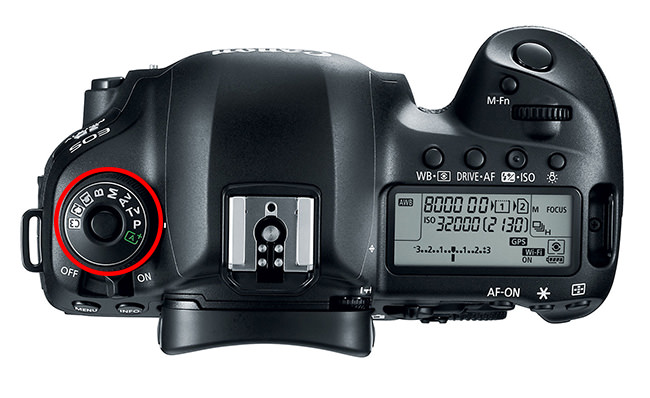
Some situations, such as when photographing panoramas or using off-camera flash call for using the Manual (M) mode, but I would only recommend to use this mode when you get comfortable with the exposure triangle. I personally favor Manual mode when photographing birds to keep my shutter speed the same, while letting the camera control ISO via Auto ISO.
Back Buttons
The Canon 5D Mark IV has a number of buttons on the back of the camera that also serve particular needs. To the top right of the camera, you can find three buttons: AF-ON, AE Lock (Asterisk) and AF Area Mode. The AF-ON button can be used in conjunction with the Custom Functions (see below) for “back-button AF” that you can use for the focusing and recomposing.
The AE Lock button is used to lock the exposure, which can be useful for keeping the exposure consistent between shots or when using the above-mentioned focus and recompose technique.
The last AF Area Mode button is used for selecting a particular focus point. When you press this button once, the top LCD will display “SEL [ ]”, which allows switching between different focus points in the viewfinder, or switching to dynamic focusing / automatic selection (with all focus points activated). If you look through the viewfinder and rotate the rear dial, you will see the focus points go vertically from top to bottom and vice versa. If you rotate the top dial, the focus points will switch horizontally from left to right and vice versa. Personally, I do not like the fact that I have to press a button to activate focus points, so I always use the multi-controller instead, as explained in detail below.
There is one more button on the back of the camera that can be quite handy for making quick adjustments to the camera and that’s the “Q” button that is located to the right of the magnifying glass and playback buttons. I love this button, because it serves as a shortcut to get to the most important settings without having to dig through the many menu items. It gives you access to the exposure triangle, exposure and flash exposure compensation, custom controls, picture styles, white balance + white balance shift, auto lighting optimizer, AF operation, metering mode, drive mode and image size / quality settings. So this button is a great shortcut to seeing a summary of all settings on the camera that are currently applied. From here, you can override the top buttons easily by simply using the multi-controller on the back of the camera. If you would like to see this menu permanently on the screen, you can press the “Info.” button on the top left side (toggle it until you see the same menu). The only downside of keeping it permanently on the screen, is that you will be using the battery more due to LCD being active all the time.
Let’s go through the camera Menu settings now.
Shoot Menu 1
Here are the settings I use for Camera Menu 1, with explanations:
- Image Quality: RAW – I always recommend to shoot in RAW format. As explained in my RAW versus JPEG article, there is a huge difference between RAW and JPEG. With RAW, you also do not have to worry about other camera settings such as picture styles, white balance and lighting optimizer, because you can modify those in post-processing.
- Dual Pixel RAW: this is a new feature on the Canon 5D Mark IV that allows pixel-level adjustment when enabled. You can read more about this feature in this article. I would keep this disabled, since the file size will pretty much double – only use Dual Pixel RAW when you need it!
- Image review: 2 sec – I leave this at 2 seconds. After you take an image, it will be shown on the rear LCD for 2 seconds. If you want to preserve the battery life, you can turn this off as well.
- Beep: Disable – leave this disabled, since the camera will beep every time focus is achieved, which is annoying.
- Release shutter without card: OFF – you do not want the camera to fire without a memory card, in case you forget to insert one.
- Lens aberration correction: I disable all corrections, because they only apply to JPEG images. If you are a JPEG shooter, leaving these on will reduce vignetting, chromatic aberration and distortion issues in your images.
- Peripheral illum corr: Off
- Distortion correction: Off
- Digital Lens Optimizer: Off
- Chromatic aberr corr: Off
- Diffraction correction: Off
- External Speedlite control: Only applies when you photograph with flash
- Flash firing: Enable
- E-TTL II meter.: Evaluative
- Flash sync. speed in Av mode: AUTO
- Flash function settings (only available when external flash unit is mounted)
- Flash C.Fn settings (only available when external flash unit is mounted)
Shoot Menu 2
- Expo.comp./AEB: 0 – this is for setting exposure compensation or exposure bracketing. I would not bother with setting exposure compensation through the menu, since you can do it much quicker with the large rotary dial on the back of the camera
- ISO speed settings:
- ISO speed: Auto – as explained earlier, I like to use the Auto ISO feature, since I do not have to worry about the exposure.
- Range for stills: 100-H2 – this setting affects what you are able to see when changing ISO through the ISO button or through the Quick menu. I want to keep the entire range for ISO selection, so I leave it at 100-H2 range.
- Auto range: 100-6400 – now this setting is particularly useful when shooting in “Auto ISO” mode. I am not comfortable with noise above ISO 6400 on the 5D Mark IV, so I keep the maximum range limited to ISO 6400. In some situations, I might push my maximum limit to 12800.
- Min. shutter spd.: Auto – with the “Auto” setting, the camera will automatically adjust the shutter speed of the camera to the reciprocal rule. For steady hands and good posture, this might be sufficient. However, if you have shaky hands, then the default “Auto” setting might not do justice to keep you away from camera shake. If you notice blur in your images, you can move the slider under “Auto” to the right towards “Faster” with the top dial, which will double the shutter speed value. For example, if at 35mm focal length you are getting 1/50 shutter speed, moving to Auto(1) will double the shutter speed to 1/100.
- Auto Lighting Optimizer: OFF – ALO settings are only applicable to JPEG images and I usually keep them turned off.
- White balance: AWB – Just like ALO, white balance setting also does not matter, as you can adjust it later in post-processing.
- Custom White Balance – unless you want to set custom white balance with a gray card, skip this setting.
- WB Shift/Bkt.: 0,0/±0 – don’t mess with this unless you know what you are doing.
- Color space: Adobe RGB – although color space does not matter for RAW images, Adobe RGB gives a slightly more accurate histogram to determine the correct exposure (since the camera shows histogram based on camera-rendered JPEG image, even if you shoot exclusively in RAW).
Shoot Menu 3
- Picture Style: Standard – does not matter for shooting RAW images. I set mine to “Standard” and use the Standard camera profile in Lightroom for consistency. For more details about this, check out my article “how to get accurate Canon colors.”
- Long exp. noise reduction: OFF – I leave this off, but you might want to turn it on if you are planning to shoot very long exposures such as when doing astrophotography.
- High ISO speed NR: OFF – another one I leave off, as it only affects JPEG images.
- Highlight tone priority: OFF – unlike Auto Lighting Optimizer (ALO), Highlight tone priority does affect RAW data, since it actually underexposes an image to recover highlights. Unless you shoot JPEG, instead of letting the camera underexpose images with HTP to keep highlight details, I would recommend to properly expose images and even slightly over-expose, then recover the data in post. This technique is known as “Exposing to the right” and it gives you better results, especially when dealing with noise.
- Dust Delete Data – this is used for removing dust in images if you have dust particles on the image sensor. I never use this feature, since I prefer cleaning the camera sensor instead.
- Multiple exposure: Disable – this is used for creative photography when stacking photos on top of each other.
- HDR Mode: Disable HDR – only relevant when shooting in JPEG mode.
Shoot Menu 4
- Interval timer: Disable – built-in intervalometer for shooting timelapse sequences. Sadly, you can only specify up to 99 shots, but if you leave it at 00, the camera will take photographs indefinitely.
- Bulb timer: Disable – disabled in all normal modes, so you can only activate it when you select “B” from the PASM dial. Now this is a killer feature and something that I wish every camera had. Many DSLRs are normally limited to 30 second exposures – anything longer requires a remote camera shutter release accessory that has the capability to hold exposure for longer than 30 seconds. The Canon 5D Mark IV has a built-in mode to set a specific timer in bulb mode, so you do not need any remote shutter release to be able to shoot for longer than 30 seconds. This is particularly useful when doing long exposure photography and when working with neutral density filters.
- Anti-flicker shoot.: Disable – if you shoot in artificial light covering sports or other events, this is another killer feature that can really help in obtaining images that are properly exposed top to bottom. As described in our light flickering article, shooting indoors can be quite challenging. Once you turn this feature on, the camera will automatically delay the shutter to match the light frequency.
- Mirror lockup: OFF – unless you want to reduce vibrations from the camera when the mirror is raised (when shooting at very low shutter speeds on a tripod), leave this turned off. When mirror lockup is on, pressing the shutter release or firing the camera with a remote will raise the mirror and the second time you trigger the shutter will start the exposure, then lower the mirror at the end of the exposure.
Shoot Menu 5 and 6: Live View Functions
Live View settings do not affect images, so I usually leave them at default settings.
Movie Menu 4 and 5
If you have the Live View switch on the back of the camera to “Movie” mode (red camera), instead of the above Live View menus you will see two movie menus instead of Live View. I don’t shoot video, so these are also set to default settings.
Autofocus Menu 1 (AF Config. Tool)
The Canon 5D Mark IV sports a high-end, complex autofocus system that can be fine-tuned for practically any situation. Since the goal of this article is to provide recommended settings and not particularly focus on what each camera feature does, I am not going to spend a lot of time explaining why I chose a particular setting. The below autofocus settings are provided as a guidance to what worked well for me when photographing birds, so your mileage might vary. My recommendation would be to read Chapter 4 in the camera manual to understand what each autofocus setting does in detail.
In menu 1 of Autofocus, you will find 6 Cases or “templates” to use for different situations. These cases are basically six different combinations of three settings: “Tracking sensitivity”, “Acceleration/deceleration tracking” and “AF point auto switching”:
- Case 1: For subjects that change speed and move erratically – I found this one to be the optimal default setting for bird photography.
- Case 2: Continue to track subjects, ignoring possible obstacles – if you need to actively track a bird in flight while ignoring trees and other objects in the scene.
- Case 3: Instantly focus on subjects suddenly entering AF points – if there are many birds in the frame and you want to focus on the closest one.
- Case 4: For subjects that accelerate or decelerate quickly – when camera to subject distance changes fast, such as a bird flying towards you.
- Case 5: For erratic subjects moving quickly in any direction – if a bird is perched and you are anticipating it to fly off.
- Case 6: For subjects that change speed and move erratically – suitable for photographing smaller birds that fly erratically, or for photographing birds diving / fighting in air
Although these cases can be very useful in different situations, it is probably best to stick to Case 1 as the default setting.
The nice thing about the above cases, is that you can actually fine tune each one of them to suit your needs by modifying the three setting parameters.
Autofocus Menu 2 (AI Servo)
In the second menu you will find only two settings relevant to AI Servo mode:
- AI Servo 1st image priority: Focus Priority – I set mine to focus priority for the 1st image, because I do not want the camera to start shooting if the subject is not in focus. This might be annoying to use in certain situations though, particularly when the subject is very erratic and the camera struggles with autofocus acquisition. By default, it is set to “Equal Priority”.
- AI Servo 2nd image priority: Equal Priority – once focus is locked and the camera is already shooting and actively tracking the subject, I want to give equal priority to focusing and releasing.
Autofocus Menu 3 (One Shot)
There are thee settings in the AF menu 3, which are relevant to One Shot mode:
- Lens electronic MF: Enable after One-Shot AF – enables using the manual focus ring after focus is already obtained
- AF-assist beam firing: ON – allow the use of the AF assist beam in front of the camera when shooting in low light situations
- One-Shot AF release prior.: Focus priority – do not allow the camera to fire if the focus is not achieved in One Shot mode
Autofocus Menu 4
The next two menus have a lot of different options, some of which are useful and important:
- Lens drive when AF impossible: Continue focus search – if focus cannot be achieved, the camera can continue searching or stop. I prefer to let the camera continue to search.
- Selectable AF point: All points – you want to be able to switch between all focus points.
- Select AF area selec. mode: everything checked – I want to be able to toggle between all AF area modes.
- AF area selection method: M-Fn button – the M-Fn button that I previously programmed to AE Lock can be used in combination with the focus AF Area Mode button to toggle between different AF area modes.
- Orientation linked AF point: Separate AF pts: Pt only – I love this feature, as it will remember what focus point I set when shooting vertical vs horizontal images. I set mine to only remember the focus point.
- Initial AFpt, AI Servo AF: AUTO – leave this one on AUTO.
- Auto AF pt sel.: EOS iTR AF: ON – leave this one ON.
Autofocus Menu 5
The last Autofocus Menu has 5 options:
- AF point selection movement: Stops at AF area edges – I do not like when AF points automatically move over to the other side when I am close to the edge.
- AF point display during focus: All (constant) – I prefer seeing all focus points, not just the selected one in the viewfinder.
- VF display illumination: AUTO – let the camera decide when to illuminate the focus points in red inside the viewfinder.
- AF status in viewfinder: Show in field of view – shows “AF” in the field of view when autofocus is active.
- AF Microadjustment: Disable – unless you want to specifically adjust phase detection autofocus, do not touch this setting. If you want to make AF adjustments, read my detailed article on calibrating lenses.
Playback Menu 1 and 2
Playback menus are used for altering images after they are captured. I normally do not mess with these and leave the settings in Menu 1 and 2 at default. The only setting I do change is in Playback Menu 2 – Image jump with rotary dial. I personally do not like the fact that the images jump by 10 by default when rotating the top dial, so I set it to “Display images one by one” instead. This way, whether I turn the top or the rear dials, both will display images one by one without skipping.
Playback Menu 3
The playback menu 3 has some important settings that I often use:
- Highlight alert: Enable – this will show the “blinkies” when there is overexposure / loss of highlight data.
- AF point disp. Enable – when displaying images, I want to see where the focus point was.
- Playback grid: Off – it is nice to see a grid in the viewfinder, but I don’t want to see it after the image is captured.
- Histogram disp: Brightness – if you want to see a histogram for each color channel, pick RGB.
- Movie play count: Rec time.
- Magnificatn (apx): Actual size – this allows me to see 100% crop when I press the magnification button when playing back images.
- Ctrl over HDMI: Disable.
Setup Menu 1
- Record func+card/folder sel.
- Record func.: Auto switch card – once the first card fills up, it will overflow to the second one.
- Record/play: 1 – you can select which card to start recording images first.
- Folder: 100EOS5D – you can use an existing folder or create a new one where photos will be stored.
- File numbering: Continuous – I want the camera to increment file numbers even if I change the memory card.
- File name: 5M1A_ – you can set how you want files to be named.
- Auto rotate: On (middle setting) – rotating vertical images in landscape view makes them appear much smaller. I prefer the camera to write the orientation to images, but not actually rotate them when displaying.
- Format card – used for formatting the inserted memory card.
Setup Menu 2
- Auto power off: 1 min – I leave it at 1 minute to turn off the camera when it is not in use.
- LCD brightness: Auto – middle selection is good, although you might want to increase or decrease brightness depending on shooting conditions.
- LCD color tone: Standard – unless you want to tweak the output of the screen, you should keep it standard.
- Date/Time/Zone: make sure to keep the date and time zone settings accurate.
- Language: English
- Viewfinder display
- Electronic level: Show – cool feature, allows seeing level right inside the viewfinder.
- Grid display: Show – I use the grid for framing and alignment.
- Show/hide in viewfinder: Everything turned off – the viewfinder is already pretty cluttered with information, so I usually do not want to add more.
- Touch control: Standard – the default Standard setting seems to work best for me, but if you don’t find the LCD to be responsive, you can set it to “Sensitive”. Those who get annoyed by the touchscreen have the option to turn it off from here as well.
Setup Menu 3
- Video system: For NTSC.
- Battery info.: Shows battery level and life.
- Sensor cleaning:
- Auto cleaning: Enable – the camera will shake off dust when turned on or off.
- Clean now – to clean the sensor now.
- Clean manually – this is different than the above options, since it is used for manually cleaning the sensor. The mirror will lock up and you can proceed to cleaning the sensor.
- INFO button display options: All checked – good for looking at important camera settings and the level works pretty well for shooting on a tripod.
- Custom Quick Control: if you want to change the way the Quick control screen (activated by pressing the Info. button or the “Q” button) looks, you can change it from here.
- INFO. button LV display options: when using live view, you can toggle between different overlays on your LCD. In this menu, you can customize which screens will be available in live view when you press the Info button and what you will see in them. I would keep it at default, unless you want to add or remove information from the different screens. The “Histogram disp” option is also kept to “Brightness” on mine.
- RATE tn function: Rating – controls the RATE button function. Can be set to Rating or Protect.
Setup Menu 4
- HDMI frame rate: AUTO.
- GPS settings: Disable – I enable GPS when traveling and turn it off if I need to preserve battery life.
- Communication Settings: from here you can enable built-in WiFi and set up its options. You can also enable FTP transfer, which is neat. Only enable these if you are planning to use them. To preserve battery life, I would keep WiFi disabled by default.
Setup Menu 5
- Multi function lock – allows selecting controls that are deactivated when multi-function lock switch is set to LOCK (on the bottom of the camera rear). By default, only the Quick Control Dial (rotary dial) is checked. But if you want to lock other controls, you can select them from here.
- Custom shooting mode (C1-C3) – there are three setting banks on the shooting mode dial. Once you set appropriate settings for a given scenario, you can save them in these two modes.
- Register settings – this will allow to save your current settings to C1, C2 or C3 shooting mode. Once saved, all you have to do is switch to the appropriate mode and the settings will be retrieved. I had mine set to three different scenarios – one for sports/wildlife, one for landscapes and one for people. For C1 (sports/wildlife), I have Auto ISO turned on, Exposure mode set to Manual, Drive set to Continuous High, AF mode set to AI Servo, AF point selection set to Surround (8 points around the center). For C2 (landscapes), I have Auto ISO turned off, ISO 100, Exposure mode set to Manual (M), Drive set to Silent Single Shooting, AF mode set to One Shot, AF point selection set to Spot AF. For C3 (people), I keep Auto ISO on, Exposure mode set to Aperture Priority (Av), Drive set to Silent Single Shooting, AF mode set to AI Focus, AF point selection set to Spot AF.
- Clear settings – used to clear the above-mentioned modes and revert to defaults.
- Auto update set.: Disable – I do not want the camera to automatically save adjustments in C1-C3 modes. This way, if I change a setting, it is only a temporary change. If I need to make a permanent change, I go to “Register settings” menu above.
- Clear all camera settings – this will reset everything on the camera and revert to factory defaults.
- Copyright information – I always put my name and copyright details when I first setup the camera.
- Certification Logo Display – displays certification logos.
- Camera firmware ver. – displays current camera firmware.
Custom Functions I: Exposure
Custom Functions menu is used to fine tune the many parameters of the camera. Some of them are very important and should not be messed with, while others make it easier to use the camera. Let’s go through each one of them, one by one.
- Exposure level increments: 1/3 stop – this will allow adjusting the exposure in 1/3 or 1/2 increments. I prefer 1/3 increments.
- ISO speed setting increments: 1/3 stop – same here for ISO.
- Bracketing auto cancel: On – if you turn bracketing on, the setting will not be permanent – it will turn itself off when you turn off the camera.
- Bracketing sequence: -, 0, + – I prefer bracketing in this order.
- Number of bracketed shots: 3 shots – depends on how you bracket. I usually go between 3 and 5 shots.
- Safety shift: OFF – used when the camera maxes out in Aperture Priority (Av) or Shutter Priority (Tv) modes. For example, if the exposure is too bright and the camera is also maxed out at 1/4000 shutter speed, with this setting turned on the camera will stop down the aperture to balance out the exposure.
- Same expo. for new aperture: OFF.
Custom Functions II: Exposure/Drive
- Set shutter speed range: 8000, 30″ – leave at default
- Set aperture range: 1.0, 91 – leave at default
Custom Functions III: Display/Operation
- Warnings ! in viewfinder: When monochrome set, When WB is corrected, When one-touch img qual set, When NR is set – shows an exclamation mark in the viewfinder if these conditions are met.
- LV shooting area display: Masked
- Dial direction during Tv/Av: Normal – I leave this at normal, but if you want to flip the direction of dials, you can set it to “Reverse direction”.
- Custom Controls – this is one of the most important menus in the camera, as it allows customizing function button behavior. Let’s go through each one by one:
- Shutter butt. half-press: AE Lock – if you want to switch to back-button focusing / focus and recompose technique, then change this to either “Metering start” or “AE lock”. I keep mine at AE lock to only lock the exposure when I half-press the shutter release. To focus, use the AF-ON button on the back of the camera.
- AF-ON button: Metering and AF start – I want to use the rear AF-ON button to focus, so I keep it at this setting.
- AE Lock button: AE lock – you can change the behavior of the AE Lock (Asterisk) button as well. Some people prefer to have the AE lock button serve as the AF-ON button. You can do that by changing the mode to “Metering and AF start”.
- DOF preview button: Depth-of-field preview – I don’t particularly use this button, so I leave it at its default setting.
- Lens AF stop button: AF stop – controls the behavior of the lens AF stop button.
- Multi-function button (M-Fn): AE lock (hold). As explained eariler, I use the M-Fn button to hold exposure.
- Set button: OFF – I only want to use the center “Set” button to make changes and access menu items, so I leave it off. Some people like to change it to “MENU” for accessing the menu, but I don’t mind pressing the Menu button to the left of the viewfinder.
- Main Dial: Aperture setting in M mode – you can control the behavior of the main dial on the top of the camera in Manual mode to either change the Shutter speed (default) or Aperture. I prefer the top dial to change aperture and the rear dial to change the shutter speed. It is a personal preference though!
- Quick Control Dial: Shutter Speed setting in M mode – with the above change, you need to set this one to control the shutter speed.
- Multi-controller: AF point direct selection – another very important setting for me. If you keep the default setting (OFF), you will not be able to make quick adjustments to focus points by using the multi-controller on the back. With AF point direct selection enabled, you simply press any side of the multi-controller and the focus point will immediately move there. Very useful, something that should have been the default!
- AF area selection button: Direct AF area selection – with the multi-controller allowing to select focus points, it makes perfect sense to use the AF area lever to toggle between different AF areas. With this enabled, I can quickly choose between different AF areas by pushing the button.
Custom Functions IV: Others
- Add cropping information: Off – if you choose a crop mode and you want that crop information to be displayed in live view and recorded into image metadata, you can choose the different options from here.
- Default Erase option: [Erase] selected – I like having the default “Erase” option, so that I don’t have to toggle from “Cancel” to “Erase” each time I want to delete an image.
- Retract lens on power off: On – only works on some lenses that can automatically retract.
- Add IPTC information: Off – you can add IPTC information to each image metadata, but in order to do that, you have to connect the camera to a computer and register IPTC information.
Custom Functions V: Clear
- Clear all Custom Func. (C.Fn) – just like the title says, you can use this option to clear all custom functions and revert to default settings.
I hope you found this article useful. Once again, these are settings that work for me and they might not necessarily suit your needs. It is best that you explore your camera and learn about each setting as much as you can in order to take advantage of all the available features and customizations!
The post Recommended Canon 5D Mark IV Settings appeared first on Photography Life.
Photography Life