
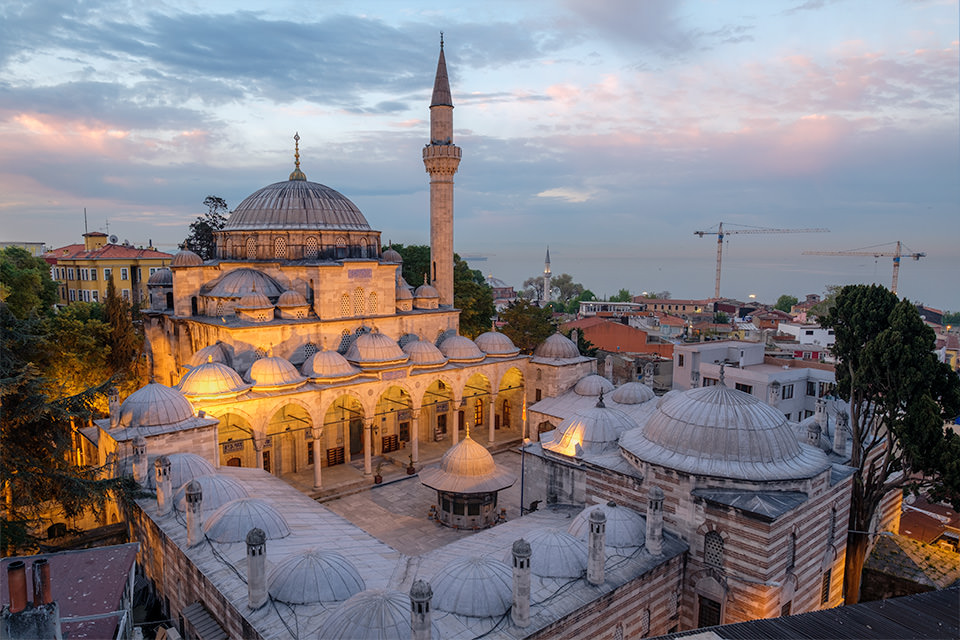
We had quite a few of our readers engage in our last “How Was This Picture Made #9” article for the image of the Sokullu Mehmet Pasa Mosque that I posted from my trip to Istanbul, Turkey. While some of the readers did a great job at giving a description of my shooting environment and even correctly guessed the location, the camera and the lens I used for the shot, none of the readers correctly identified the specific challenges I faced when photographing the scene. And to be honest, it would have been nearly impossible to identify those challenges by just looking at the photo, since it is the final, processed version. Let’s go through all the steps that will reveal everything I did to capture and process this image.
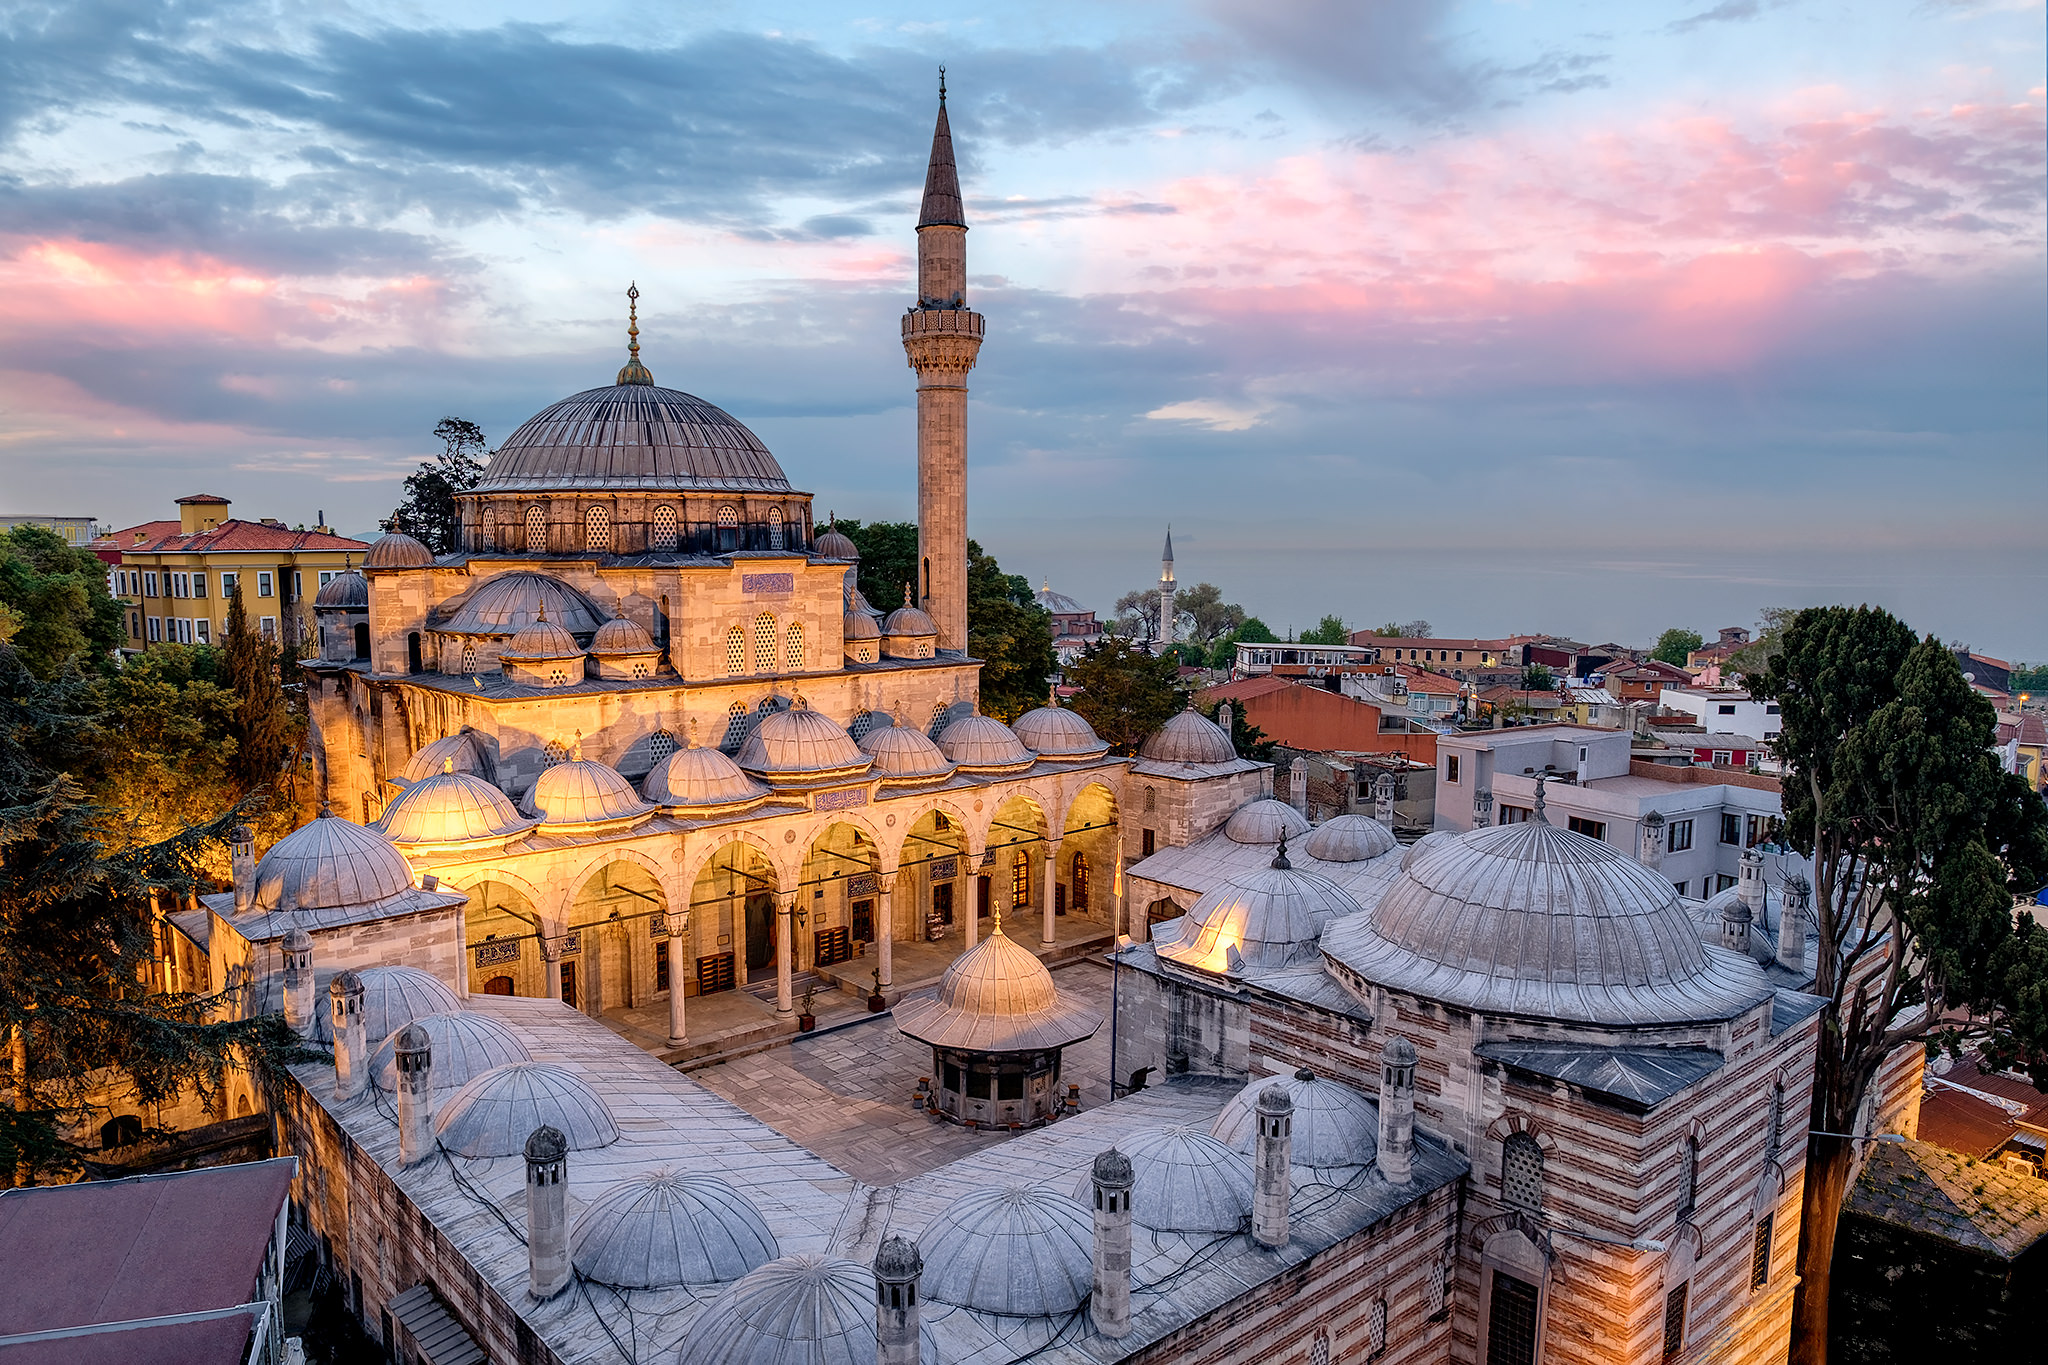
X-Pro2 @ 14.5mm, ISO 200, 1/3, f/5.6
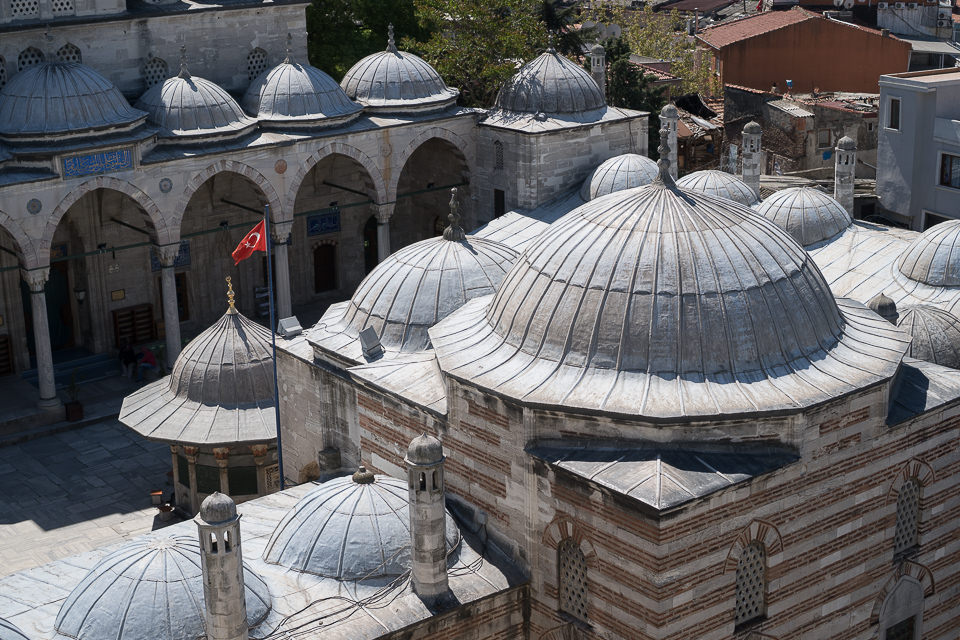
Right off the bat, you can see from the EXIF data above that I used the Fuji X-Pro2 camera to capture the image. The focal length is shown as 14.5mm, because I used the Fuji 10-24mm f/4 lens. An awesome combination to capture wide-angle scenes like this. I shot from the roof of the Sultan’s Palace hotel (by the way, if you stay at this hotel, you will be allowed to shoot from the rooftop) and since the mosque is right next to the hotel, the use of a wide-angle lens was necessary. Prior to photographing the scene, I scouted the rooftop a day earlier to see exactly where I would need to stand in order to get the best perspective. Although the rooftop is quite large in size, not every spot offers the same great view. For example, if you stand at the very south end of the rooftop, the center component of the mosque gets completely blocked, as shown in the close-up version below:
Because of this, I had to move around to determine the best location for the ideal composition, which happened to be towards the northern side of the rooftop. So kudos to everyone who correctly guessed the exact location and the equipment I used to capture this image! Although I did capture a few panoramas of the exact same scene with the Fuji 35mm f/2 lens, I decided against the panorama technique for one main reason – light was changing way too fast and the clouds were also moving too quickly that morning.
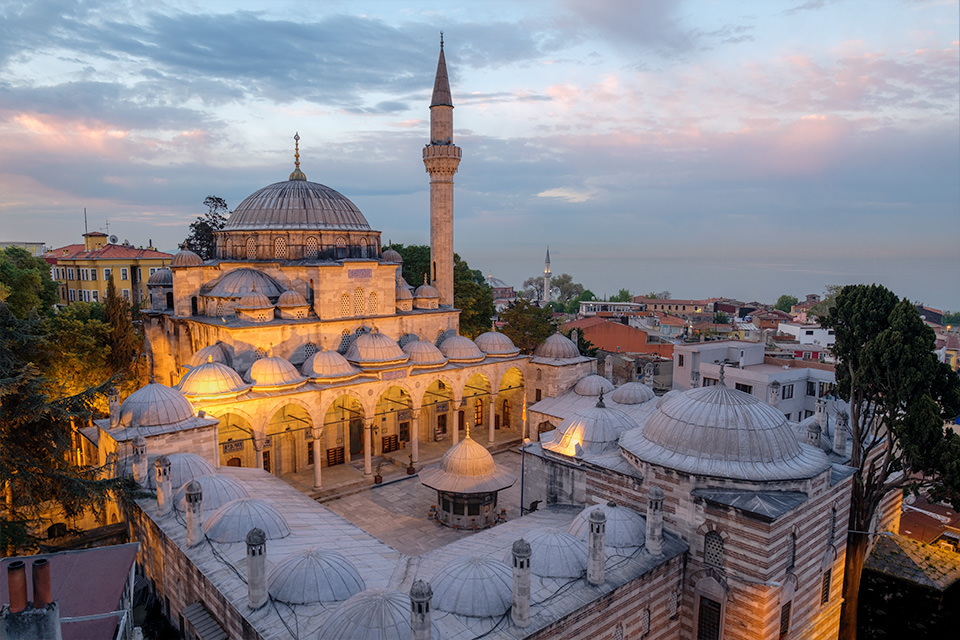
Yes, I captured the image at sunrise. Actually, let me rephrase that: I captured a series of images in order to make this single blended image. I woke up very early that day. My idea was to capture the mosque with its night lights first, then wait for the sunrise and if I see color, capture another image in order to then blend both images in post-processing. Around 45 minutes before sunrise, I set my camera up on my travel tripod (it was a bit challenging to do this, since the legs of the tripod were touching the glass fence that was a bit elevated), then captured the below image:
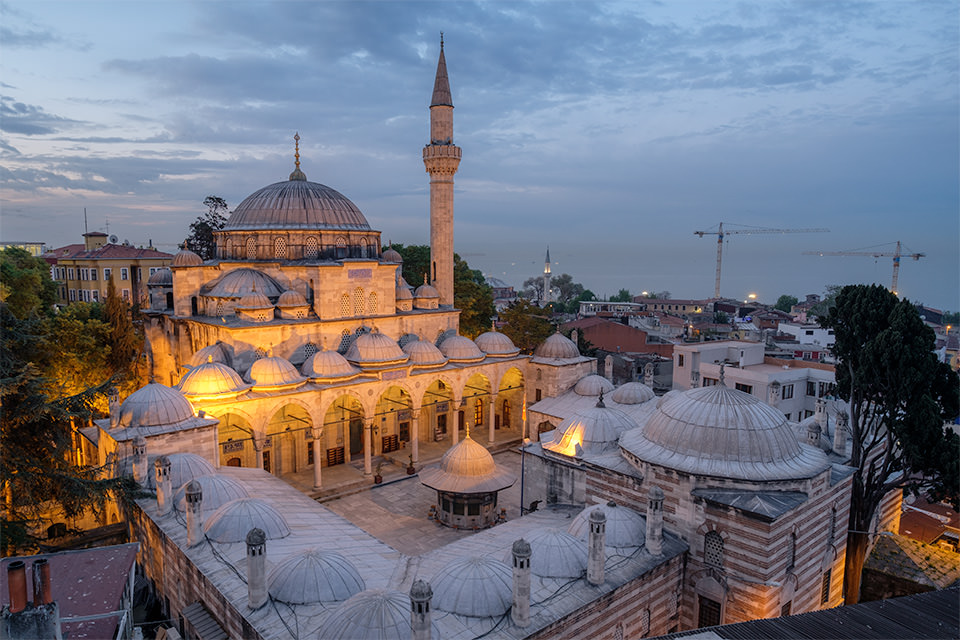
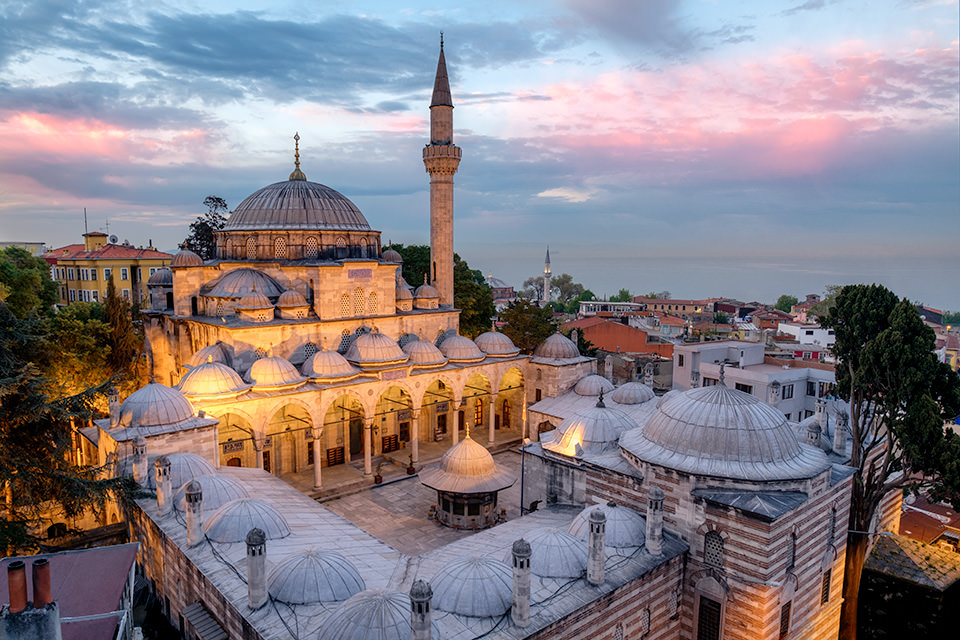
As you can see, it was a bit too early for the sunrise. However, I was specifically aiming for the night lights shining on the mosque, so it worked out great. Next, it was time to wait for the sunrise. I patiently watched the sky for the next 40+ minutes…I got nothing! The clouds were blocking the horizon and there were no colors to be seen before or at sunrise. Then in about 5 minutes after sunrise, my patience finally paid off. One of the clouds opened up and let some of that red light through:
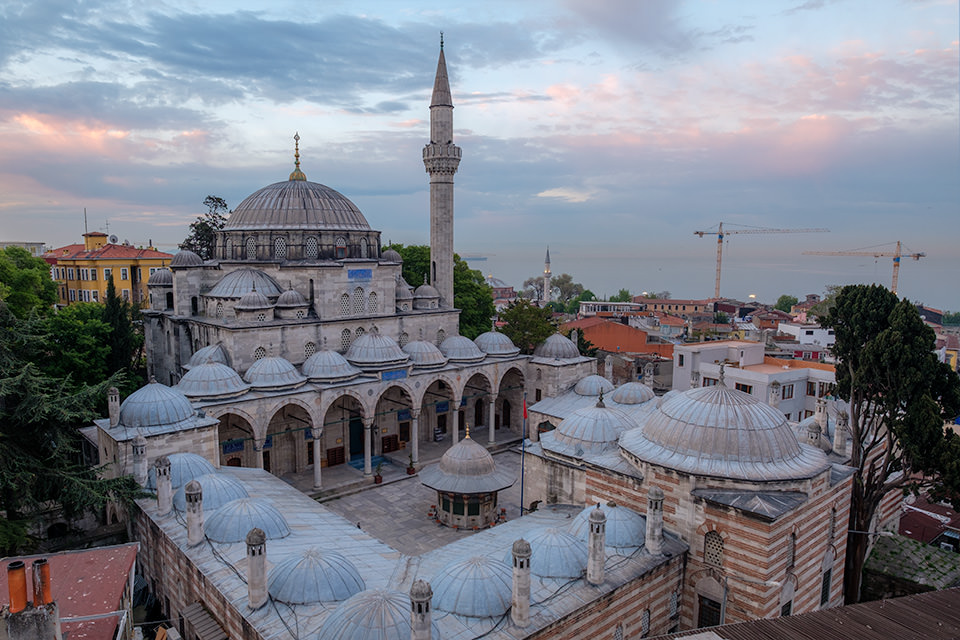
It was not a lot of color, but enough to make my day, since I knew I could boost those colors up a bit in post.
Now that I had both images captured, it was time to put them through both Lightroom and Photoshop. I came to my room and immediately started editing the image with my Surface Pro. First, I made some basic tweaks to both images – white balance and exposure adjustments, -100 highlights, +75 shadows and a bit of whites and blacks. I changed the camera profile to Camera PROVIA/STANDARD, which is what I typically work with when editing images from Fuji cameras. The next step was to take both images into Photoshop, since Lightroom cannot be used to blend multiple images together. I right-clicked on both images and picked “Open as Layers in Photoshop”.
With both images opened as layers, I first made sure that they are perfectly aligned, in case I accidentally moved my tripod. And indeed – it turned out that my tripod did move just a bit from shot to shot. I selected both layers, then aligned them using “Edit->Auto-Align Layers”. It took a second and Photoshop was able to quickly align both layers perfectly. Next, I cropped the image, so that I don’t have any empty space on the sides after alignment.
From here, the biggest challenge was to create a mask that could blend the two images properly together. Although one could use masking techniques to isolate the clouds from the foreground, the biggest problem when combining images like this is to have a good balance of light from both shots. If one just copy-pastes the sky, the rest of the scene will never match the brighter sky, making the image appear very fake. Instead, the best method is to combine exposures using Luminosity Masks in Photoshop, which can yield much more natural-looking results. I started out with a simple Luminosity Mask by visiting the “Channels” tab right next to “Layers” in Photoshop, then CTRL-clicking the RGB Channel. I saved the selection as an Alpha Channel, then added a layer mask on top of the top layer, which was my colorful sky layer. The mask had to be adjusted to make a better selection, so I proceeded to the Mask Properties and clicked “Color Range” to manually mask out the sky:

Although Photoshop did a decent job at creating a workable mask, since the yellow light on the building was so bright, it was also heavily selected, so I had to manually brush out the mask for the lights to come through. This was the messy part of the whole job and it took me a while to create a proper mask. After everything was done, here is the mask I ended up with:

That’s a pretty messy mask, but it worked out OK 🙂 As you can see, I concentrated quite heavily on the mosque and its minaret in order to bring back those artificial colors. Here is what the blend looked like after the mask was applied:
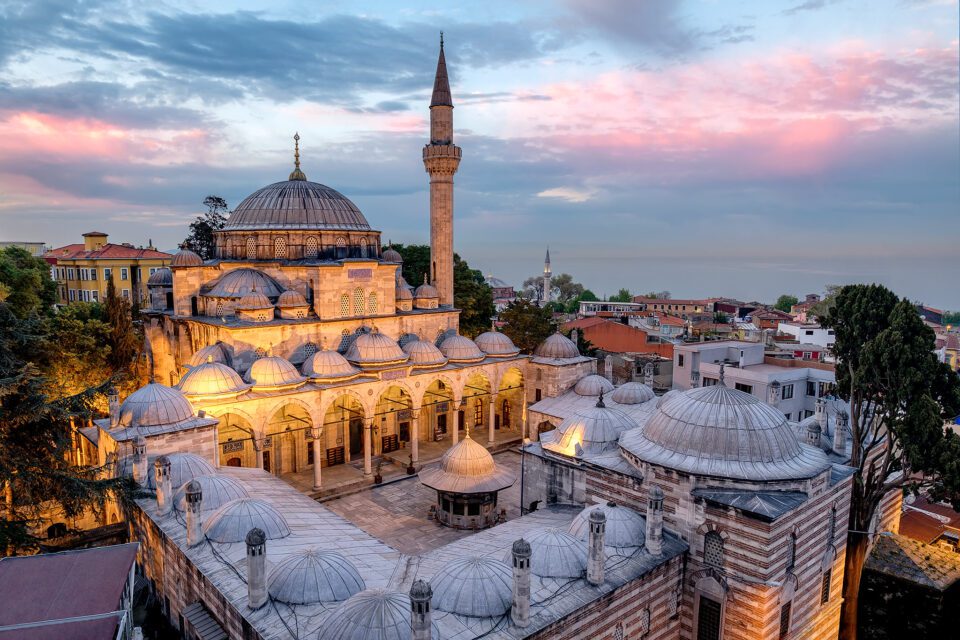
From here, I created another layer to remove unwanted objects using the Spot Healing and Clone Stamp tools. Although construction was taking place in the distance, I did not want those large cranes to be part of my image, so I removed them all. Next, I cleaned up the area to the left bottom of the frame, since it was a bit distracting. The next challenge was the large piece of roof that was there on the bottom right side of the screen. Although I initially kept it in the image, I decided to put a bit more time in post to clean it up as well. I really did not want to crop the image any more, as it would cut into the bottom part of the mosque. Photoshop did a pretty decent job here, but the structure on the bottom right corner was not something I was able to create out of nothing. So I ended up darkening it a bit to conceal my terrible cloning work 🙂 Here is the end result of all that effort:
Now that things were cleaned up, I wanted to boost the contrast and the colors in the image. I fired up Google’s Nik Color Efect and Viveza and applied some global adjustments:
The image was done, but there was one last thing I wanted to do while at it, which is to clean up some of the bird poop and the two pipes that are sticking out like a sore thumb. I cleaned those up, then applied some sharpening and I was done! Here is the before and after, showing where I started before sunrise and the final blend with all the adjustments:
Hope you’ve enjoyed this article and the tutorial! If you have any questions, please feel free to ask in the comments section below.
The post How Was This Picture Made #9: The Answer appeared first on Photography Life.


