
Adobe Lightroom is arguably the most widely-used image editing software around these days. While most of our readers are probably quite familiar with it, a piece of software as complex as Lightroom is sure to have some tricks and features that not everyone knows about. What I’d like to do today is share a few of those with you. If some of these are new to you, enjoy having some new tricks up your sleeve! If these are old news to you and you already knew them all, please leave one of your favorite tips or tricks in the comments section.
1) When making adjustments to an image, view the thumbnail to make sure the effect is not overdone
This works the best when dodging or burning, but can also work well with other adjustments such as vignetting and color or exposure gradients. Let me show you what I’m talking about:
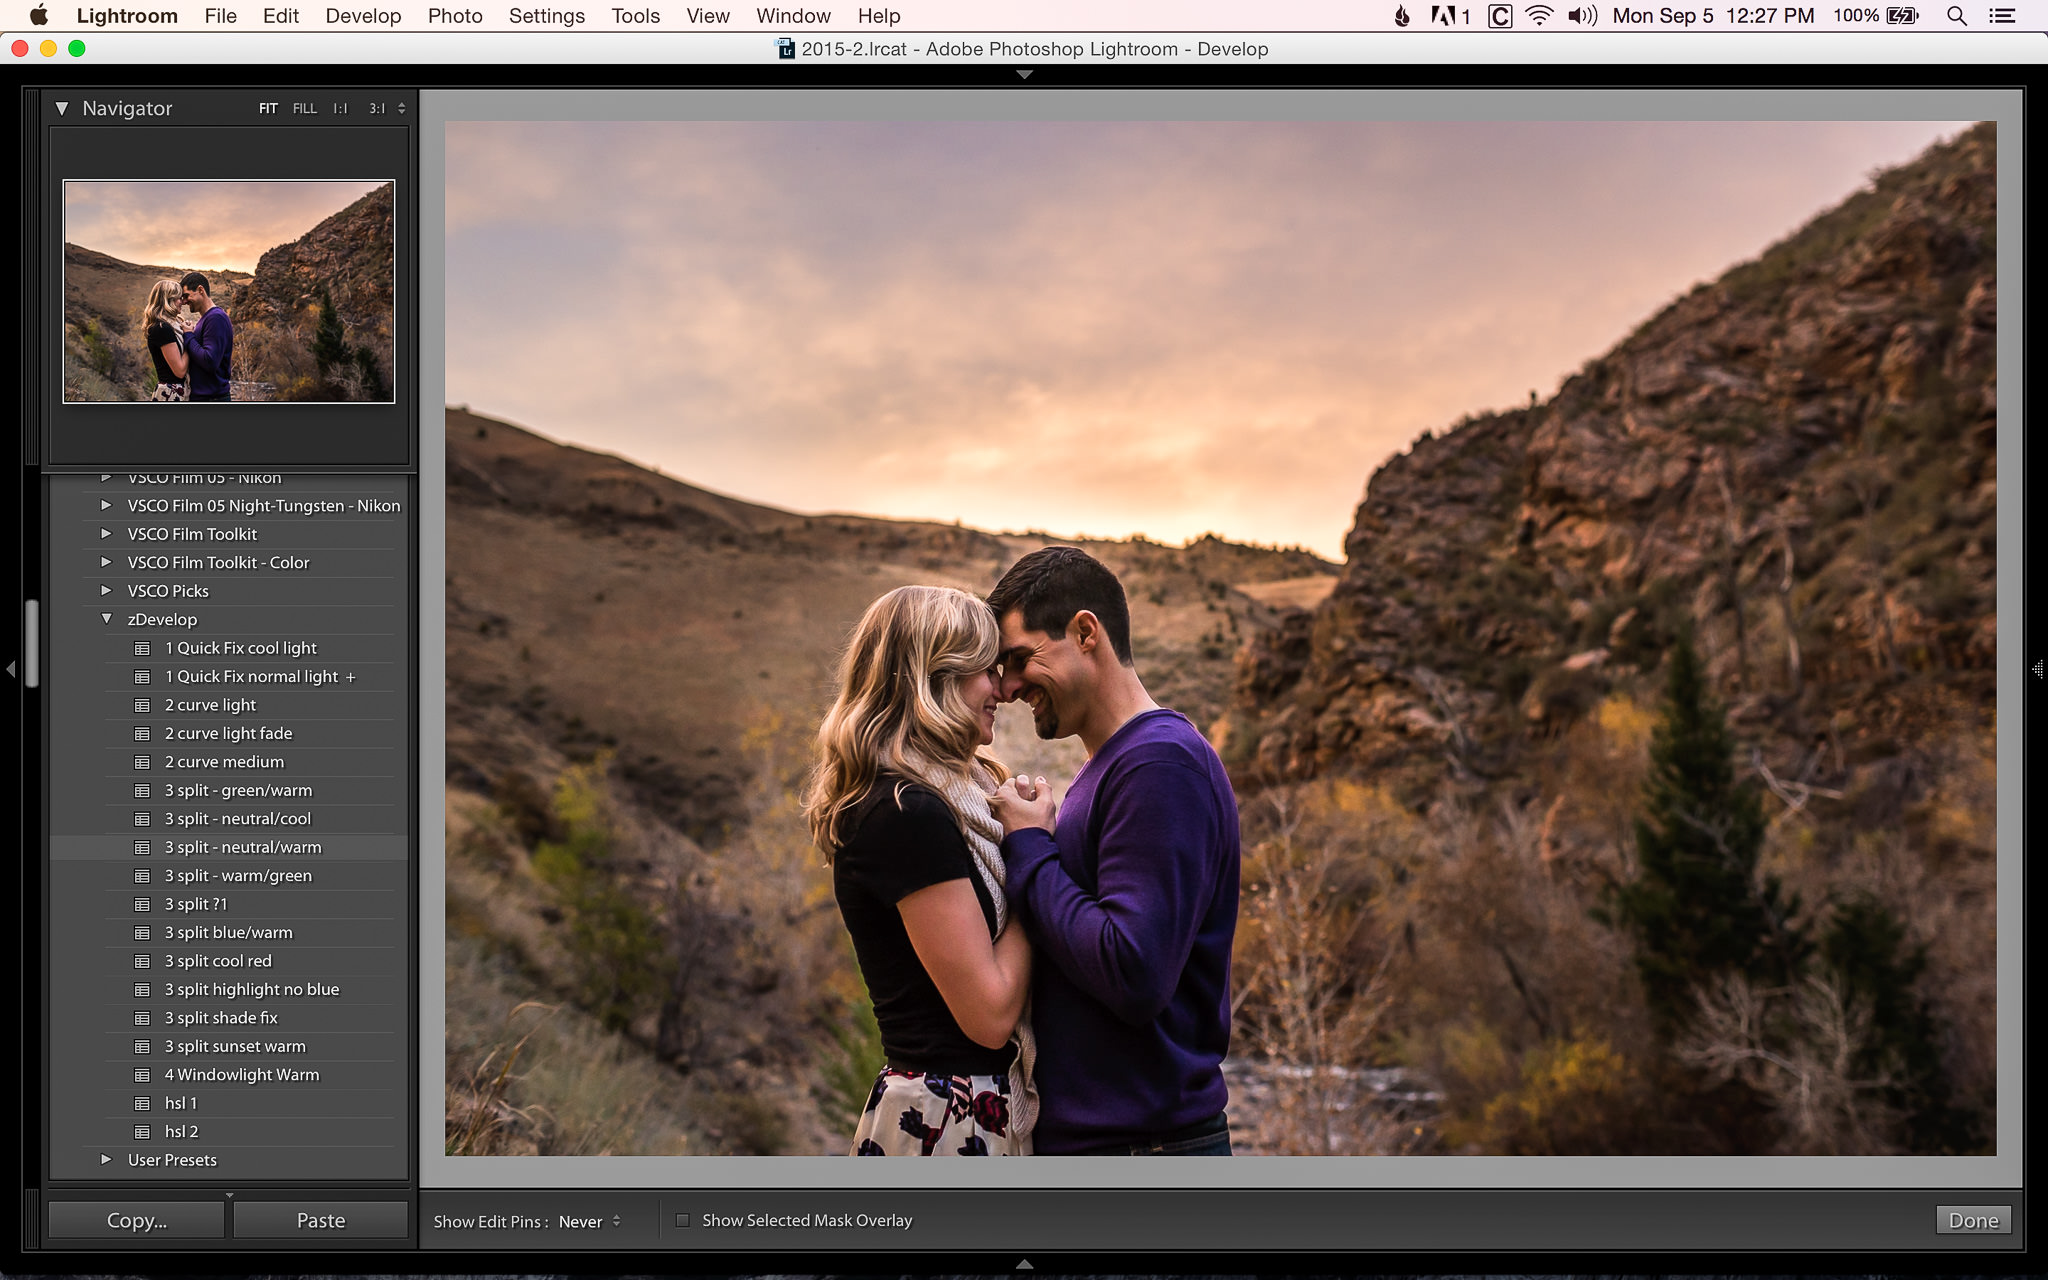
Obvious halos around my subject
In the above image, if you look at the large view of the image, it looks pretty good. If you look at the small thumbnail in the upper-left corner in the Navigator section, you can see obvious haloing around my subject that is caused by sloppy dodging. Of course, if you know what to look for, you can see it in the larger image (I also exaggerated a bit for this example), but there have been times I’ve been editing and only been able to see the halo in the small image.
Why is it so much more obvious in the smaller image? It’s a simple case of downsampling. When you reduce the size of an image, some aspects of the image can be minimized (such as noise), while others can get accentuated (such as sharpening). I won’t go into detail here about downsampling, as there are plenty of articles on this site that do just that. All you need to understand is that looking at a smaller version of an image might reveal information that you might miss in a larger version of the same image.
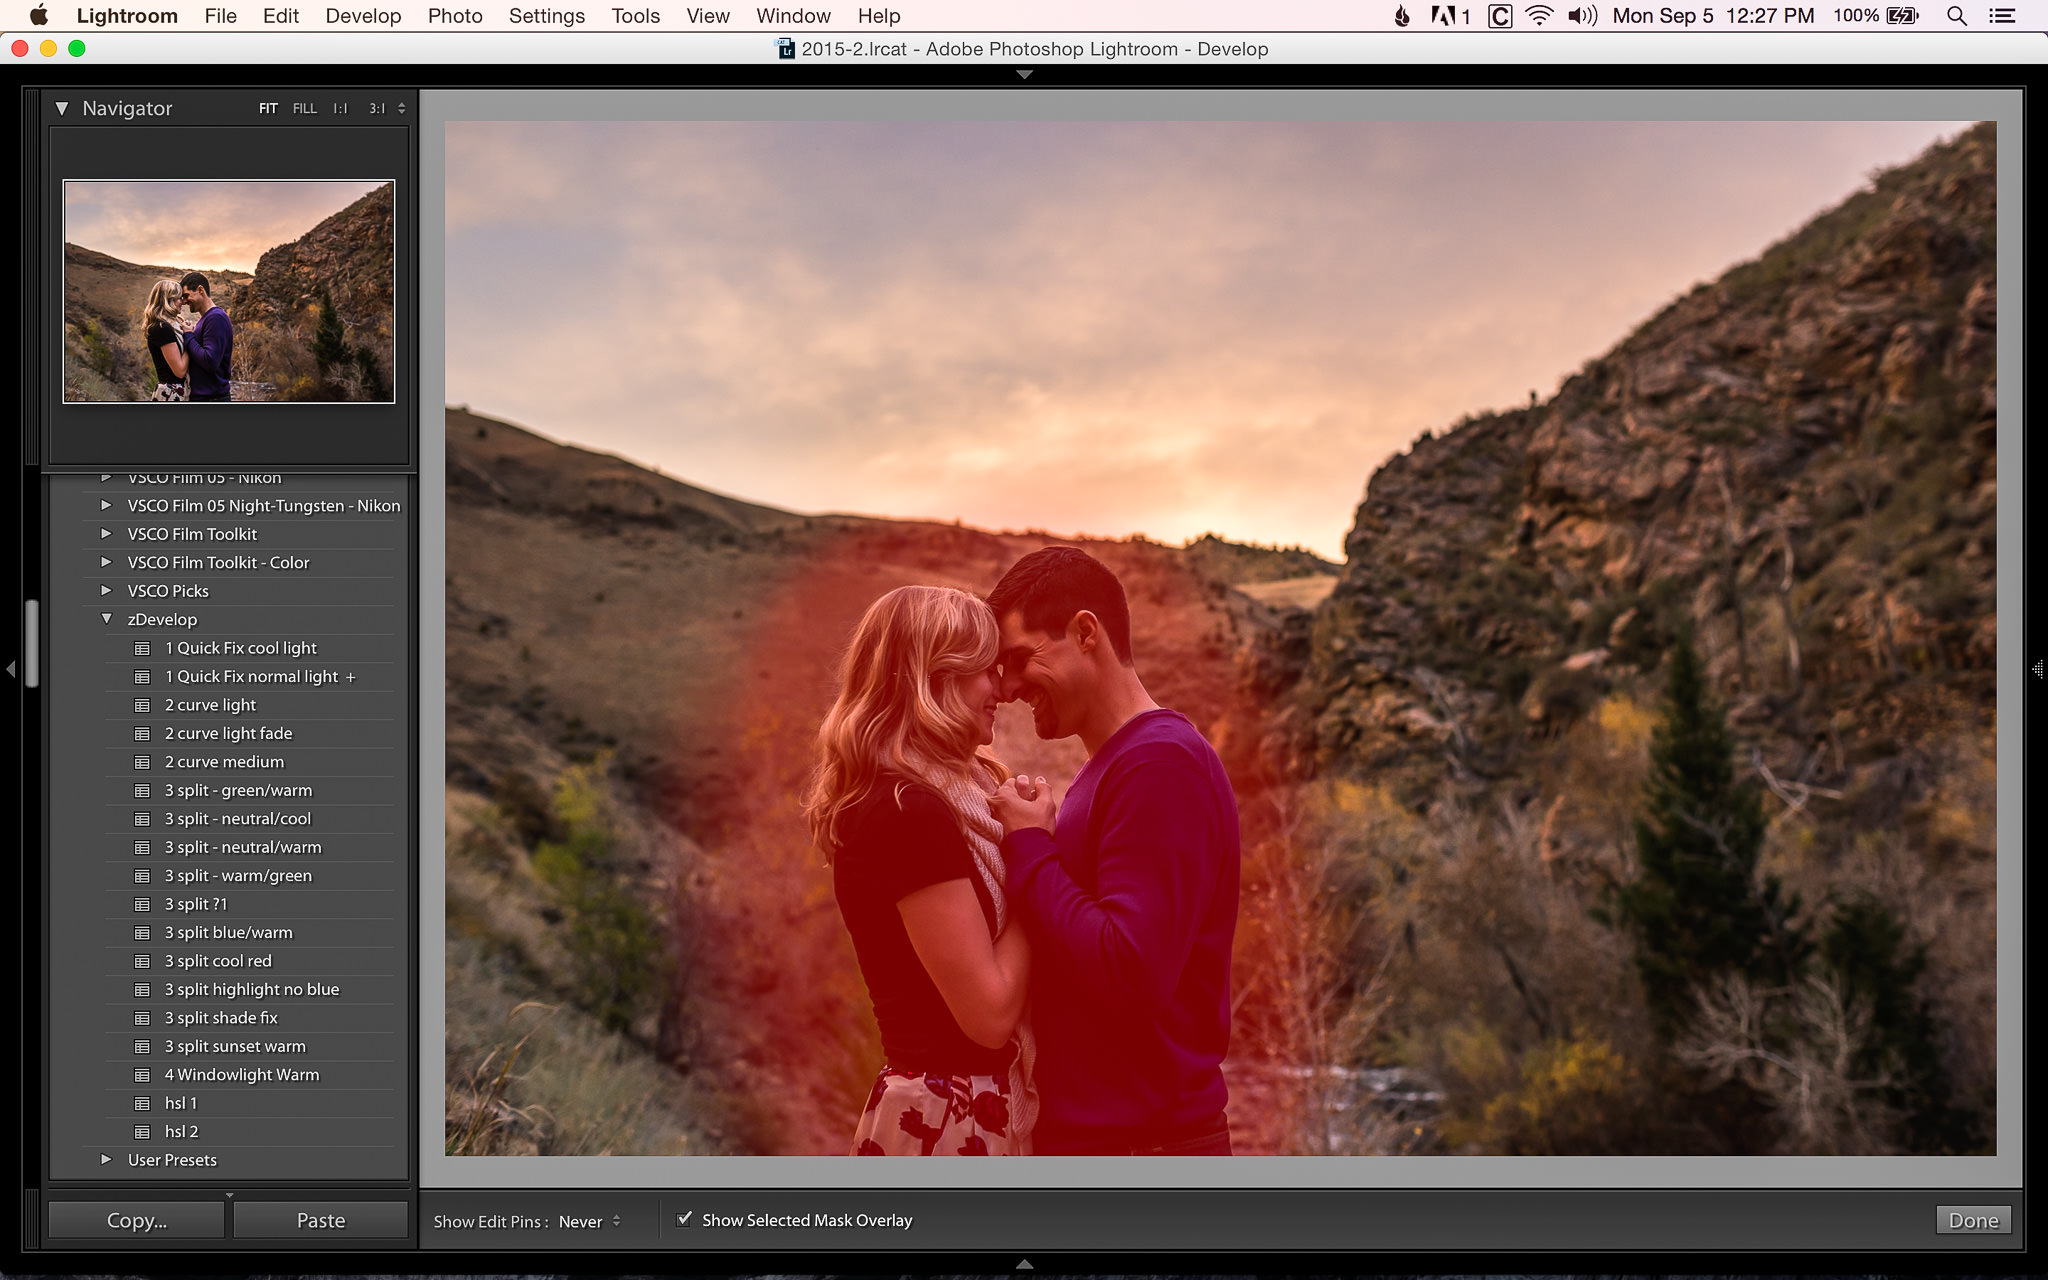
Tool mask turned on
In this case, by pressing “O” and revealing the mask overlay, you can see that I obviously colored outside of the lines. Now I can erase my dodging from where it doesn’t belong and I won’t have halo around my subject in my final image.
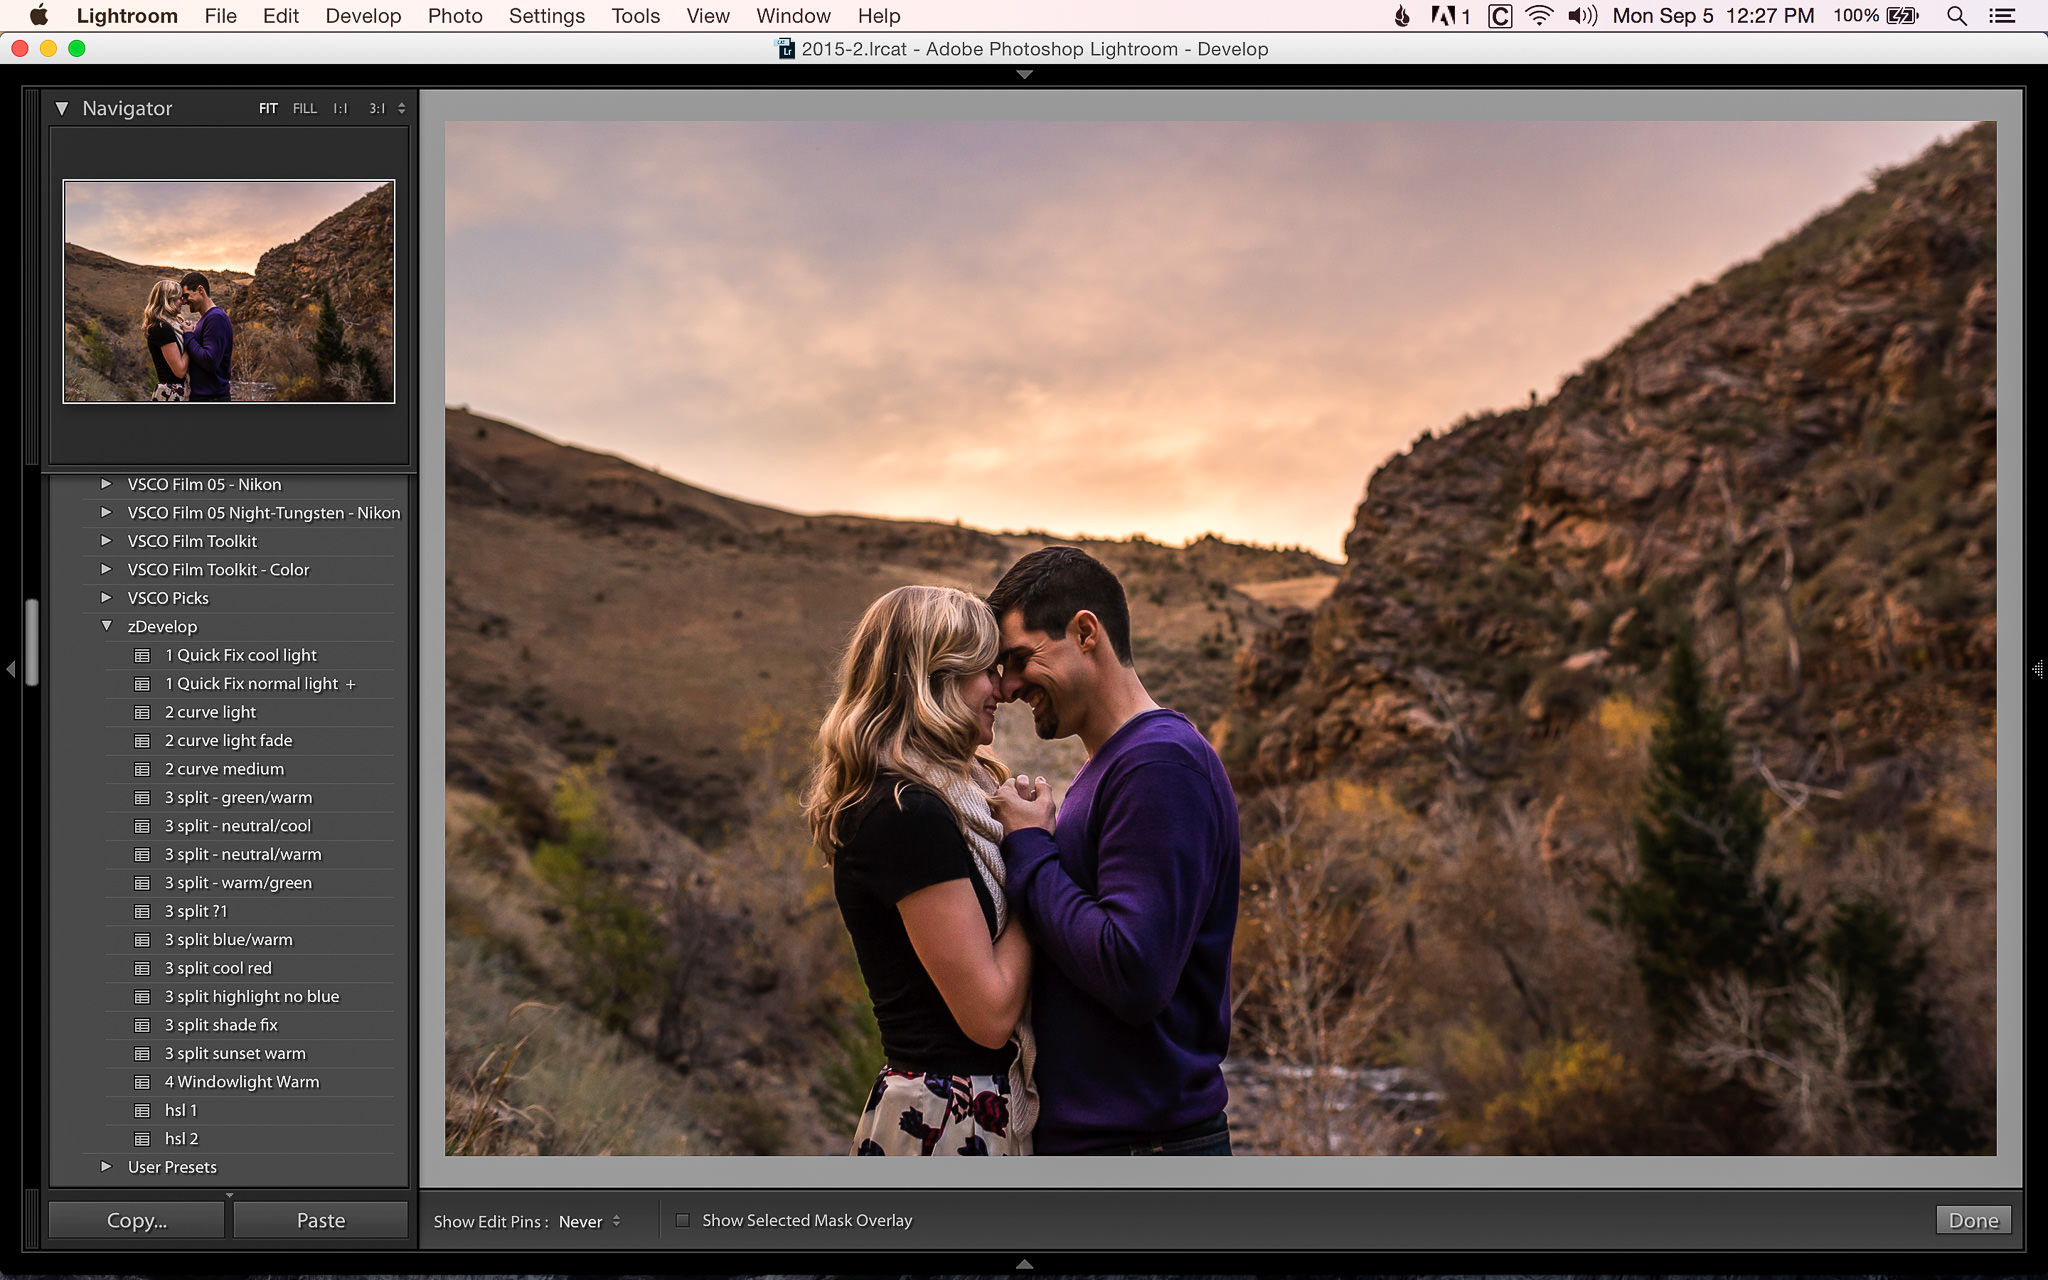
Removed excess dodging and halo
2) For more precise image straightening, hide the side panels
This is a trick that I picked up from Photography Life’s own Spencer Cox, and now I can’t live without it! Straightening an image in Lightroom can be an imprecise endeavor. Moving the Angle slider in the Crop panel isn’t very accurate or easy to control. Clicking in the grey area outside of the image and rotating with your mouse is more precise, but can still sometimes make larger adjustments than are desirable.
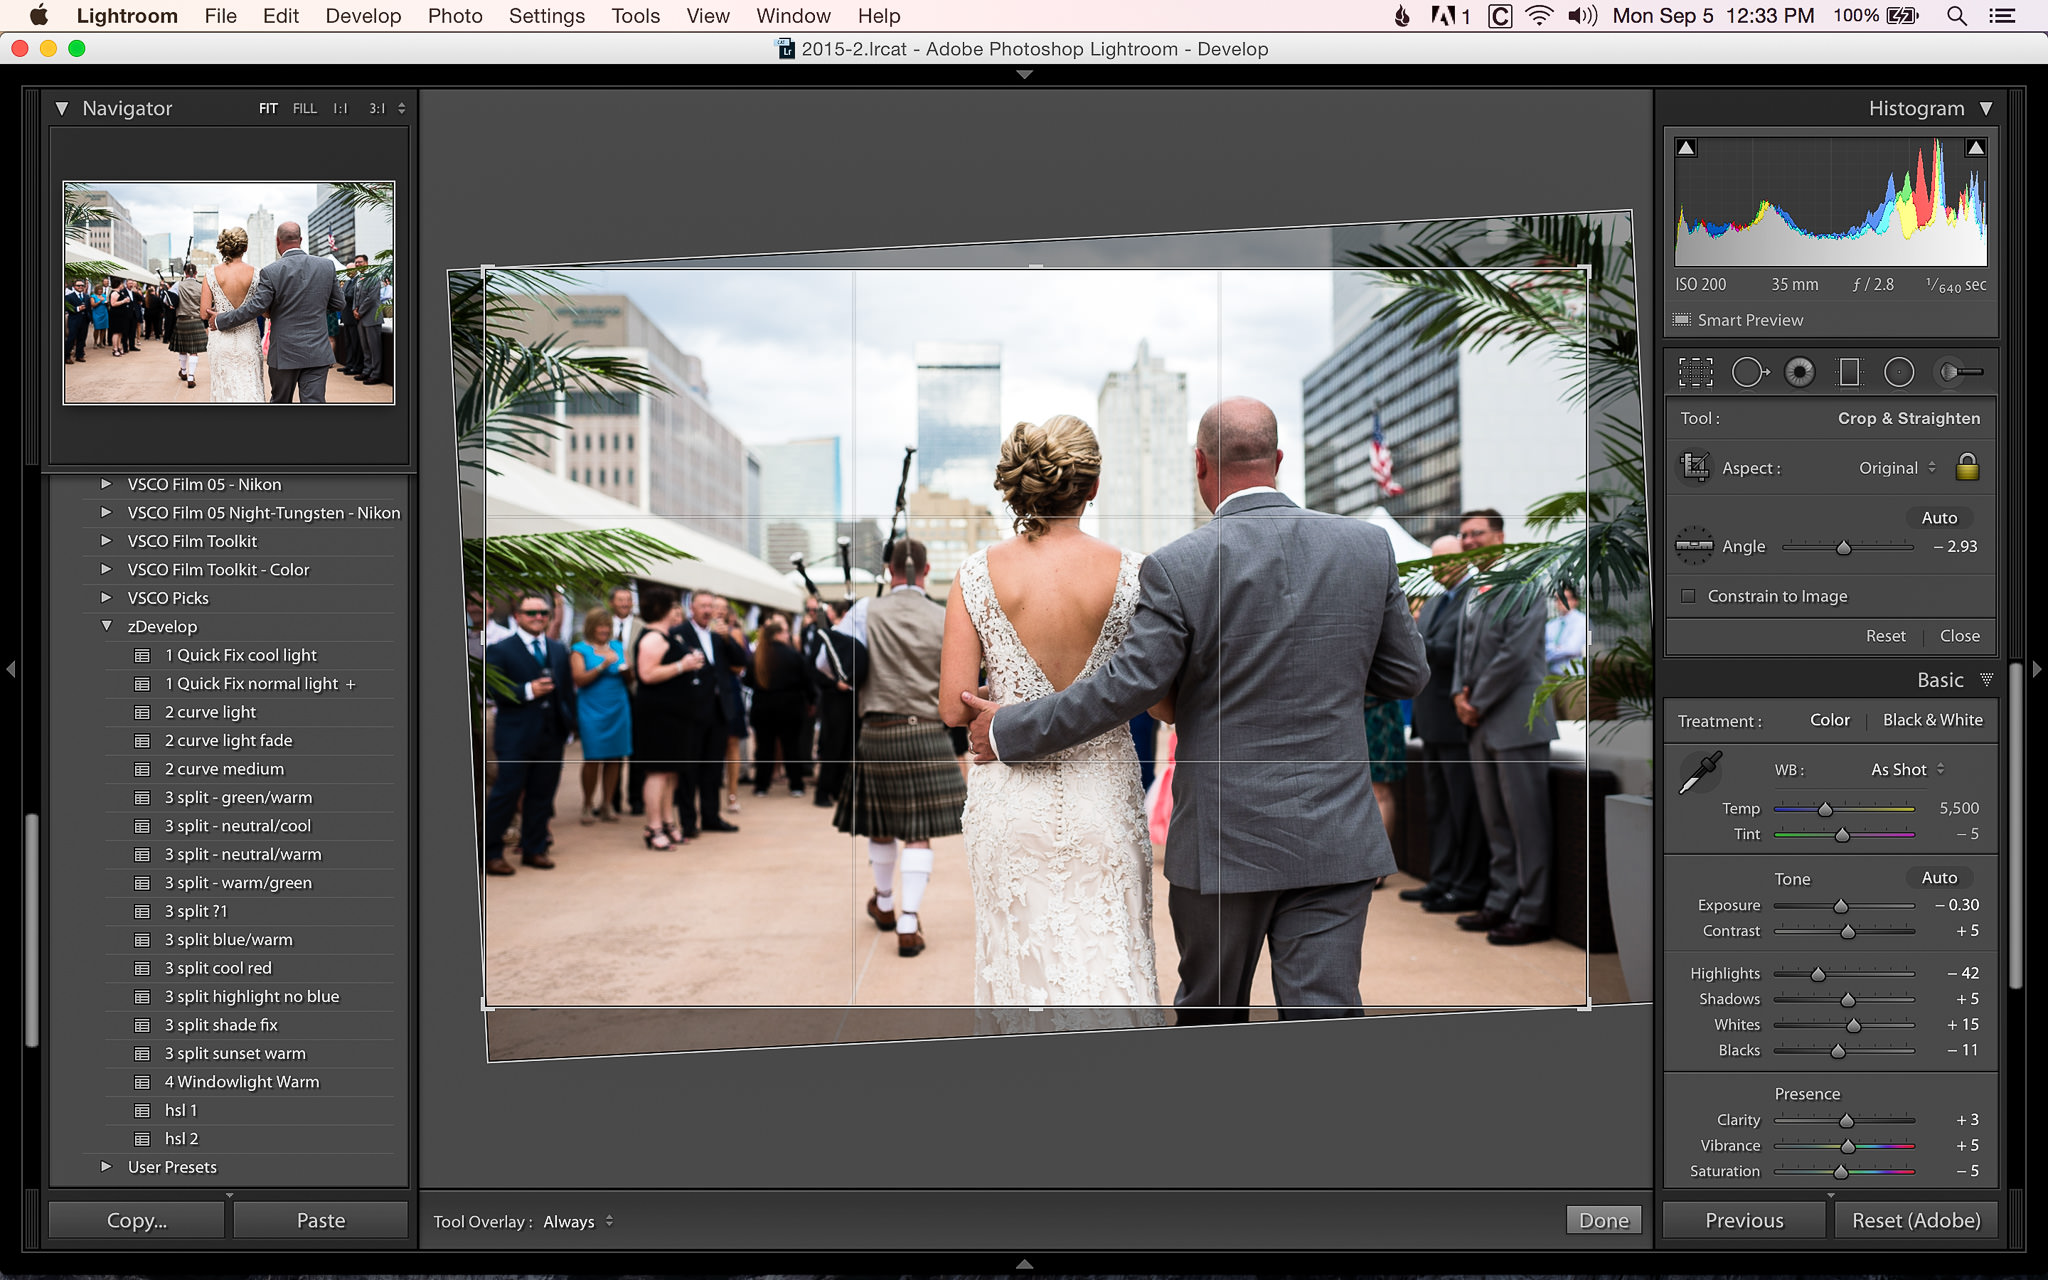
Straightening an image – small view
A simple way to make even more precise adjustments while straightening an image is to hide the side panels in Lightroom by pressing “Tab”. This will make your image take up the entire screen. Now when you rotate the image, it moves much more slowly, giving you precise control over the straightening process.
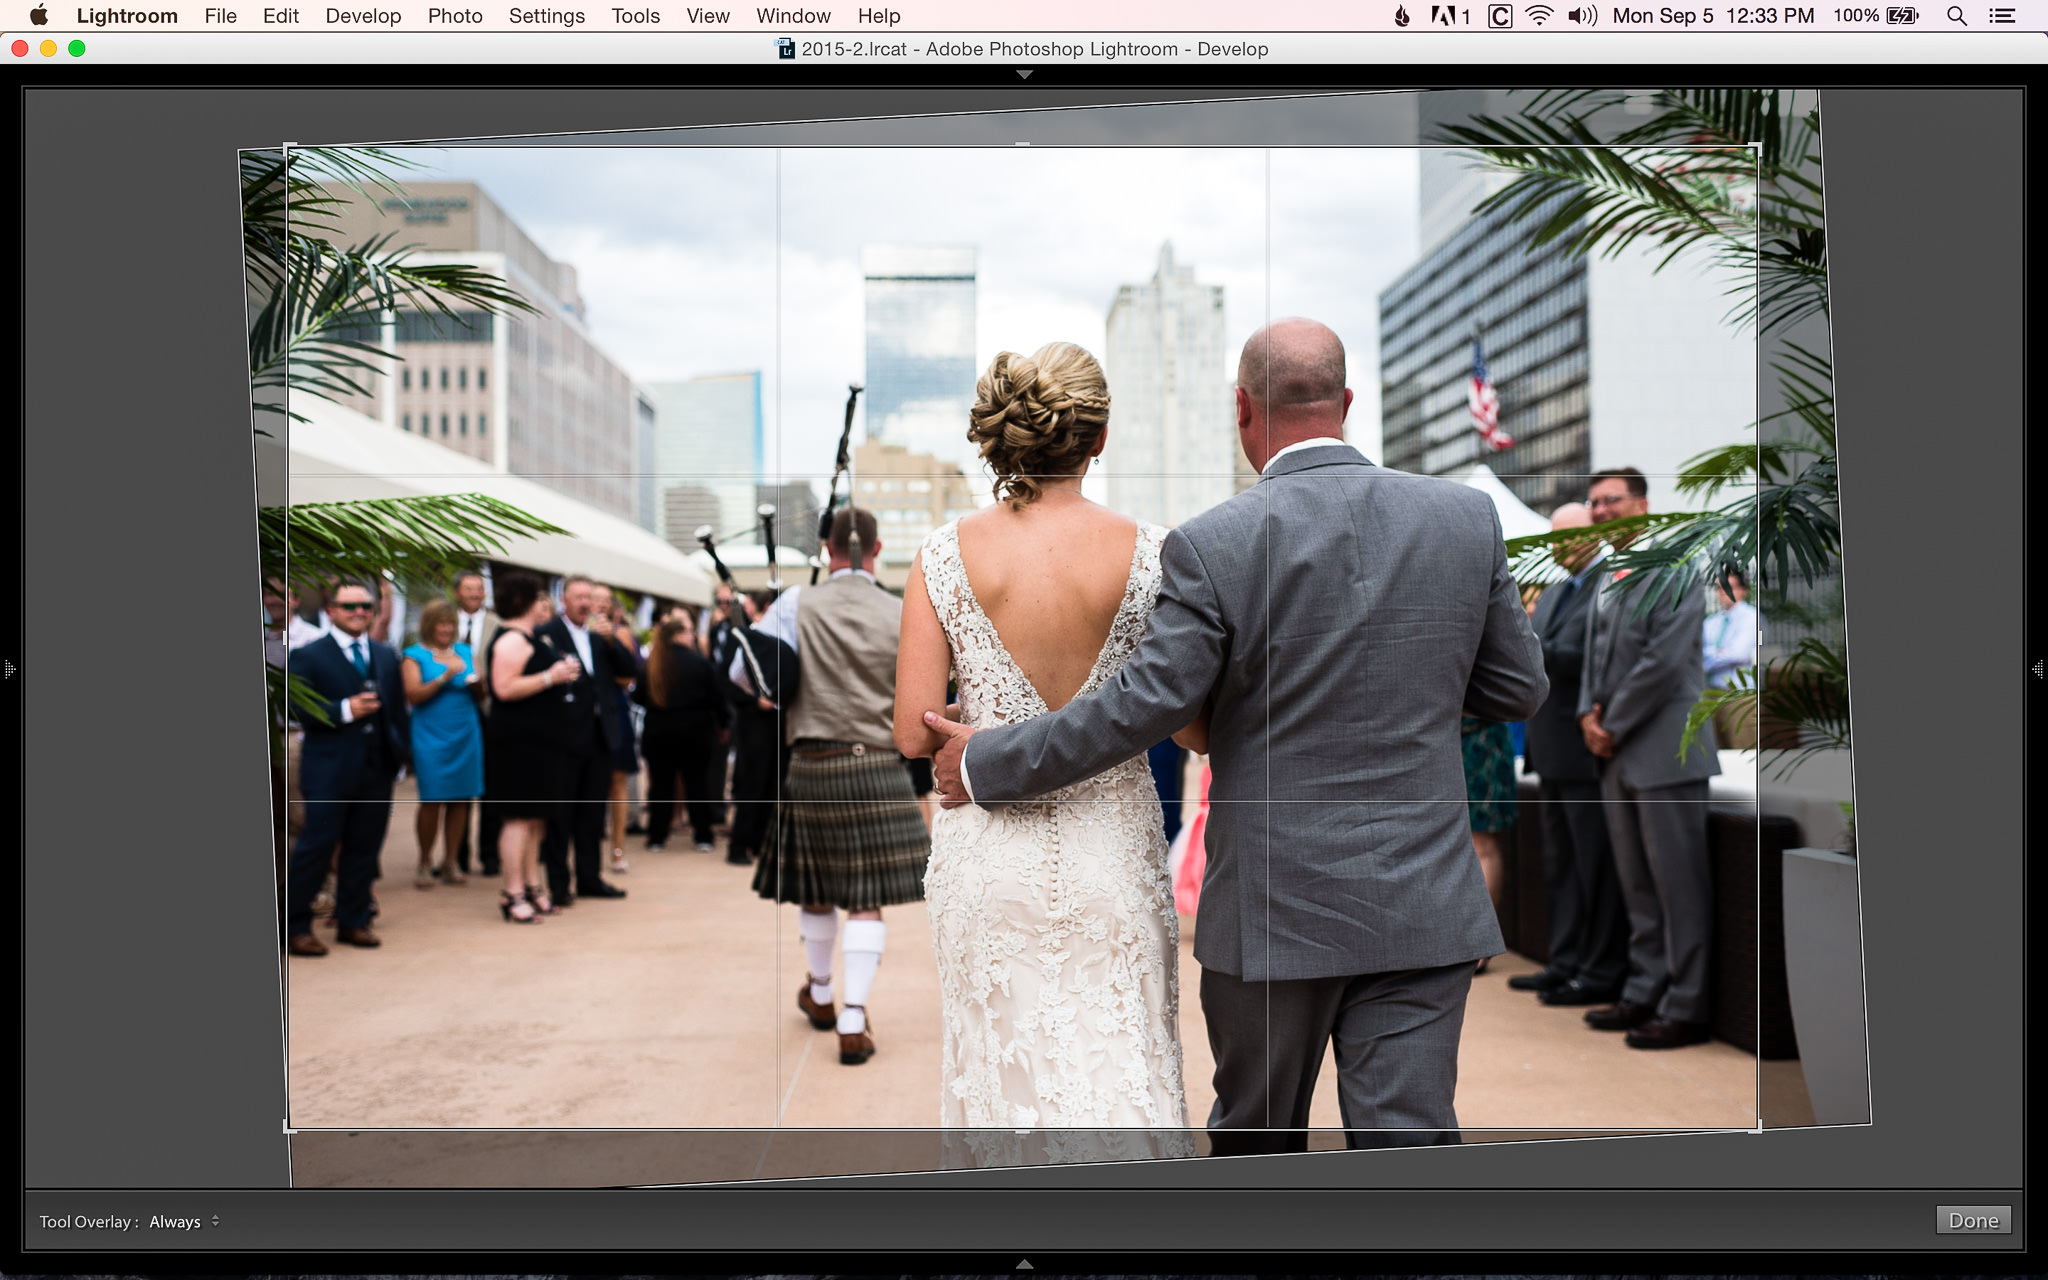
Straightening an image – large view
When you’re done straightening your image, simply press “Tab” again to unhide the side panels.
3) Hold down the Alt/Option key when making adjustments to see more information
This trick works great when you’re trying to fine tune adjustments to your image. You can use it when adjusting exposure, highlights, shadows, whites, blacks and even sharpening. Simply hold down the “Alt” key (on PC) or “Option” key (on Mac) while moving the adjustment slider. This replaces the image with other information, such as blown highlights, lost shadows or your sharpening mask.
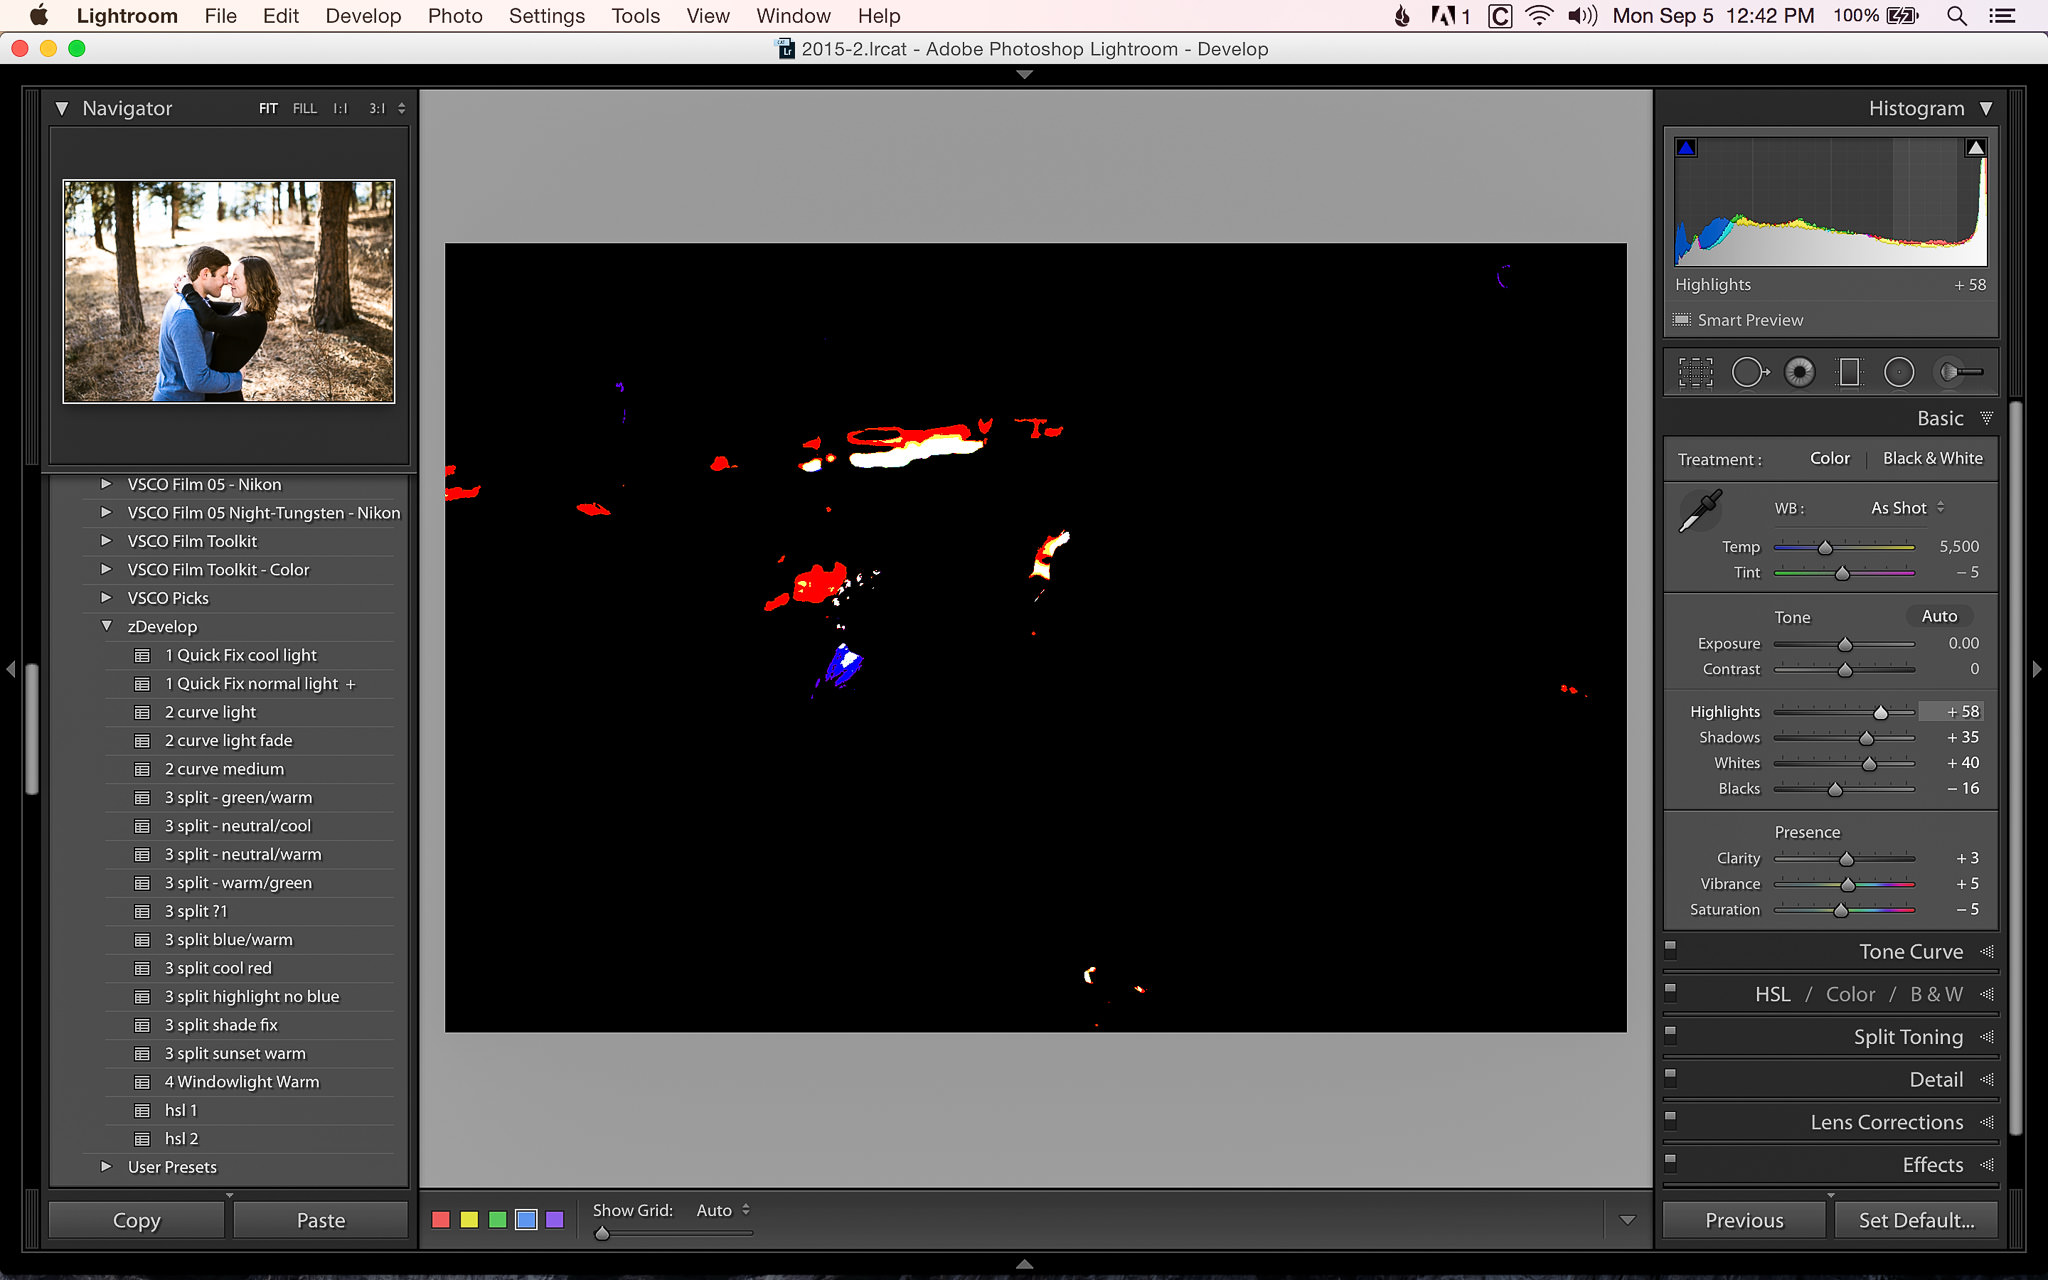
Clipping while adjusting highlights
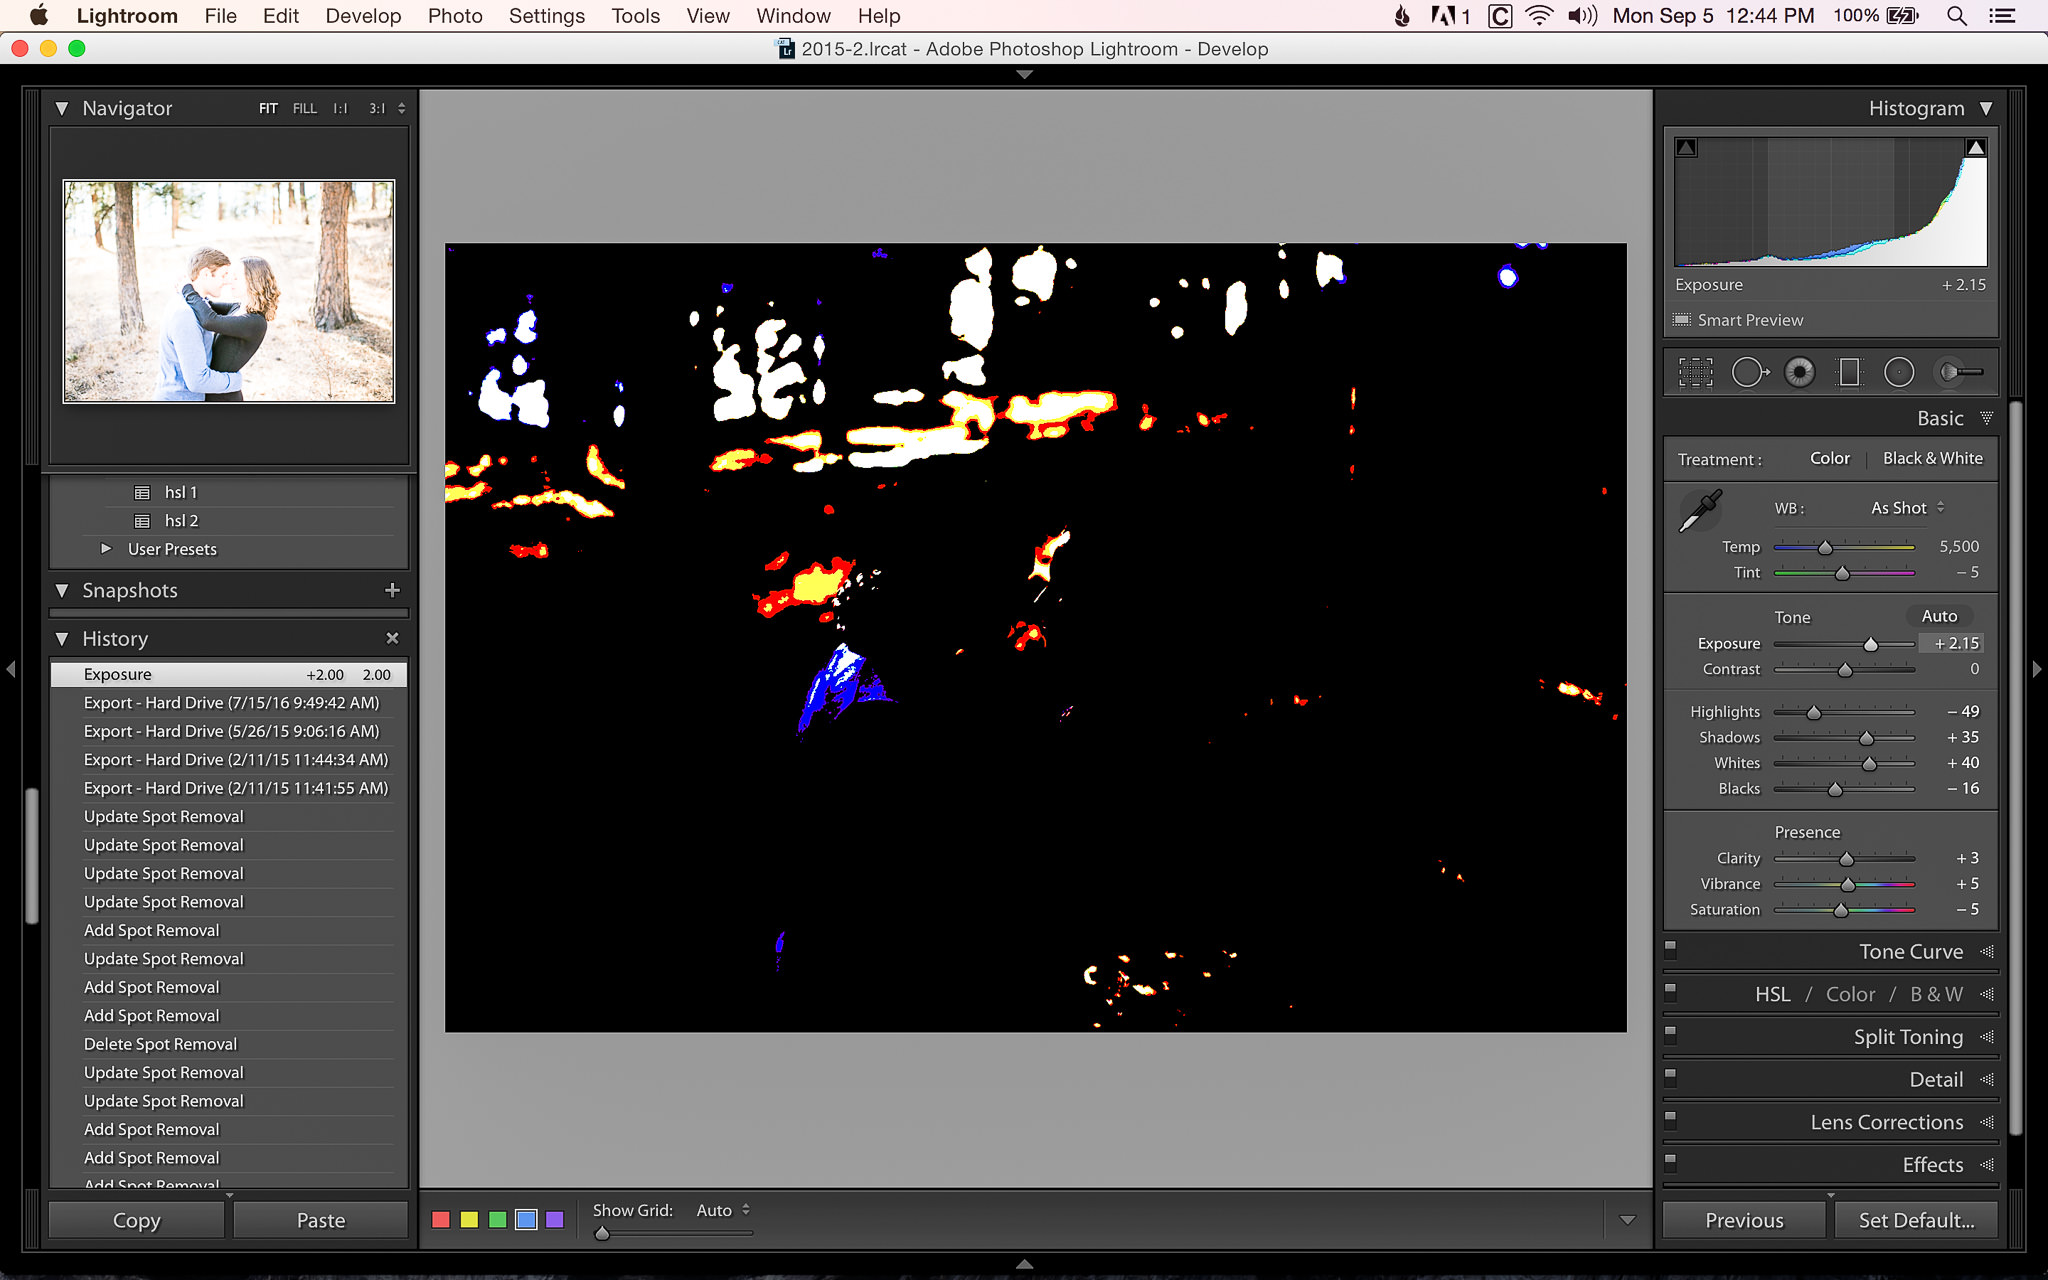
Clipping while adjusting exposure
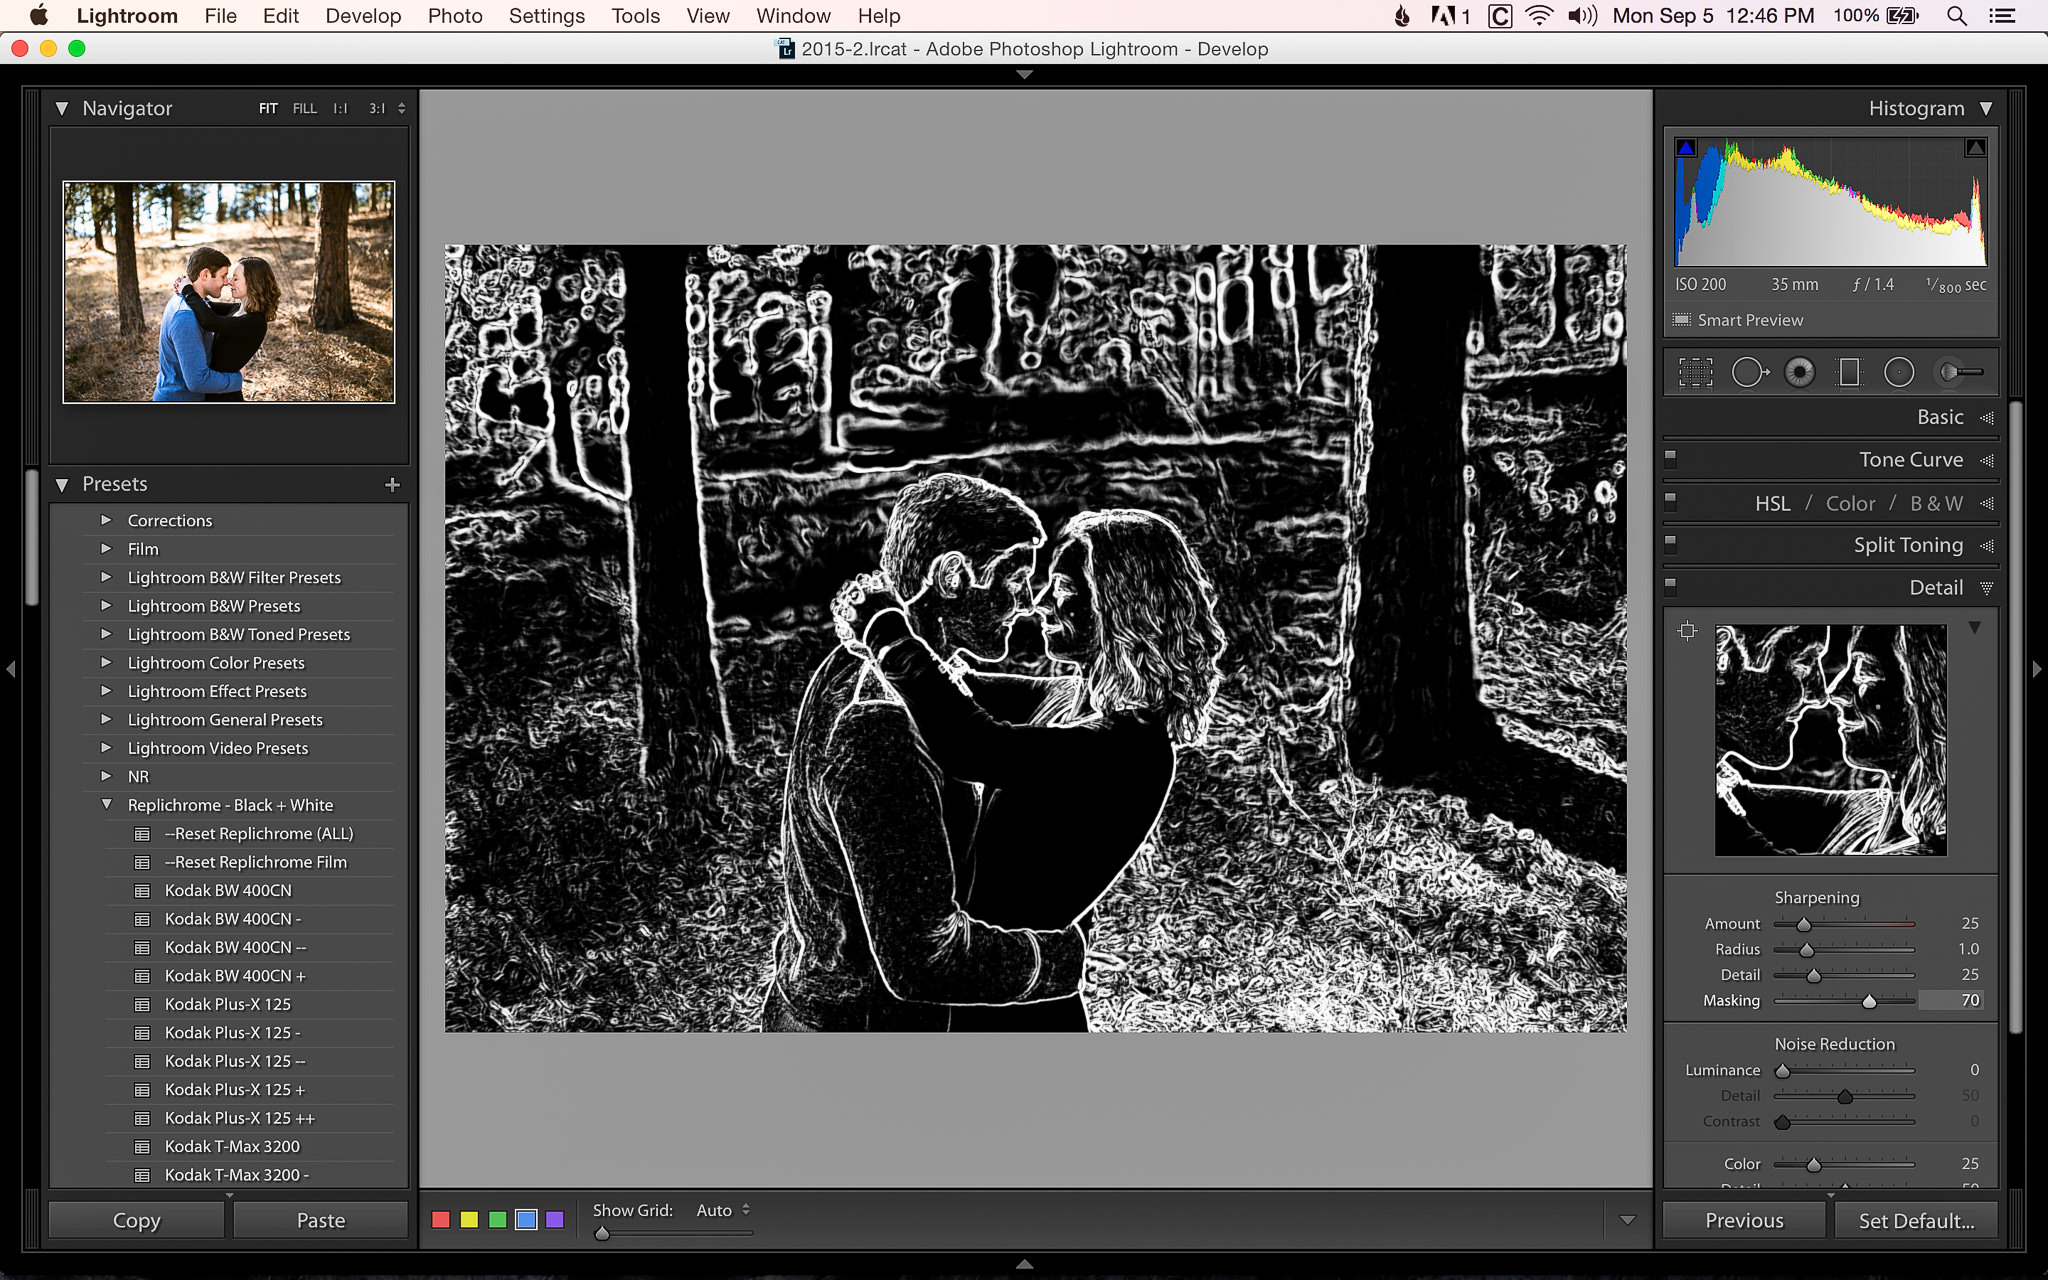
Sharpening mask
Why would you want to do this? When you’re making adjustments, being able to see exactly when highlights start to blow out or when you have your sharpening mask precisely how you want it can make your editing process much easier and more consistent.
4) Get more consistent exposure adjustments by using the RGB values
In our Photography Life Level 1: Workflow and Post Processing video course, we discuss how viewing conditions and screen calibration can affect the final exposure of your image. If you can’t avoid working in different lighting conditions or using different displays, you need a way to ensure that your images have consistent exposures.
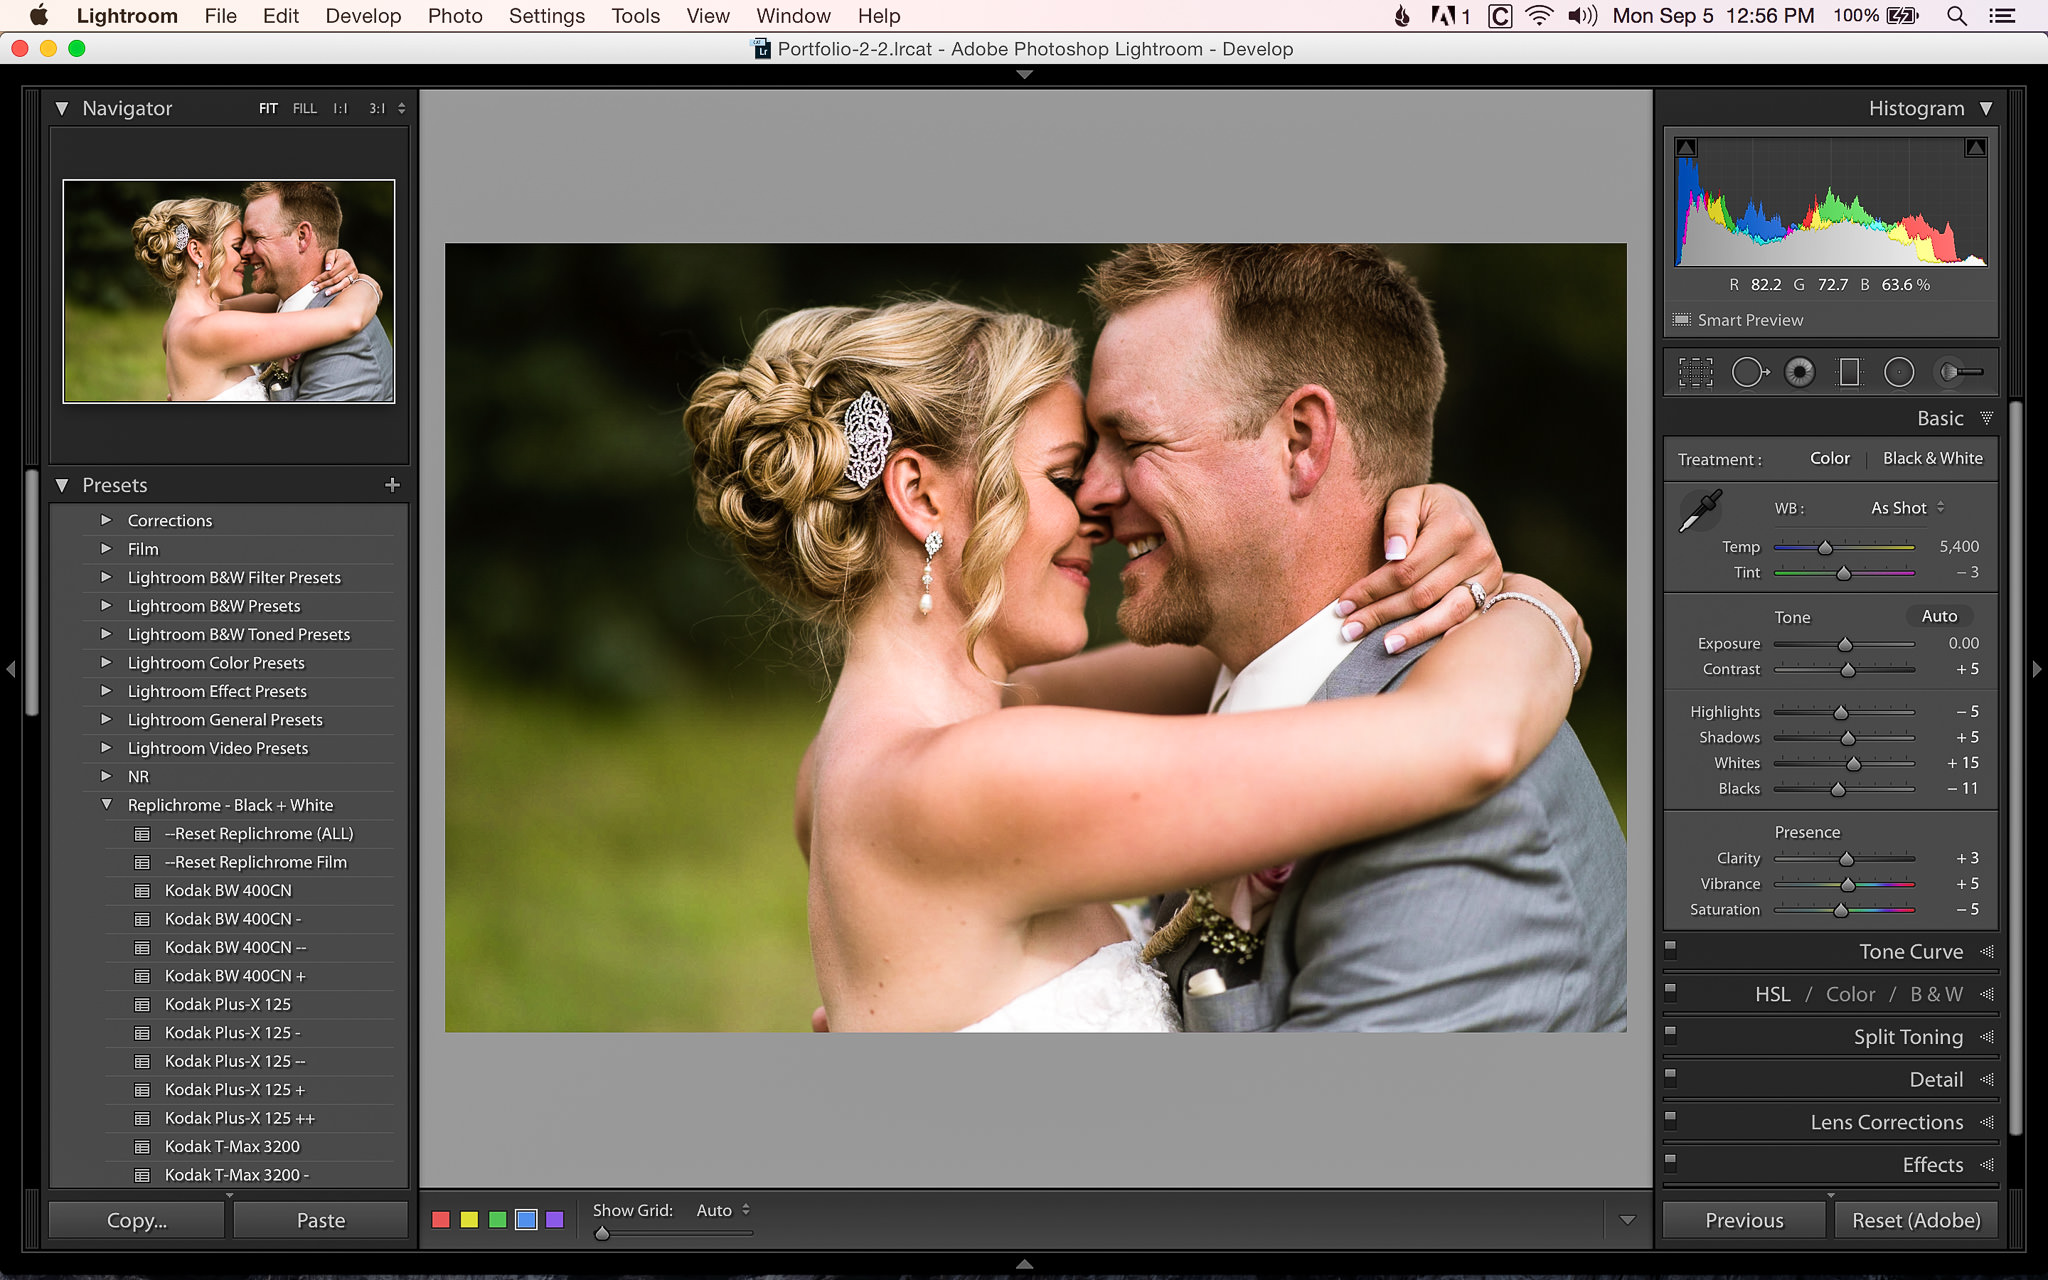
Using RGB values for consistent exposure
When I’m editing any type of skin, I pay close attention to the RGB values in the upper-right corner, directly under the histogram. From experience, I know that if I hover my cursor over a person’s forehead and the average “R” value is around 80 for lighter skin or 70 for darker skin, the exposure for their skin should be where I want it to be. In this particular image, I metered near her eyebrow for this value of “R 82.2”. The rest of the values on their faces ranged between R 75-85, which is great for skin. Knowing this, I can get a good exposure for their skin regardless of the conditions I’m working in or my screen’s calibration.
You can refer to these RGB values for your own editing, regardless of what type of photography you do. With a little observation, you should be able to find a value for a part of your image that you can always refer to (maybe a blue sky or green leaves). Then, regardless of the conditions you’re editing in, you can consistently set the exposure for an important part of your image.
Keep in mind, this only works for the specific part of the image you’re reading the value from. For example, I might be able to get a person’s skin looking perfect, but the sky might be completely blown out. This is simply another tool that you can use while editing, not a magic bullet for perfect overall exposures.
5) Change your camera profile
This is something that I learned from Nasim while we were creating our Post Processing video. It’s not necessarily a trick, but it is something that I was completely unaware of, simply because I had never explored it. In the Lightroom develop module, on the right side if you go all the way to the bottom to the Camera Calibration section, you’ll see a drop down selection named “Profile”. By changing this, you will adjust the way the image looks without affecting any of the other settings, such as exposure, curves, HSL, etc…
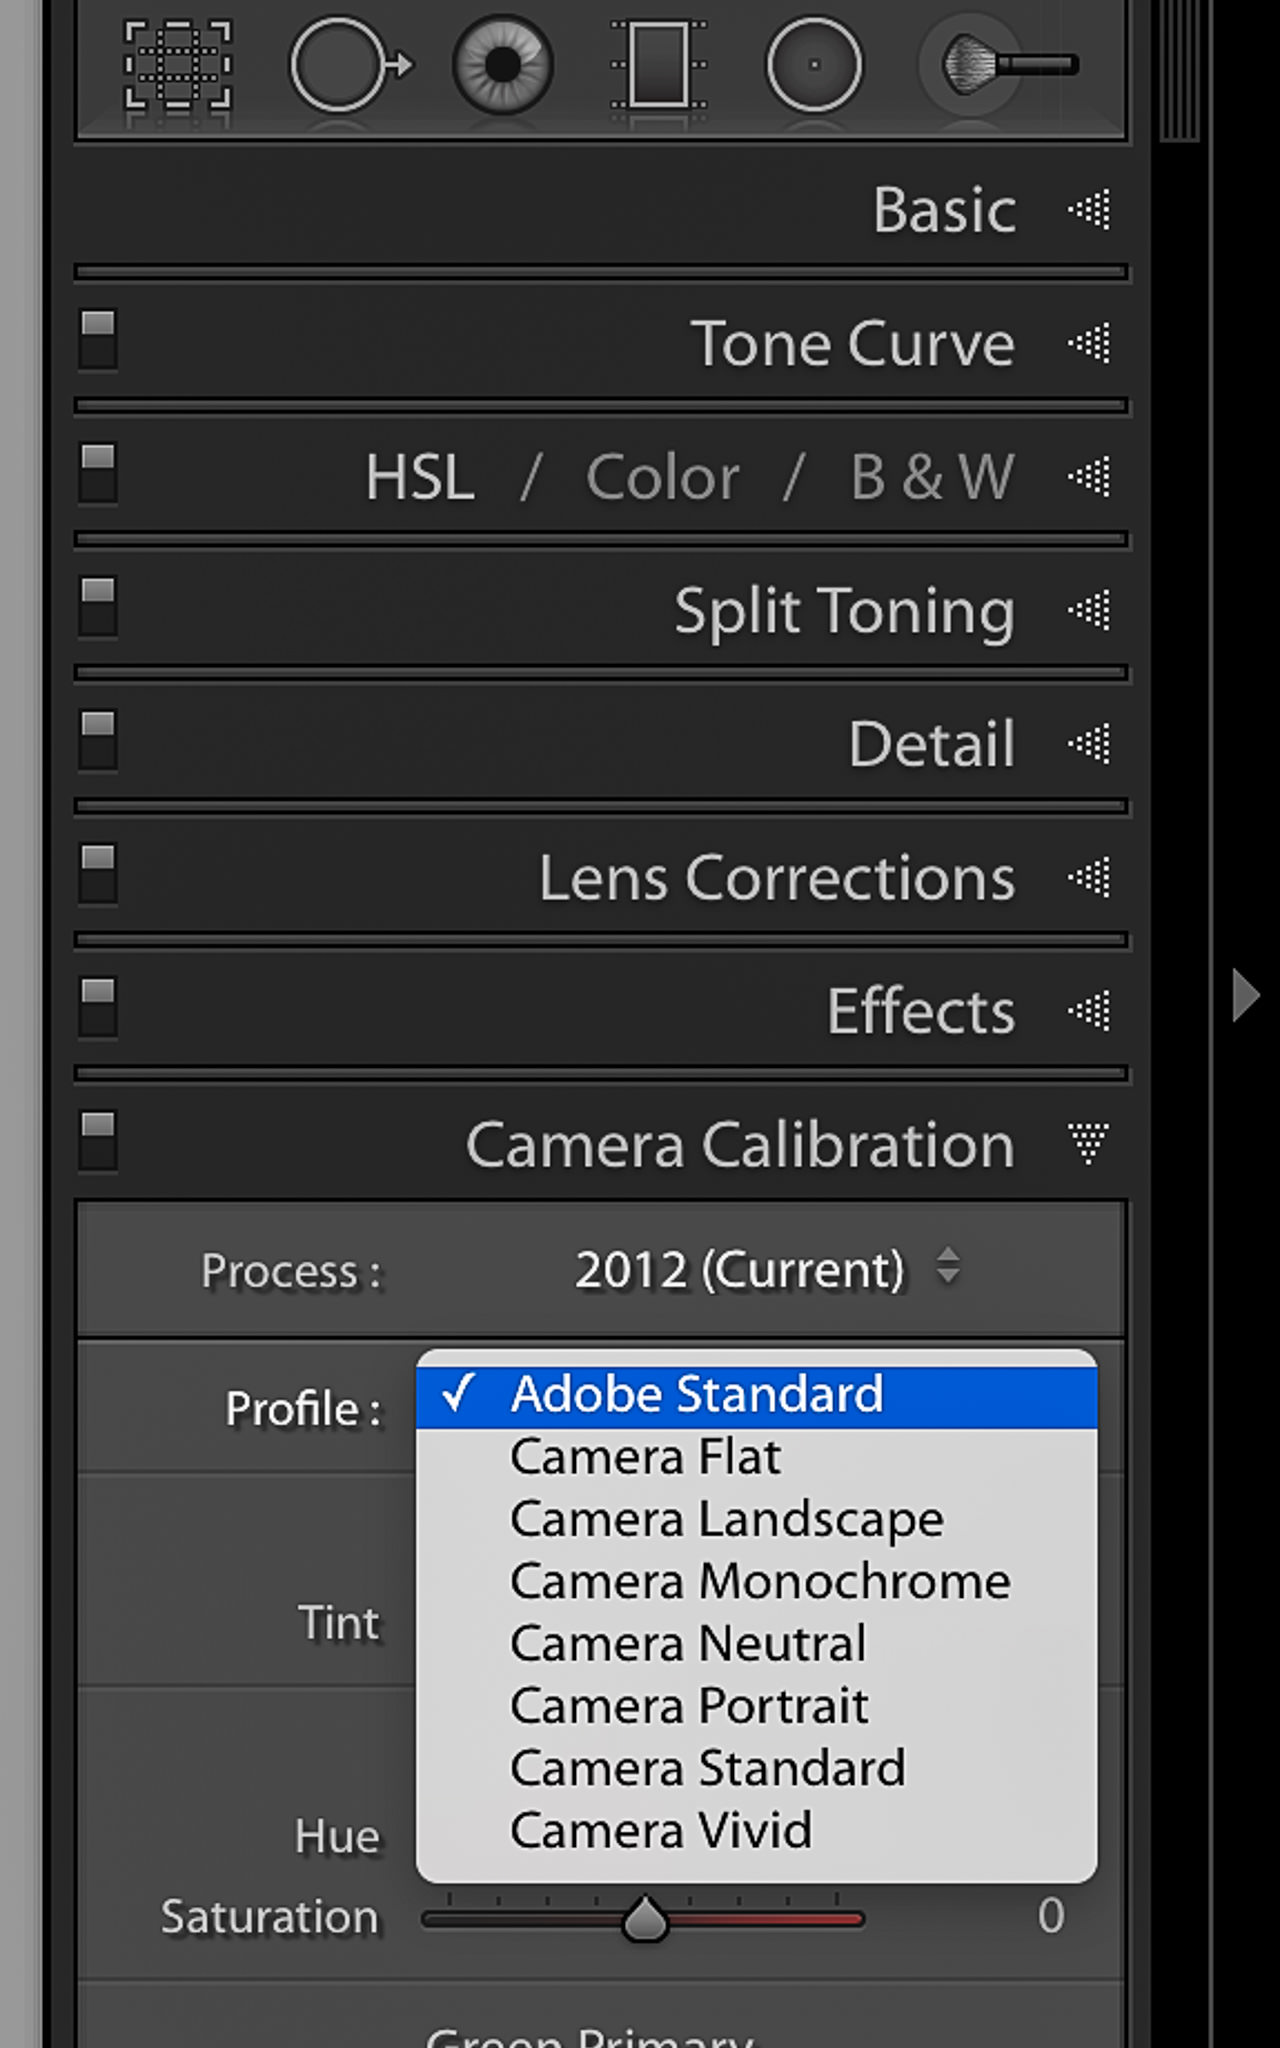
Camera Profile options
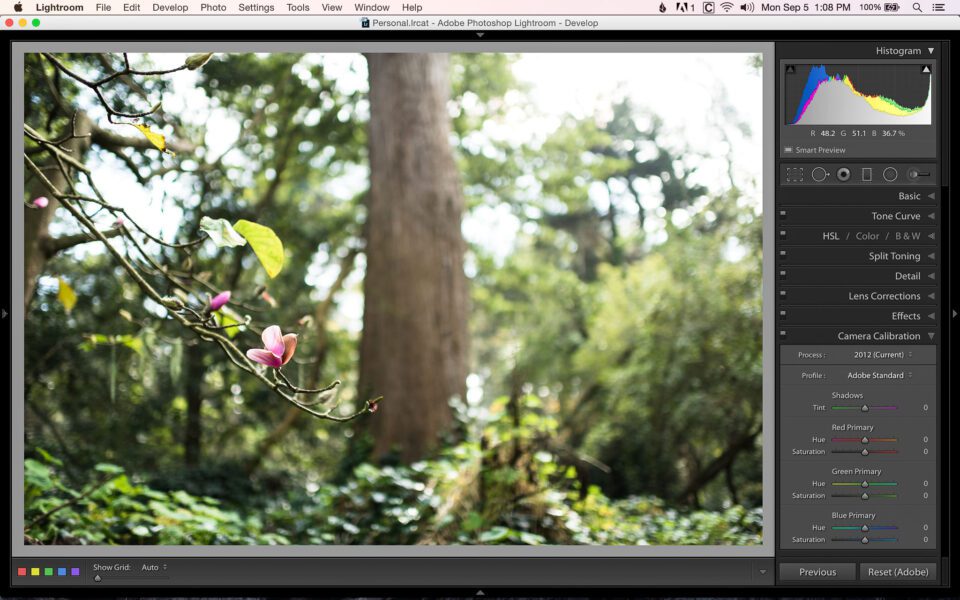
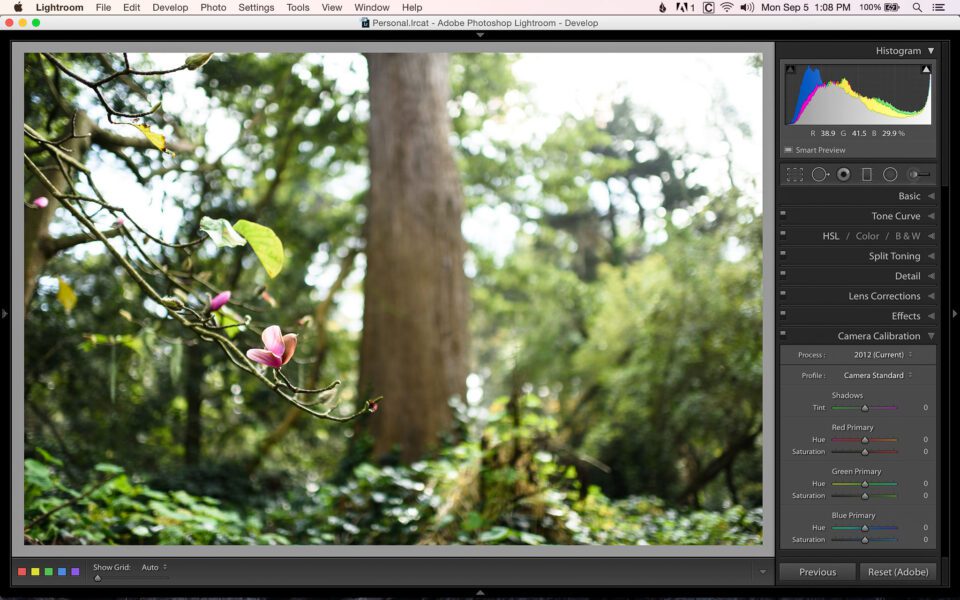
Although it’s found at the bottom of the screen, this can be a great starting point when editing your images. I know that this is the first step of Nasim’s editing process, done before he ever even adjusts the exposure. Changing this setting can make your RAW images look a lot closer to the way they looked on the back of your camera. In the example below (I figured I’d throw in a landscape just to give you a break from wedding photos), you can see the difference between the default setting of Adobe Standard and the updated setting of Camera Standard. This was the only adjustment made to the image, which is otherwise straight out of the camera.
Conclusion
With a piece of software as complex as Adobe Lightroom, there are bound to be features that go unnoticed or tricks that can be used to make photo editing easier. Maybe you never knew you could hold down “Alt” to see more information about the changes you’re making to an image. Maybe it never occurred to you that by making the image larger on the screen it would become easier to straighten. Hopefully by reading this article you picked up a thing or two that will help make your time spent in Lightroom a little bit easier.
The post 5 Simple Lightroom Tips You Might Not Know About appeared first on Photography Life.


