Nikon D500 Review

I never did completely lose faith. I think in the end it was probably just myself, Thom Hogan and one or two others – the true believers. Nikon would give us a legitimate successor to the D300S. I think that the many who told us to give up and move on to FX because DX is dead, or that the D7200 was the real D300S replacement, perhaps missed the point. The D7200 is an absolutely excellent camera, but I have always thought it pretty obvious that Nikon was holding back on the D7x00 series. And as far as moving on to FX, well we were already there shooting D4s, D800s, etc., but looking back to DX for the potential advantages that a smaller format, high-performance body could bring to shooting wildlife and other action. There was room at the top of the DX model lineup for a specialist camera and now we have it – the D400 D500. Nevertheless, I was caught off-guard, along with most people I think, when the D500 was announced alongside the D5 in early 2016. We all knew the D5 was coming, but just how did Nikon manage to keep the D500 a secret?

Nikon D500

The D500 takes its place at the top of the Nikon APS-C (“crop sensor”) format camera body lineup as a true flagship model and as the undisputed, long dreamed of replacement for the D300S (has it really been 7+ years?). There is no question that the D500 is meant to be viewed as, and perform as, a mini-D5. Consider the naming of the two, the simultaneous announcements, the new auto-focus system common to both, the use of XQD memory cards in both cameras, and even the identical resolution 21MP sensors, among many other commonalities. Quite frankly, on paper the D500 looks like a dream. And clearly, I’m not the only one thinking that. The first batch of cameras sold out rather quickly and at the time, specs on paper is all there was to go on. And at the time of writing (late June) it is once again out of stock at major online retailers. Interestingly, Nikon classifies the D500 as “enthusiast” rather than “professional”, placing it in the same camp as the D7200. Given the specifications, I think we have to conclude that it is simply the sensor size that prevents Nikon from considering it a “professional” camera. Snobbery over sensor size won’t prevent many professional and non-professional photographers from doing amazing work with this camera. Of that I have no doubt. Some have commented that the US $ 2,000 price tag is a little steep. Next to the D7200 at $ 1,200 when announced and now discounted, it does seem so. But then consider that the D300 was announced in 2007 at $ 1,800, alongside the D3 at $ 5,000. In that time we have seen an 11% increase in price for the top DX model versus a 30% price hike for the top FX model. So if the ask for the D500 seems high, just put it alongside its big brother, the D5 at $ 6,500, and the price tag on the mini-D5 starts to look somewhat mini itself.

Reddish Egret (white morph) - Nikon D500, 600mm f/4, ISO 220 1/4000s f/5.6

Reddish Egret (white morph) – Nikon D500, 600mm f/4, ISO 220 1/4000s f/5.6

1) Specifications Summary

  • Sensor: 20.7MP (5568 x 3712) APS-C “DX” format CMOS sensor (23.5mm x 15.7mm)
  • Pixel Size: 4.2μ
  • ISO range: 100 – 51,200 (50 – 1,640,000 extended range)
  • Shutter: 1/8000s – 30s (flash sync. 1/250s)
  • Shutter Durability: Rated to 200,000 actuations
  • Continuous Capture: up to 10 fps, up to 3 fps in quiet continuous mode
  • Processor: EXPEED 5
  • Storage: 1 XQD and 1 SD (UHS-II)
  • Viewfinder: Pentaprism with 100% frame coverage and 1.0x magnification
  • LCD Screen: Tilting and touch-sensitive LCD, 3.2 inch, 2.36 million RGB dots, 1024 x 768 pixels
  • Metering: 180,000-pixel RGB sensor, -3 to +20 EV range
  • Autofocus System: Multi-CAM 20K with 153 focus points (55 selectable)
  • AF Sensitivity Range: -4 to +20 EV
  • AF modes: Single point, Dynamic 25, 72 or 153 point, 3D-tracking, Group-area, Auto-area
  • Movie: 3840 x 2160 (UHD) up to 30fps, 1920 x 1080 (HD) up to 60fps, H.264/MPEG-4 encoding
  • Connectivity: Wi-fi 802.11b/g, Bluetooth 4.1, USB 3.0, HDMI out, Analog stereo audio in/out
  • Power: EN-EL15 Li-ion battery 14Wh, 1240 shots per charge (CIPA standard)
  • Dimensions/weight: 5.8in. x 4.6in. x 3.2in. / 147mm x 115mm x 81mm (WxHxD), 26.9oz / 760g camera body only
Crested Caracara - Nikon D500, 200-500mm f/5.6 @ 360mm, ISO 250 1/2000s f/5.6

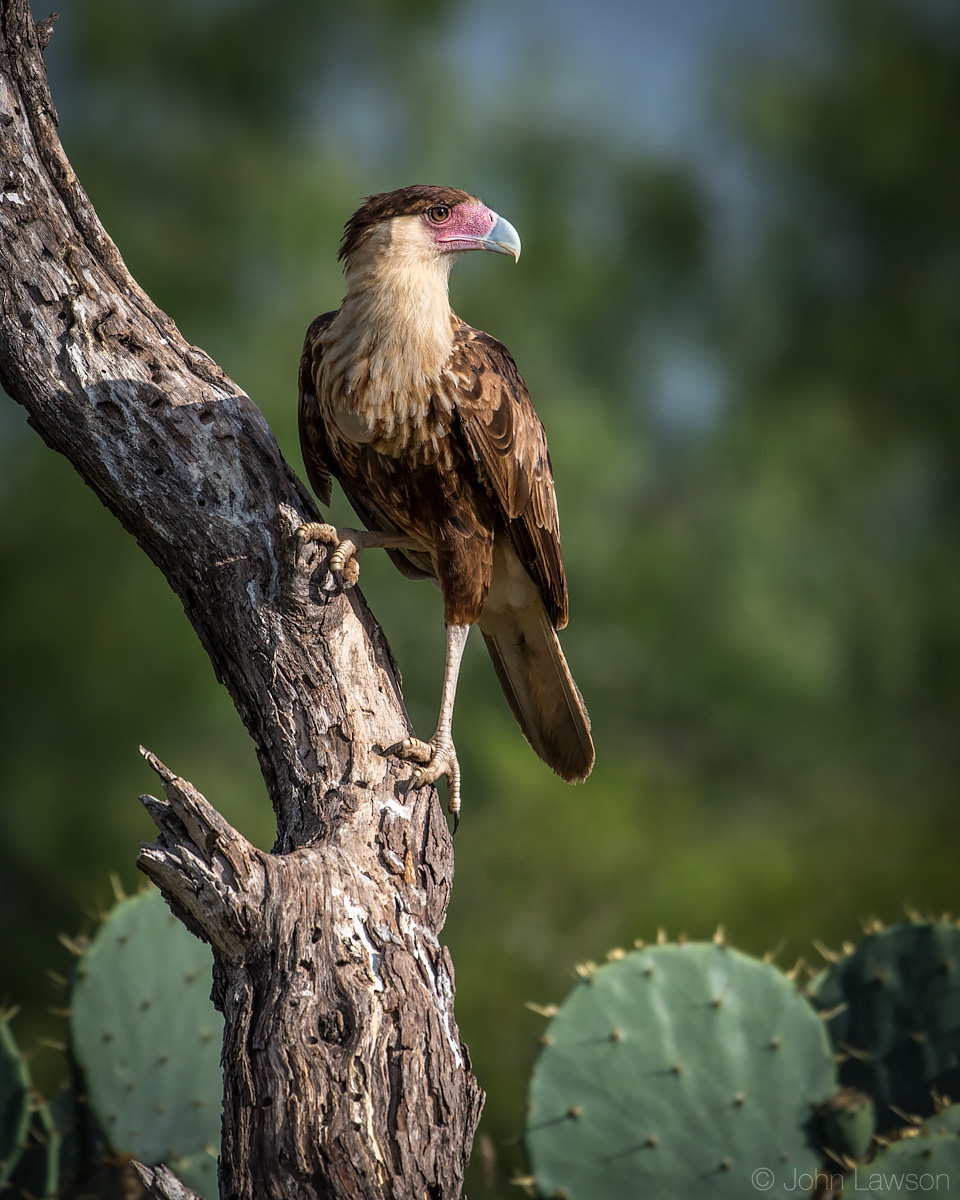
Crested Caracara – Nikon D500, 200-500mm f/5.6 @ 360mm, ISO 250 1/2000s f/5.6

2) Nikon D500 vs D7200 vs D300S Specifications Comparison

Let’s take a quick look at how the Nikon D500 compares in terms of specifications with the D7200 and the D300S:

Camera Feature Nikon D500 Nikon D7200 Nikon D300S
Sensor Resolution 21MP (5568 x 3712) 24MP (6000 x 4000) 12MP (4288 x 2848)
Native ISO range 100 – 51,200 100- 25,600 200 – 3,200
Expanded ISO range 50 – 1,640,000 100 – 102,400 100 – 6,400
Image Processing Engine EXPEED 5 EXPEED 4 EXPEED
Continuous Frame Rate up to 10 fps up to 6 fps up to 7 fps (8 fps with MB-D10)
Buffer Capacity (RAW) up to 200 up to 18 up to 17
Storage Media 1 x XQD, 1 x SDXC (UHS-II) 2 x SDXC 1 x CF, 1 x SDHC
Viewfinder Magnification 1.0x 0.94x 0.94x
Shutter Durability 200,000 actuations 150,000 actuations 150,000 actuations
Metering System 180,000-pixel RGB sensor 2,016-pixel RGB sensor 1,005-pixel RGB sensor
Metering Sensitivity -3 – 20 EV 0 – 20 EV 0 – 20 EV
Autofocus Module Multi-CAM 20K Multi-CAM 3500 II Multi-CAM 3500DX
Autofocus Points 153 (55 selectable) 51 51
Autofocus Modes Single, Dynamic 25/72/153,
 3D-tracking, Auto-area,
 Group-area Single, Dynamic 9/21/51, 
3D-tracking, Auto-area Single, Dynamic 9/21/51,
 3D-tracking, Auto-area
Autofocus Sensitivity Range -4 – 20 EV -3 – 19 EV -1 – 19 EV
Autofocus Fine-Tune Automatic, Manual Manual Manual
LCD Size 3.2in. 3.2in. 3.0in.
LCD Resolution 2.36M dots 
1024 x 768 RGB pixels 1.23M dots
 640 x 480 RGBW pixels 922K dots
 640 x 480 RGB pixels
LCD Tilt & Touch Yes No No
Movie Formats UHD 3840 x 2160 30fps,
HD 1920 x 1080 60fps HD 1920 x 1080 60fps VGA 640 x 480 24fps
Flash (Built-in) No Yes Yes
Wireless Connectivity Wi-Fi 802.11b/g,
 Bluetooth 4.1 Wi-fi 802.11b/g No
Battery Type EN-EL15 Battery EN-EL15 Battery EN-EL3e Battery
Battery Life 1240 shots (CIPA) 1110 shots (CIPA) 950 shots (CIPA)
Size 5.8in. x 4.6in. x 3.2in.
(147mm x 115mm x 81mm) 5.4in. x 4.2in. x 3.0in.
(136mm x 107mm x 76mm) 5.8in. x 4.5in. x 2.9in.
(147mm x 114mm x 74mm)
Weight 26.9oz (760g) 23.9oz (675g) 30oz (840g)

As might be expected, the D500 stands out from the D7200 and D300S in almost every way. Performance improvements include a very fast top frame rate with a huge buffer. The metering module is very high resolution compared to the older cameras and is also far more capable in low light. On paper, at least it has 3 stops greater sensitivity. Of course there is next generation auto-focus which is functional down to an incredible -4 EV. So what is that in terms of an actual exposure? 1 second at f/1.4 and ISO 3,200 – very dark! The LCD monitor has received a big spec bump with all the attention going to the tilt and touch capabilities. But note too the increase in resolution. More on that later. UHD (not quite 4K) movie recording is now possible. And with SnapBridge (Wi-Fi & Bluetooth), Nikon is making an attempt to provide wireless connectivity that is actually useful. The jury is still out on whether they have succeeded.

Yellowstone National Park (1)

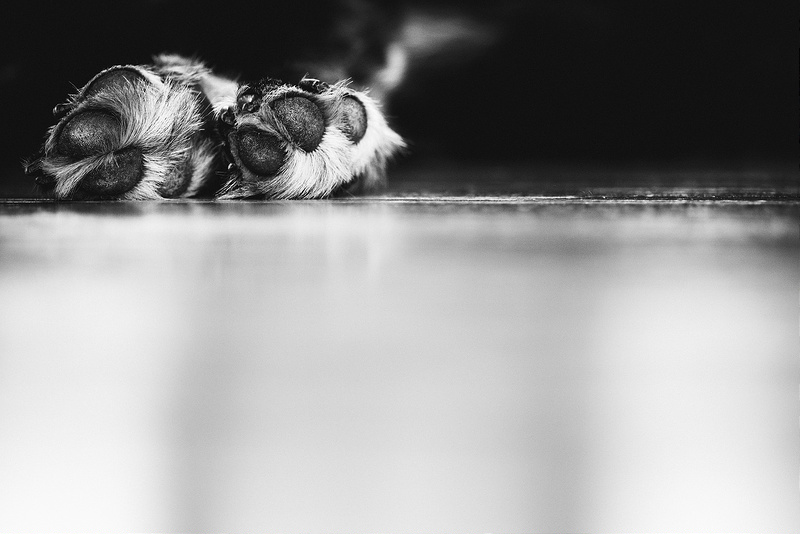
NIKON D500 + 300mm f/4 @ 420mm, ISO 800, 1/200, f/8.0

3) Nikon D500 vs D5 Specifications Comparison

And here is the Nikon D500 compared to its big brother, the Nikon D5:

Camera Feature Nikon D500 Nikon D5
Sensor Size DX 23.5mm x 15.7mm FX 35.9mm x 23.9mm
Sensor Resolution 21MP (5568 x 3712)
Native ISO Range 100 – 51,200 100 – 102,400
Expanded ISO range 50 – 1,640,000 50 – 3,280,000
Image Processing Engine EXPEED 5
Frame Rate up to 10 fps up to 12 fps
 (14 with mirror locked up)
Buffer Capacity (RAW) Up to 200
Storage Media 1 x XQD, 1 x SDXC (UHS-II) 2 x XQD or 2 x CF
Shutter Life 200,000 actuations 400,000 actuations
Metering Module 180,000-pixel RGB sensor
Metering Sensitivity -3 – 20 EV
Autofocus Module Multi-CAM 20K
Autofocus Points 153 (55 selectable)
Autofocus Modes Single, Dynamic 25/72/153, 
3D-tracking, Auto-area,
 Group-area
Autofocus Sensitivity -4 – 20 EV
Autofocus Fine-Tune Automatic, Manual
LCD Screen Size 3.2in.
LCD Resolution 2.36M dots 
1024 x 768 RGB pixels
Tilt & Touch Tilt, Touch Touch
Movie Formats UHD 3840 x 2160 30 fps,
 HD 1920 x 1080 60 fps
Wireless connectivity Wi-Fi 802.11b/g,
 Bluetooth 4.1 External module
Battery Type EN-EL15 battery EN-EL18a battery
Battery Life 1,240 shots (CIPA) 3,780 shots (CIPA)
Size 5.8in. x 4.6in. x 3.2in.
(147mm x 115mm x 81mm) 6.3in. x 6.3in. x 3.7in.
(160mm x 159mm x 92mm)
Weight 26.9oz (760g) ~49oz (1400g)

There are three very obvious factors that differentiate the D5 from the D500: sensor size, camera size and price. But looking past those, the two are remarkably alike. Notice how many of the features in the table above are common to both. It is not a comprehensive list by any means, but does pretty well illustrate the shared raison d’être of these two cameras. In recent years it has been a very frustrating fact that, as a Nikon user, the only way to get a really high speed camera was to get a D4 or D4s. There has been no affordable alternative since the D300/D300s until now.

Reddish Egret (white morph) - Nikon D500, 600mm f/4, ISO 900 1/3200s f/5.6

Reddish Egret (white morph) – Nikon D500, 600mm f/4, ISO 900 1/3200s f/5.6

4) Camera Size Comparisons

Below are comparison shots with the D500 side-by-side with other Nikon DSLR cameras. The images are to scale giving an idea of the relative sizes.

D500 and D300S

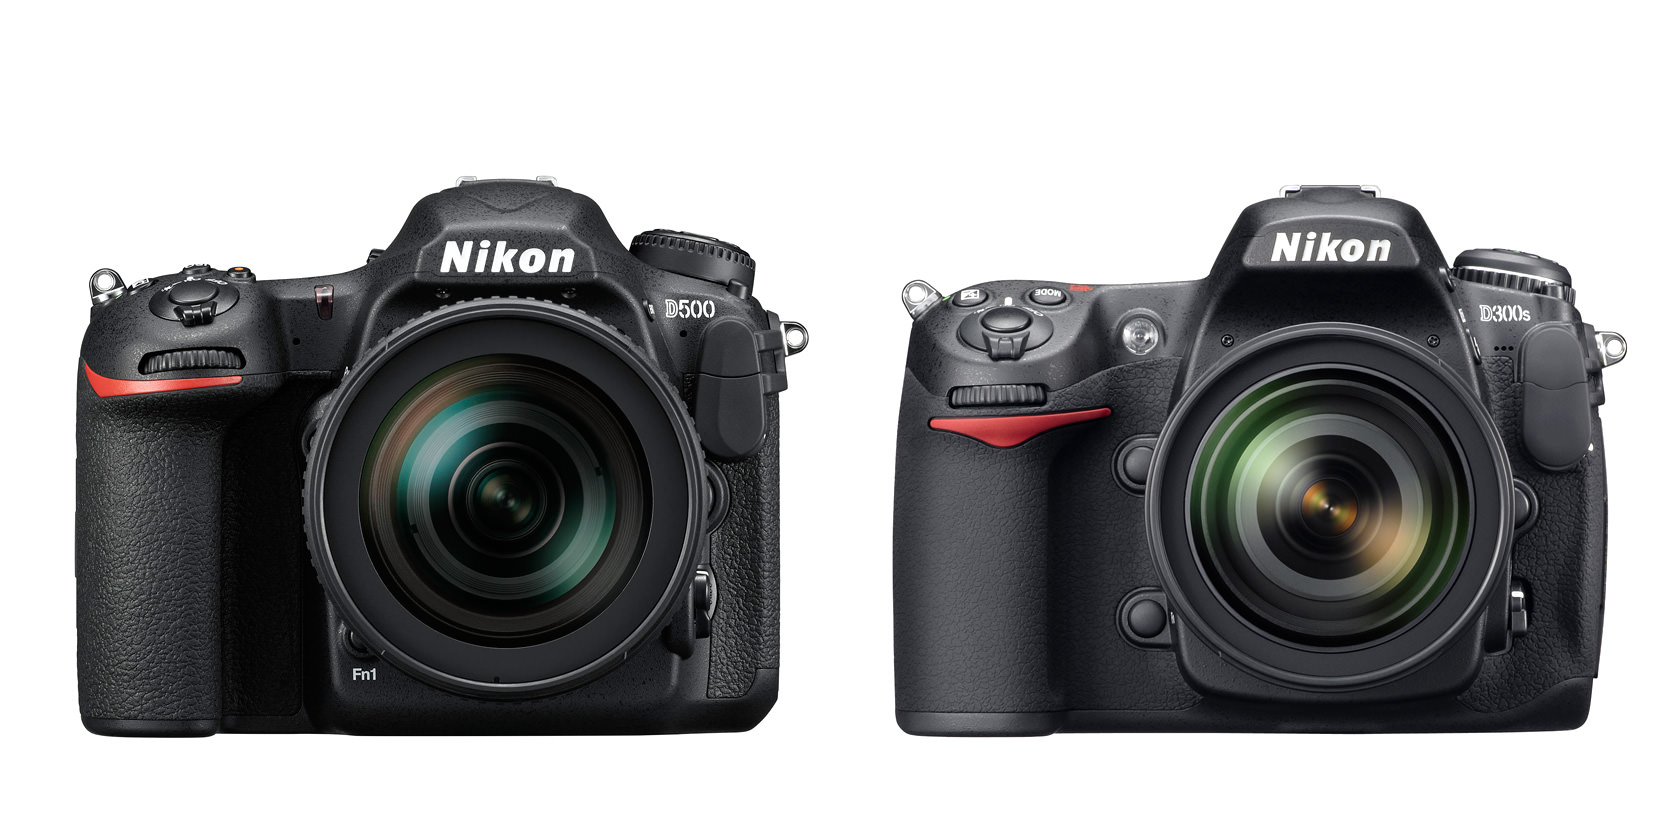
Here we see the shiny new D500 next to the venerable old D300S. Overall size is very similar – the D300S with squarer shoulders and rounder hips. The old boy is noticeably heftier at 840g versus 760g. I always appreciated the weightiness and solid feel of the D300/D300S. It meant business.

D500 and D7200

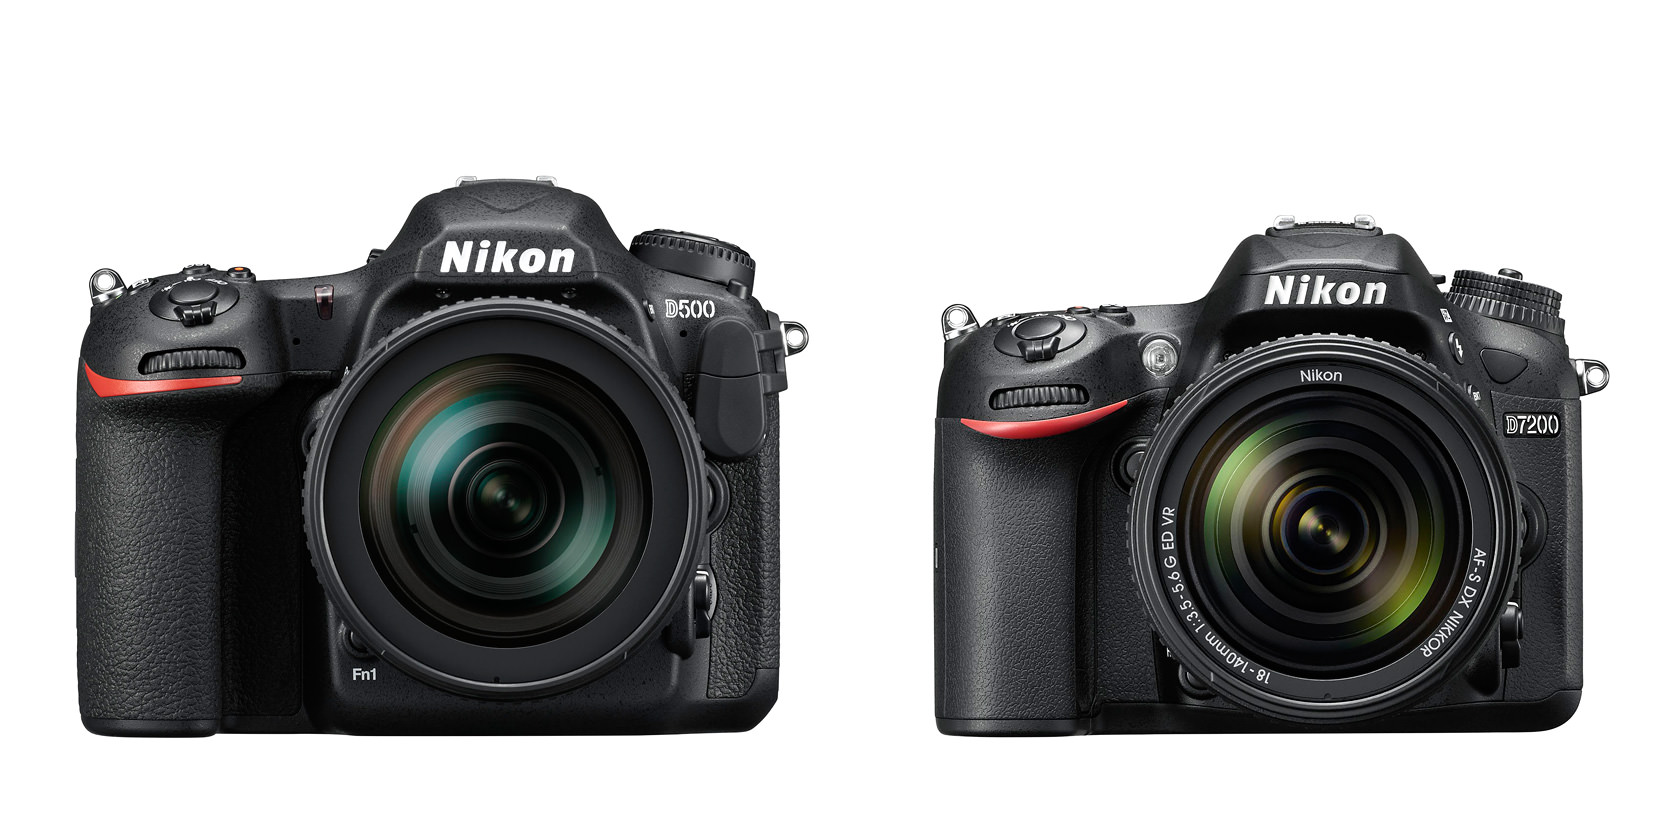
The D500 is large for a DX camera. It is significantly larger and heavier than the D7200 and absolutely dwarfs the D5500. But for me the relatively large size is a good thing. The D7200 is just too small to feel really comfortable in my hand. There is not quite enough to grab onto and my little finger feels like it’s about to fall off the bottom. By contrast the D500 has a tall and deep, though slightly narrow, grip which is very comfortable. Things improve when adding a vertical grip to each camera. The MB-D15 for the D7200 transforms it into a full-size camera. Now all my fingers fit and when held vertically I actually find it slightly more comfortable than the MB-D17 on the D500.

Perhaps surprisingly, the D500 is also larger and heavier than both the D610 and D750 FX bodies. You won’t be buying this one to save space and weight. It’s not until you get to the second largest camera in the Nikon DSLR range, the D810, that you have something a little larger than the D500. The D810’s grip is fatter than, but not as deep as, the D500’s grip. Both are very good but I have a preference for the D810’s shape.

D500+MB-D17 and D5

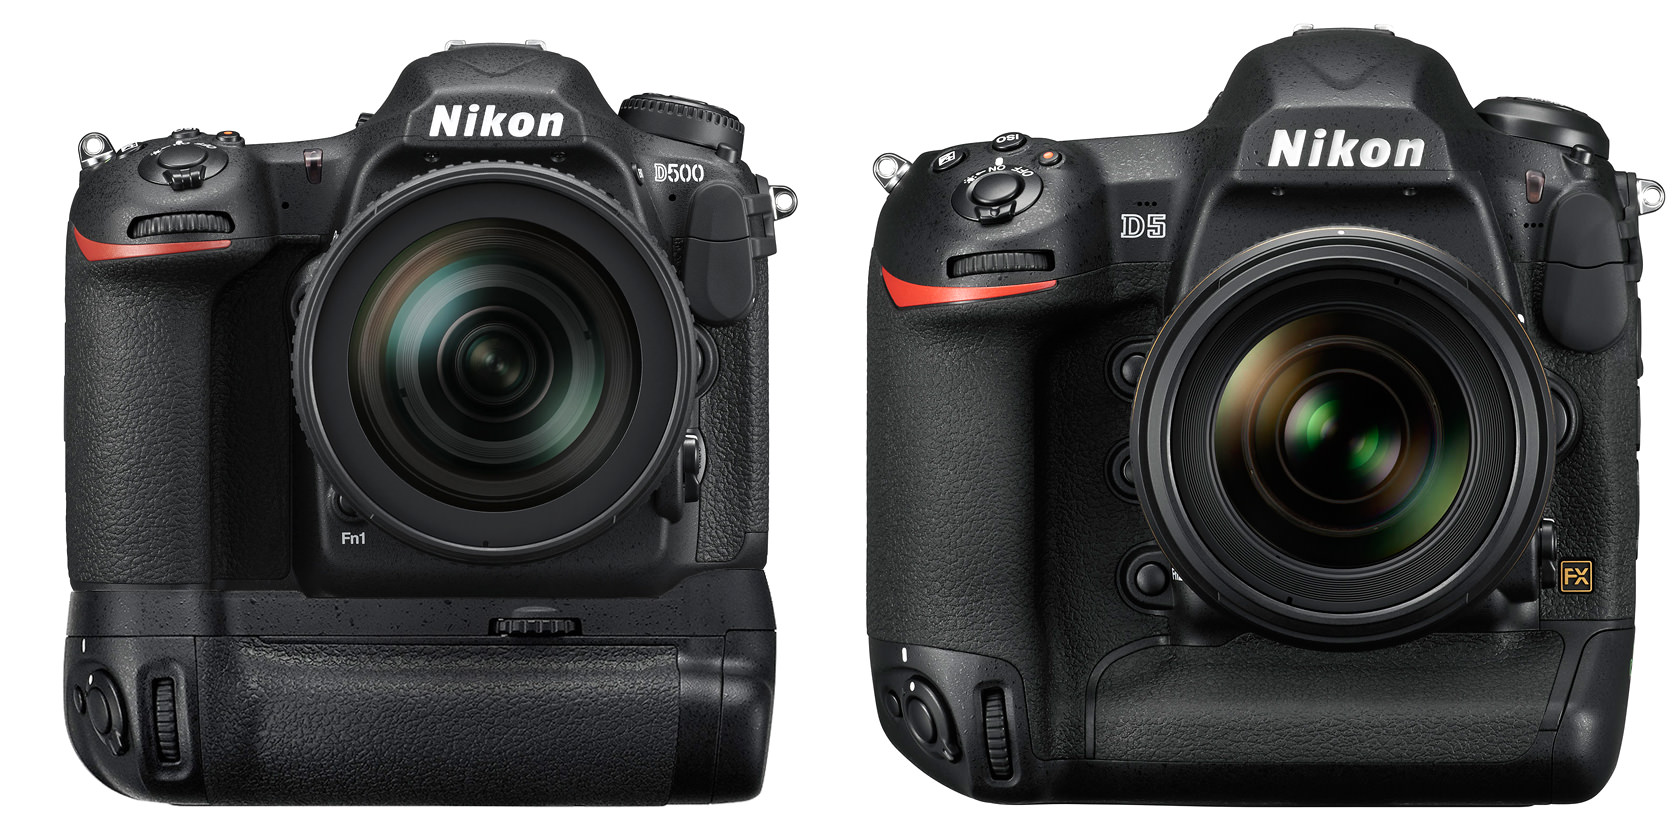
Of course the D5 towers over the D500. Big brother really is big. Heavy too, at around 1,400g or approaching double the weight of the D500. I had actually hoped the new DX flagship would have an integrated grip mirroring the D5, but that was just wishful thinking. However, once you add a vertical grip, the D500 approaches the size and weight of the D5. The MB-D17 “Multi Battery Power Pack” (Nikon speak) is a great addition to the D500. For my photography, I consider vertical grips essential and shooting the D500 vertically without one is something I find to be quite awkward to the point where I shoot less verticals, which is not a good thing. Equipment should not dictate the kind of pictures taken. So the MB-D17 goes on and stays there. As a bonus, you can load an extra battery to help with “range anxiety”. Having to remove the vertical grip to get at the in-body battery is a small annoyance that comes with using the accessory grip. I always set the camera to use the MB-D17 battery first which often means at the end of the day there is no need to remove the primary battery for charging.

The post Nikon D500 Review appeared first on Photography Life.

Photography Life

Posted in Photograpy How To | Tagged , , | Leave a comment

19 creative photos of pairs

Above image by Danielle Norris

One of our favorite posts here on the Clickin Moms blog each month is this one, the monthly member share. We love throwing a theme out to the forum members and seeing how they interpret it. This month, guest judge Fiona Margo chose the theme of ‘Pairs’ and there were so many fantastic images submitted. Enjoy…

Angee Manns

Angee Manns

Beckie Lehlbach

Beckie Lehlbach

Chanel French

Chanel French

Dorene

Dorene

Eileen Critchley

Eileen Critchley

Erin Bremer

Erin Bremer

Erin Wagnild

Erin Wagnild

Eve Tuft

Eve Tuft

Jessi Trigg

Jessi Trigg

Kate Luber

Kate Luber

Click Away photography conference in Seattle 2016

Kathleen Chapman

Kathleen Chapman

Kathy Roberts

Kathy Roberts

Korri Leigh Crowley

Korri Leigh Crowley

Morgan Ellis

Morgan Ellis

Ophelia James

Ophelia James

Rachel McConoughey

Rachel McConoughey

Renata Plaice

Renata Plaice

Sarah Keene

Sarah Keene

Would you like the opportunity to be featured in next month’s photo share here on the CMblog? Our next guest judge has asked for your favorite ‘Nostalgia’ photos which you can submit here.

Not a member of the forum? Don’t forget that you can sign up today risk-free!

The post 19 creative photos of pairs appeared first on Clickin Moms.


Clickin Moms

Posted in Photograpy How To | Tagged , , | Leave a comment

Utilizing Candle Sconces in Outdoor Settings

If there’s one way to decorate your wall and accent it with low lighting at the same time it’s by using candle sconces. They come in all kinds of metals, usually though they are wrought iron. But you can find them made of silver or brass. They attach securely to any wall and can be made to fit any size candle. Glass coverings protect the walls from accidental fires but most candle sconces stick far out enough from the wall that there is no concern of a fire starting. Using drip-less candles will prevent a mess. Styles include Gothic, the Hemingway sconce, which is has a cage around the candle, traditional and art deco styles as well as too many modern designs to mention. Needless to say their popularity has increased over the years.

They are generally sold in pairs but often times they are sold as single items in case you have need for more than two. These are mass produced and simple in design making them very affordable. Very few candle wall sconces are made of wood but they are out there. But most come in a matte black and work both indoors and out.

If you use them outdoors consider wrought iron candle sconces. They are made for the outdoors and provide a texture unmatched by other metals. Most of the outdoor types are made to hold the large pillar candles. These provide maximum lighting. Despite their size they will easily attach to any exterior wall. Regardless of the size candle you intend to use, hanging the candle sconce with a bracket that can support a pillar candle is always the best way to go.

You can use brass outdoors but be prepared to polish them a lot. Unless of course you want to let your brass candle sconces age to give you a marina look. They make for better outdoor candle sconces than for indoor use nonetheless. They can be expensive, upwards of $ 150 per sconce. But the look they offer an outdoor setting is like nothing else.

Peter Flaherty has been involved with home improvement for seventeen years. He knows all the tool and techniques for the DIY crowd and loves to share his knowledge with the general public. If you are interested in learning more about candle sconces or if you would like information on other candle accessories like candle lanterns, please follow the links provided and you will find all the information you need.

Posted in Camera Settings | Tagged , , , , | Leave a comment

19109677.jpg Canvas Gallery Wrap 18×24 Photo On

19109677.jpg Canvas Gallery Wrap 18×24 Photo On


19109677.jpg” is an art print by Alfred Eisenstaedt from The Life Picture Collection. Get photo prints of “19109677.jpg” in a variety of frames, styles, and materials. Photographer Bio Alfred Eisenstaedt (1898-1995), or Eisie to those who knew him, received his first camera as a gift from his uncle at 14, a few years after moving to Berlin from Poland with his family. At 17, he was drafted to the German army. His interest in photography blossomed while recovering from a shrapnel wound. He became a regular at museums, studying light and composition. By 31, he was a full-time photographer. In 1933 he was sent to Italy where he shot the first meeting between Hitler and Mussolini. Two years later, when Hitler came to power, Eisie immigrated to America. Soon after arriving in New York, he was hired along with three other photographers-Margaret Bourke-White, Thomas McAvoy and Peter Stackpole-by Time Inc. founder Henry Luce for a secret start-up venture known as “Project X.” Six months later, Life magazine premiered on November 23, 1936. The first issue sold for 10 cents and featured five pages of Eisie’s pictures. His most famous photo was the kiss in Times Square on V-J day, about which he said, “I was running along the street grabbing any and every girl in sight. Whether she was a grandmother, stout, thin, old, didn’t make any difference. None of the pictures that were possible pleased me. Then, suddenly in a flash I saw something white being grabbed. I turned and clicked the moment the sailor kissed the nurse.” Over his career, Eisie shot a total of nearly 100 covers for Life magazine and some 10,000 prints. The Life Picture Collection From one of the most iconic magazines ever to hit the shelves comes The Life Collection – an archive of some of the most recognizable imagery of the 20th Century. Documenting events in politics, culture, celebrity, the arts and the American experience, these compelling and provocative photographs include the works of some of the greatest photographers capturing some of the greatest moments in history.

Price: $
Sold by Photos.com by Getty Images

Posted in Camera Photography | Tagged , , , , , | Leave a comment

What lens(es) do I need for kids’ sports?

Which lens should I buy?

This seems like such a simple question.

In fact, I am asked this all the time. My kids are swimmers and I have been capturing them and their teammates in summer league, club meets, and now high school meets for years. I’ve also been the high school football photographer for a season, the middle school track team photographer, and I love to catch a quick shot of my adorable 8-year-old neighbor when she has a soccer game. I LOVE sports photography. I love the action, the emotion, and the feeling of capturing “the shot!”

To determine what gear you need, it is important first to consider what makes a great shot in sports. First and foremost, a clearly defined subject is extremely important. When you look at your photo, is it absolutely certain who the hero is in that shot? The right focal length on the lens can help you achieve that.

Secondly, does the subject “pop?” Do they stand out against any distractions in the background? The use of aperture will help you achieve this.

Finally, is your subject in focus? Have you stopped the action without hands or feet blurring? When you zoom in, is your subject crisp and clean? The shutter speed and the ability of the lens to focus quickly will help you achieve this.

There are so many other factors that go into a great sports shot: light, emotion, composition, shooting angle, sense of place, processing… the list goes on! However, if you focus on the three items above, you can elevate your photos from a mere snapshot to photographs that have impact and tell a story. The lens that you choose plays a critical role in your ability to do this. Let’s take a look at the elements of a lens and how they affect your picture.

boy high jumping by Andrea Ferenchik

FOCAL LENGTH

Focal length at its most basic is how wide or narrow the angle of view is that the lens can take in. If a 50mm lens is considered similar to what the eye can see, a number smaller than that would be considered a wide angle lens. So on the extreme end of this, the fisheye will take in a 180-degree angle of view and a lens larger than 50mm would be considered a telephoto. Telephoto lenses work extremely well in sports photography because they allow you to fill your frame with just the amount of the scene that you are trying to focus on. Consider this versus an iPhone photo. While the quality on your phone has gotten quite good, you are not able to zoom in and fill your frame with your subject easily due to the extreme wide angle of the phone lens.

At longer focal lengths, you get lens compression. Lens compression basically means it pulls everything together. It makes the background seem closer, or people or items in a line seem closer together. This is in contrast to a wide angle lens that exaggerates distance. Think once again of your iPhone. Have you ever tried to take a picture of a beautiful moon only to realize it seems small and so far away on your phone?

photo of a football player by Andrea Ferenchik

f/4, 1/500, ISO 6400 @300mm The background is pulled in close to the subject at 300mm and the crowd turns into beautiful colored bokeh.

photo of child swimming by Andrea Ferenchik

f/4.5, 1/800 sec, ISO 5000 @ 200mm The lane ropes appear to get closer together as you move away from the subject.

football players standing together by Andrea Ferenchik

f/4, 1/800, ISO 640 @ 300mm The helmets are compressed together creating a tight group @300mm.

One other thing to consider is whether you shoot with a crop sensor or a full frame camera. Most entry level DSLRs come with a crop sensor, which is actually a good thing in sports photography because it takes the focal length of your lens and makes it even longer! What does this mean? In its simplest form, it means that the camera actually “crops” your photo in closer when it takes the picture. In the example of a Canon Rebel, the crop factor is 1.6. So you take your lens and multiply it by 1.6 to get the focal length for your lens. Example: 24-105mm on a full frame camera equates to a 38.4-168mm on a crop sensor camera. It means you can get that much closer across a large soccer field and maintain maximum detail. That’s great news!

Related: What the crop? Full frame and crop sensors explained.

APERTURE

I believe the use of aperture is the single most important thing you can do to instantly improve your sports photography. Aperture is basically an opening in your camera lens that opens up wide, or closes down to a small hole, and controls whether you have background blur or an incredibly sharp photo from front to back. When your lens is “open wide” your subject is in focus and everything in front of and behind them falls into a lovely blur.

kids being coached by Andrea Ferenchik

f/1.4, 1/4000, ISO 320 @ 50mm

track and field photo by Andrea Ferenchik

f/2.8, 1/1000, ISO 500 @ 143mm

The level of blur created by aperture is increased when combined with a telephoto lens zoomed all the way into its highest number. Huh? That just means that if you take the lens that came with your camera at 18mm with the aperture set at f/3.5 and you compare that to a picture taken with a 200mm lens set at f/3.5 and you are the same distance from your subject, the 200mm will show far more blur in the background and your subject will really pop. Here is an example of 2 photos taken with a 70-200mm lens, with the aperture consistently set to f/2.8. The first one taken at 70mm shows much less blur than the second one taken at 200mm, which really isolates the main subject.

swimming race by Andrea Ferenchik

f/2.8, 1/640, ISO 2000 @ 70mm

photo before a swimming race starts by Andrea Ferenchik

f/2.8, 1/640, ISO 2000 @ 200mm

Click Away photography conference in Seattle 2016

SHUTTER SPEED

In sports photography, your shutter speed should typically go no lower than 1/500th of a second and ideally 1/1000th of a second or higher. At speeds around 1/500th or lower you will begin to see the extremities blur, especially in your fast moving sports like football, lacrosse, tennis, and soccer. So what do you need to keep your shutter speed high? You need light! How do you get more light? You have 2 choices. You can either raise your ISO (not my first choice, and can be troublesome on older cameras as you introduce an unacceptable amount of digital noise,) or you can lower your aperture. Most professional photographers shoot with lenses that open all the way to f/2.8. The trouble with this is that those lenses can get expensive. We’ll talk about that in a minute!

picture of teen swimming at a race by Andrea Ferenchik

f/2.8, 1/1000, ISO 100 @ 200mm

football player running with the ball by Andrea Ferenchik

f/2.8, 1/500, ISO 4000 @ 200mm

football players legs by Andrea Ferenchik

Notice the foot beginning to blur at 1/500th?

IMAGE STABILIZATION

Or vibration compensation, or vibration reduction, or optical stabilization… it is called something different by each lens manufacturer, but essentially this feature is extremely helpful in sports photography, especially with telephoto lenses. At the higher focal lengths, hand shake can become a real issue. A high shutter speed helps with this, but with the addition of image stabilization you can get sharp, shake free photos at even lower shutter speeds than you would be able to without it. In my opinion, it is worth the extra money.

JUST ANSWER MY QUESTION! WHICH LENS SHOULD I BUY?

Now that we know what elements make a great sports photo, as well as the elements in a lens that help us achieve that, it really gets down to price! Fortunately, there is a wide range of options available from the most budget conscious beginner to those who are ready to take it to the next level.

For someone new to photography or extremely budget conscious, a great, affordable choice is the 70-300mm f/4-5.6. It is available from all of the major lens manufactures (Canon, Nikon, Tamron, Sigma) at a very reasonable price and includes image stabilization. Many starter camera packages come with this lens as an addition to the 18-55mm “kit lens.” The Canon and Nikon versions are both less than $ 500 and are 4.5+/5 star rated on Amazon. The Sigma version is even more affordable at less than $ 150.

There are many pros to this lens including its ability to zoom in very tightly on your subject and isolate them from the background, creating beautiful background blur even at f/5.6. This is ideal for outdoor sports with great natural light such as soccer, daytime football, baseball, etc. Where it gets tricky is when the action moves indoors.

Sports such as wrestling, volleyball, basketball, etc. will find it much more challenging to achieve high shutter speeds due to the apertures that do not open wider than f/4 at 70mm and f/5.6 at 300. You will have to bump your ISO up to compensate for this. Unless you have a newer camera, you might find that you don’t like the amount of noise you see in the resulting photo. If this is your only option, “embrace the grain” and focus on proper exposure and great composition. No one is going to notice a grainy photograph if it is well exposed, at the peak of action, and has great emotion!

photo of kid jumping into a pool by Andrea Ferenchik

Shot with the Canon 70-300 f/4-5.6 @ 70mm f/4, 1/1600, ISO 100

picture of kid swimming by Andrea Ferenchik

Shot with the Canon 70-300 f/4-5.6 @ 300mm f/5.6, 1/1000, ISO 100 (notice even at f/5.6, you still get a nice background blur and lens compression)

As your budget gets larger, the next logical choice is a 70-200 f/2.8. This can get very expensive ($ 2000+) from the 2 big name camera manufacturers but there are more affordable options at great quality available from Sigma and Tamron. I personally own the Tamron 70-200 f/2.8 VC Di and I have never regretted it! It comes with a 6-year warranty that recently covered a full repair of the autofocus system! I had rented this lens so many times that I decided it was time to buy it.

Renting is great way to try before you buy. A couple of great options are Borrow Lenses, Lens Pro To Go, or Aperturent. Once you decide to buy, purchasing a used lens is another great option. Sites like KEH fully evaluate the lenses and rate them accordingly. You can buy a “like new” lens for significant savings.

If you find yourself shooting an indoor sport and cannot afford the 70-200 f/2.8 lenses, a less expensive option is the 85mm f/1.8. The Canon version costs $ 350 and allows you to zoom in fairly close and open the aperture very wide. If you shoot with a crop sensor camera, you get a bonus of an additional 51mm of focal length for an equivalent of a 136mm lens making this a real contender for indoor sports.

If light is typically not an issue, Tamron offers a multi-purpose lens that allows you to shoot wide and set the scene all the way through tight close-ups. This is their 28-300 f/3.5-6.3 Di VC PZD. This is not a cheap lens but essentially takes the place of 2 lenses at $ 849. I wouldn’t recommend this lens for indoor sports due to the fact that it can only open as wide as f/6.3 at 300mm, but would be a good option for outdoor daytime sports.

DON’T THROW AWAY YOUR KIT LENS!!

While the typical 18-55mm lens that come with your camera will not produce great action shots, don’t underestimate its value in giving your photos a sense of place. Balance your action shots with shots of the field, the participants, or the stadium. If you can, get up close or shoot down low to give your image a more thoughtful composition.

picture of fans cheering by Andrea Ferenchik

f/4, 1/500, ISO 2000 @ 24mm

The options can be overwhelming when you go to do your research, but if you keep in mind the fundamentals of a great sports photo and the minimum requirements that your lens needs to meet to achieve this, it makes your choices much less daunting. Have fun shooting and seeing the immediate difference in your sports photography!

The post What lens(es) do I need for kids’ sports? appeared first on Clickin Moms.


Clickin Moms

Posted in Photograpy How To | Tagged , , , | Leave a comment