On the Road: Traveling Through Yellowstone

Our landscape photography tutorial has taken us from Colorado to Wyoming to Montana, and we have filmed in some amazing locations along the way. Cell coverage is hard to find in this area of the country, but there is no shortage of beautiful landscapes to photograph. After packing up and heading out of Grand Teton National Park, we took a short detour through Yellowstone on the way to Montana. This was the first visit for both John and I, and it did not disappoint – I wish that we had more time to spend in such an amazing place! Still, with our filming schedule, we had to make the most of the couple of days that we had.

The day that we arrived in Yellowstone, we spent a few hours driving around and seeing the highlights. Photos can hardly show the vivid colors in a place like this – they are far more intense than you would think. As fun as it was to see Old Faithful and other dramatic geysers, my favorite sights were these colorful thermal pools. Because of the bacteria that feeds in the warm water, these pools can be bright yellow to orange in color, which is a striking contrast to the dark blue water. Places like this are made for photography, and we weren’t the only ones who thought so – some parking lots were so full that people had to walk more than a mile to reach the hot springs!

Yellowstone Colors

NIKON D800E + 20mm f/1.8 @ 20mm, ISO 100, 16/10, f/11.0

A running theme of our landscape photography trip is that we have seen a range of interesting animals along the way, too – this just as well could be a wildlife photography video! In one of Yellowstone’s orange thermal pools, a Baird’s Sandpiper started walking around and posing for some photos. We also saw a bald eagle, an osprey, and – of course – a huge number of bison. This area of the United States is wonderful for wildlife photography.

Sandpiper

NIKON D800E + 70-200mm f/4 @ 200mm, ISO 180, 1/800, f/4.0

Our trip is about landscapes, though, and that’s what we saw the most. On the morning we left Yellowstone, we woke up early to photograph the sunrise at West Thumb. The clouds were incredible, and the cold air meant that we saw a lot of mist from the thermal pools. This view is not something I will forget!

image

Now, we are near Glacier National Park to film the rest of our landscape photography tutorial. Yellowstone was a great place to visit and clear our heads, but we’re back to business for the next couple weeks. Hopefully, we will have more photos and stories to share along the way!

The post On the Road: Traveling Through Yellowstone appeared first on Photography Life.

Photography Life

Posted in Photograpy How To | Tagged , , , | Leave a comment

Too Much, Too Little, Too Late?

Picture

© freshidea

Two weeks ago I wrote a post about Customer Service and shared several key mistakes made by Buick in servicing a new car. I couldn’t have been more honest about my frustration along with the mistakes Buick was making at my expense.

Buick finally got the part to the dealer and my car is back in my garage. It was not an easy process. I started out with their 800 line; later I faxed Mary T. Barra, CEO of Buick; then I posted on Buick’s Facebook page, and I repeatedly tweeted @Buick in an effort to get somebody’s attention. All I wanted was my car back in a reasonable time.

After the first week, they recognized my complaint and assigned my case to “Caroline” in Executive Customer Service. She couldn’t have been nicer or more professional.  When she called me to let me know the problem had been resolved, she made a comment essentially stating she hoped I would be as quick to share the good news about Buick as I was to share the bad.

I’m doing my best to do that. They did resolve the problem and there’s no doubt in my mind it was thanks to Caroline’s persistence. The dealer was terrific and did their best as well. In fact, I’m nuts about the crew at the dealership.

However…Here’s another great lesson, thanks to Buick. 

If you know anything about people having a stroke, then you know it’s critical to get medical care as quickly as possible. An article from the TIME site states:  When it comes to successfully minimizing physical — and subsequent mental and emotional — damage caused by stroke, timing is of the essence.

Well, Customer Service is no different and here’s a lesson GM and Buick need to learn. The longer it takes to resolve a problem the greater the damage. Taking a new car in for service one would normally expect to have it back within 24 hours. Instead, it was almost two full business weeks. Even worse, I know had I not been the squeaky wheel, I’d still be waiting for my car. I was an ambassador for them before this experience. Now, I’m silent and even skeptical about anything happening again.

Remember with your own customers, this is a word-of-mouth business. I shared these statistics in another post recently after doing a little research on Google: The average Internet active consumer does 36 Facebook posts per month and broadcasts to 130 connections. Every second there are 650,000 Facebook shares, 100,000 tweets, and 48 hours of video uploaded to YouTube.

Handle complaints quickly and professionally. Don’t ignore upset clients.

                                             Your most unhappy customers are your greatest source of learning.
                                                                                                 Bill Gates

Don’t give your clients a reason to ever go beyond their first contact to you or your staff.  


SkipCohenUniversity – SCU Blog

Posted in Photograpy How To | Tagged , , | Leave a comment

Tommy Colbért: A Photographer Shooting Just for the Fun of It  

by Skip Cohen

One of the best things social media has given us is the ability to sneak a peek into each other’s lives when something special happens. It also keeps us in touch and connected.  Meet Tommy Colbért from Massachusetts. Tommy and I met years ago at WPPI, and there’s simply a nice friendship. That friendship is often fueled by what he shares on Facebook.

This morning, while catching up on what people have been sharing, I ran across this post from Tommy. It simply said, “Sometimes the stars align, and I have both my children at the beach together… and I didn’t forget my Nikon this time.”

I immediately caught Tommy on a Facebook IM and asked for permission to share these, but I want to explain why.

They’re the perfect reminder of why we’re all in this business – to capture memories. Sadly, too often we forget to capture our own. I don’t know Tommy’s daughters, but that doesn’t change the smile the images put on my face – not just because they’re fun, but because they capture one of those perfect days for a Dad with his kids!

Of course, it doesn’t hurt that Tommy is a terrific photographer and regardless of the subject matter, you’ll always find his signature passion for imaging. Click on any image to visit Tommy’s website for more great images.

Images copyright Tommy Colbért. All rights reserved. 

SkipCohenUniversity – SCU Blog

Posted in Photograpy How To | Tagged , , , , | Leave a comment

How to use the clarity slider in Lightroom

At the beginning of my journey as a photographer, I watched a lot of tutorials and read plenty of articles saying DO NOT TOUCH THE CLARITY SLIDER. Instead, most publications recommended using the Sharpening slider.

Hmmm…

Personally, I now use both. At the same time. With success.

Love it or hate it, but at least give it a try!

That being said, the clarity slider won’t work with all your images.

At the beginning of my journey as a photographer, I watched a lot of tutorials and read plenty of articles saying DO NOT TOUCH THE CLARITY SLIDER.

DO use the clarity slider for…

  • natural textures already present in your image (grass, foliage, clothes, clouds, leaves, sand, wood, etc.)
  • environmental portrait (small face in your big picture)
  • semi-silhouette or silhouette pictures

DON’T use the clarity slider with…

  • pretty bokeh (but sometime it can surprise you and work).
  • Close up portraits of faces.

DO (with caution)…

  • Human subject in a landscape

Okay, so let’s do this.

how to use the clarity slider in Lightroom by Annick Paradis 3

Here is an image that I know will work with a lot of clarity. When I say a lot, I don’t mean 15, I mean between 30 and 60 and sometimes 100! And I promise, my faces always end up looking good.

So, in this picture, my son and his friend are relatively small in the frame and their faces are tiny. There are textures everywhere: the sky, the bay, the sand and on their clothes.

The first thing I do is analyze the histogram. I’ll want my histogram to reach both ends of the spectrum. Here, I’ll probably need to darken my blacks and watch for my highlights near the sun. I am happy with my exposure overall.

Then I start editing. I begin by pushing my highlights and my shadows to the extremes. Why? Because the clarity slider works really well with these settings.

  • Highlights : -100
  • Shadows : +100

I push the vibrance to 20 to begin and the clarity slider to 100. I then make my way down with the clarity slider. My goal is to reach the maximum clarity I can without compromising my son’s skin and the overall natural look of my picture.

As clarity often turns the image grey, it’s important to play with vibrance and saturation simultaneously. This is an important aspect of editing using the clarity slider. If you only do things in sequence, you will often end up with a clarity setting that is not all it could be. Try to keep the image appealing as you are trying different clarity values.

Clarity also increases contrast so you have to monitor your histogram for any loss of details. If needed, just modify the appropriate slider or use a brush to get them back if the problem is localized.

In my image, I need more blacks to get my histogram correctly balanced again but I will do it with the dehaze slider later. I also need to decrease the whites because they were clipped.

When my clarity slider is finally set, I do a last pass on the highlight and shadow sliders to really optimize contrast.

As you can see here, I ended up at clarity 100.

how to use the clarity slider in Lightroom by Annick Paradis 1

This is with clarity at 0 with the previous histogram with a clarity at 100.

how to use the clarity slider in Lightroom by Annick Paradis

This is with clarity at 0 with a corrected histogram.

how to use the clarity slider in Lightroom by Annick Paradis 3

Now that the Basic Panel is done, I go on and tweak the other panels… all of them! One of my favorite is the Camera Calibration one, but that is another story for another day.

The Detail Panel:

The one you should be interested in is the Detail Panel. I mentioned previously that I use both clarity and sharpening sliders and I promised that my faces still look great.

Here is a before and after of my son and you can see my values for yourselves.

how to use the clarity slider in Lightroom by Annick Paradis 5

I know, skin-tones are ugly, but it will be corrected later.

First, I have a look at my ISO setting (400) and check for grain on his face.

  • Noise Reduction: around 20 is my starting point. I rarely go over 30 but it happens occasionally.
  • Sharpening: I will stay around 40 (lots of grain) or 50-60.
  • Radius: between 1,1 and 3! If I used a lot of clarity, as in this picture, I will stay low. The key is to play with the “masking” by sharpening only the contour of what I want to have sharp (my son). I don’t want to sharpen his skin tough. To see what you are sharpening, click “alt-click” and move your slider. I only want the contour of his face to be outlined.
Click Away photography conference in Seattle 2016

And that’s it… or almost. I go into Photoshop to do my cloning because I don’t like to do it in LR, it slows me down. I also correct my skin-tones there and tweak white balance!

Here is the before and after image in Lightroom, before pulling it into Photoshop.

how to use the clarity slider in Lightroom by Annick Paradis 2

Here is the final image:

pic of two kids on a beach playing by Annick Paradis

Don’t forget! If your subject is bigger in the frame and starts looking unnatural when using the clarity slider, you can put a radial filter over him and decrease the clarity. Some images just don’t like it. I always try, but some images will stay at a small clarity level, between 0-15.

Here are other examples where I went crazy with the clarity slider.

picture of boy playing on the beach by Annick Paradis

Clarity at 100

backlit photo of woman with boy on the beach by Annick Paradis

Clarity at 56

The post How to use the clarity slider in Lightroom appeared first on Clickin Moms.


Clickin Moms

Posted in Photograpy How To | Tagged , , | Leave a comment

The Atacama Desert: Perilous for Humans, Great for Cameras

Being married to a university professor has its advantages (and disadvantages, but this is not the time or place…), the most important being the international conferences and research trips. After-all, if one airline ticket and hotel is already paid for, it makes sense to buy another ticket and make a holiday of it, right? So when my wife announced a research visit to Chile in 2013, I didn’t need much encouragement to join her once most of her work was done. The only condition was that she would still need to spend several days of our time together working, and during that time I would be her “official photographer”. Since these “work days” would be at abandoned nitrate mines in the middle of the Atacama desert, you might wonder what the attraction was – but the prospect of “leisure” days looking at volcanoes, salt lakes and mountains soon persuaded me.

Image 1 Salar de Surire

NIKON D800 @ 70mm, ISO 200, 1/500, f/8.0

This was the first serious trip for my beloved Nikon D800, with a trio of lenses – Nikon 16-35mm f4, Nikon 24-70mm f2.8, and Sigma 120-400mm. And having taken notice of people (especially Thom Hogan) saying your shooting discipline has to be sky-high to take full advantage of the camera, I also packed tripod and remote-release, and used the 3” shutter delay wherever possible. Were the results worth it? Read on…

Our first stop was Copiapo, a mining town.

Image 3 Copiapo

NIKON D800 @ 38mm, ISO 100, 1/125, f/8.0

Not hugely interesting (with one exception), but a useful base for day-trips up into the Andes. Here’s the exception. Remember the Chile mine rescue – where they drilled an emergency shaft and pulled the 31 trapped miners up, one at a time? This is the actual rescue pod they squeezed into:

Image 5 Mine rescue pod

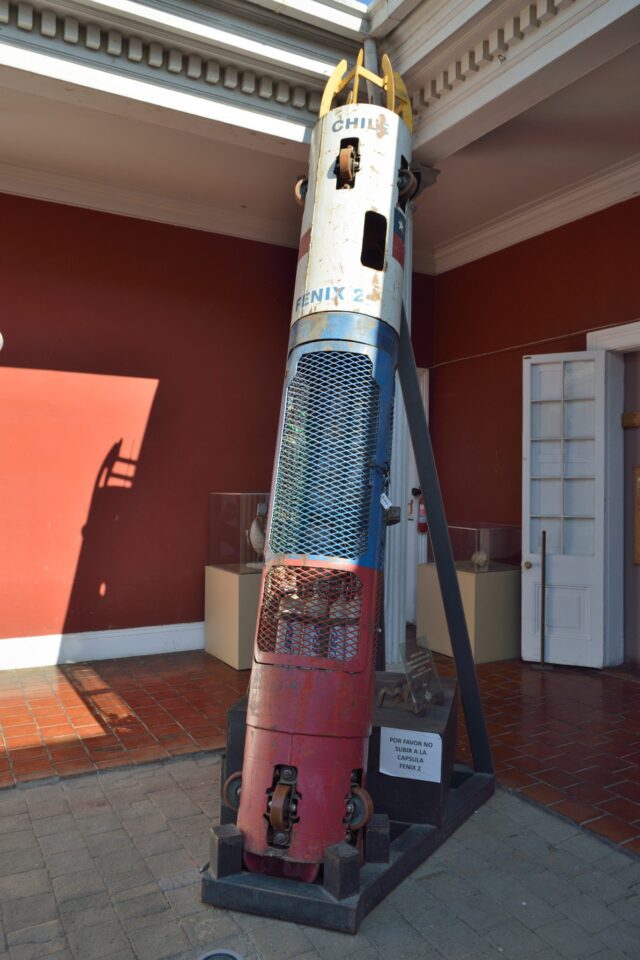
NIKON D800 @ 26mm, ISO 400, 1/400, f/5.6

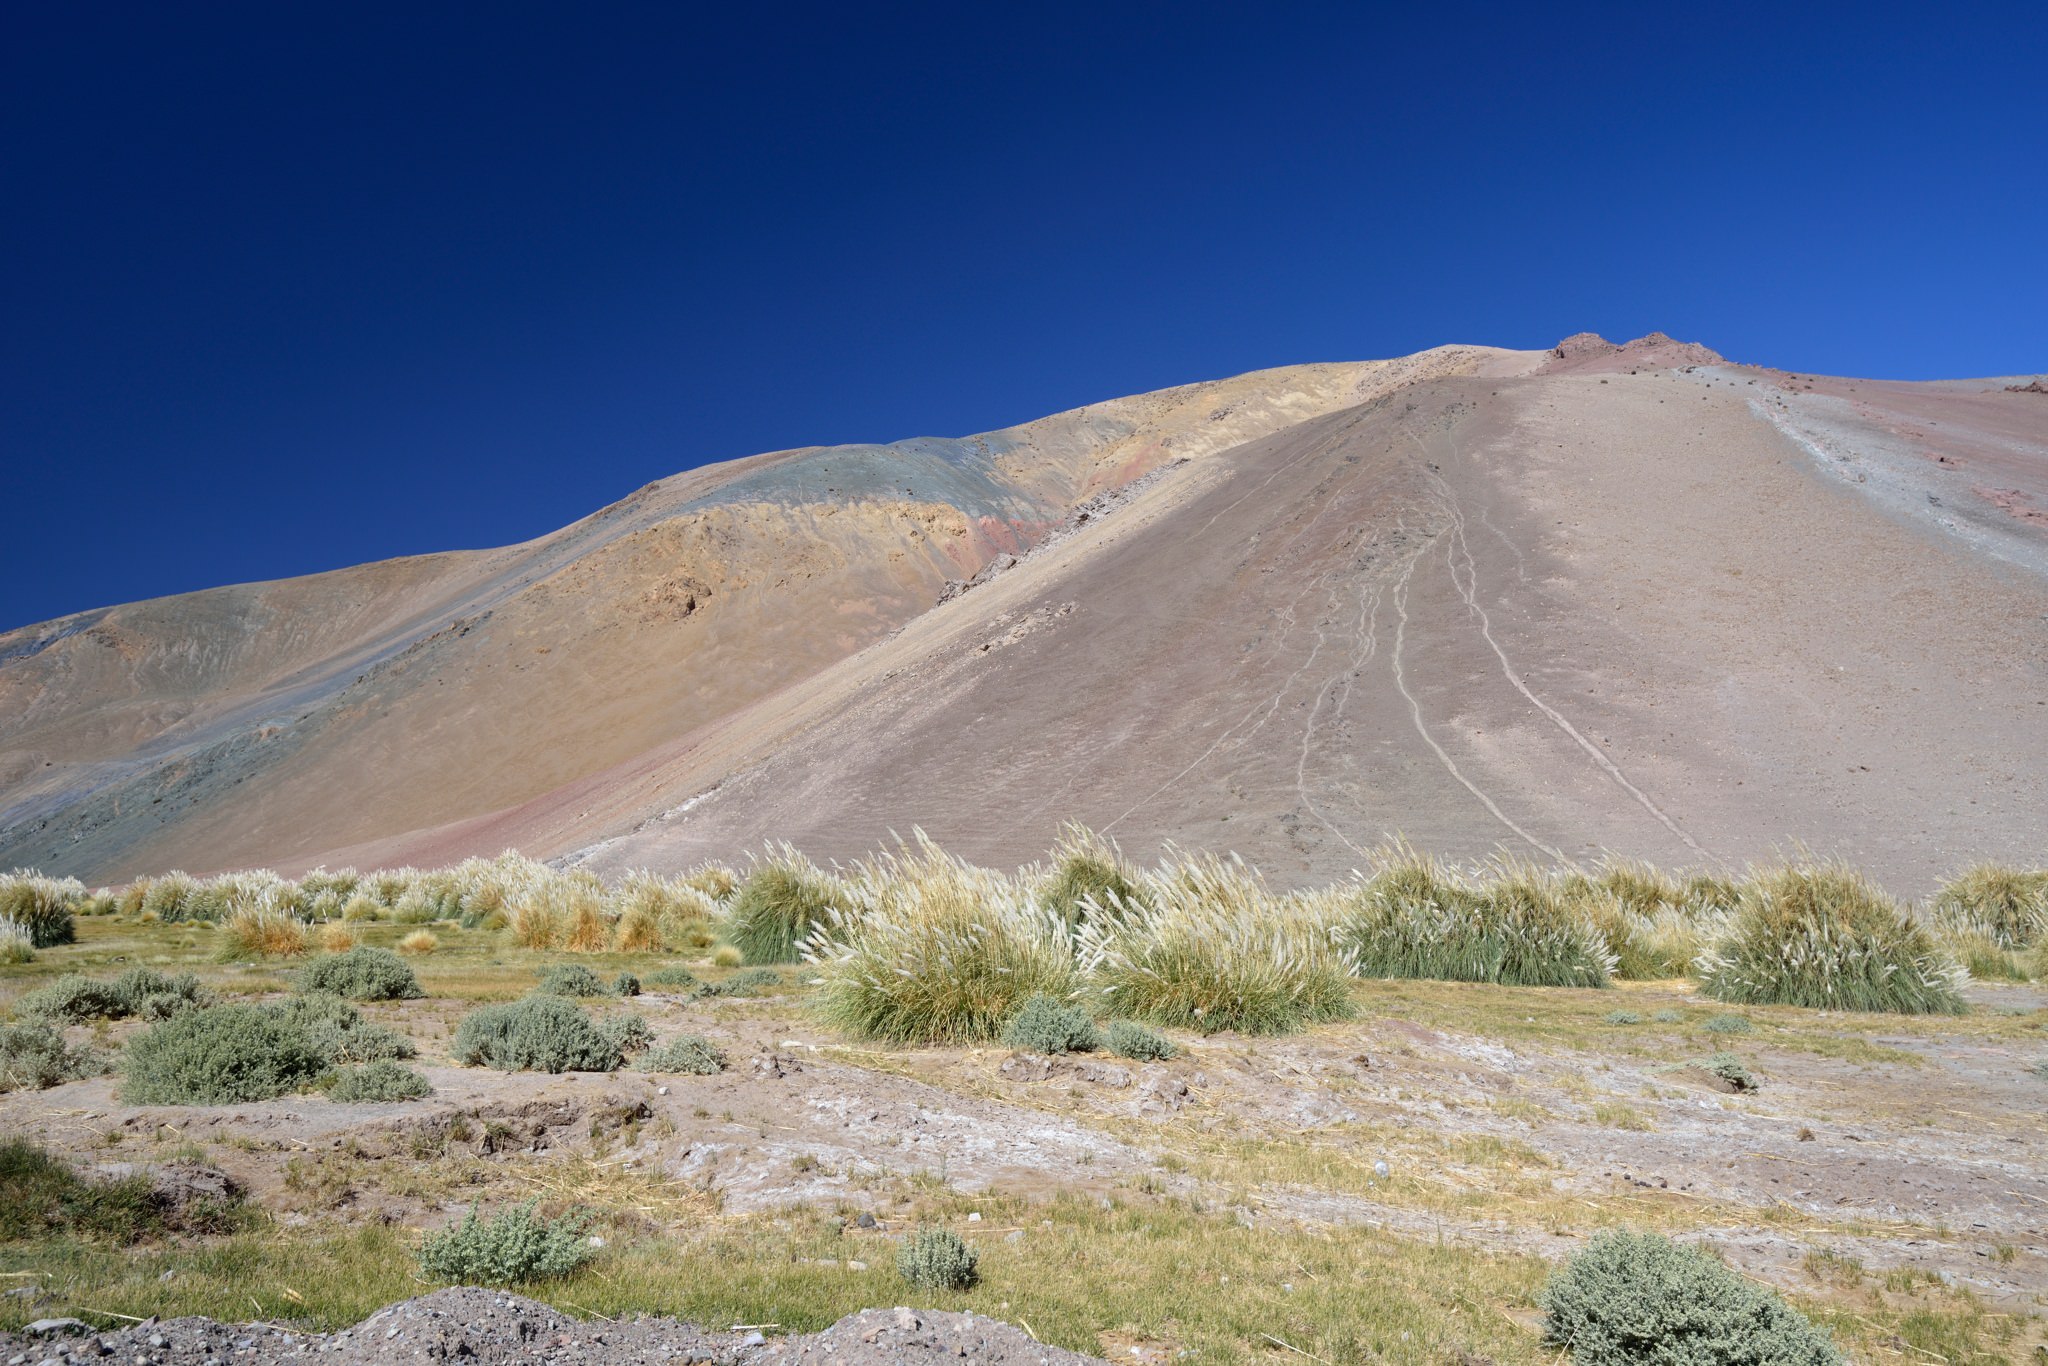
And the real reason for staying in Copiapo? – a couple of hours drive away, up into the mountains.

Image 7 Andes near Copiapo

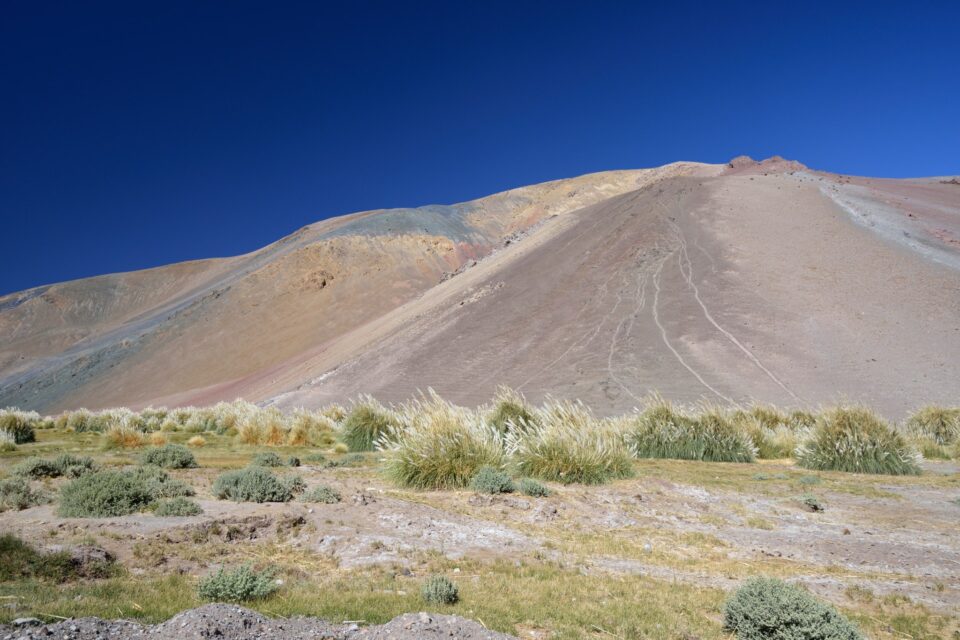
NIKON D800 @ 22mm, ISO 100, 1/100, f/8.0

So much to shoot! From amazing vistas to stunning details. At this altitude, the air is crystal clear, and the light amazing. Apart from one minibus which showed up, and left within 20 minutes, we and our guide had the place to ourselves. Can you imagine that in Yosemite?

Image 8 Salar de Maricunga

NIKON D800 @ 56mm, ISO 100, 1/200, f/8.0

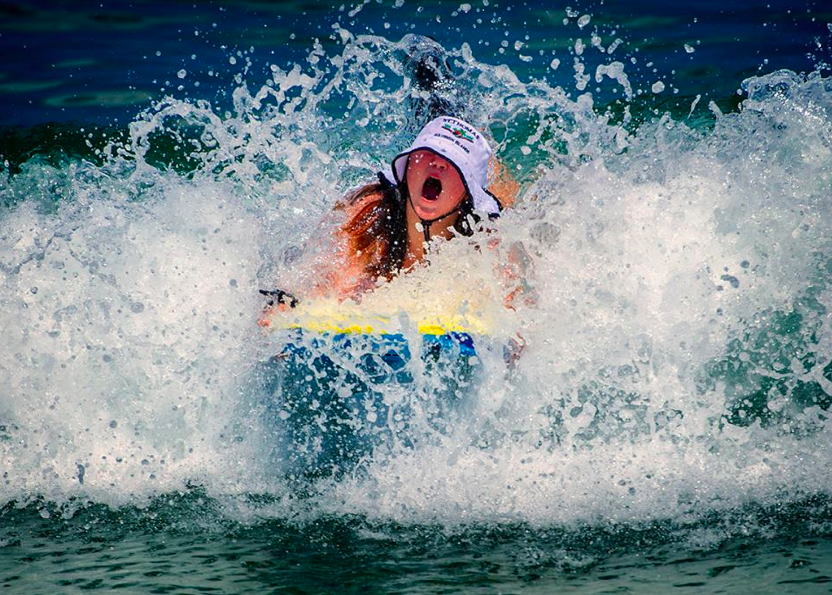
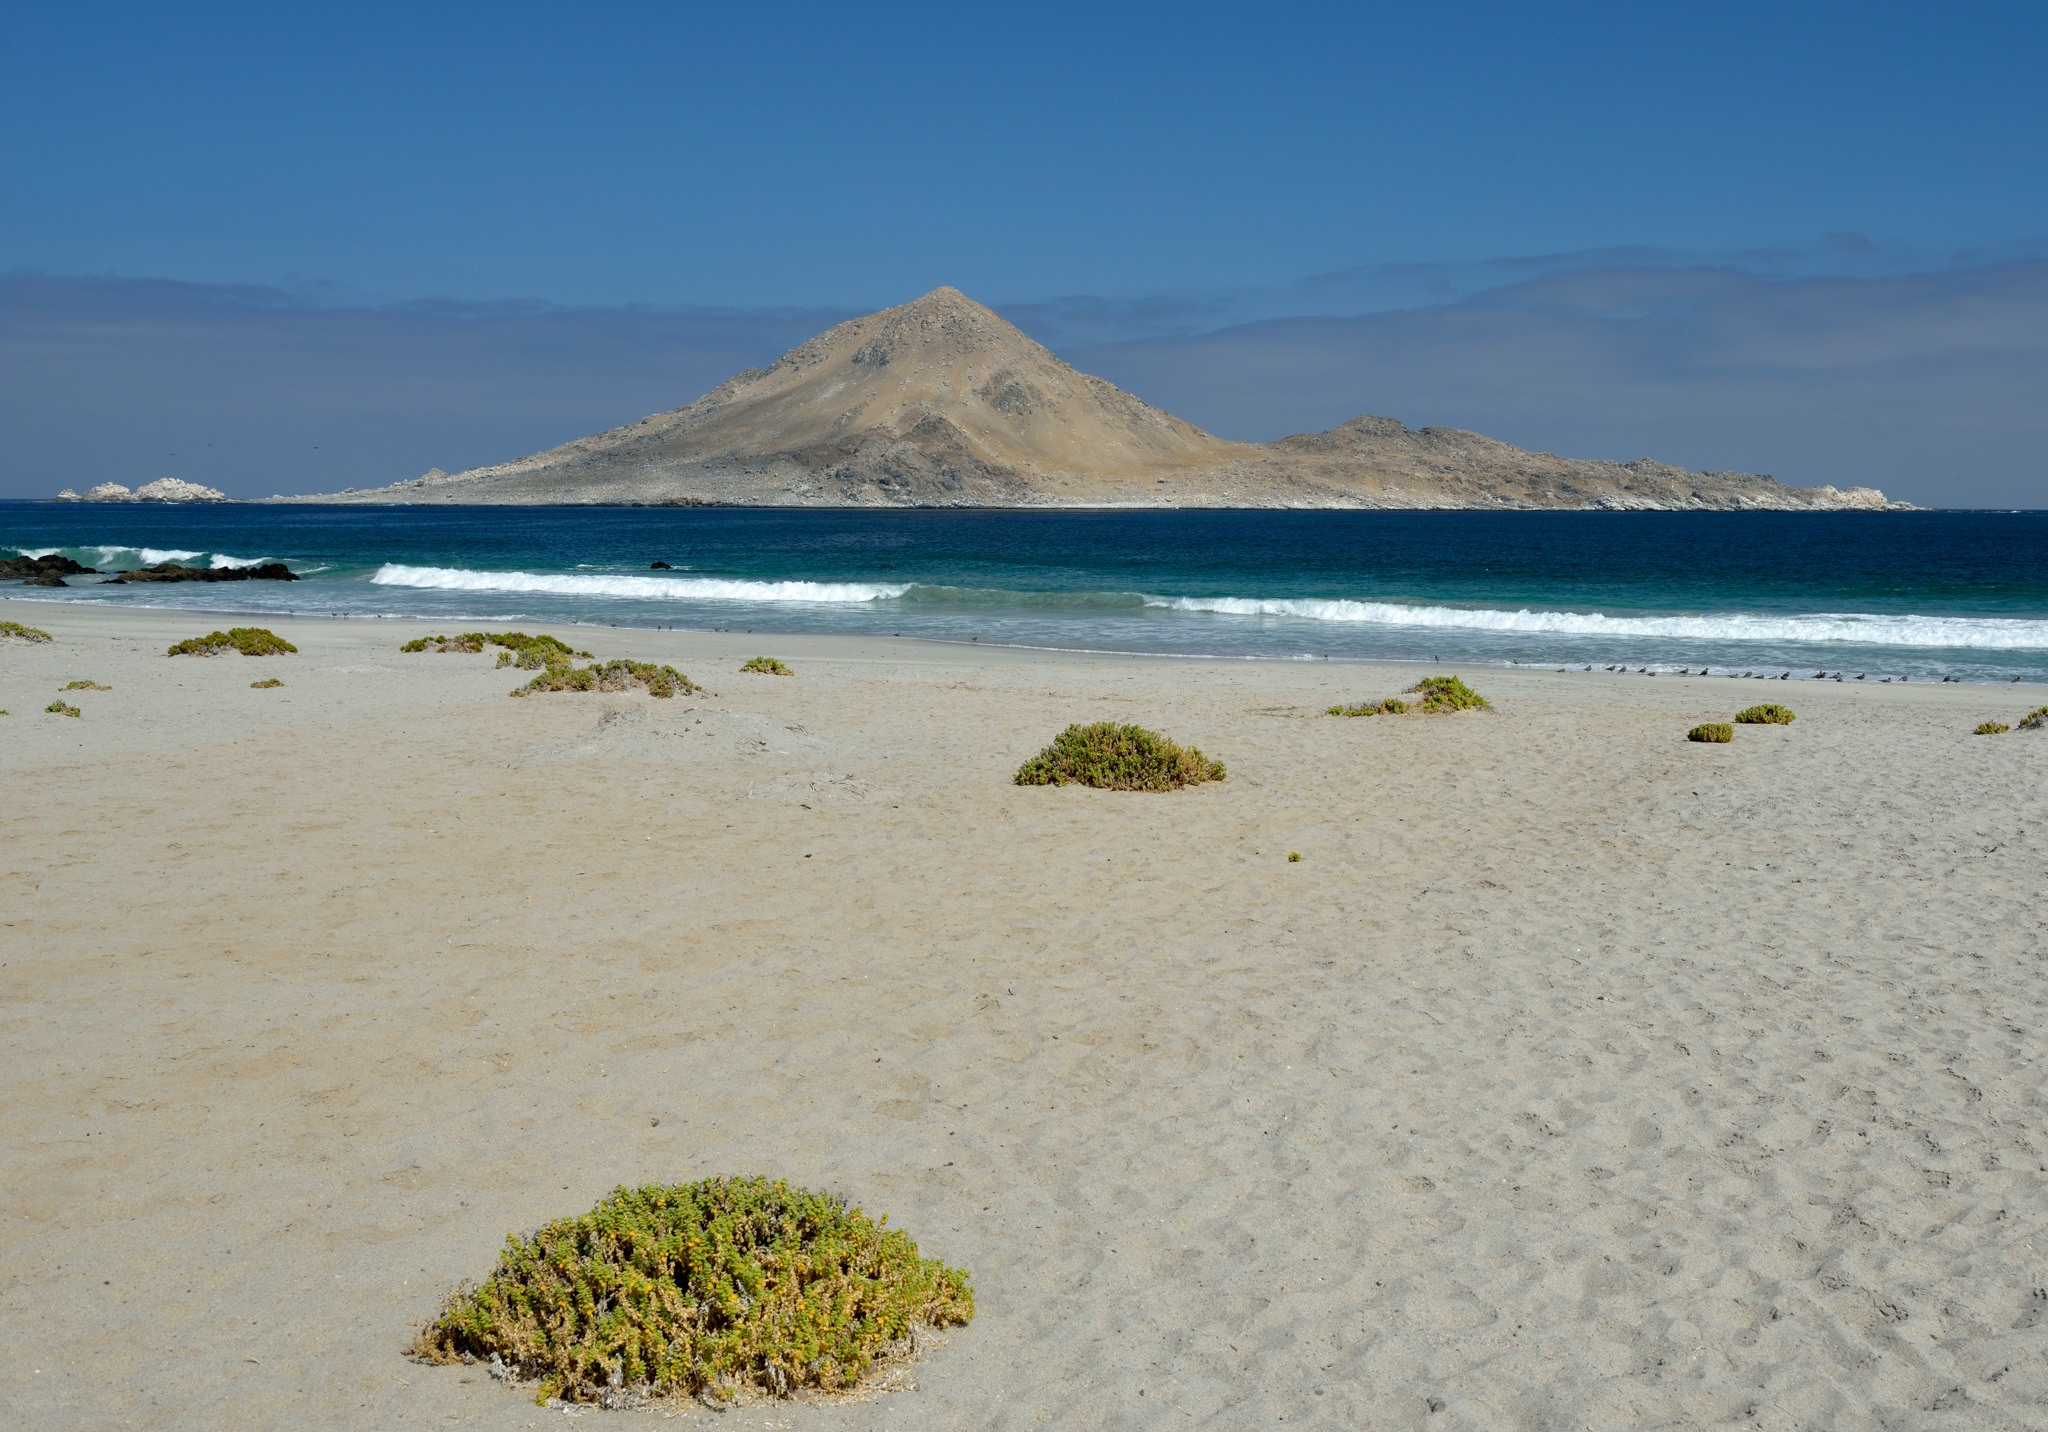
Next day was a trip to the coast. Miles of pristine beaches – but deserted.

Image 12 PN Azucar

NIKON D800 @ 32mm, ISO 100, 1/320, f/8.0

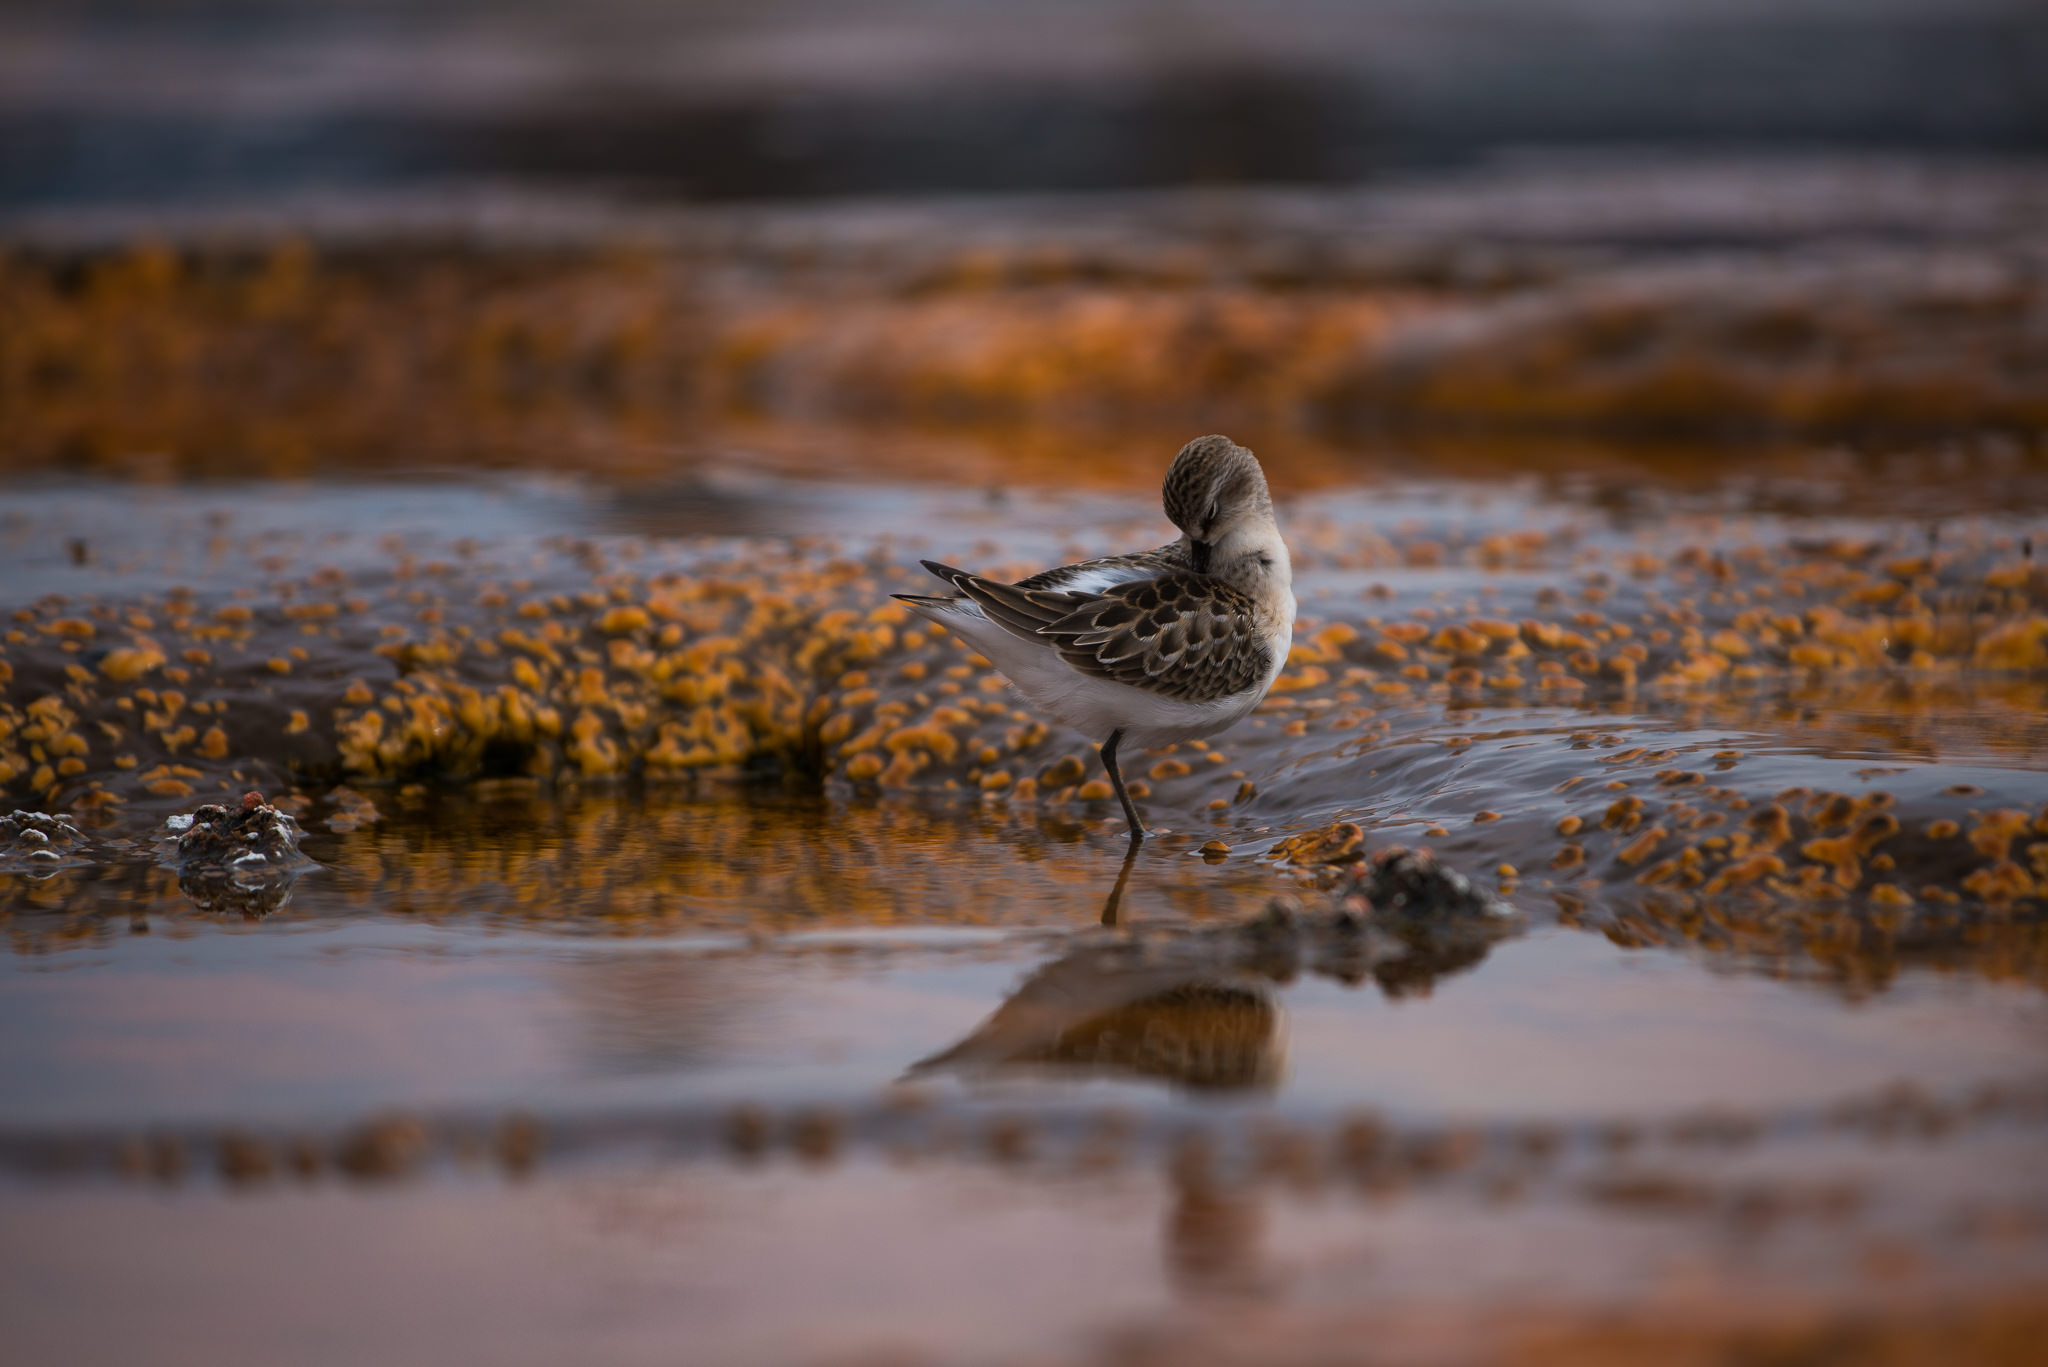
Maybe not so surprising when you realise the water is freezing cold. Cold enough for a colony of Humboldt Penguins…

Image 13 Humboldt Penguins

NIKON D800 @ 400mm, ISO 400, 1/2500, f/5.6

Though the pelicans might have preferred a bit more warmth…

Image 14 PN Azucar pelicans

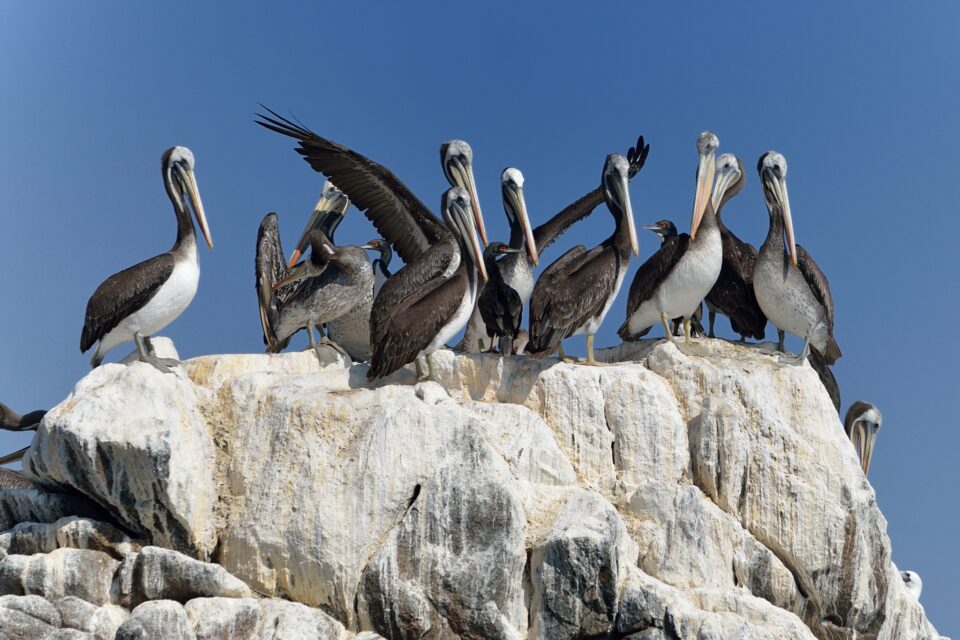
NIKON D800 @ 270mm, ISO 400, 1/6400, f/5.6

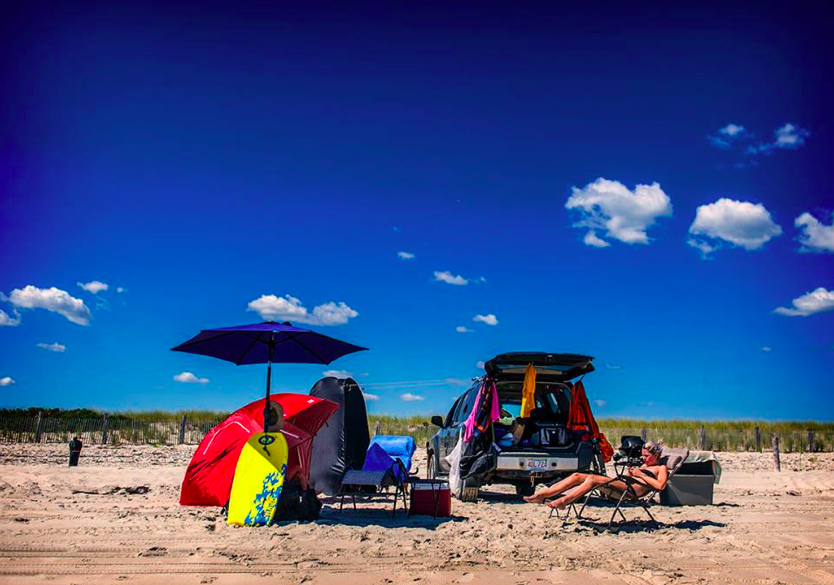
After Copiapo, we flew up to Iquique, situated like the other (few and far between) coastal cities on a narrow strip of land at the base of a 3000 foot slope.

Image 15 Iquique, down below

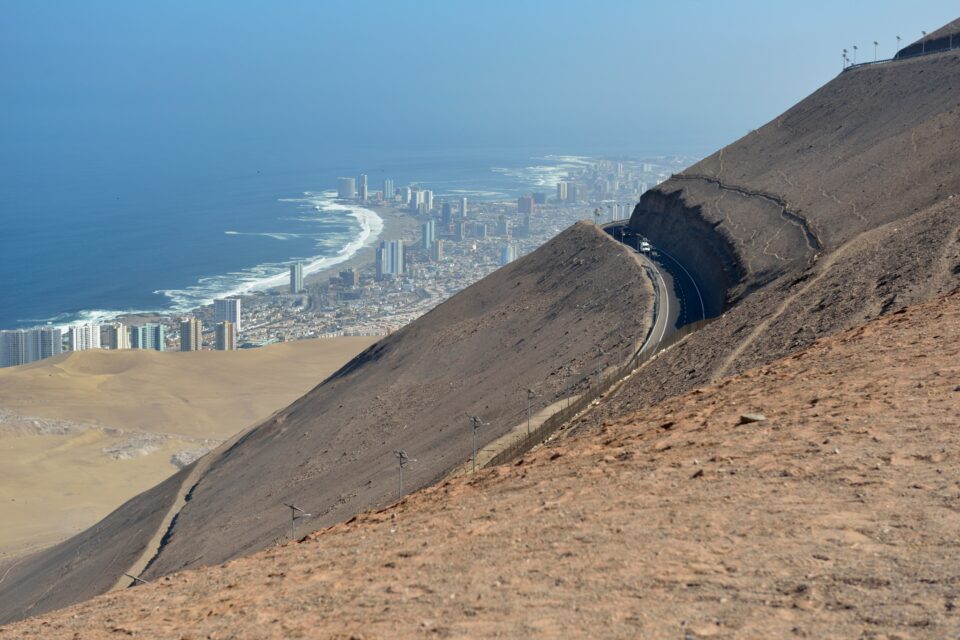
NIKON D800 @ 70mm, ISO 100, 1/200, f/6.3

It might look like a great place for a beach holiday (and it is popular with Chileans) – but with a cold sea and regular earthquakes (tsunami evacuation routes are clearly marked!), I don’t suppose it will rival Miami or Rio anytime soon.

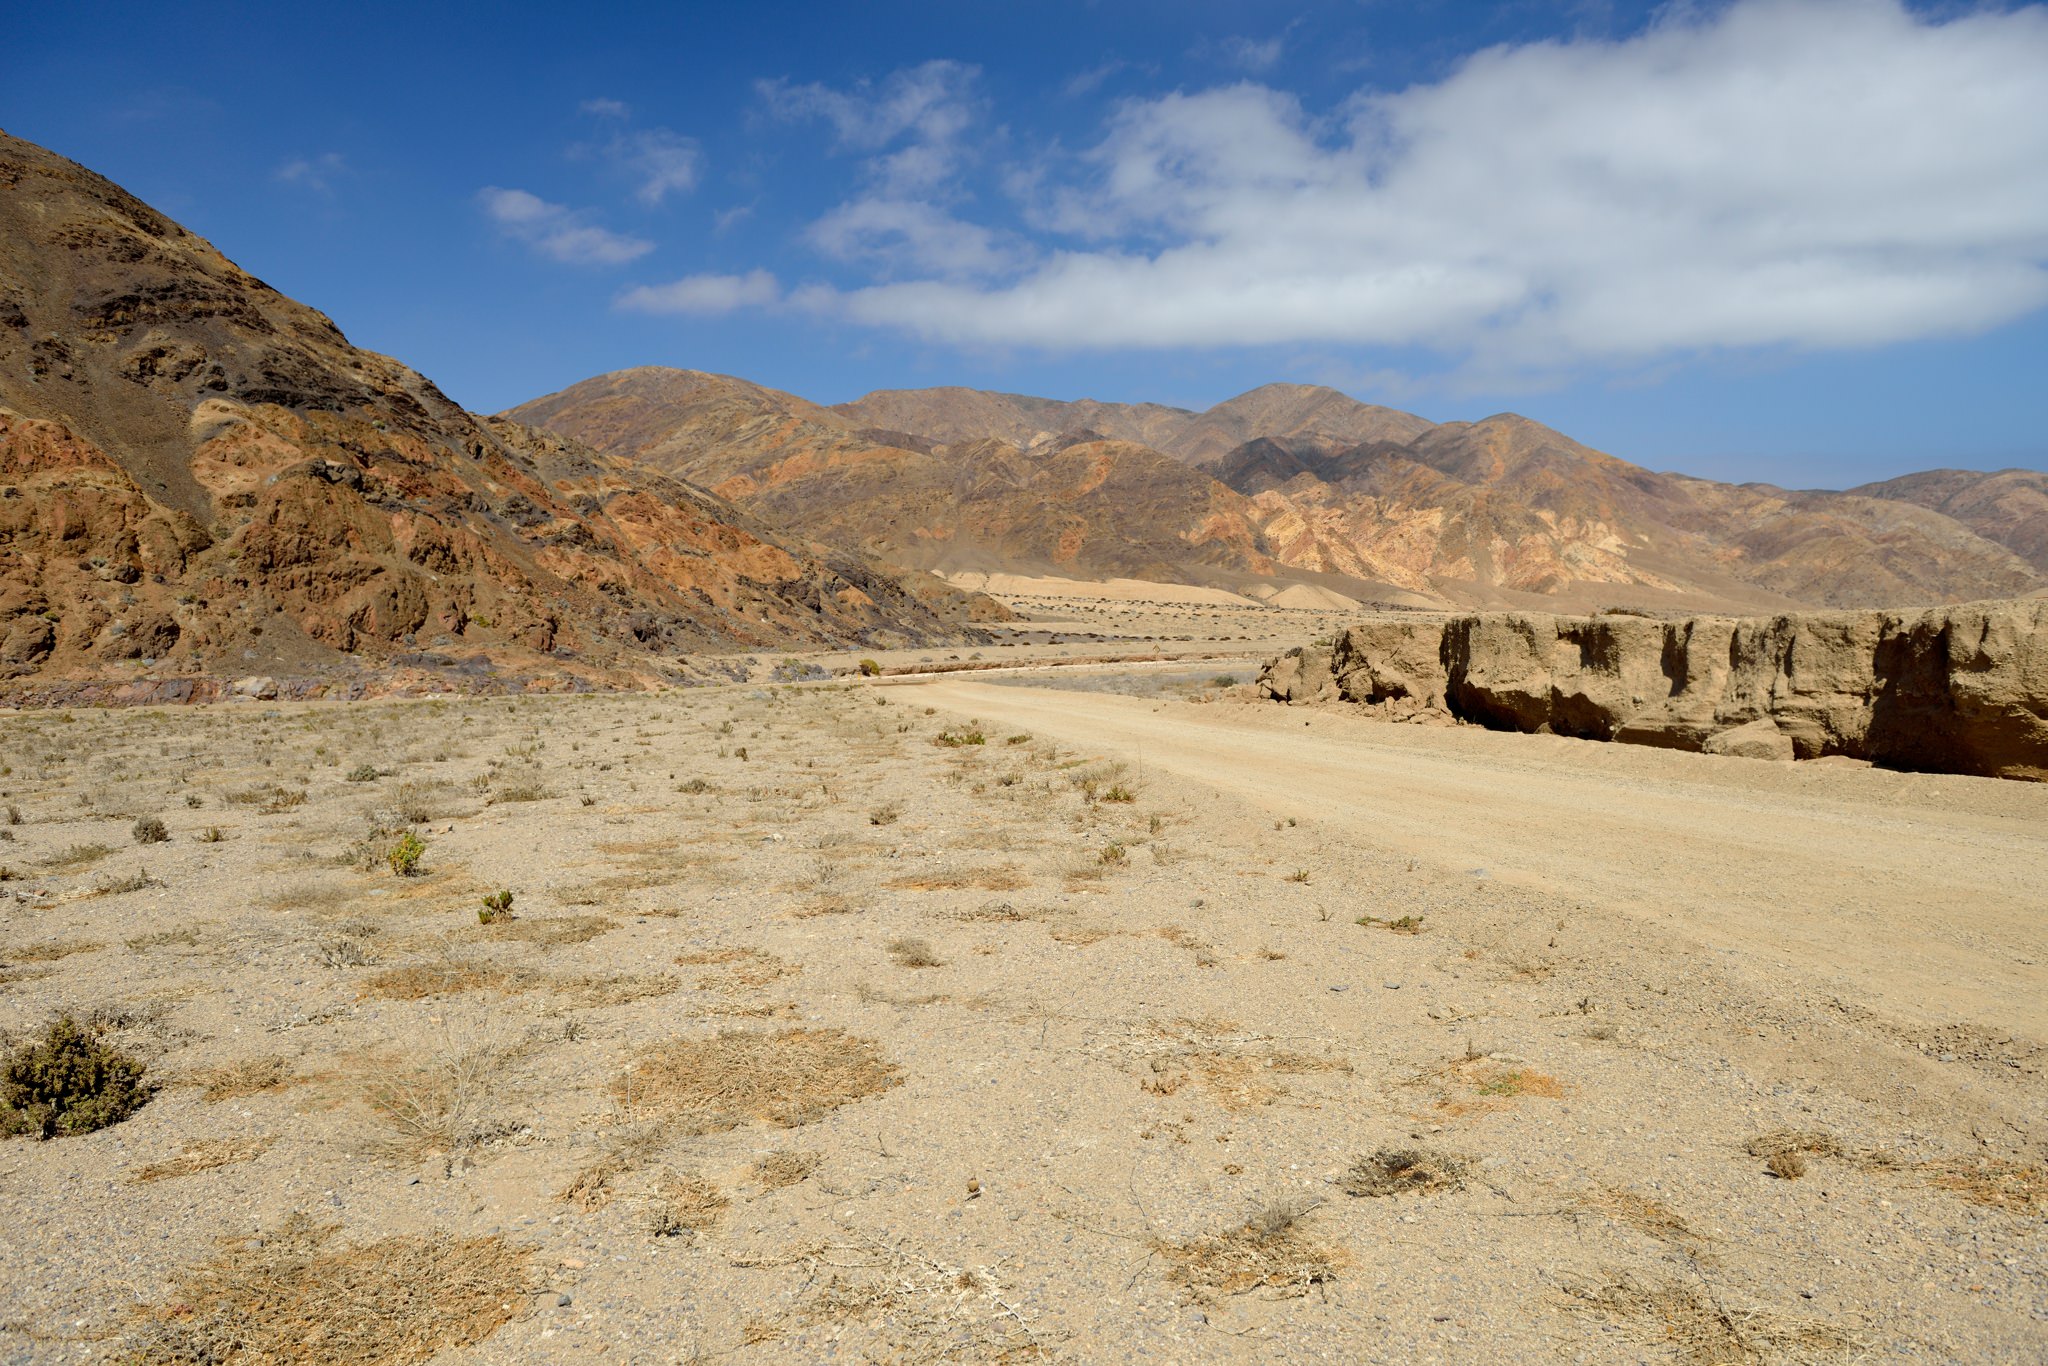
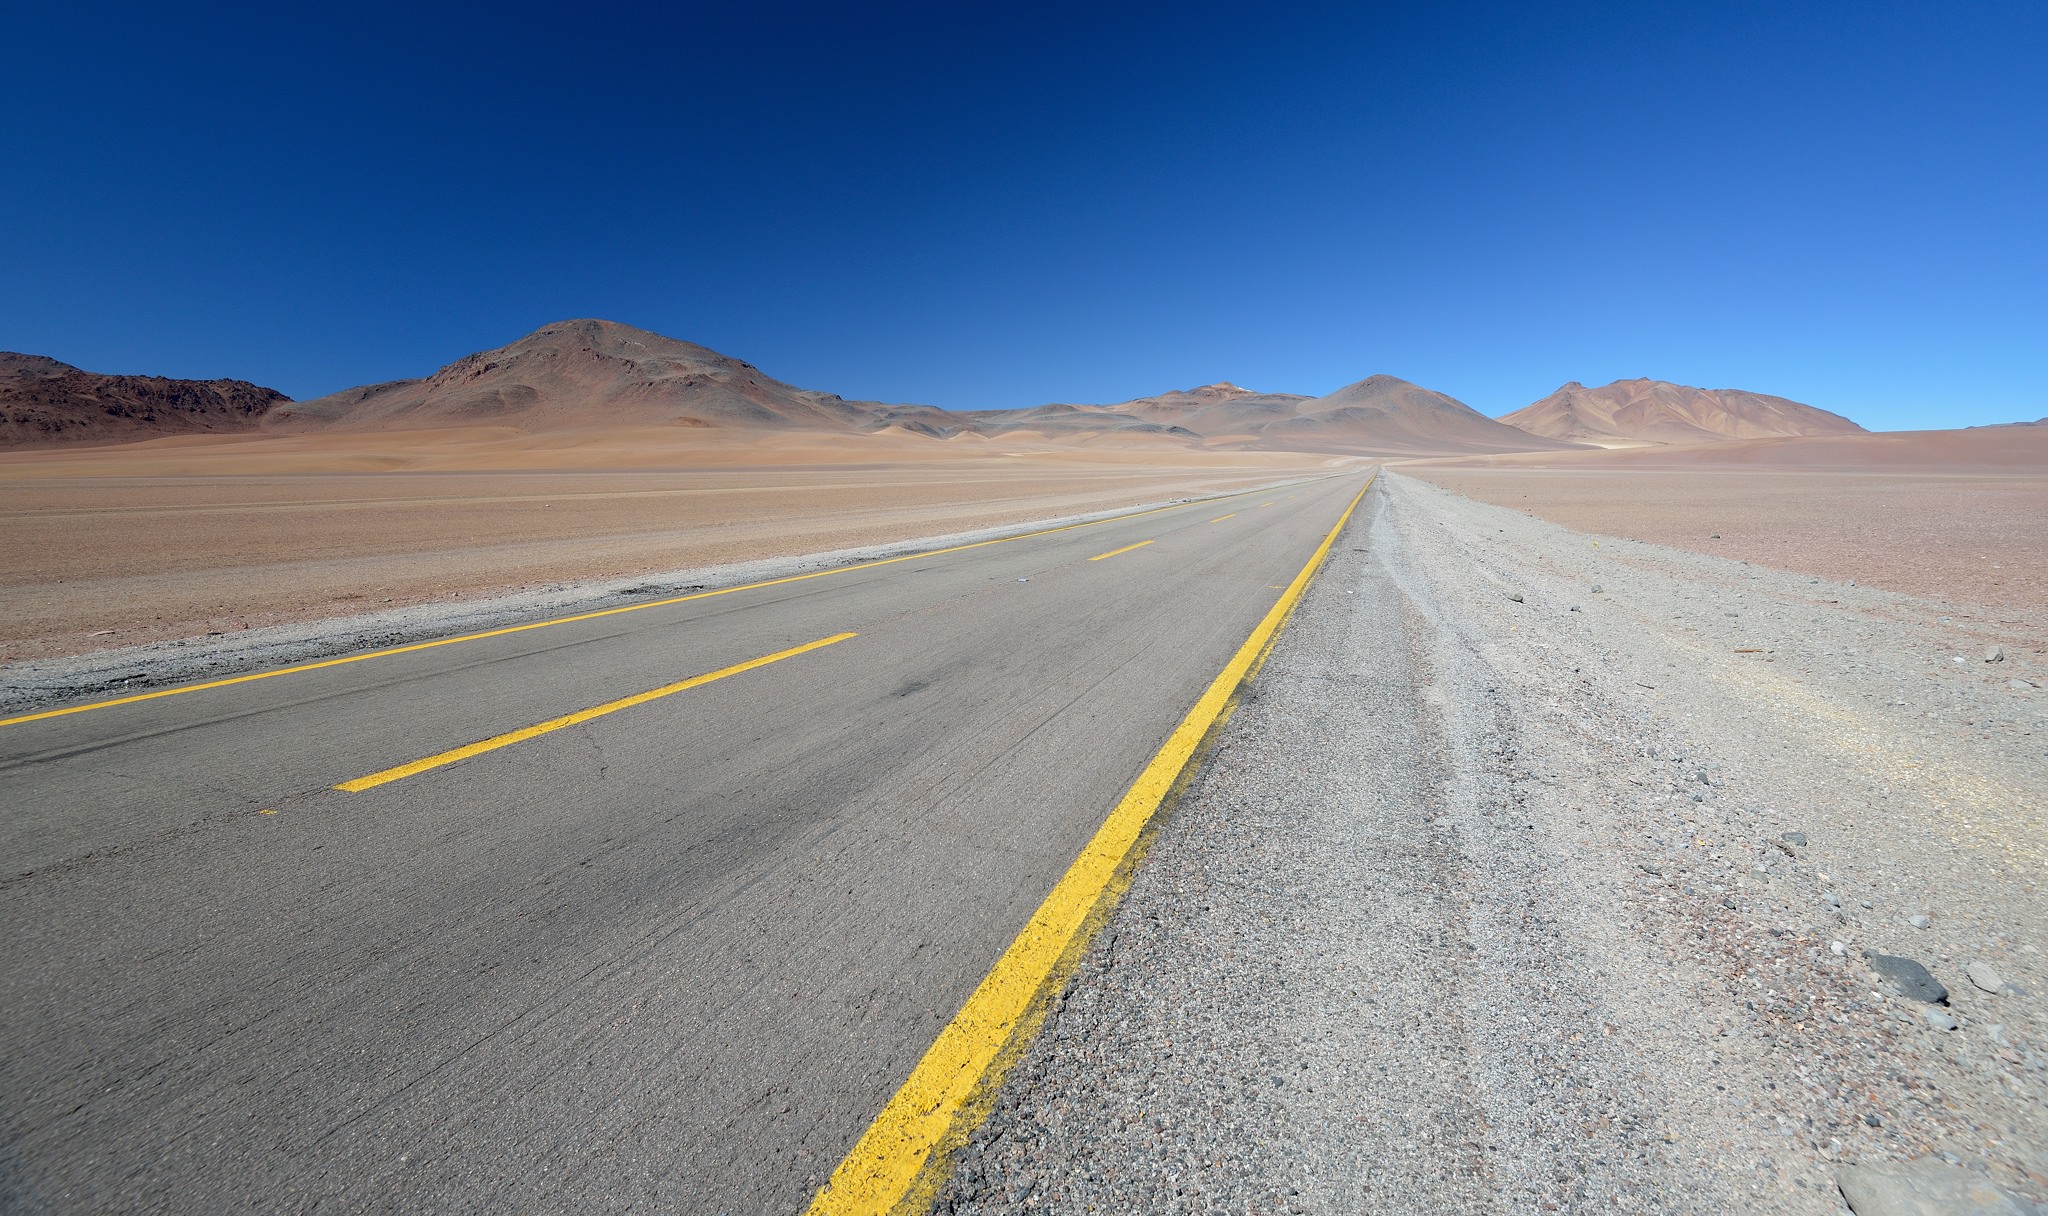
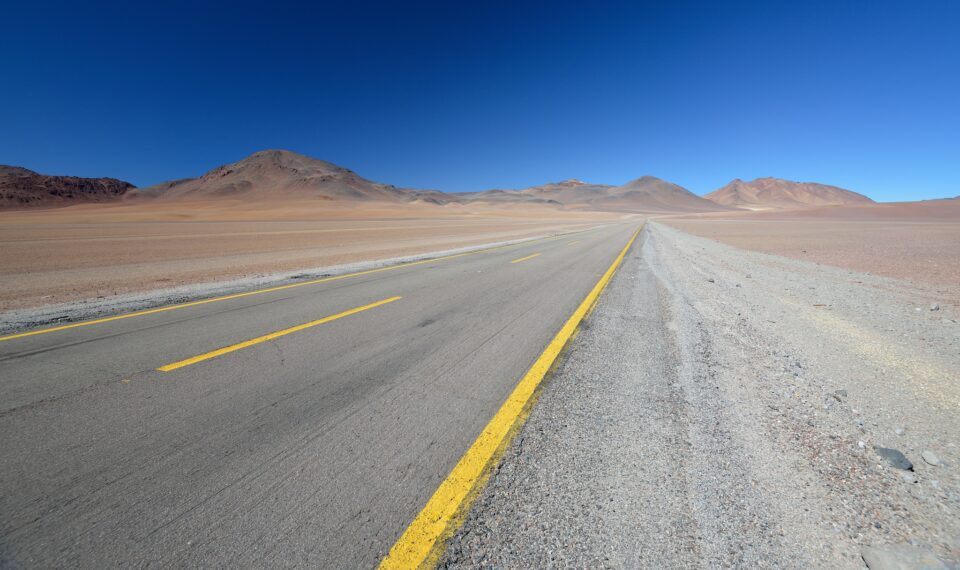
Then a few days of work and my duties as ‘official photographer’ – more on that in another post? OK, maybe a couple of desert vistas for now:

Image 18 Atacama

NIKON D800 @ 24mm, ISO 100, 1/400, f/5.6

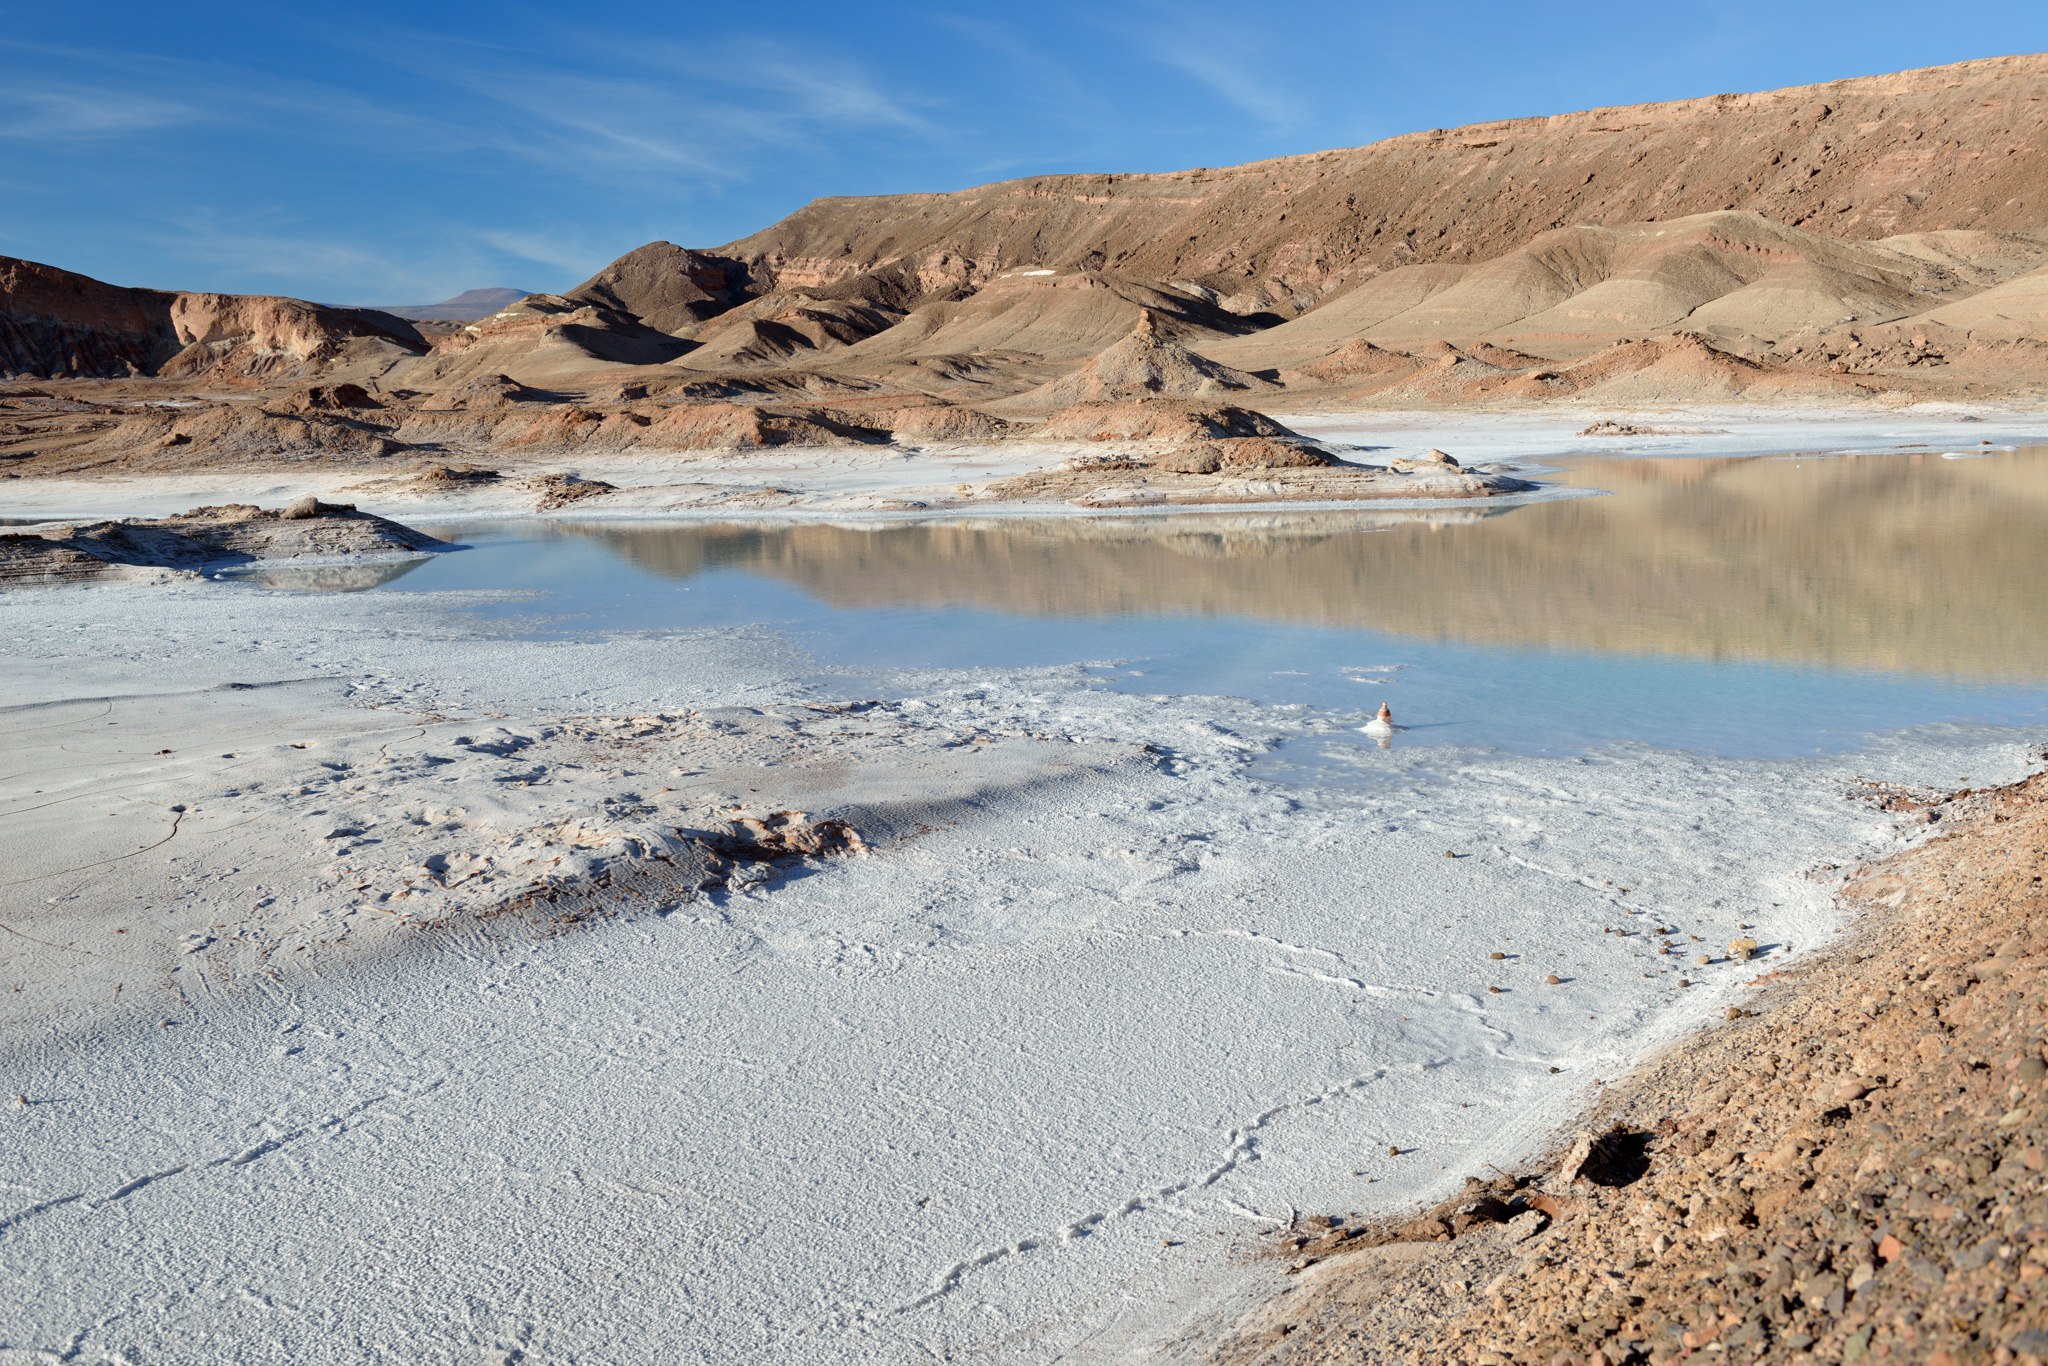
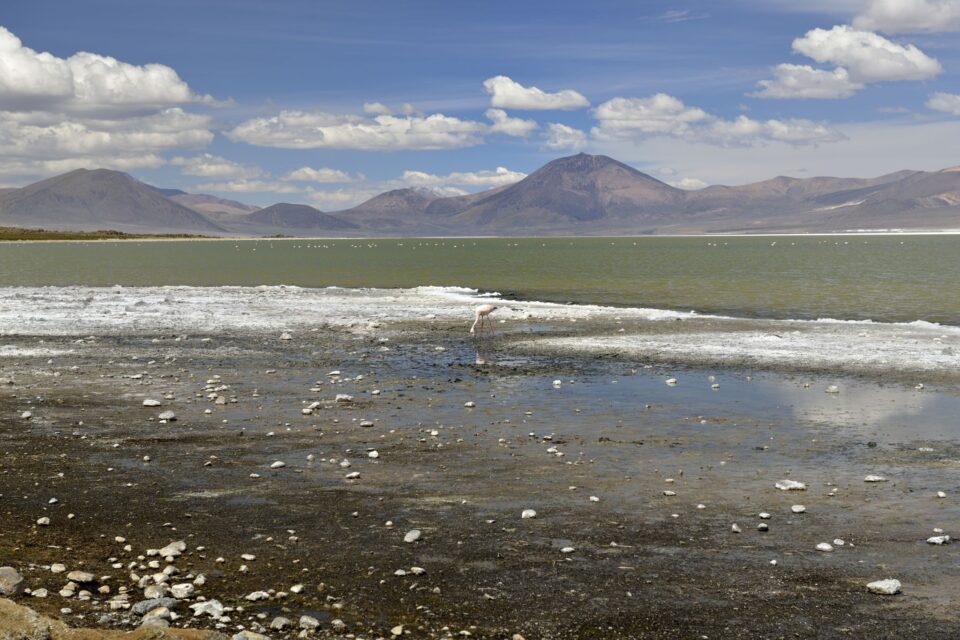
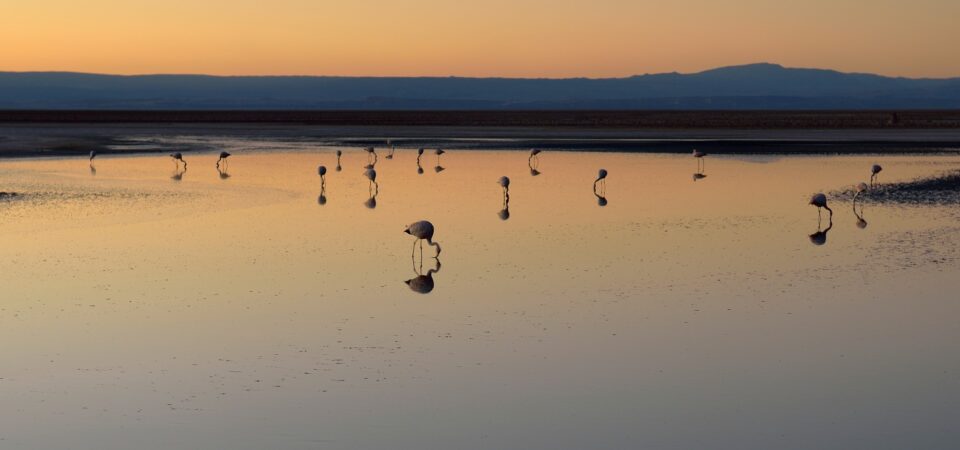
Next holiday stop was San Pedro de Atacama. A few miles out, we came across this ‘salar’ (salt lake/flat) just by the side of the road:

Image 21 Salar near San Pedro with cola bottle

NIKON D800 @ 36mm, ISO 100, 1/160, f/6.3

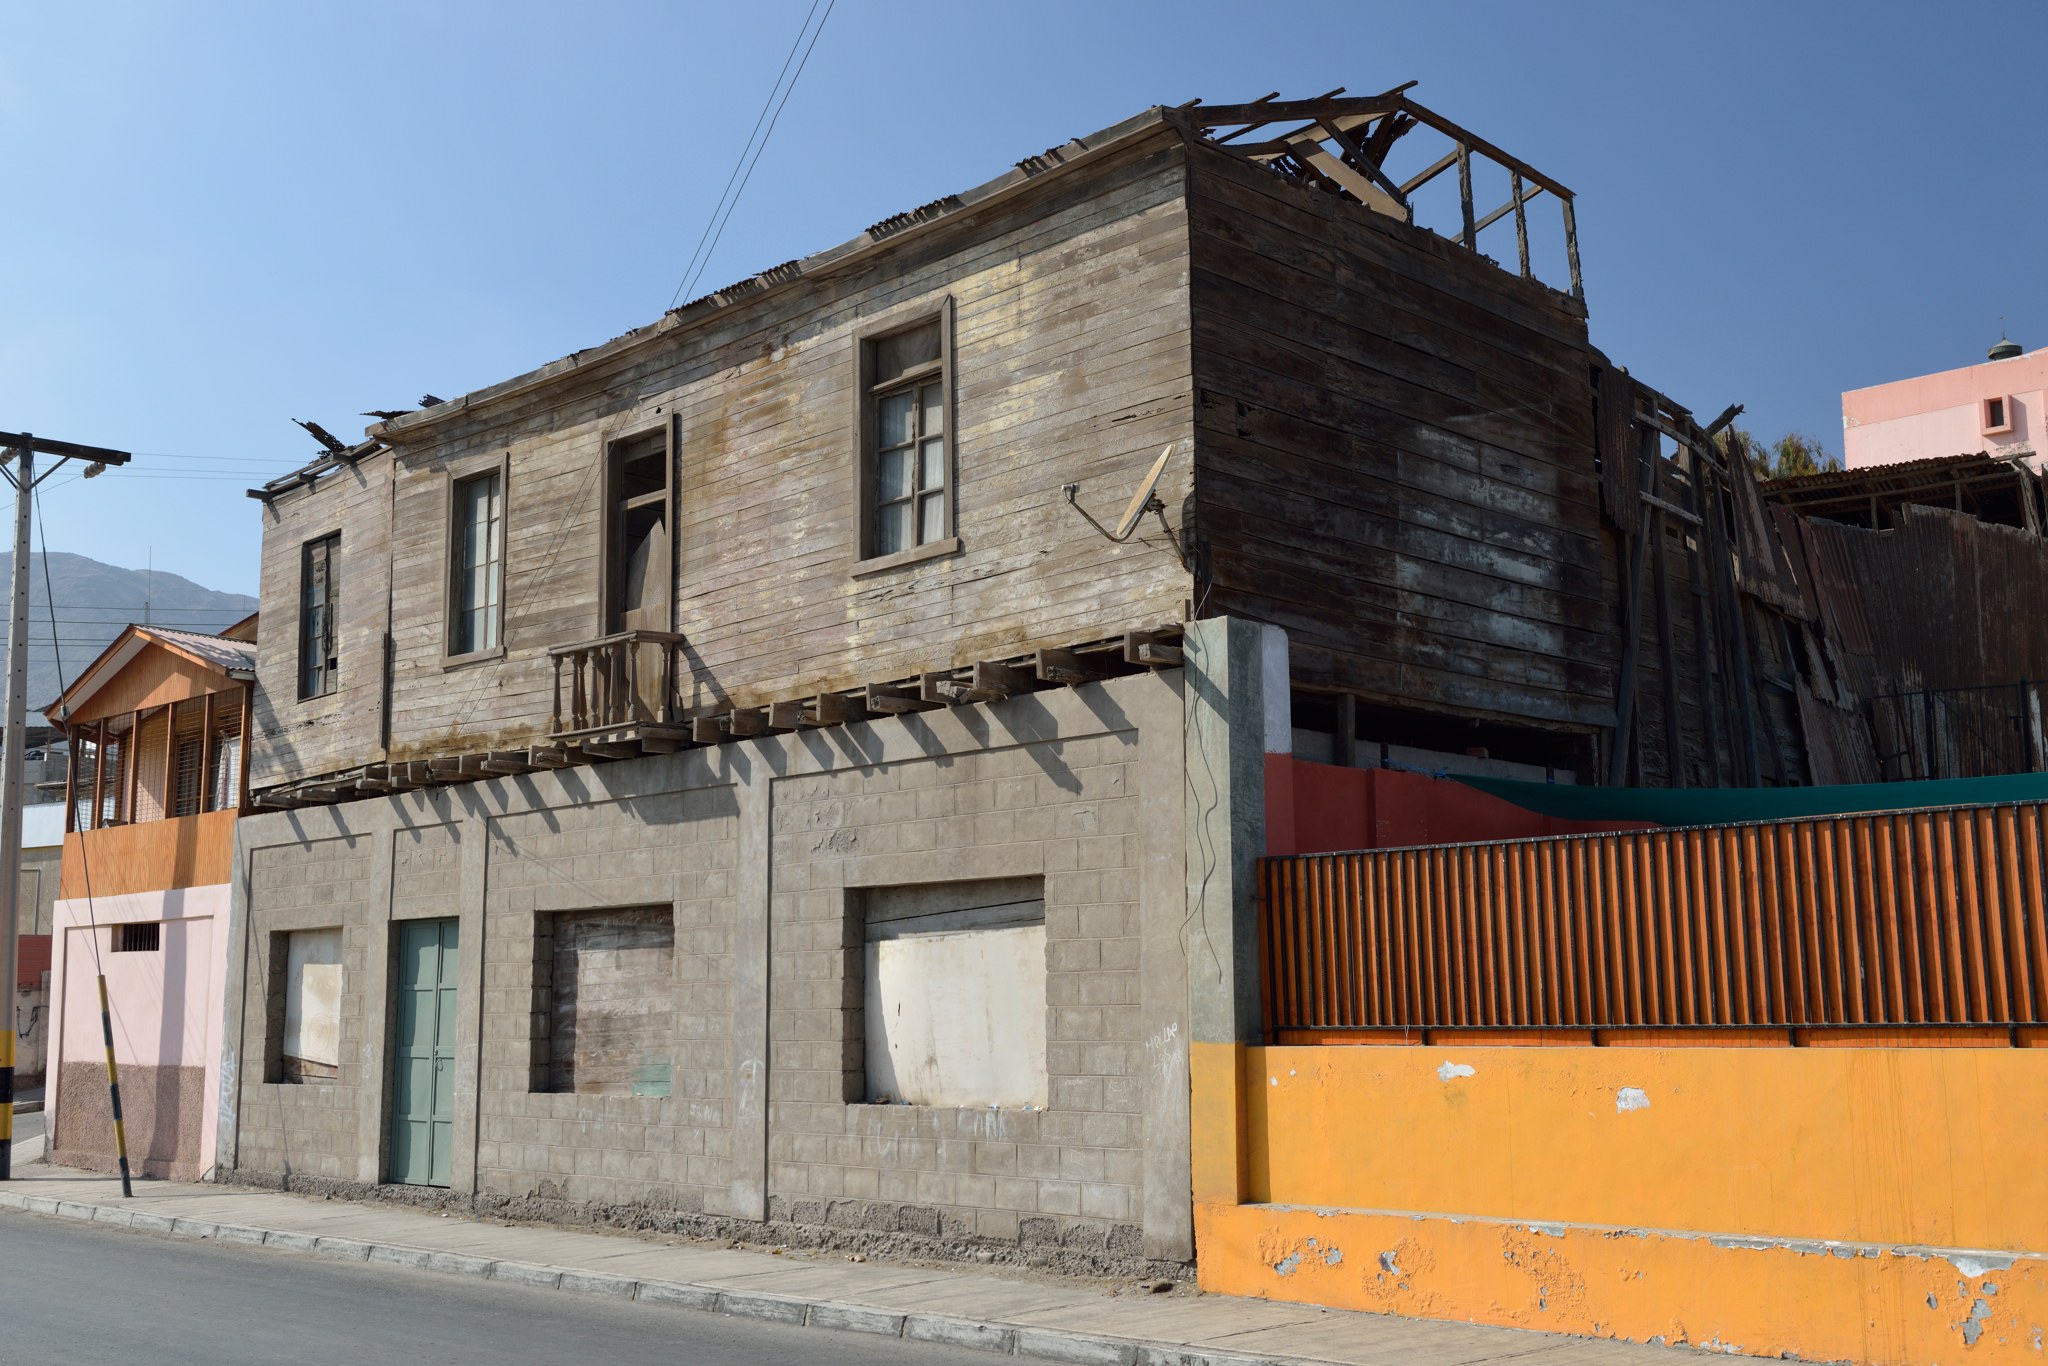
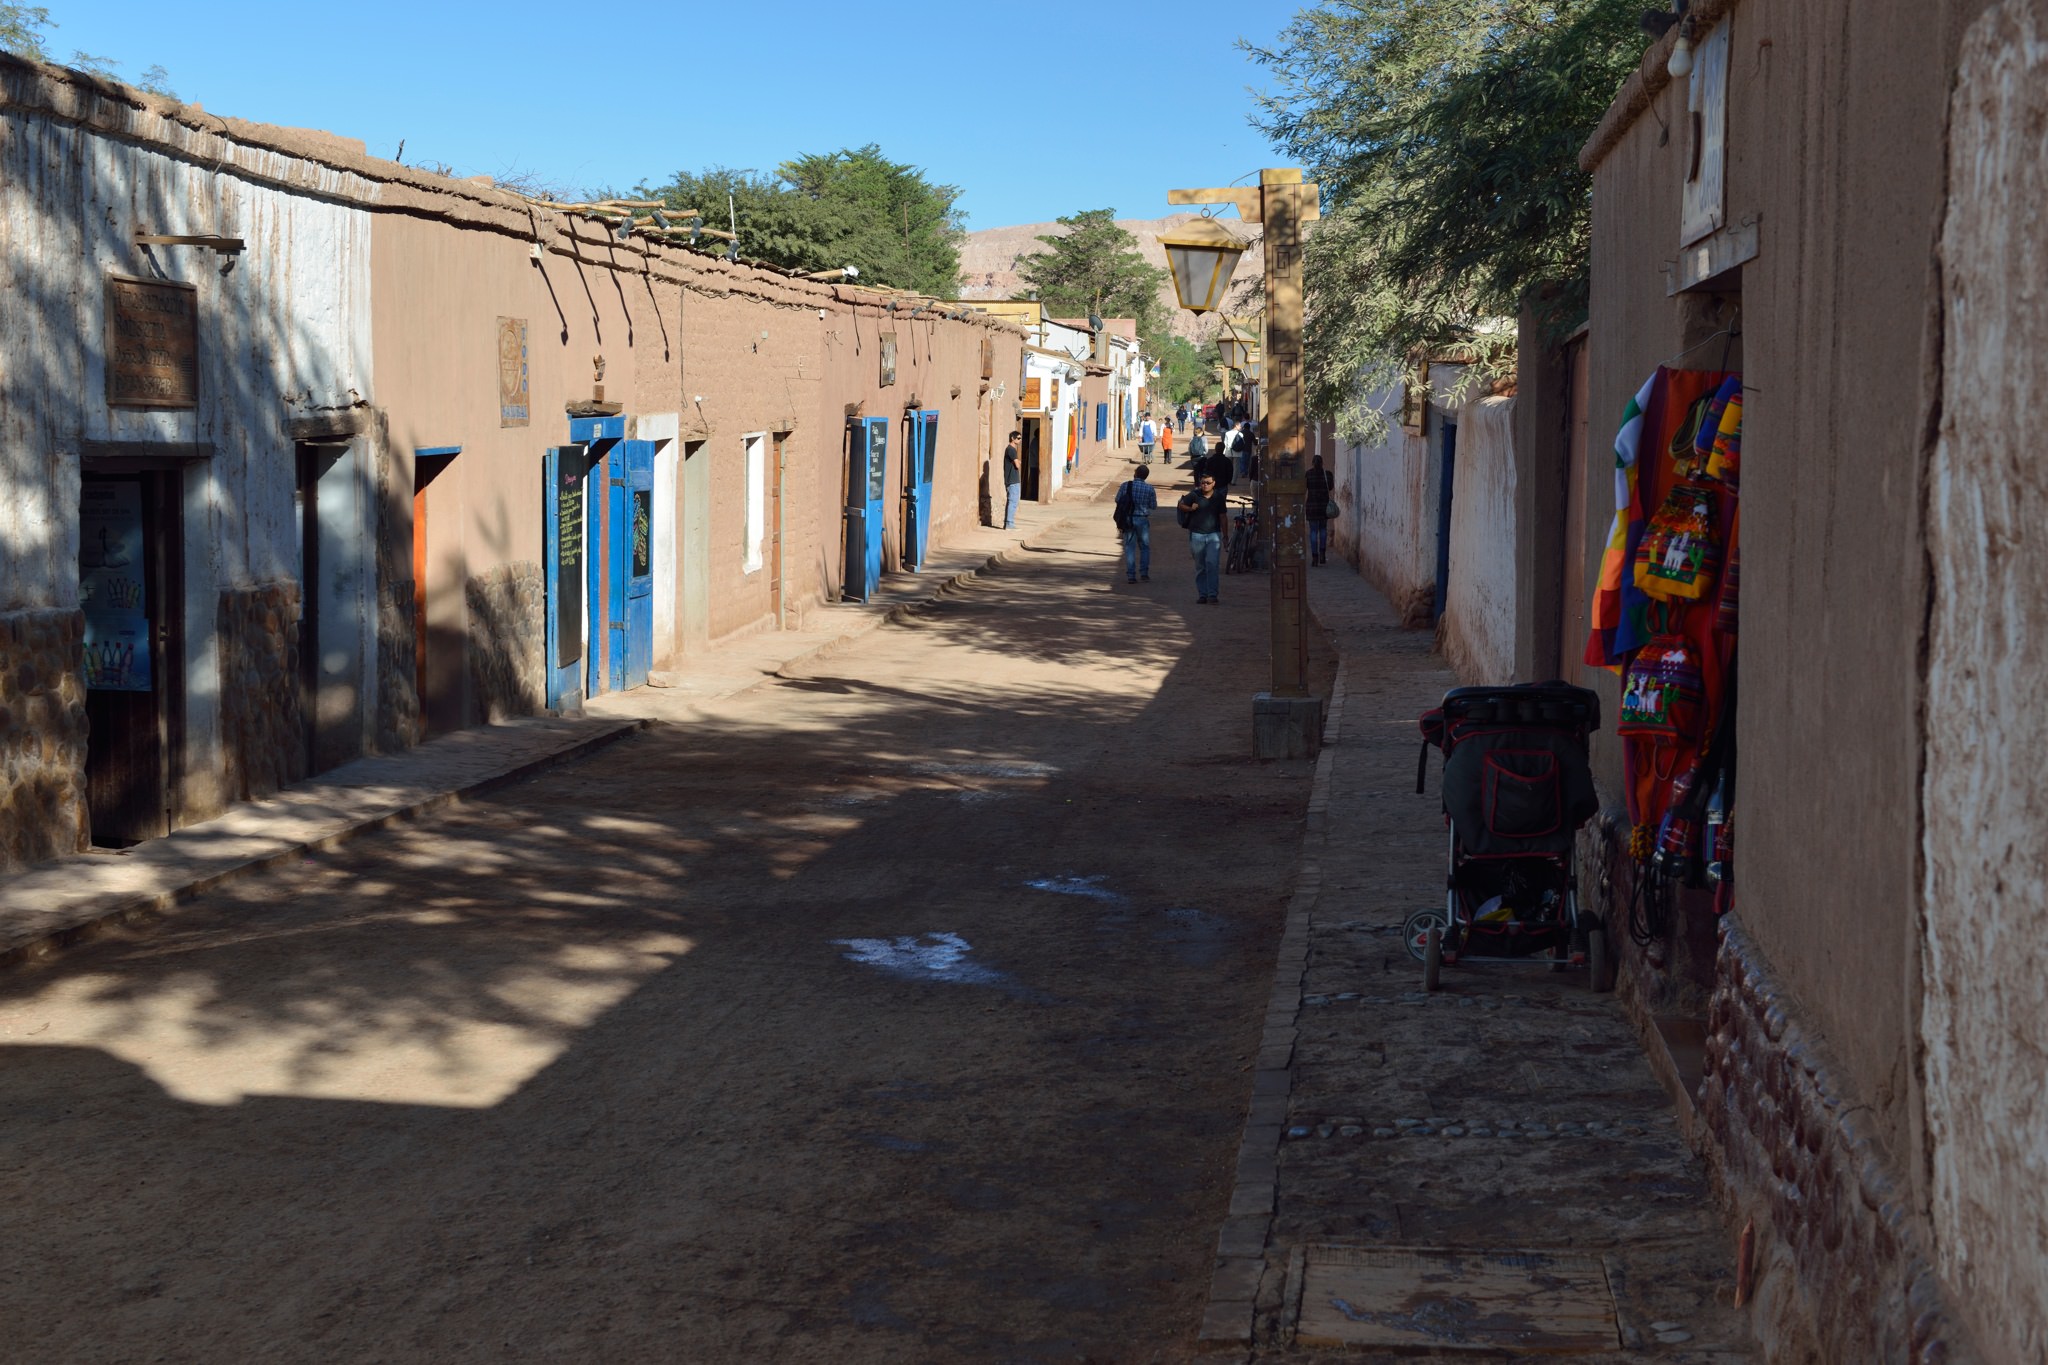
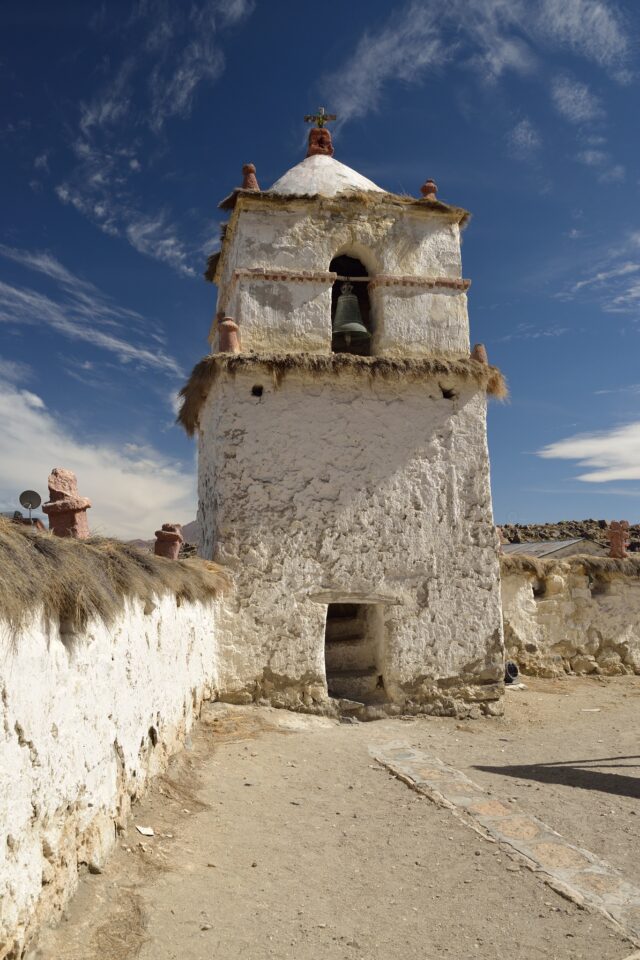
San Pedro is a tourist town, full of back-packers (and new-agers), but still pretty, with everything low-rise and using local materials

Image 22 San Pedro de Atacama

NIKON D800 @ 44mm, ISO 100, 1/100, f/6.3

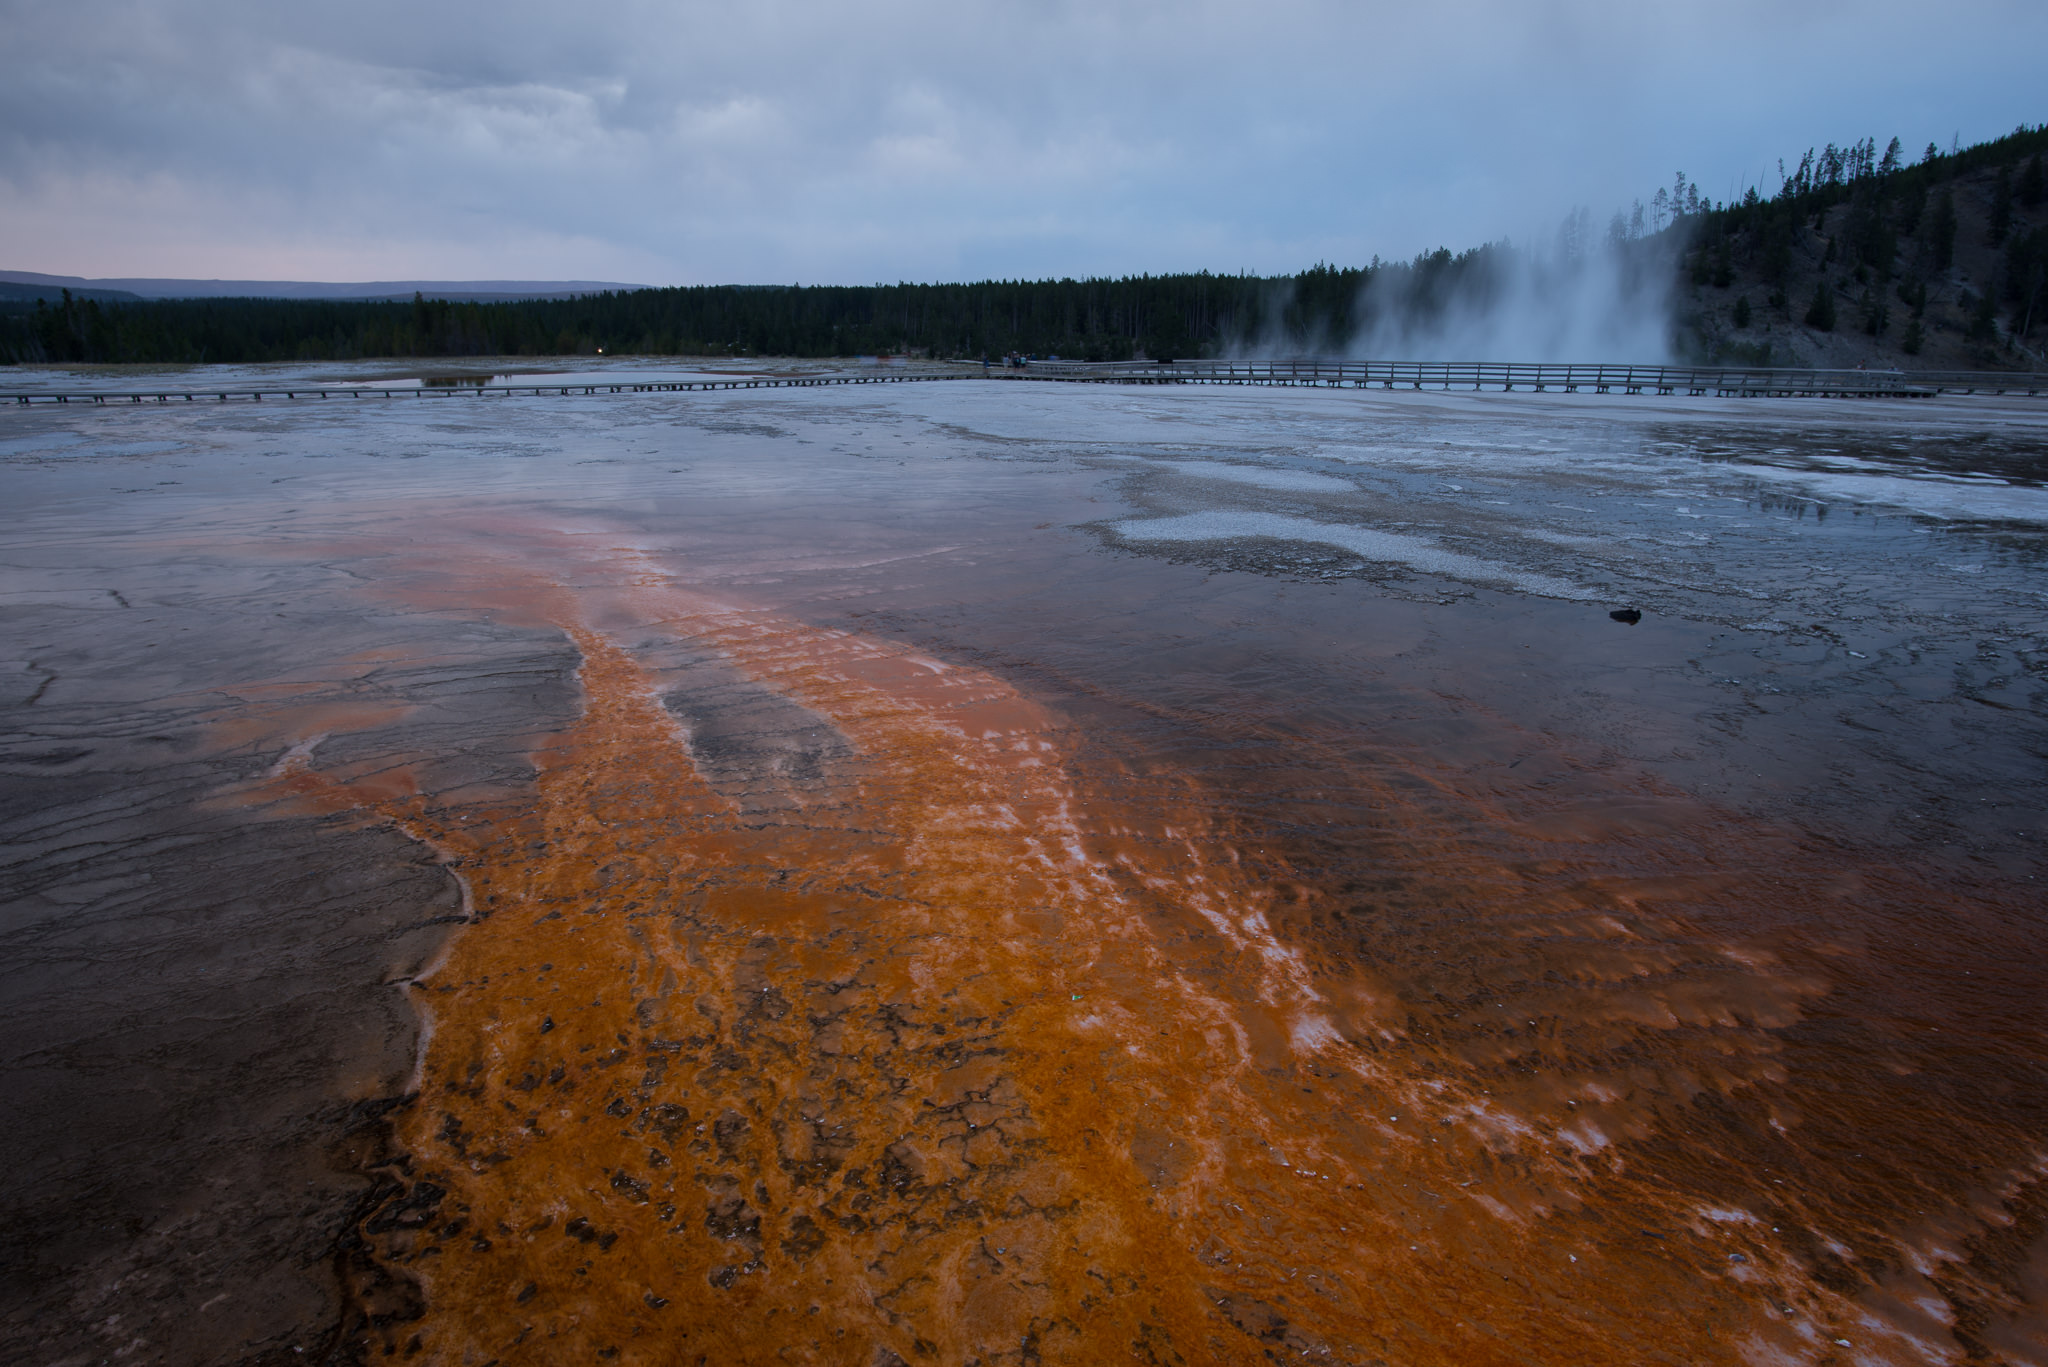
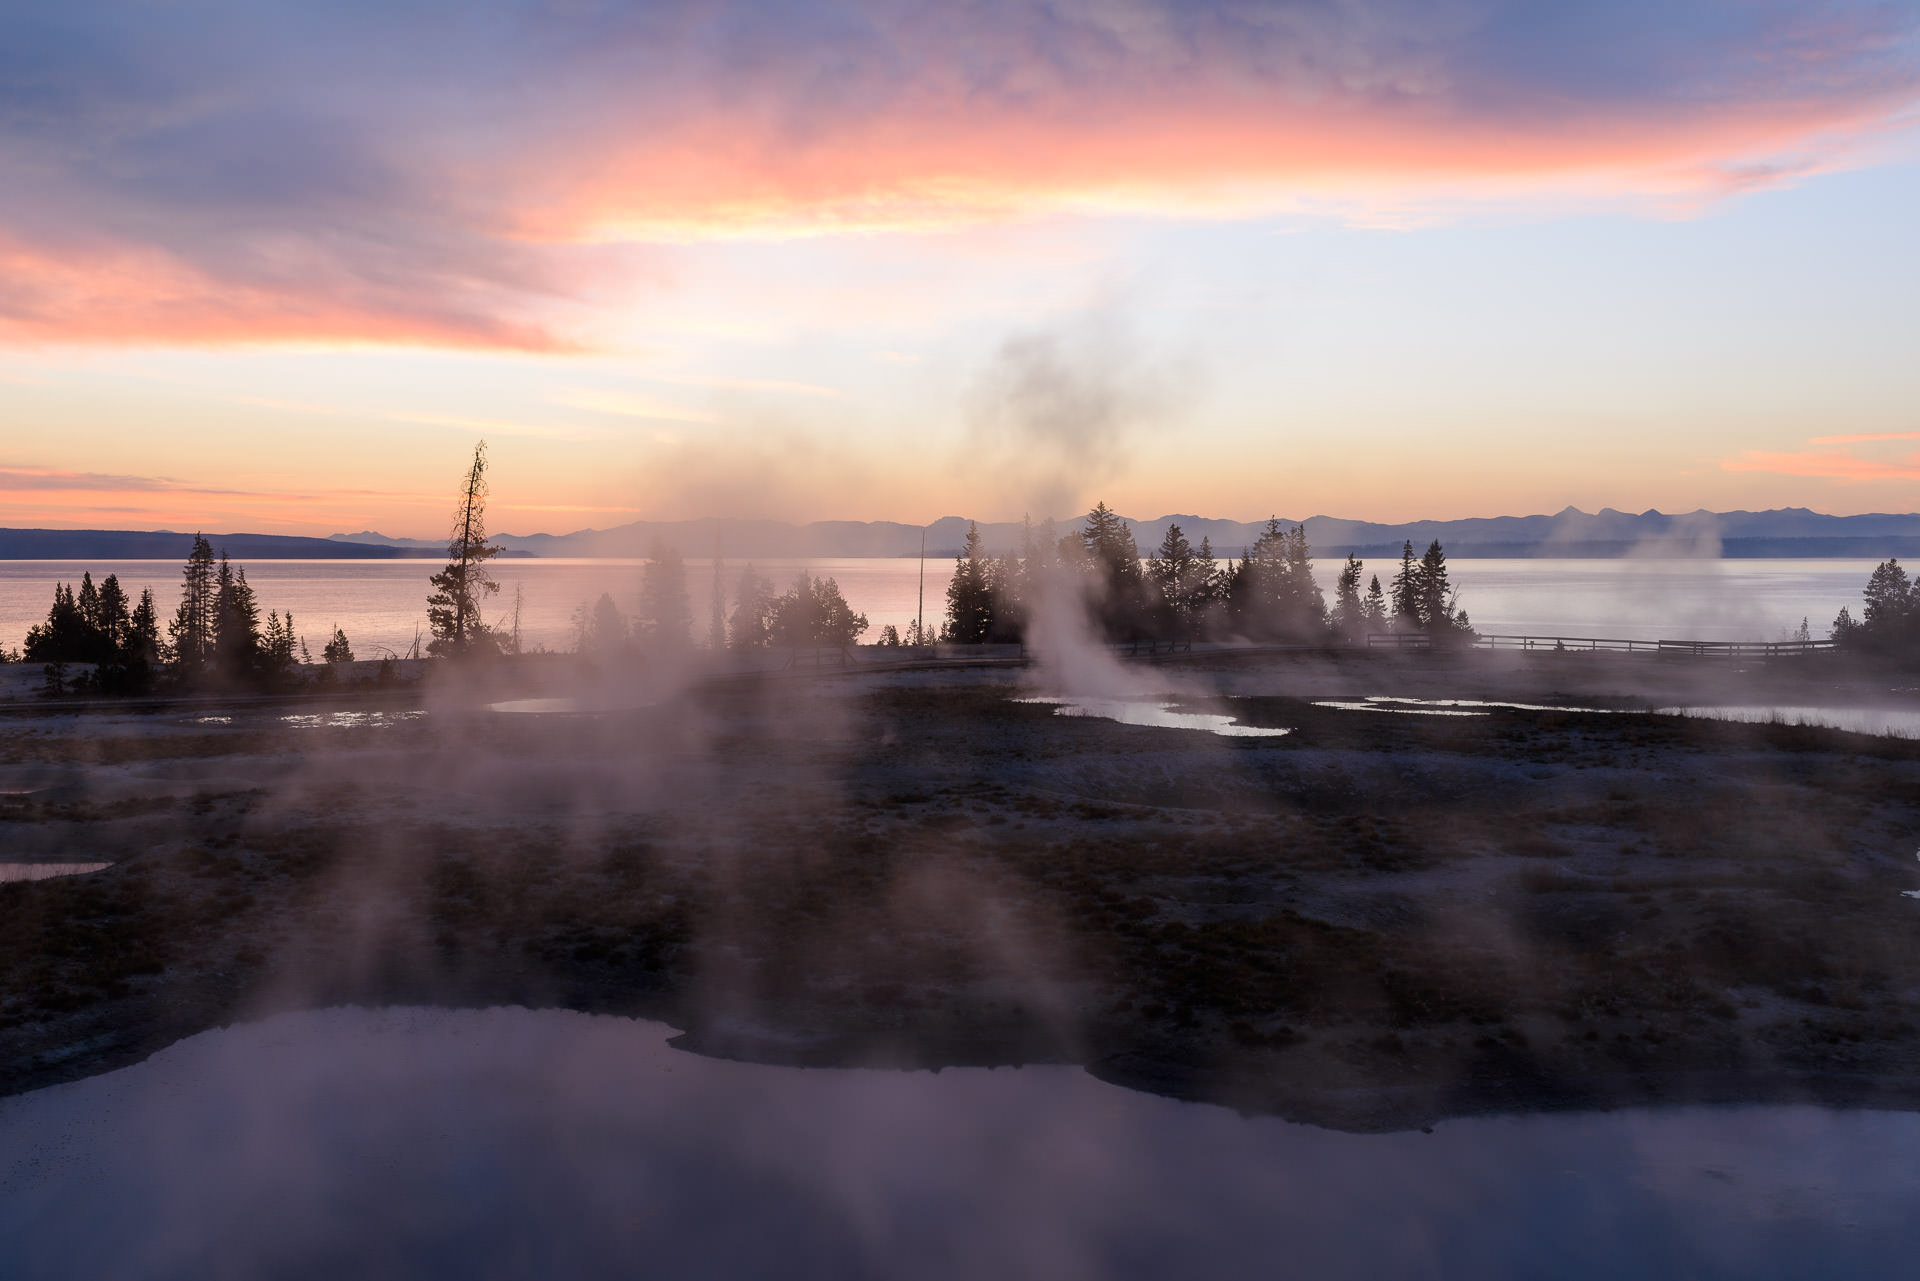
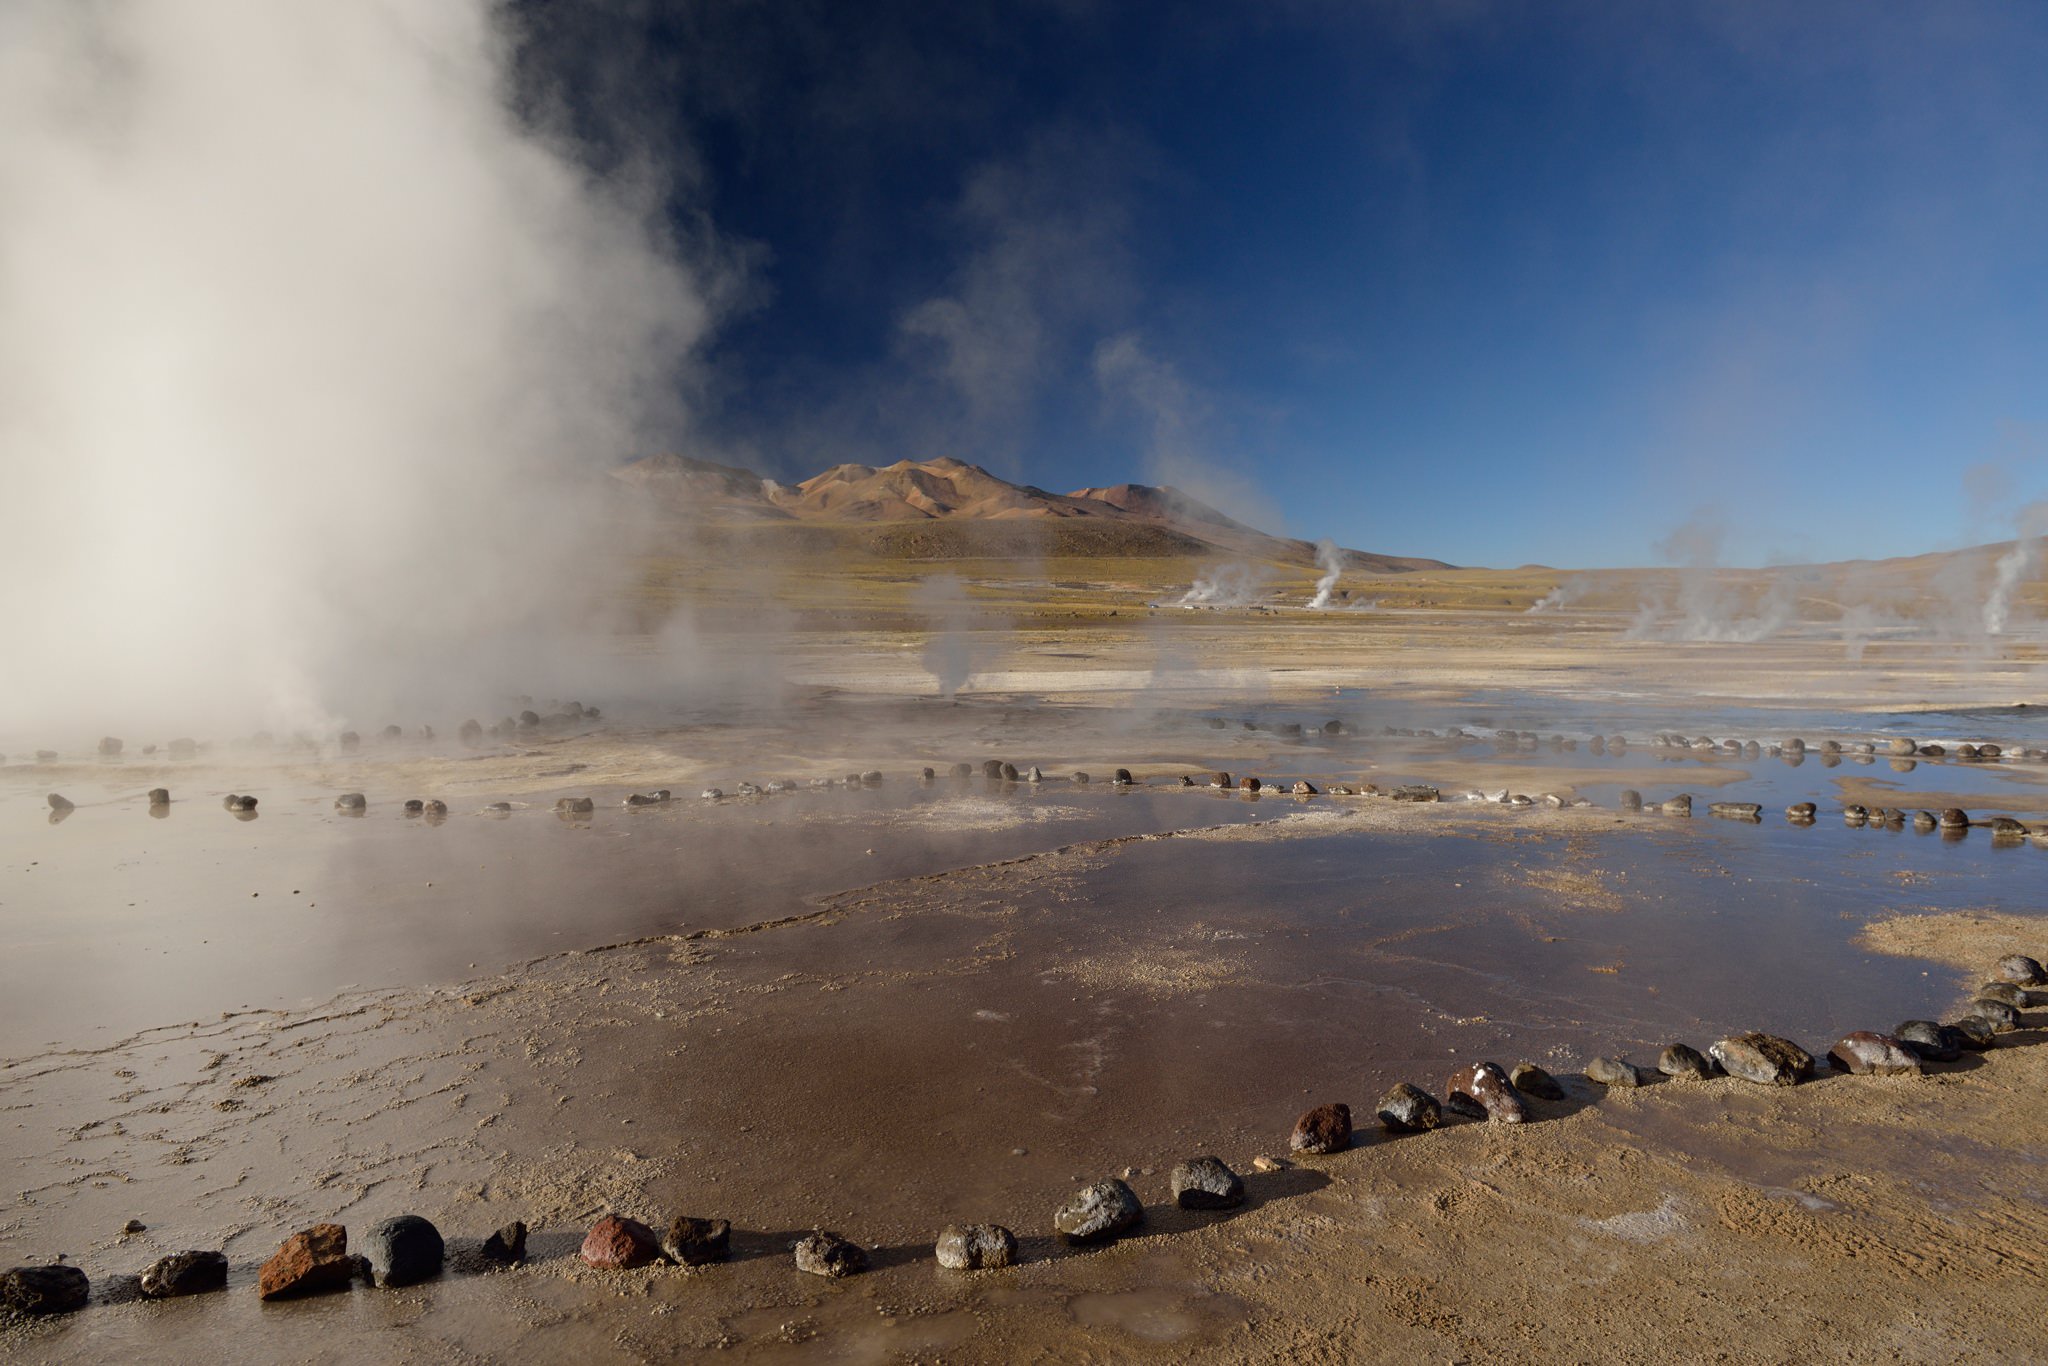
One of the big draws (OK, the big draw) of San Pedro is a pre-sunrise trip up (14 000’) to the El Tatio geysers. These vents are only ‘active’ from an hour or two before sunrise until an hour or so after. Shooting was a real challenge, from the dark (pre-sunrise, remember?), to the freezing temperatures, the hordes of people getting in your shots, and (once the sun appeared) the extreme dynamic range. It was El Tatio more than anywhere else that convinced me I’d made the right choice with the D800. I think the extreme range of this shot – from the disc of the sun through the steam, to black (to the naked eye) shadows on the ground, with nothing lost or blown out – is something only the D800 could have captured.

Image 23 El Tatio sunrise

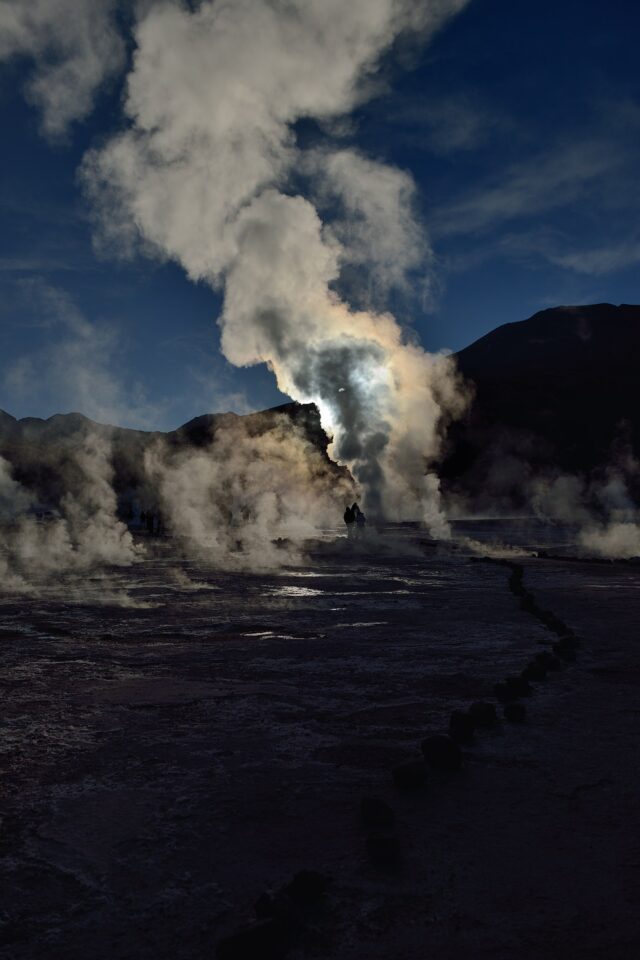
NIKON D800 @ 31mm, ISO 250, 1/4000, f/4.5

I will confess – fumbling around in the cold and dark, I did end up hitting the White Balance (rather than ISO) button, and switching to something weird. The rest of that day’s photos looked rather more dramatic than intended – thank goodness for the easy re-set in Capture NX2!

Image 25 El Tatio geysers

NIKON D800 @ 24mm, ISO 250, 1/800, f/6.3

The geysers are not the only draw from San Pedro. To the south is the Salar de Atacama, the biggest salt flat in Chile:

Image 30 Salar de Atacama

NIKON D800 @ 70mm, ISO 125, 1/10, f/3.5

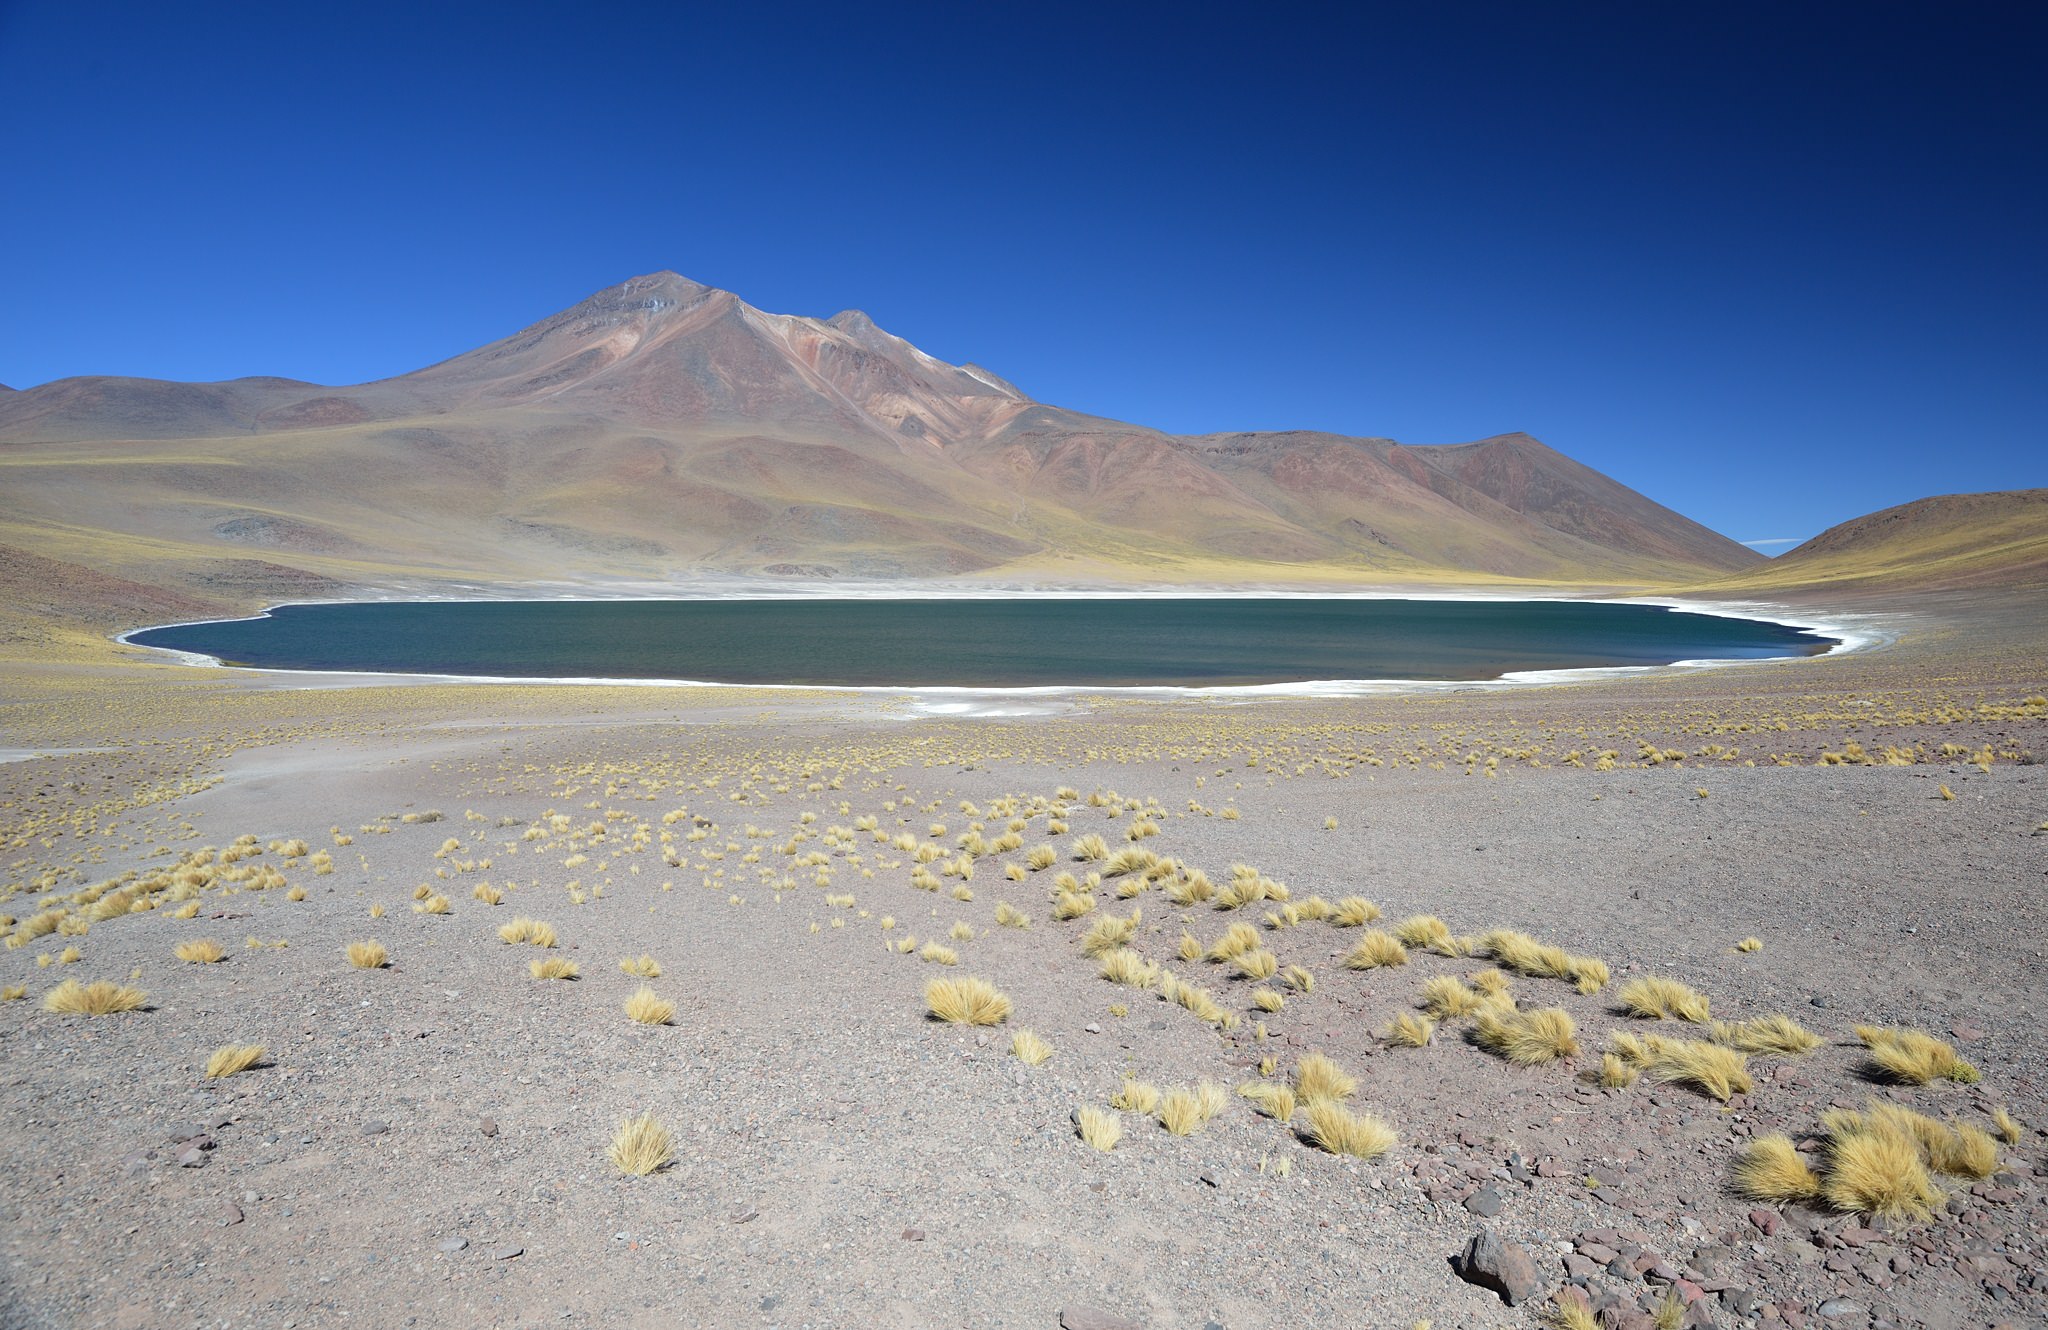
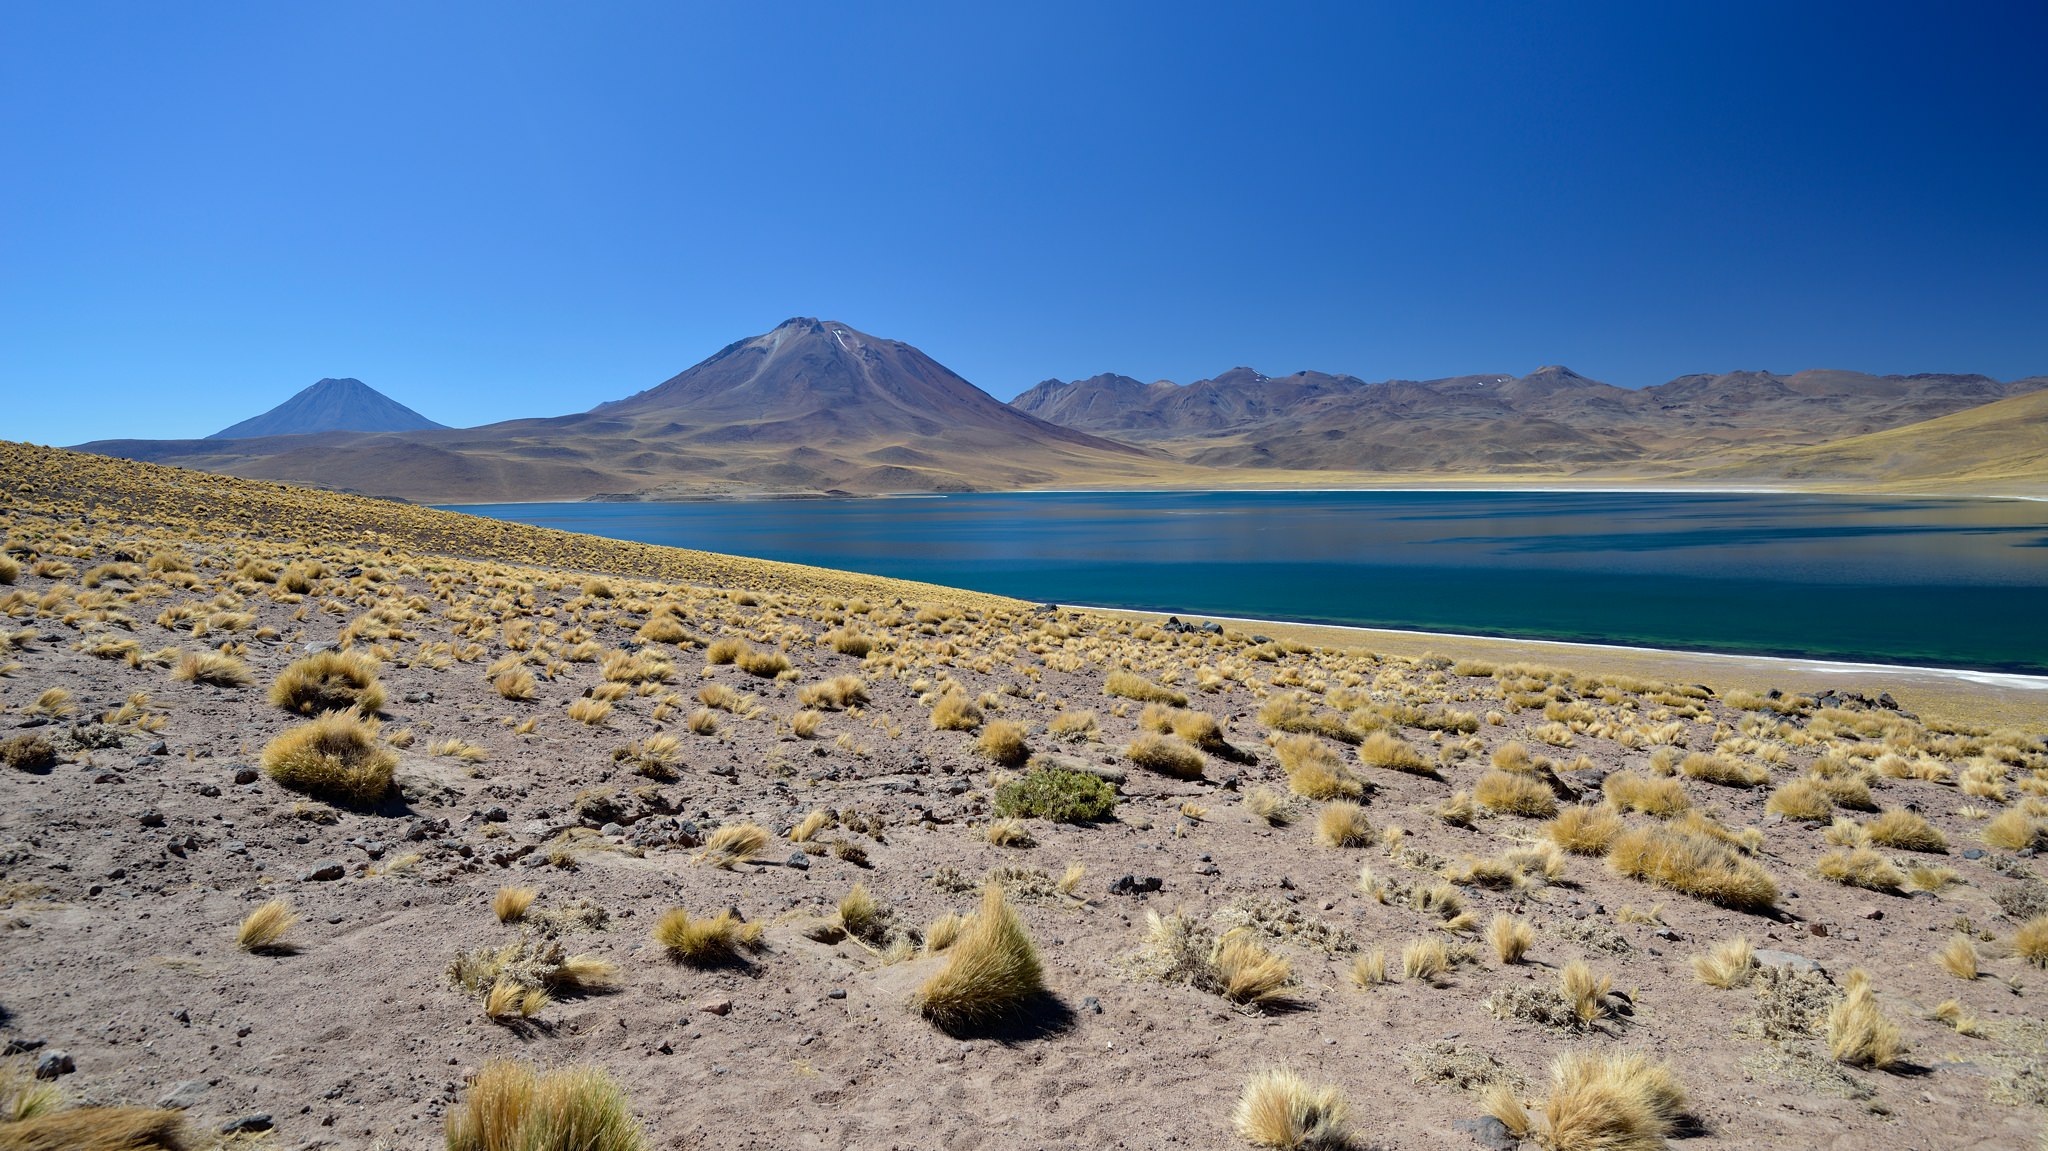
To the south-east, the twin lakes of Miscanti and Miniques:

Image 31 Laguna Miniques

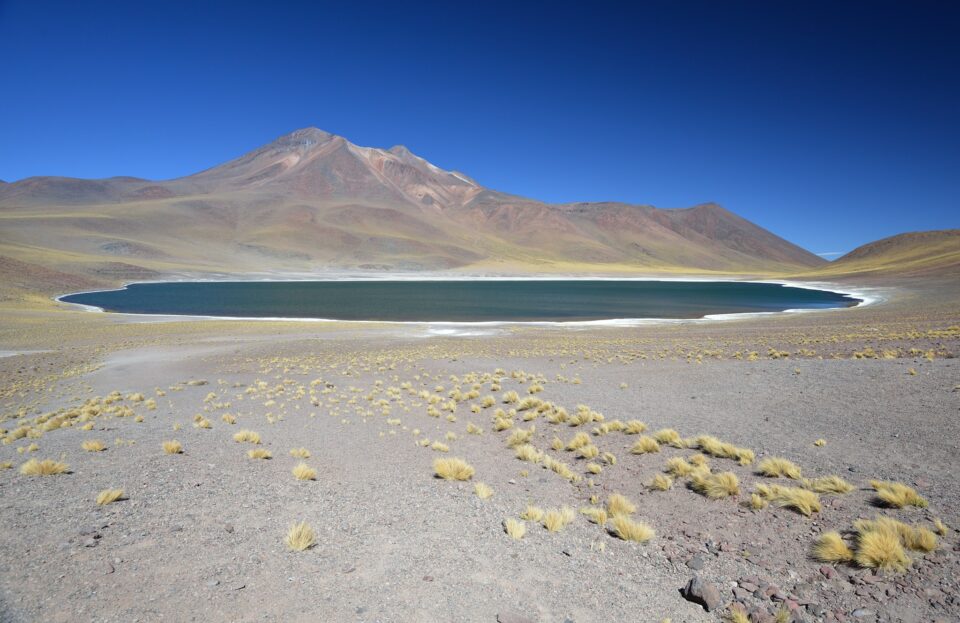
NIKON D800 @ 18mm, ISO 200, 1/125, f/8.0

Image 32 Laguna Miscanti

NIKON D800 @ 20mm, ISO 100, 1/50, f/8.0

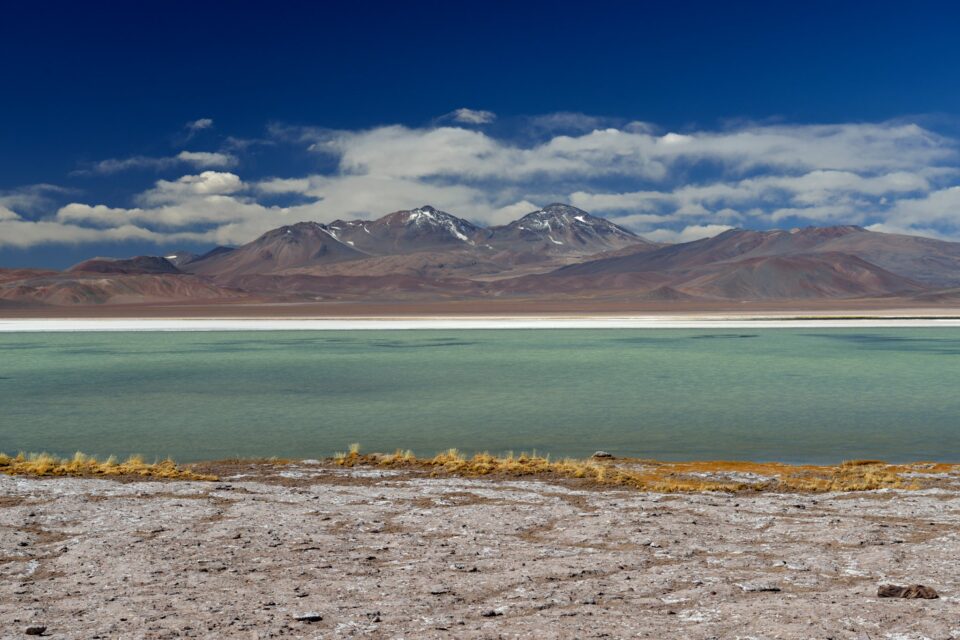
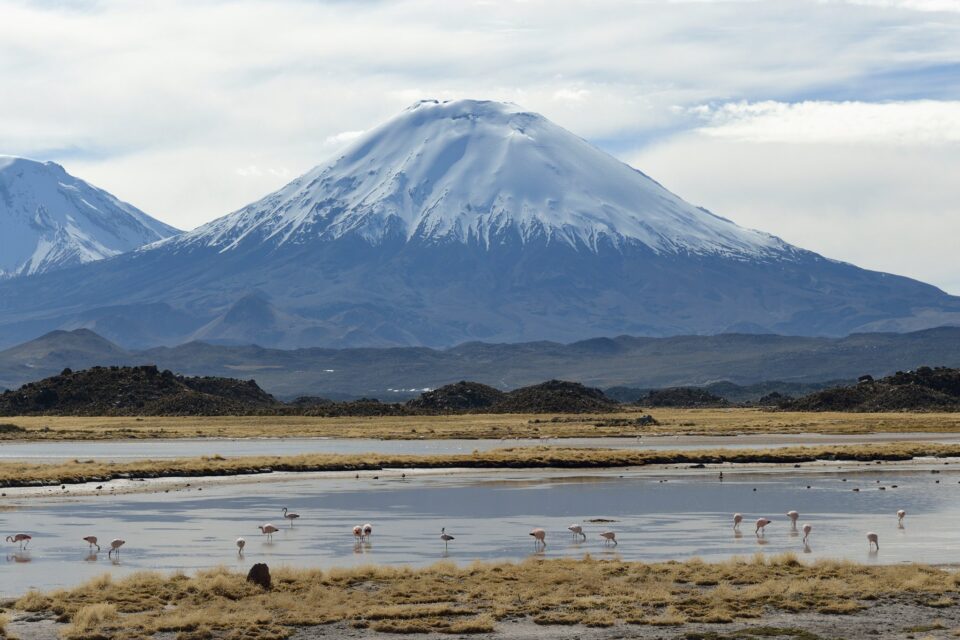
To the east, and up into the Andes, more lakes and volcanos:

Image 36 Andes east of San Pedro

NIKON D800 @ 16mm, ISO 250, 1/200, f/7.1

And to the west, the Valley of the Moon:

Image 37 Valley of the Moon

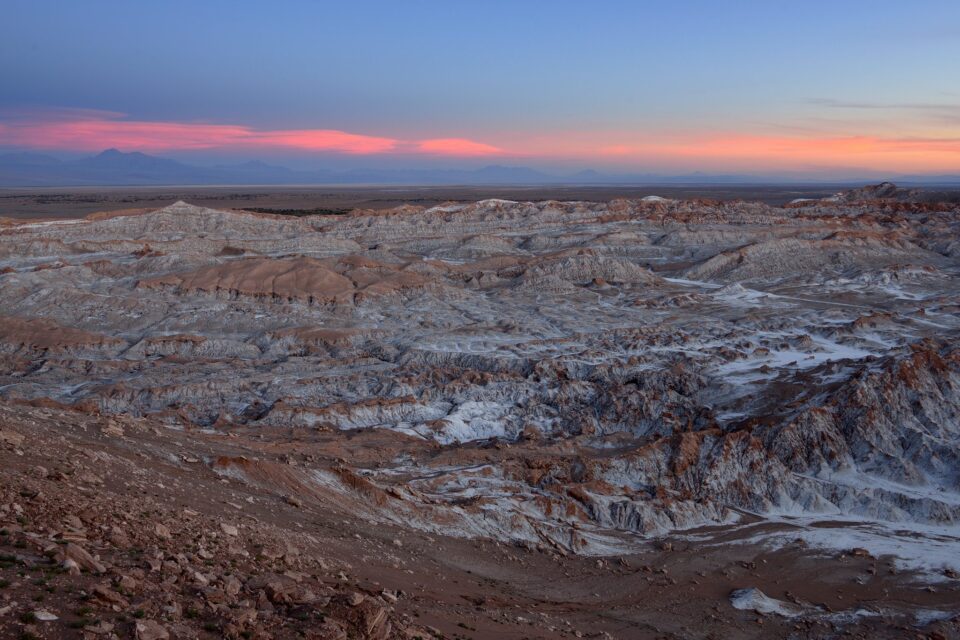
NIKON D800 @ 24mm, ISO 100, 1/4, f/8.0

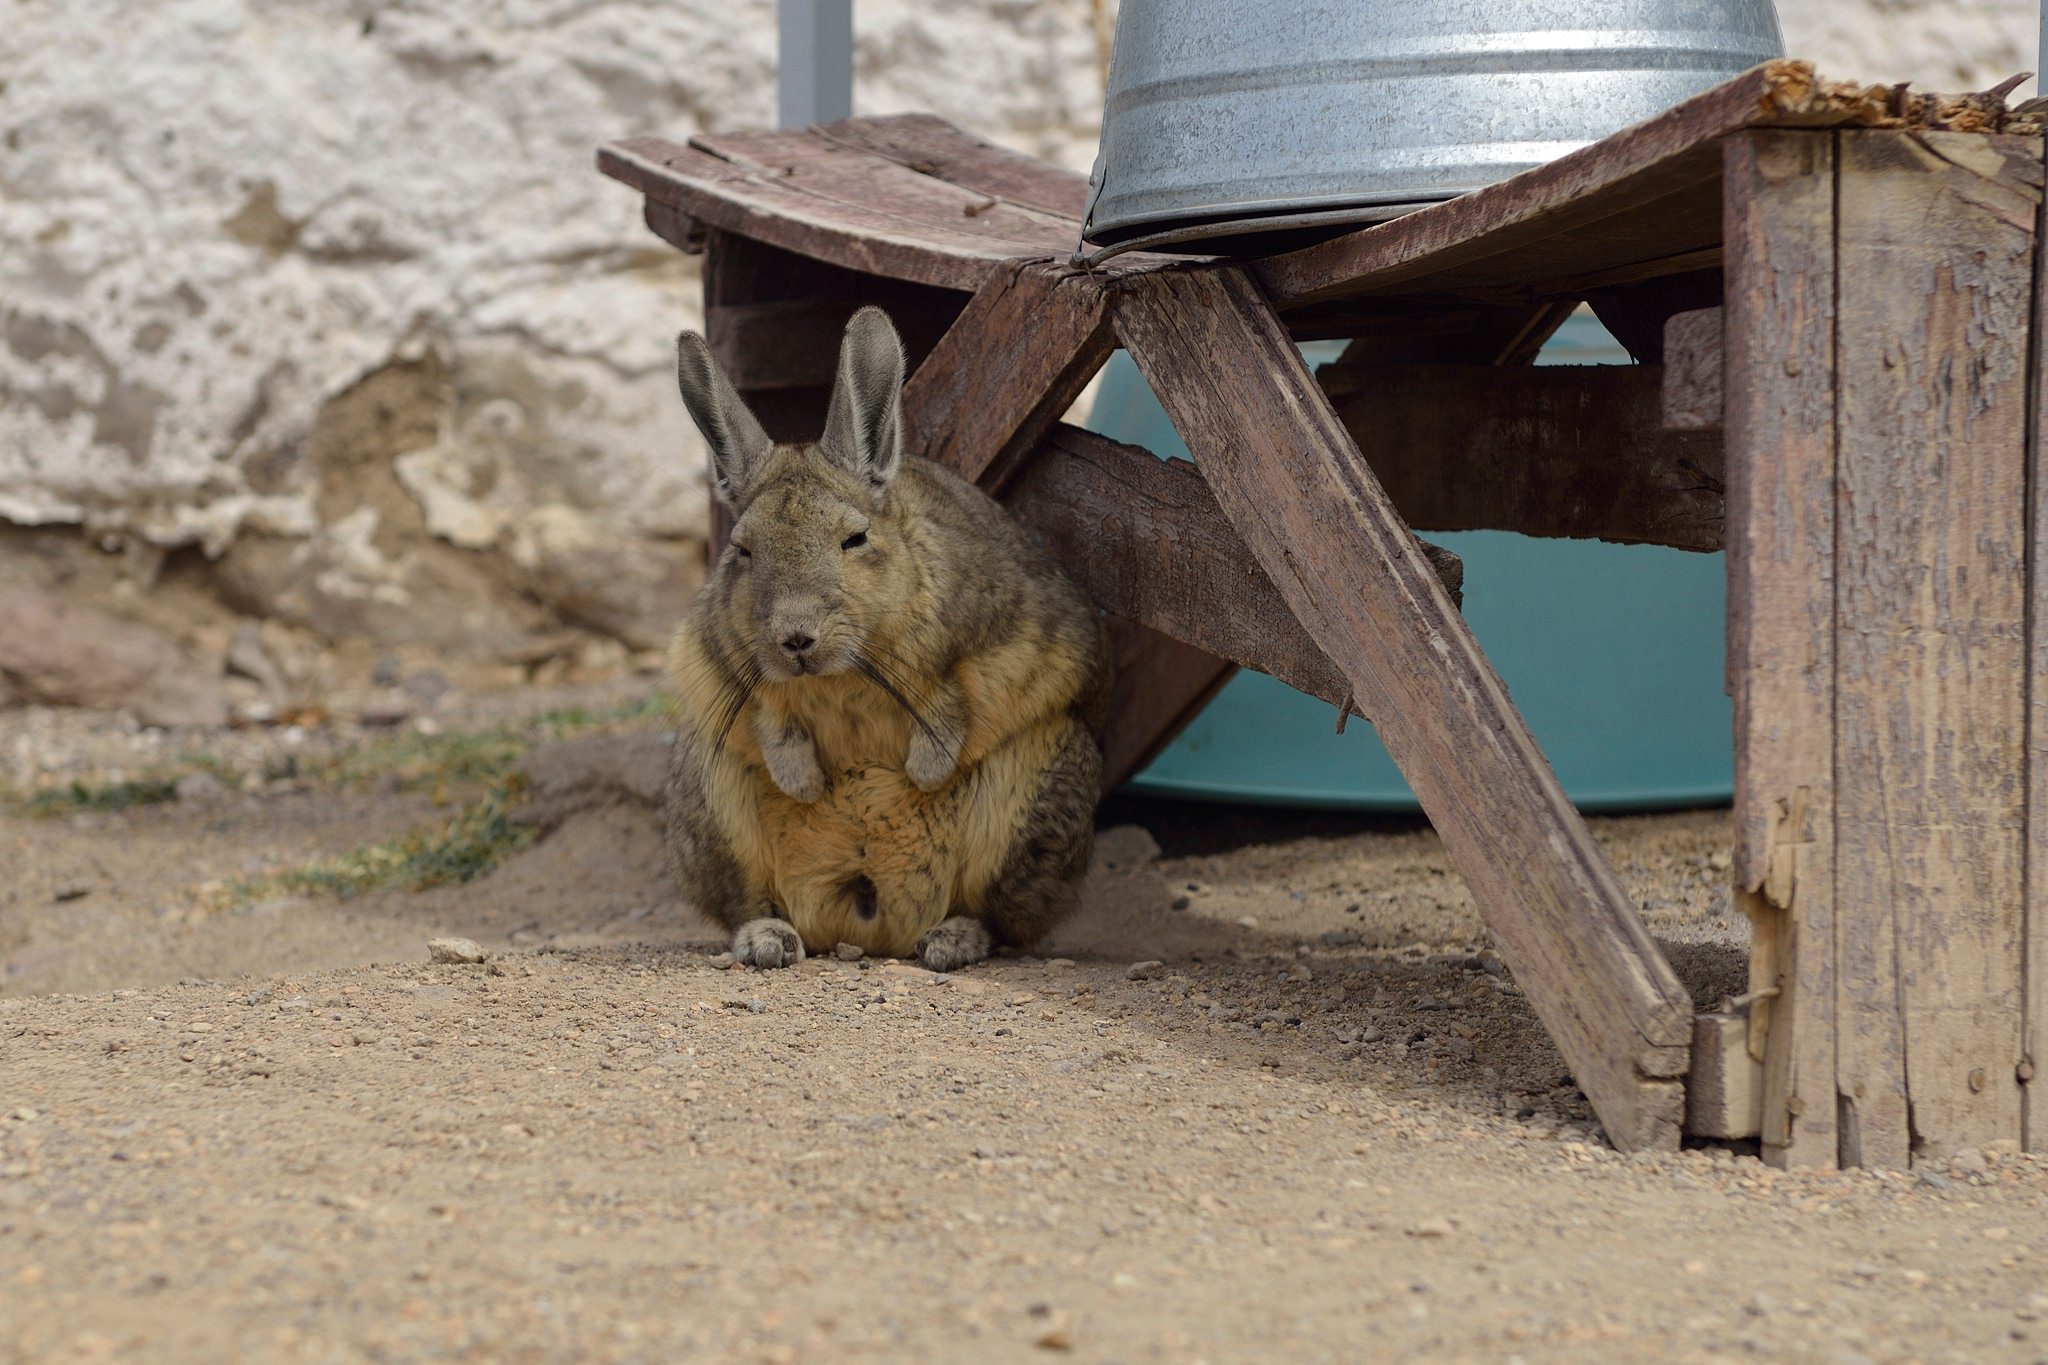
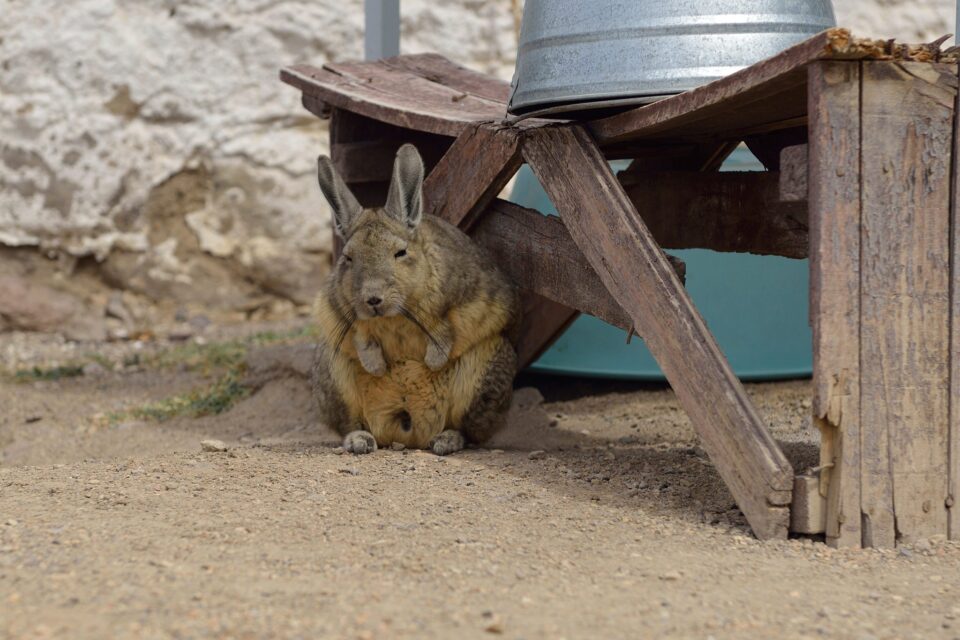
For the final chunk of holiday, we headed up to Arica, on the border with Peru. From there, our guides took us back up into the mountains for more volcanos, lakes and wildlife – and again, no other humans in sight…

Image 38 Vizcacha waiting for lunch

NIKON D800 @ 70mm, ISO 100, 1/500, f/4.5

Image 39 flamingos enjoying the view

NIKON D800 @ 70mm, ISO 100, 1/320, f/8.0

Image 42 colonial heritage, Chile-style

NIKON D800 @ 32mm, ISO 100, 1/400, f/7.1

So how did the gear perform? Well, the Nikon D800 and the Nikon 24-70mm f/2.8 were great and I love the results (though now I have the stunning Sigma 24-35mm Art, I can’t help wondering how much better they could have been). The Nikon 16-35mm f/4 was disappointing – not so much the quality, but more the range. Somehow 16mm was never quite wide enough, so as soon as we got home, it was traded in for the Nikon 14-24mm f/2.8 – an absolutely amazing lens, which always draws looks and comments from other photographers, especially with the huge Fotodiox 145mm filter out front!

The Sigma 120-400mm was a real let down. It used to produce acceptable results on my old D300S, but it’s nowhere near sharp enough for the merciless D800. Did I mention days doing “work” photography? – to my surprise, they were amazing too! But I think that must wait for the next post…


This guest post was submitted by Alan Mosley. To see more of his work, please check out his online gallery #1 and gallery #2.

The post The Atacama Desert: Perilous for Humans, Great for Cameras appeared first on Photography Life.

Photography Life

Posted in Photograpy How To | Tagged , , , , , | Leave a comment