How to Improve Your Photography

Among the many articles I have read here, at Photography Life, the most controversial are the ones that especially call my attention. Despite being against the polemics, I am in favor of sincere dialogue, because through dialogue we can grow internally too. In my opinion, there are several steps that one can take in order to make better pictures. Therefore, I invite you all to carry out a reflection on the subject.

Portrait-8

The Theme

The most important initial step is having some sort of a theme to your work (you might even call it a “project”). And the more specific, the better! For example, we can dedicate ourselves to take pictures of birds, but if we create a theme within the subject, our photos will be inherently better, as they will be related through something common. For example, one could study and photograph bird migration patterns, or perhaps photograph ecological problems that impact bird populations. With such themes, a variety of situations that normally would not come to mind when thinking about pictures of birds may emerge, making your work even more interesting.

Portrait-1

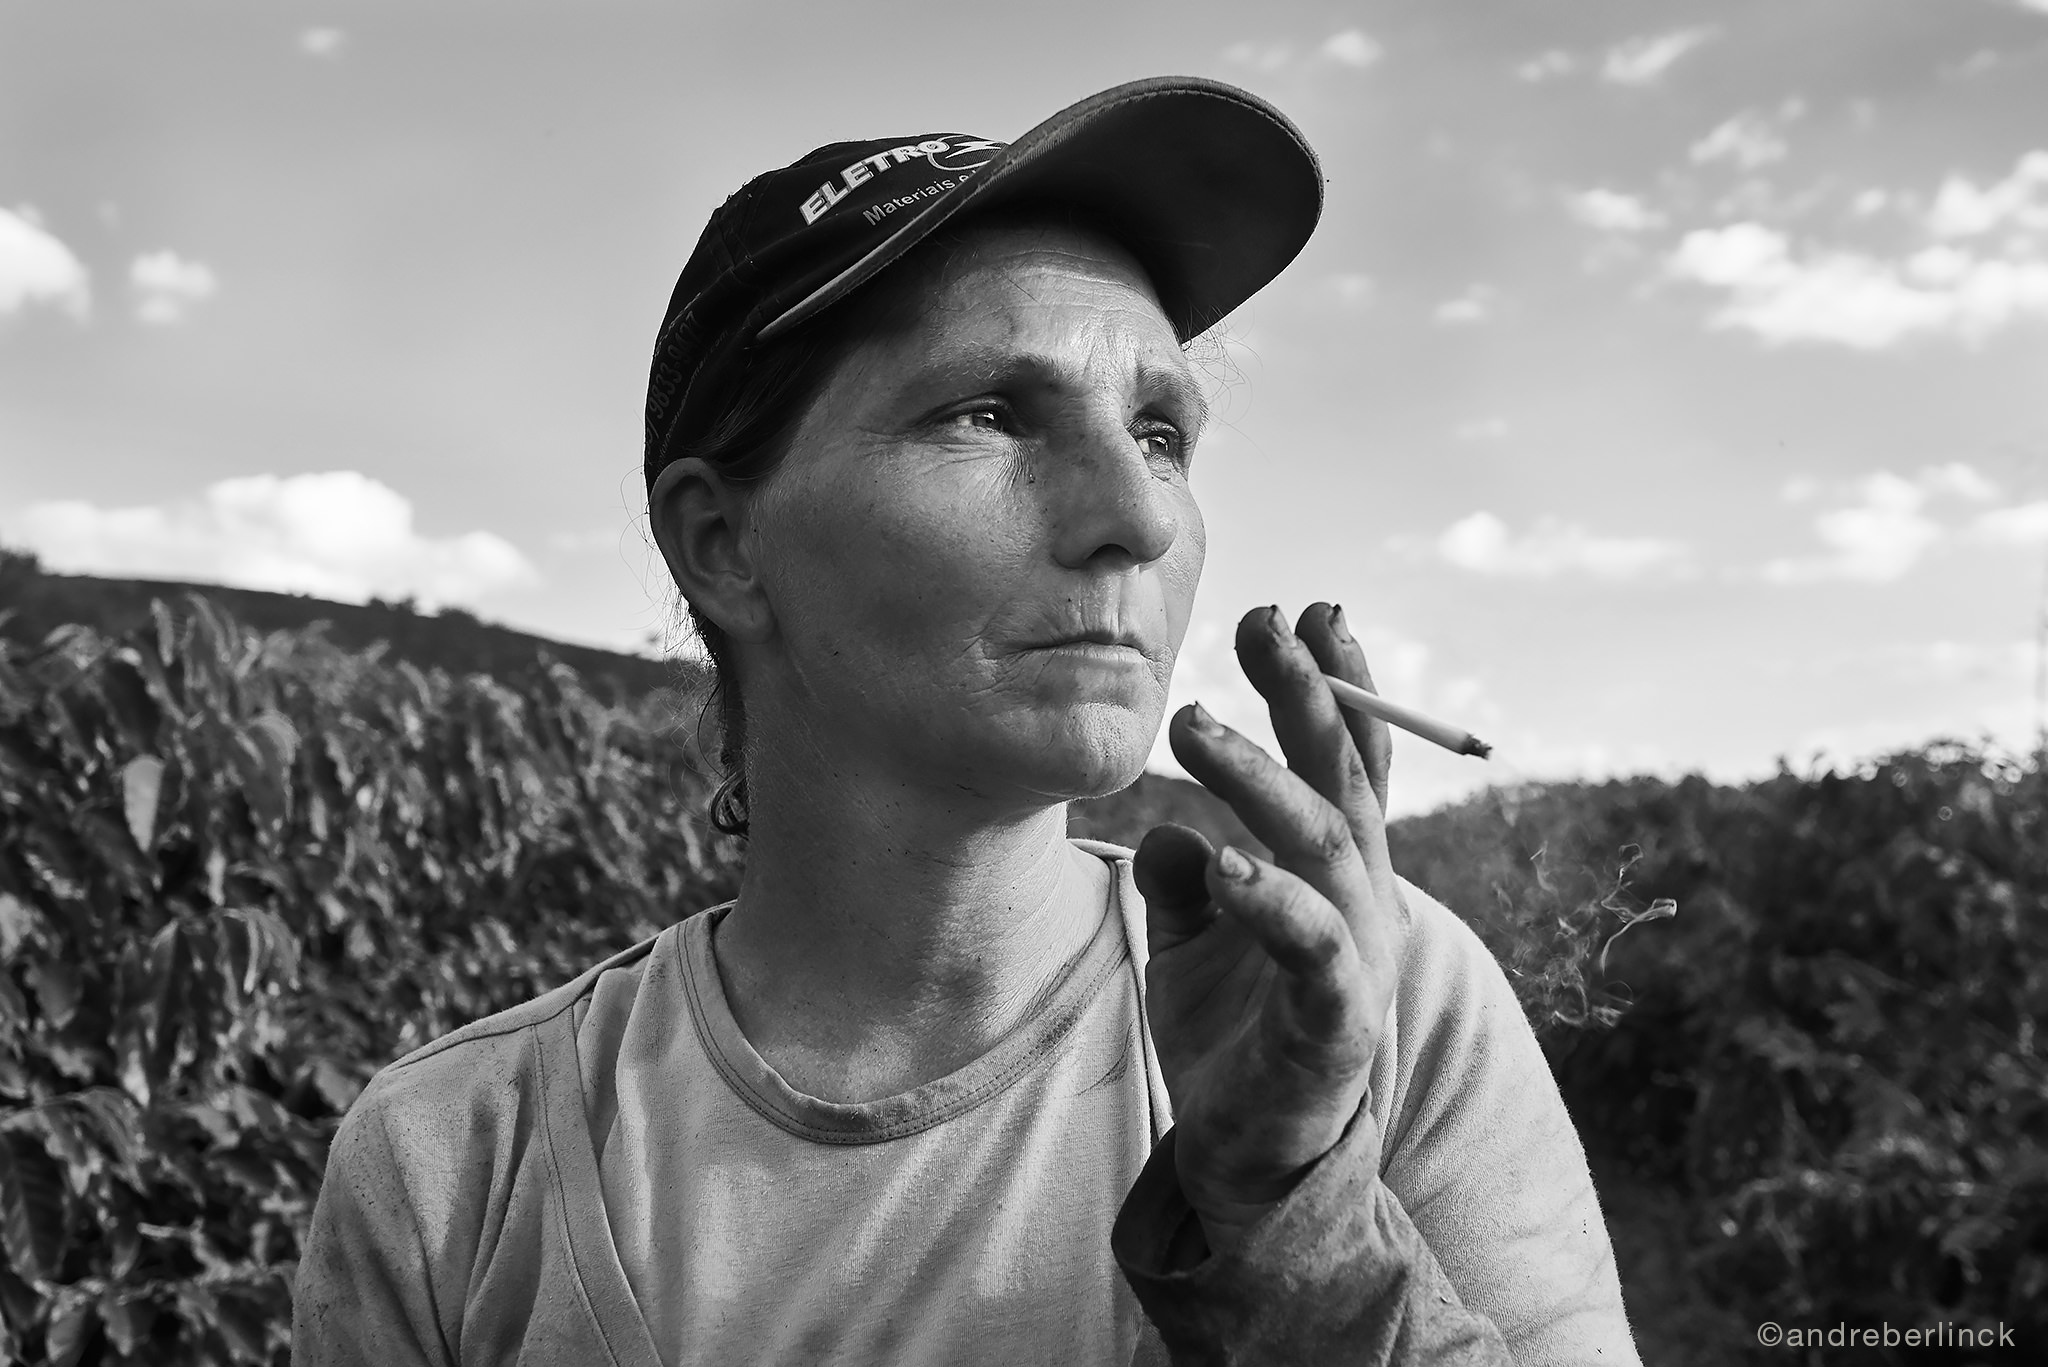
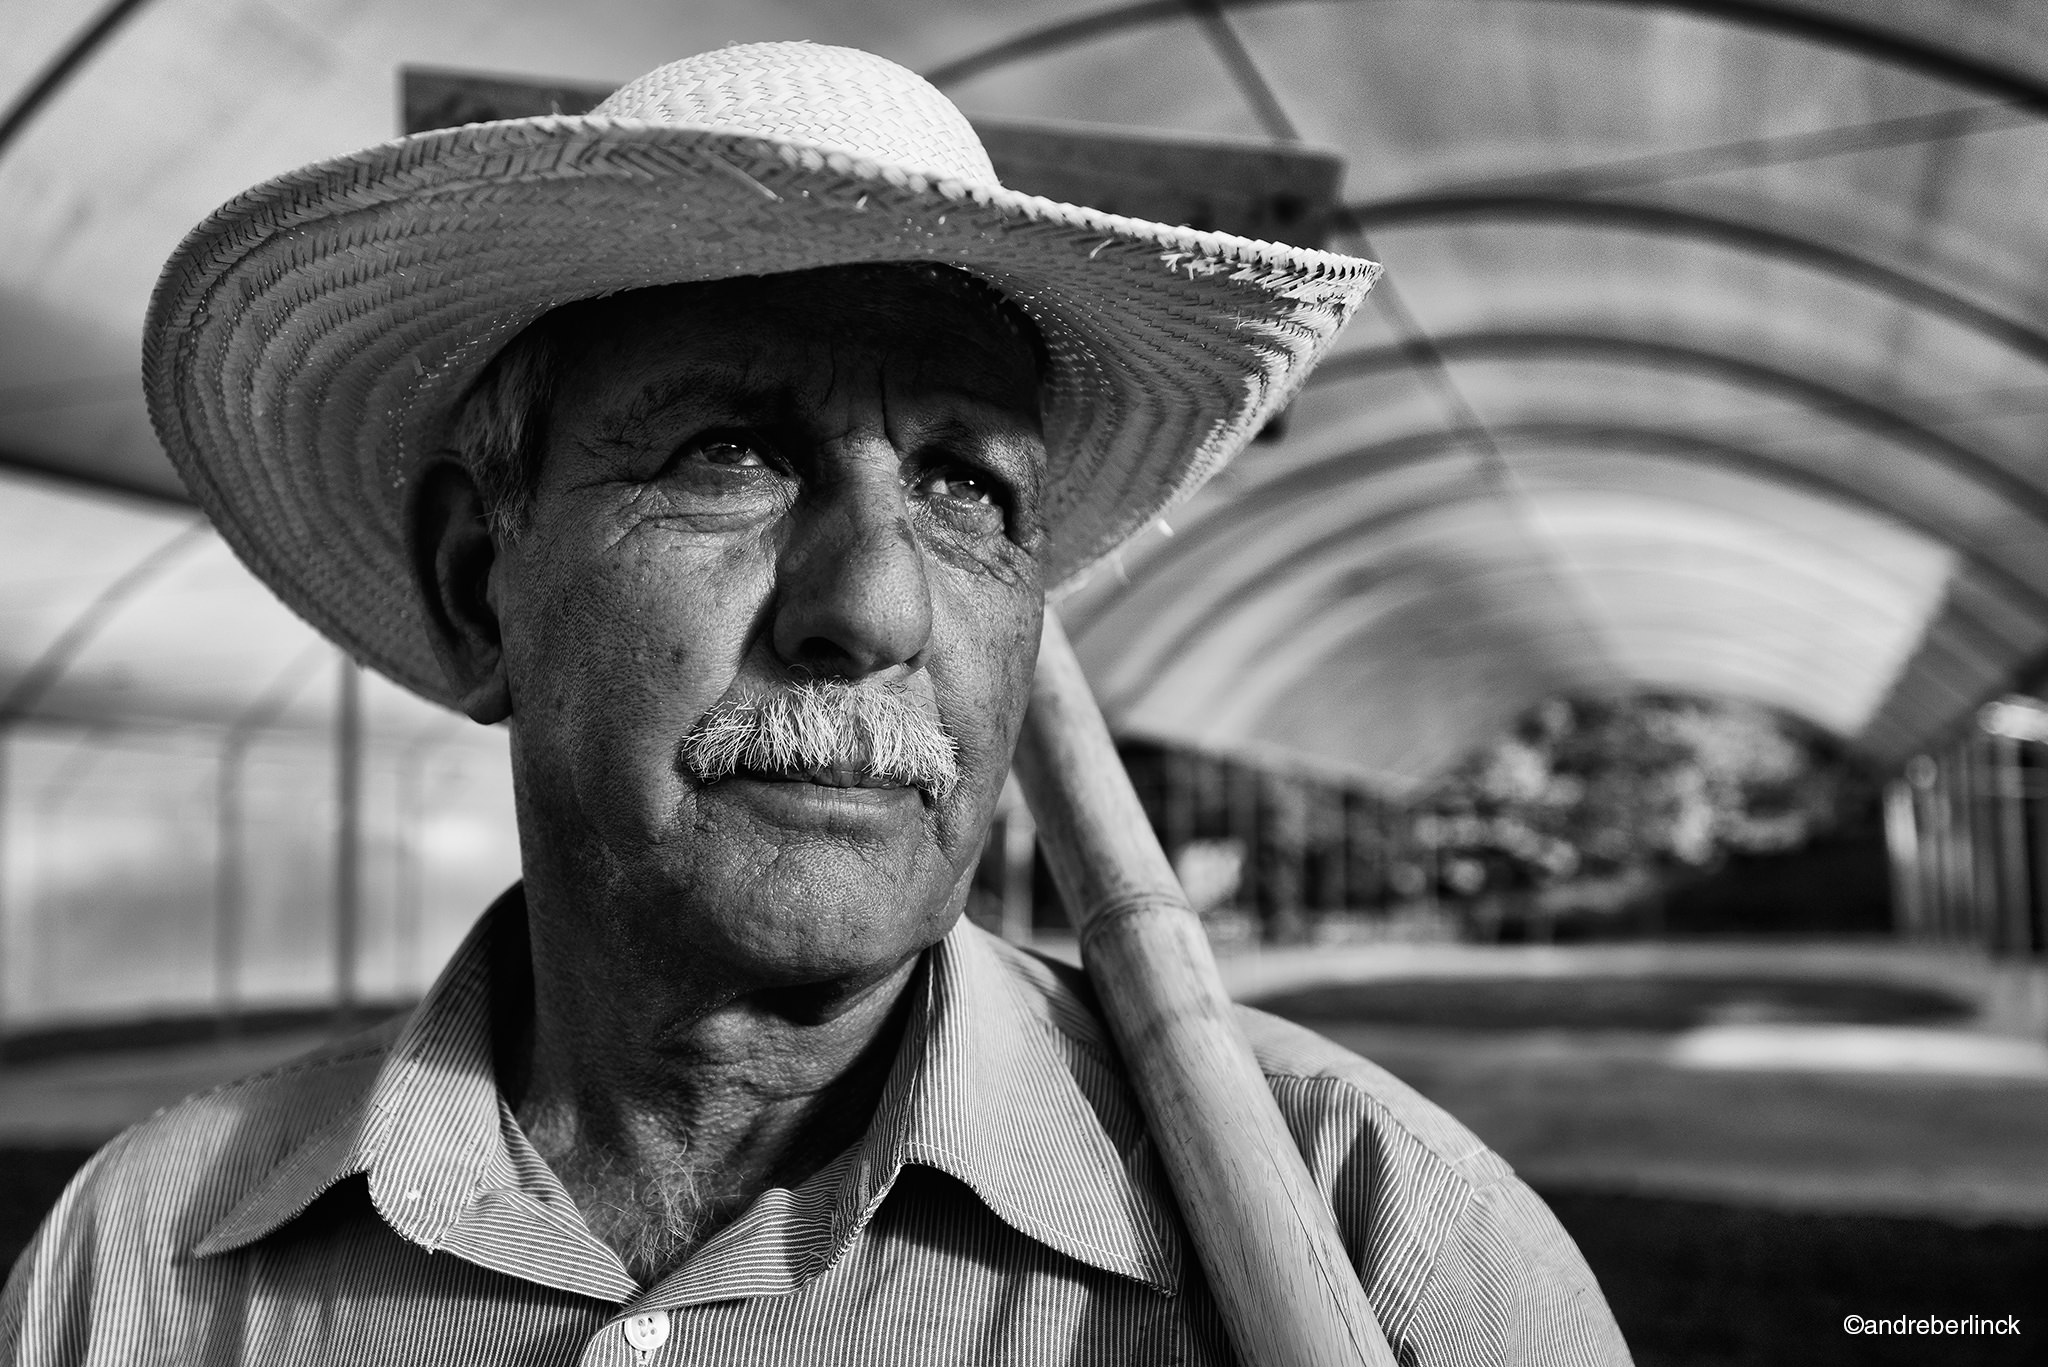
NIKON D750 @ 135mm, ISO 800, 1/250, f/4.0

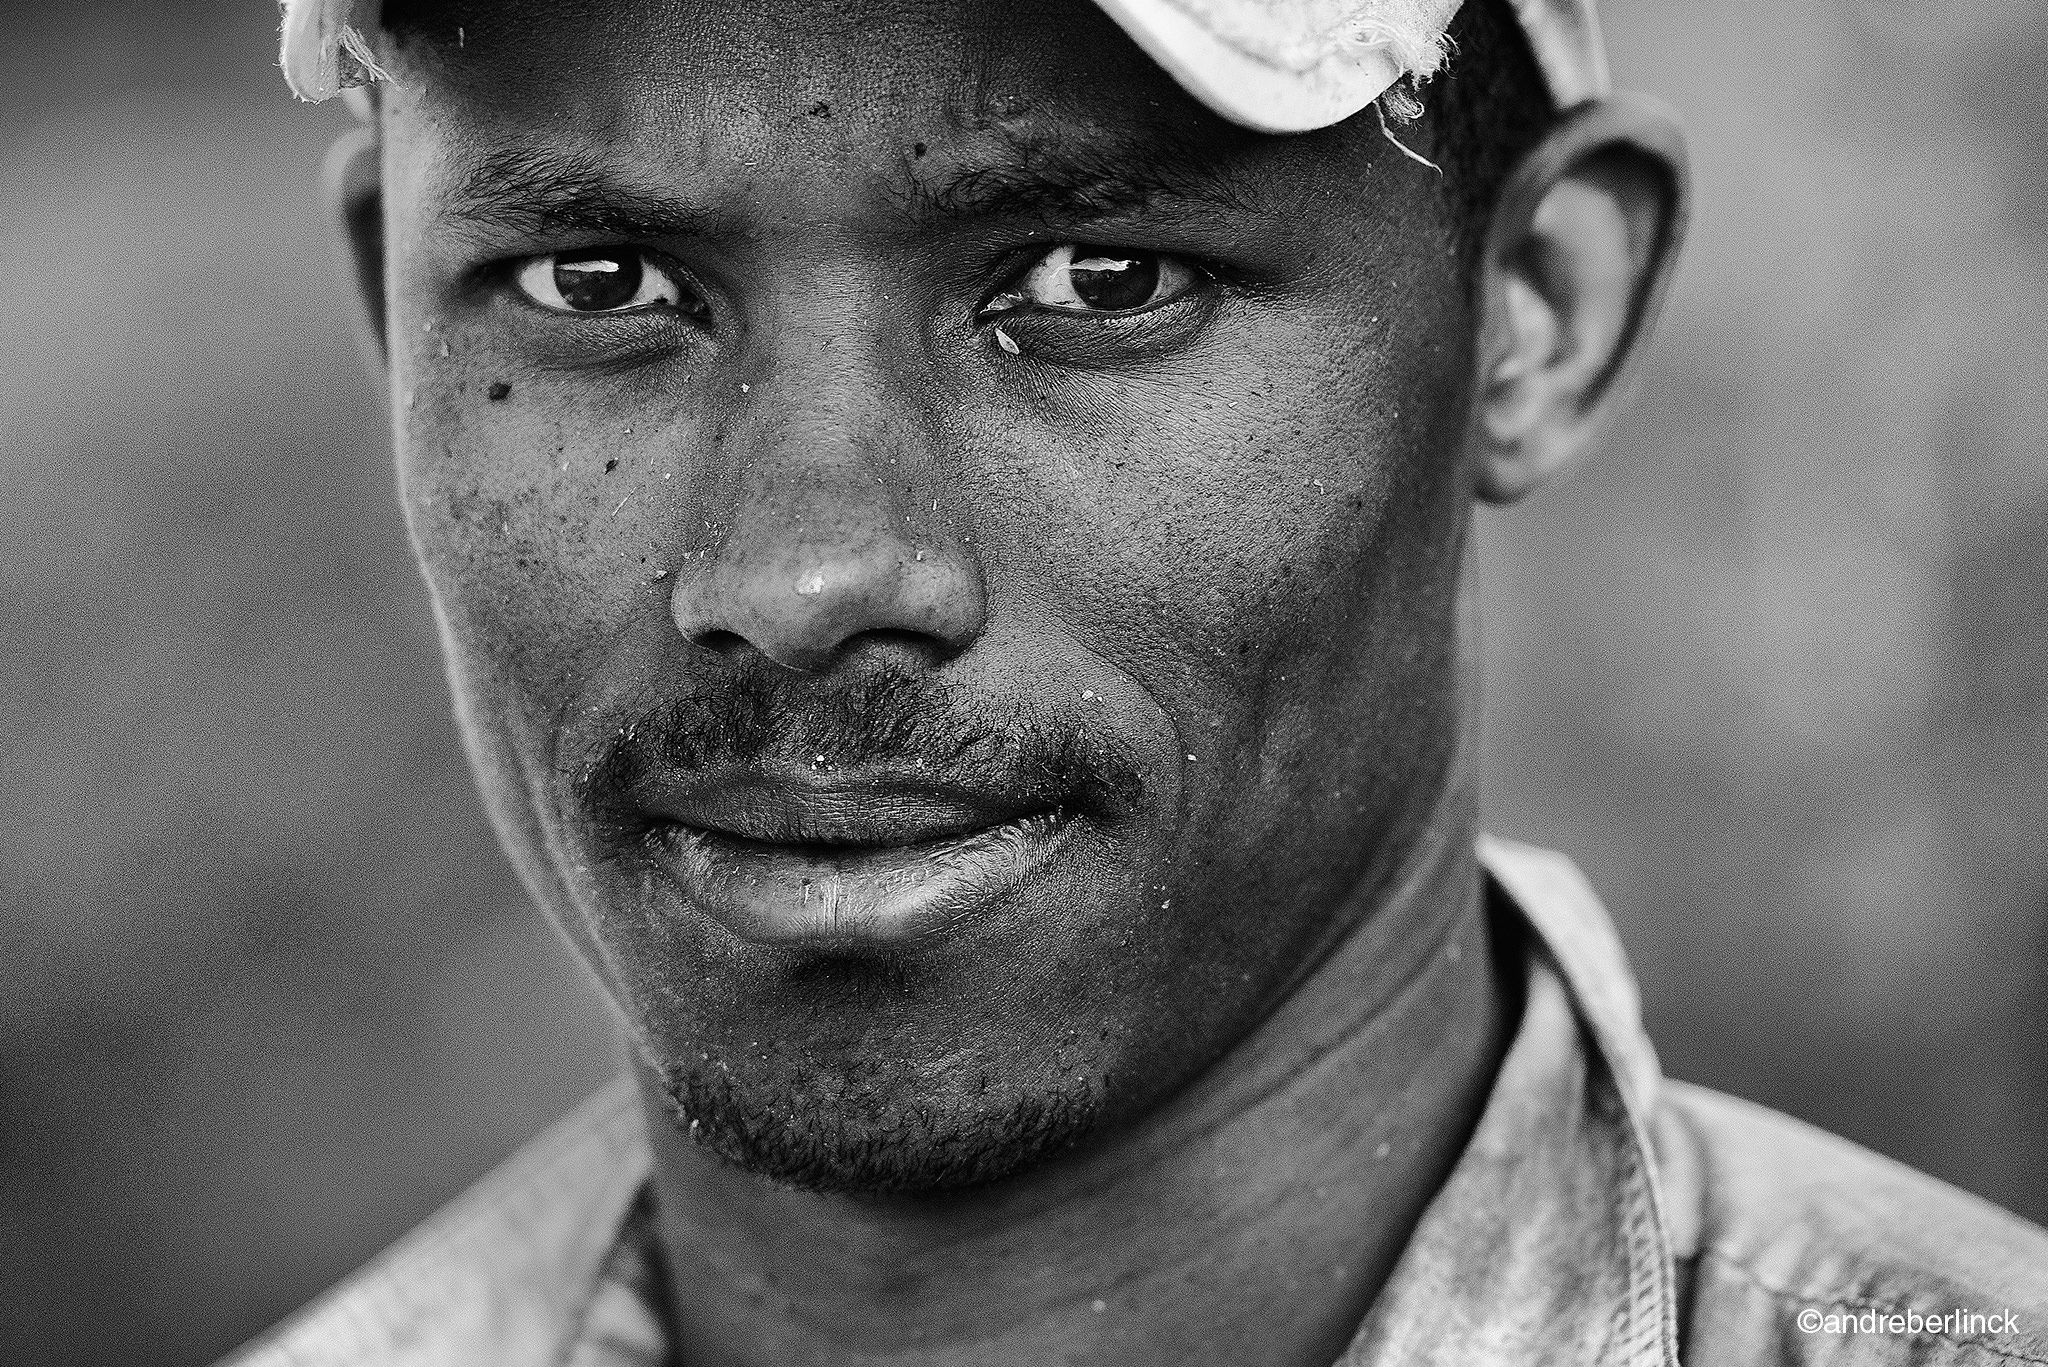
Themes and photography projects are endless. For example, for portraiture, we can use a theme related to coffee workers and that’s exactly what I have done in this article. It is interesting how the more specific the subject becomes, the more captivating photography can get.

Portrait-4

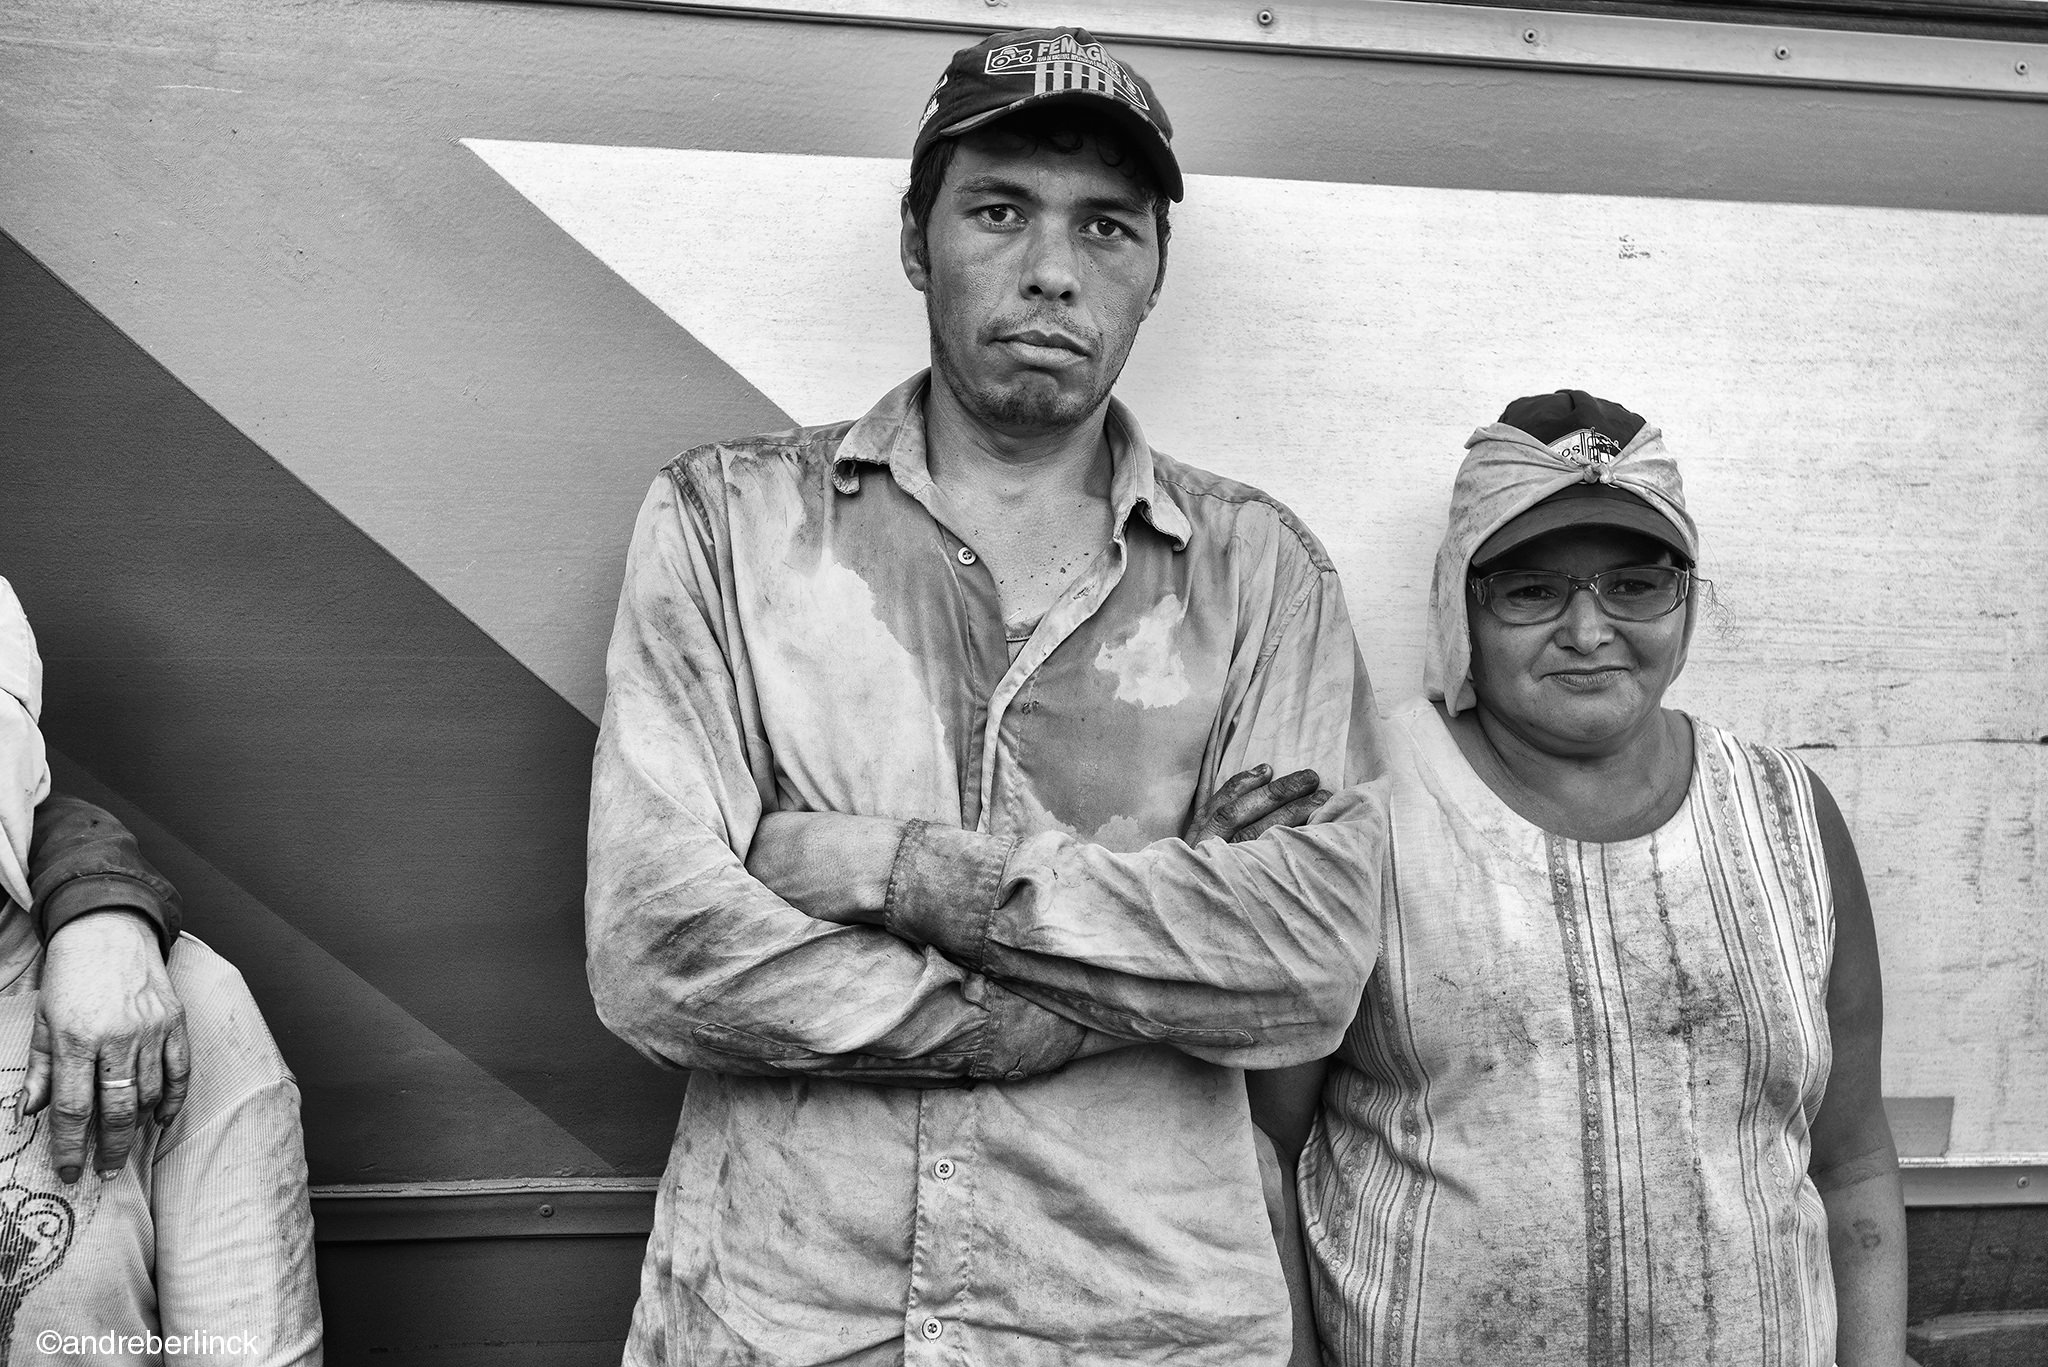
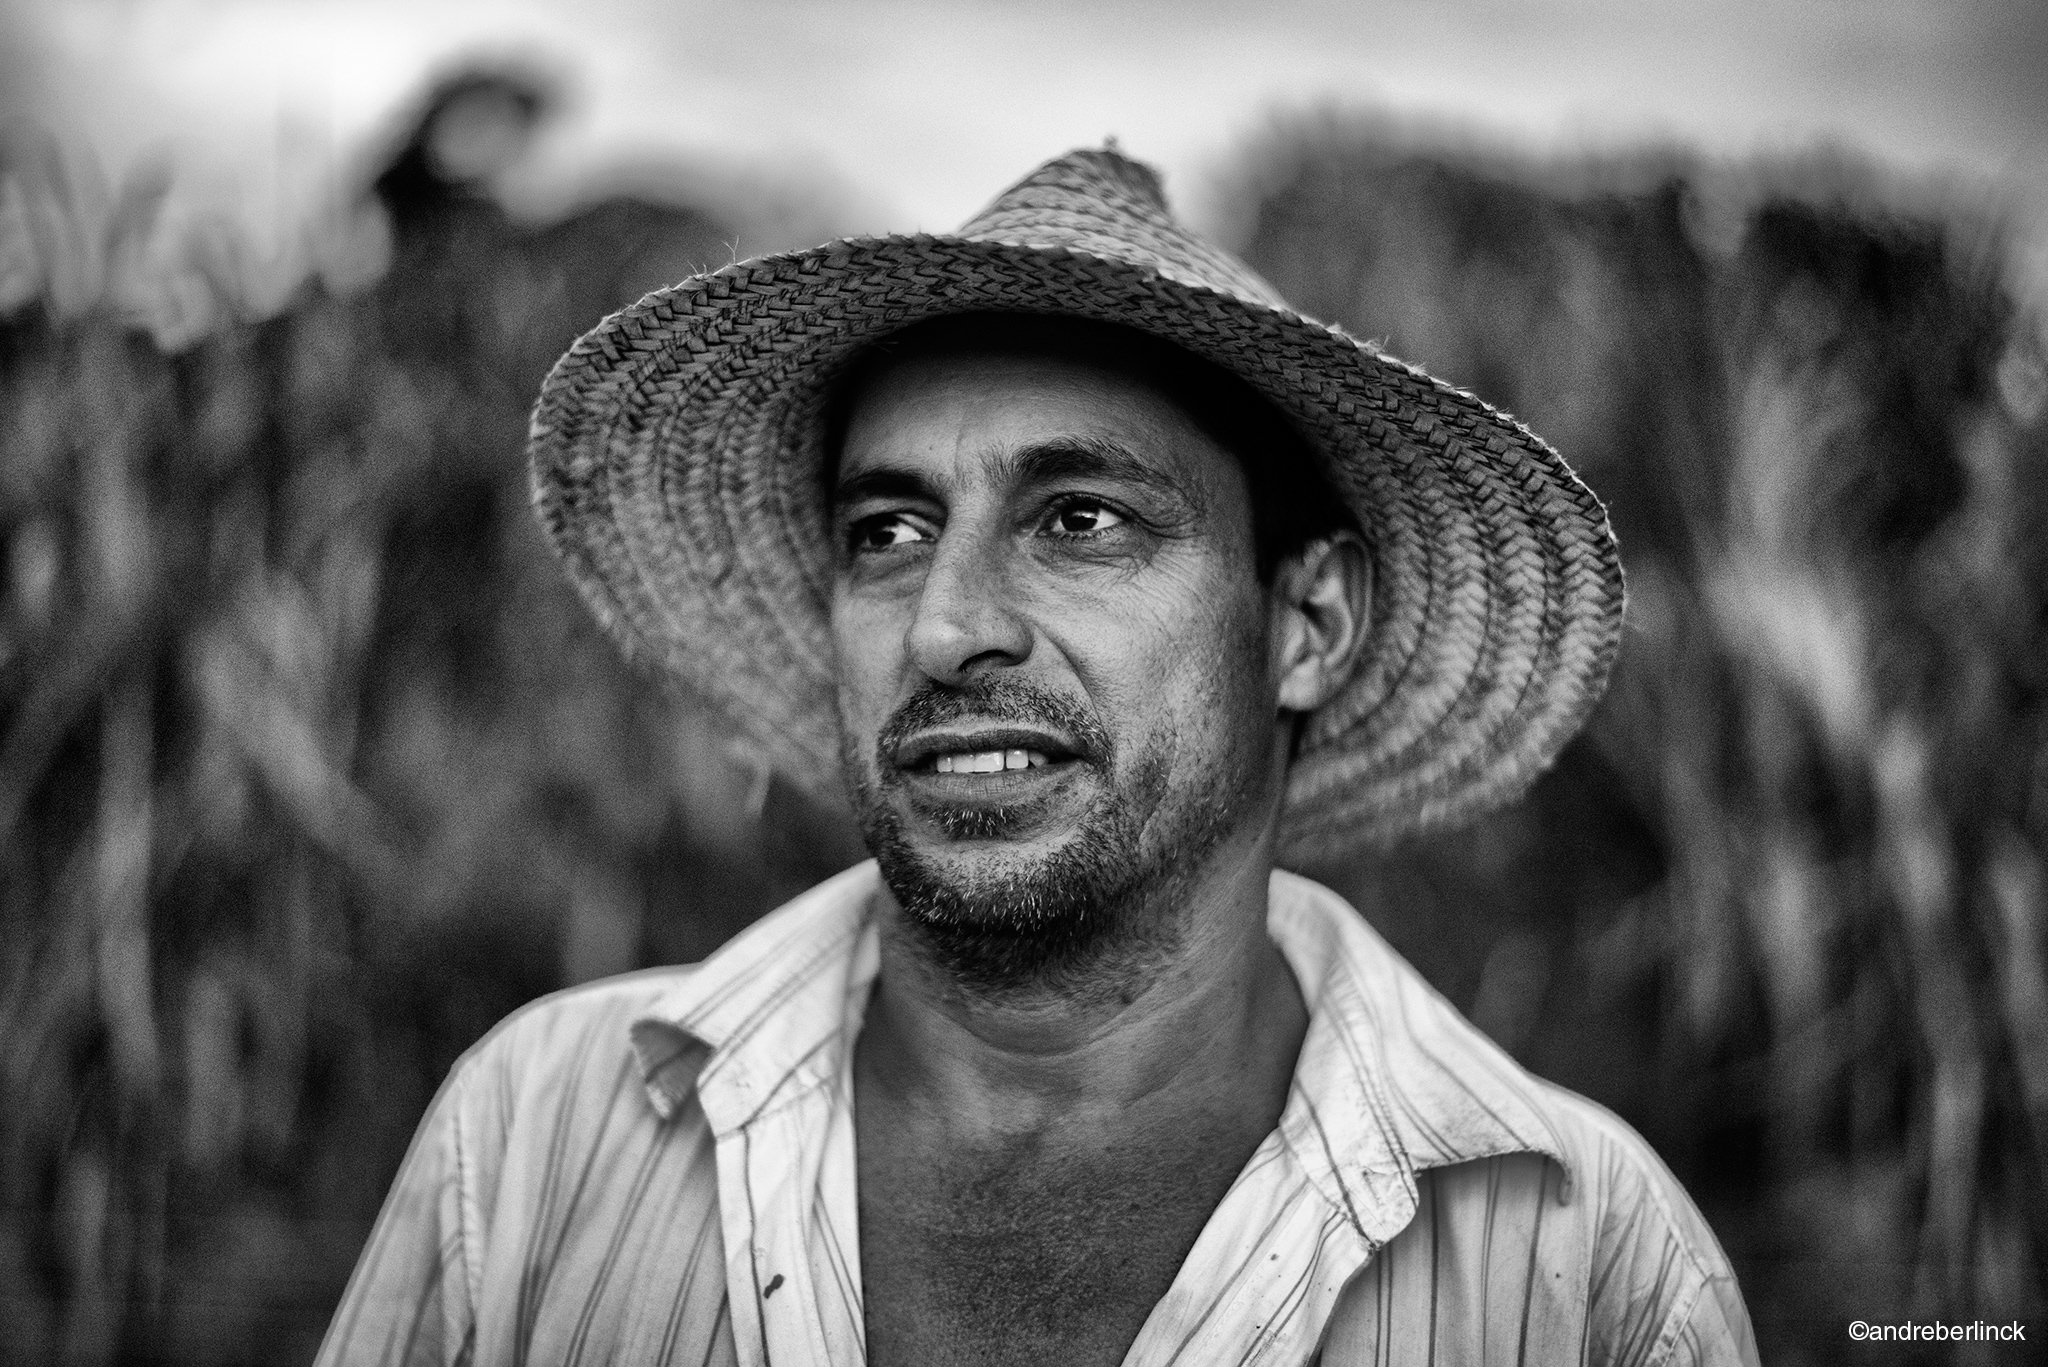
NIKON D750 @ 31mm, ISO 1600, 1/160, f/9.0

Location

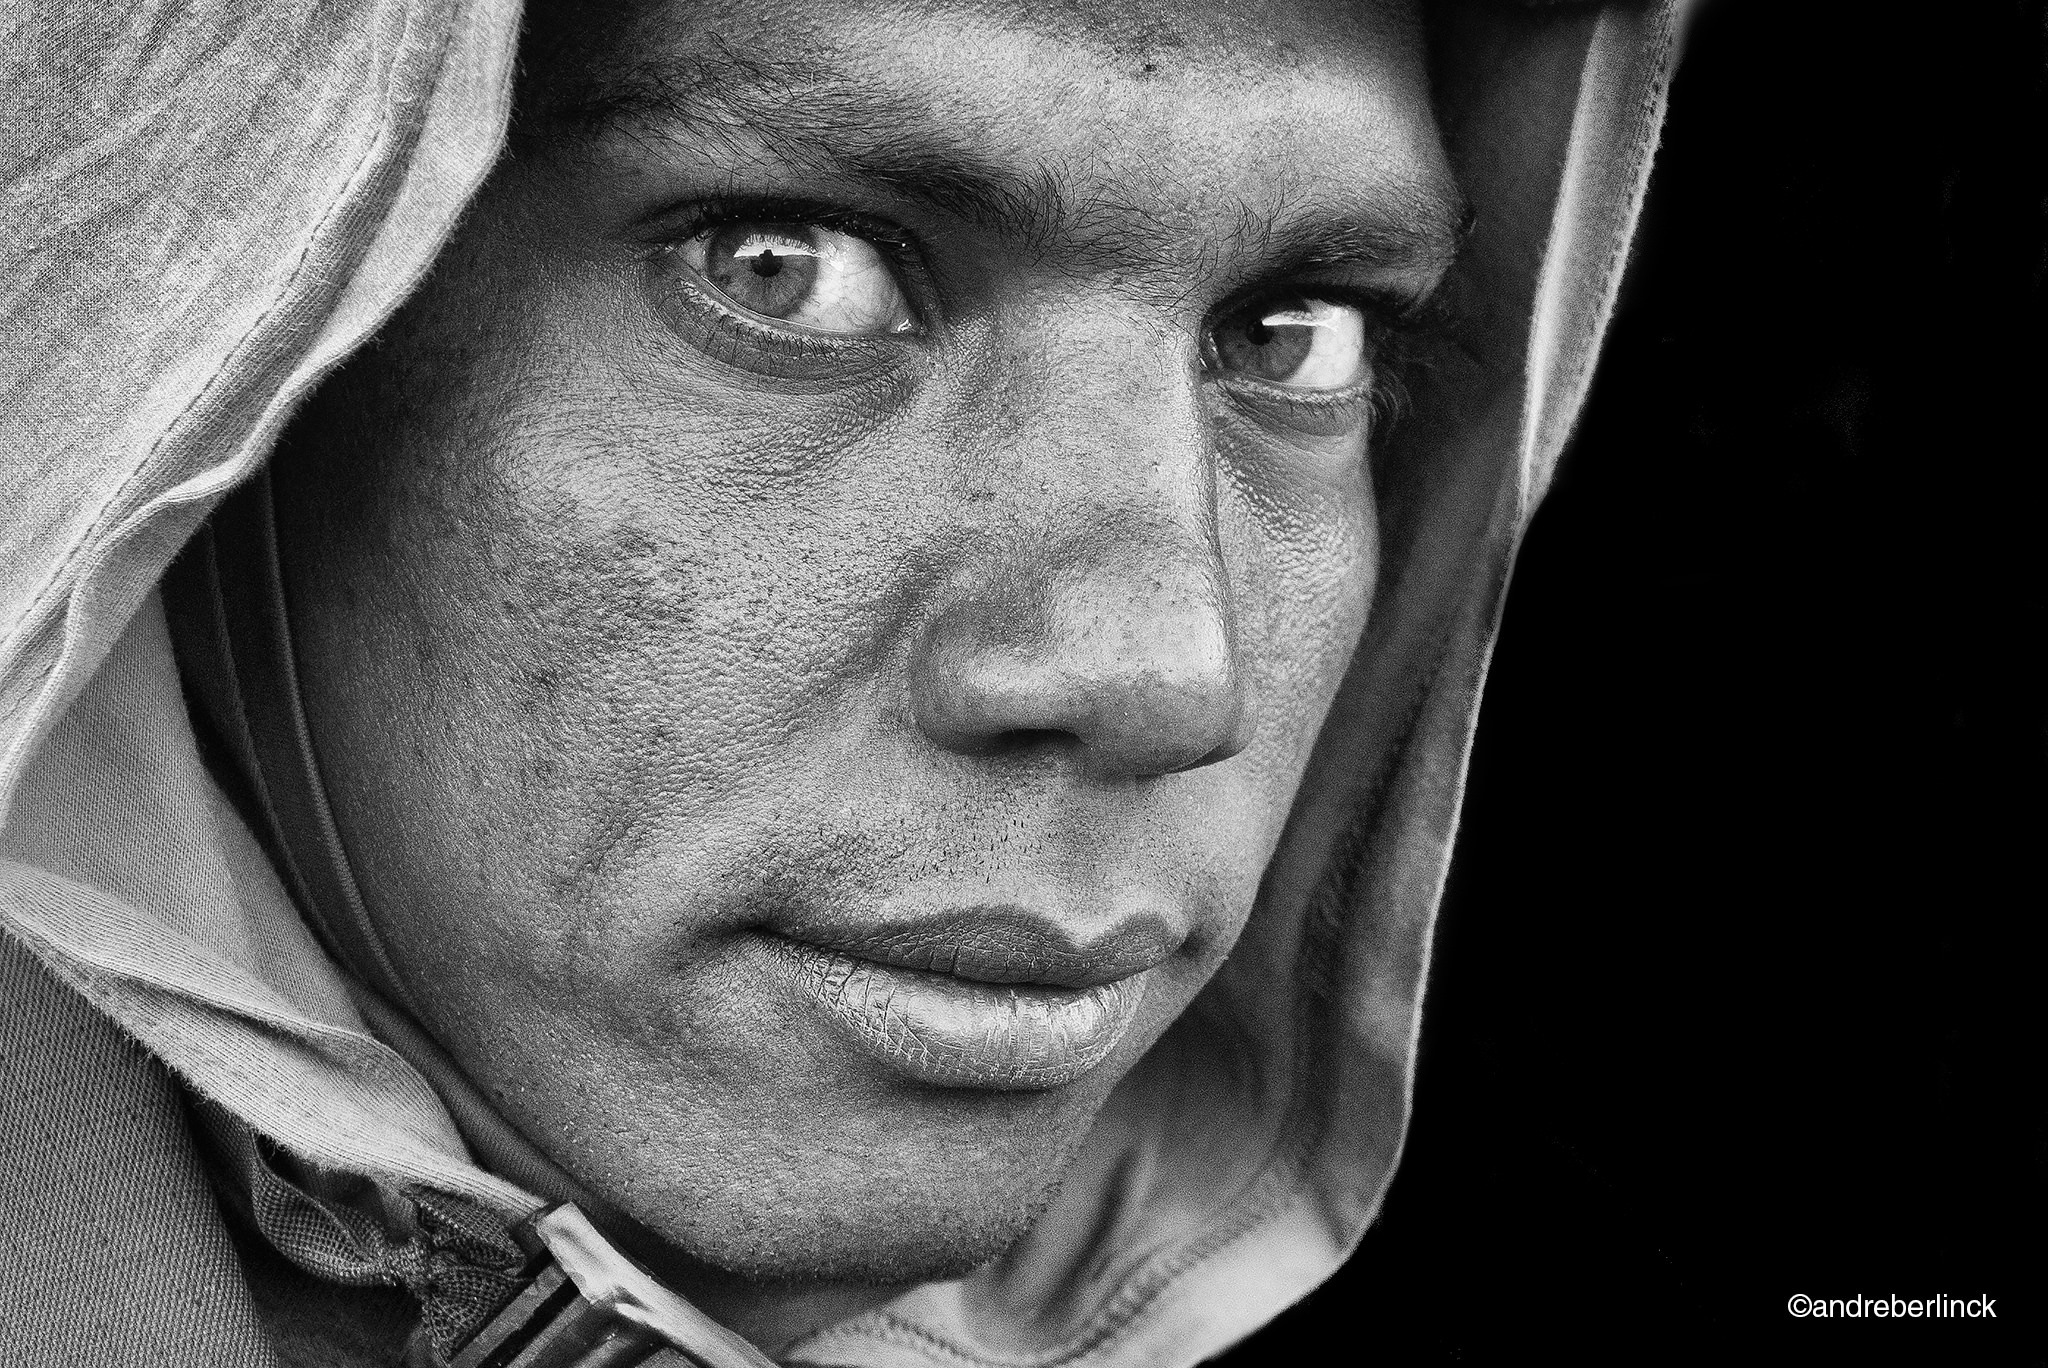
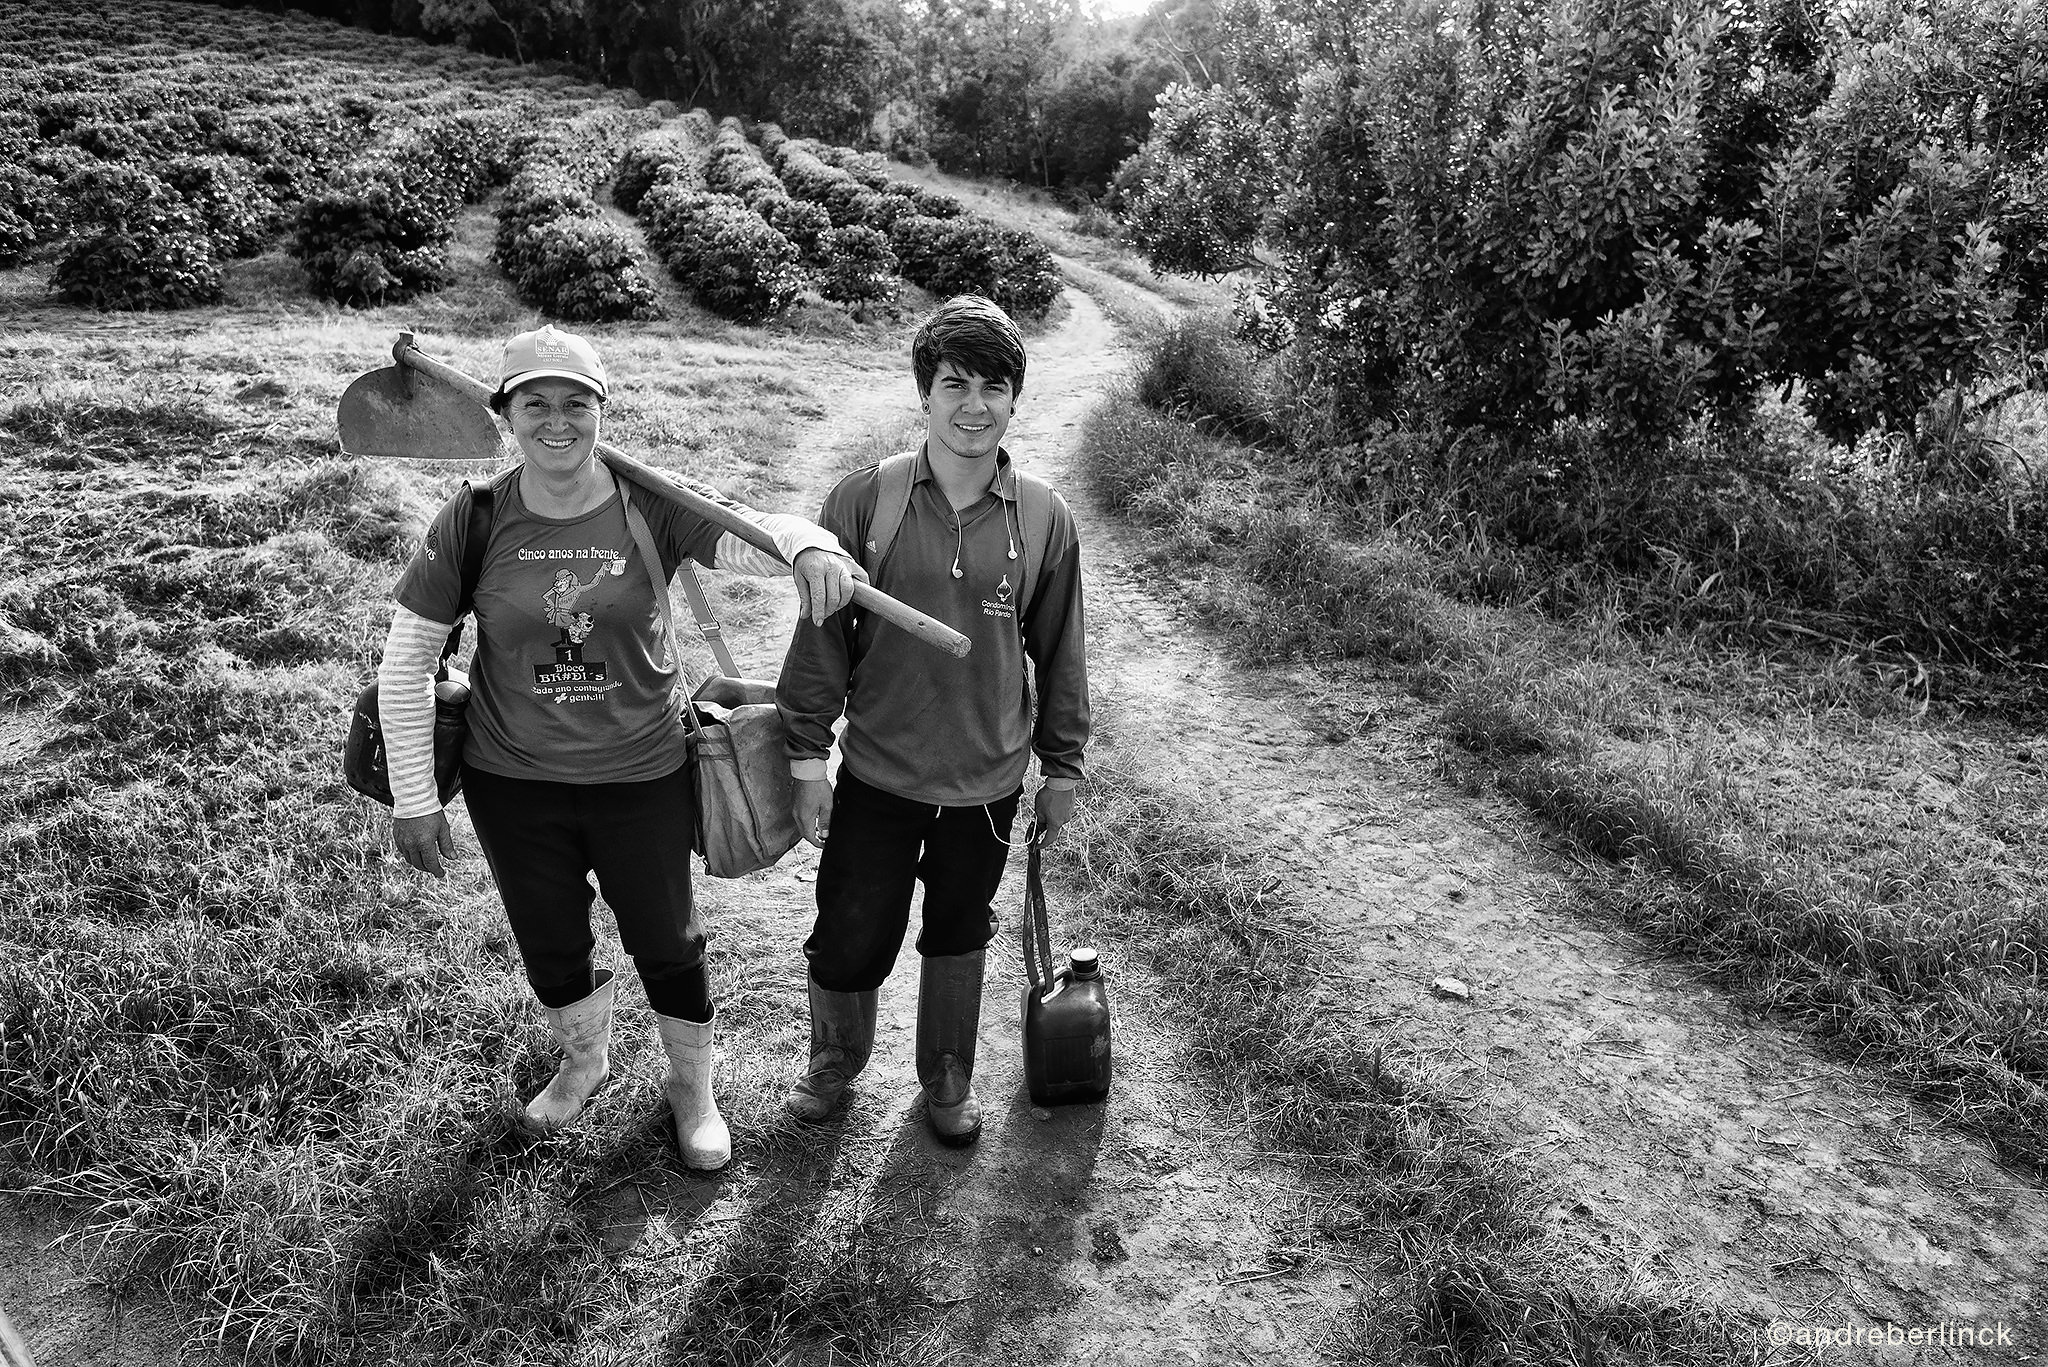
The location is obviously very important – that’s where you shoot. Studying it, learning the best moments and times of light, the great possibilities of varying the angles and the best lenses to use for the particular location will be very important in yielding potentially stunning images. You must also know the location in order to be efficient with your time – the more you know, the faster and easier you will be able to execute a project. In the choice of lenses, you must take into account your theme / project, because depending on your approach, things like angle of view, focal length and maximum aperture might vary and change. In the case of coffee workers, for example, I used portrait lenses suitable to my style and I did not just concentrate on the portraits themselves – in many cases, I wanted to highlight the surrounding environment and the working conditions of the workers, which is very important.

Portrait-3

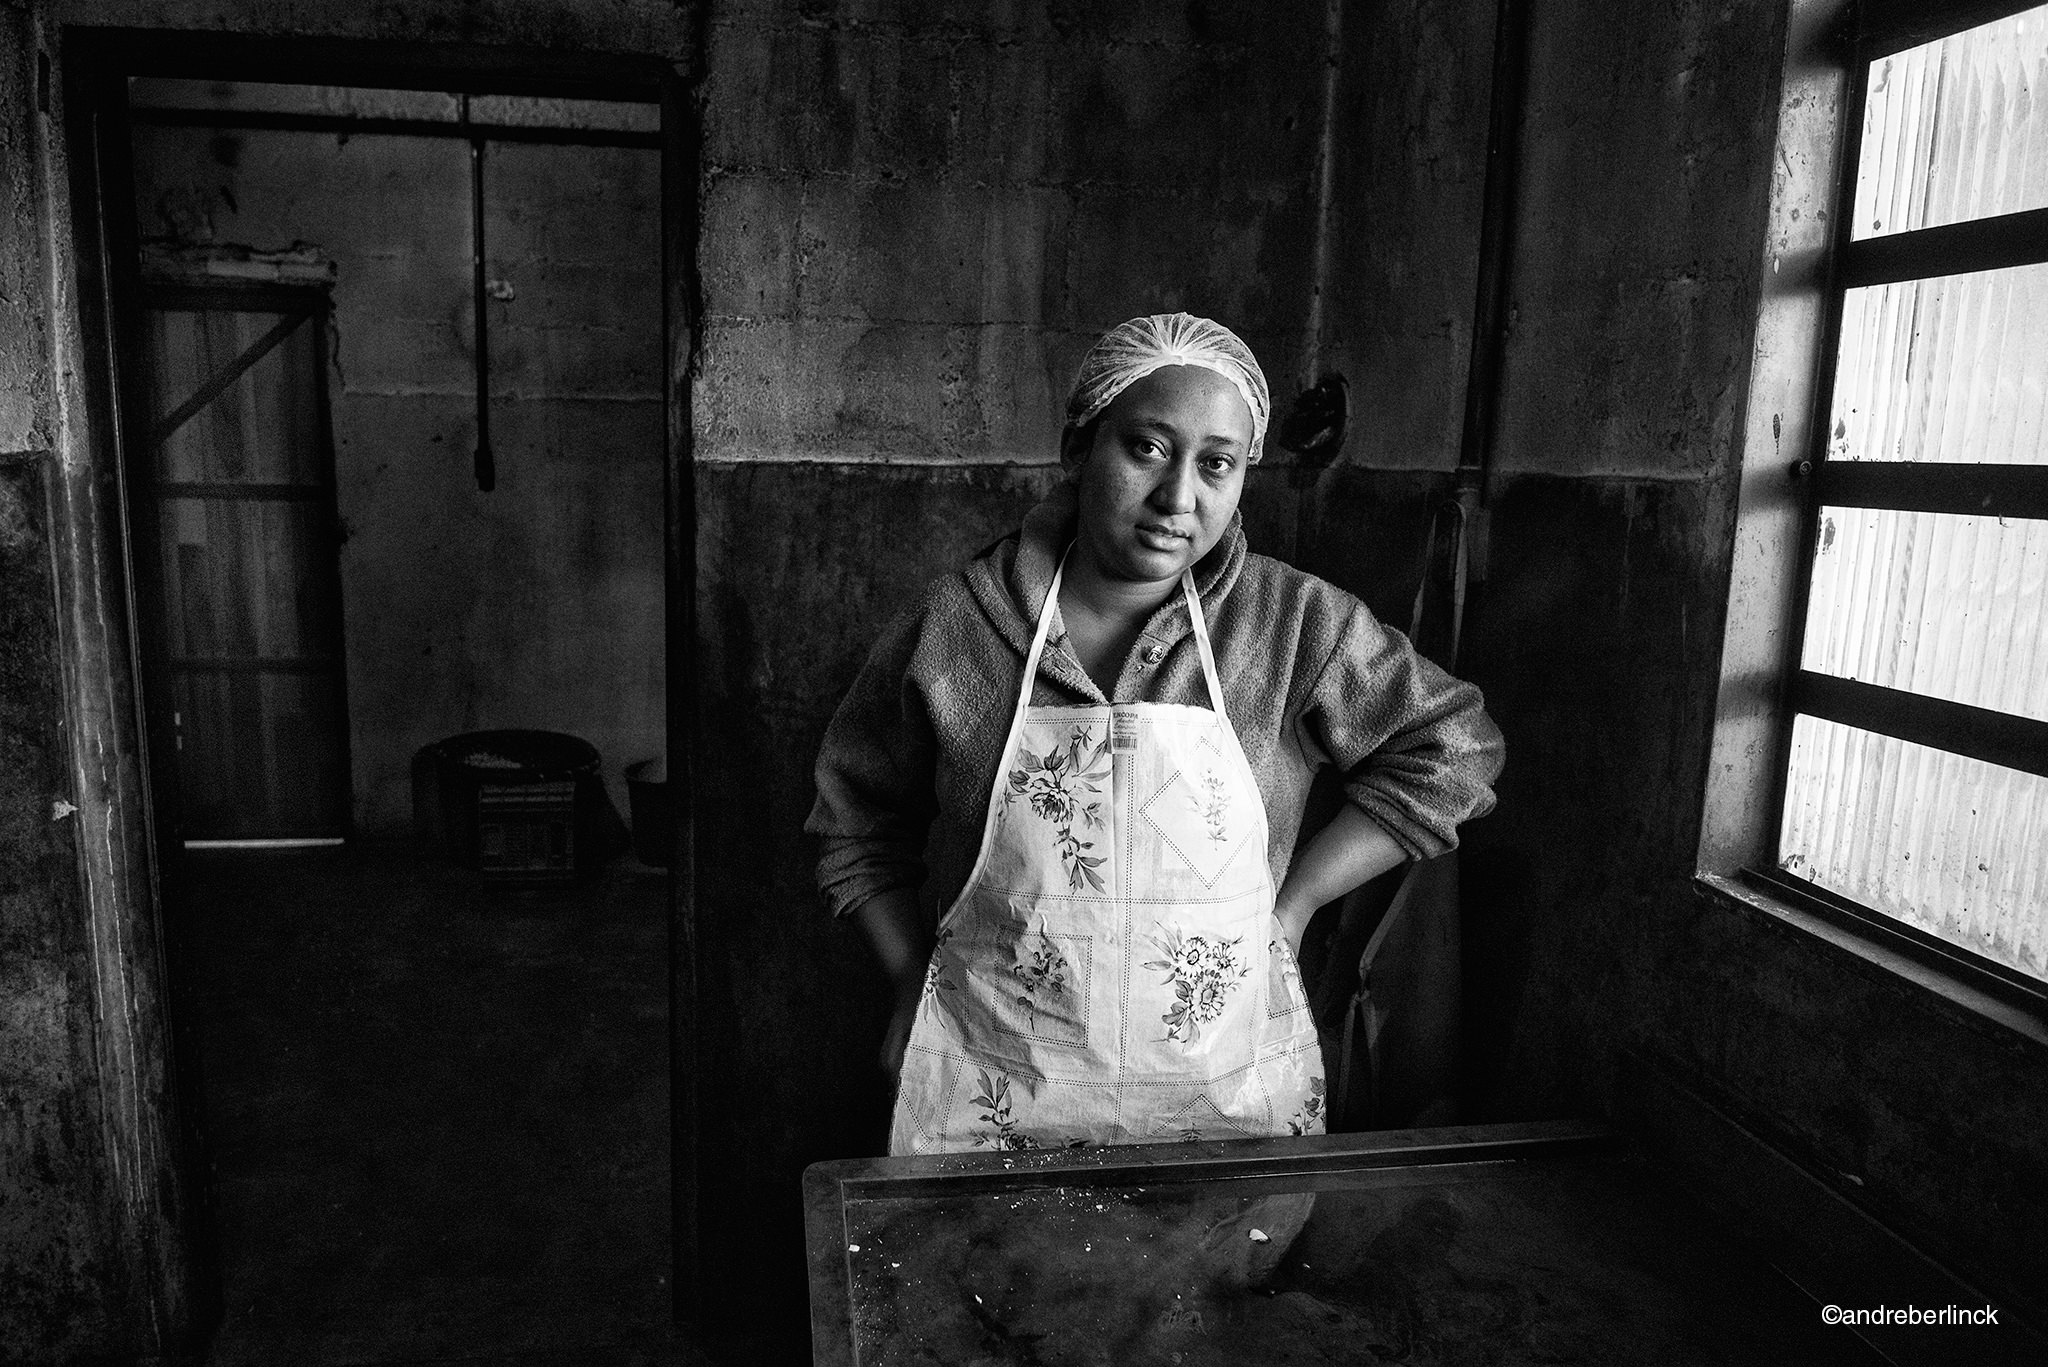
NIKON D750 @ 35mm, ISO 1250, 1/320, f/9.0

The second plan is where we place the subject in the environment and, in this case, a wide-angle might be preferable in order to show what’s going on around the subject. This also does not mean that you cannot use telephoto lenses – sometimes telephoto lenses are even more preferable, as they allow focusing in one particular area of the scene, rather than introduce all the potentially undesirable clutter.

Portrait-2

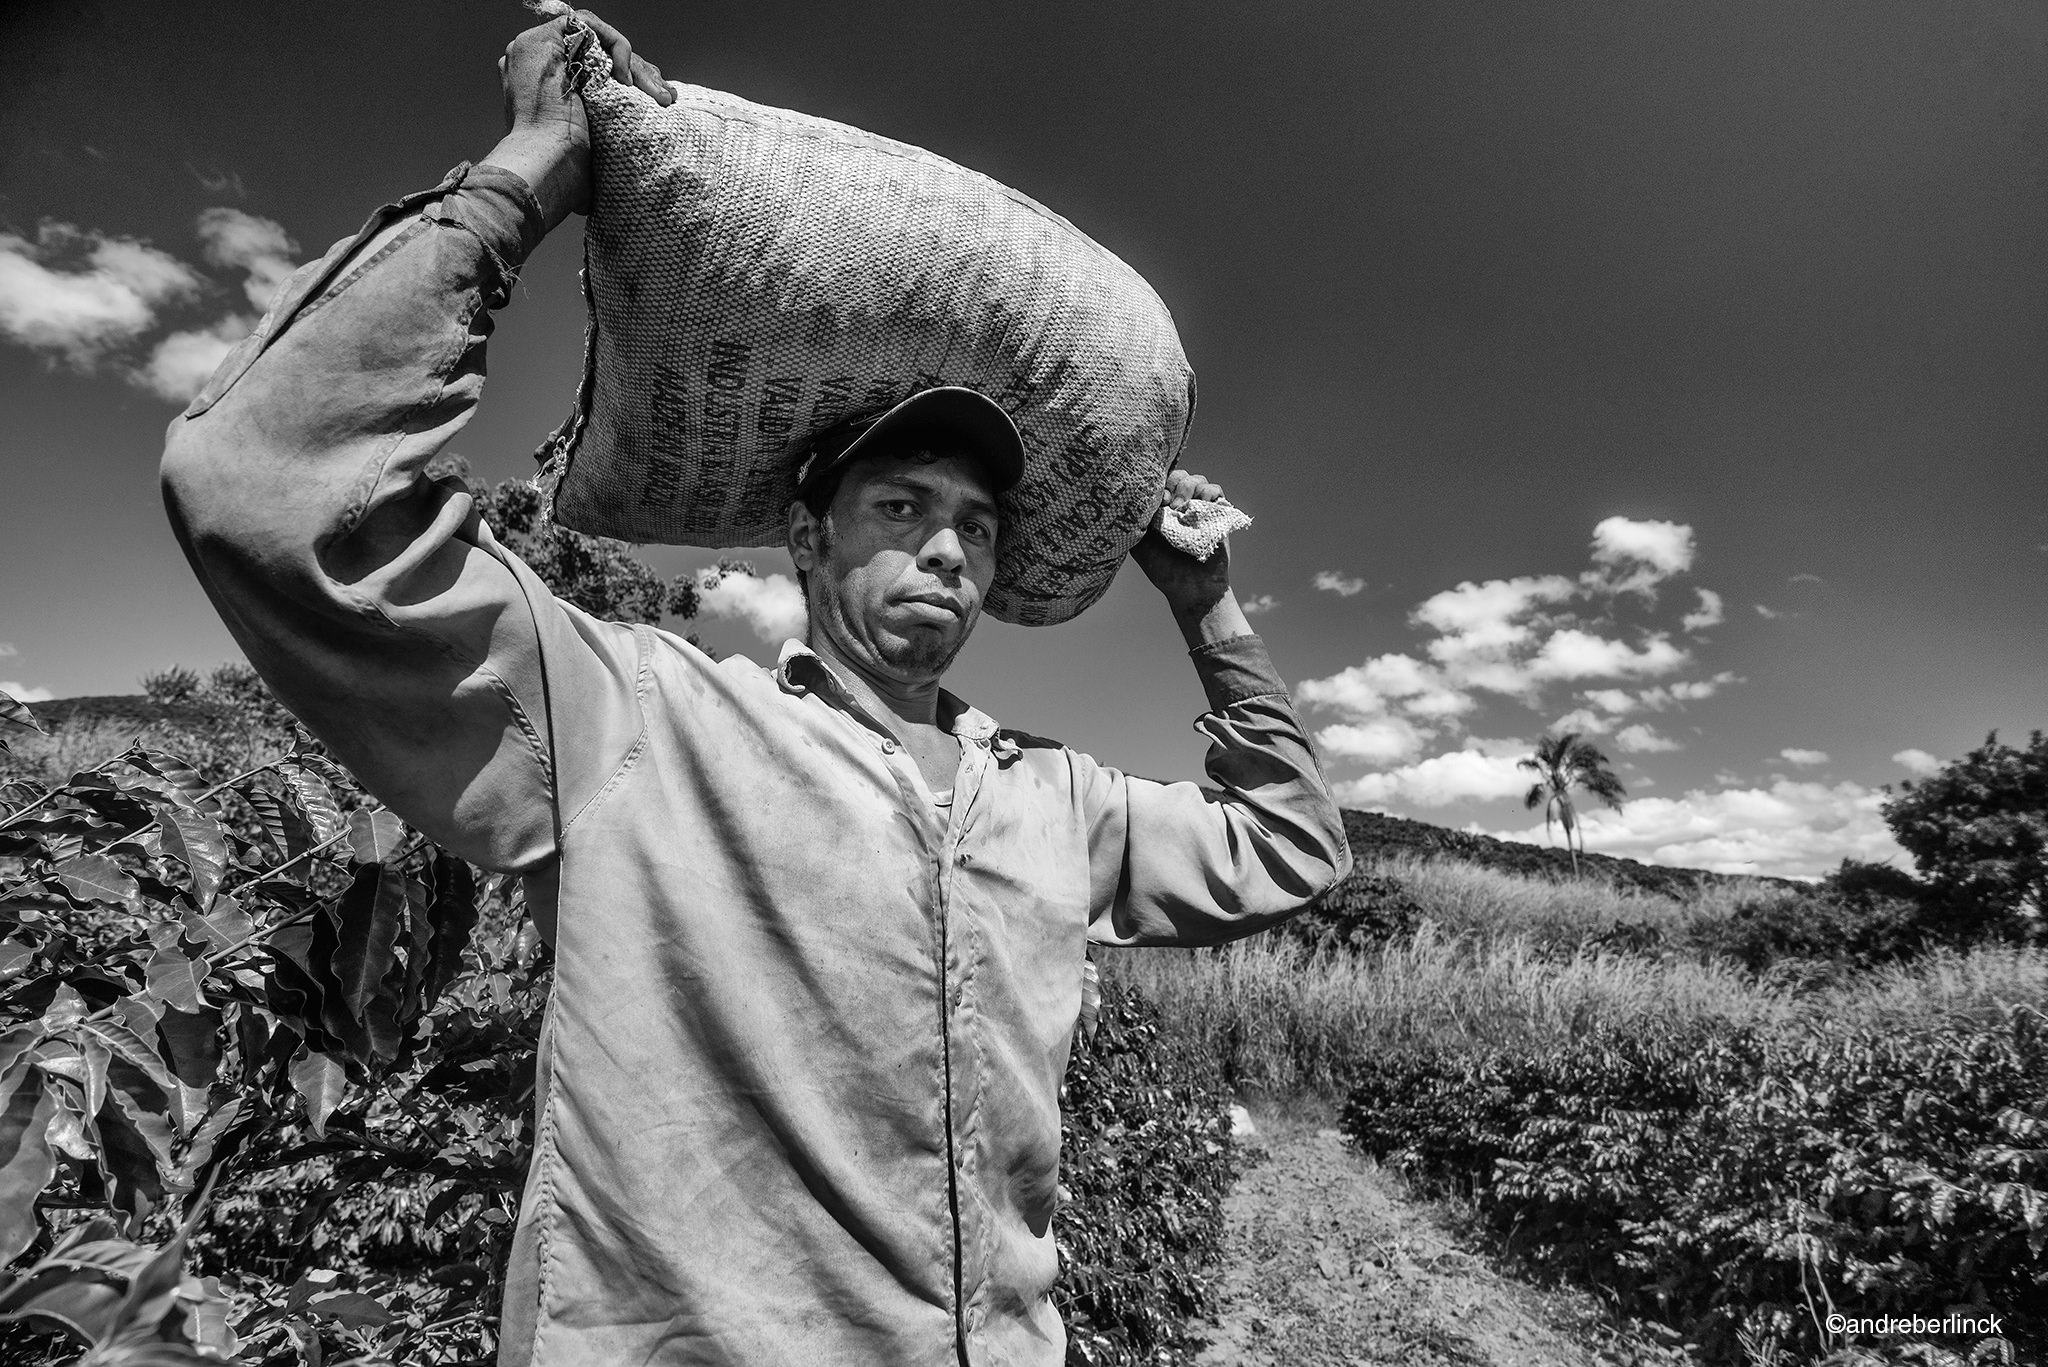
NIKON D750 @ 35mm, ISO 640, 1/200, f/6.3

Now that our theme and location are set, it is time to reflect on our possibilities.

Possibilities

Many argue that photography is an elitist profession, full of people with financial possibilities. And it can certainly be true in some cases, especially when it comes to digital photography. If we take two skilled photographers and put them in a jungle in Borneo, Indonesia with different-level equipment and budgets to work with, it is expected that the one with the better gear and resources will yield better photographs. For example, if photographer A has limited gear, such as the Nikon D7100 with a kit 18-55mm lens and say a single telephoto lens such as the 70-300mm VR, with a 7 day deadline, whereas photographer B has a Nikon D5 with a collection of exquisite lenses such as the holy trinity (14-24mm, 24-70mm, 70-200mm), along with high-end super telephoto lenses such as the 200mm f/2, 400mm f/2.8 and 800mm f/5.6, and on top of that has all other tools and resources such as a helicopter, a plane, etc, with unlimited time on his/her hands, it is expected that the latter will produce much better work, simply due to the above factors. So in a way, gear and resources unfortunately do matter when it comes to possibilities, but it does not mean that we should ignore other factors such as knowledge, skill, patience, luck, etc. However, one must evaluate and understand their possibilities and limits – what we can and cannot do with the tools and resources we have today.

Portrait-5

NIKON D750 @ 20mm, ISO 3200, 1/60, f/5.0

Understanding and knowing the tools you have today is very important. For example, if you shoot an event with other photographers who are shooting with 70-200mm lenses and you do not own such a lens, lenses such as the 105mm f/2.8 or other classic portrait lenses can produce similar, if not better quality images. Knowing your lens limitations, you might need to move around more and try different angles, but that’s the beauty – your gear will force you to get more creative than the others, which might actually make your images look better in comparison. If you photograph wildlife, you might not have the $ 10K 600mm f/4 that your neighboring photographer might be shooting with, but slap on a 200-500mm budget lens on your camera body and it is all about the subject and the light at that point. While he will be busy attaching his lens to a gimbal head, you are already out taking pictures hand-held and capturing those unique moments he is missing out on. Sometimes, it is as simple as waking up earlier than others that will give you the advantage. Many photographers are often lazy to get up early, but you know that it is all about that early morning and late afternoon light that makes a picture go from average to superb.

Portrait-9

NIKON D750 @ 16mm, ISO 200, 1/500, f/9.0

References

Studying good photographers and having references in your head is fundamental in growing your photography. It would be very naive on our part to think that we are the first to conceive this or that project. We should use tools such as Google before making our projects, and references will certainly arise. Nowadays, the level of photography is highly elevated – there are many amazing photographers out there. Right here, at Photography Life, you can find very young photographers who already get it right, whereas for many of us, it took years of practice to get to where they are today…

Portrait-7

NIKON D750 @ 32mm, ISO 400, 1/640, f/4.5

Studying known photographers and their work is important. If you shoot in Black and White, you should know who Henri Cartier-Bresson, Fan Ho and Sebastiao Salgado are. You should study their work, study their compositions and how they interpreted light. The same goes for all other types of photography – understanding and knowing masters of particular photography genres will help you in shaping who you are today and where you will be tomorrow. It will be a good reference point in your head and it will make you want to get better.

Portrait-10

NIKON D750 @ 24mm, ISO 800, 1/1000, f/7.1
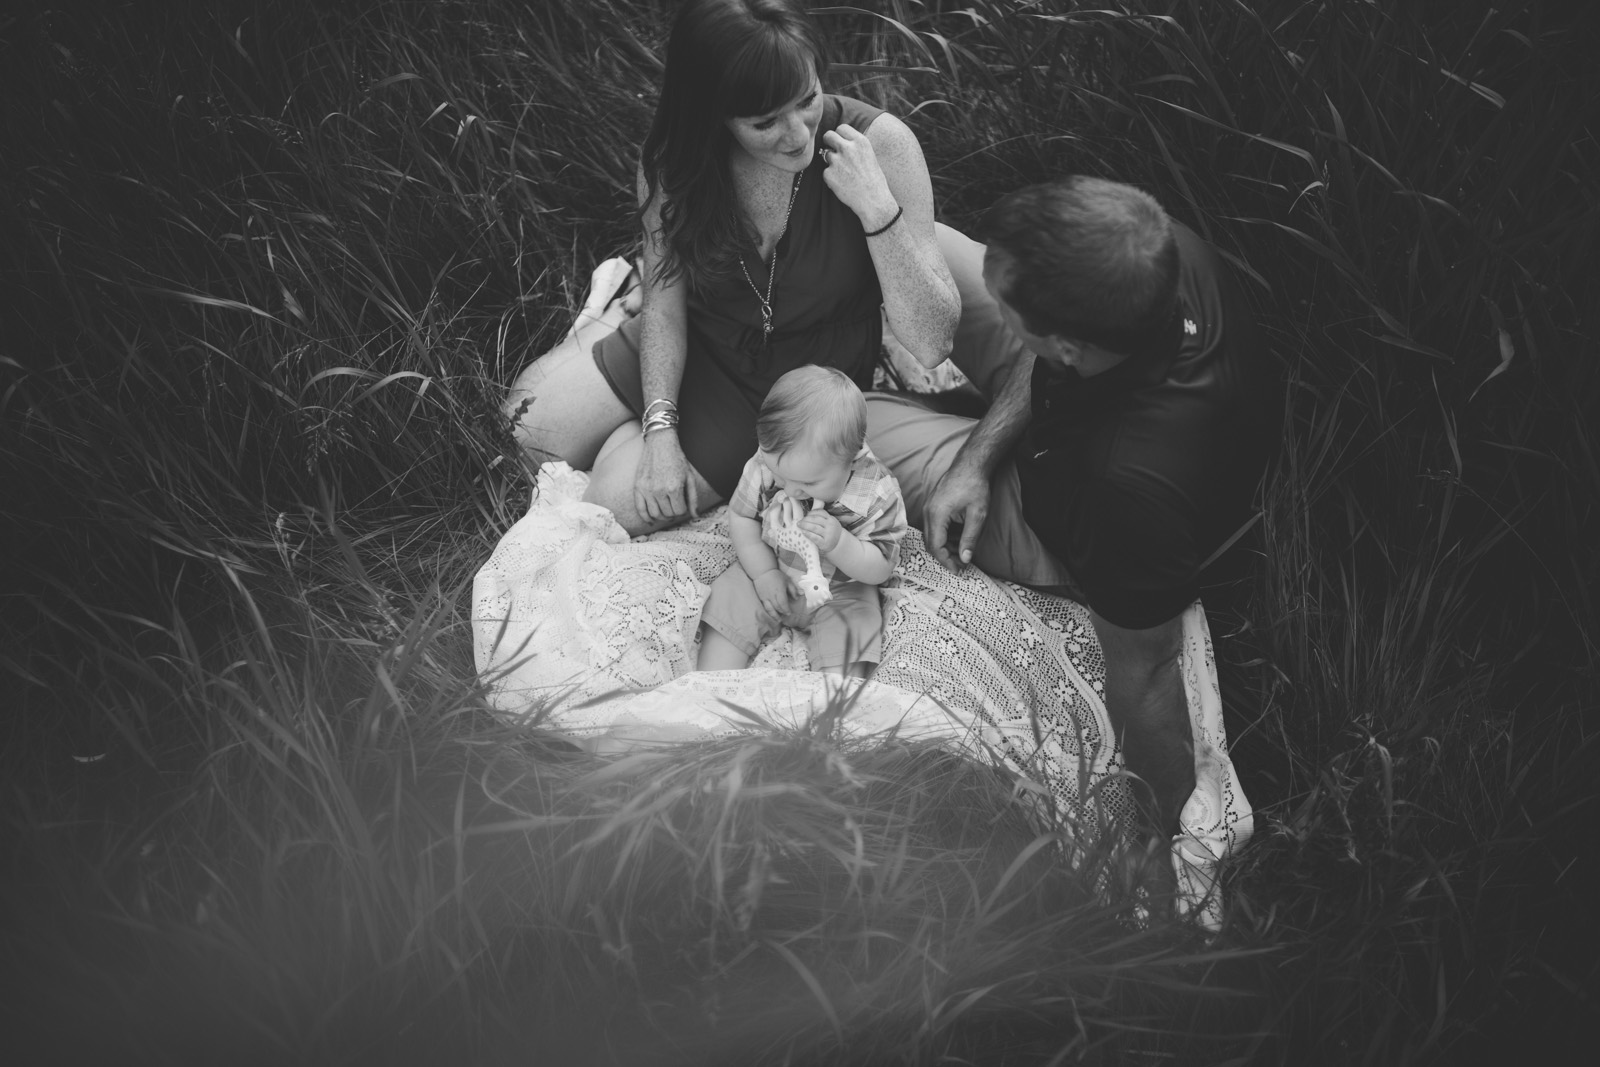
Humility

You might be a great photographer already. You might have the money to buy a high-end camera with an 800mm f/5.6 to parade everywhere you go. However, you might be walking on a thin line with your pride and arrogance, so watch out! At the end of the day, it is not about you – it is about what you can do for the world around you.

Be open and listen to what others have to say, because sometimes a little phrase might be the biggest tip of your life.

Portrait-6

NIKON D750 @ 50mm, ISO 1600, 1/125, f/1.8
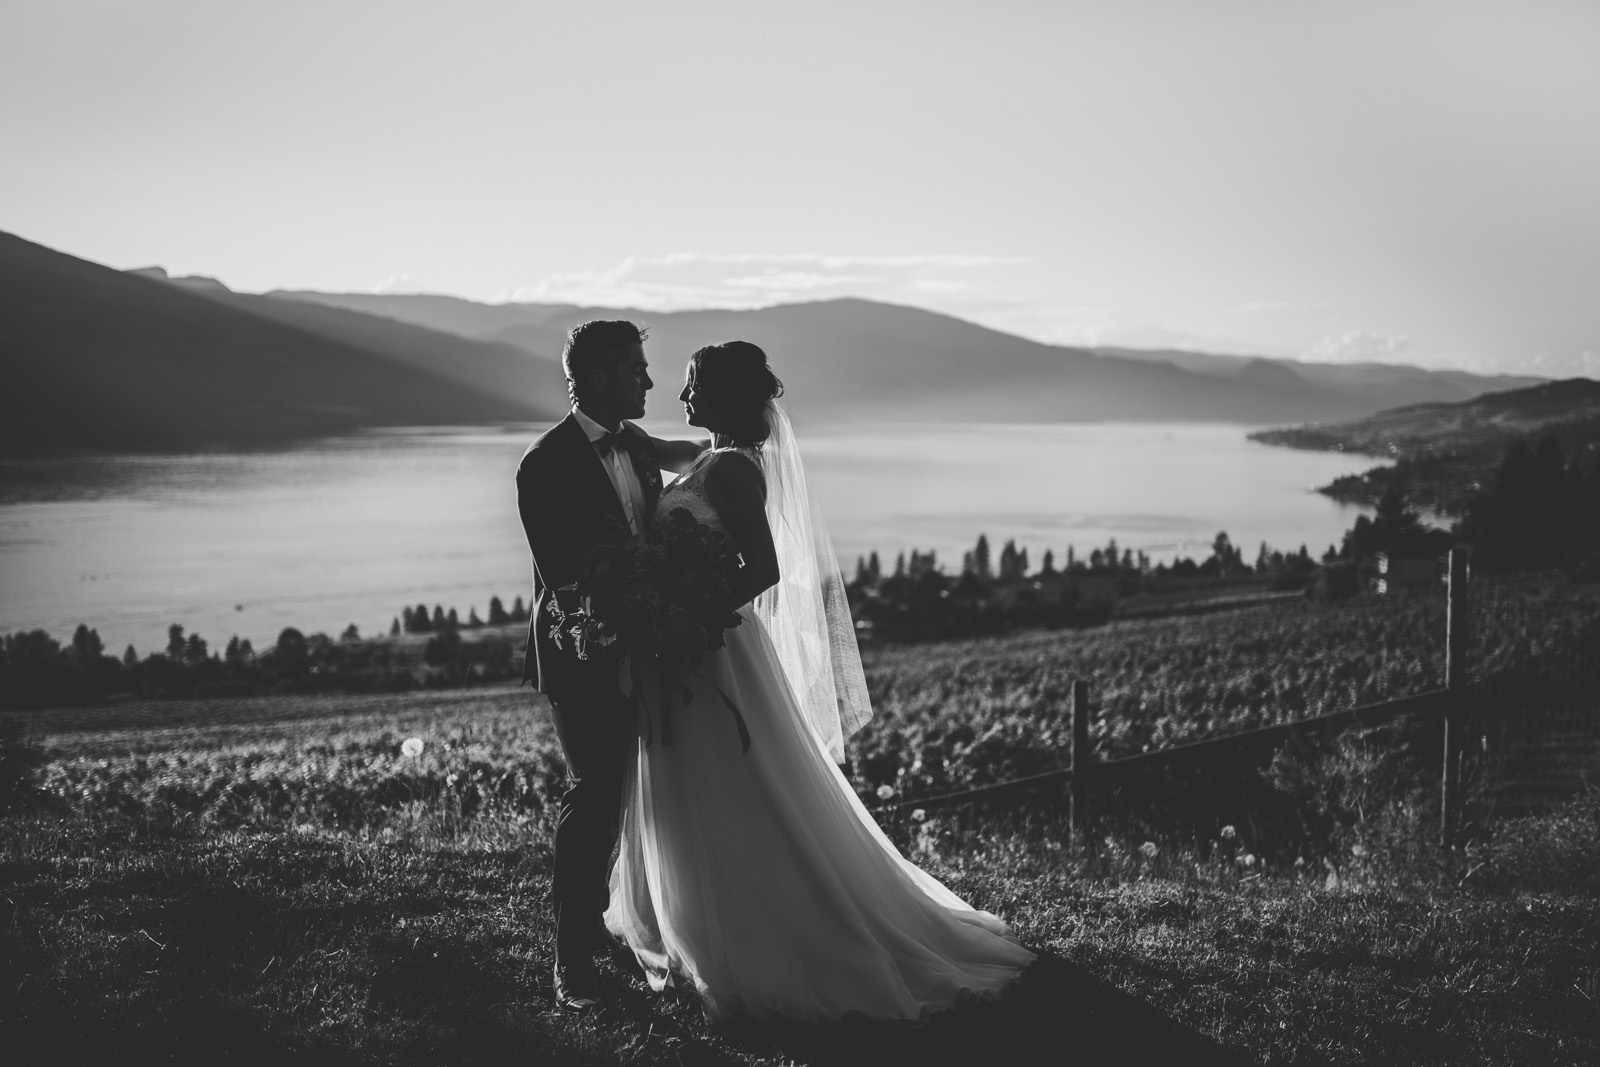
Mood

Be an joyful photographer. Look into your heart to see what you should do next, even if you are on your own and nobody wants to support you. Do not let others make your day gray!

And always remember the following:

“Why worry, there should be laughter after pain
There should be sunshine after rain
These things have always been the same
So why worry now”

Mark Knopfler

Happy shooting my friends!

The post How to Improve Your Photography appeared first on Photography Life.

Photography Life

Posted in Photograpy How To | Tagged , | Leave a comment

Alicia Alonso;igor Youskevitch Canvas Traditional 1 5/8″ Natural Espresso Wood Grain 22×28 Photo On Canvas

Alicia Alonso;igor Youskevitch Canvas Traditional 1 5/8″ Natural Espresso Wood Grain 22×28 Photo On Canvas


Alicia Alonso;Igor Youskevitch” is an art print by Gjon Mili from The Life Picture Collection. Get photo prints of “Alicia Alonso;Igor Youskevitch” in a variety of frames, styles, and materials. Photographer Bio Emigrating to the United States from Albania in 1923, Gjon Mili is regarded as the first photographer to use electronic flash and stroboscopic light to create photographs outside of a scientific context. A true pioneer of the artform, Mili’s photographs of dancers, athletes, and pictures or performances have shaped our understanding of how movement too rapid or too complex for the eye to discern is captured in the still image. Mili’s career as a photographer for Life Magazine spanned four decades and saw the publication of thousands of his photographs, taking him around the world; from collaborations with Pablo Picasso, to the incarceration of Adolph Eichmann, to original photos from Broadway plays. The Life Picture Collection From one of the most iconic magazines ever to hit the shelves comes The Life Collection – an archive of some of the most recognizable imagery of the 20th Century. Documenting events in politics, culture, celebrity, the arts and the American experience, these compelling and provocative photographs include the works of some of the greatest photographers capturing some of the greatest moments in history.

Price: $
Sold by Photos.com by Getty Images

Posted in How To Photograph | Tagged , , , , , , , , , , | Leave a comment

Pedestrian Walkway On The Brooklyn Bridge. Paper Framed Print 1 5/8″ White 22×28 Photo Paper

Pedestrian Walkway On The Brooklyn Bridge. Paper Framed Print 1 5/8″ White 22×28 Photo Paper


Pedestrian walkway on the Brooklyn Bridge.” is an art print by Alfred Eisenstaedt from The Life Picture Collection. Get photo prints of “Pedestrian walkway on the Brooklyn Bridge.” in a variety of frames, styles, and materials. Photographer Bio Alfred Eisenstaedt (1898-1995), or Eisie to those who knew him, received his first camera as a gift from his uncle at 14, a few years after moving to Berlin from Poland with his family. At 17, he was drafted to the German army. His interest in photography blossomed while recovering from a shrapnel wound. He became a regular at museums, studying light and composition. By 31, he was a full-time photographer. In 1933 he was sent to Italy where he shot the first meeting between Hitler and Mussolini. Two years later, when Hitler came to power, Eisie immigrated to America. Soon after arriving in New York, he was hired along with three other photographers-Margaret Bourke-White, Thomas McAvoy and Peter Stackpole-by Time Inc. founder Henry Luce for a secret start-up venture known as “Project X.” Six months later, Life magazine premiered on November 23, 1936. The first issue sold for 10 cents and featured five pages of Eisie’s pictures. His most famous photo was the kiss in Times Square on V-J day, about which he said, “I was running along the street grabbing any and every girl in sight. Whether she was a grandmother, stout, thin, old, didn’t make any difference. None of the pictures that were possible pleased me. Then, suddenly in a flash I saw something white being grabbed. I turned and clicked the moment the sailor kissed the nurse.” Over his career, Eisie shot a total of nearly 100 covers for Life magazine and some 10,000 prints. The Life Picture Collection From one of the most iconic magazines ever to hit the shelves comes The Life Collection – an archive of some of the most recognizable imagery of the 20th Century. Documenting events in politics, culture, celebrity, the arts and the American experience, these compelling and provocative photographs include the works of some of the greatest photographers capturing some of the greatest moments in history.

Price: $
Sold by Photos.com by Getty Images

Posted in Camera Photography | Tagged , , , , , , , , , | Leave a comment

Teenagers Aluminum Mounted 27×18 Photo On Aluminum

Teenagers Aluminum Mounted 27×18 Photo On Aluminum


Teenagers” is an art print by Alfred Eisenstaedt from The Life Picture Collection. Get photo prints of “Teenagers” in a variety of frames, styles, and materials. Photographer Bio Alfred Eisenstaedt (1898-1995), or Eisie to those who knew him, received his first camera as a gift from his uncle at 14, a few years after moving to Berlin from Poland with his family. At 17, he was drafted to the German army. His interest in photography blossomed while recovering from a shrapnel wound. He became a regular at museums, studying light and composition. By 31, he was a full-time photographer. In 1933 he was sent to Italy where he shot the first meeting between Hitler and Mussolini. Two years later, when Hitler came to power, Eisie immigrated to America. Soon after arriving in New York, he was hired along with three other photographers-Margaret Bourke-White, Thomas McAvoy and Peter Stackpole-by Time Inc. founder Henry Luce for a secret start-up venture known as “Project X.” Six months later, Life magazine premiered on November 23, 1936. The first issue sold for 10 cents and featured five pages of Eisie’s pictures. His most famous photo was the kiss in Times Square on V-J day, about which he said, “I was running along the street grabbing any and every girl in sight. Whether she was a grandmother, stout, thin, old, didn’t make any difference. None of the pictures that were possible pleased me. Then, suddenly in a flash I saw something white being grabbed. I turned and clicked the moment the sailor kissed the nurse.” Over his career, Eisie shot a total of nearly 100 covers for Life magazine and some 10,000 prints. The Life Picture Collection From one of the most iconic magazines ever to hit the shelves comes The Life Collection – an archive of some of the most recognizable imagery of the 20th Century. Documenting events in politics, culture, celebrity, the arts and the American experience, these compelling and provocative photographs include the works of some of the greatest photographers capturing some of the greatest moments in history.

Price: $
Sold by Photos.com by Getty Images

Posted in Camera Photography | Tagged , , , , | Leave a comment

8 tips to get the perfect black and white photo

I love black and white.

I love the timelessness of it, I love how it so simply gets rid of distractions or colors I do not prefer or enjoy together.

I like how it draws your attention to something completely different in each photograph than where it was drawn in color.

I love how it so beautifully can add depth and intimacy.

And I love, love printing them because they go so effortlessly in all decor.

If you scroll through really great black and white photographs, you will find that so many artists take it in many directions, so the tips I share with you are not universal in the ‘right way’, but they are tips in showing you a beautiful way to do black and white. My love for black and white photography has always been constant but my ability to create one the way I wanted was not. With time, experience and learning I have been able to create black and whites that are strong and often my favorites.

1. Chase shadows

When taking a photo, look for a lot of shadows and contrast. I love the contrast you get with cloudy skies in your background but some of my favorites are photos with layers of shadows with little to no bright spots.

To do this, avoid having any sky, instead looking for areas where trees or foliage fill up your background. If you’re indoors, ensure there are no light sources coming through in your background. You can also shoot towards the ground as there is no light coming from there; long grasses and earth can give you added darkness and depth.

family photo in black and white by Andrea Brooke Photography

2. The matte effect

Clip your blacks and whites either with the tone curve or sliders. On your tone curve it will look a bit like an s curve as your highlights will drop down at the top and your shadows will be brought up on the bottom of the curve.

how to use the tone curve panel in Lightroom to get a matte effect in your photos

I usually use both. This will take out the blackest of blacks, and the whitest of whites giving it a more matte feeling. You can add back in a lot of black, it will give you more darkness, but it will not let your blacks get as deep, depending upon how much you have clipped.

photo of couple kissing in black and white by Andrea Brooke Photography

Related: 4 Lightroom secrets to great black and white images

3. Use your brush and radial tools

You can add in clarity for a more raw and gritty black and white or to draw attention to certain areas of a photograph. Folds in a long dress, waves in hair, or hands held together are beautiful examples of this. You can lower contrast on any faces or skin that appears too harsh. Or lower a large area of contrast with the radial tool when looking for a softer black and white photograph.

using the radial tool in Lightroom to improve your black and white pictures

4. Manage highlights

Although I think that so many times the bright, whiter parts of a photograph are what can ‘make it’, going in with a highlighter brush and dropping highlights even after you’ve done so with the tone curve or sliders to ensure nothing is getting close to overexposed will help lend to the softer matte feeling in the photograph. You have to watch as you slide though as you will see there is a point where you can take it too far – it will go from matte to dull with no luminance. You want to make sure you don’t get there and if you do, bump the highlights back up a bit.

black and white photo of kids doing dishes by Andrea Brooke Photography

Related: Before and After: a black and white edit in Lightroom

5. Remove distractions

Once you have established where you want your viewer to focus, I often look around for spots that can draw you away from that. They are usually other bright spots near the edges of your photograph. Sometimes I will crop or, if possible, I will clone them out. Whether it be a bright reflection from a fridge door or bright spots of sky coming through trees and leaves, minimizing distractions is just another way to strengthen your photograph and draw your viewer in, exactly where you want them.

how to use the clone tool in Lightroom to removing distractin spots in a photo

Related: How to use the clone tool in Lightroom

Clickin Moms photography forum

6. Sharpness

If the photograph seems to need a little pop, I up the sharpness and slide it over so it’s just sharpening your prominent edges.

backlit wedding portrait of bride and groom by Andrea Brooke Photography

7. Custom vignette

Avoid adding vignetting but instead, use the radial tool to do so. You will have so much more control and will avoid an obviously vignette for any semi-trained eye. Making sure vignettes are off center help lend it a more natural look.

black and white portrait of woman in the water by Andrea Brooke Photography

8. Practice makes perfect

Don’t expect to master anything from one article or class. Use the information you gather from various sources and play. You will gain a better understanding of what is happening in different types of light and backgrounds simply by paying attention when you convert a photo to black and white, which will help you have a better eye and ability to foresee what you are shooting for and ending up with. Over time, you will find yourself tweaking even the best advice to find what exactly suits you and your style and make it your very own.

black and white picture of boys running in a field by Andrea Brooke Photography

My love for black and white photography has always been constant but my ability to create one the way I wanted was not. With time, experience and learning I have been able to create black and whites that are strong and often my favorites.

The post 8 tips to get the perfect black and white photo appeared first on Clickin Moms.


Clickin Moms

Posted in Photograpy How To | Tagged , , , , | Leave a comment