Another year is over and it is that time of the new year when many of us go back and assess our personal successes and failures of the past year. While 2016 was surely an eventful year, we should be grateful to be alive and well, as many were not as fortunate. We have seen a number of both positive and negative changes that affected the world we live in today and how we will be living it in the future. But let’s not focus on the bad – after-all, keeping positive attitude and encouraging healthy, proactive thinking always leads to more fruitful results, especially in the long run. 2016 was a very busy year in the world of photography as well – a lot of new cameras, lenses and gadgets were announced. Nikon finally revealed the long-awaited Nikon D500 and D5 DSLRs, while Canon updated two of its high-end DSLRs with the Canon 5D Mark IV and the 1 DX Mark II. Pentax finally brought us the amazing full-frame K-1. Fuji, Sony, Olympus, Panasonic and Sigma have all been keeping busy as well, but the two that definitely stole the show last year were Fuji and Hasselblad, releasing “budget” interchangeable lens medium format mirrorless cameras – the Hasselblad X1D-50c and the Fujifilm GFX 50S, both under the $ 10K price tag. And when it comes to lenses, we have seen a slew of different lenses for all kinds of needs from all manufacturers, with so many great third party options. I have been barely able to keep up with all these announcements and although I have done my best to produce as many reviews as I possibly can, all the travel and projects I have been involved with ate up the bulk of my time, shifting my priorities significantly. I am grateful for all these opportunities, but above all, I am incredibly thankful for the amazing and patient community of readers and followers of this very site, which has been steadily growing year after year. But enough of this mumbo jumbo, let’s take a look at some of my most favorite photos from 2016!
I started out the year by doing a big tour from Colorado to California, taking the southern route through New Mexico and Arizona. The White Sand Dunes National Monument has always been one of my most favorite spots to visit and photograph, especially in the winter. Temperatures stay pretty low and the park is not as busy as it gets during the season. I only spent one evening at the park, but it was enough to give me an image I was quite pleased with:
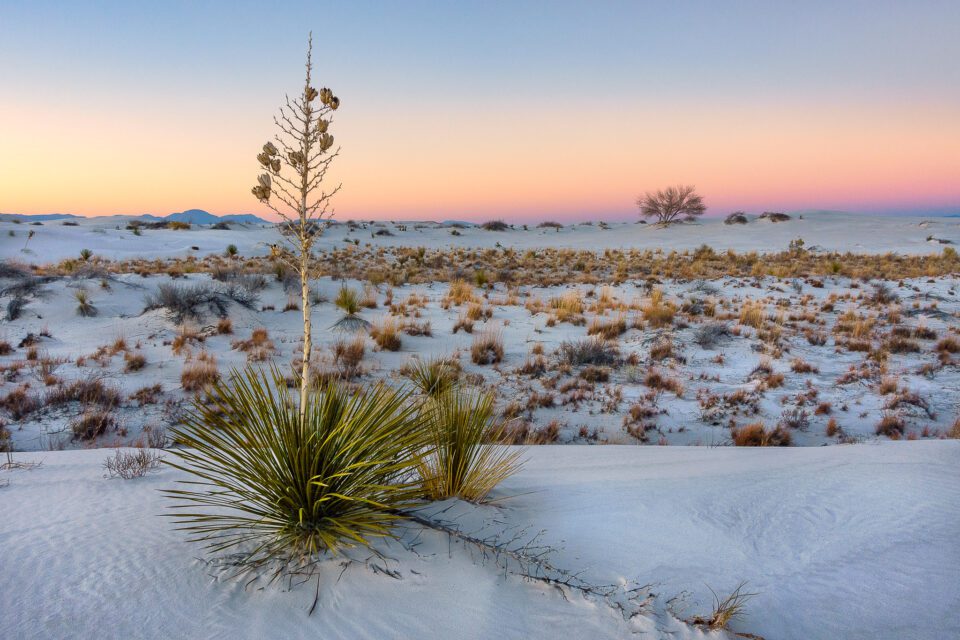
Sunset at the White Sand Dunes National Monument, New Mexico
DSC-RX100M4 + 24-70mm F1.8-2.8 @ 10.15mm, ISO 200, 1/13, f/11.0
I like the way the landscape appears “layered” in this shot and the large tree in the background counter-balances the yucca in the foreground quite nicely. Although I hoped for some cloud coverage, sometimes having a little bit of haze in the distance can actually help in yielding pleasant sunset colors, especially at or right before the blue hour.
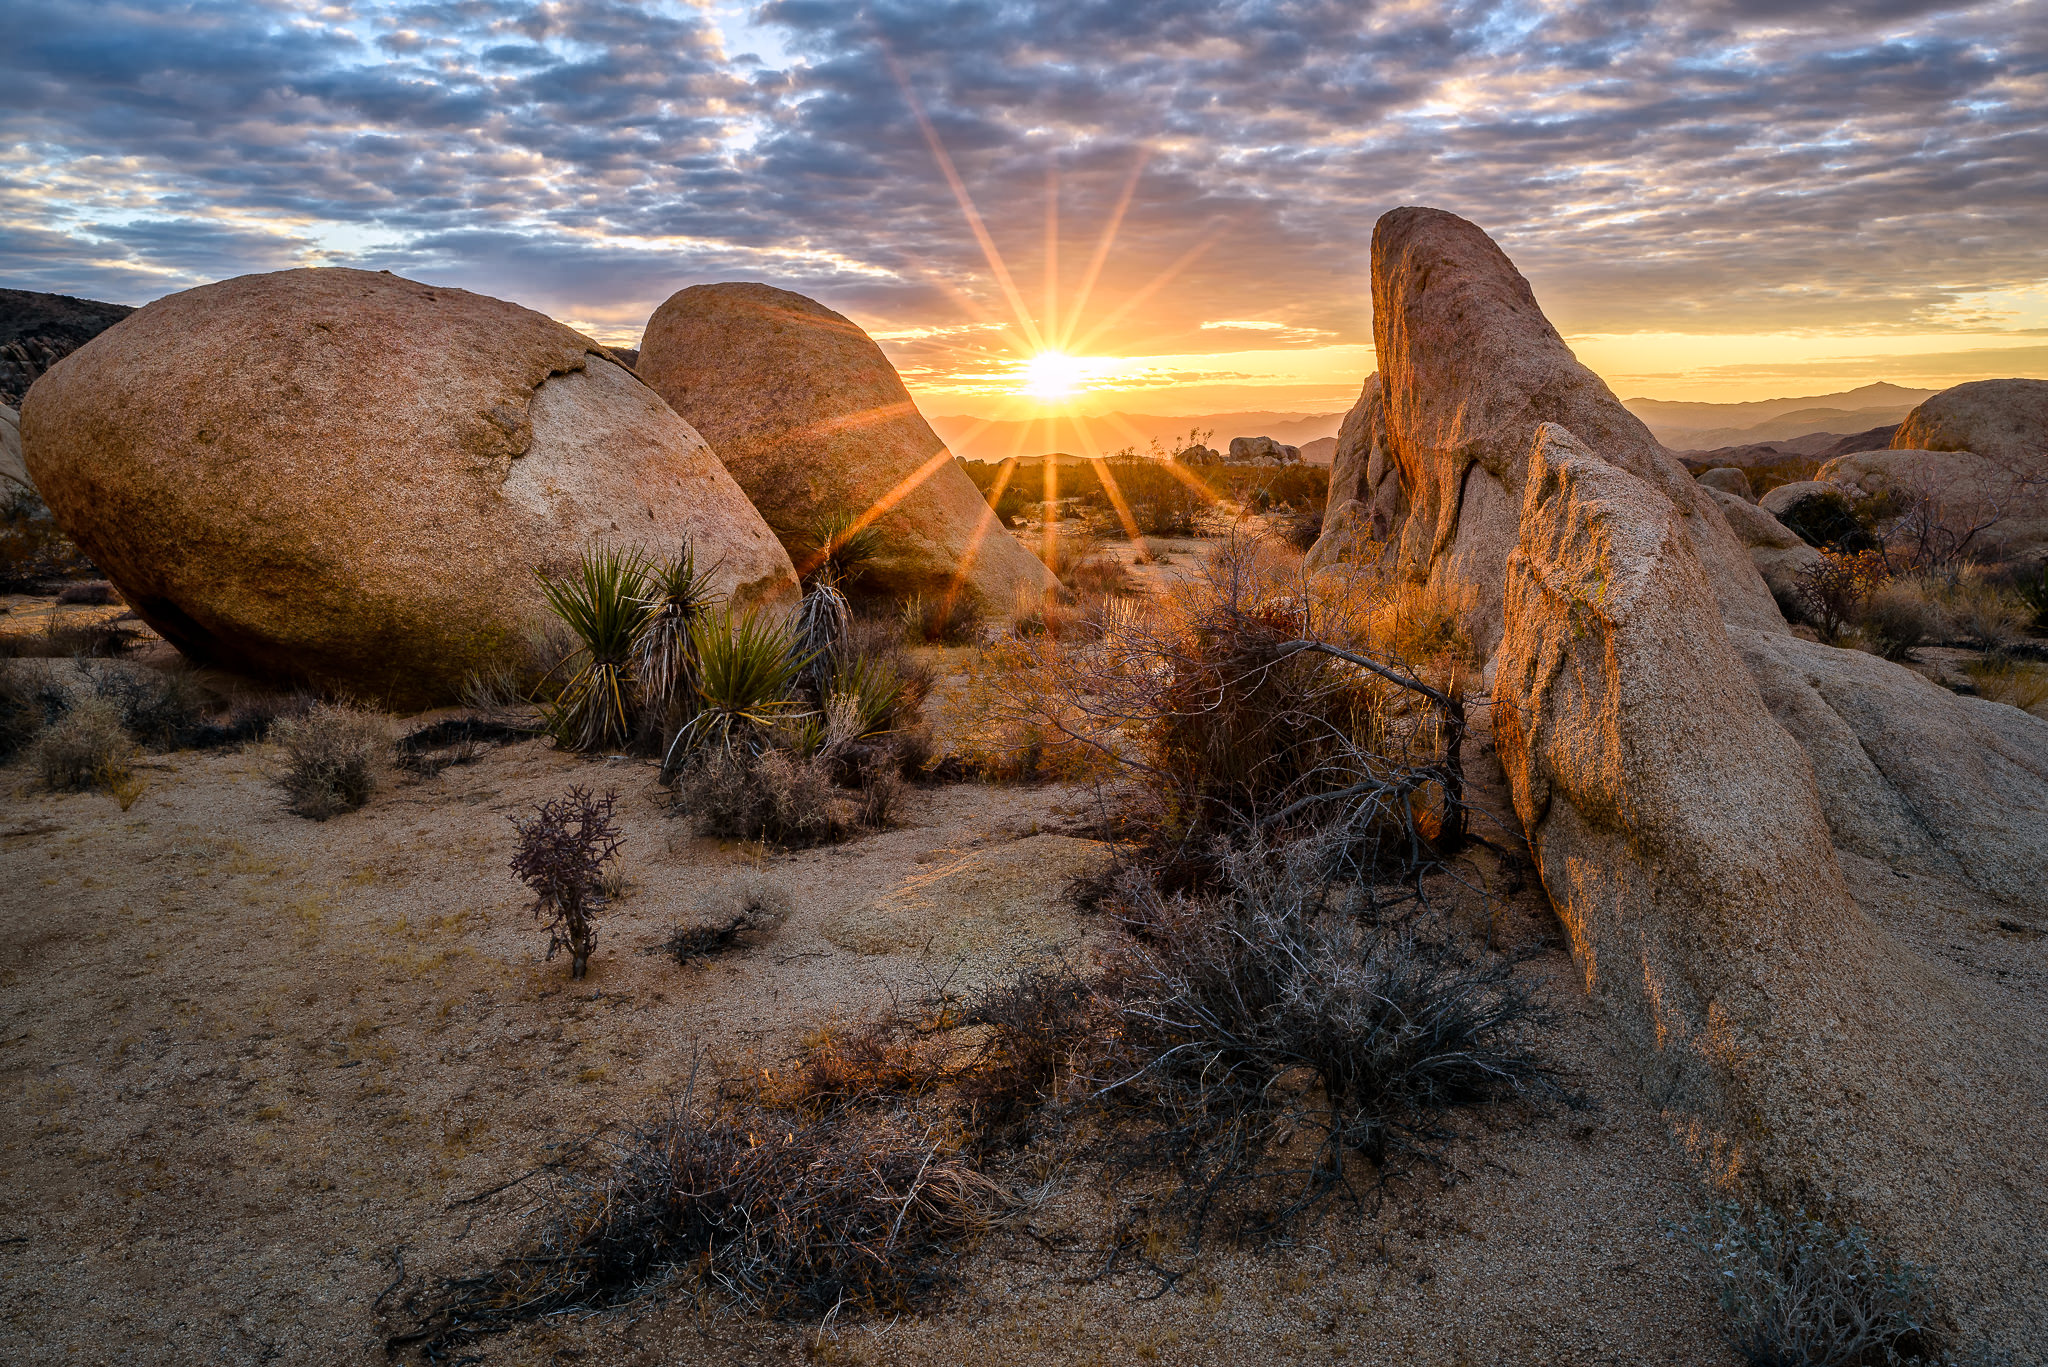
I distinctly remember how I captured the below image. I was out at the Joshua Tree National Park with my friend Tunc and we were both running around at sunrise the day after we arrived at the park, looking for a solid composition. Since we arrived very late, we overslept a bit and we did not scout the park for a good spot beforehand. Sadly, neither of us were able to find anything worthy of keeping when the colors were in the sky (and the sunrise was one of the most beautiful ones I have ever seen!), but after I slowed down and really focused on finding a solid composition (instead of chasing colors), I was able to find a few rocks in the foreground that ended up working out:

Sunrise at Joshua Tree National Park, California
NIKON D750 + 24mm f/1.8 @ 24mm, ISO 100, 1/15, f/16.0
This is the mistake I see in many photographers, including myself – when we see amazing colors in the sky, we end up chasing the light, often heavily compromising on composition. If you find yourself in such a situation, always keep in mind that composition and light, along with a strong subject should go hand-in-hand – don’t forget to slow down and think it through before clicking that shutter release button. A single planned shot is going to be much stronger than a bunch of meaningless shots of the beautiful sky.
The Nikon 24mm f/1.8G did a phenomenal job at making the sunstar the highlight of the composition, which I was able to achieve by stopping down to f/16. Thanks to the wide dynamic range of the Nikon D750, I was able to recover a lot of the details in the foreground without adding too much noise. I did my best to expose as much to the right as possible without losing highlight detail and having a 0.6 GND soft filter definitely helped in making it happen. To make sure that the sun did not add any ghosting and flare to the image, I also used the “fingering the sun” technique explained in my how to eliminate ghosting and flare in landscape photography article.
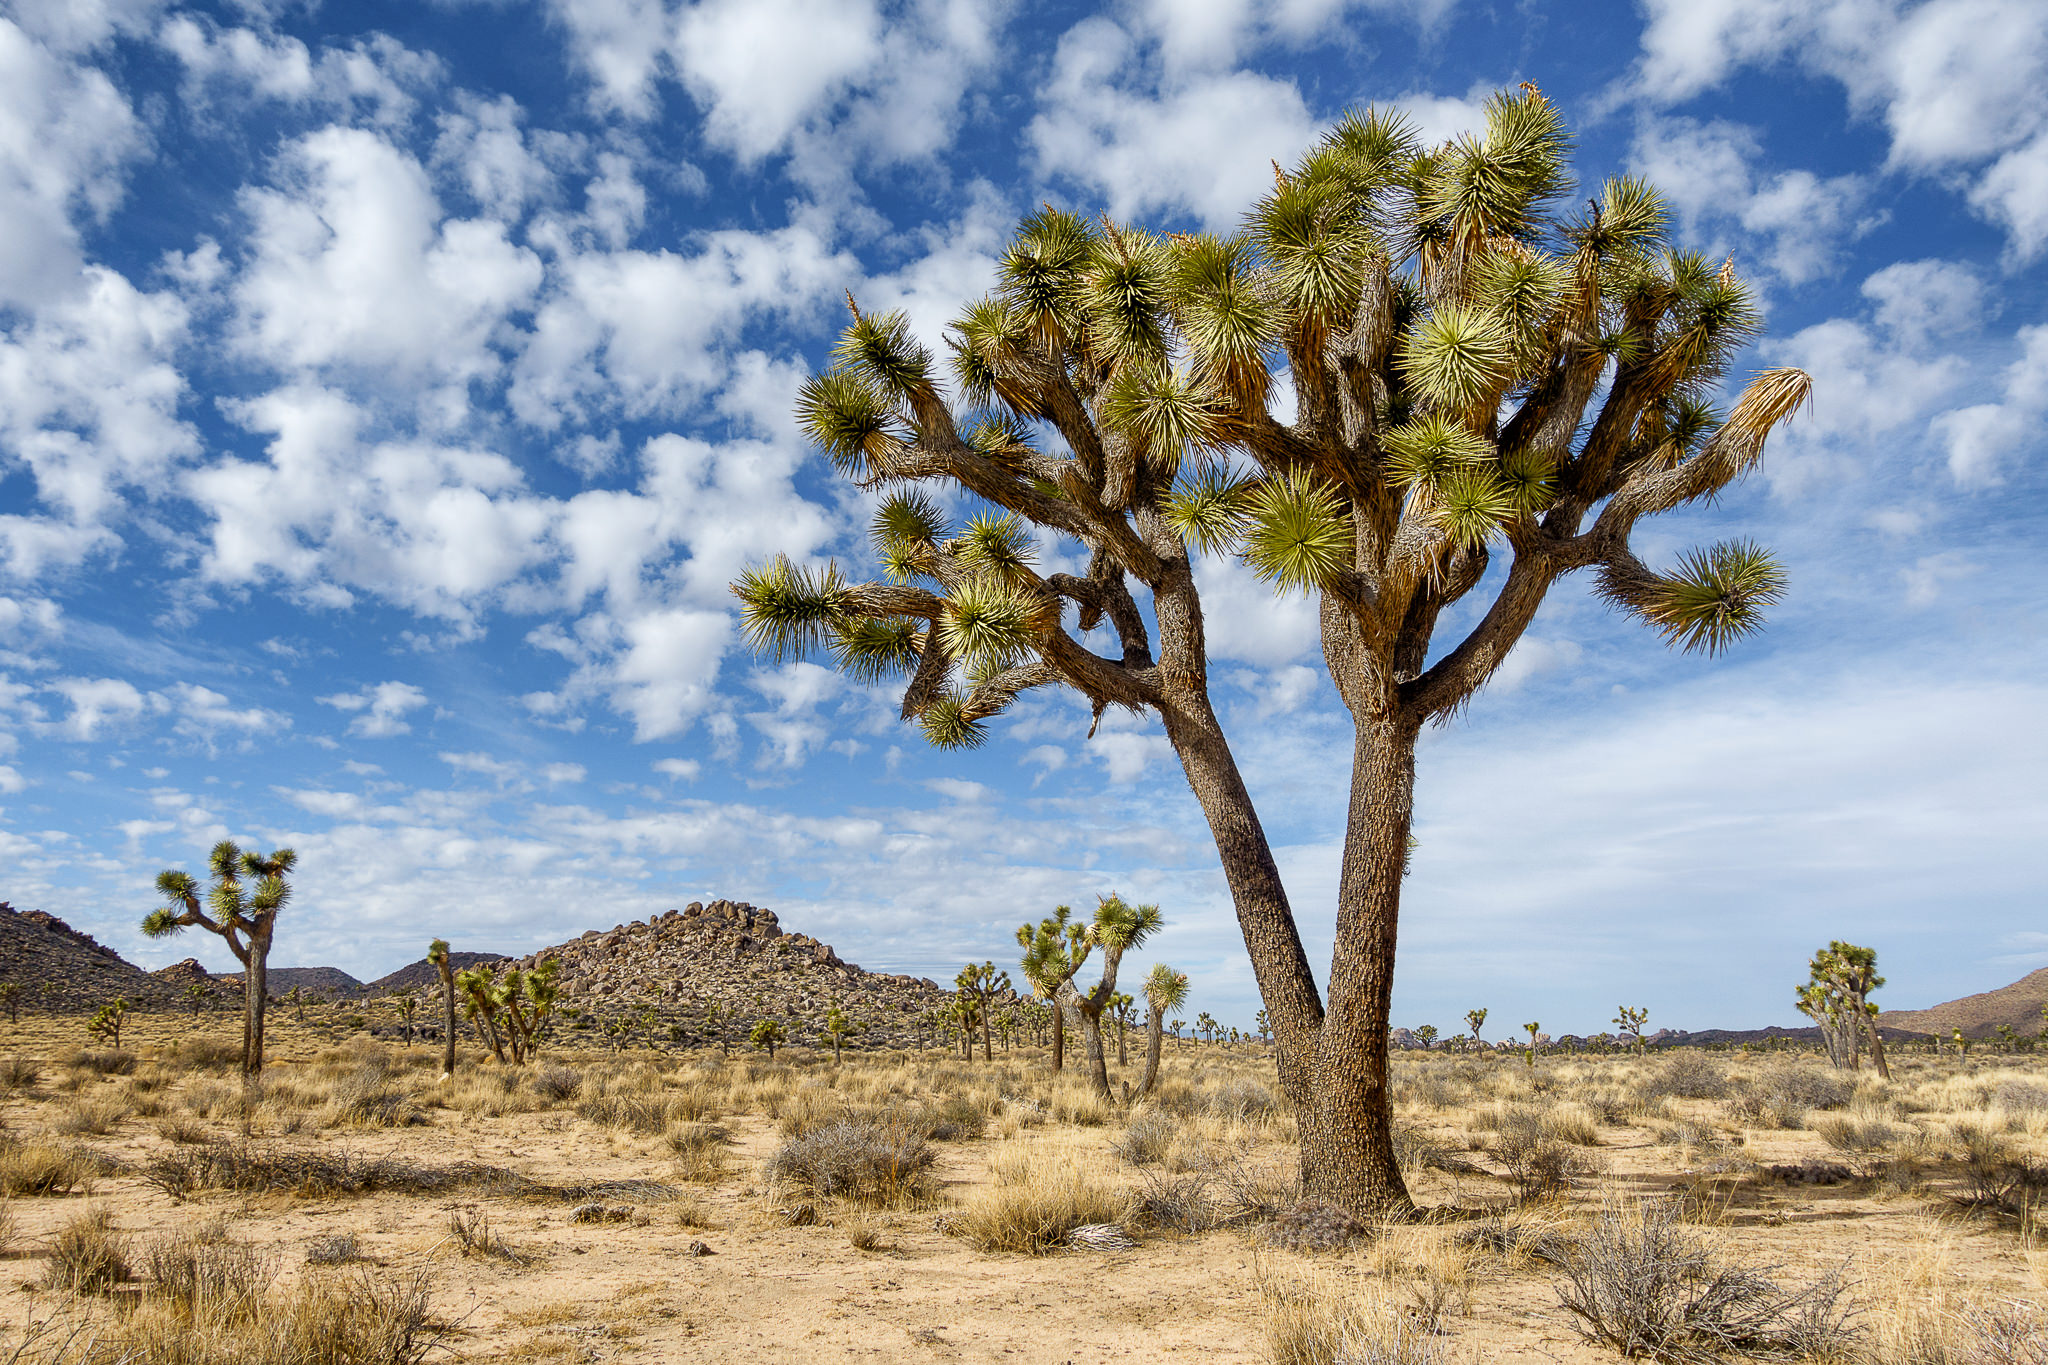
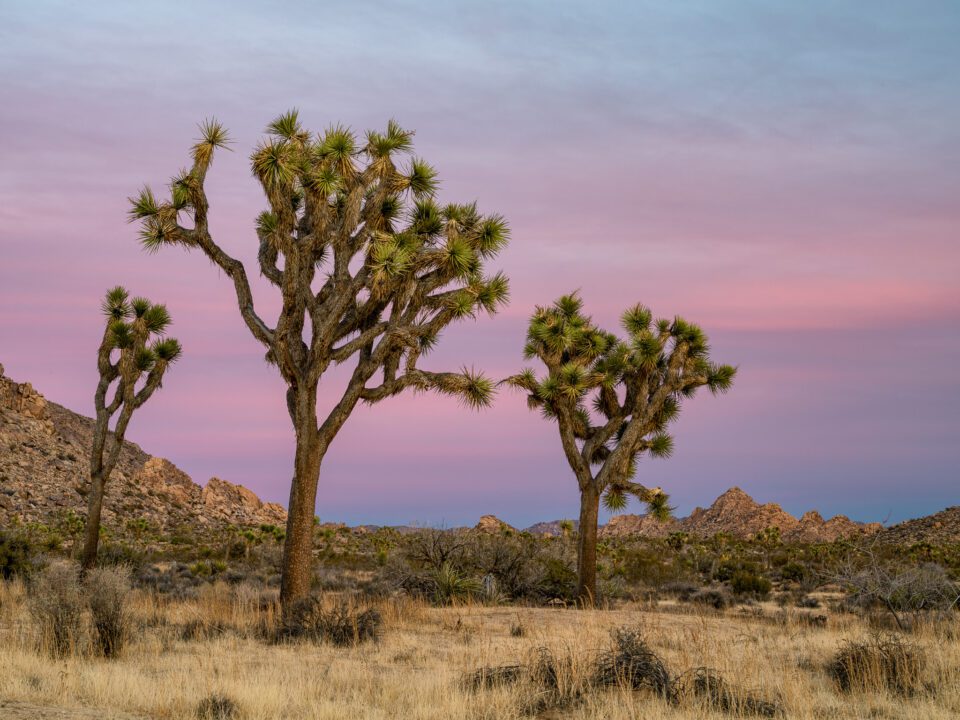
While having beautiful sunrise or sunset colors can really enhance images, shooting early in the morning or late afternoon can also yield beautiful images. I personally like the puffy clouds and the simplicity of the below image of a Joshua tree in the foreground, which I captured early in the morning on the same day:
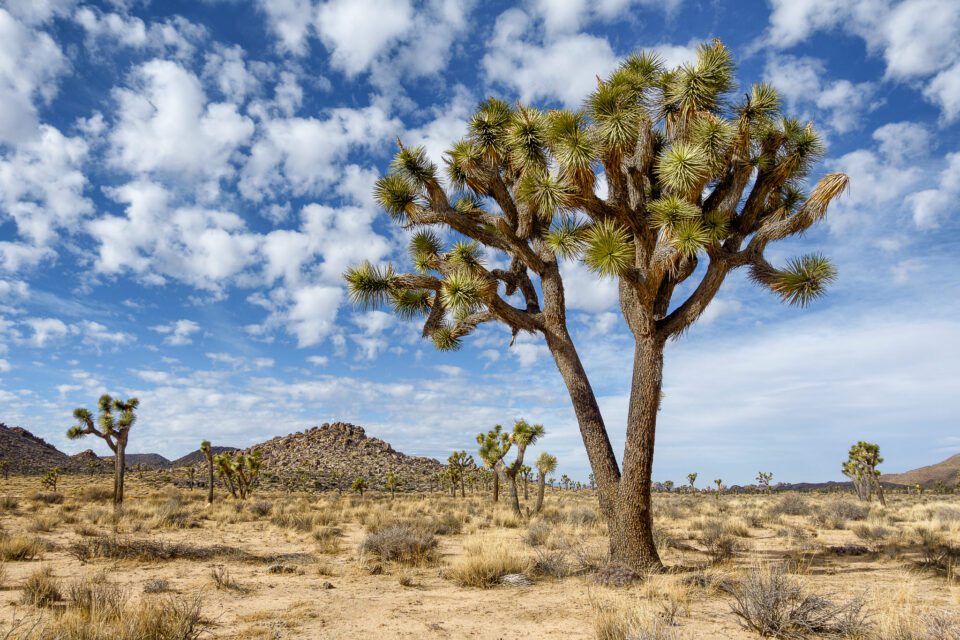
Joshua Tree with Puffy Clouds, Joshua Tree National Park, California
DSC-RX100M4 + 24-70mm F1.8-2.8 @ 8.8mm, ISO 125, 1/100, f/5.6
Here, the composition is quite simple – I moved the Joshua tree off-center a bit to the right and the puffy clouds in the sky helped fill the rest of the space. Since the tree is the highlight, I shot the image at a low angle and minimized the foreground. I made sure to keep my subject separated from all other elements, including other Joshua trees in the background. Spencer and I talk about subject isolation and simplicity quite a bit in our new Landscape Photography eBook.
After spending a full day at the park, we moved on to Death Valley National Park. And that’s where I captured quite a few of my most favorite images from 2016, as you can see below. Death Valley is a massive park and you could spend months there without fully exploring it. Zabriskie point is a pretty popular spot to photograph at sunrise, but for those who are willing to climb up the rather dangerous and slippery trail (especially after rain or snow) to the right of the parking lot, there are a few great spots to photograph the Manly Beacon from the side, while having Badwater Basin and the beautiful mountains in the background. I have climbed this trail a number of times, but I have only been fortunate to witness a truly stunning sunrise once (see below). The below image from Zabriskie Point still made it to my favorites from 2016, because the early colors on the landscape really helped shape it out and I was fortunate to see a very rare phenomenon, where the clouds were forming and hanging very low at the distant mountains – something I have never seen before in Death Valley:
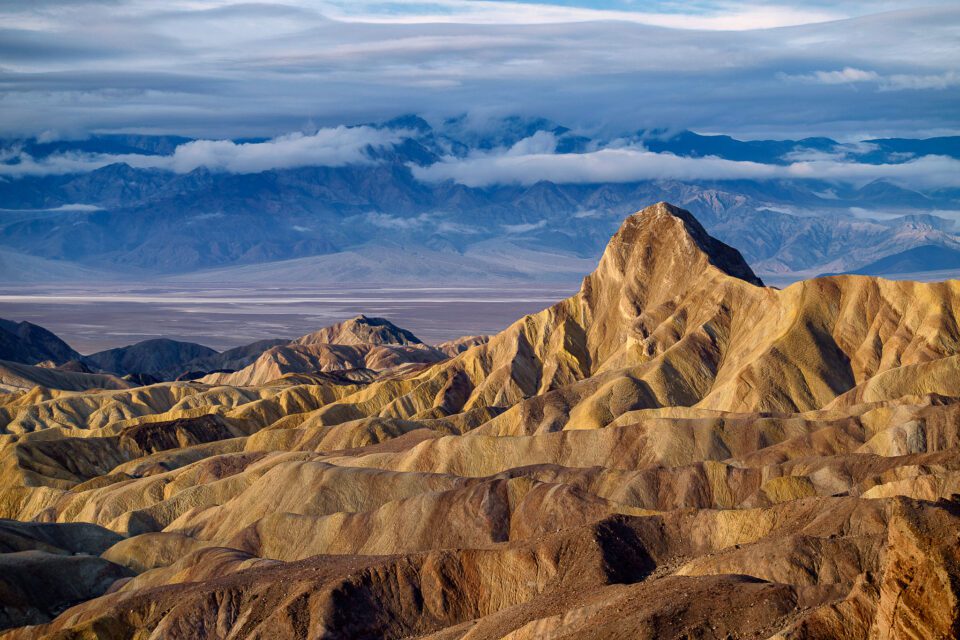
Manly Beacon, Death Valley National Park, California
DSC-RX100M4 + 24-70mm F1.8-2.8 @ 23.53mm, ISO 125, 1/200, f/5.6
Compositionally, I decided to move the Manly Beacon off to the right a little bit, since I wanted to show off the salt areas of the Badwater Basin in the background. Center composition here would not work, since the right of the peak is a bit taller compared to the left, which would make the composition appear off-balance.
The next image is something I struggled with quite a bit both at the time of capture and at the time I was ranking it. To be honest, I was not sure if it was worth including as one of the best shots of 2016. Although the primary subject was the salt formations in the very salty waters of the Badwater Basin, I struggled with finding unique patterns to fill the foreground with. I scouted quite a bit, but failed to find something truly interesting worth concentrating on. Light was changing fast and when I saw rays of light piercing through the clouds, I decided to capture the reflection with all the amazing colors:
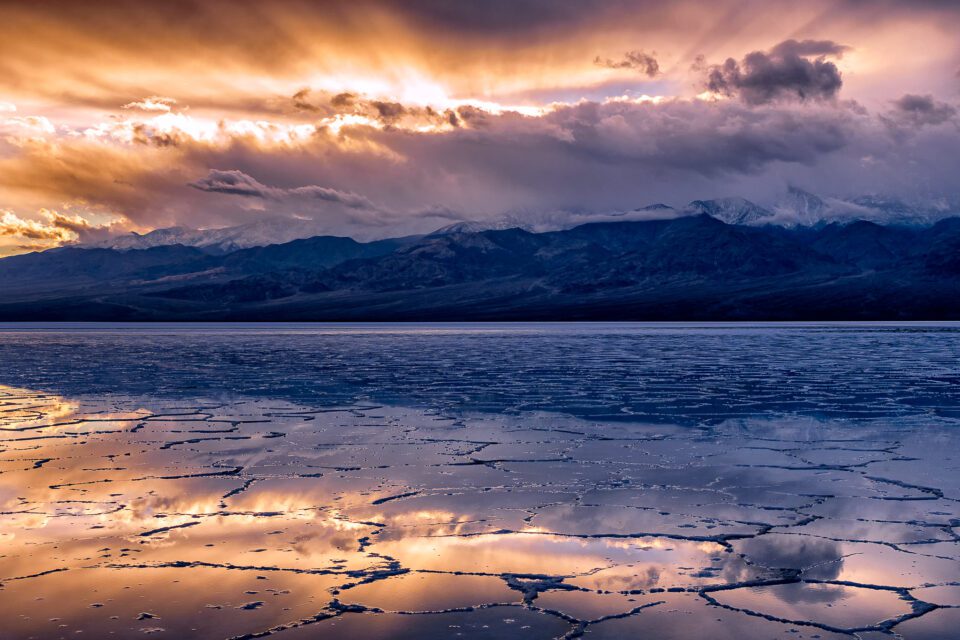
Badwater Basin at Sunrise, Death Valley National Park, California
DSC-RX100M4 + 24-70mm F1.8-2.8 @ 16.17mm, ISO 125, 1/160, f/5.6
The composition here is again very simple – it is a 50/50 reflection, just like the shot below:
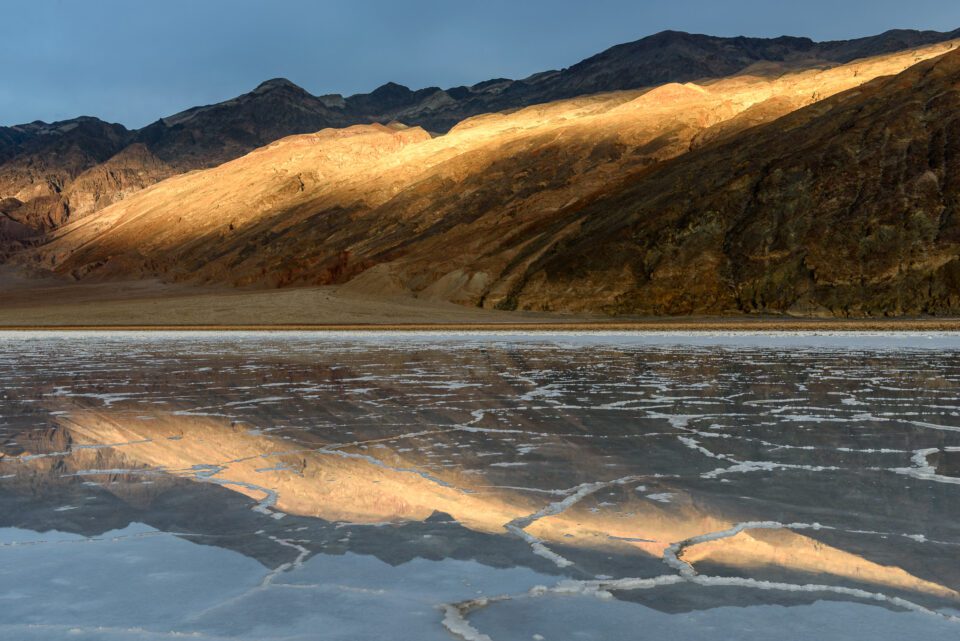
Light Reflection on Badwater Basin, Death Valley National Park, California
NIKON D810 + 24-70mm f/2.8 @ 34mm, ISO 64, 1/10, f/11.0
Sometimes we focus so much at the landscape in front of us, that we fail to see what happens right behind us. In this particular case, the clouds at sunrise were very dense, but there were a few openings that allowed sun rays to come through and paint on the landscape. I looked back and saw another opportunity for a mirror reflection, which I captured hand-held with my trusty Nikon D810 and the amazing Nikon 24-70mm f/2.8E VR. The composition is right-heavy for sure though – I wish there was a colorful cloud to the left, or it would be even nicer to have the moon there instead. I personally stay away from composites, which is why I didn’t just copy-paste the moon into the above shot.
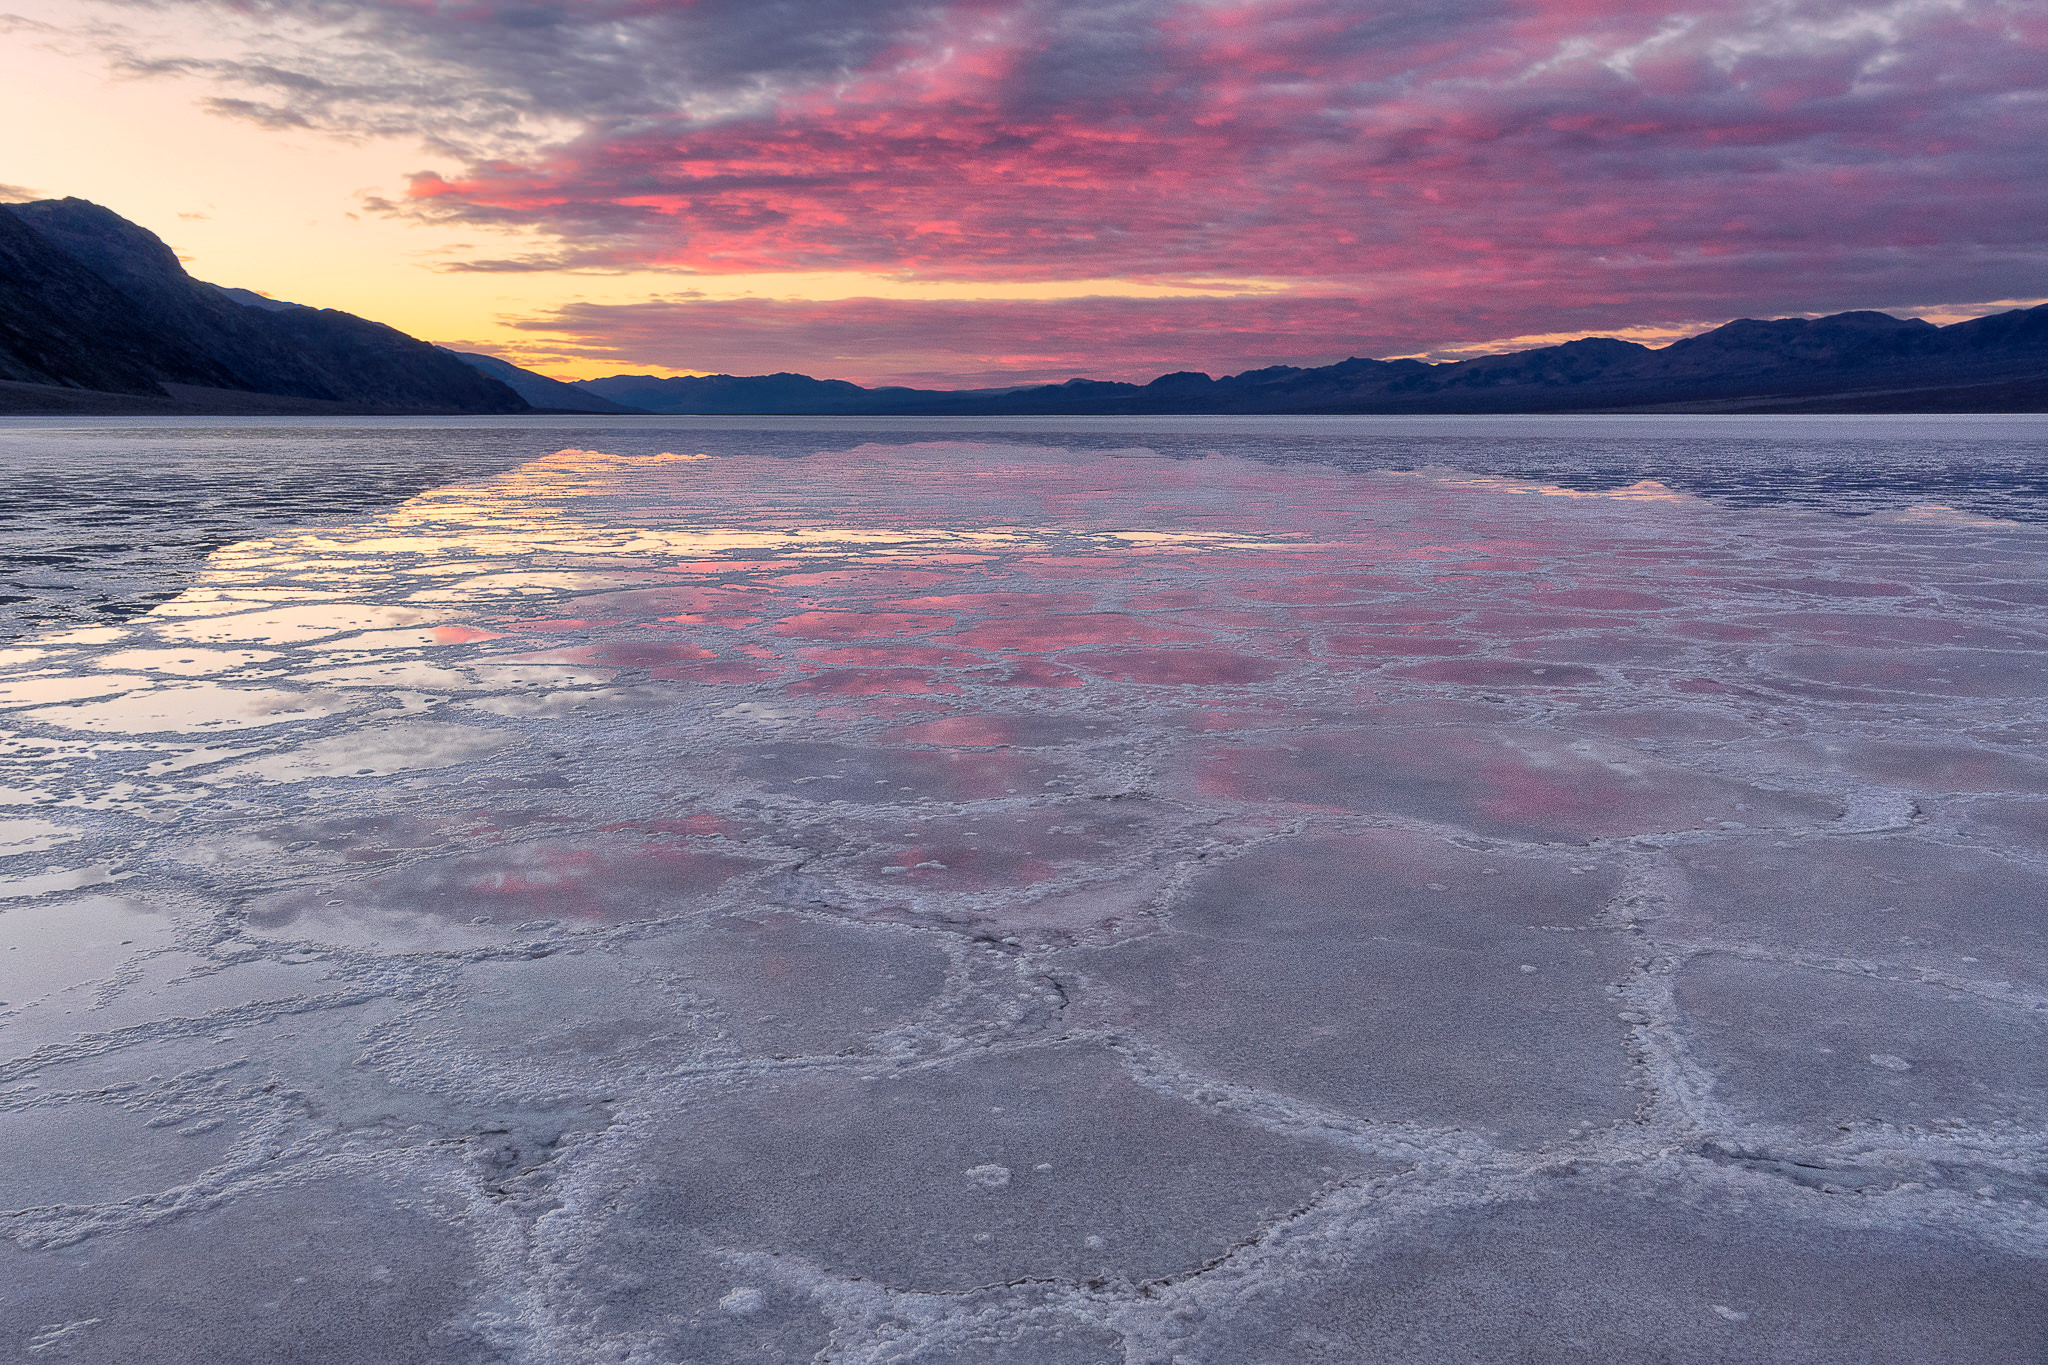
Persistence does pay off though. After visiting the same area a few times, I was fortunate to witness a beautiful sunrise with some clouds. This time, I focused a bit more on my composition and finally found some interesting patterns to fill the foreground with:
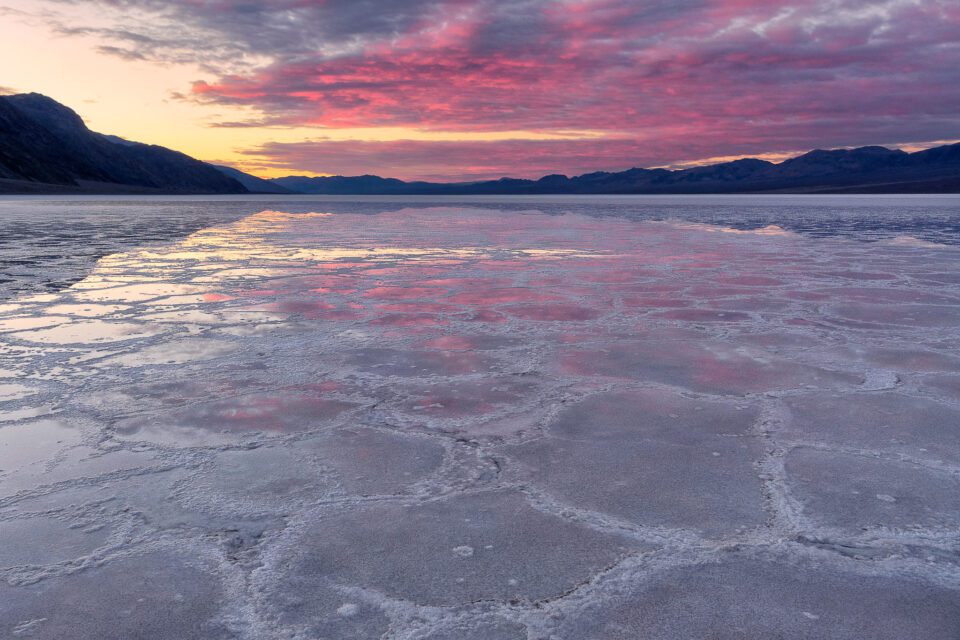
Sunrise at Badwater Basin, Death Valley National Park, California
DSC-RX100M4 + 24-70mm F1.8-2.8 @ 10.42mm, ISO 200, 1/8, f/8.0
I like this composition much better than the first two, as it shows the true beauty of the landscape I was standing on. My feet were soaking wet and cold though – the really nasty saltwater completely destroyed my Merrell Goretex waterproof shoes. If you ever visit Badwater Basin when there is water in it, make sure that you are ready to potentially sacrifice your hiking shoes / boots. Although I did my best to wash the salt away after each visit, a few trips ended up eating into the shoe fabric and penetrating it.
You might have noticed that many of my favorite shots from Death Valley were captured with a point-and-shoot Sony RX100 IV. There are a few reasons for this. First, I always do my best to take as many shots as possible with the camera I intend to review. Second, although I do have similar images captured with much better cameras like the D750 and the D810, I already post-processed them for the review anyway, so I decided to use the same images instead of having to re-post-process everything. Third, the Sony RX100 IV is a wonderful camera that produces beautiful images, so why not showcase its capabilities again? And lastly, many obsess over camera gear too much – keep in mind that bigger is not always better. Even with point and shoot cameras one can yield pretty incredible results. Would I want to make a wall-sized print with the images from the Sony RX100 IV? Of course not! But for smaller prints and the web, even cameras with 1″ sensors can produce amazing images.
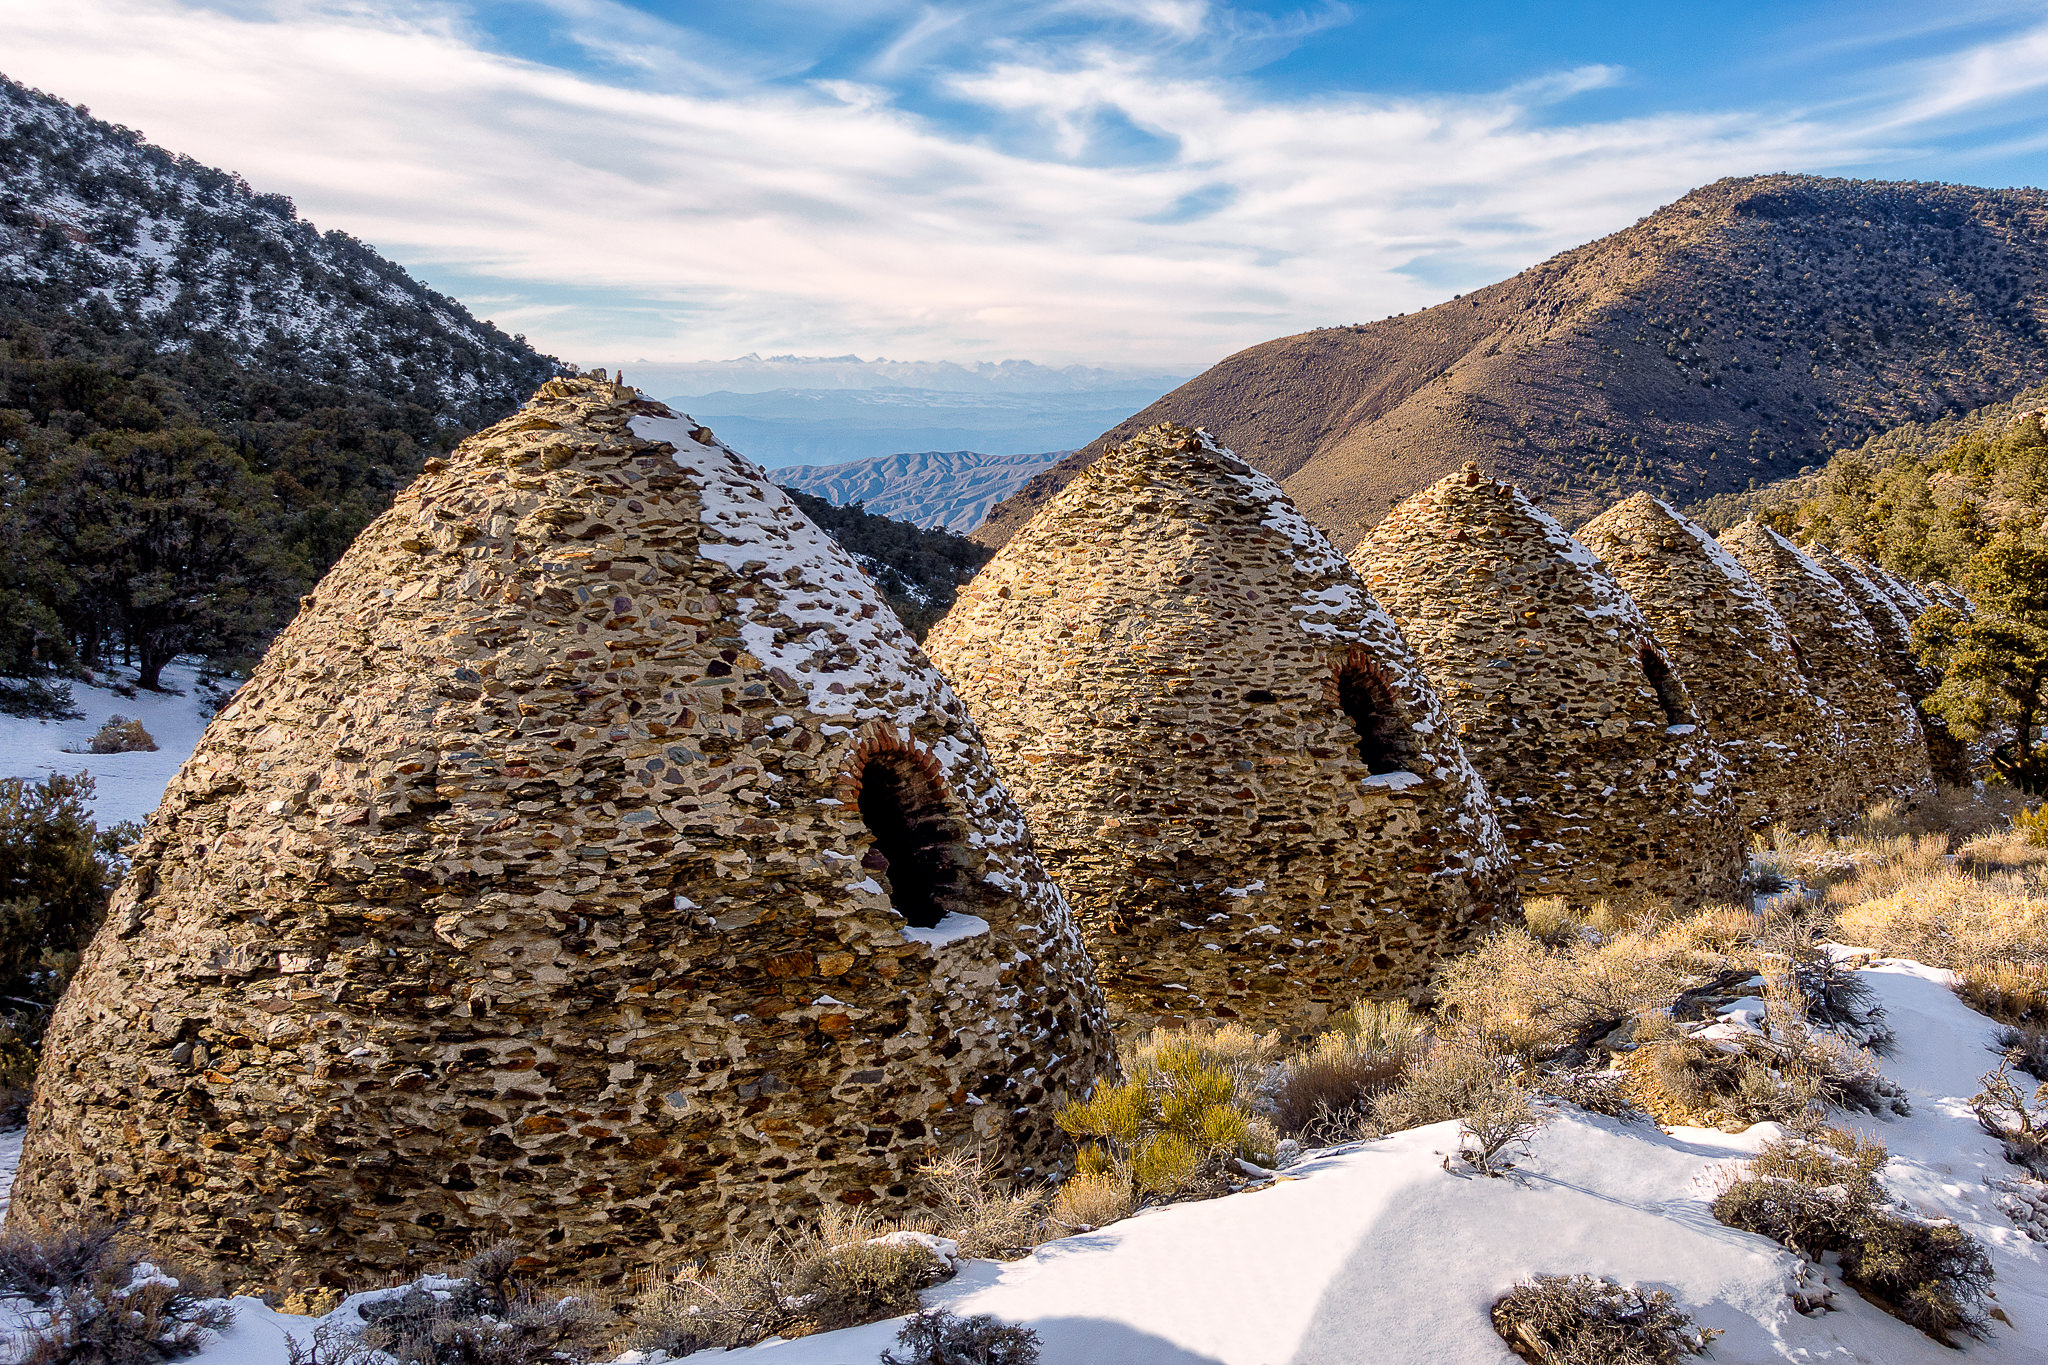
During my last visit, I decided to spend a little more time checking out other areas of the park that I have never explored before. I made it all the way to Charcoal Kilns, which is definitely something I really enjoyed photographing. Although I shot the below image late in the day (the drive from Furnace Creek is pretty long!), I like this particular composition – the hills in the back form a nice “V”, showing the valley behind, while the kilns form a repeating pattern and serve as a nice foreground element:

Charcoal Kilns, Death Valley National Park, California
DSC-RX100M4 + 24-70mm F1.8-2.8 @ 14.1mm, ISO 125, 1/400, f/5.6
The only painful part was cloning out all the footsteps on the snow – it turns out that a lot of people visit the kilns, even in the winter!
It was also the first time I visited Eureka Dunes. Another long drive, but definitely worth it, especially if you are after photographing really tall sand dunes. I decided to climb one of the peaks, so with two cameras hanging off my neck and a heavy backpack on my back, I started moving up one of the dunes. As I looked up, I saw this scene:
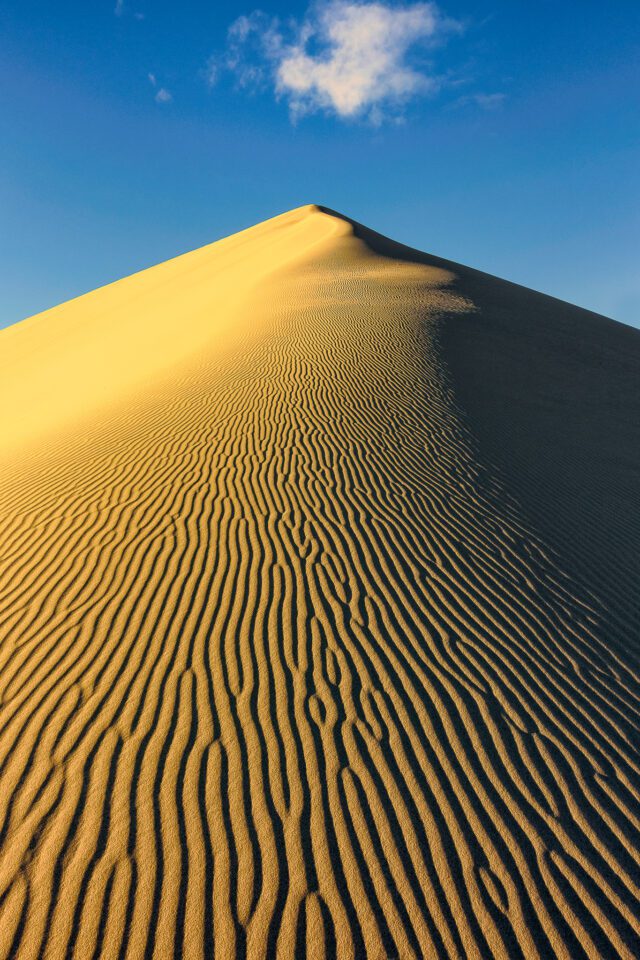
Eureka Dunes, Death Valley National Park, California
DSC-RX100M4 + 24-70mm F1.8-2.8 @ 8.8mm, ISO 125, 1/200, f/8.0
It was a pretty clear day, but a single patch of cloud was moving in the sky. I did not quite capture it at the perfect time though – by the time I raised the camera and took a shot, the cloud already moved a bit to the right. Oh well, I still like this image, since the patterns in the sand are nicely defined and beautiful, making for a great foreground. They also lead the eye towards the top, where the peak takes a well-defined triangular shape. Sand dunes are great to capture right after sunrise or right before sunset, since you get those beautiful, golden lines with shadows that shape up the dune patterns.
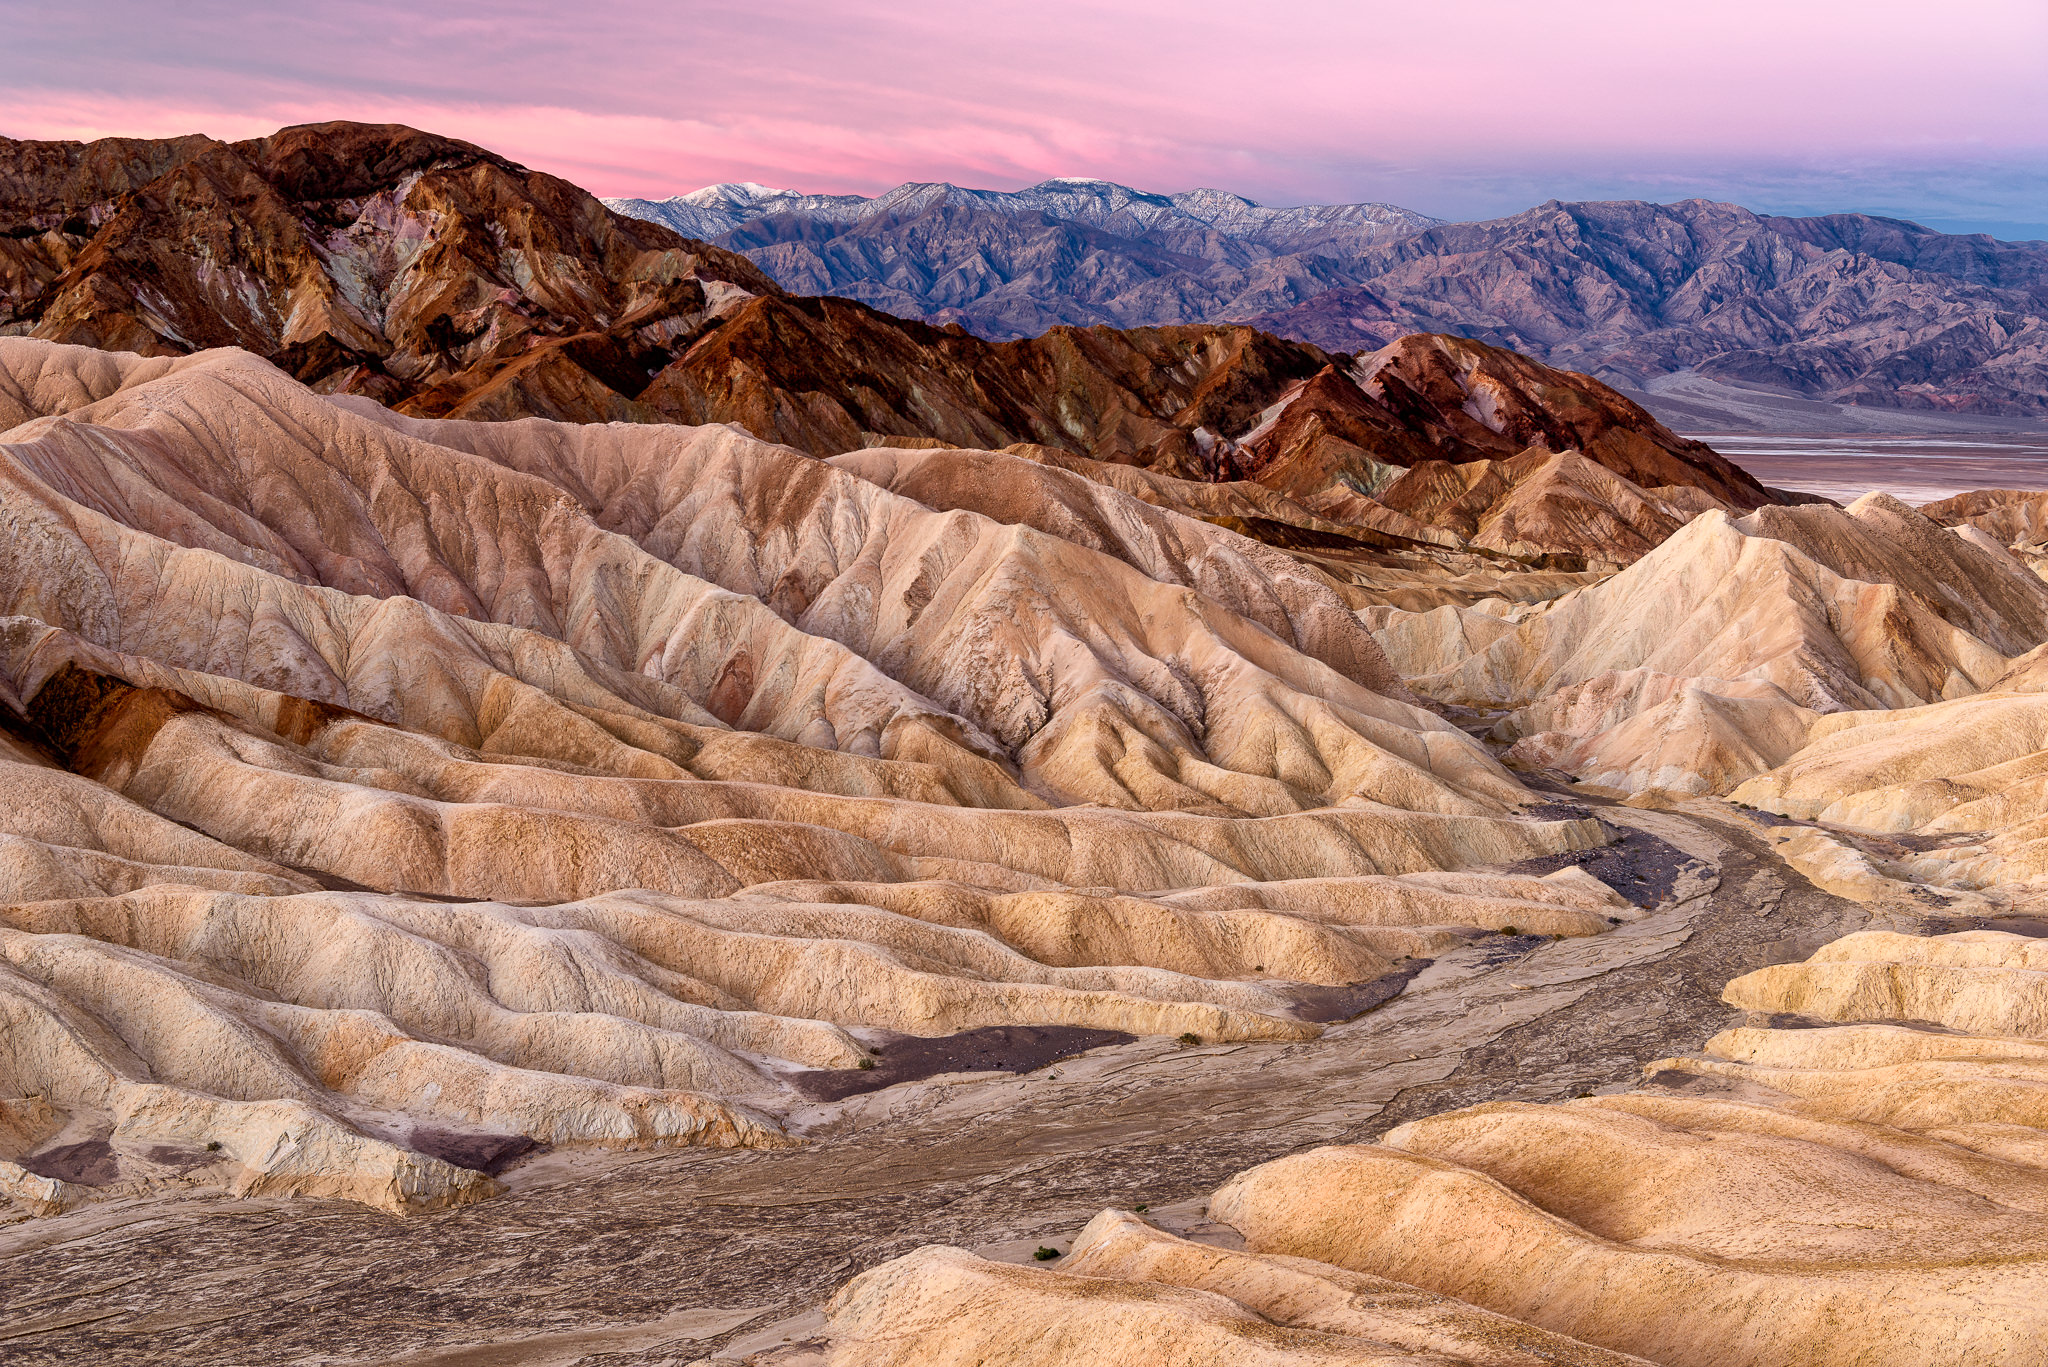
After spending a day at Eureka Dunes, I headed back to Zabriskie Point to attempt to capture some colors again. I did not get amazing clouds, but I certainly did get some colors in the distance. For this composition, I decided to concentrate on the area to the left of the Manly Beacon. Again, the patterns and the shapes here work out great, especially at sunrise. I used the bottom of the basin that resembles a road for composition – it helps lead the eye from the bottom left side of the frame to the higher darker hills, the background mountains and the colors in the sky, and having that curve at the end makes it a successful composition.

Zabriskie Point at Sunrise, Death Valley National Park, California
NIKON D810 + 24-70mm f/2.8 @ 38mm, ISO 64, 2/1, f/8.0
If you are willing to explore the area around Badwater Basin and Furnace Creek, you can find all kinds of interesting places and foregrounds to use for composition. For the below shot, I found an area with crazy circular shapes that were formed as a result of moisture, salt and soil type:
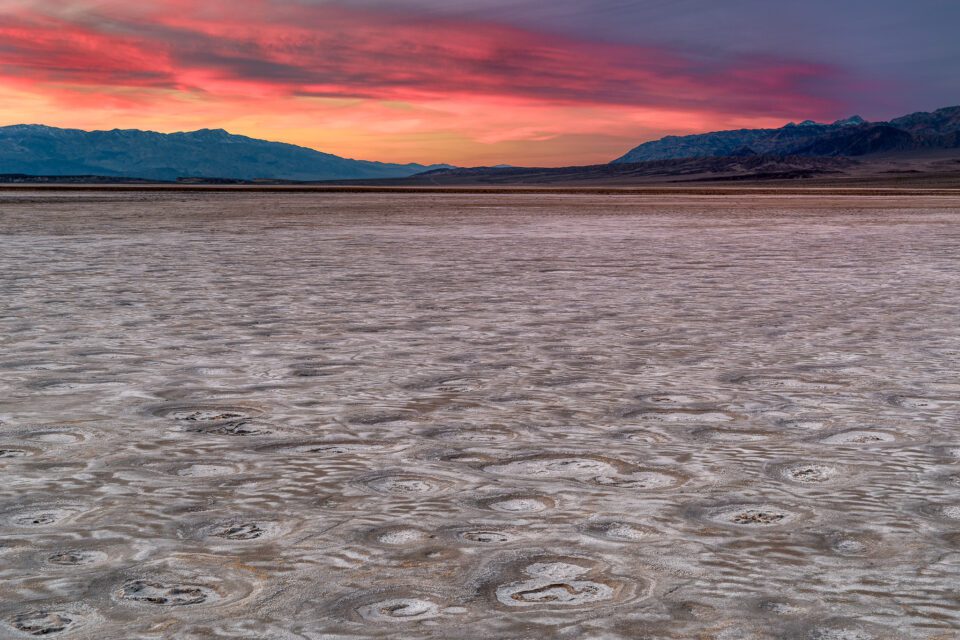
Circular Patterns, Death Valley National Park, California
NIKON D810 + 24-70mm f/2.8 @ 52mm, ISO 64, 2/1, f/11.0
The colors in the sky were very vivid and bright, so it was a good opportunity to include it in the scene. I walked around quite a bit until I found an area that would allow for a balanced “V” composition for the hills in the background.
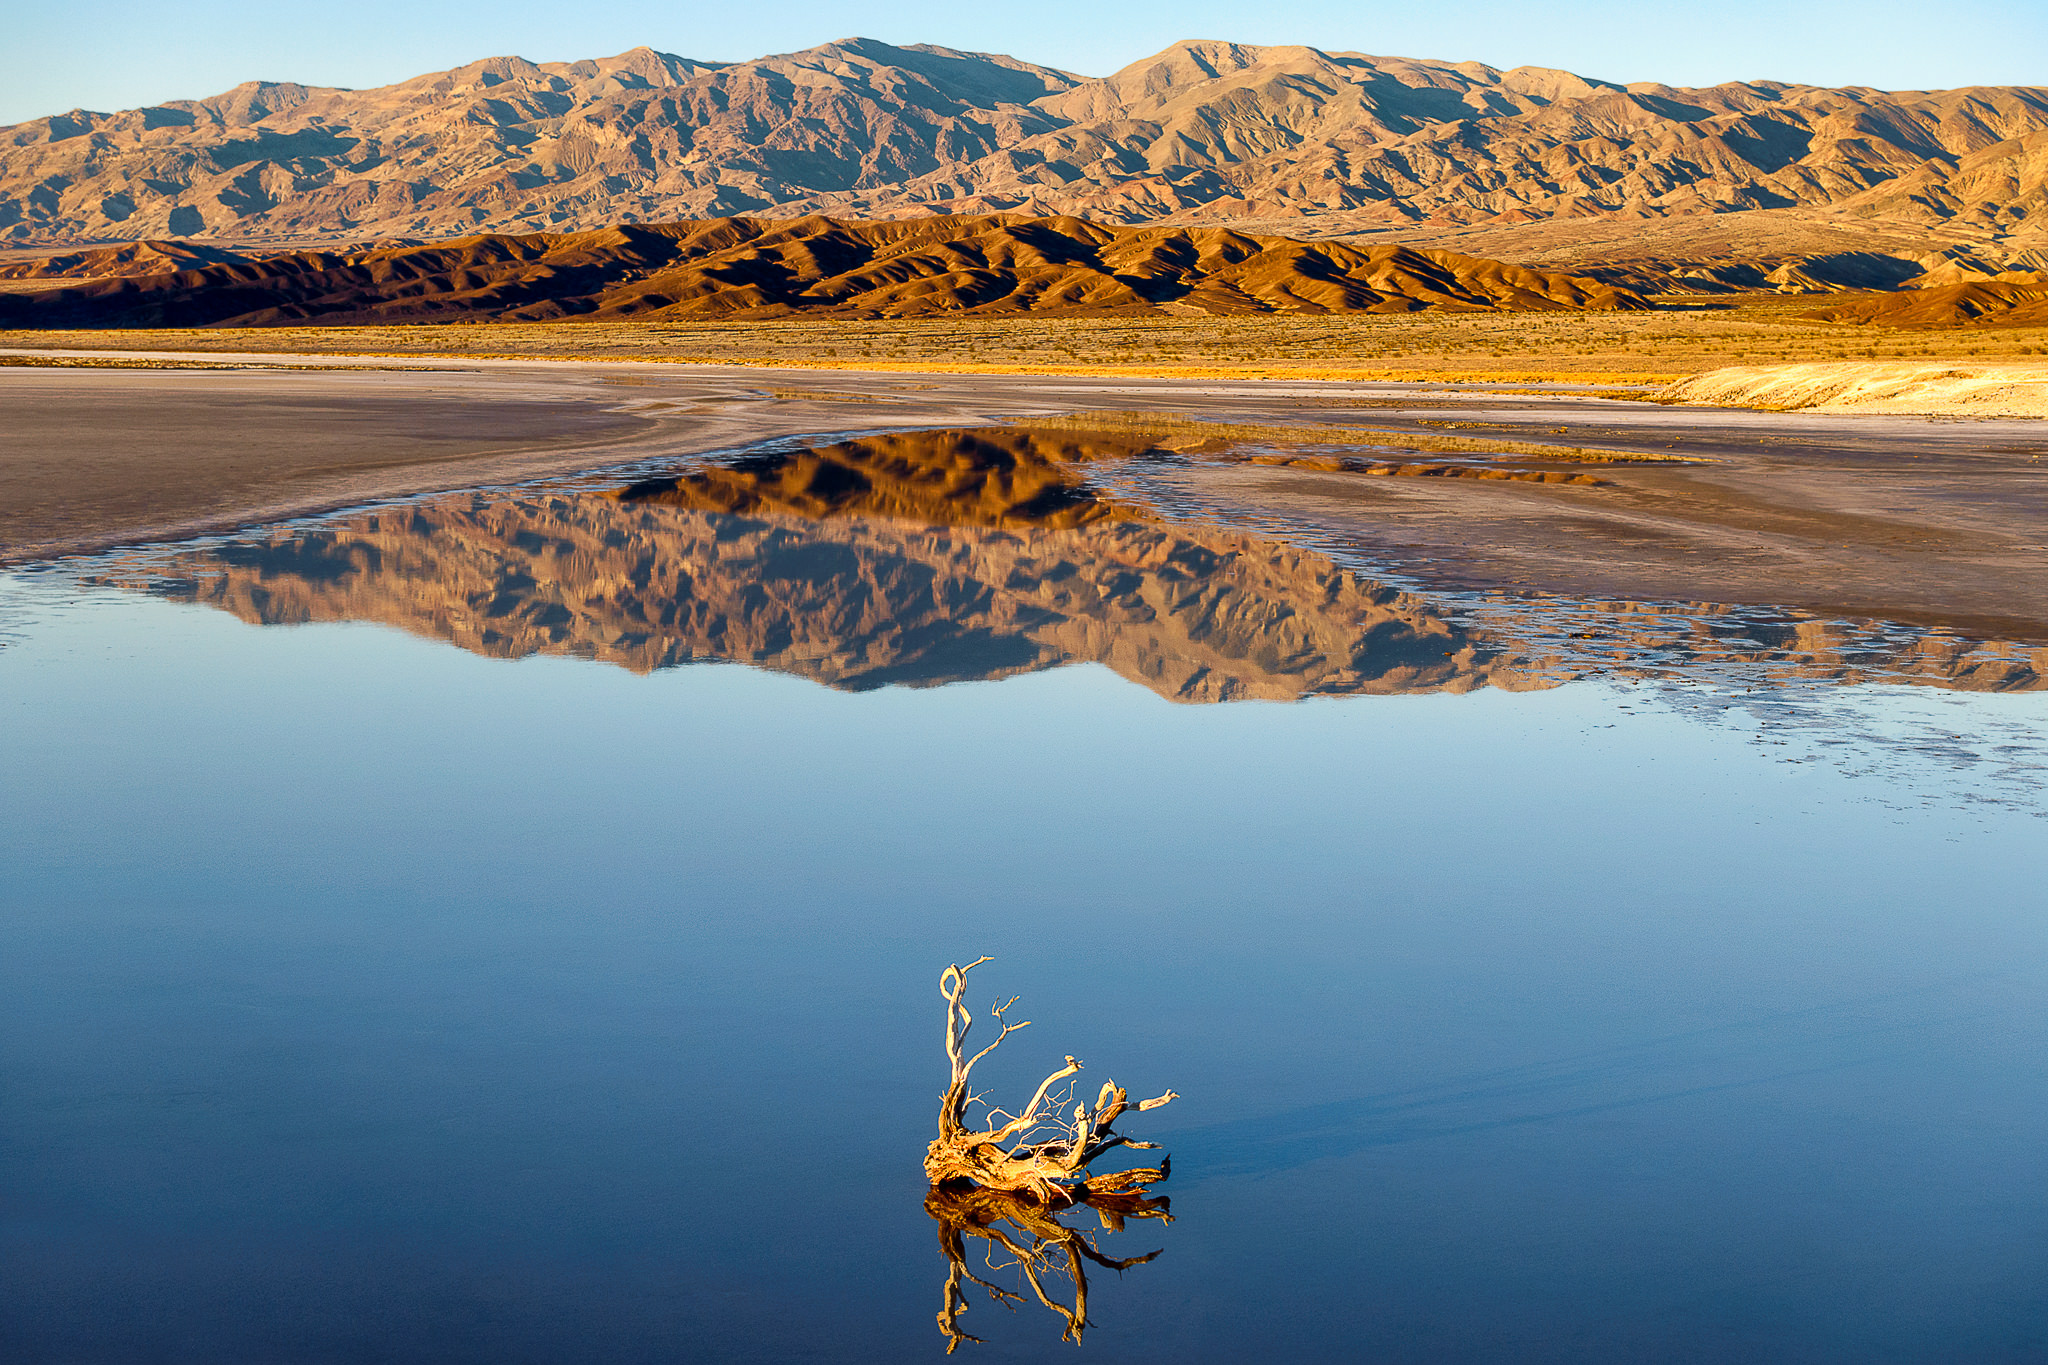
I liked the area quite a bit, so I decided to scout the area again next day. I found an area that had quite a bit of water in it and as I was exploring it, I found remains of a plant, which worked out great as a primary foreground subject:
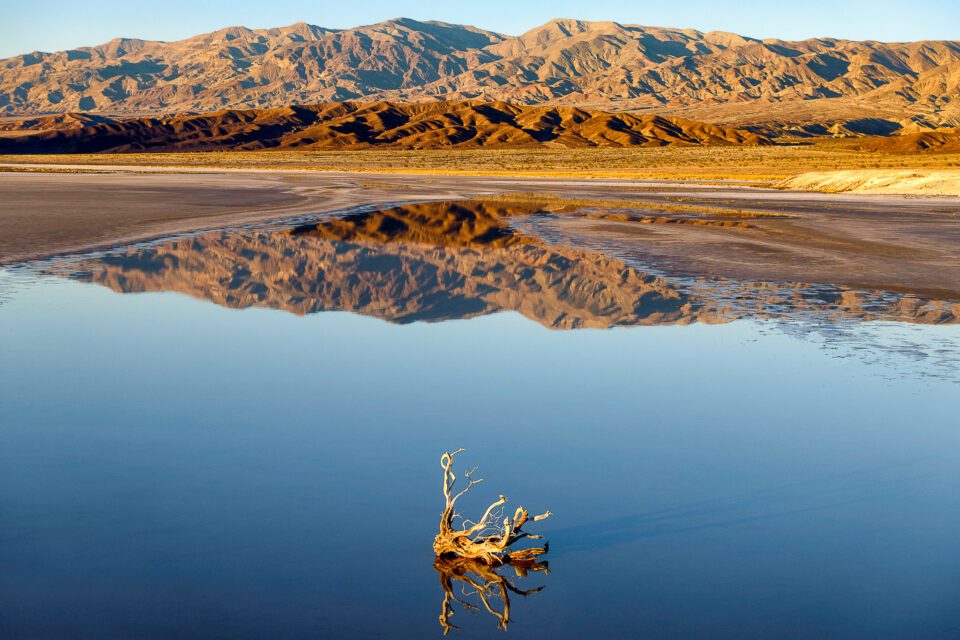
Dead Bush, Death Valley National Park, California
DSC-RX100M4 + 24-70mm F1.8-2.8 @ 20.81mm, ISO 125, 1/200, f/5.6
It is a perfectly balanced shot for a number of reasons. First, the dead bush remains sit right in the middle of the reflection, which works out great compositionally – the stream gets narrower towards the end, forming a nice-looking triangle, which then leads the eye towards the beautifully shaped mountains in the background. The mountains are also perfectly balanced in this case, forming a nice-looking “V” right in their center towards the top of the frame. Since the day was very clear, I excluded most of the sky on purpose. Note that I included the full reflection of the dead bush – when dealing with reflective surfaces, you do not want to cut into your primary subject, or its reflection (more on this in our Landscape Photography eBook). I suspect that the dead bush was placed by another photographer in this particular location for a good reason – it works out great as a foreground element. I seriously doubt that the bush was just washed away perfectly like this, although there is a very small chance that it actually happened 🙂
As I was ready to wrap up my trip, the Pentax 645Z medium format DSLR finally arrived – I was hoping to use it from day one at Death Valley, but sadly, B&H was out of stock on the lens I wanted to use with the camera, so I had to wait. As soon as I received the camera, I decided to revisit Zabriskie Point at sunrise again. After dozens of unsuccessful prior attempts, this time I was finally greeted with a truly spectacular sunrise. I set up two cameras on two tripods – my Nikon D810 with the 24-70mm f/2.8E VR and the Pentax 645Z with the 45-85mm f/4.5. Here is one of my most favorite shots from 2016:
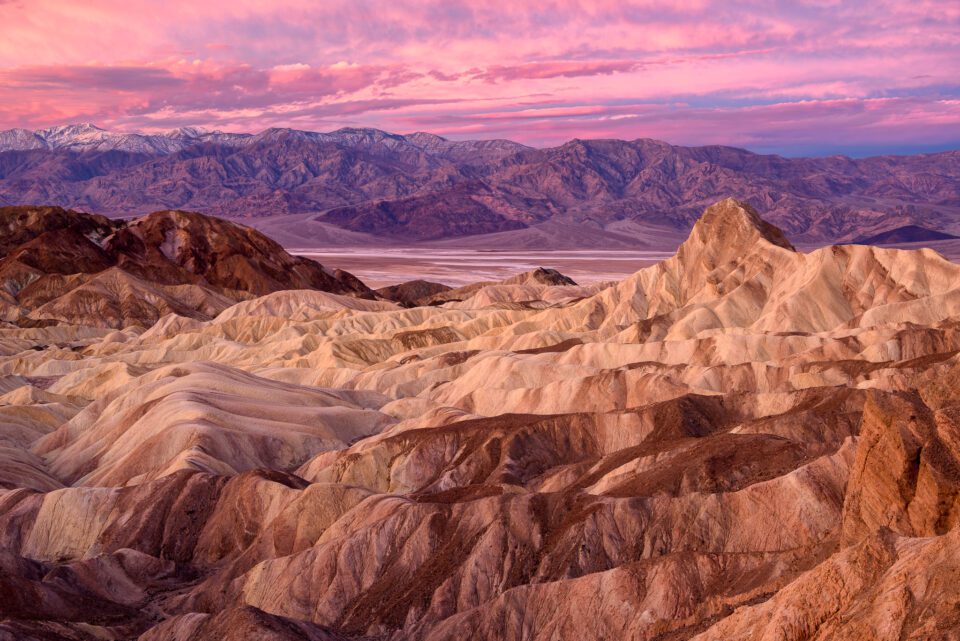
Zabriskie Point at Sunrise, Death Valley National Park, California
NIKON D810 + 24-70mm f/2.8 @ 40mm, ISO 64, 13/10, f/8.0
It was a spectacle worth coming back for! Dramatic sky, beautiful clouds and the colors were simply unbelievable. I documented my experience right here during my trip, because I was very excited. I was able to capture a panorama of this sunrise using the Pentax 645Z, yielding a very high resolution image that I can print really huge! Speaking of which, one of my goals for 2017 is to do some serious printing, so stay tuned for some articles on printing later this year!
On my way back home, I stopped at Joshua Tree National Park, taking some more pictures of the beautiful Joshua trees:
Joshua Trees at Sunset, Joshua Tree National Park, California
PENTAX 645Z + smc PENTAX-FA645 45-85mm F4.5 @ 75mm, ISO 100, 3/1, f/18.0
Initially, I planned for a center composition, but the large hill to the left made the shot look too left-heavy. Plus, there were too many distractions to deal with, making the image look overly busy. Simplicity is key, so I decided to exclude all that junk and place the three trees slightly to the left of the frame. Pay attention to subject isolation – none of the trees are crossing one other – only the middle and the right Joshua trees are barely touching each other, forming a relationship. I wish the hill to the left didn’t cross the leftmost tree, but oh well, there was nothing I could do about it.
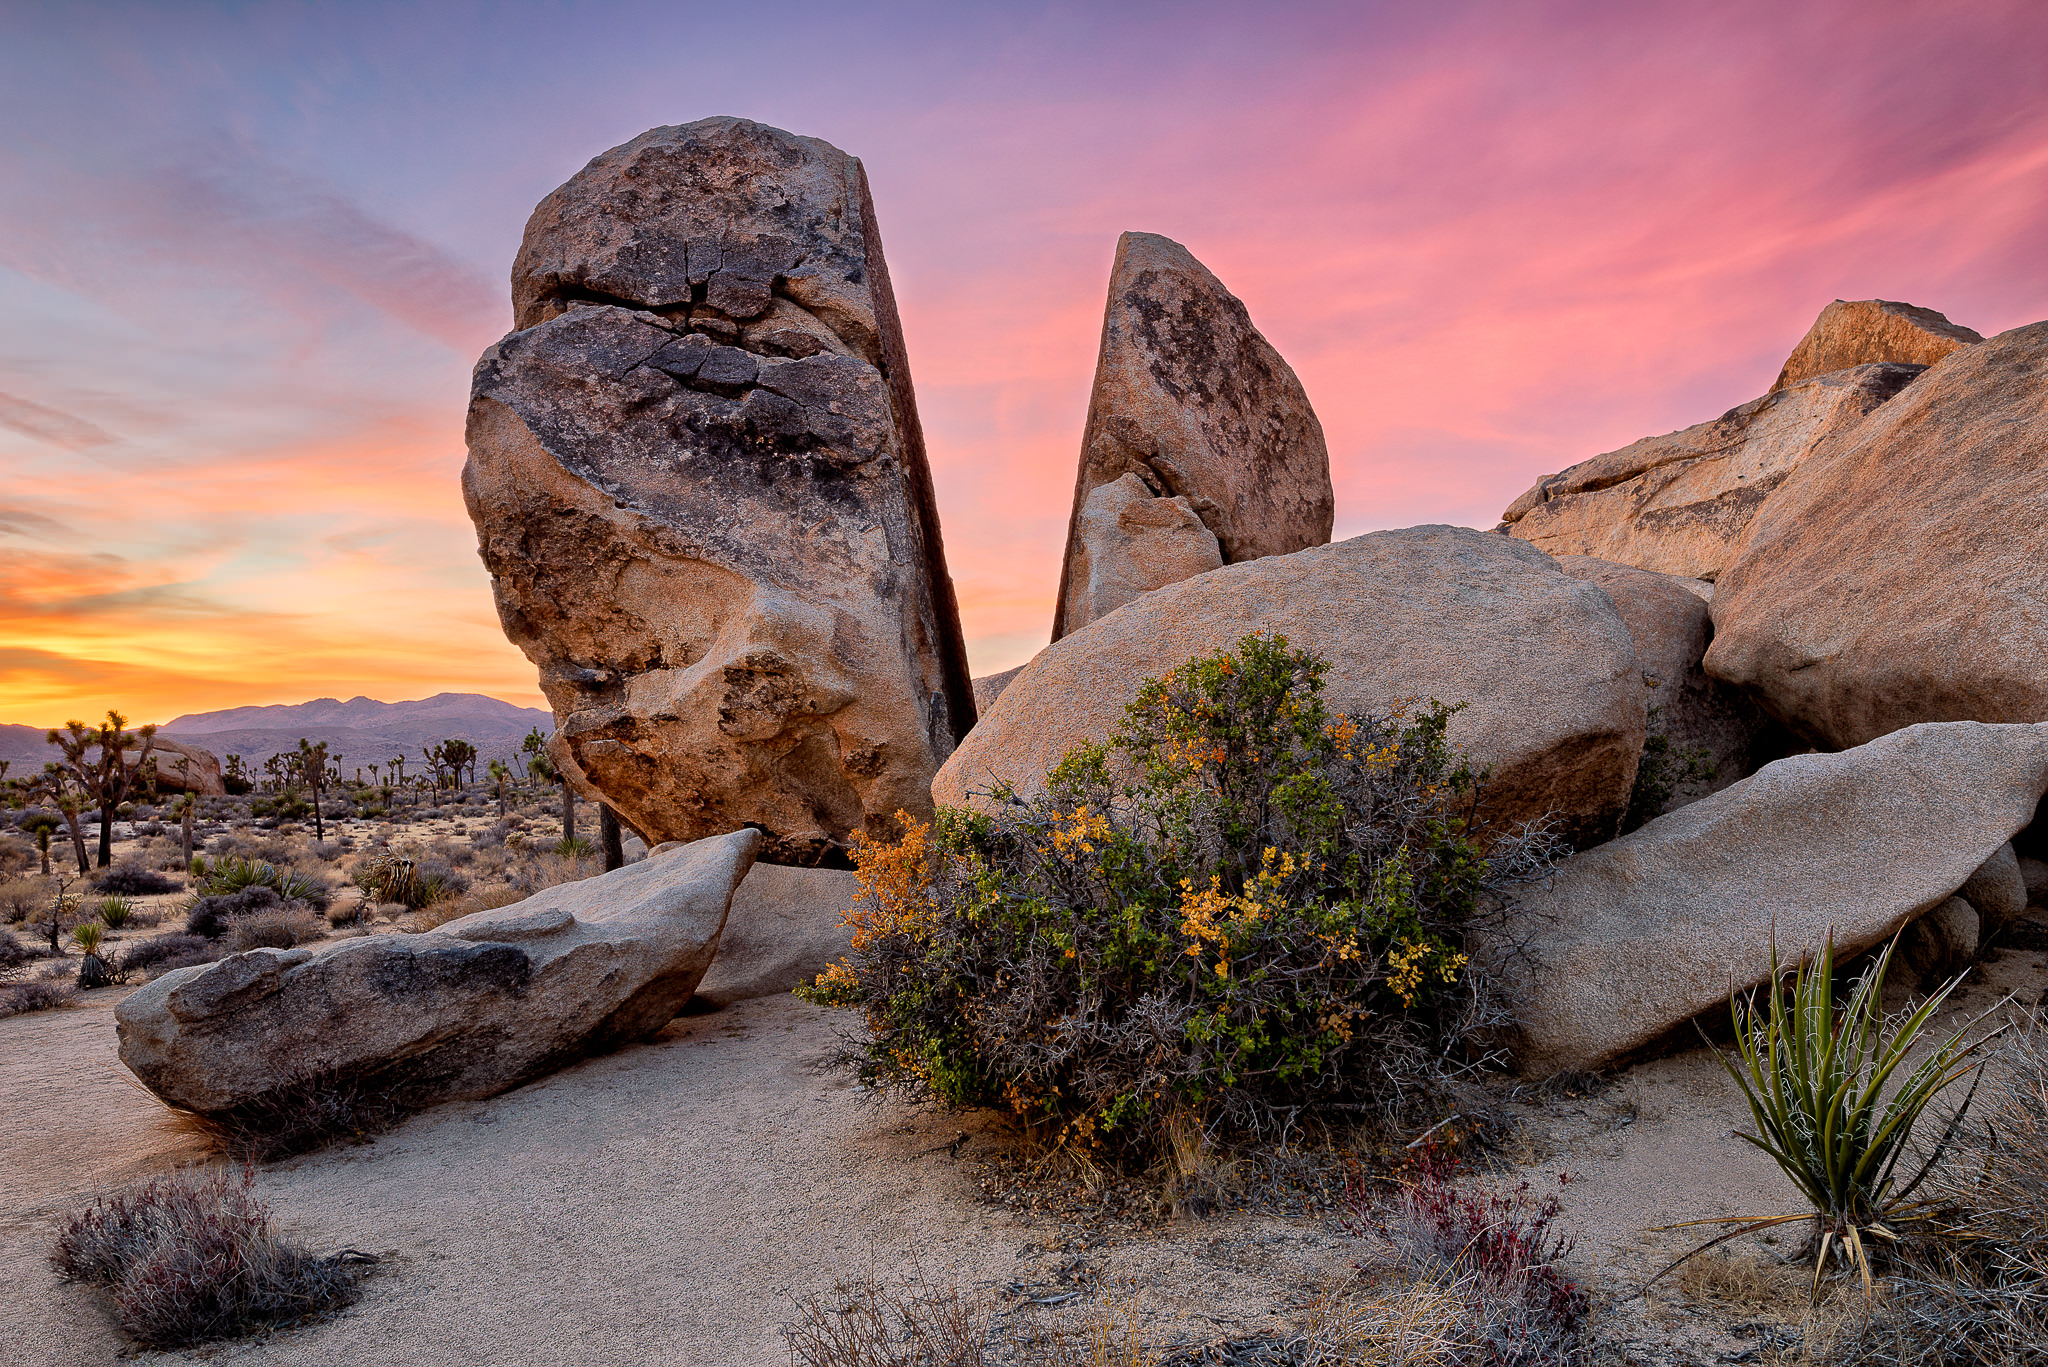
The next shot was captured at a previously scouted area in the same park. It is a pretty complex composition with a number of elements in it, with the “V” split rock being the primary subject:

Split Rock, Joshua Tree National Park, California
NIKON D810 + 24mm f/1.4 @ 24mm, ISO 100, 25/10, f/11.0
I documented this composition in detail in this article, explaining exactly what I have done, so I recommend that you give it a read – I won’t repeat everything here, since the post is quite comprehensive. The post was taken from the case study section of our Landscape Photography eBook.
Another 2016 favorite is from the Signal Hill area of the Saguaro National Park in Arizona. For this shot, I used the Pentax 645Z to make a panoramic image. The clouds looked beautiful at sunset, so I did not want to miss the moment to capture a very detailed image. For composition, I used the rocks in the foreground as the main element, with the circular petroglyph on the large rock serving as the primary element. The mid-frame is composed of saguaro trees, whereas the background is nicely balanced with distant mountains and the colorful sky. I had to stop down quite a bit to get both the foreground and the background in focus:

Signal Hill at Sunset, Saguaro National Park, Arizona
PENTAX 645Z + smc PENTAX-FA645 45-85mm F4.5 @ 45mm, ISO 100, 5/1, f/22.0
This shot basically concluded my three-week trip, which was definitely one of the most fruitful trips in the past few years!
The next images are from Istanbul, Turkey. Lola and I spent our 10 year anniversary in Turkey and it was a wonderful experience during which I was able to capture a few great shots, one of which will definitely end up in my portfolio:
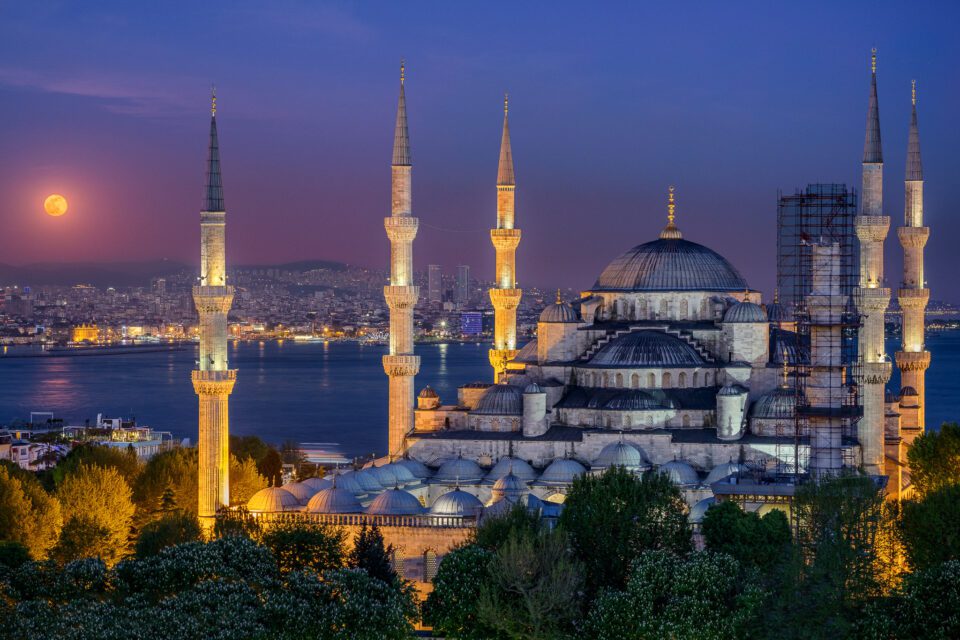
Moonrise Above the Blue Mosque, Istanbul, Turkey
X-Pro2 + XF56mmF1.2 R APD @ 56mm, ISO 200, 1/8, f/5.6
We were very lucky to witness this scene – the beautiful and timeless Blue Mosque right after sunset at blue hour, with the full moon appearing right behind it. What a recipe for a perfect composition! I placed the mosque a bit to the right, fitting the moon to the left of the frame. Although the moon was at a better position later on that night, clouds started blocking it and the colors in the sky were completely gone, making this shot my #1 pick. The Fuji X-Pro2 with the 56mm f/1.2 R lens made it possible to capture a lot of detail in the scene, although I wish I had the 50-140mm zoom during the time to go slightly wider, or do a panorama with.
The Fuji X-Pro2, along with the Sony A6300 accompanied me all the way in Turkey. To be honest though, I much preferred the X-Pro2 to the A6300, so I ended up using the Fuji a lot more in comparison. Plus, the lenses for the X-Pro2 were amazing, while Sony lenses were all crap, which definitely contributed to less use of the Sony camera. Sadly, Sony has been pushing most of its efforts on full-frame lenses, pretty much neglecting APS-C, just like Nikon and Canon have done for years. For this reason alone, I would never invest in Sony’s APS-C cameras like the A6300/A6500, no matter how good they are. Fuji has made wonderful lenses for the X mount and it continues to deliver year after year, which is why I personally decided to invest in the Fuji X system. I have no regrets and I love my X-T1, although after my experience with the X-T2, I am seriously thinking about moving up (more on the X-T2 in the second part).
Here is another shot from Istanbul that I captured with the X-Pro2, but this time using the 10-24mm f/4 OIS lens:

Sokullu Mehmet Pasa MosqueX-Pro2 + XF10-24mmF4 R OIS @ 14.5mm, ISO 200, 1/20, f/5.6
This is the only composite shot I have shown on this site, mostly for educational purposes. You can read this article that explains everything I have done in this image, including the blending of the sky and the foreground to teach about using Luminosity Masks for blending images. In short, I combined the sunrise sky with the pre-sunrise shot of the mosque, which was a pretty complex procedure that involved quite a few steps in post-processing using layers in Photoshop.
That’s a wrap of Part 1 of the “Best of 2016” images. In Part 2, I will showcase some images from other trips I had in 2016, along with a few images from New Zealand, so stay tuned. Part 2 is going to have a lot more images in comparison, along with some notes on the Fuji X-T2!
The post Best of 2016 – Part One appeared first on Photography Life.
Photography Life