In the first of a series of follow-up articles to The Quality of Light, I have posted this article to share a series of photographs (along with the thought processes behind them) that I hope will accentuate the interplay of light, directionality, shadows, and mood in landscape photography. As previously discussed, the directionality of light is a powerful factor in defining the quality of shadows, the contrast, textures, and three-dimensionality of a scene, as well as the mood and emotion that the photograph will convey. In particular, unidirectional light qualities (e.g., side lighting and backlighting) serve this purpose well in landscape photography.
Unidirectional side lighting sweeping across the landscape, creating long shadows, revealing textures, and imparting depth
Nikon D800, Nikkor 28-70mm f/3.5 – 4.5 D
Unidirectional side lighting sweeping across the landscape, creating long shadows, revealing textures, and imparting depth
Mamiya 7II, 43mm f/4.5 L, Fujichrome Velvia 50, Hoya HMC 81A
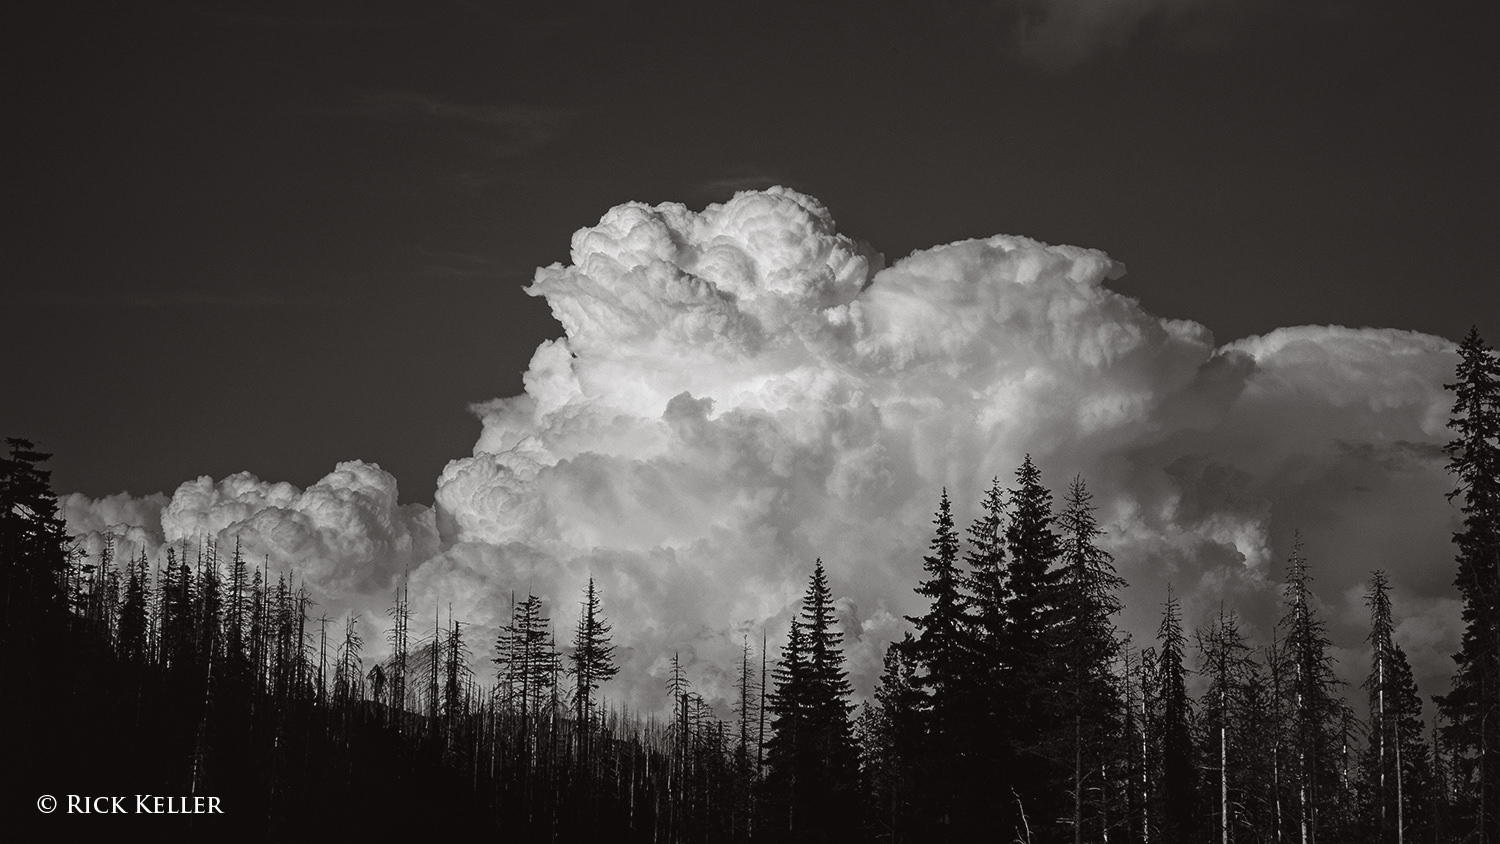
Moreover, with both unidirectional and non-unidirectional lighting the prevailing cloud cover can potentially be an equally powerful factor in modifying the quality of light. In landscape photography, clouds serve two instrumental purposes. The most obvious is that they can potentially represent a strong compositional element in the scene.
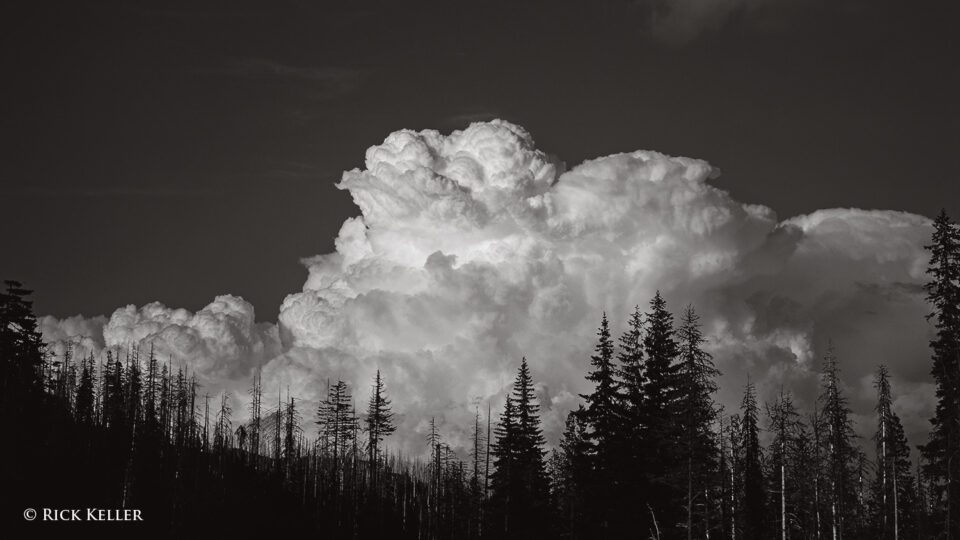
Mamiya 7II, 150mm f/4.5 L, Kodak T-Max 100, Hoya O (G) HMC (Wratten #16), Hoya HMC polarizer

Mamiya 7II, 80mm f/4 L, Ilford Pan F Plus 50, Hoya Y (K2) HMC (Wratten #8), Hoya HMC polarizer
Secondly, clouds can be effective substrates in modifying the quality of shadows, and thus, the contrast, textures, and depth of the scene. As previously discussed in The Quality of Light, in the context of even lighting overcast skies represent one extreme of cloud cover that causes the incident sunlight to illuminate the scene from all angles, resulting in less well-defined shadows, relatively lower contrast, and potentially a flat appearance of the landscape. In essence, the cloud cover of overcast skies serves as a giant “soft box” that increases the effective area from which light emanates, creating a diffuse light source that fills in shadows, resulting in low contrast. Depending on the photographer’s visualization for the photograph, this quality of light may or may not be desirable. On the other extreme, in the relative absence of clouds (i.e., clear blue skies) the sun serves as a “point” light source that depending on other factors (the directionality of the light, time of the day, season of the year, geographical latitude/longitude) results in more well-defined shadows and potentially excessive contrast that may or may not be desired.
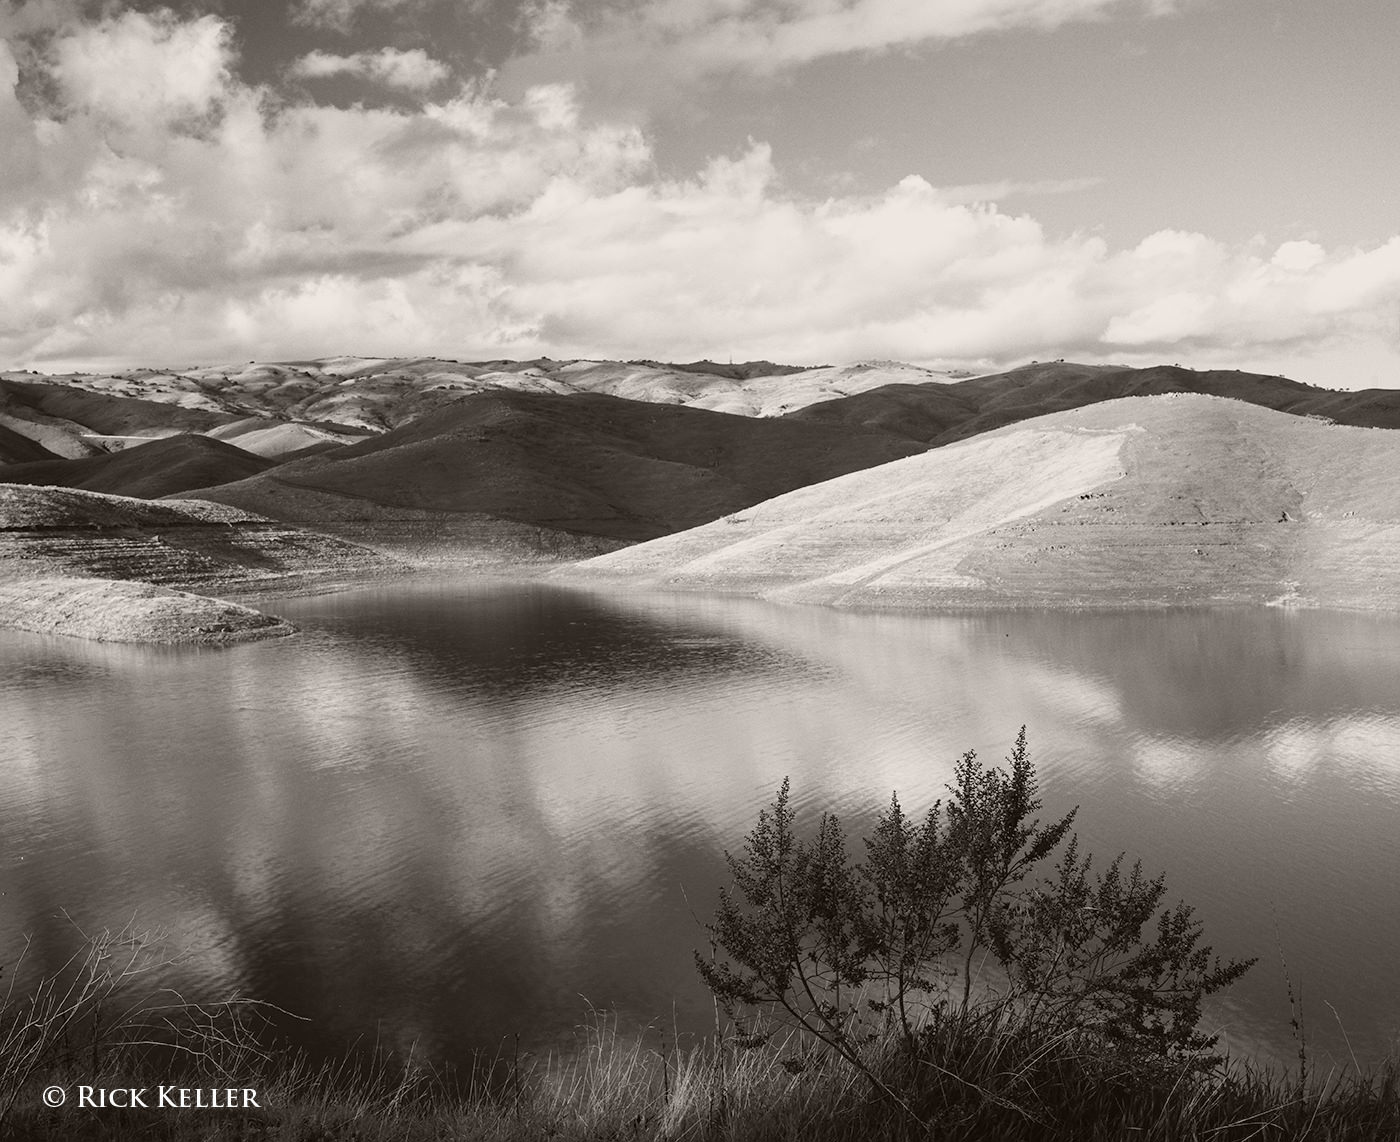
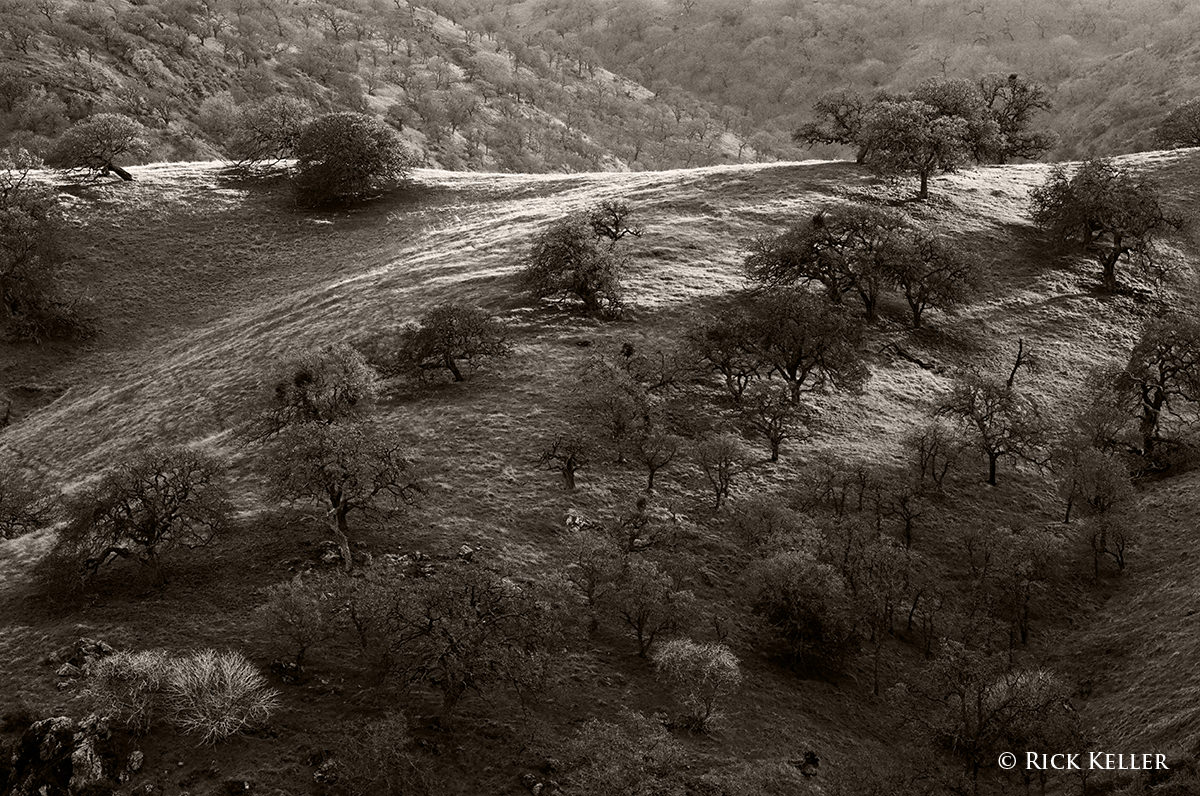
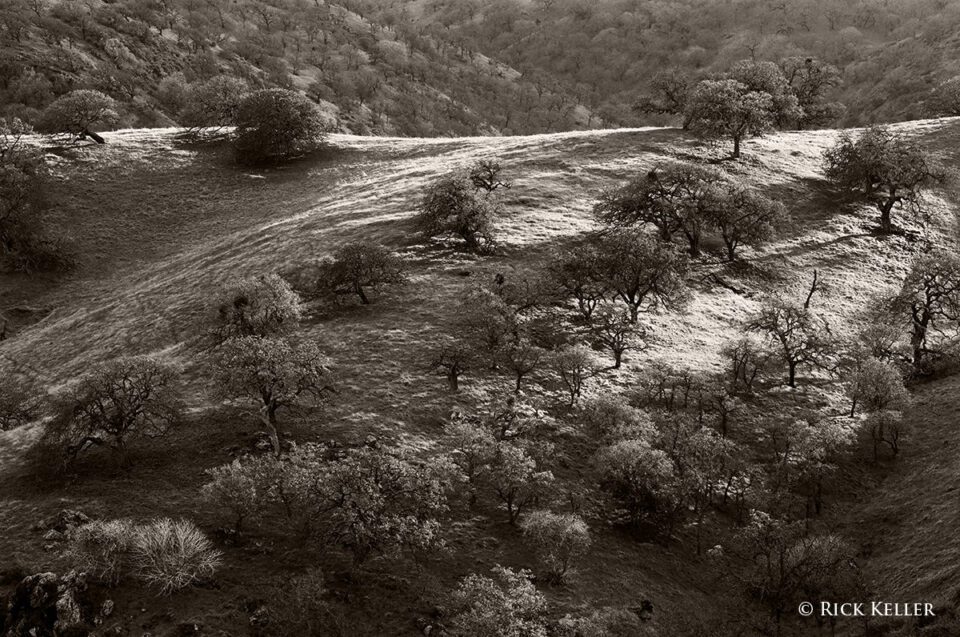
With these considerations in mind, let’s examine how cloud cover and its potentially dynamic nature can alter the quality of light and the mood of a landscape scene. Consider the following series of four photographs, all made in a single photo shoot in the late afternoon on a winter day in the U.S. with the sun at a relatively low angle in the sky. (Technical notes: Nikon F6, Nikkor 70-200mm f/4 G ED VR, Rollei Ortho 25, Hoya HMC polarizer)


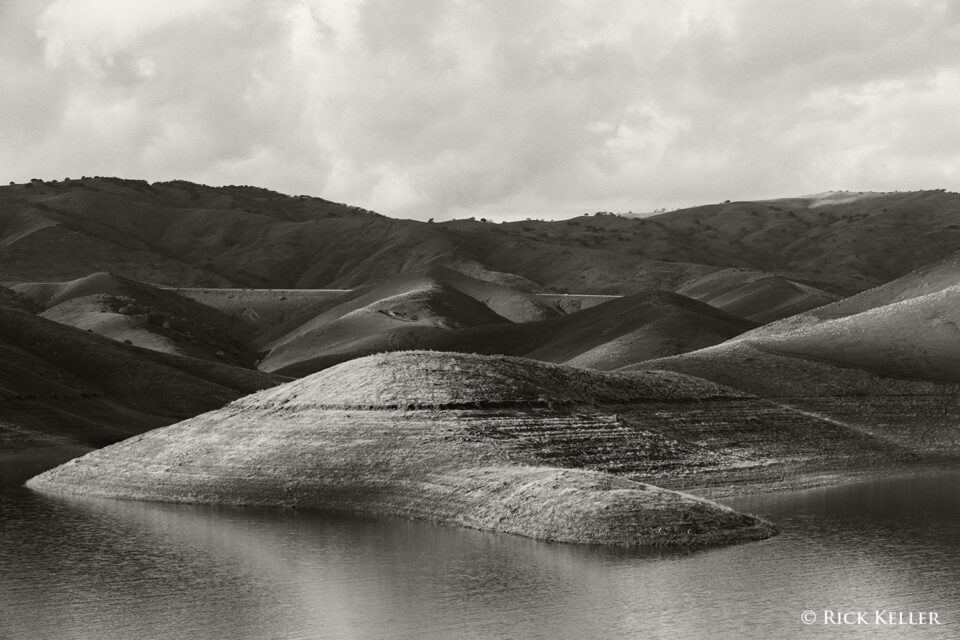
First, please note the directionality of the light. From which direction is the incident light illuminating the landscape? What direction are the shadows being cast? Perpendicular to the lens? Toward the lens? Or away from the lens? Here, I chose one of my preferred qualities of light: unidirectional light from the side and slightly behind the landscape (oblique angle relative to the lens), which lends itself well to revealing textures, shape, and dimensionality. Secondly, please note the dense cloud cover. I had been scouting this site for the previous two weekends at the same time of the day. At that time the paucity of cloud cover yielded unfettered unidirectional light that was too intense and contrasty for what I visualized for my photograph; there were not enough shadows to impart the mood and dimensionality that I desired. So, as any determined landscape photographer would do, I patiently waited for the weather to change to obtain the desired cloud cover and quality of light. And I waited … and waited … until Mother Nature kindly provided a few rainy days. In my humble opinion, when bad weather arrives the time is now for the landscape photographer. I plan to have more thoughts on this special quality of light in a dedicated article soon, but an approaching and/or clearing storm can potentially create a special quality of light that can provide the landscape photographer with his most cherished tool and inspiration to capture the moment. It is a quality that you cannot adequately describe in words; you just have to be there to witness it and photograph with it. For this particular series of photographs, I waited until the storm front began to clear and the cloud cover to gently lift. Ultimately, I was blessed to have had cloud cover that was physically dynamic – changing form moment to moment, providing a beautiful quality of light with moderated intensity and dynamic shadows to paint the landscape. It was gorgeous!
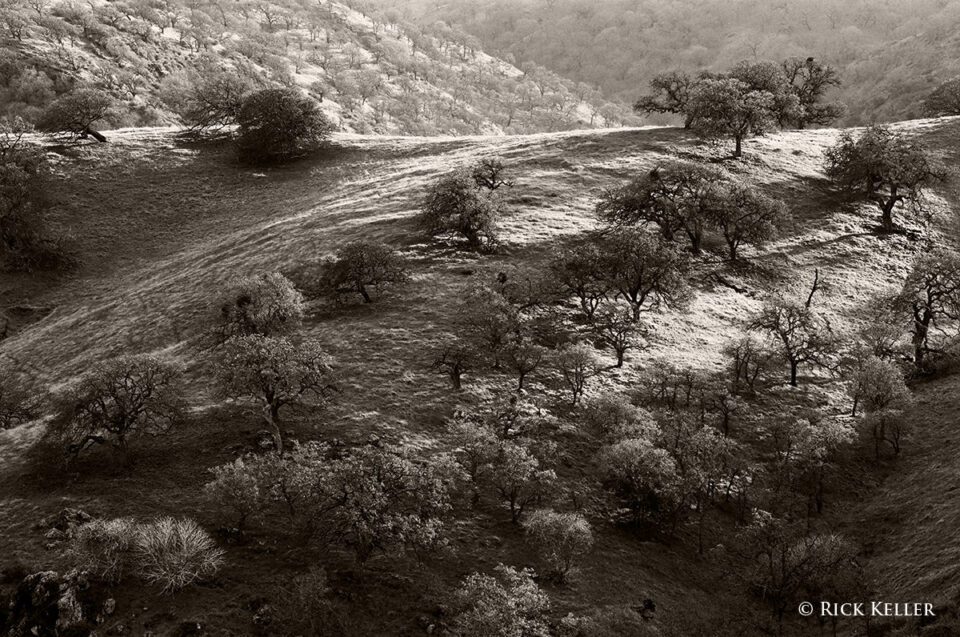
Please, carefully study the above series by clicking on the first photo and using the toggle arrow at the right hand corner to scroll back and forth. Starting with the first photo, you can discern that the dense cloud cover had pockets that allowed some sunlight to bathe the landscape, creating a lovely series of alternating highlights and shadows that nicely revealed the textures of the grassy hills and imparted shape, dimension, and mood to the scene. As the clouds starting moving eastward and the pockets of light changed, the landscape evolved before the human eyes: a new set of shadows declared itself, revealing a new set textures, new shapes, and a different mood as the seconds elapsed. Every photograph in this series is different because the light and shadows are different. Herein lies the take home point of this article: it really is all about the light. My personal favorite photograph of this series is the third one, but that is a matter of taste and again highly dependent on the visualization process and what the photographer was feeling and seeing at the time of opening the shutter. This is what I love about landscape photography!
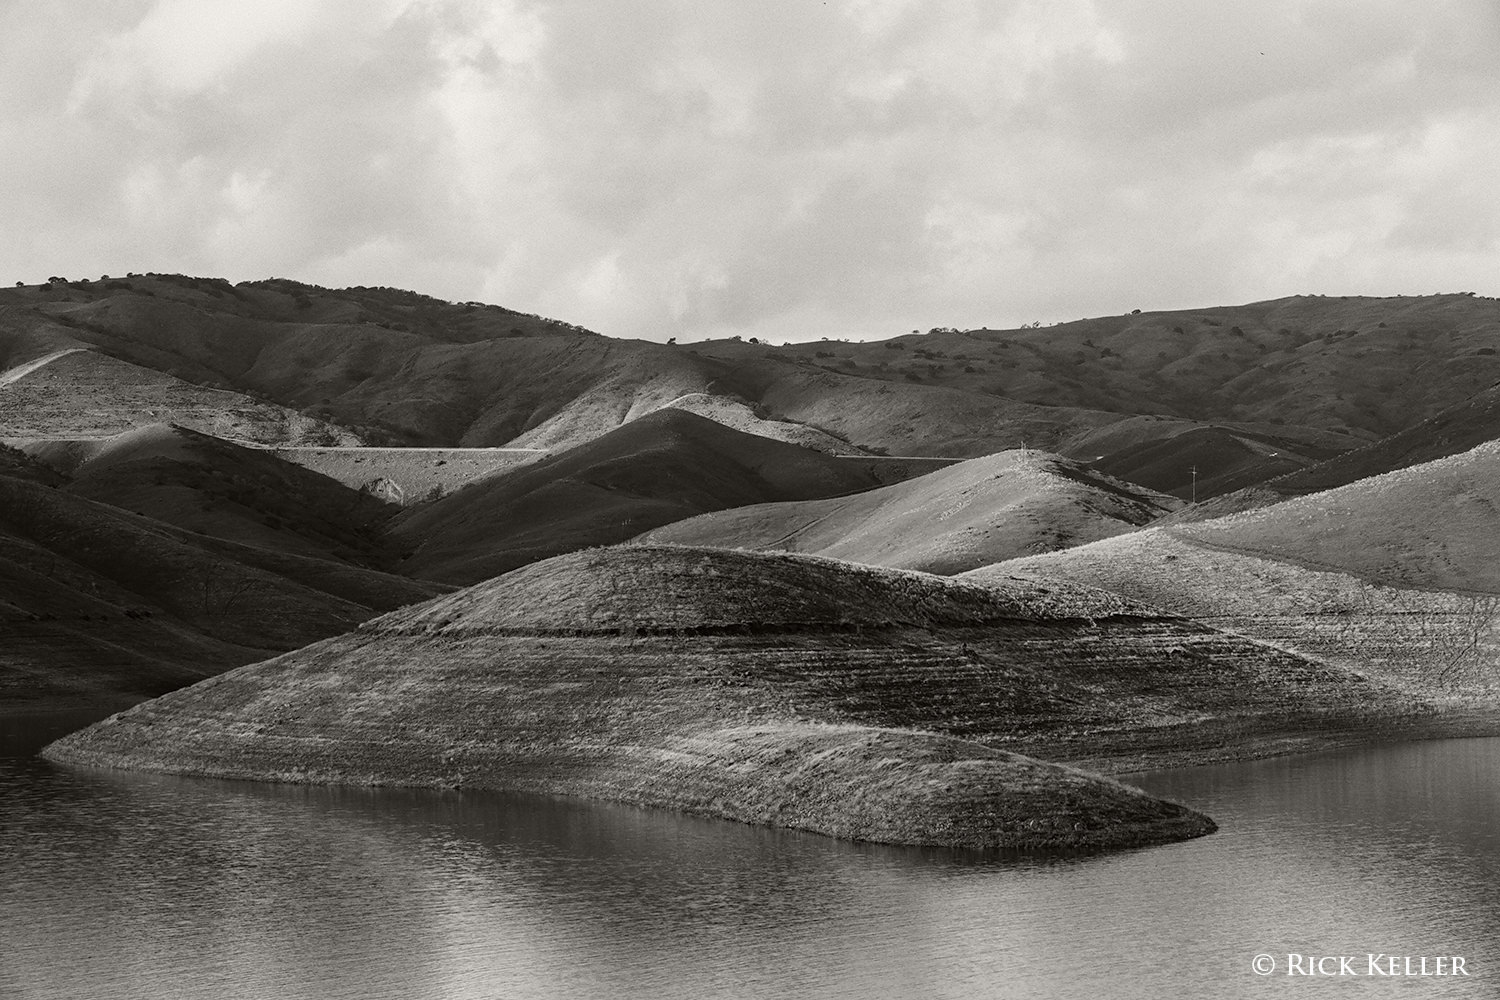
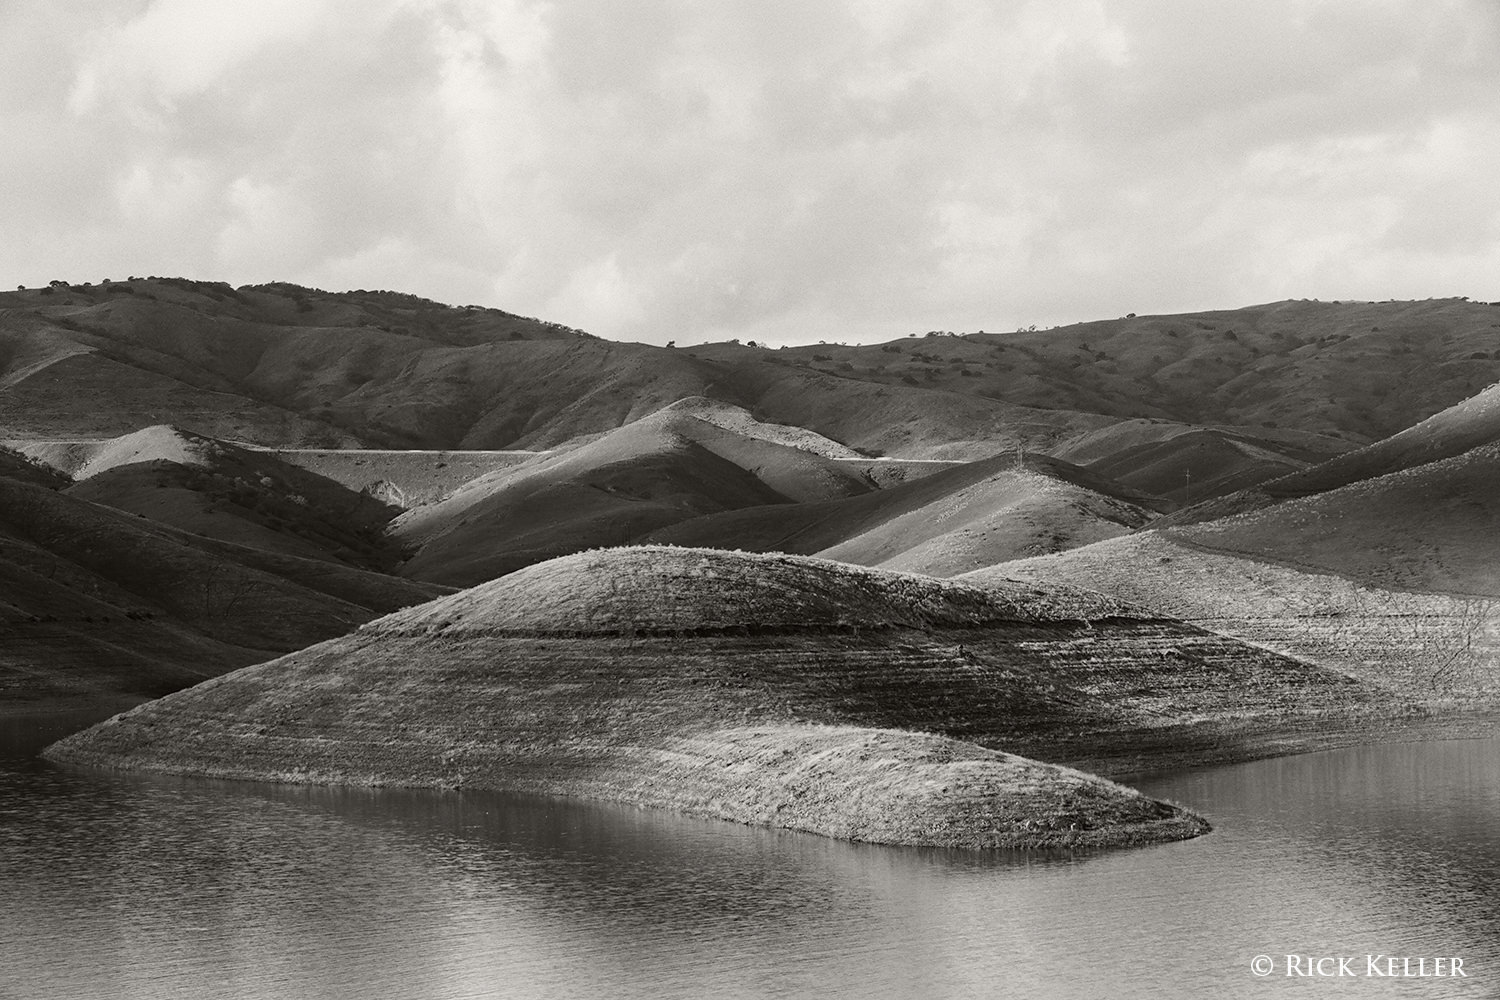
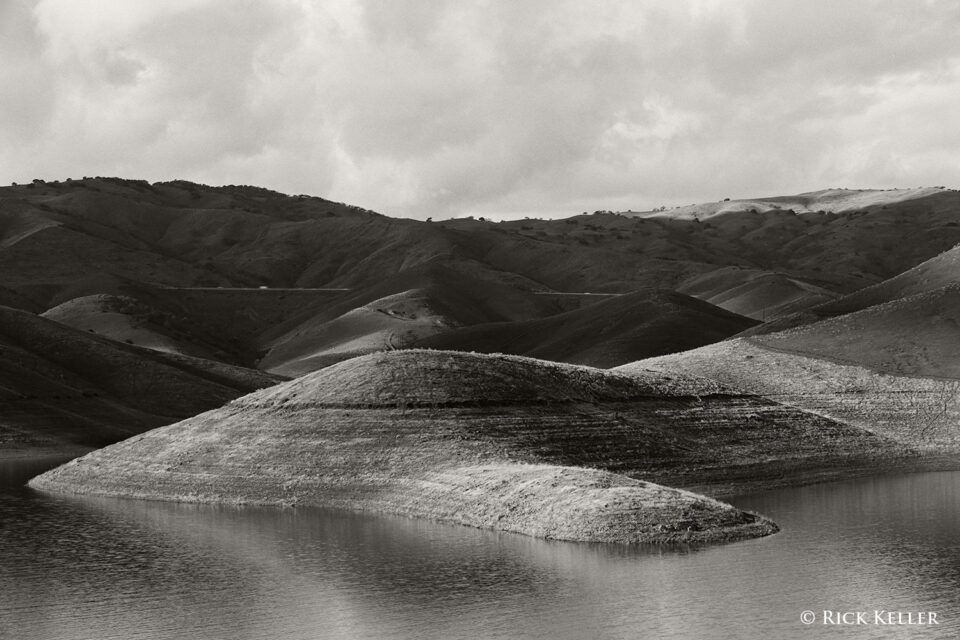
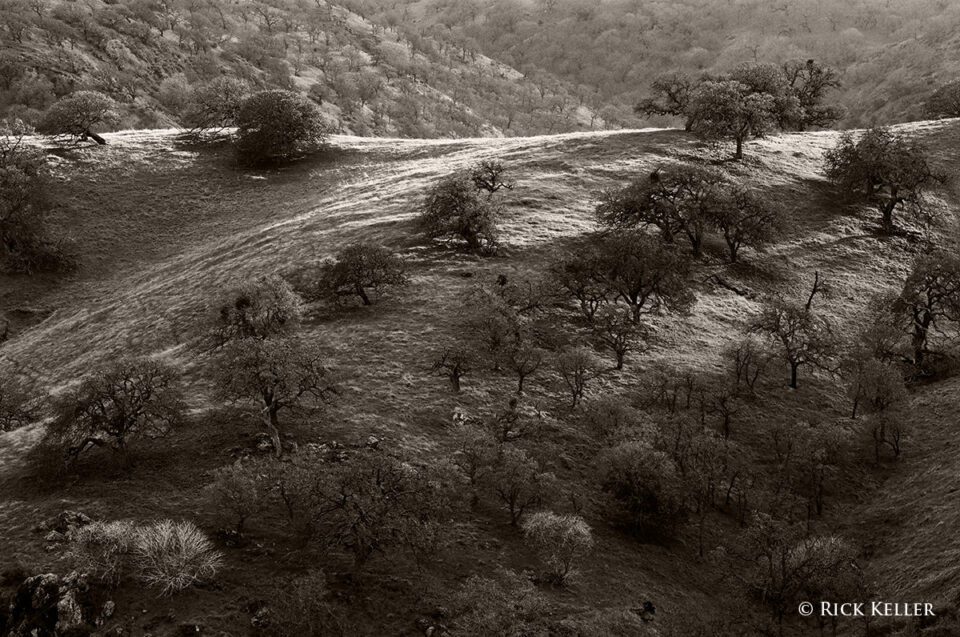
Next, let’s consider the following series of photographs made under similar circumstances: unidirectional light from both the side and back under rapidly changing cloud cover. As you scroll through these images, please note the change in the quality of the shadows, the textures, and the mood. The same subject . . . three different qualities of light . . . three different photographs. In my humble opinion, one of the great challenges of landscape photography is capturing the moment during rapidly changing light; yet this challenge also represents of its most enjoyable aspects. In this scenario, the photographer may potentially visualize a different composition, feel a different emotion and interpretation, and thus come away with a completely different photograph in a span of seconds to minutes, which I think is a beautiful experience. (Technical notes: Nikon F6, Nikkor 70-200mm f/4 G ED VR, Rollei Ortho 25, B+W MRC UV filter)
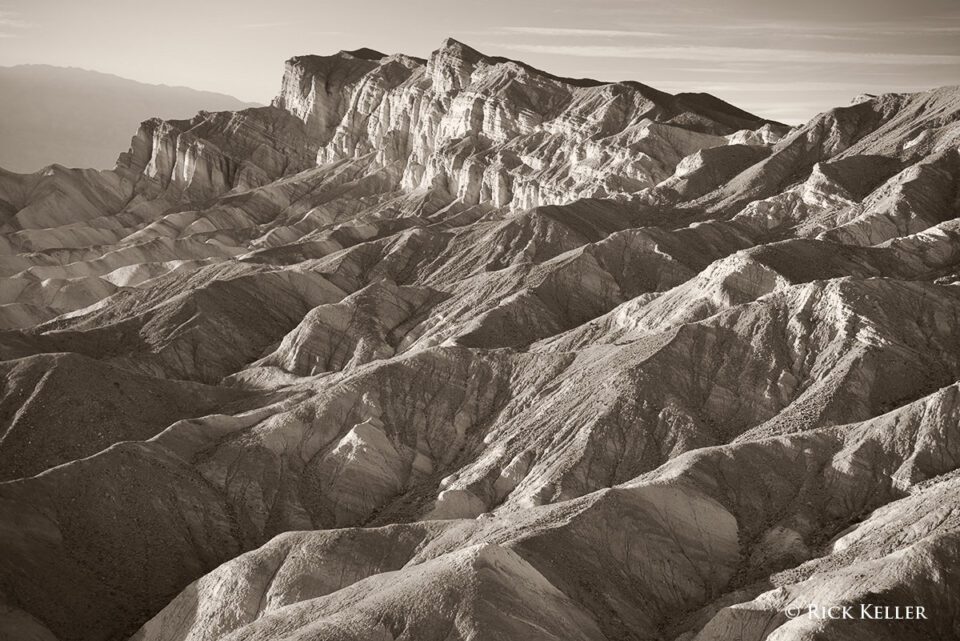
Next, I chose the following landscape photograph to share to reinforce the observations and principles of light already discussed as well as to share some of my personal reflections on Nature. The difference here is that I chose a subject with more simplicity and emotion.
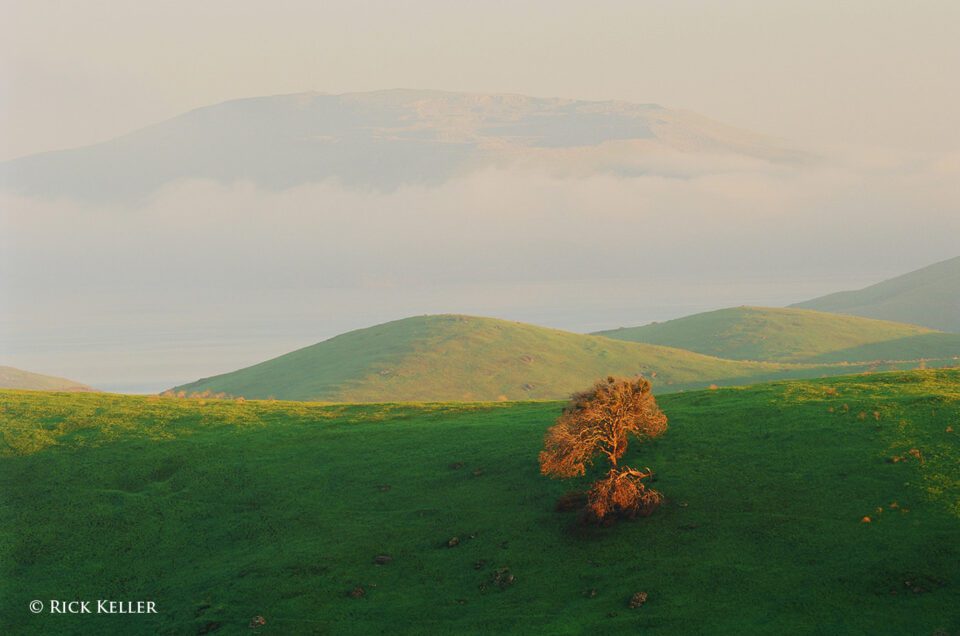
Nikon F6, Nikkor 70-200mm f/4 G ED VR, Fujichrome Velvia 50, Hoya HMC 81C, Hoya HMC polarizer
A week before I made this photograph, I had scouted this scene under dense overcast skies. At the time, the scene had artistic potential in terms of the composition, but the light was uninspiring: even, diffuse, and devoid of patterns of highlights and shadows. Emotionally, the scene was cold, flat, and lifeless. Nonetheless, my imagination was captivated by the seemingly dead tree in the foreground with a backdrop of rolling hills and fog/mist. As I surveyed the scene, I felt that if the light were to be vibrant and inspiring then perhaps the tree and the mood of the scene may become also vibrant and lay the framework for an enticing image. Then came the most critical part of making this image: as I do with every single photo I make, I invoked the process of visualization. I studied the scene with my composing card. I made note of the desired perspective within the frame as well as the modifiers of light to the far right (bigger hills that would potentially obscure low angle incident sunlight). For the light, there was only option to fulfill the visualization: warm, unidirectional light from the side. I visualized a scene in color with the warm glow of light during the Golden Hour bathing the landscape (in particular the dead tree in the foreground) to impart life to a cold and lifeless scene. With these aesthetic considerations in mind, the choice of tools was manifest: color slide film and a long lens to frame the perspective. All I needed was for Mother Nature to deliver the goods. As the days and weather reports passed, I did not lose faith in this process. In my heart and mind, I needed to follow visualization and this inspiration to the very end. When the moment finally arrived, Nature did not disappoint. The beautiful glow of the Golden Hour light invigorated the landscape; the hills were revitalized; and an otherwise lifeless tree was once again born. Perhaps, a second chance, a fresh start, in life . . . Please, note the directionality of the light, the shadows, and the contrast. With light cloud cover in the vicinity of the sun, the light swept in low and at a right angle to the axis of the lens and unveiled lovely textures on the grassy hills, accentuated their contours, and imparted an illusion of depth. As the textures burgeoned, I felt as if I could run my fingers through the blades of grass and feel the damp and soft textures of the grass on my bare feet … Minutes later, as the light ceased to bathe the landscape, the scene became lifeless and cold – devoid of texture, dimension, emotion, or intrigue. Mother Nature raised the curtains then lowered them on a scene visualized in the heart and mind of the artist. It was but one act of many in a series of light performances that are there for the taking. Yes … it is all about the light.
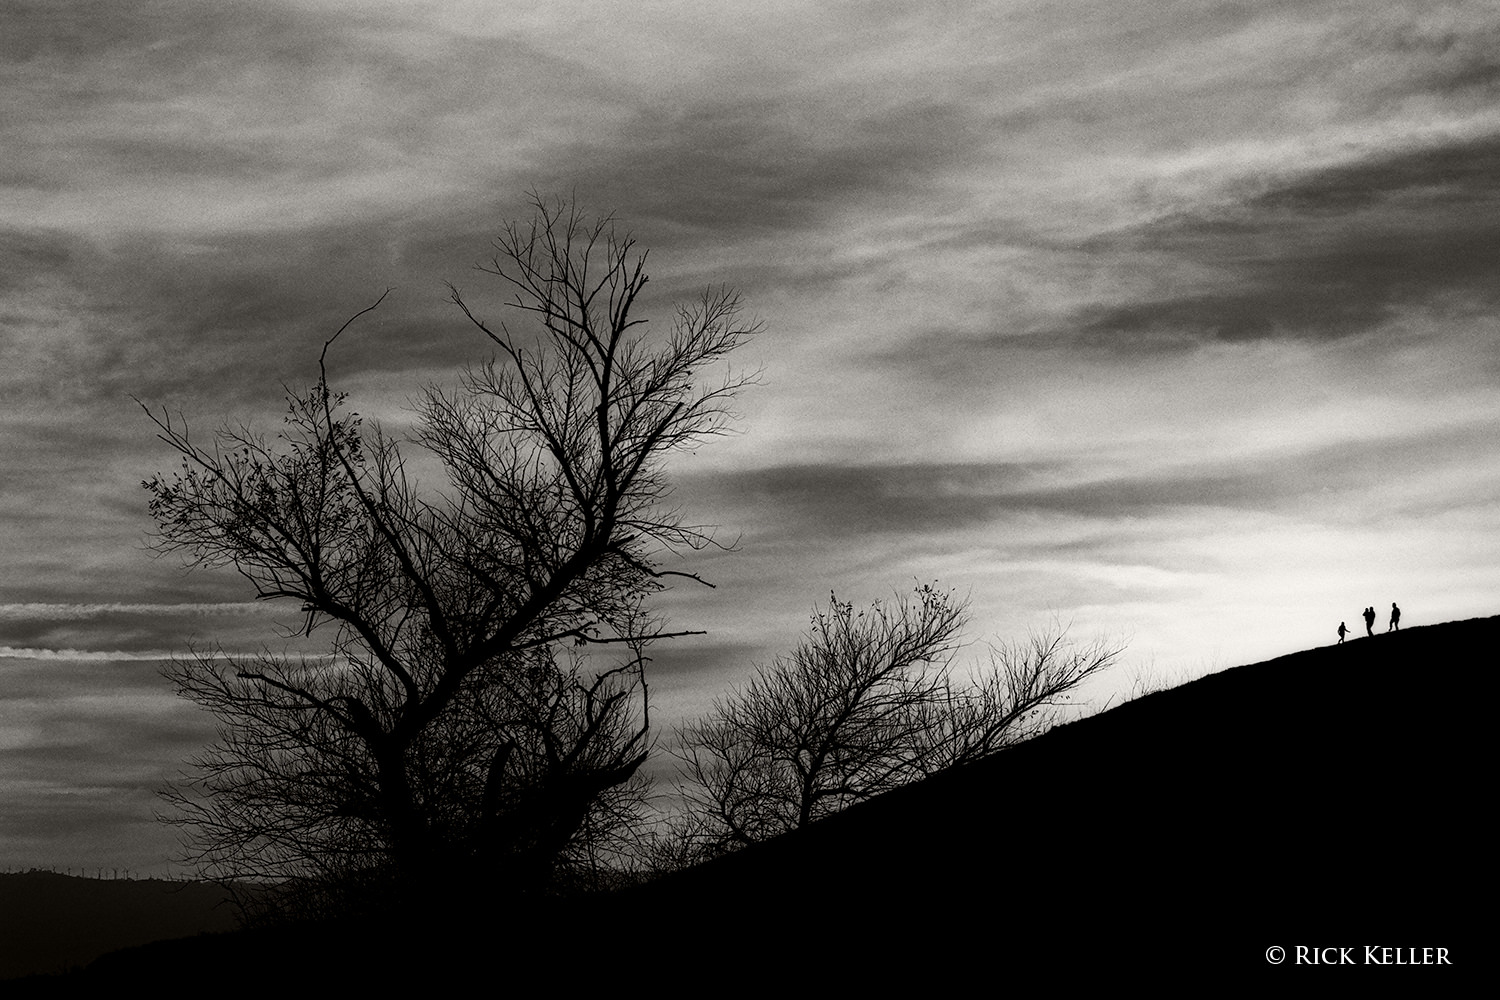
Next, let us explore once again the special mood conferred from backlighting and the silhouette effect. The choices of subjects (mountains, hills, trees, people, buildings) and compositions that the landscape photographer can visualize and craft with this quality of light are endless, which is why I gravitate to backlighting as one my most preferred tools. Consider the following photograph, which I made near the end of a delightful hike and photo shoot in the rolling hills of Central California. Interestingly, I neither scouted this subject, nor did I have time to visualize the photograph in advance. It was a serendipitous opportunity that presented itself when the light and the emotion just happened to be in harmony.
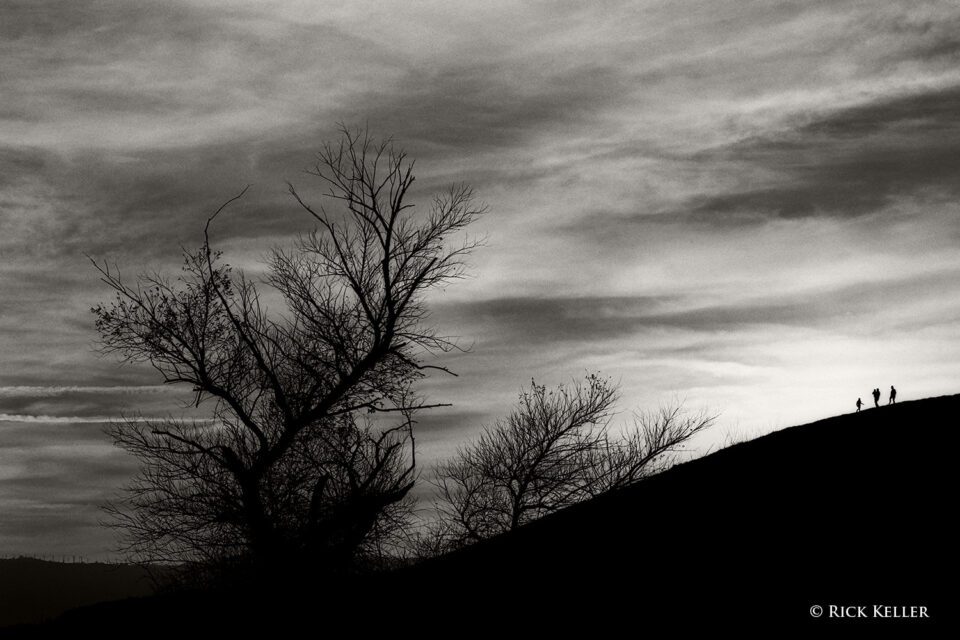
Nikon F6, Nikkor 70-200mm f/4G ED VR, Rollei Ortho 25, B+W MRC UV filter
As I have previously written, whenever I set forth on a landscape photo shoot, I do so with either one (or both) of two approaches in mind. Either I have a pre-determined subject that I have scouted and all that I require is for the desired light to materialize, or inspiring light has already declared itself but I do not yet have a well-defined subject in mind. Neither approach is mutually exclusive; yet every photograph I construct has one of these approaches as its foundation. As Galen Rowell often wrote and spoke about in his books, teachings, and interviews, once ‘magical’ light has materialized for the landscape photographer the artistic imperative becomes one of finding a subject to place within that light. Returning to the photograph, as my mind explored the trees, hills, contours, and directionality of the light, I was not yet inspired by a subject to make an exposure. With the retiring sun beaming through diffuse but thin cloud cover, a chilly breeze numbed my face and ears, and the mist of my breath billowed in all directions. Suddenly, among the distant hills I was stunned to see a delightful family of four (adults, children) hiking in the distance. With the soft and warm light glowing on my face, I felt as if I could reach out with my hand and feel the light bathe my palm and collect the silhouetted human figurines in my hand. With the brooding silhouetted appearance of the foreground trees contrasting with the uplifting mood of the human element in the distance, at that moment I saw and felt my photograph and opened the shutter. It was a beautiful experience.
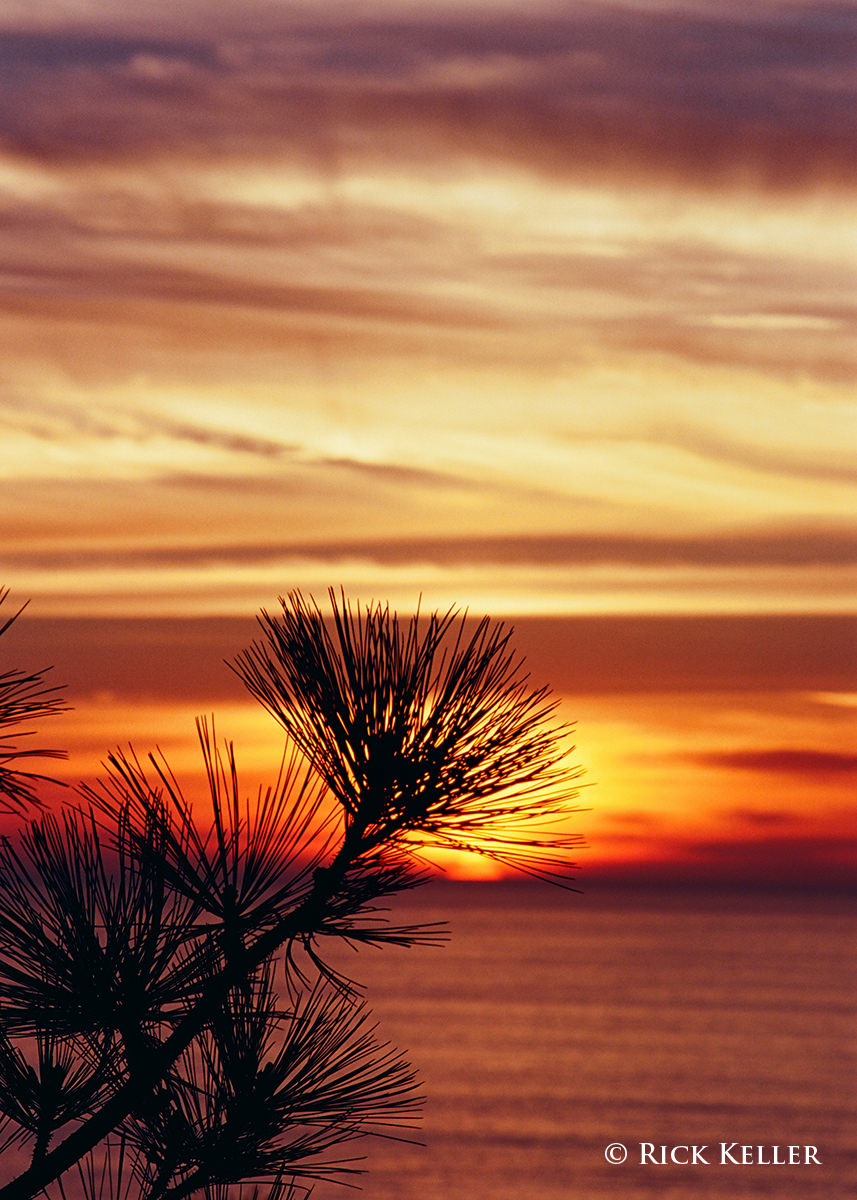
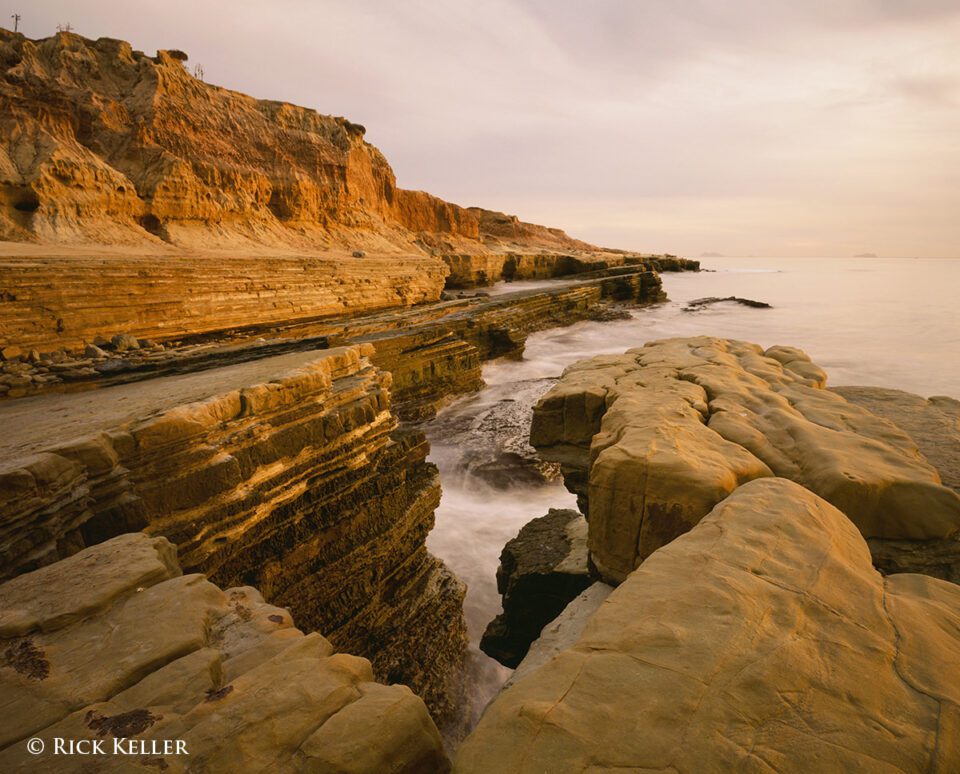
Finally, I chose this next photograph to once again illustrate my personal vision and interpretation of the intersection of light, directionality, color temperature, and emotion. Days before I made this exposure of a Torrey Pine, I had scouted this subject. I felt that if the light, cloud cover, and the mood were aligned, the potential was there to make a pleasing image that accentuates simplicity and harmony. I saw my image through my composing card (exactly as composed in the photograph below), but the light and the mood were uninspiring. So I waited . . . and contemplated … and dreamed … To fulfill the visualization, I chose the tail end of the Golden Hour to take advantage of the strong backlighting, silhouetting, and warmth of the sun melting into the ocean.

Nikon F6, Nikkor 70-200mm f/4G ED VR, Kodak Ektar 100, Hoya HMC 85C
To accentuate the radiance of the light that I had visualized, I used a strong warming filter to lower the color temperature. Please, note the textures of the clouds and on the surface of the water provided by the light sweeping across and toward the lens. Technically, to frame the scene as I had visualized it though my composing card, I used a long lens to isolate the subject. I selected the appropriate aperture for sufficient depth field (but not too much) to reveal enough creamy and soothing textures in the clouds and water; if I had chosen to pursue more depth of field, then too much detail would have been revealed in the water and clouds, potentially distracting the viewer’s eyes from the primary subject. There is no right or wrong in visualization, yet these considerations are one of the many joys of the ‘artist’s choice’ at the decisive moment. As I opened the shutter, the mood was uplifting, as I felt an emotion of peace and harmony at the conclusion of a glorious day. Seconds after I closed the shutter, the sun dipped below the horizon, and in an instant all textures on the water surface and the contrast between the silhouetted pine and the water disappeared. Another curtain raised and lowered on a magnificent performance by Nature. As Galen Rowell once said, we only get to witness only so many of these acts in our lifetime … Following the light to the edge was symbolic and exhilarating. The edge of a light performance, the edge of creativity, the edge of another glorious day of our short life on Earth. It was yet another beautiful experience.
Conclusions
Short and to the point: one tool, one imperative, the quintessence of the photographic and artistic process: it really is all about the light. In landscape photography, the prevailing cloud cover (especially if it is dynamic) can potentially modify the shadows and contrast to provide the photographer with the inspiration to visualize the photograph and the physical means to make the decisive exposure. A landscape photographer need not always have clouds to enjoy landscape photography or make a compelling photograph, but their presence can certainly make a positive impact on the aesthetic quality of the composition and potentially on the quality of the light; of course, it all depends on the photographer’s visualization process. Whether you are a landscape photographer or have an interest in other genres in photography, an important philosophy to bear in mind is that light, artistic vision, and the skill of the photographer are paramount to visualizing the photograph and making it a reality. As always, my best recommendations for my fellow beginning photographers are to study the light, allow yourself to be inspired by it, learn to manipulate the light, and use it creatively to translate your expressions and interpretations of the world as you feel and see it. More importantly, seize the day and have fun!
Special thanks to Northcoast Photographic Services for the film development services for these photos. Great job, Bonnie & Scott! Please, stay tuned for an upcoming article, “The Second Sunset”, where I will discuss and illustrate how this special phenomenon of light can capture the imagination of the artist and lend itself well to making spectacular scenic photographs.
All of these photographs are copyright protected. All rights reserved, Rick Keller © 2017. You may not copy, download, save, or reproduce these images without the expressed written consent of Rick Keller.
Suggested Reading
- Light For Visual Artists, Richard Yot.
- Mountain Light, Galen Rowell.
- Galen Rowell’s Inner Game of Outdoor Photography, Galen Rowell.
- The Quality of Light
- A Study In Light, Vision, and Shadows
- Construction of a Photograph: The Process of Visualization
- Visualization: The Hunt For The Light
The post A Study in Light, Directionality and Mood appeared first on Photography Life.
Photography Life