Shooting Hand-held at Slow Shutter Speeds with a Non-EVF Camera

handheld non efv 10

We’ve all faced situations when we had to shoot hand-held in quite poor lighting conditions using slow shutter speeds, in order to capture a photograph. This challenge is further complicated when using a non-EVF camera since we loose our third anchor point, not being able to bring our camera up against our eyebrow. During a recent photography field-work trip to Nova Scotia I was faced with some very challenging lighting and took the opportunity to use quite slow shutter speeds (and high ISO) with one of my non-EVF Nikon 1 J5 cameras. The objective of this article is to discuss a few of the techniques that can be used when shooting hand-held at slow shutter speeds.

[Read More…]

Photography Life

Posted in Photograpy How To | Tagged , , , , , , | Leave a comment

Using Lightroom Mobile to make your life on the go easier

Have you ever wanted to access your images on the go yet they were stuck on your computer at home?

Do you wish you could cull, edit, or share your images from any location?

Well, you can and it is a fantastic benefit for Lightroom users!

Lightroom Mobile is a free downloadable app available to Adobe Creative Cloud (CC) subscribers. Available for iPhone, iPad, or android, the app allows you to add, cull, edit, and sync your images from your mobile device to your main Lightroom catalog on your computer.

Let that sink in for a minute. You do not have to be chained to your desktop or laptop to add or edit your images! I frequently use those minutes I am waiting at the doctor’s office or on long car rides with my family to import photos from my phone or DSLR, cull, rate, quickly edit, and even share.

Here is what you need to do to get set up with Lightroom Mobile.

1. First, verify that you are subscribed to the Creative Cloud plan. Rates are around $ 10 a month for the photography plan which also includes Photoshop.

2. Download the free Lightroom Mobile App onto your iPhone, iPad, or android device. Go ahead and sign in with your Adobe username.

3. From your main computer, make sure you are signed in to Lightroom Mobile. To do this, click on the Lightroom Name Plate area on the upper left corner of the screen. Be sure that the “sync” is on.

Do you wish you could cull, edit, or share your images from any location without the need of your computer? Well, you can and it is a fantastic benefit for Lightroom users!

4. Now, choose which catalog you would like to sync to the cloud. At this time, Adobe only allows you to sync one catalog at a time with LR mobile. This is just one of many reasons why I suggest keeping your number of catalogs down to a minimum!

Personally, I keep a client catalog and two personal catalogs. Depending on my workload, I alternate between synchronizing my personal or client catalogs. It is easy to switch catalogs but you must resync each time you switch.

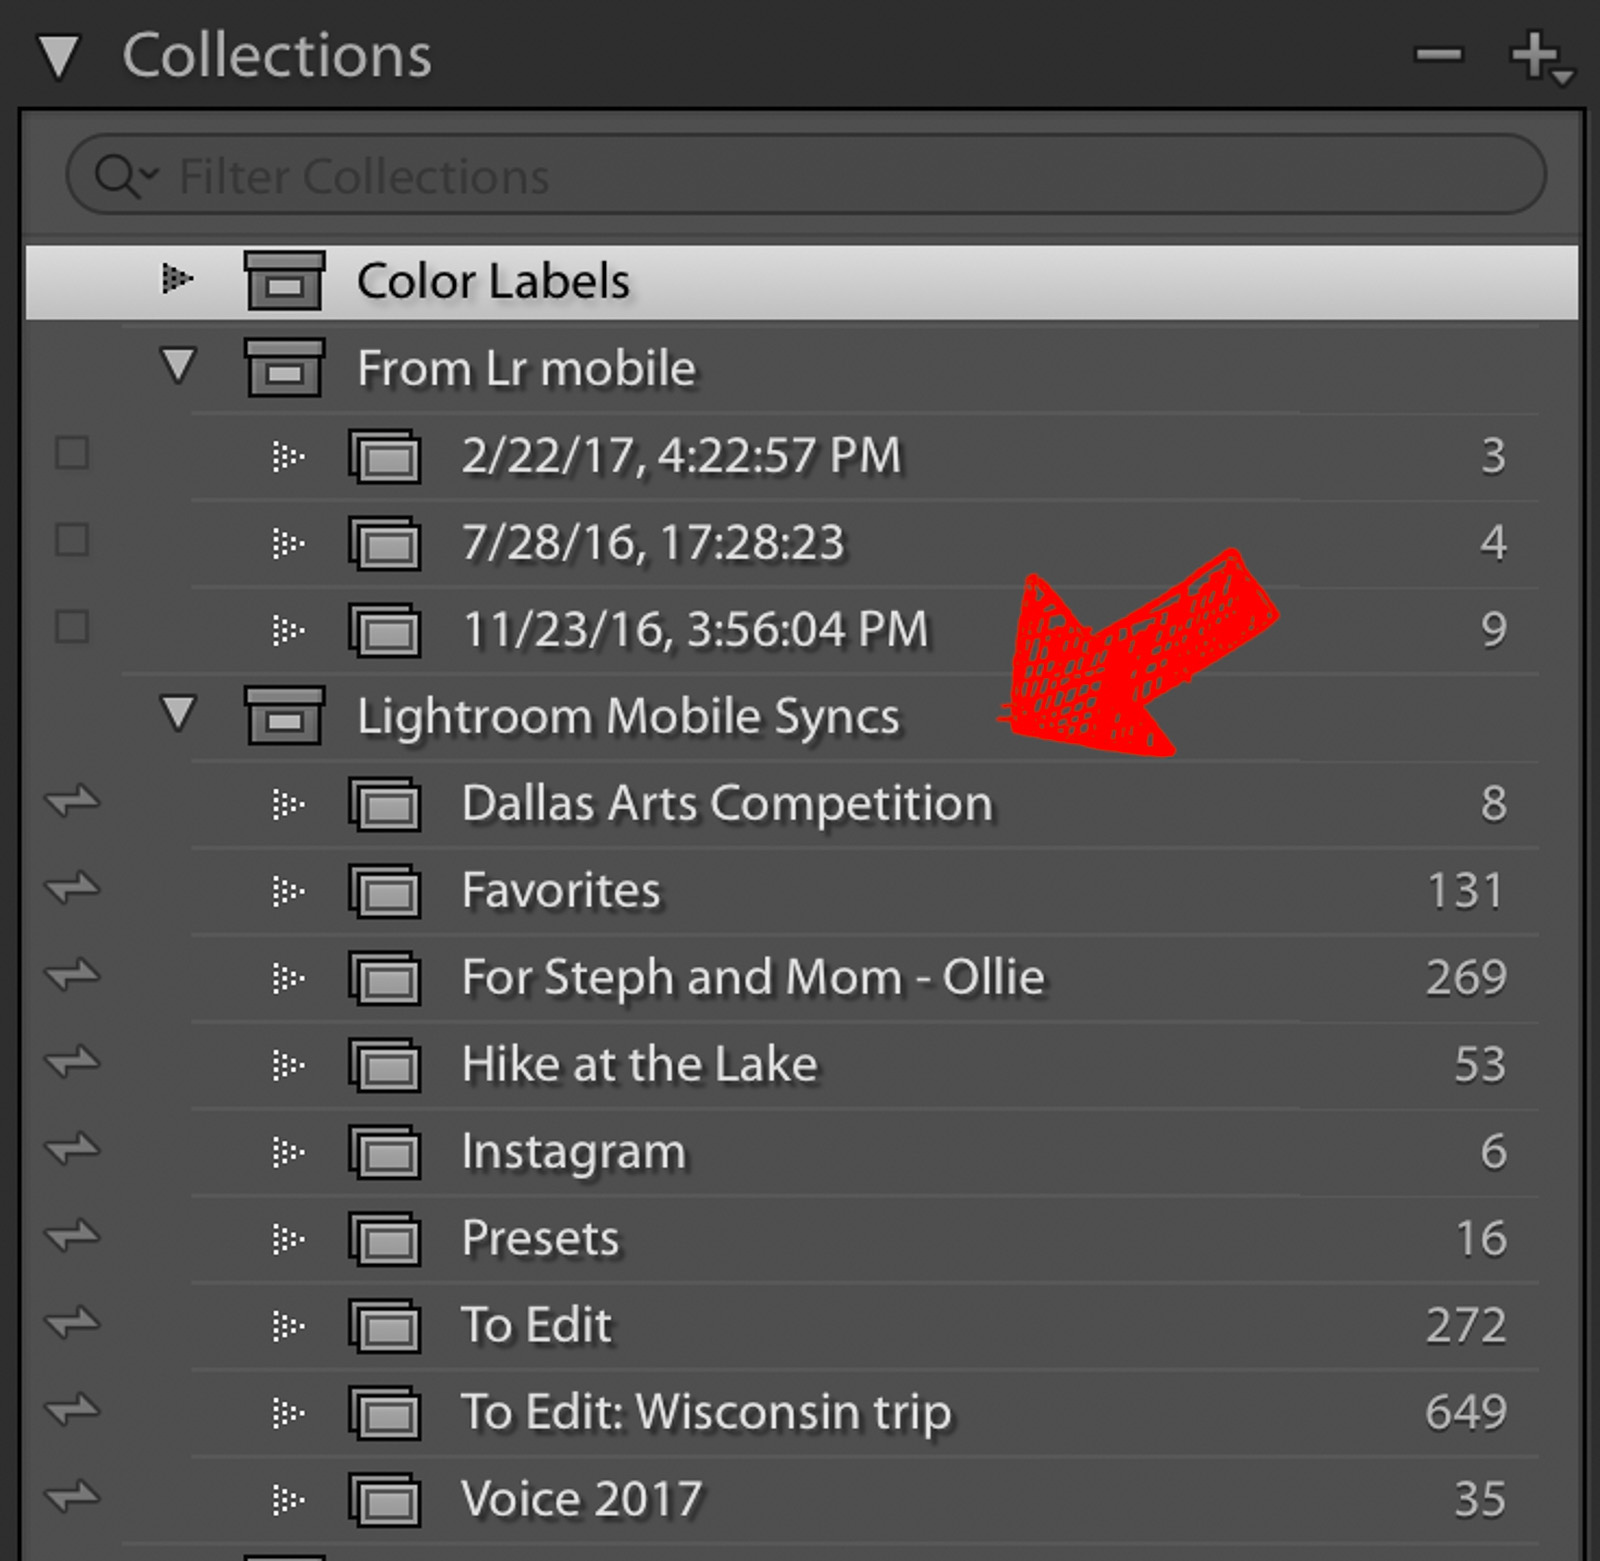
5. Create a Collections Set (Go to Collections and then hit the + sign) that is specifically for the images synced to the cloud. I creatively name this “Lightroom Mobile Syncs.” Note that it must be a COLLECTION, not a smart collection!

Do you wish you could cull, edit, or share your images from any location without the need of your computer? Well, you can and it is a fantastic benefit for Lightroom users!

6.  Next, choose which images from your catalog you would like to sync with the cloud. At this time, Adobe does not have a storage limit on how many images you can sync but keep in mind that the more images you choose, the longer the sync will take and it may slow down your mobile devices. Again, images synced to LR Mobile MUST be in a collection.

Tip: Create a “Social Media” collection set! I love being able to throw all of my Instagram and Facebook images into the set. Then in the app on my phone, I save them to my camera roll at 2048px.

Do you wish you could cull, edit, or share your images from any location without the need of your computer? Well, you can and it is a fantastic benefit for Lightroom users!

7. Once you’ve added images to the collection that is housed within your “Collection Set,” click on the thunderbolt icon next to the collection name. If you are connected to the internet, your images will immediately begin to sync.

8. Voila! You have just unchained yourself from your computer! You can now cull, edit, and share your catalog images right from your phone or smart pad. LR Mobile uses smart previews (not the full raw file) so any adjustments you make away from your computer will be automatically synced by the magic Adobe fairies in cyber space!

You have all the same editing adjustment options as the full version of Lightroom (even radial filter, HSL options, dehaze, etc), which means you can duplicate your workflow on the go. I love that I can edit my iPhone shots in a similar method as I do my DSLR ones.

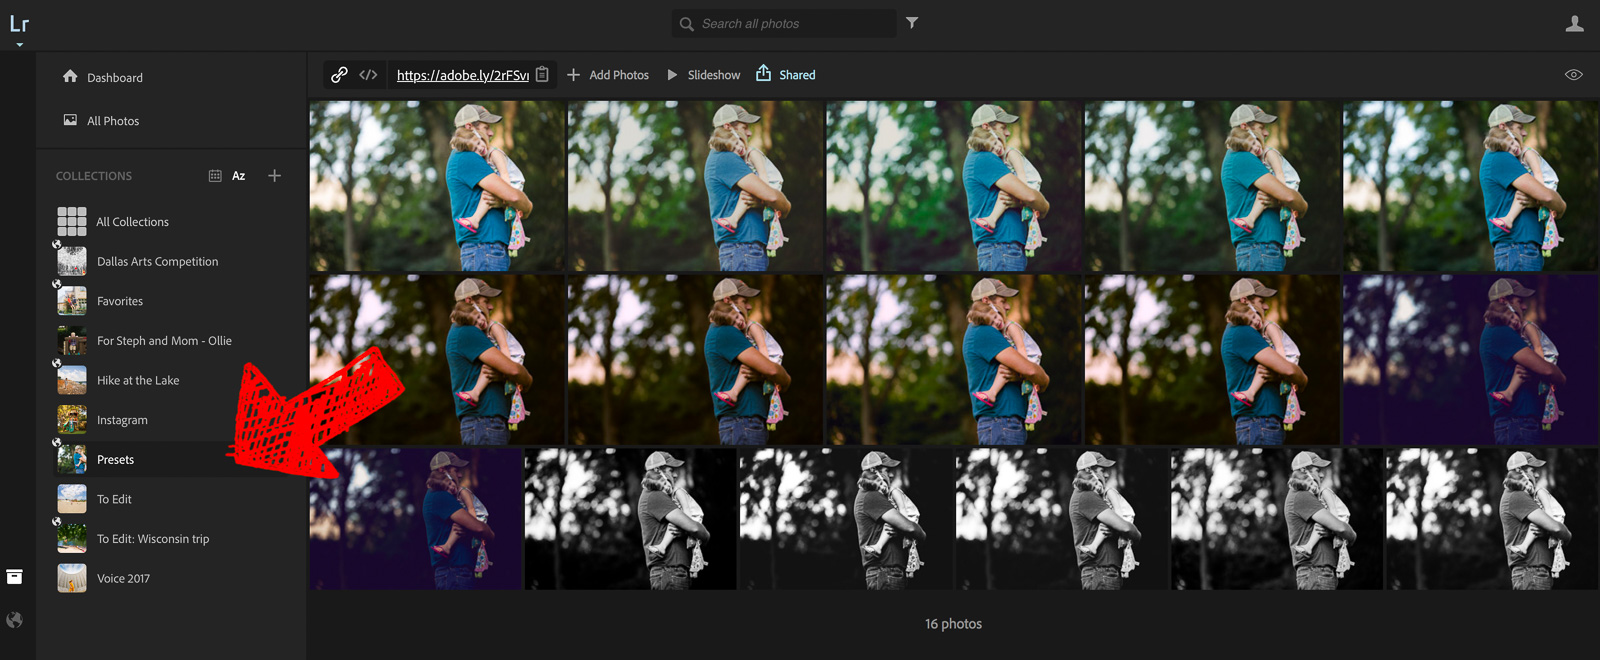
Unfortunately, you’ll notice that there is not a preset area for your created/purchased presets. However, I have a hack!

My workaround trick is to go to my big computer and create a collection folder named “LR Mobile Presets.” Then, choose an image and create numerous virtual copies of it and add them to the LR Mobile Presets collection. Finally, apply your favorite presets to each virtual copy. In LR Mobile you can copy the preset settings and apply them to your images.

Do you wish you could cull, edit, or share your images from any location without the need of your computer? Well, you can and it is a fantastic benefit for Lightroom users!

Finally, I strongly suggest that you take a look at the app menu options. An awesome way to automatically add your phone images and videos to your Lightroom catalog is to turn on the “Auto Add Photos” and/or “Auto Add Videos” option in the LR menu at the top left. Personally, I also choose to “Sync Only Over Wifi” and “Load Full Resolution.”

Do you wish you could cull, edit, or share your images from any location without the need of your computer? Well, you can and it is a fantastic benefit for Lightroom users!

But wait! There’s more!

Not only are you able to view your images on your mobile devices, but you can go to www.lightroomontheweb.com and log in to your account. You will see your synced images (which are actually just the smart previews) online – this is known as “Lightroom on the Web.”

Do you wish you could cull, edit, or share your images from any location without the need of your computer? Well, you can and it is a fantastic benefit for Lightroom users!

Why is this helpful? The power of using ANY computer, despite not having Lightroom installed, is immeasurable! Working professionals can have a “back up” computer if their computer fails (within limits, of course) and those who work other full time jobs can use their lunch hour to do a bit of editing.

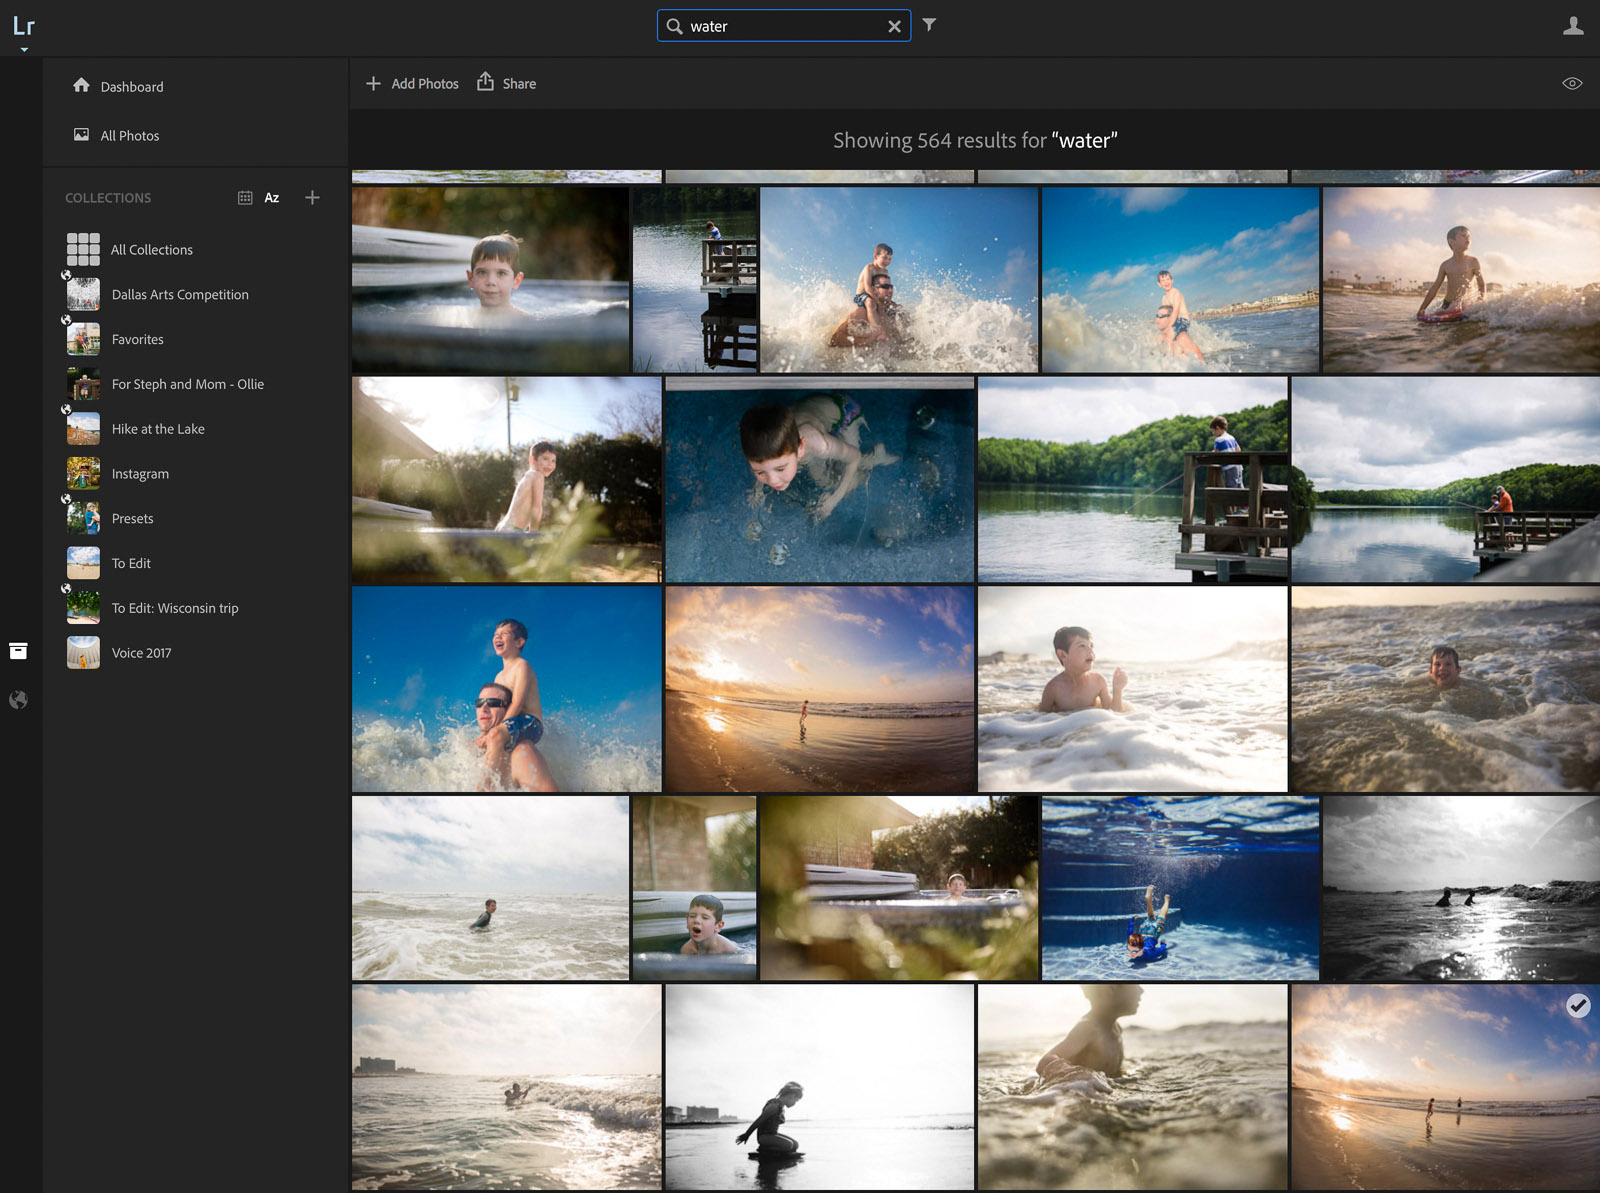
Lightroom on the Web also has a few additional features that are amazing. The Image Search is a beta program, but it really rocks! Try using keywords such as water, a color, clouds, hands, etc. to find your images.

Do you wish you could cull, edit, or share your images from any location without the need of your computer? Well, you can and it is a fantastic benefit for Lightroom users!

However, my FAVORITE feature of Lightroom on the Web is the capability to share images with close friends and family. No more exporting and importing into Dropbox or other photo sharing platform!

Once your collection of images are synced to LR on the Web, click the image set, hit “share” at the top, and click “share this collection.” Not only can you directly share to social media but you can even create a FREE gallery site to share your work!

What I like to do is copy the web link, check to “allow downloads,” and give that link to my close family and friends. They can download the image from your link and even make comments on the image that show up right in your desktop Lightroom program (Found in the Library Panel at the very bottom – “Comments”)!

I love, love, love this benefit and if you do not use LR on the Web for anything else, except this, you will not be sorry.

Do you wish you could cull, edit, or share your images from any location without the need of your computer? Well, you can and it is a fantastic benefit for Lightroom users!

Adobe continues to add more and more features that allow photographers to work remotely.

For me, Lightroom is essential to my organization, editing, and image sharing. Extending my workflow from my desktop computer to the palm of my hand is a huge time saver!

Join the Clickin Moms photography forum

Save

Save

Save

The post Using Lightroom Mobile to make your life on the go easier appeared first on Clickin Moms.


Clickin Moms

Posted in Photograpy How To | Tagged , , , , | Leave a comment

Take Ten: An easy personal photography project to try

Looking for a personal photography project but don’t have a lot of time?

Maybe a Take Ten challenge can help.

Whether you are just starting out or have been working in the industry for many years, there can be periods of time when you are not feeling very creative and a personal project can be just the key to jump start your creativity. But let’s face it, life is busy!

Finding the time needed to dedicate to a personal project such as a Project 365 or even a 30-day challenge can seem almost impossible. This is especially true if you have a session to edit or piles of laundry magically growing before your eyes.

Perhaps a Take Ten challenge can be the perfect mini-project needed to get you out of that creative rut without sacrificing too much time out of your busy schedule.

What is a Take Ten challenge?

When I do a Take Ten challenge, I pick a subject then try to create ten different images. Achieving a variety of looks can be done with changes in composition, angles, backgrounds, lighting and editing. My favourite genre for this type of challenge is still life, especially flowers.

Looking for a personal photography project but don’t have a lot of time? Maybe a Take Ten challenge can help.


Looking for a personal photography project but don’t have a lot of time? Maybe a Take Ten challenge can help.


You could do this project with any type of photography, though.

How you can achieve a Take Ten project.

For portraits, you could try different poses that you wouldn’t normally do with your clients. With your kids, get them to see how many funny faces they can make or let them choose their poses.

Change your point of view by getting down low on the ground or up higher for a different vantage point.

Looking for a personal photography project but don’t have a lot of time? Maybe a Take Ten challenge can help.


Looking for a personal photography project but don’t have a lot of time? Maybe a Take Ten challenge can help.


Looking for a personal photography project but don’t have a lot of time? Maybe a Take Ten challenge can help.


If you like food photography, try different ways to photograph the same dish. You could start with preparing the food to the finished product or take the hassle out of cooking and buy something pre-prepared from the store. Even something as simple as a packet of cookies can provide several photography options. The possibilities are endless!

How to make it easier on you.

I love using my iPhone for this type of challenge because I can take the images very quickly. Then, I edit them later when I find myself out of the house with some time to spare. Some of my favourite edits have happened in doctor’s waiting rooms and it helps to pass the time quicker.

All the images in this post were taken using an iPhone 5C and edited using the Snapseed, Mextures and VSCO apps.

Looking for a personal photography project but don’t have a lot of time? Maybe a Take Ten challenge can help.


Looking for a personal photography project but don’t have a lot of time? Maybe a Take Ten challenge can help.


My set up was done using a combination of either two black foam core boards or two white foam core boards as well as a wooden cutting board. Each image was taken in the same location in my house, on a coffee table next to a large, north facing window on the left of the subject.

Looking for a personal photography project but don’t have a lot of time? Maybe a Take Ten challenge can help.


Looking for a personal photography project but don’t have a lot of time? Maybe a Take Ten challenge can help.


As you can see, from clean and simple to textured and dark and moody, each image is different although the subject matter is the same.

If you find yourself struggling to come up with ten different images, try thinking smaller and use a macro lens. Capturing so many tiny details can create many more opportunities.

Adding props to your images can help to add to the variety, too. For portraits, think hats, wigs and costumes. For still life, your kitchen can be a treasure trove of supplies. Try using cutting boards, plates, and utensils. For smaller subjects, craft supplies such as scrapbook paper can make wonderful backgrounds.

Whatever you choose to do for your Take Ten challenge, remember the most important thing is to have fun!

The post Take Ten: An easy personal photography project to try appeared first on Clickin Moms.


Clickin Moms

Posted in Photograpy How To | Tagged , , , , | Leave a comment

Nikon D850 Review

Nikon D850

Perhaps one of the most anticipated camera releases of 2017 has been the D810 successor, the Nikon D850. Nikon’s high resolution camera body shook up the industry once again, this time with a strong punch, making the Nikon D850 the most versatile DSLR on the market. Thanks to its 45.7 MP sensor with a native ISO sensitivity range of 64-25,600, upgraded 153-point autofocus system, advanced 181,000-pixel RGB metering system, 7 fps continuous shooting speed that can be bumped up to 9 fps with a battery grip, a fully weather sealed construction and a bunch of other hardware and software upgrades, Nikon managed to pull out a camera that can satisfy every photography need – from landscapes and architecture, to sports and wildlife. In this review, I will be assessing the camera from many different angles and comparing to its predecessor, as well as its primary competition.

[Read More…]

Photography Life

Posted in Photograpy How To | Tagged , , | Leave a comment

Why Hyperfocal Distance Charts Are Wrong

Hyperfocal-Distance-chart-landscape

One of the most misunderstood parts about landscape photography is the correct way to fit your entire scene within a photo’s depth of field. Where do you focus? What aperture should you use? You might think that these questions are easy to answer with a hyperfocal distance chart, where you provide your focal length and aperture, and the chart tells you exactly where to focus. There’s only one hiccup — if you want the sharpest possible results, these charts are spectacularly wrong. For most landscape and architectural photographers, that’s a big deal. This article explains everything about hyperfocal distance charts: what they are, why they fail, and where to focus instead.

[Read More…]

Photography Life

Posted in Photograpy How To | Tagged , , , | Leave a comment