How I edit a high contrast photo in Lightroom

In the video, you'll see how I edit a high contrast, color photo. No presets are used and I take you step-by-step through my thought process.
before

In the video, you'll see how I edit a high contrast, color photo. No presets are used and I take you step-by-step through my thought process.
after

Every time I take a photo, I do my best to make sure the in camera image is a good as possible.

This helps with how little I have to edit in post processing.

However, sometimes, even if the image is amazing and doesn’t need too much editing, I like to go a little crazy and edit a high contrast, moody image. These require a bit more work in post processing but can be quite fun… at least for me.

I use Lightroom for editing about 95% of the time. There are occasions where I will take an image into Photoshop for cloning or changing the composition of a picture. But for most of the images I edit, Lightroom is perfect for what I need.

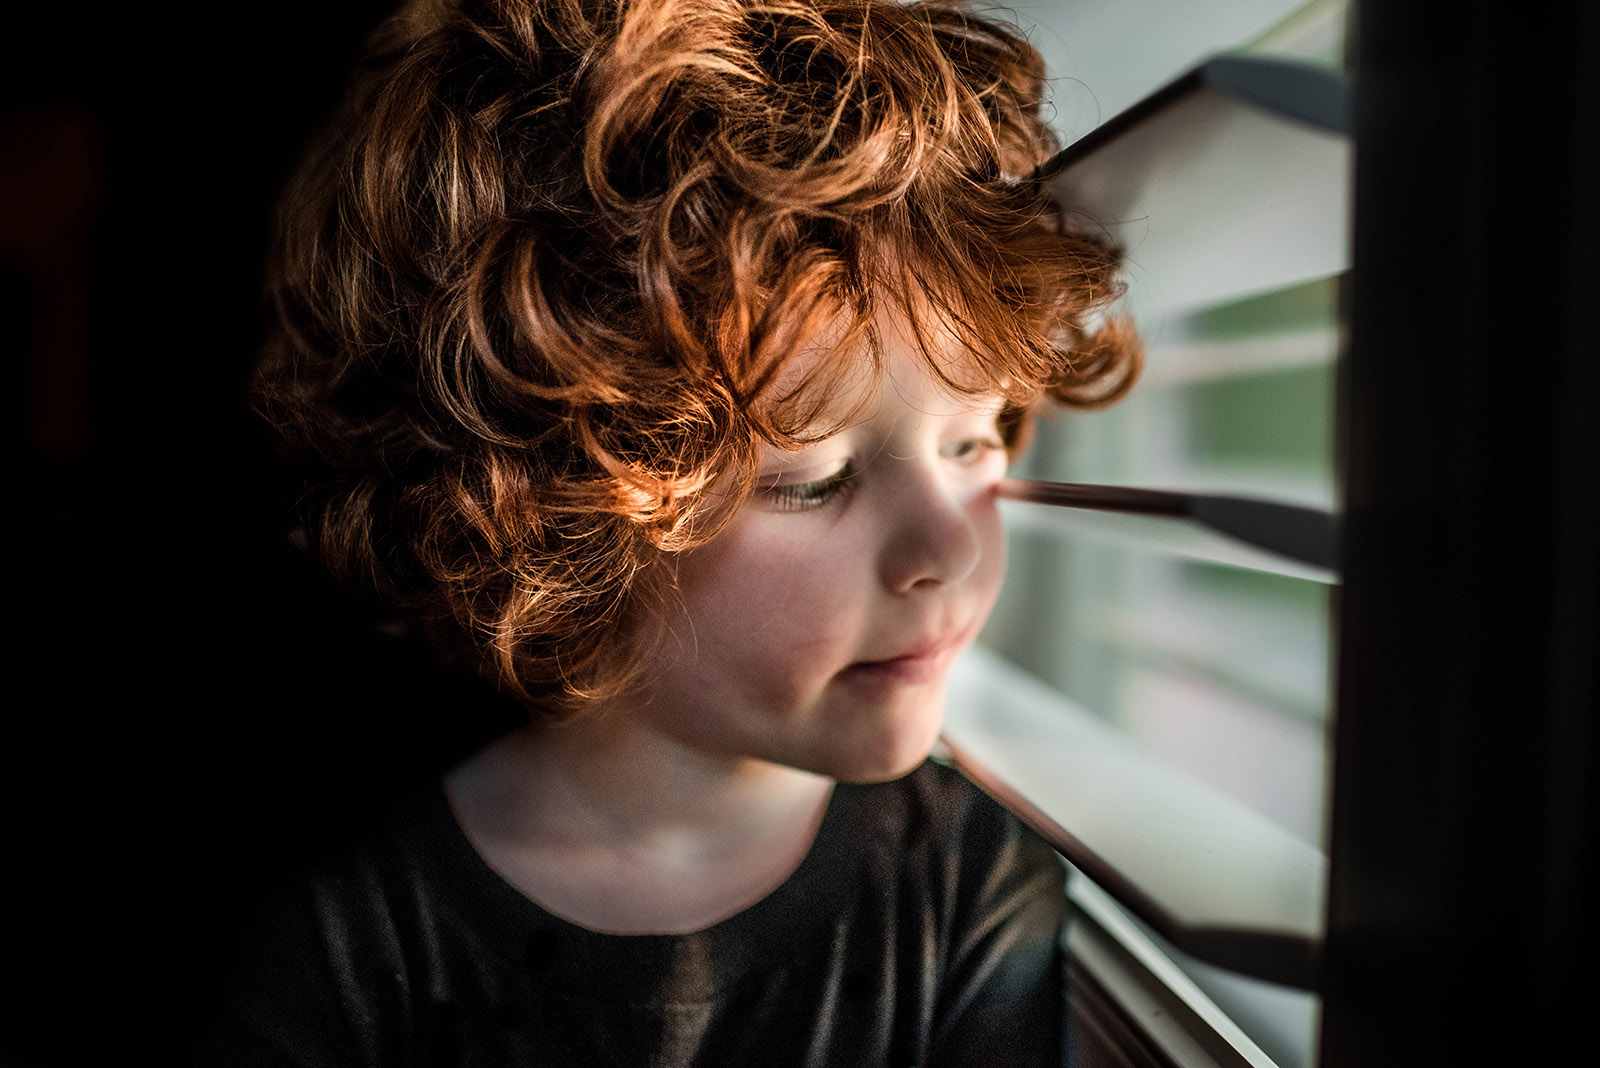
In the video below, you will see how I edit a high contrast, color photo. This is a straight out of the camera, RAW image of my son. No presets are used and I take you step by step through my thought process behind why I edit it the way I do.

Typically it takes me 5-10 minutes to edit a picture like this, but because I am walking you through my thoughts and basically re-editing it from scratch, the video is a bit longer.

To recap, here are my final settings below.

  • Exposure: -.20
  • Contrast: +16
  • Highlights: +31
  • Shadows: +100
  • Whites: +14
  • Blacks: -19
  • Clarity: +81
  • Vibrance: +16
  • Saturation: +1

Tone Curve: In the video I passed over this section in the beginning but decided I wanted to do a little tweaking later. The picture was still feeling a bit bright for me so I wanted to fix it and give you that info. I typically fool with this panel at the end of my editing.

Here are the adjustments I made in this section to help darken the image just a tad:

  • Highlights: -12
  • Lights: -8
  • Darks: -7
  • Shadows: -10

HSL Panel adjustments:

Hue:

  • Orange: -14
  • Yellow: -15
  • Green: +17

Saturation:

  • Orange: +20
  • Green: +16

Luminance:

  • Orange: +13
  • Yellow: +1

Sharpening:

  • Amount: 40
  • Radius: 1.0
  • Detail: 25

Noise reduction:

  • Luminance: 6

Multiple brushes were added in the background, one to darken around Max’s face and the window and it’s light. Another brush was used to completely black out the background. Be careful when doing this around hair and make sure to blend the darkness with the hairline.

Another brush was used to take red and pink out of Max’s face as well as one to lower the contrast and clarity. Lastly, I used one to add more contrast and lift more shadows in his hair just to add some extra WOW to it.

Let me end this article by apologizing for all of sniffling in the video – these Austin allergies are for real!

Second, thanks so much for reading this article and for watching me edit. I hope you learn some new techniques to help you achieve a very high contrast and bold look.

Join the Clickin Moms photography forum

The post How I edit a high contrast photo in Lightroom appeared first on Clickin Moms.


Clickin Moms

Posted in Photograpy How To | Tagged , , , , | Leave a comment

Positive and Negative Space in Photography

Positive and negative space in photography

The deeper you go into photography, the clearer it will be that everything is about emotion. Each decision you make — every single part of your thought process — matters for that one reason. A prominent example? Positive and negative space. These two elements of photography are important because of the emotions they carry. So, what are positive and negative space, and how can you use them to improve your work?

[Read More…]

Photography Life

Posted in Photograpy How To | Tagged , , , | Leave a comment

Sand Dunes Photography Tips

Sand dunes photography

The way I see it, sand dunes are among the most wonderful places in the world. They’re the very definition of a windswept landscape — the product of our planet’s most fundamental forces. They also exist everywhere, from coastal regions to deserts that span entire continents. Below, I’ll offer some of my top tips for photographing sand dunes and getting incredible images.

[Read More…]

Photography Life

Posted in Photograpy How To | Tagged , , , | Leave a comment

Never Stop Seeing

Lean to the left

What do you do if you spend weeks planning a photography adventure, and then when the time to experience that adventure arrives, something comes up that spoils all your preparation? Maybe its the weather, maybe its a park closure, or maybe the fall colour was two weeks late. Experiences like these can happen to anyone. And unfortunately, I have seen too many photographers throw up their hands, stow their camera, and abandon all that they had planned just because things didn’t turn out how they imagined. This type of experience should never stop you from seeing! You just need to learn how to see differently. Keep reading and I’ll give you some tips for tackling just such a situation.

[Read More…]

Photography Life

Posted in Photograpy How To | Tagged , , | Leave a comment

Get better pictures by making the most out of one pose

You dress the kids in their cutest clothes and haul them out to a field to practice.

You pose them together smiling at the camera and settle into your spot for taking the perfect picture to share with friends and family.

It turns from fun to frustration quickly. The camera settings are correct but the pictures are still not turning out how you envisioned.

I remember feeling so disappointed. I had all of the information to create a beautiful picture but it wasn’t translating into my final images.

Then I tried something that worked. I decided to stop trying to get that one perfect picture. I was finally creating fun images to be proud of.

Instead of capturing one pose in one way, I was capturing one moment, multiple ways.

1. Determine your location and settings.

Always start by placing your subjects in the light and location where you want to shoot. Check your settings to make sure you can get it as close to perfect in camera as possible.

I remember feeling so disappointed with my photos. Then I tried something that worked. I decided to stop trying to get that one perfect picture and I finally started creating fun images to be proud of.

2. Get closer. Even closer.

Once they are posed and your settings are correct, start shooting. Start by having them looking at the camera.

Take a few steps closer and ask them to engage with each other. Kids always love tickling each other, kissing their baby sibling or making funny faces at each other!

Get even closer and shoot tight, capturing the small details like tiny hands holding onto each other.

Walk around your subjects, shooting from as many different angles as you can. You’ll be surprised at how much you love a perspective you’ve never shot before!

I remember feeling so disappointed with my photos. Then I tried something that worked. I decided to stop trying to get that one perfect picture and I finally started creating fun images to be proud of.

I remember feeling so disappointed with my photos. Then I tried something that worked. I decided to stop trying to get that one perfect picture and I finally started creating fun images to be proud of.

3. Move to the side.

By stepping to the side of your original scene, you can capture the moment in a different way. The scenery, light and aesthetic of the image is completely different now. You may not even be able to choose a favorite.

I remember feeling so disappointed with my photos. Then I tried something that worked. I decided to stop trying to get that one perfect picture and I finally started creating fun images to be proud of.

I remember feeling so disappointed with my photos. Then I tried something that worked. I decided to stop trying to get that one perfect picture and I finally started creating fun images to be proud of.

4. Shoot from above or below.

Getting on different levels is another excellent way to create many looks from one moment. Shoot down on your subject and then in the next moment get level with them.

If you have a single person as your subject, create multiple looks by having them engage with the camera. Then have them glance off into the scene. A good fake laugh always turns out adorable as well!

I remember feeling so disappointed with my photos. Then I tried something that worked. I decided to stop trying to get that one perfect picture and I finally started creating fun images to be proud of.

I remember feeling so disappointed with my photos. Then I tried something that worked. I decided to stop trying to get that one perfect picture and I finally started creating fun images to be proud of.

Make the most out of each pose you place your children in. Never stop moving to capture each pose from different angles and heights.

Stop focusing on the perfect picture and think of how you can genuinely capture the moment. By allowing yourself to have fun, you can create amazing images that stay with you for a lifetime.

Fun prompts for more engaging pictures:

  • Anytime there is a dress involved, ask for a spin. Kids always love to spin!
  • Have your subject close their eyes and tell them to open them on “three”. This always creates some fun laughter!
  • Little boys will be more than excited to show off their jumping skills.
  • Have them play Ring Around The Rosie or hold hands walking together. These are always some of my favorite shots.
  • Once your children are sitting together, ask them to snuggle in as tight as they can.
  • Ask your child to pretend to be their favorite animal. You’ll get silly roars, chirps and growls with gorgeous, genuine smiles in between.

I remember feeling so disappointed with my photos. Then I tried something that worked. I decided to stop trying to get that one perfect picture and I finally started creating fun images to be proud of.
Join the Clickin Moms photography forum

The post Get better pictures by making the most out of one pose appeared first on Clickin Moms.


Clickin Moms

Posted in Photograpy How To | Tagged , , , , | Leave a comment