
Every so often, the planet Mercury lines up perfectly between the Earth and the Sun. When it does, astronomers and photographers have a relatively rare chance to see and photograph the planet Mercury transiting across the Sun. Next Monday (May 9) is one of those opportunities. In this article, I will cover some tips and techniques for photographing this year’s Mercury transit.
Although I have never photographed Mercury’s transit before, I photographed the Venus transit in June of 2012. It was an incredible sight, especially since there won’t be another Venus transit until the year 2117! Luckily, a Mercury transit isn’t quite as rare. If you miss out this year, you’ll have another opportunity in November of 2019.
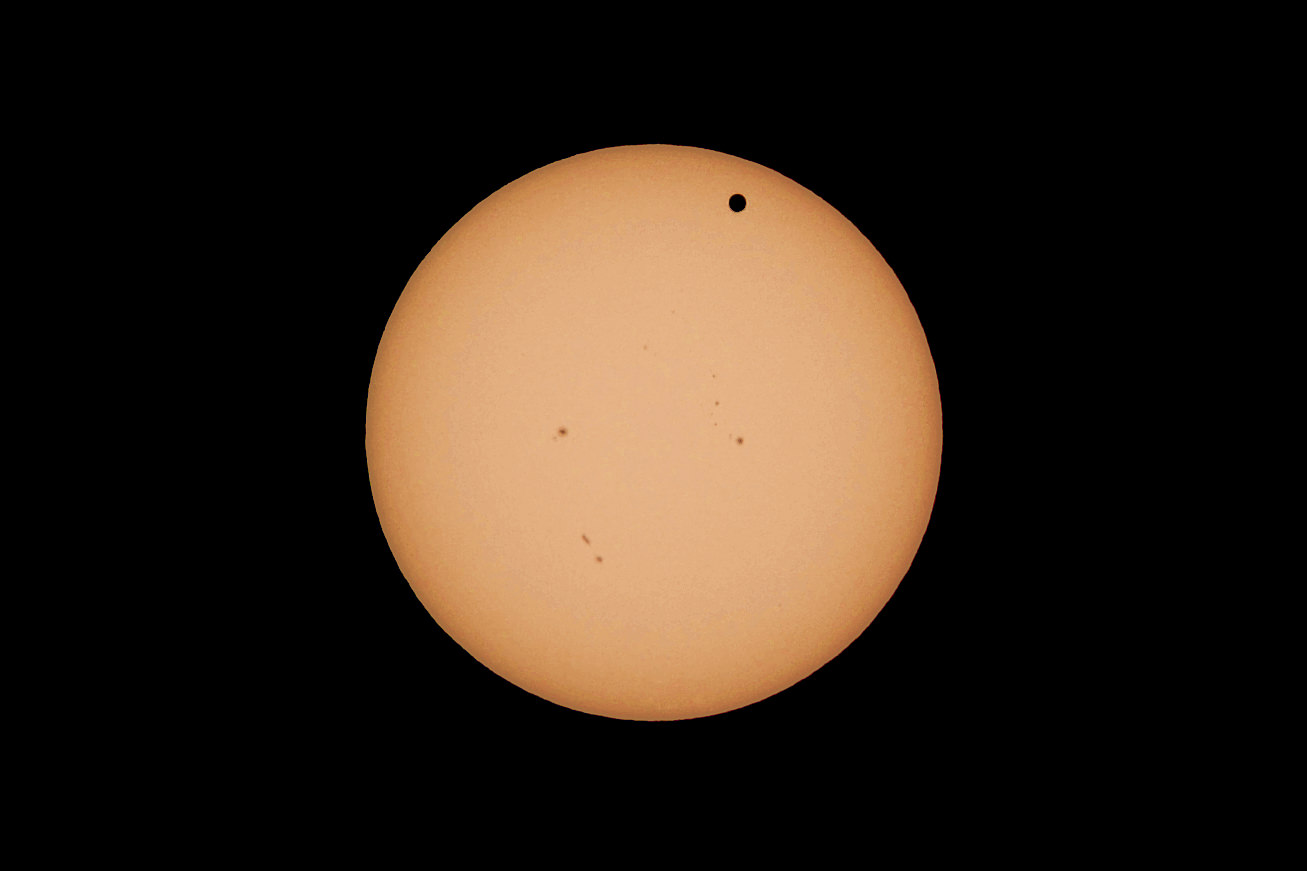
NIKON D5100 + 55-300mm f/4.5-5.6 @ 300mm, ISO 100, 1/400, f/16.0
2012 Venus transit and sunspots.
1) When and Where
The Mercury transit takes place on May 9. The full transit begins at about 11:16 AM GMT, and it ends around 6:38 PM GMT. In the Eastern time zone, that’s 7:16 AM to 2:38 PM.
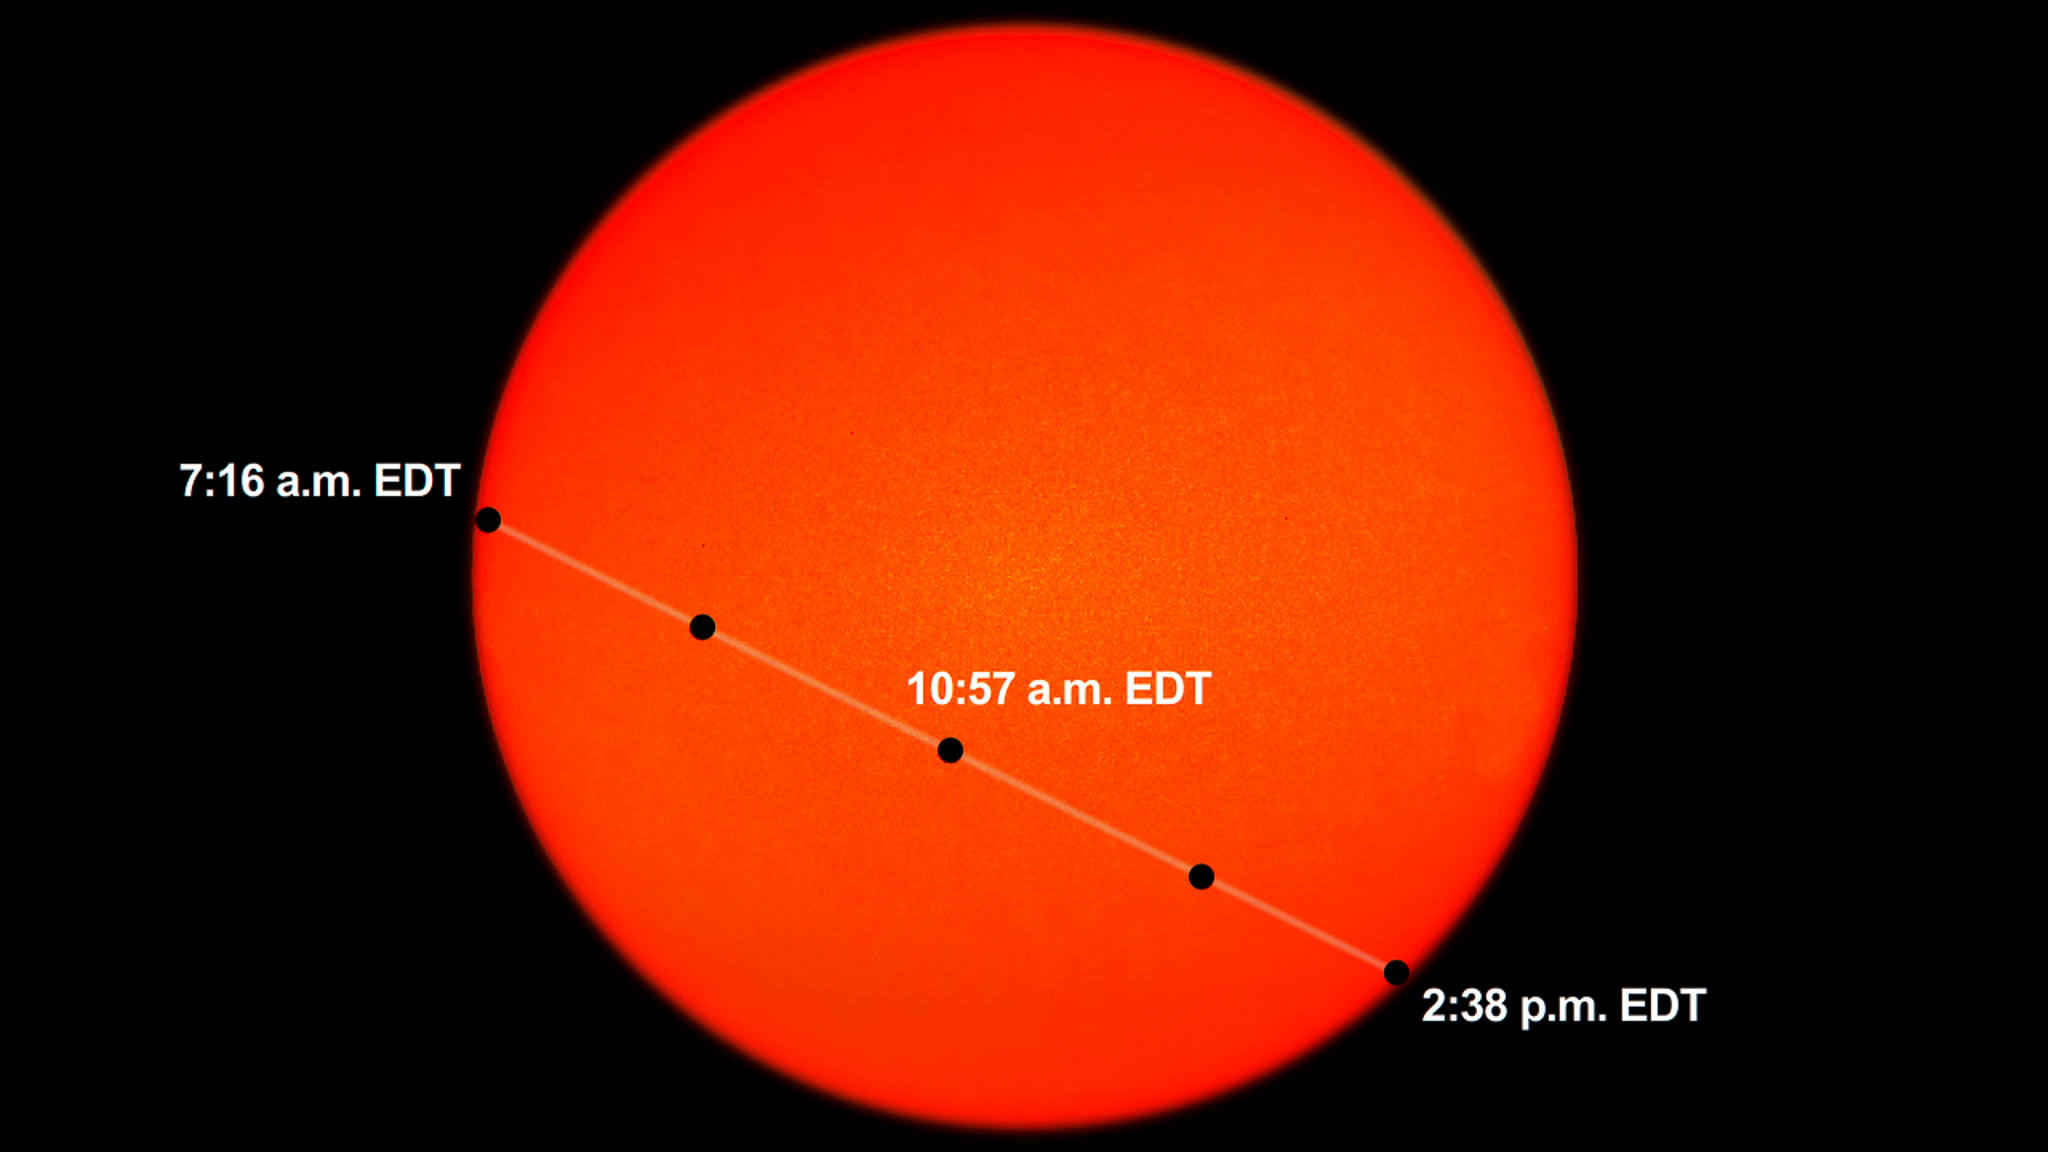
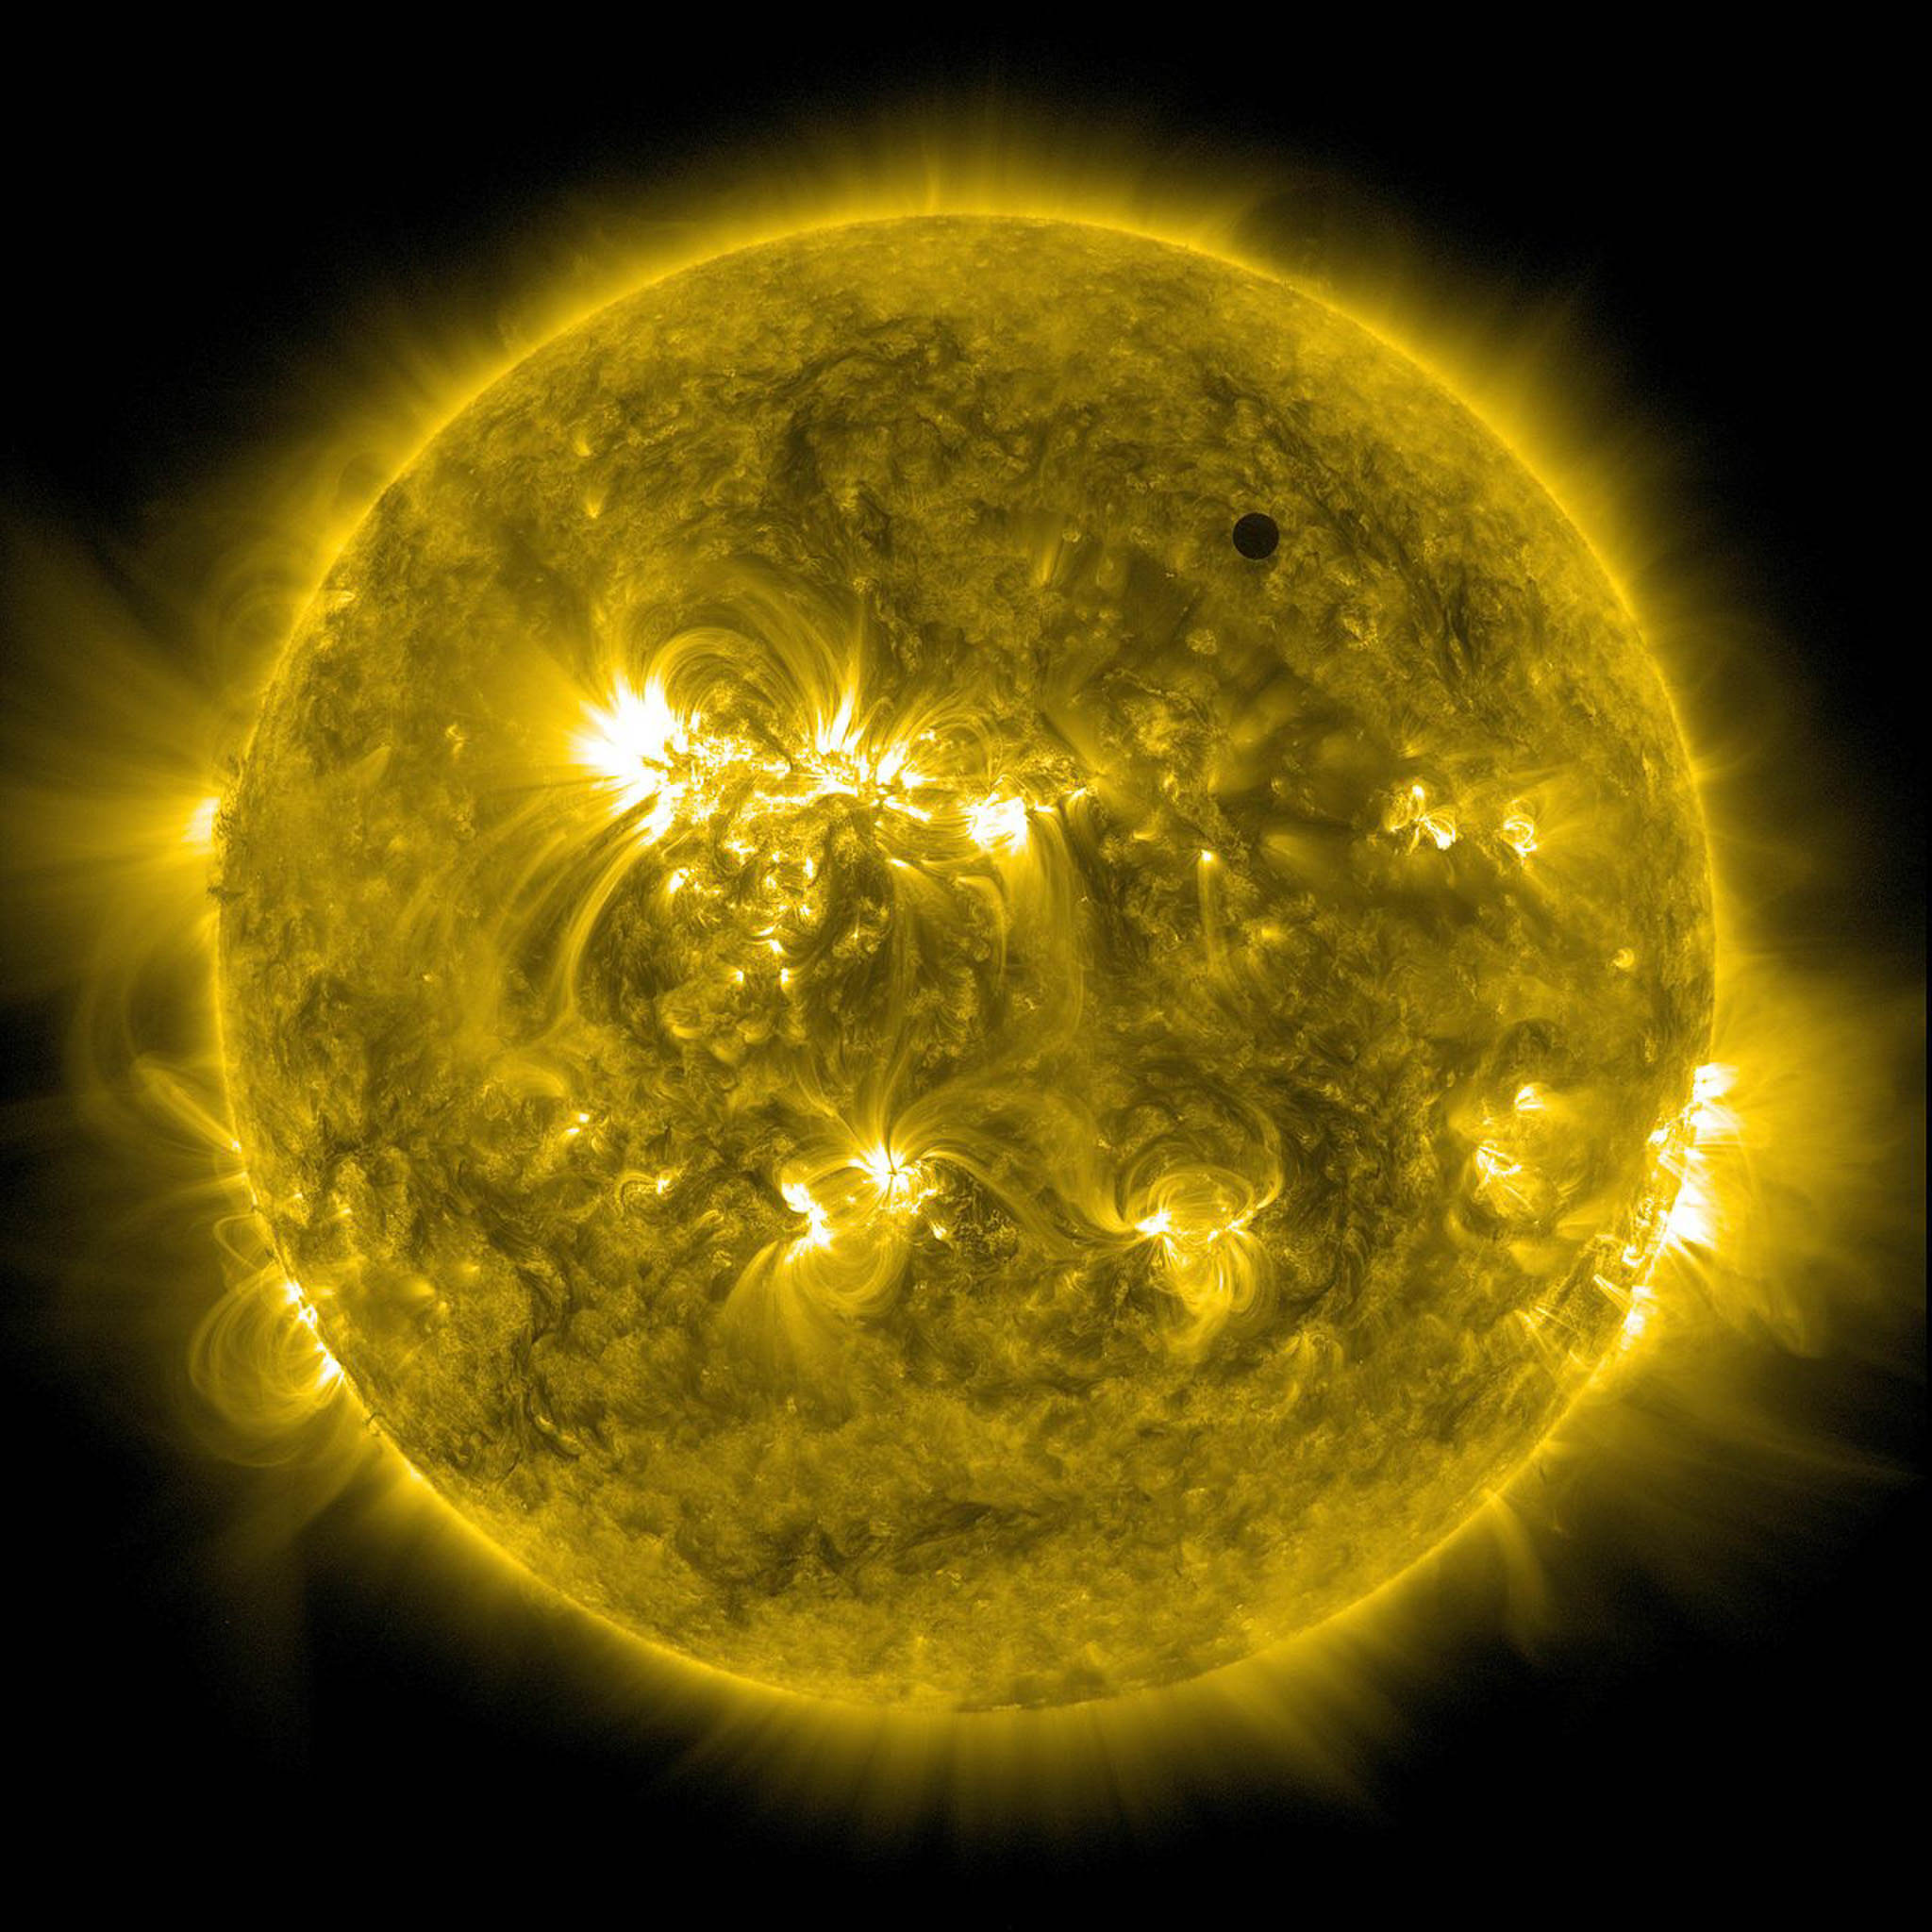
Image from NASA – Mercury’s size exaggerated
In most of the Western hemisphere, the transit stretches from morning until afternoon. In the Eastern hemisphere, it spans the afternoon. To find the specific times in your time zone, you will need to convert from GMT.
The 2016 Mercury transit will be visible from almost every place on Earth. Unfortunately, if you are in Australia or eastern Asia, you won’t be able to see it this year. Many places around the world will be able to see the transit for more than seven hours, including much of South America, Europe, and the United States. Other places might have the transit cut short by sunrise or sunset. Still, there should be more than enough time to set up for the best possible shots.
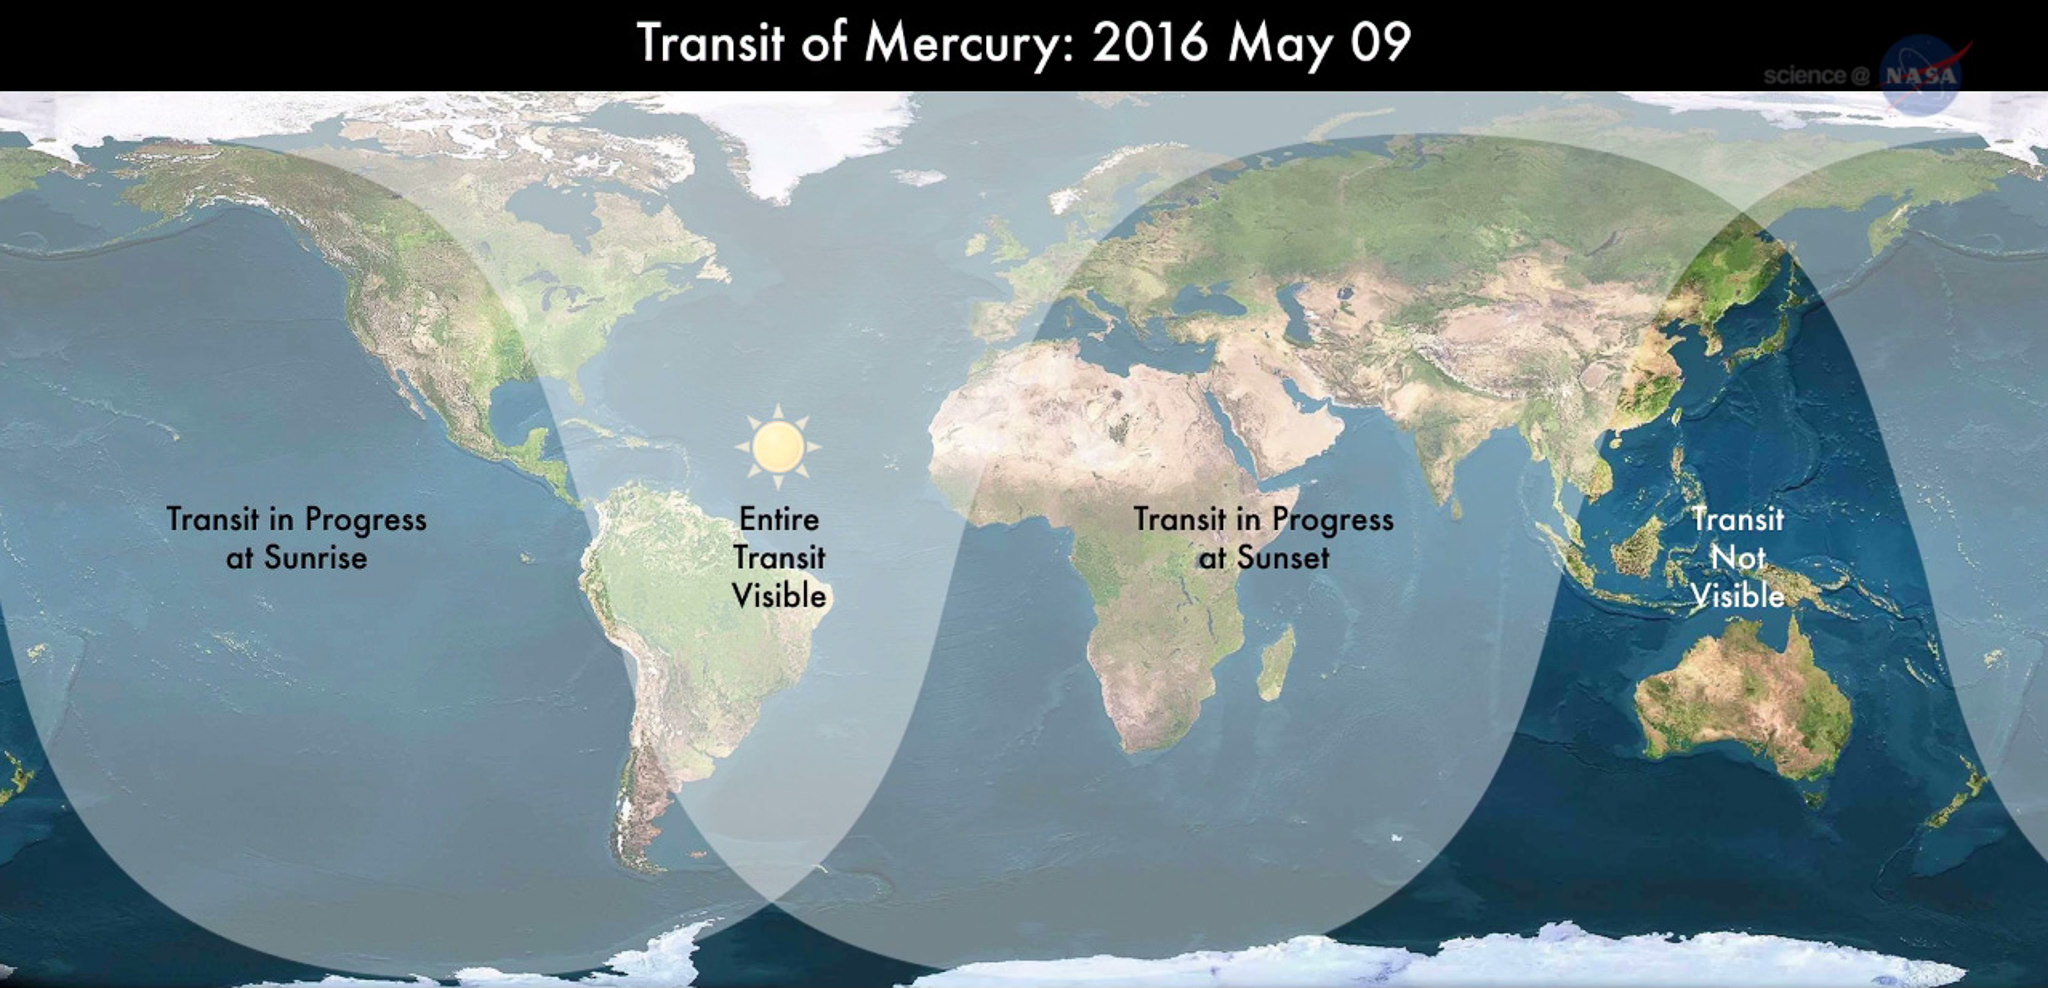
Image from NASA
2) Filters
The most important part about your kit is the filter that you choose. You can’t photograph the Sun without a proper filter; otherwise, you may burn your camera’s sensor.
I strongly recommend using a solar foil filter made specifically for use with a telescope for visual observation; these will not damage your eyes or camera if used properly. One example is a black polymer filter that is only $ 18 on Amazon. If you buy it within the next couple days, it should arrive before Monday. This material is fairly flexible, and it it is easy to cut down to different sizes. Add some tape and cardboard, and you can build a filter that works with any lens.
DO NOT use a filter that you are not certain is made for this purpose. Some filters that block sufficient visible light to make the sun appear dim do not block UV or infra-red light, and you can permanently damage your eyes or camera using them. This includes standard neutral density filters. Never look through the viewfinder without a specialized solar filter, and be very wary of using your camera in live-view even with a strong neutral density filter.
If it’s too late for you to purchase this type of filter online, you may consider trying to find something at a local store. It all depends upon where you live, but some cities have specialty astronomical shops that sell filters like this. Even number 14 welding glass works, assuming you can find a place that sells it.
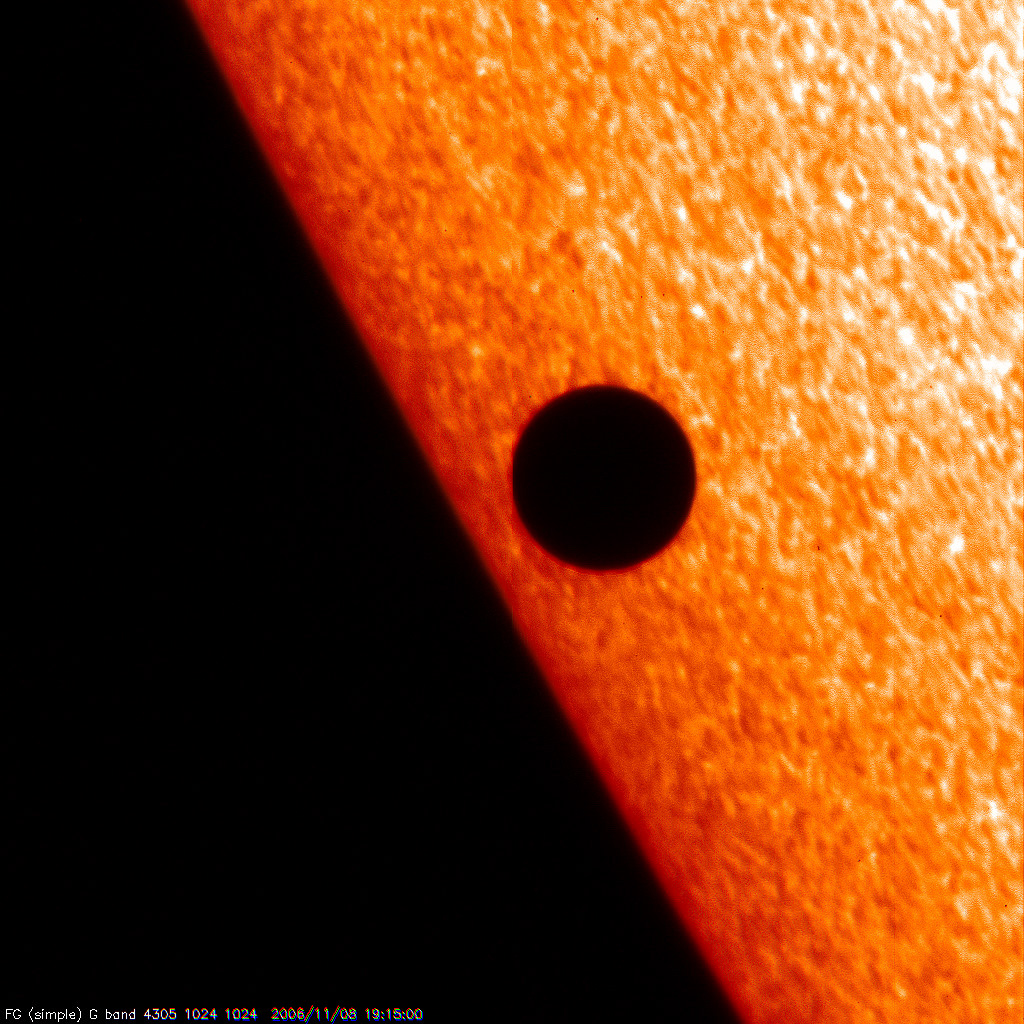
2006 Mercury transit image from NASA
3) Camera Equipment
Mercury is smaller than Venus and farther from Earth. While some people were able to see the Venus transit even without a telescope, Mercury is decidedly more difficult to photograph. This will prove especially true if there are pronounced sunspots during the transit, some of which may be the same size or shape as Mercury.
From a photographic standpoint, your goal is to get as many pixels as possible on the Sun. The best way to do this is with a supertelephoto lens. The Sun won’t fill your frame with a focal length less than about 2000mm, so feel free to use the longest lens you have. Anything longer than a 300mm equivalent should be enough to see Mercury clearly, although ideally you would use something even longer. If you have a teleconverter, now’s the time for it.
In terms of the camera itself, the best ones for this task have a high pixel density. A modern crop-sensor DSLR will work well; so would a Nikon 1 camera with an F-mount adaptor, for example. The camera isn’t as important as the lens, though, so feel free to use whatever you have.
A tripod is almost a necessity, too. At such long focal lengths, the blur from handholding the camera will rob significant sharpness from your photographs. Also, the transit lasts so long that your arms will get tired very early from the weight of a supertelephoto.
If you don’t own any of this equipment, it’s best to make due with what you have. A 55-200mm zoom on a crop-sensor camera, for example, will show enough detail for you to see Mercury, albeit not very well. Or, you can even use a smartphone to take pictures through a telescope if you don’t have a DSLR. The quality won’t be very good, but you still may be able to see the transit.
You also could consider renting a long lens for a couple days. The transit will last for seven hours in some parts of the world, which might give you time to visit a local rental house if you hadn’t prepared beforehand! If you rent a lens, get the longest one you can. The Nikon 200-500mm f/5.6 (review) is a good, relatively inexpensive option. So are the similar Sigma and Tamron lenses.
This is the Venus transit of 2012, not a Mercury transit, but hopefully NASA will get similar photos of this year’s event! Photo from NASA.
4) Camera Settings
Luckily, the Sun is very bright. Even with a strong solar filter, you don’t need to worry about using extreme camera settings. I recommend shooting at ISO 100, an aperture from f/5.6 to f/11, and a shutter speed that gives you the proper exposure (probably around 1/1000 second).
If you’re handholding the camera, make sure to use the reciprocal rule to find the right shutter speed. You may need to increase your ISO for handheld shots. Don’t worry about this for tripod-based shots, unless the Sun is moving so quickly that it is beginning to blur in your photos even at 1/1000 second. If that is the case, use a quicker shutter speed and a higher ISO. (This is unlikely unless you are using an extreme telephoto and an unusually strong solar filter.)
Since Mercury is so small compared to the Sun, it may not be possible to distinguish it from a sunspot in a single image. To fix this, you may choose to take several photographs and layer them in Photoshop after the transit. Align the images, then blend them so that Mercury appears several times in succession across the Sun. The photograph below shows what I mean:
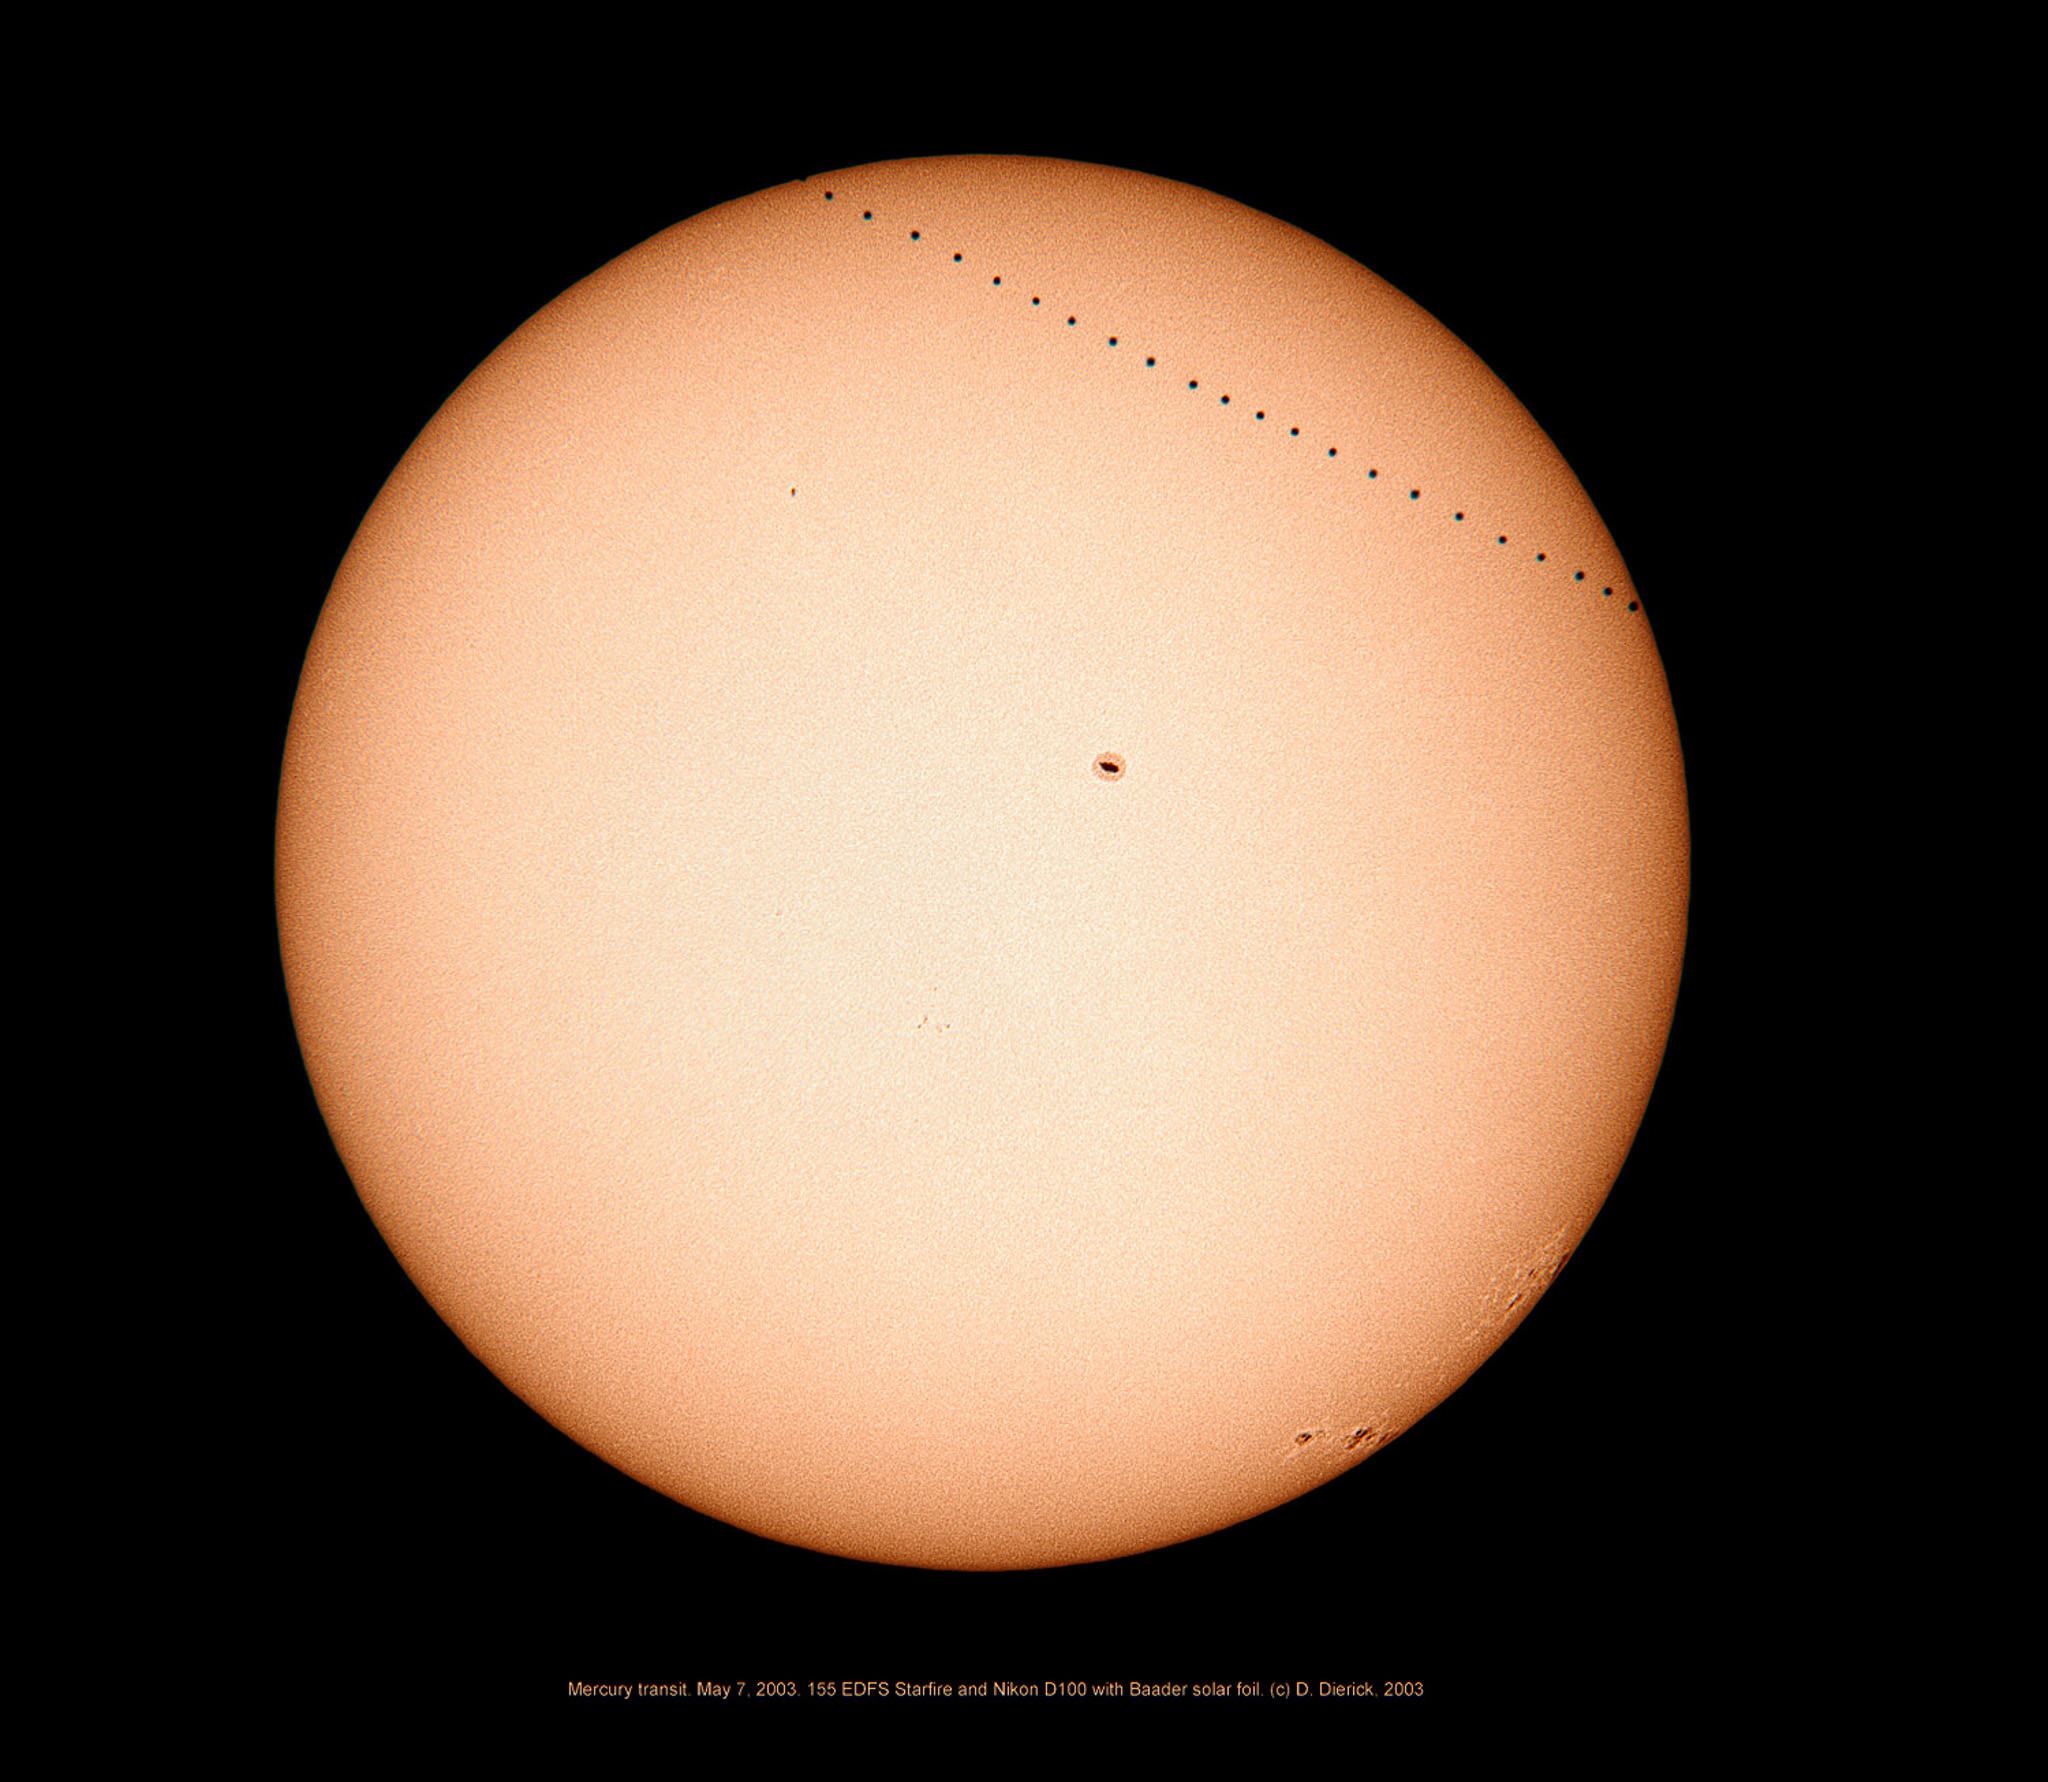
From Mercury’s 2003 transit, courtesy of Dominique Dierick at NASA APOD
Or, you may consider doing a time-lapse video instead. If you want your audience to know which dot is Mercury, this may be your best bet.
5) Safety
It should go without saying, but the Sun can cause extreme eye damage even if you only look at it for a brief moment. This effect is amplified tremendously if you are looking through a supertelephoto lens. You must use a solar filter while taking pictures. I also recommend that you avoid looking through your viewfinder, even if your lens has a solar filter. Use live-view instead.
Even your equipment is susceptible to damage from the Sun. If you forget to use a solar filter – particularly if you shoot in live-view mode – you run a high risk of burning your camera’s sensor. However, if you use a solar filter properly, there is no significant risk to your sensor, even in live-view.
If you’d prefer not to risk your eyes or your equipment, though, you also have the option of viewing the event live online from NASA TV. Although it’s always fun to see something like this in person, I have no doubt that NASA’s coverage of the transit will be well-done.
The Mercury transit is a fun and beautiful astronomical event, and this is your only opportunity to see it for the next few years. Although it isn’t necessarily easy to photograph, I recommend that you give it a try. If you are careful to avoid staring at the Sun, your photographs will be well worth the effort.
The post How to Photograph the Mercury Transit appeared first on Photography Life.


