
Garages have a bad reputation.
They’re dirty and full of clutter. Well, mine is at least. That mess doesn’t mean you can’t take some great photos in your garage, though! Sometimes you have to push things around and sometimes you just have to be a little more creative. We asked a few pros for their advice on tackling photos in the garage and have compiled them all here for you. Best of all, nobody suggested cleaning!
1. Choose the Perfect Angle
by Kerry Lee

2. Blackout the Background (aka the inverse square law)
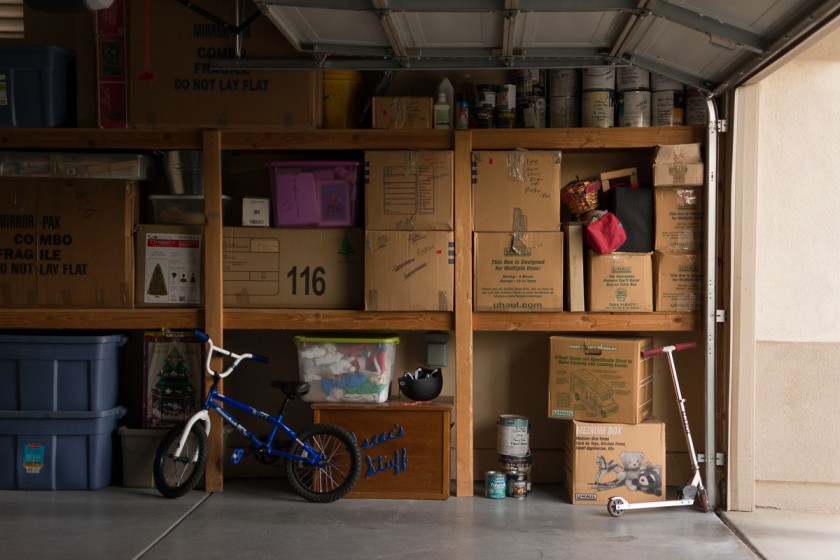
Anytime I want a neutral backdrop outside, my go-to is my garage. As long as it is light outside, it works anytime of the day. I just have my subject stand right inside the line that separates the shade of the garage and the light of the sun. This way my subject is illuminated by the sun, but still has the nice even lighting of the open shade. The closer I am to my subject the more the light behind them falls off into shadow. I then use post processing to easily fully blackout the garage and hide the junk!


3. Find the Side Light
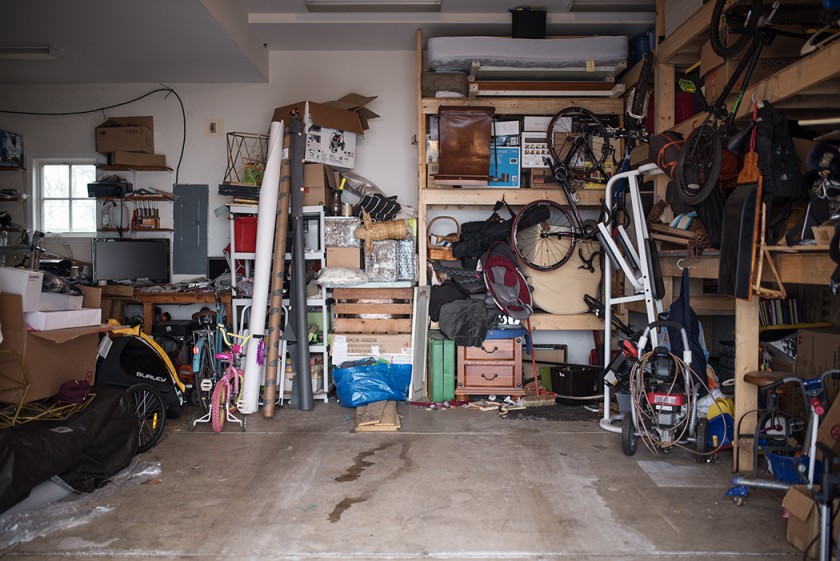
Using a garage as a natural light studio can be really easy. It doesn’t matter if the garage is cluttered or clutter-free, big or very small! If you have space for both you and your subject to sit or stand, you have an opportunity to make something work for you. I am drawn to light that wraps around my subject to create depth and form. In this photo, I chose to have my subject stand just inside the garage approximately 1 foot. On one side of him there was full day sun, and on the other side of him and to his front, was softer directional light coming from 2 windows that are high up on one wall (although one window is currently blocked with stuff). The garage door was left open all the way so that I could take advantage of that full sun illuminating him from the top of his head down on the left side of his body. This was important to me as I wanted to create a moodier, more dramatic feel. Using light that wraps around your subject such as this actually creates several opportunities – first, you are able to maintain catchlights, or that glimmer of light in both eyes, and second, you can adjust the subjects’ face so that very little or no light is on one side (split lighting); or third, adjust the face slightly by turning it towards the brighter light so that you create the classical look of Rembrandt lighting as I did here. Exposure is very important and making sure you expose for the brightest part of your subjects skin, especially when you are working with both full sun and low light at the same time, will ensure that the the overall tonal range is just right! Use dodging and burning if needed to further enhance your overall look. And don’t be afraid to bring exposure down selectively in the background (and do some cloning work if needed) in order to remove distracting elements present in your scene.


4. Close the Doors and do a Silhouette
by Suzie Zemke
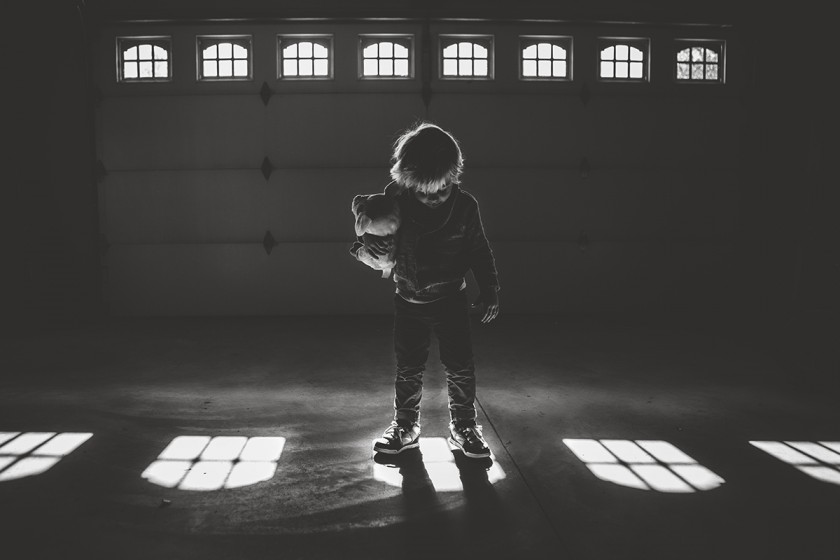
My favorite way to use garage light is to creatively expose, and meter for the highlights. In doing so, you are bringing down the light of the scene in a way that is different from what the eyes are seeing. Not only are you able to capture the details in the light while accentuating the shadows and making a more moody environment, but you are able to capture the detail of the light and soften it’s harshness. Bonus: you won’t have to tidy up before using the space! Don’t have windows in your garage? No problem. Crack open a door and use the available light that way. Different times of the day make different lighting, watch for the effects of direct vs indirect light, and use what inspires your creativity!


5. Fun with Flash
I officially have the world’s messiest garage. It is littered with bikes and furniture and toys and power tools and twelve-foot rolls of seamless paper and who knows what else. And it is my absolute favorite place to take pictures. Ever since I learned how the Inverse Square Law works and how I could use my camera settings to make all of that clutter fade to black without hauling around a backdrop stand, I have been happily obsessed with garage portraits.
In this image of my Annie, I took the garage portrait to a new level with a single off-camera flash, an orange gel, and some fake snow (easily found at most big box craft stores or on Amazon). I simply set the flash on the garage floor with a stand, applied the orange gel, and aimed it up toward the back of Annie’s head while she stood in the light just outside of the garage. Then I had my assistant (my 11-year-old son) throw the fake snow in the air between the flash and Annie. When the flash fired, it illuminated the snow and with my exposure set on Annie, the garage mess faded to black and she remained perfectly lit.

6. Makeshift Studio
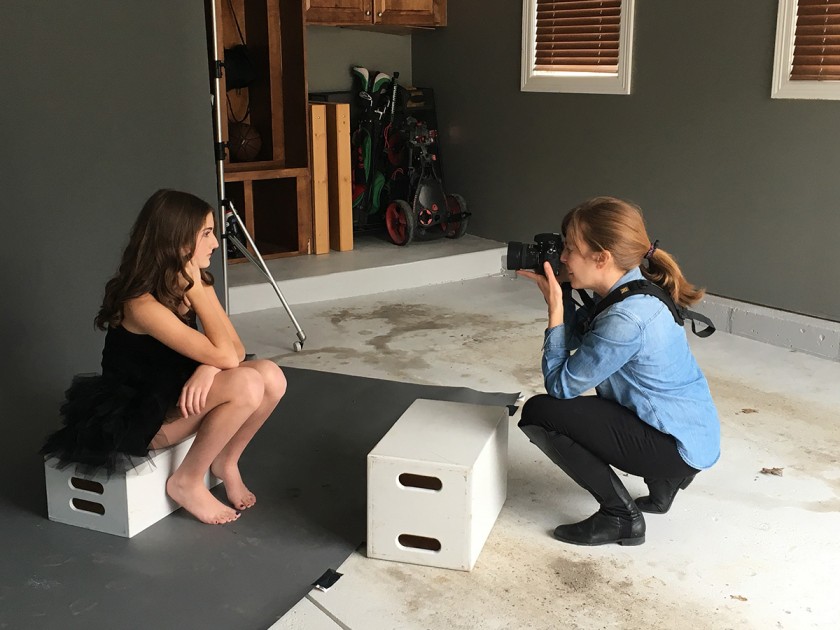
I love using soft, flat or loop light with a little hint of drama especially for my female clients. It is flattering and oh so dreamy. Garage light provides for some truly beautiful lighting that is available all day long (caution: if you have an east or west facing garage, the rising and setting sun can be harsh…wait until the sun isn’t streaming straight into your garage). To find just the right light, I stand where my subject would be and make a fist, with my thumb, pointer finger facing the light. I move my fist to the left and right, forward and back until I find the perfect amount of shadow and light and build everything from there. Typically, I position the backdrop at a 30-45 degree angle to the open garage door and just where the light starts to fall off since I want the backdrop a little darker (if using seamless paper, make sure garage floor is free of rocks, dirt or oil. Use gaffer’s tape to tape down front edges of backdrop). I put my subject 2-4 feet in front of my backdrop seated on an apple box at the same 30-45 degree angle to the garage door as the backdrop. This allows me the flexibility to rotate my subject toward to the light for more of a flat lighting scenario or away from the light for Rembrandt or a split lighting look. Start shooting and prepare to fall in love with your garage in a whole new way.


So what are you waiting for? Open that garage door of yours, kick some piles of junk out of the way and get to shooting!
The post Why Your Messy Garage is a Great Location for Photos appeared first on Clickin Moms.


