Using Lightroom’s Graduated and Radial Filters with the Adjustment Brush

The graduated and radial filters which allow you to make localized adjustments to portions of your photo bring Lightroom’s capabilities even closer to those of Photoshop. But did you know that these filters can be even further refined with the use of adjustment brushes found within each filter’s panel?
before

The graduated and radial filters which allow you to make localized adjustments to portions of your photo bring Lightroom’s capabilities even closer to those of Photoshop. But did you know that these filters can be even further refined with the use of adjustment brushes found within each filter’s panel?
after

Adobe Lightroom is my preferred editing program.

I love that all of the adjustments and tools available to me are visible and easily accessed and used from one screen for instantaneous results.

The inclusion of the graduated and radial filters which allow you to make localized adjustments to portions of your image bring Lightroom’s capabilities even closer to those of Photoshop.

But did you know that these filters can be even further refined with the use of adjustment brushes found within each filter’s panel?

If you are familiar with Lightroom, you probably know that both the radial and gradient filters function similarly, allowing you to place the filter on a portion of your image and apply exposure, color, and other adjustments to only that portion of your image.

The difference between the two is merely the shape of the filter. The graduated filter is linear while the radial filter is elliptical.

The only downside of the filter is that it can cover a part of your image you don’t want it to affect. For example, when I applied a graduated filter to darken the sky of this image:

The graduated and radial filters which allow you to make localized adjustments to portions of your photo bring Lightroom’s capabilities even closer to those of Photoshop. But did you know that these filters can be even further refined with the use of adjustment brushes found within each filter’s panel?

The mask covered my subject:

The graduated and radial filters which allow you to make localized adjustments to portions of your photo bring Lightroom’s capabilities even closer to those of Photoshop. But did you know that these filters can be even further refined with the use of adjustment brushes found within each filter’s panel?

The graduated and radial filters which allow you to make localized adjustments to portions of your photo bring Lightroom’s capabilities even closer to those of Photoshop. But did you know that these filters can be even further refined with the use of adjustment brushes found within each filter’s panel?

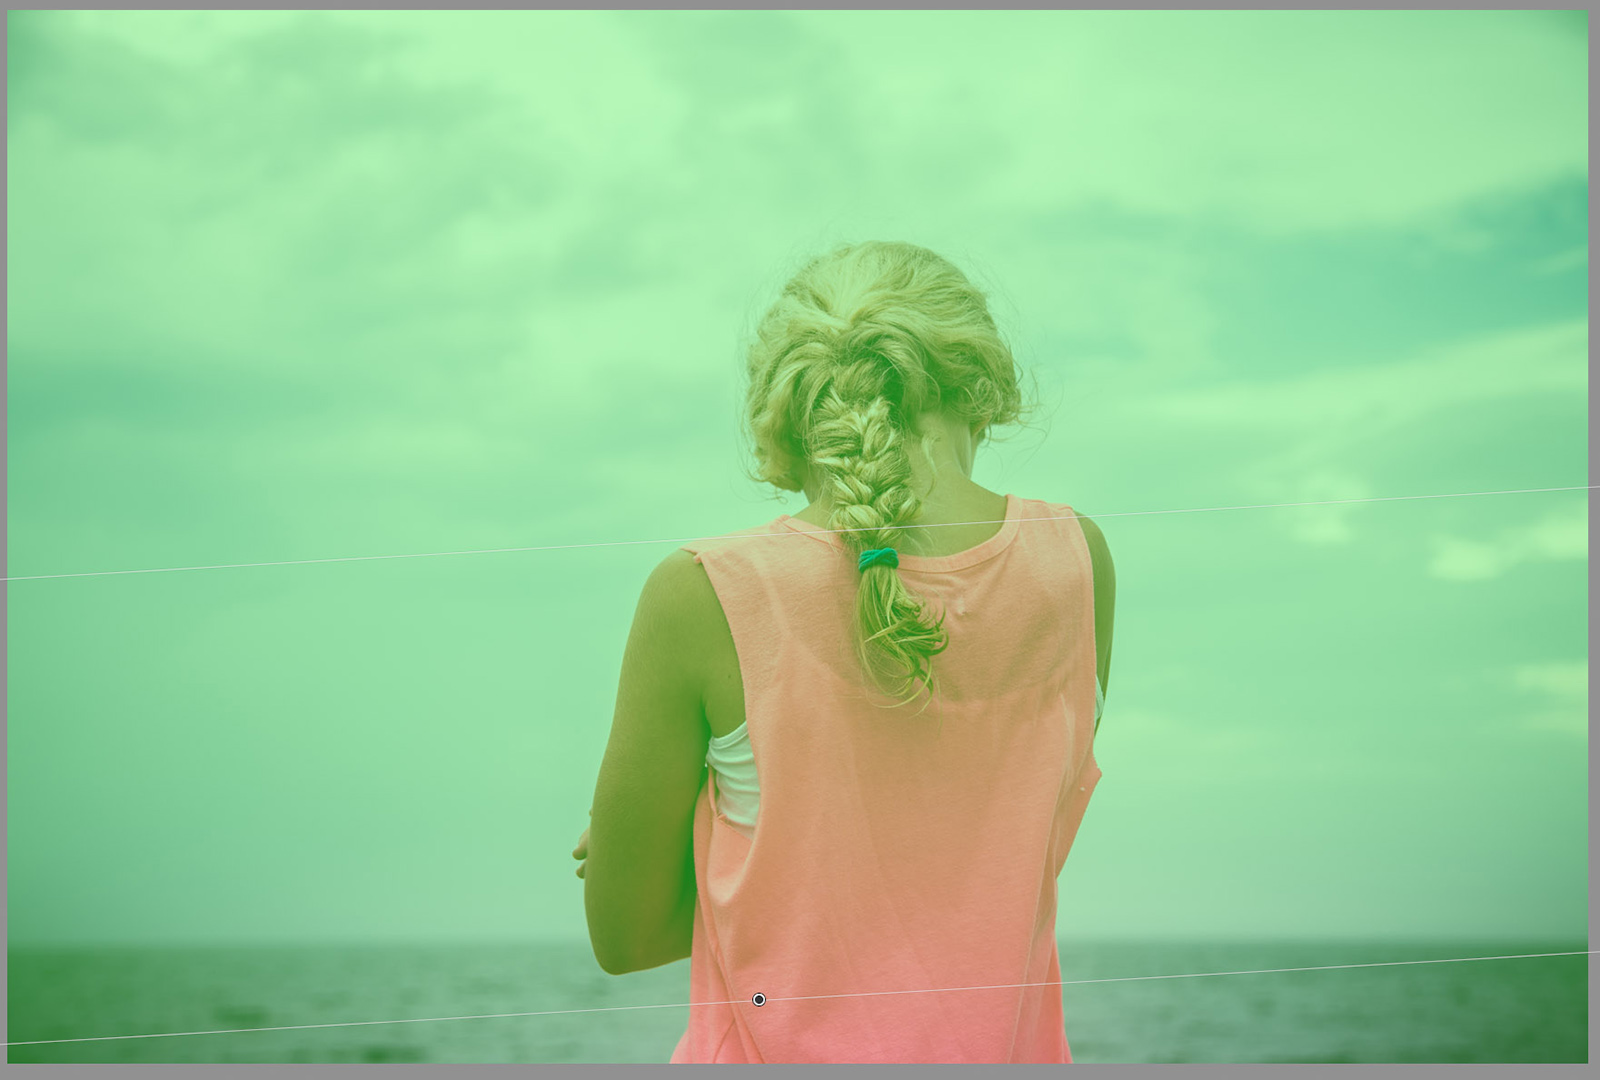
Now the sky looks great but now my subject is too dark.

The graduated and radial filters which allow you to make localized adjustments to portions of your photo bring Lightroom’s capabilities even closer to those of Photoshop. But did you know that these filters can be even further refined with the use of adjustment brushes found within each filter’s panel?

Here’s the secret. Did you know you can erase parts of these filters or add to them with their adjustment brushes?

Here’s how it works:

Once your radial or graduated filter is set, in this case the graduated filter, click on the Brush tool in the filter’s panel and select the “Erase” brush. After selecting the “Brush” option, you can also press and hold the alt/option key to activate the erase brush.

In this instance, I used medium density brush with medium flow and a fair amount of feathering.

The graduated and radial filters which allow you to make localized adjustments to portions of your photo bring Lightroom’s capabilities even closer to those of Photoshop. But did you know that these filters can be even further refined with the use of adjustment brushes found within each filter’s panel?

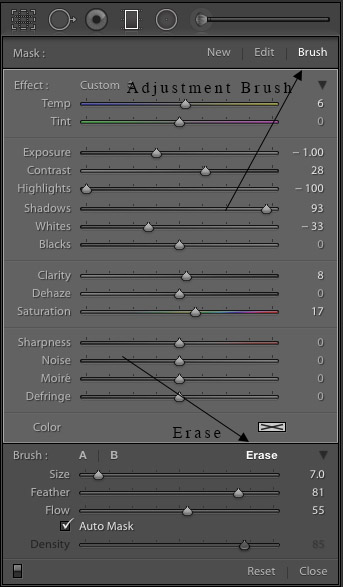
Activate the overlay (“O”) and use the Erase brush to remove the filter from those areas where you do not want it.

As you go, you can toggle the overlay on and off to see how things are looking, paying careful attention to the edges. Sometimes the auto mask option is helpful here, if you have trouble getting a clean edge, try turning it on.

Don’t worry if you accidentally remove too much. Just brush it back on with an appropriate brush by clicking Brush A or B and setting it for the appropriate density, flow and feathering.

Generally, it is a good idea to start with a low flow and build up for more precise refinements.

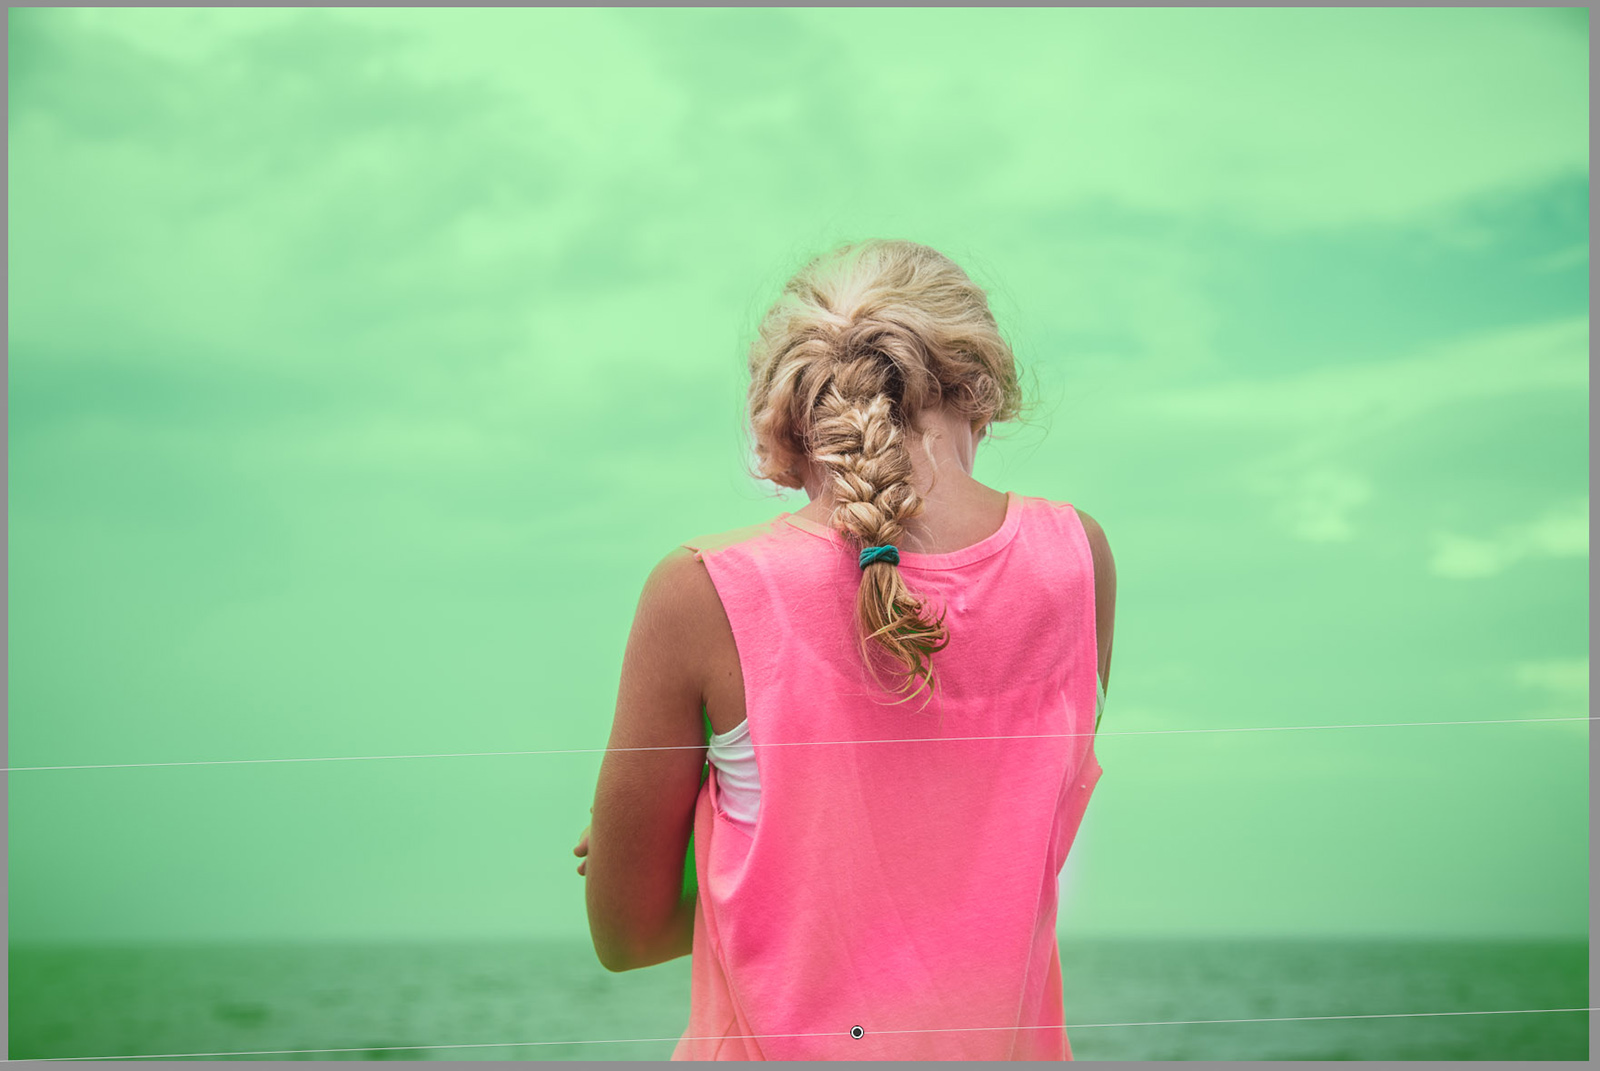
Here is the filter after I have erased it from my subject:

The graduated and radial filters which allow you to make localized adjustments to portions of your photo bring Lightroom’s capabilities even closer to those of Photoshop. But did you know that these filters can be even further refined with the use of adjustment brushes found within each filter’s panel?

And here’s the before and after:

The graduated and radial filters which allow you to make localized adjustments to portions of your photo bring Lightroom’s capabilities even closer to those of Photoshop. But did you know that these filters can be even further refined with the use of adjustment brushes found within each filter’s panel?
before

The graduated and radial filters which allow you to make localized adjustments to portions of your photo bring Lightroom’s capabilities even closer to those of Photoshop. But did you know that these filters can be even further refined with the use of adjustment brushes found within each filter’s panel?
after

Watch this video for a demonstration of the erase brush in action.

Join the Clickin Moms photography forum

The post Using Lightroom’s Graduated and Radial Filters with the Adjustment Brush appeared first on Clickin Moms.


Clickin Moms

This entry was posted in Photograpy How To and tagged , , , , , , . Bookmark the permalink.

Leave a Reply