
MIOPS Smart Camera Trigger is a camera and flash trigger in a single unit. It provides seven different triggering modes, including lightning, sound, and laser. It also functions as an intervalometer for timelapse photography. It has an HDR mode, a scenario mode, and a DIY mode. With the smartphone app, you can also use the trigger in four shutter release modes: cable release, press and hold, press and lock, and timed release. The past few days I have had a lot of fun playing with my MIOPS Trigger, and I would like to share my experiences with you.
Note: Nasim recently posted an introduction to MIOPS Smart Trigger, which I recommend reading to understand how the device works and what it can be used for.
1) First Impressions
I received my MIOPS Smart camera trigger just before we left for a weekend trip to Destin, Florida. The weather forecast called for some storms, so I threw the MIOPS into my bag. Living on the Gulf of Mexico, we get a lot of electrical storms, and this was the main reason I wanted to try the trigger. I had successfully captured lightning before, but it was a hit and miss type of capture. I was very interested to see if this device would increase my strike capture rate.
Our first night I woke up around 5:30 in the morning to the sound of thunder. Now I’m not a morning person, but I dragged myself out of bed and found my camera. I hadn’t even opened the MIOPS box yet, let alone read the instructions. Oh well, I have an engineering degree, so how hard can this be?
As I opened the box and found the battery I realized that I should have done a bit more preparation. The battery would take longer to charge than the storm would last. I also discovered that the MIOPS does not ship with any instructions, which would mean downloading them first! No time for that. I was beginning to regret dragging myself out of bed. I decided to install the battery and take my chances.
It turns out that the MIOPS comes shipped with the battery approximately 80% charged! I was thrilled. I wish more manufactures would do this. I grabbed the camera to MIOPS connection cable and hooked it up to my Nikon D800. So far, so good! When I turned the unit on, I discovered a very easy to use menu interface. Bonus marks for the developers. Remember I’m not a morning person, and I hadn’t even had a cup of coffee yet, so simplicity was paramount. I went to grab my tripod to set up on the balcony. That’s when I realized that in the haste to unpack the night before, I had left my tripod in the car. Oh well, time to improvise. I stacked our cooler on top of a coffee table and balanced the camera and MIOPS unit on the top. I framed up the shot as best I could. I set my camera to a low ISO (100) and a fairly small aperture (f/11) in aperture priority. I switched to manual focus, focusing on the horizon and crossed my fingers. Within ten seconds I saw a large bolt of lightning light up the sky and heard the sound of my camera’s shutter. Success!
I was quite proud of myself and very impressed with the MIOPS trigger. However, I guess in my excitement to chimp at the back of the camera, I loosened the cord connection to the trigger unit. This time a beautiful forked bolt of lightning lit up the sky, but I didn’t hear my camera fire. Several more bolts, still nothing. I adjusted the sensitivity on the MIOPS. Still nothing. By the time I realized that the connection had become loose, the storm had subsided. Regardless, I was impressed at how well the MIOPS trigger had worked. Although I was kicking myself for not realizing sooner why it hadn’t fired at subsequent bolts. I blamed that on the lack of caffeine, not the trigger!

NIKON D800 + 24-70mm f/2.8 @ 24mm, ISO 100, 3/1, f/11.0
2) Interface
The MIOPS unit is slightly smaller than a deck of cards and appears sturdy and ruggedly built. It doesn’t take up much room in your camera bag or pocket. It has a hotshoe adapter so that you can attach it directly to the top of your camera and a ¼”-20 brass threaded insert so that you can mount it away from your camera on a lightstand or tripod. It comes with a rechargeable Li-On battery, which is rechargeable through a USB connection. I was very impressed with the battery life, and only had to recharge it once throughout my testing.
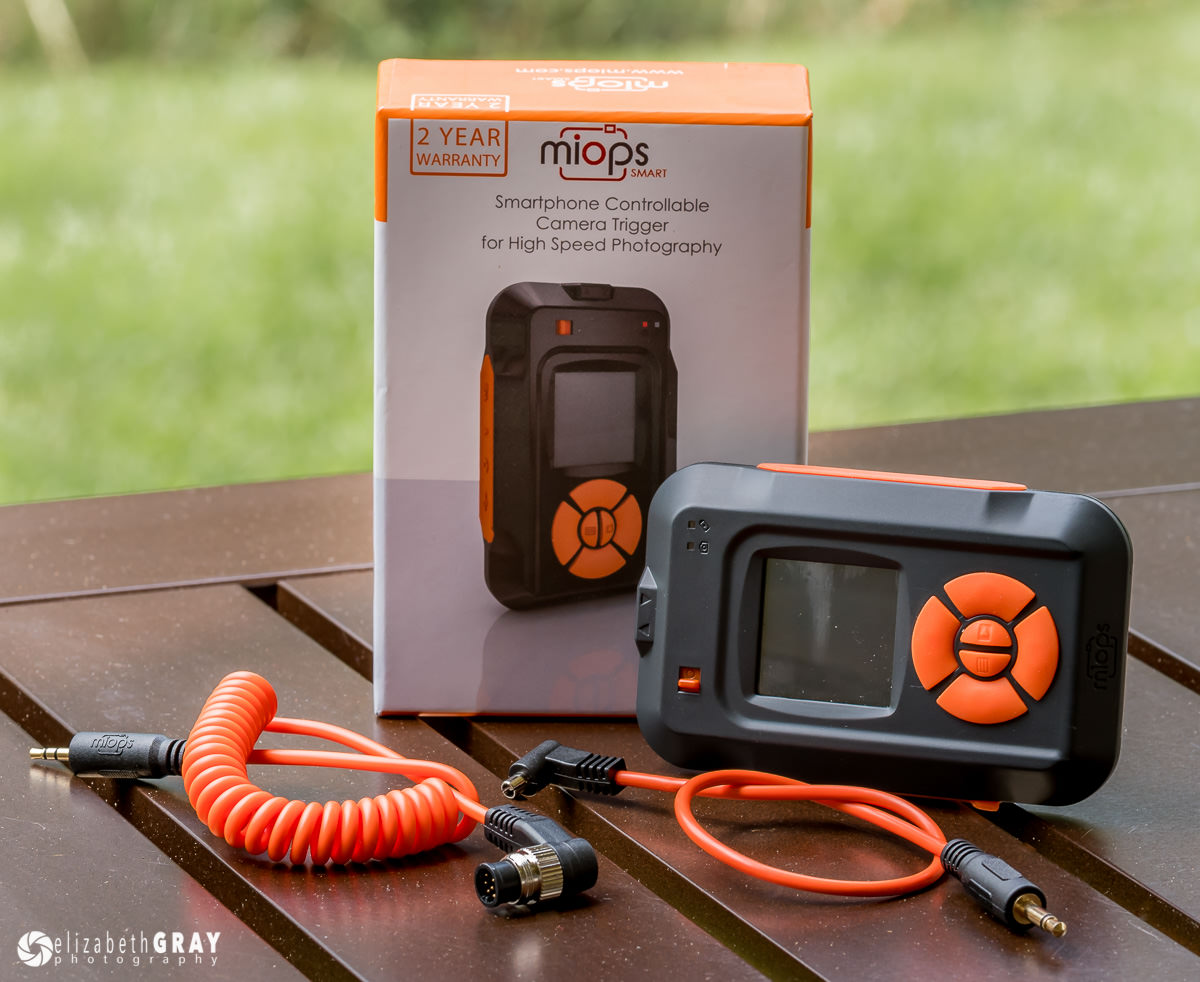
The MIOPS ships with the trigger, a camera connection cable, a flash connection cable, battery and USB charger.

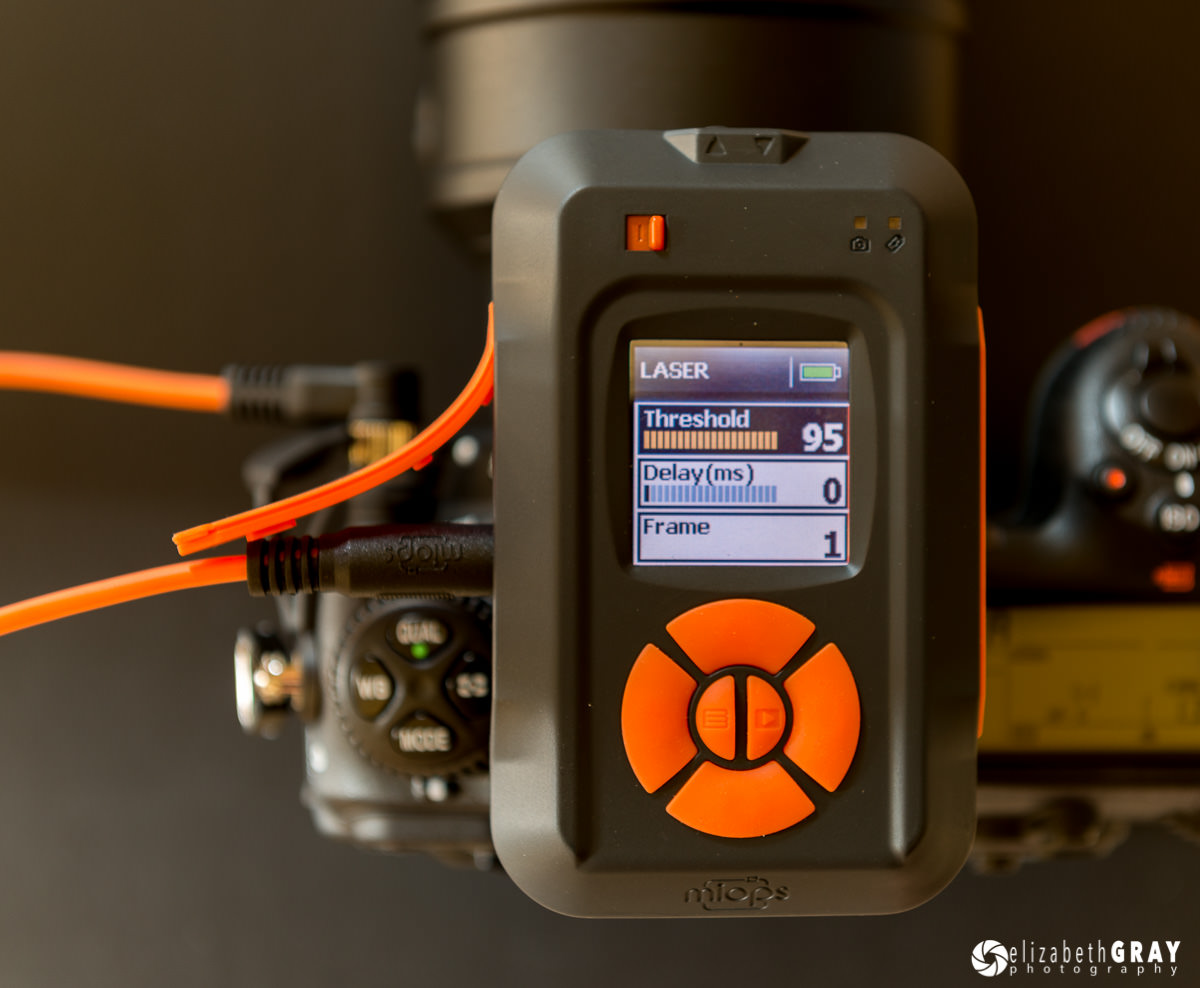
MIOPS trigger mounted on camera.
As I mentioned earlier, the Menu system in the MIOPS is very easy to negotiate. It has two main buttons (menu and start) surrounded by four navigation keys. Scrolling through the modes and changing parameters is very straightforward. The screen is clear and easy to read, even in bright daylight. The buttons are firm and responsive.
In addition to using the unit directly, you can download MIOPS’s smartphone app. It is available in both iOS and Android platforms and can be used as an alternate interface to configure and control the device. The app is very well designed and simple to use with a great user interface. Like the menus on the trigger, using the app was self-explanatory.
Because the trigger itself is often out of reach when you set up your shots, I found the app more convenient to use. It made changing parameters and starting/stopping the unit much easier.
I was also impressed with the Bluetooth connection between the app and trigger. It took only a second or two for my phone to detect the trigger. I never had any troubles with the Bluetooth disconnecting. For several of my shots, I was standing approximately 40’ away from my camera with the MIOPS mounted in its hotshoe and had no problems communicating with the trigger. In addition, each unit has its own identifier so that if you are shooting with a friend you will not interfere with each other’s connection.
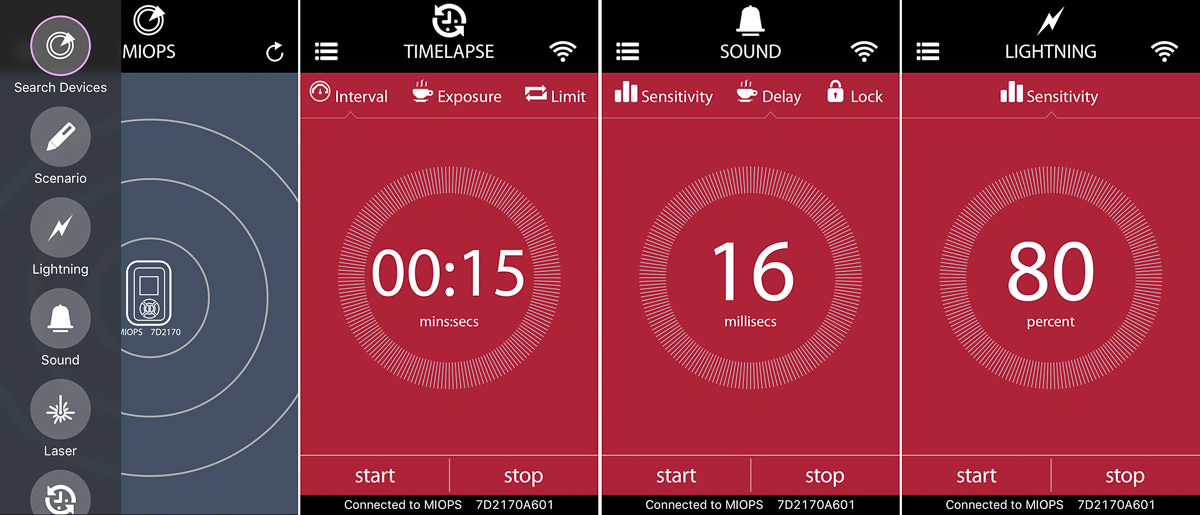
The smartphone app interface.
3) Modes
The MIOPS has seven different modes that can be selected from the trigger. In addition, there are four camera release modes that are available using the smartphone app.
3.1) Lightning Mode
As I mentioned earlier, the main reason I was interested in the MIOPS was to use it as a lightning trigger. I was not disappointed. I think what I liked best about the unit was how fast and easy it was to set up.
Lightning Mode has one parameter you can vary, sensitivity. For taking shots of lightning during the day, when the bolts are not as bright, you can increase the sensitivity. If the storm is very strong, the skies are dark, and you only want to catch the more intense strikes, you can adjust the sensitivity downwards.
Another benefit of using the MIOPS to capture lightning is the safety aspect. I could set up my camera and sit inside, or in my car, where I was out of the elements and out of “striking” distance! Remember that the current from lightning can travel long distances. It is not safe for you to be outside when you hear thunder, even if it has not started to rain yet where you are.
Although I have not had a chance to capture a lot of lightnings with the MIOPS yet, I am sure I will be using it quite a bit during the storm seasons. Here is an image of a lightning captured by Nasim while he was sitting in the comfort of his car, triggering the camera remotely as it was raining:

Double Lightning by Nasim Mansurov
NIKON D810 + 70-200mm f/2.8 @ 95mm, ISO 100, 30/1, f/5.6
3.2) Sound Mode
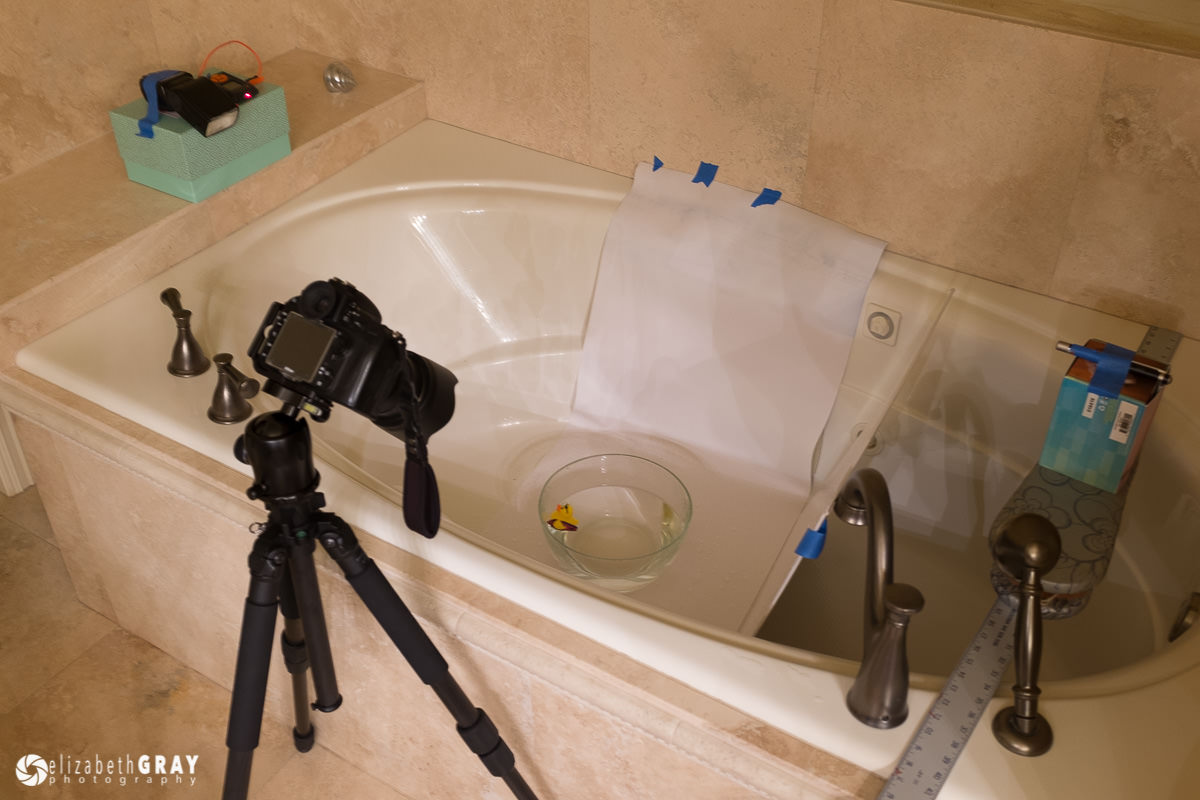
To test the Sound Mode I had fun with some water balloons. I found that the hardest step using the trigger was planning and setting up the shot. Execution was the easy part. In my first test, I connected the MIOPS trigger to my flash to capture some high-speed stop-action shots. In order to freeze the action of the balloon bursting, you need a much faster shutter speed than your camera is capable of. To get around this, I set up my camera in our bathroom (the only room in the house without windows) so that I could turn off the lights and use only my flash to expose the shot. By setting my flash to 1/64th power, I achieved a flash duration of 1/35,700th of a second.
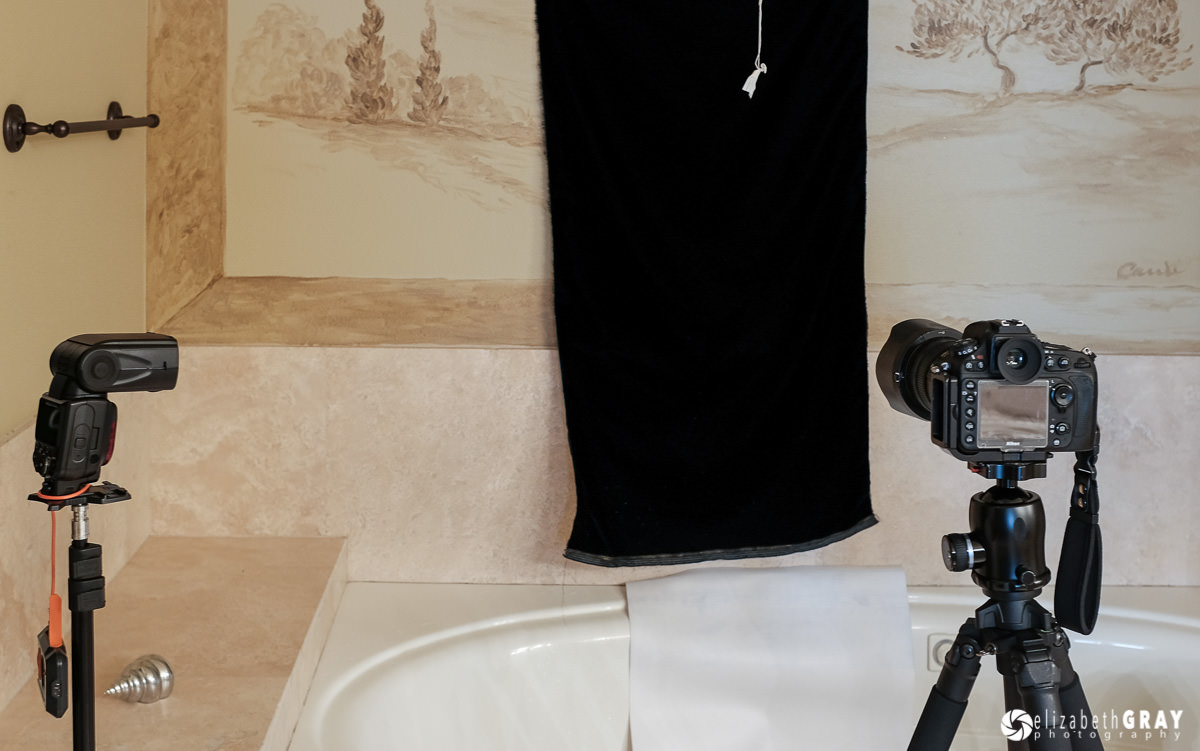
Setup for balloon burst using high-speed flash to freeze the action.
MIOPS did not disappoint! Here are the first three shots I took. The sound of the balloons popping was enough to trigger the flash.
NIKON D800 + 24-70mm f/2.8 @ 70mm, ISO 400, 5/1, f/9.0, Flash set to 1/64 power

NIKON D800 + 24-70mm f/2.8 @ 70mm, ISO 400, 5/1, f/9.0, Flash set to 1/64 power

NIKON D800 + 24-70mm f/2.8 @ 70mm, ISO 400, 5/1, f/9.0, Flash set to 1/64 power
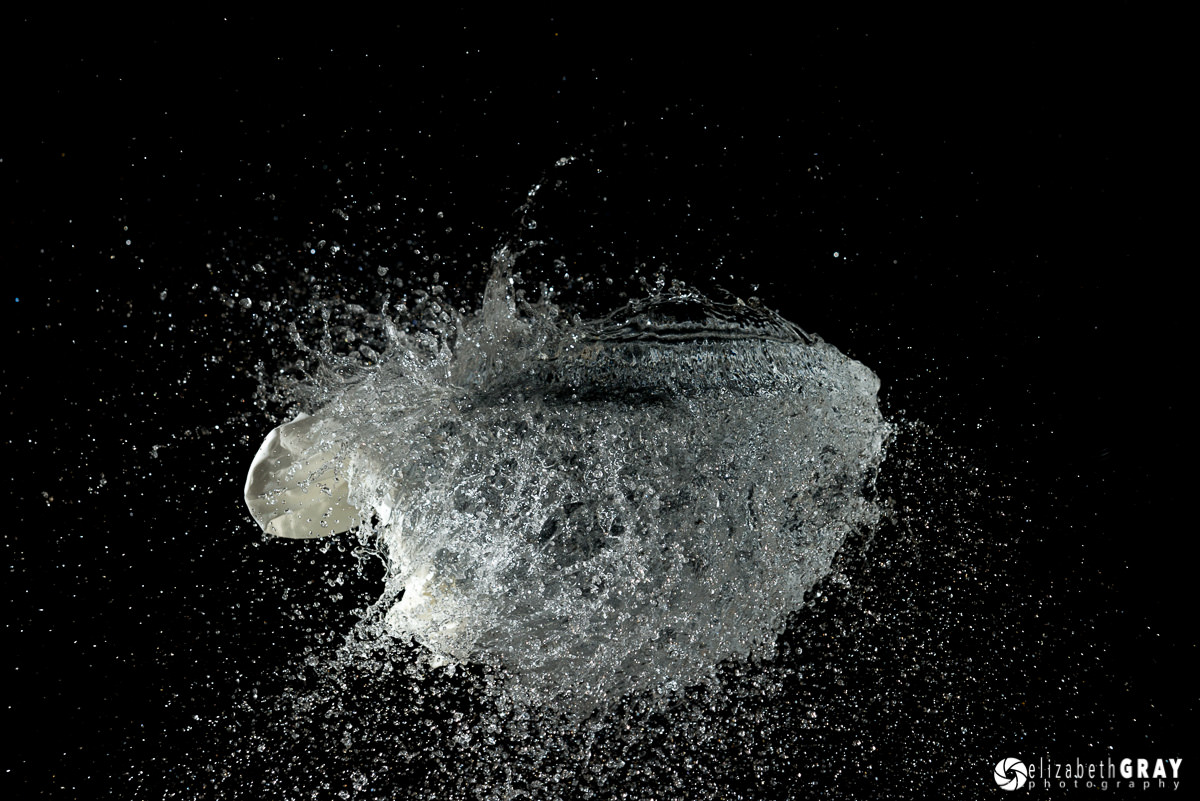
Popping water balloons is a lot more fun when you have a target! So, with a bit of a bribe I managed to convince my daughter to sacrifice herself in the name of this review! This time I connected the MIOPS to my camera directly, and used a fast shutter speed to capture the action. Since Lisa did not want to go through this experiment more than once, I did a test run using a bike helmet as a stand-in for her head!
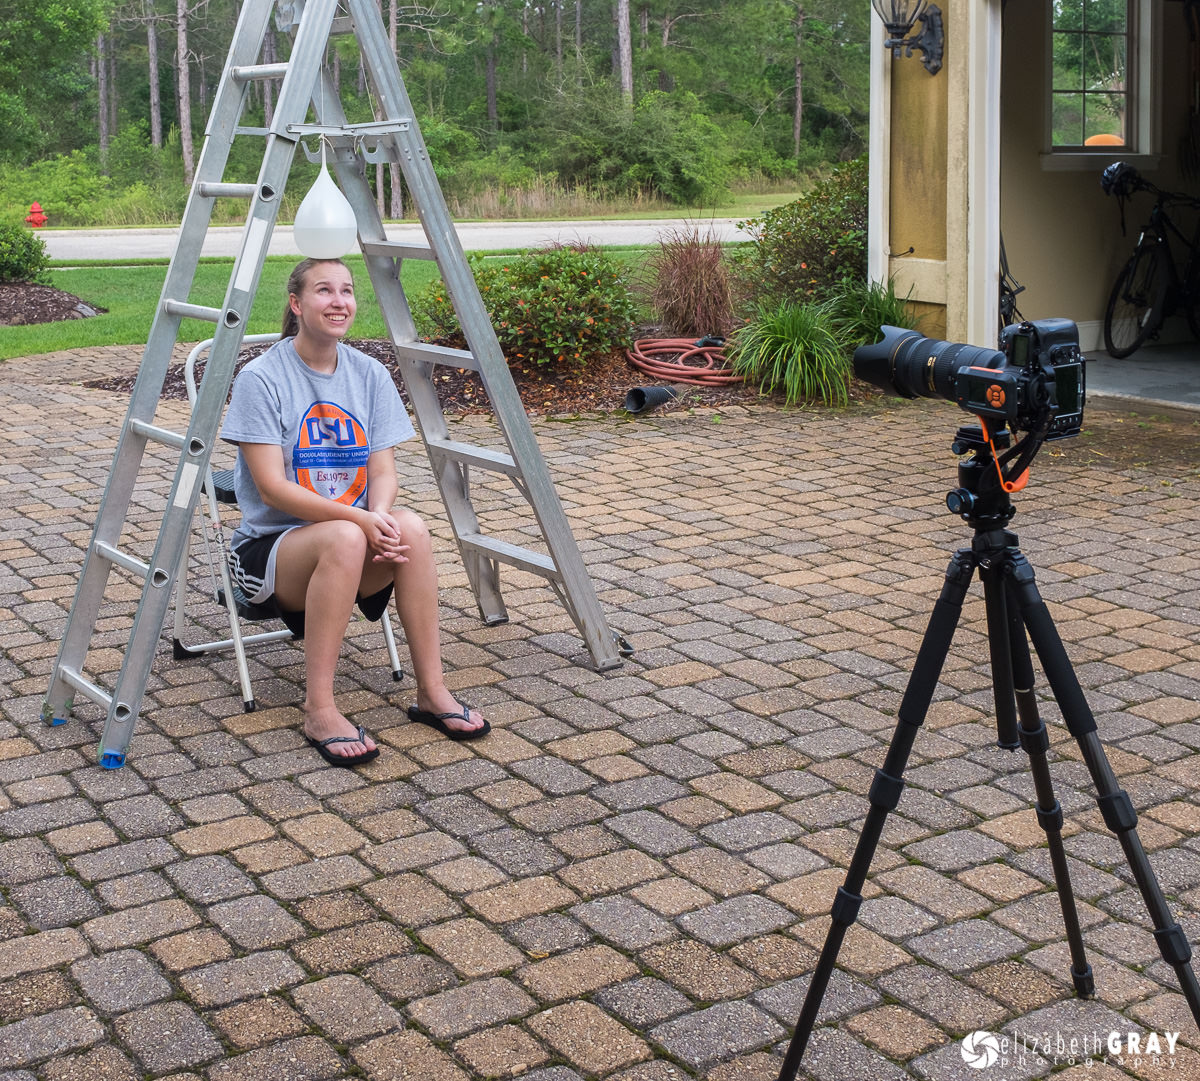
Setup for balloon bursting on Lisa’s head.
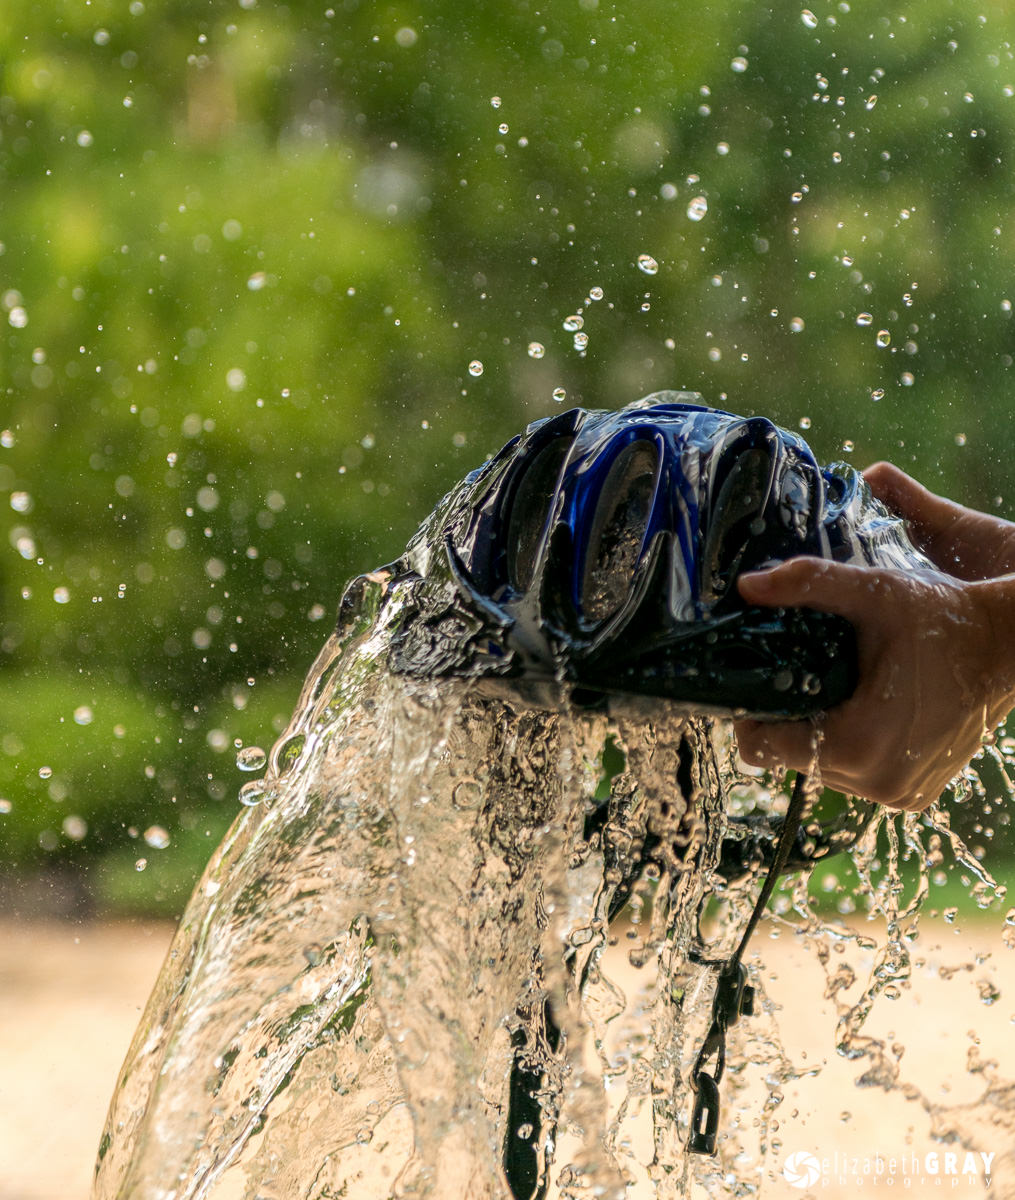
Test shot! NIKON D800 + 24-70mm f/2.8 @ 70mm, ISO 800, 1/3200, f/2.8
Luckily it was a hot day!

NIKON D800 + 70-200mm f/2.8 @ 200mm, ISO 800, 1/4000, f/3.5

NIKON D800 + 70-200mm f/2.8 @ 200mm, ISO 800, 1/4000, f/3.5
I did have some difficulty using the trigger in the outdoor shots above. Firstly, in order to have the trigger pick up the sound of the balloon over the background noise, I had to have the trigger quite close to the popping balloon. This is an issue because the connection cable is very short and I did not want to set up my camera any closer to the splashing. I found that if I tried to stretch out the coiled cord, it would loosen just enough to disconnect from the MIOPS unit without actually falling out. This resulted in several popped balloons without any photographic evidence of the event (translation, Lisa had to endure over a dozen failed attempts). In the end I had to elicit the help of my husband. He stretched out the cord, pulling the MIOPS trigger towards the balloon, while holding it tight into the device with the other hand. I popped the balloon and Lisa braced for impact. This combination of extra hands produced a 100% success rate.
3.3) Laser Mode
MIOPS can also detect a laser beam (from a laser pen purchased separately) and trigger your flash or camera when the beam is broken. As with the Sound Mode, the hardest part of capturing motion shots using the Laser Mode was the planning and setup. I also felt limited by the length of the both the flash and camera connection cables again. It would be nice to be able to place the MIOPS farther away from the flash or camera for more flexibility positioning and aiming the laser beam. However, once I was set up, capturing the action was easy and 100% repeatable. If you want to try and capture water drops, this is the mode to play with.
Laser Mode has several parameters that you can change. The threshold level can be changed to allow for different brightness of beams. You can also adjust the delay of the trigger from 0-999 milliseconds (almost 1 second). Thirdly, you can change the number of frames taken once the beam is broken.
Setup for Laser Mode shot.

NIKON D800 + 24-70mm f/2.8 @ 70mm, ISO 400, 5/1, f/11.0, Flash set to 1/64 power

NIKON D800 + 105mm f/2.8 @ 105mm, ISO 400, 8/10, f/16.0, Flash set to 1/128 power
3.4) Timelapse Mode
The Timelapse Mode allows you to take a set number of exposures evenly spaced apart. I have an intervalometer built into my camera, but I find it finicky to set up. The MIOPS Timelapse Mode on the other hand is extremely easy to configure. And, an added benefit is that if your camera is in bulb mode, you can set the length of your exposure from the trigger. This allows you to set exposures longer than 30 seconds.
I experimented with this mode to create a series of photos of an incoming storm and then created the short timelapse video below.
Nasim has also used his copy of MIOPS to make a timelapse in 4K resolution, which you can enjoy below:
3.5) HDR Mode
Although I did not test the HDR Mode, it can be used to create extreme HDR’s with images that have exposures longer than 30 seconds.
3.6) DIY Mode
The DIY Mode opens up all kinds of possibilities. In this mode, you can connect external sensors to your MIOPS, such as temperature, pressure, motion, etc. Although I did not test this mode, it offers a great deal of versatility for capturing event-based action. This mode sets MIOPS Smart apart from other camera remotes.
3.7) Scenario Mode
Using the Scenario Mode you can create a custom script with up to five different steps. In each step, MIOPS can use any of the six basic modes (Lightning, Sound, Time Lapse, Laser, HDR, or DIY) or a certain amount of delay. Each step is fully configurable using the parameters of that particular mode.
For example, if you were going to photograph a fireworks display, you could create a scenario where you set up MIOPS to capture a timelapse sequence of the crowd arriving and sun setting. Then photograph each firework explosion as individual images using the Lightning Mode. All of this could happen while you enjoy the show!
The possibilities are only limited by your creativity!
3.8) Shutter Release Modes
If sound, laser and lightning aren’t enough, you can also release the shutter four different ways using the smartphone app (cable release, press and hold, press and lock, and timed release). These modes are self-explanatory and mean that if you have the MIOPS in your bag, you don’t need to carry around a cable release or dedicated wireless release.
Using Timed Release Mode allows you to set a delay anywhere between one second and one hour. This gives much greater flexibility for organizing large group shots than any camera allows. However, do not use this mode for selfies! For an explanation, see Nasim’s excellent article “The Generation of the Self-Obsessed“!
I had some fun with the Press & Hold mode, which allows you to continuously fire your shutter while touching the screen. I set up my camera on a tripod in front of a couple of our birdhouses. Then I relaxed on the patio, in the shade, with that cup of coffee I didn’t have the first time I used the trigger, and watched for incoming birds. I was able to capture several shots of the bluebirds and titmice coming in to feed their babies without having to set up a hide or disturb the birds. It allowed me to see the whole scene, not just the scene through the viewfinder. I was able to see when the birds were approaching and could hold down the release just as the birds flew up to the house. With my camera set to a high frame rate, I was able to capture various wing positions each time.
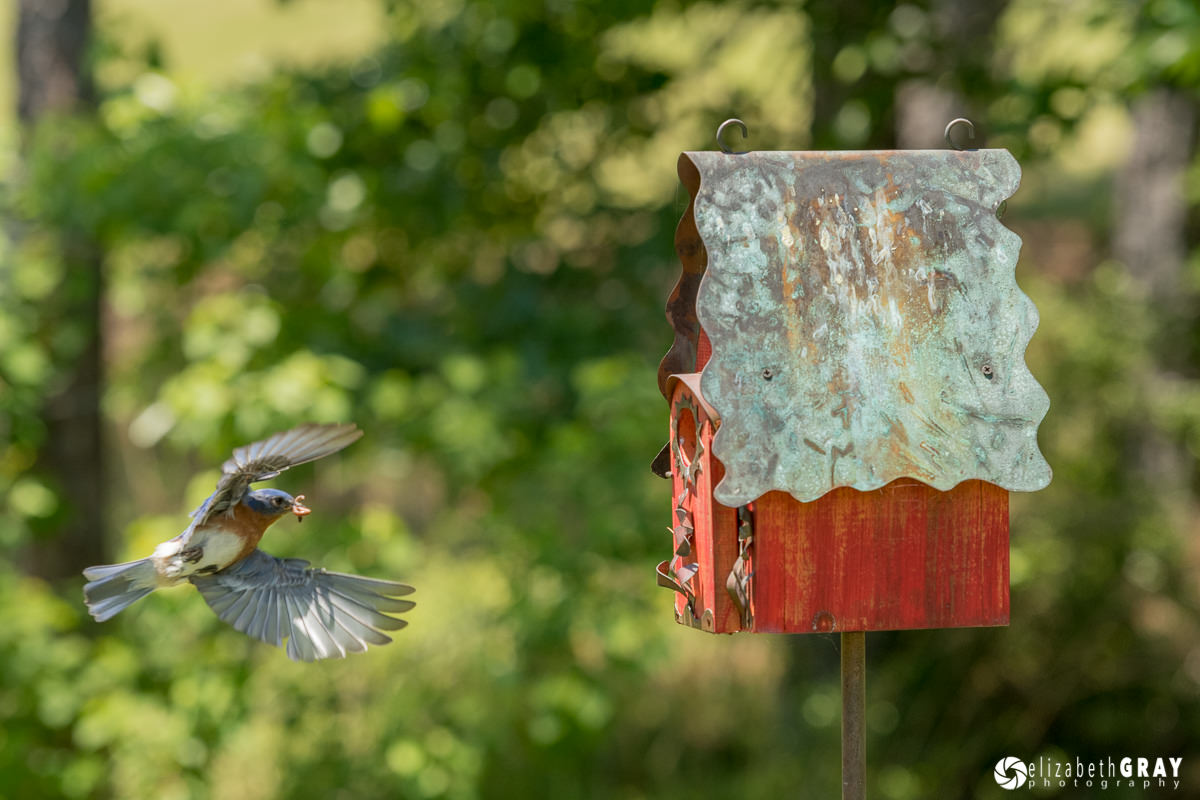
NIKON D500 + 70-200mm f/2.8 @ 135mm, ISO 800, 1/2000, f/4.0
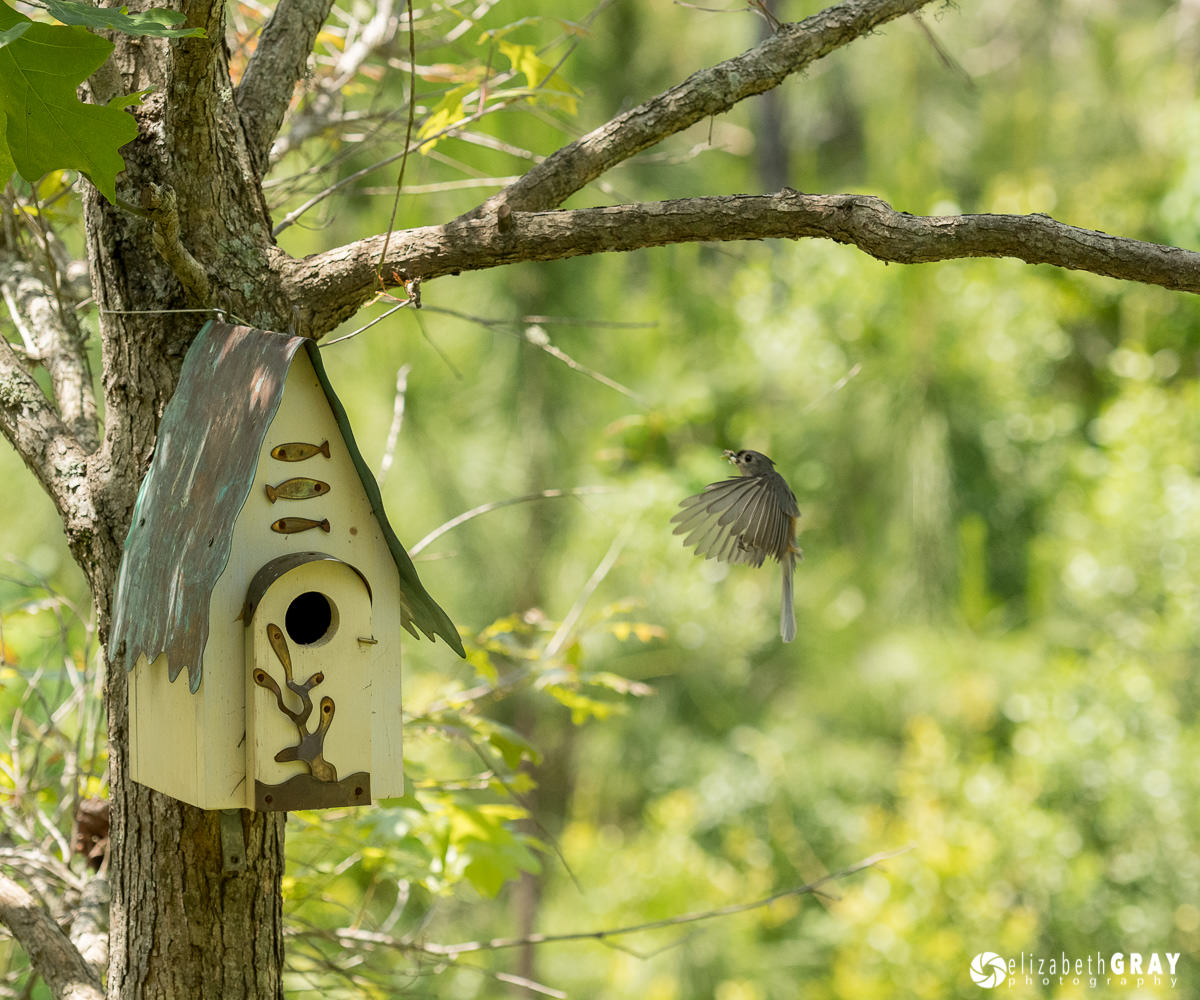
NIKON D500 + 70-200mm f/2.8 @ 105mm, ISO 800, 1/2000, f/4.0
4) A Few Issues
The MIOPS Smart Trigger did have a few problems. For some reason, the screen on my first unit stopped working after just a few days. I could still use the trigger through the smartphone app though. The company replaced this unit within a few days (excellent customer service, by the way!) and I haven’t had any screen issues with the second unit. I am assuming that something must have happened to the screen during shipping.
I was also disappointed with the cable connections to the MIOPS unit. The connections seem to stay in place at the camera and flash end, but not to the MIOPS trigger. This did lead to several missed opportunities. However, once I was aware of this problem, I could work around it. The length of the cables was also limiting, and I wish the unit would ship with 3’ cables that were not coiled. After some research I did discover that you can extend the camera cable using a 2.5mm stereo extension cable and extend the flash cable using a 3.5mm mono extension cable.
The only other thing that would improve the unit, and this is getting picky, is a better hotshoe adapter. The adapter is plastic and was a very tight fit in each of my cameras. I really had to work to get it to fit in my hotshoe and felt that I might damage the hotshoe in the process. I also worried about the adaptor breaking off from the unit when I fought to remove the MIOPS trigger from my camera.
It turns out that the hotshoe adapter works great on Canon DSLRs, but is a bit too tight for Nikon DSLRs. We have provided feedback to MIOPS regarding this and we are hoping that the developers will come up with a solution soon.
5) Final Verdict
In my opinion the pros far outweigh the cons and the MIOPS Smart Trigger is a winner. As well as providing many ways to trigger your shutter, it is small, has a long battery life, has a very easy interface, has a well designed smartphone app, is very reliable (apart from the cord issues), its firmware is upgradable, and it is solidly built. At $ 199, the MIOPS Smart Trigger is a great value. In addition, I found the resources on the MIOPS website very helpful. If you are in the market for a wireless trigger, and want to have some serious fun with high-speed, stop-action photography and lightning photography, give this gadget a try.
6) Where to Buy
MIOPS Smart Camera Trigger can be bought from MIOPS.com directly. No matter what part of the world you are from, MIOPS will send you the trigger via DHL Express, so you should receive the unit within 1-3 business days. Shipping is free.
The post MIOPS Smart Camera Trigger Review appeared first on Photography Life.


