
Telephoto lenses are wonderful tools for almost any genre of photography, but they aren’t necessarily easy to use. In particular, telephoto lenses will magnify any camera shake and provide a much thinner depth of field compared to wide angles. Don’t let that stop you, though. Telephotos have a unique way of showcasing the world — one which may be ideal for your photos. In this article, I’ll go in detail about telephoto lenses, including some of their benefits, possible ways to use them, and tips for dealing with their unique challenges. Although I personally tend to take landscape photos, the techniques in this article apply no matter what subjects you like to capture.
1) Focus on Details
Not surprisingly, telephoto lenses are very useful if you want to focus on smaller details in a given scene.
Because telephoto lenses have such a narrow field of view, they make it easier to capture just a thin slice of the world. In everything from dense forests to wide-open overlooks, a telephoto lens lets you isolate details far more easily than a medium or wide angle lens. (That’s not to say you can’t capture small details with a wide angle; some of my favorite images do just that. However, the narrow field of view that telephotos have typically makes it easier.)
What sorts of details? That depends upon the type of photography that you like to do. If you’re a portrait photographer, you can capture someone’s face more easily, without any surrounding elements. For landscape photography, you can focus on a single mountain peak and make it the most prominent item in your image. Also, don’t forget macro lenses, which are typically telephotos; they let you photograph even the tiniest of scenes.
This is perhaps the most important way in which I use telephoto lenses. It isn’t true in every landscape, but — more often than many people think — a single detail can be more impressive than an expansive scene. You just need to keep an eye out and a telephoto handy.
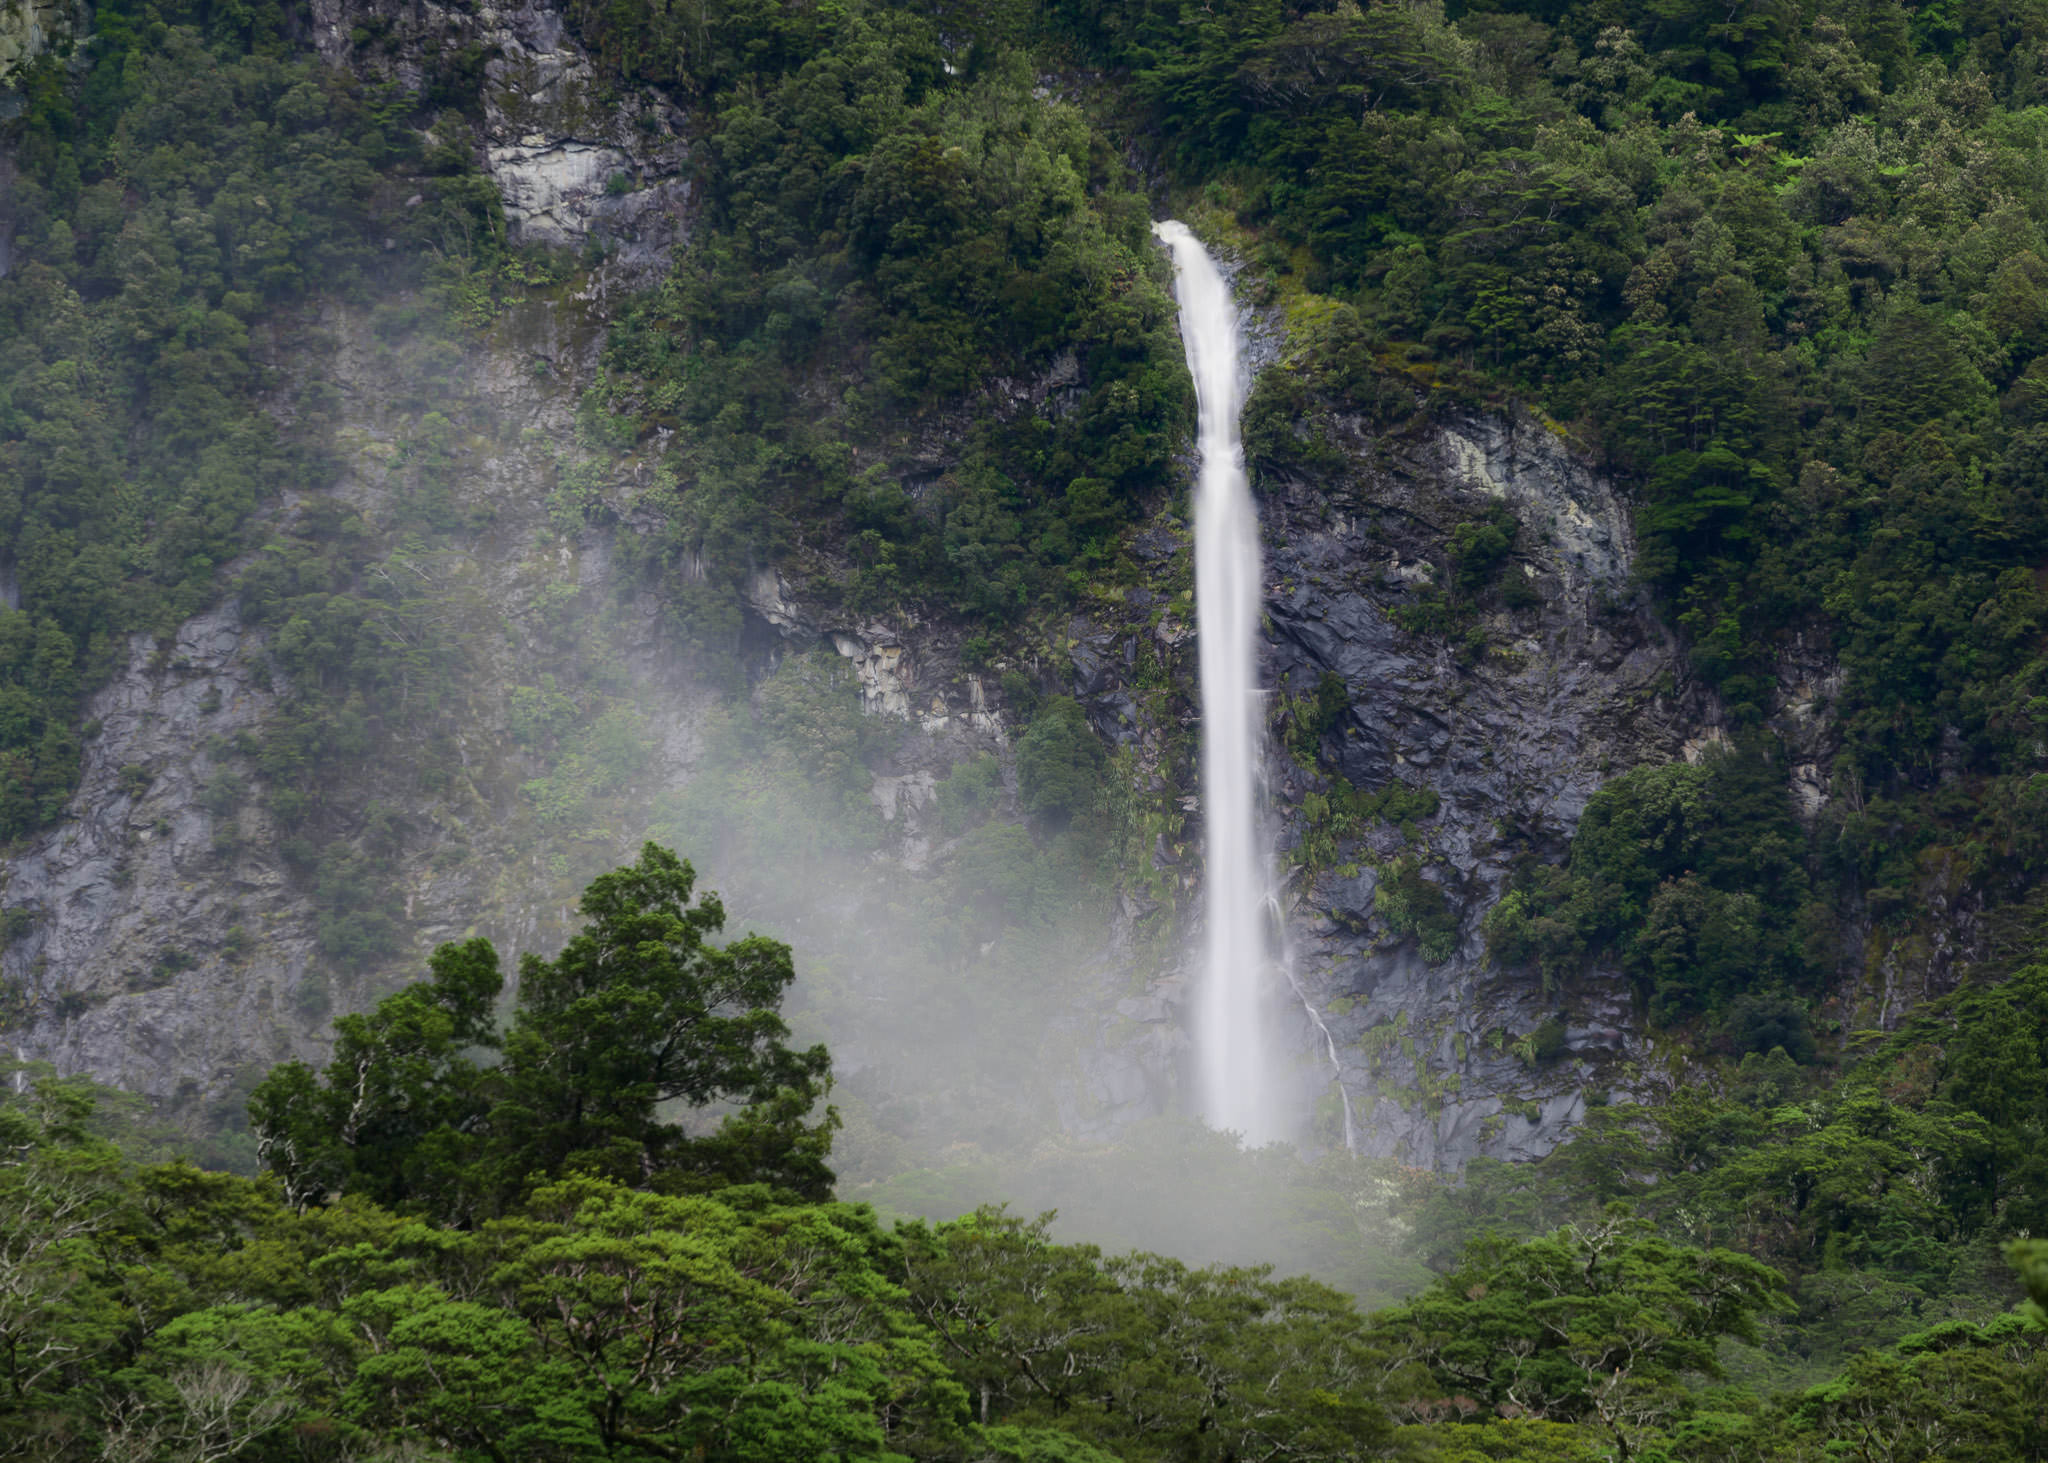
NIKON D800E + 70-200mm f/4 @ 185mm, ISO 100, 8/10, f/16.0
2) Create Abstract Photos
One of my personal favorite reasons to use a telephoto lens is to create abstract or semi-abstract photos.
Since telephotos can isolate details so well, in certain landscapes, you’ll be able to capture a small sliver of the scene that completely removes context — the definition of an abstract image. Other times, even if you can’t remove the context completely, you’ll still end up with a photo that focuses on shapes and patterns rather than a perfectly-literal image of a scene.
I’m a fan of abstract photos. They’re all about the basics: light, color, shapes, and composition. If your viewer can’t tell what a photo actually depicts, then the image becomes more about its underlying aesthetic qualities. For example, if you take an abstract photo at Yosemite, people’s first reactions will be “Wow, those shapes are really interesting” rather than “Cool, I also went to Yosemite!”
Of course, not all photos need to be abstract, and not all abstract photos must be taken with a telephoto lens. You can still capture abstracts with a wide-angle, particularly if you are able to position your camera very close to your subject. However, if abstracts are what you want to photograph, you should keep a long lens handy. It’s one of the best ways to isolate the shapes and forms of a scene.

NIKON D810 + 70-200mm f/2.8 @ 200mm, ISO 400, 1/500, f/5.6
2) Show a Sense of Scale
If you’re standing close to a tree with mountains in the distance, and you use a wide angle lens, the tree will appear quite large compared to the background:
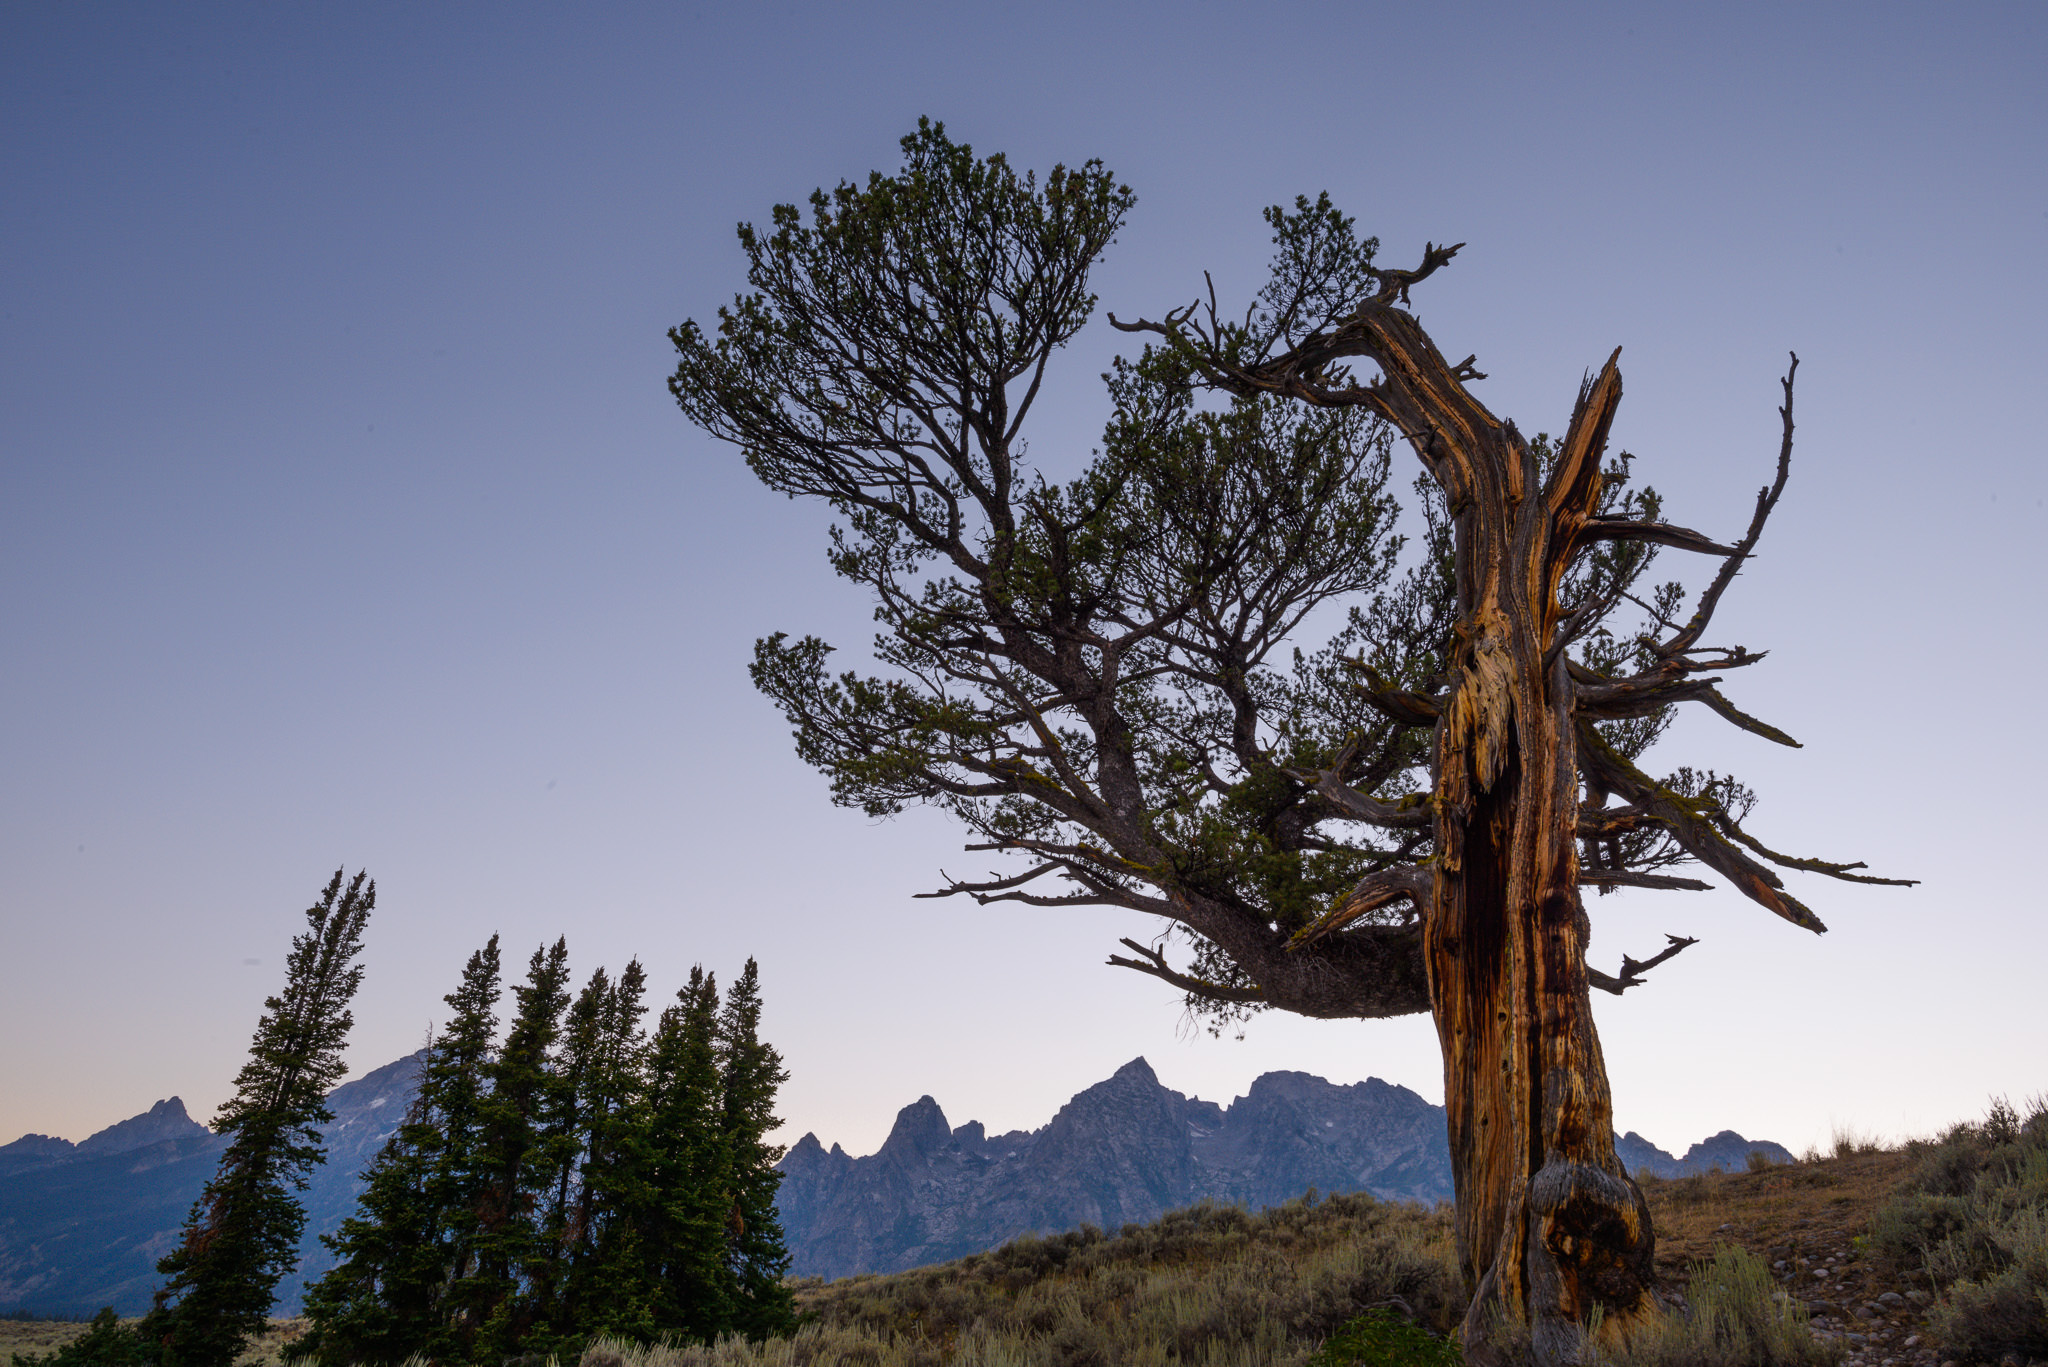
NIKON D800E + 20mm f/1.8 @ 20mm, ISO 100, 1/4, f/16.0
This has to do with perspective. The closer that you are to an item, the larger it appears relative to its background. Although it may seem like it, this effect actually has nothing to do with the lens you use — it’s all about your camera position. However, if you are positioned very close to something and use a wide angle lens, then your field of view will be so wide that this relationship is much more obvious to viewers. (If this is confusing, Elizabeth wrote a full tutorial on lens compression and Nasim has an article about focal length and subject distortion that you should consider reading.)
The flip side of this coin is when you use a telephoto lens and stand much farther back. Then, items start to look their actual relative sizes. People in front of a mountain will appear huge if you stand two feet away from them and use a wide angle lens, but they’ll be tiny if you stand back and zoom in; instead, the mountain will appear larger.
When I took the photo above, I wanted to focus on the interesting patterns in this tree. However, I soon realized that this perspective didn’t show the extreme scale of the mountains in the distance. So, I switched from my 20mm lens to my 70-200mm, and I walked farther back. Ultimately, I was able to capture this photo instead, which has a very different sense of scale:
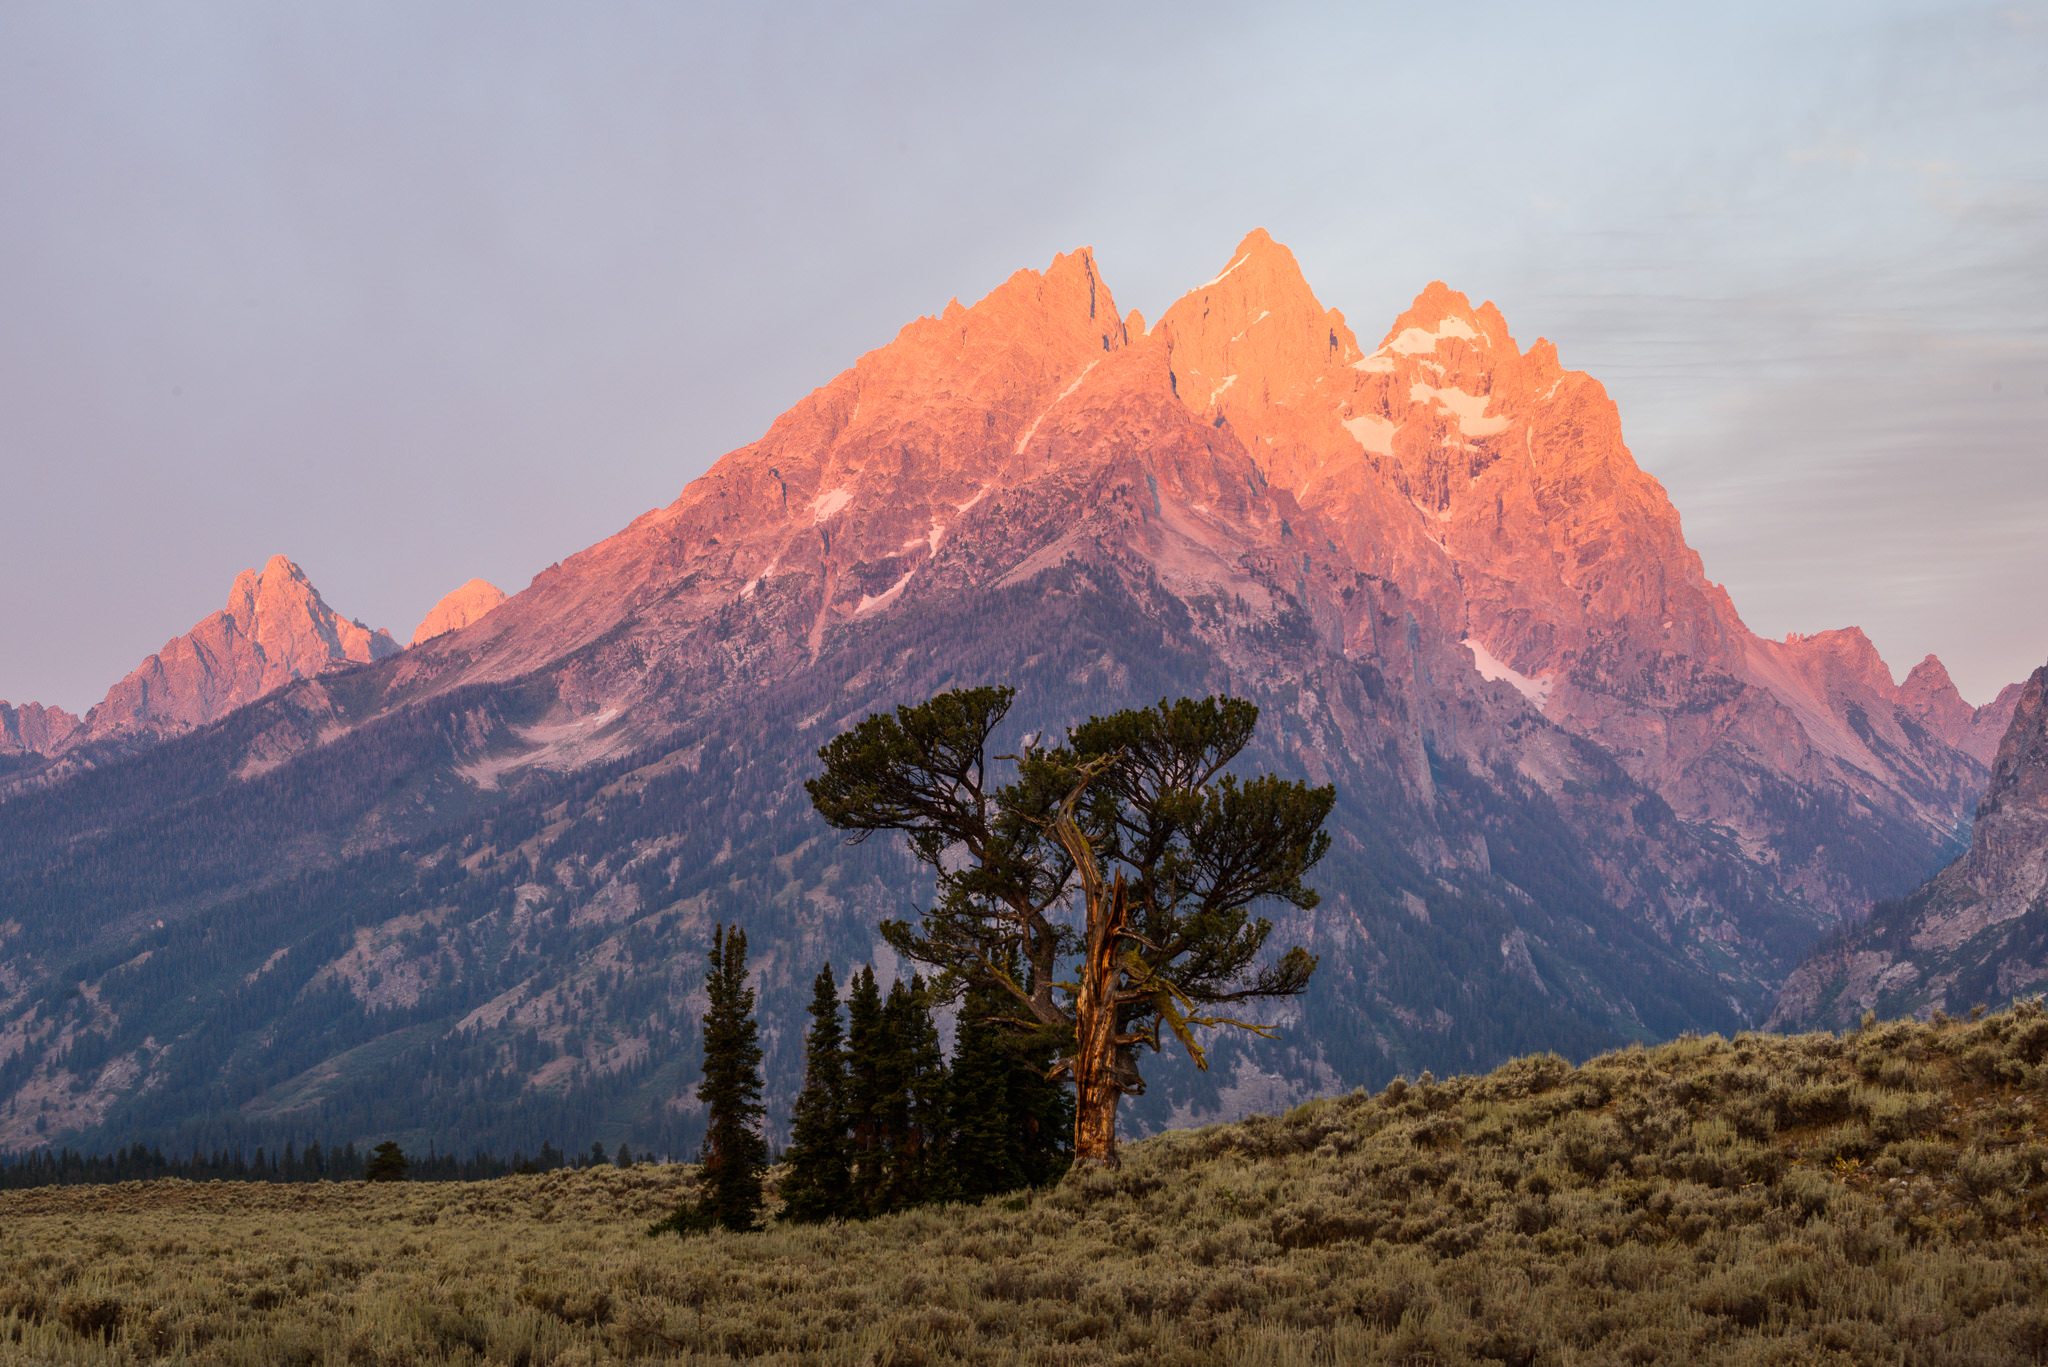
NIKON D800E + 70-200mm f/4 @ 70mm, ISO 100, 6/10, f/16.0
This technique can be valuable in a number of different situations, from landscapes to sports, and everything in between. If I ever capture a mountain that doesn’t have enough power in an image, I always zoom in; or, if one of my foreground elements appears too large, I’ll step back and use a telephoto.
The extra sense of scale in these photos isn’t directly caused by your longer lens, but it indirectly is an important factor. Your photo’s perspective is determined by your camera position — which, if you use a telephoto, can be farther back than normal.
This effect is often used by portrait photographers in order to “flatten” their subject’s face and make their features look more like normal. See the comparison below (photos by Nasim):

Here, although the photographer’s position is what really caused the change in perspective, the 300mm telephoto lens made it possible to capture a head-and-shoulders portrait (without cropping) that had realistic proportions. The 14mm image, by comparison — where the photographer was only a couple feet from the model — looks much more exaggerated.
If your goal is to show the real-life relative sizes of the elements in your image as accurately as possible, your task is simple: zoom in, stand back, and compose your photo. Compared to a wide-angle at close range, you’ll notice a clear difference.
3) Getting Enough Depth of Field
As you zoom in, your depth of field will shrink dramatically.
With an ultra-wide lens — something like 14mm — it is incredibly easy to capture an entire landscape within your depth of field. Even a moderate aperture like f/5.6 will render the entire scene with extremely high levels of detail from eight feet to infinity.
However, just by zooming into 50mm — by most standards, not even a telephoto yet — you’d need an aperture of roughly f/22 in order to capture the same depth of field. (I got these numbers from my article on choosing the sharpest aperture.)
Telephoto lenses are amazing for landscape photography, but your subject needs to be quite far away if you want the whole scene to be sharp! You can sometimes focus stack if you don’t get quite what you want, but that can be a time-consuming technique, and it isn’t possible for some quickly-moving landscapes.
How do you get around this issue? If a small aperture like f/11 or f/16 doesn’t provide the depth of field you need, and you aren’t able to focus stack, you’re mostly out of options. Definitely try moving farther back, if possible, although that won’t be feasible everywhere.
Still, don’t let this stop you from taking landscape photos with a telephoto lens! I find that most telephoto-worthy landscapes are far enough away that depth of field isn’t a big issue — and, for most of the others, you’ll be able to focus stack instead.
4) Using Shallow Depth of Field to Your Advantage
Worst-case scenario — or, if you’re optimistic, best-case scenario — you’ll have to work with a shallow depth of field.
A shallow depth of field is one of the most compelling parts about photography, and, simultaneously, most annoying parts about telephoto lenses. If you want everything in your photo to appear sharp, this thin depth of field can be a headache; if you want to capture a softly-blurred background, it’s perfect.
As a landscape photographer, it’s typically unusual to capture photos of grand landscapes with an out-of-focus background. However, if you ever take pictures of wildlife or small details, it can be a great tool:
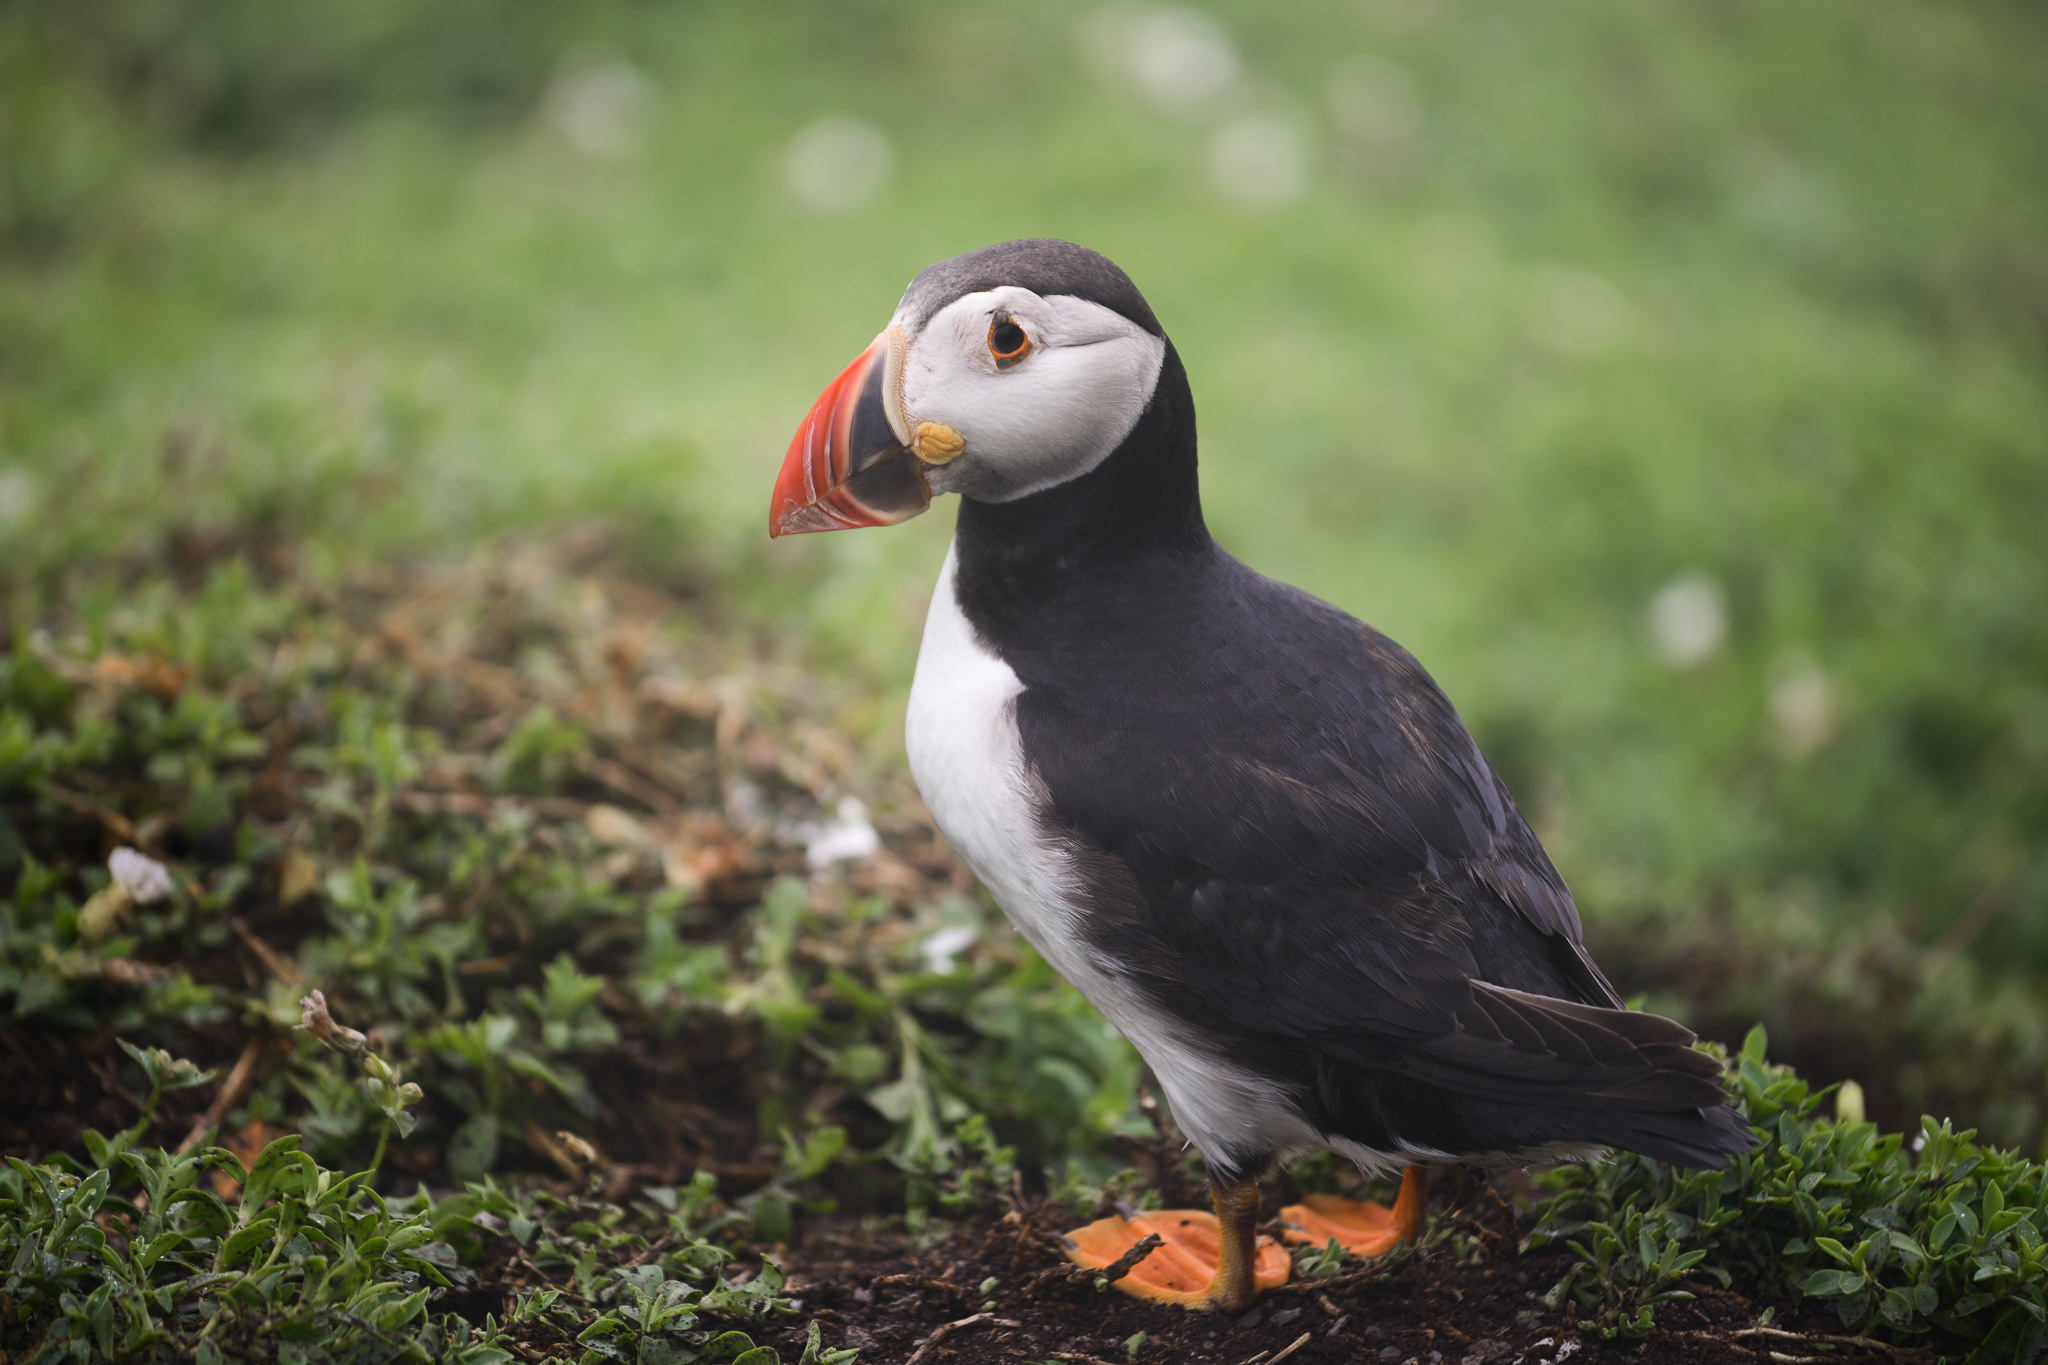
NIKON D800E + 70-200mm f/4 @ 175mm, ISO 100, 1/250, f/4.0
A shallow depth of field simplifies your photos. By highlighting your subject, it tells your viewer’s eye exactly where to look.
Since telephoto lenses have a naturally thinner depth of field (assuming that you stand in the same position), they are perfect for this type of photography. Use a wide aperture like f/2.8, get close to your subject, and zoom in. You’ll end up with a beautifully-blurred background.
5) Watch for Camera Shake
Telephoto lenses have an unfortunate habit of magnifying the camera-shake problems in your image.
For example, if you’re handholding a lens with poor technique, a wide angle lens may never show the problem — but a telephoto lens could reveal it immediately. Or, more difficult to control (but still fixable), a tripod shaking in the wind may cause blurry photos with a telephoto even when wider angles seem to be completely sharp.
If you use a telephoto, you need to be particularly careful with your overall setup. Any slight bit of shake will be magnified, and the problem only worsens as you use longer and longer lenses.
How do you remedy this problem? With a long lens, be willing to use a tripod to stabilize things as much as possible. Or, if you’re shooting something like sports or wildlife — where you may need to move your camera more quickly than a tripod allows — consider using a monopod instead. If it’s windy, try lowering the thinnest sections of the tripod to see if that improves your stability.
Most of all, check occasionally to make sure that your shots are sharp. Review your photo and zoom in all the way. Does the photo look good? If not, try to find places where you can eliminate blur from your setup. It won’t always be easy, but telephoto lenses provide such an interesting perspective that they are worth the effort.
6) Conclusion
Clearly, telephoto lenses are fantastic tools that can provide exactly the look you’re after, depending upon the scene.
People always seem surprised when I describe my 70-200mm as, perhaps, my favorite landscape lens. Some photographers simply don’t think of telephotos as a tool for nature photography — if it’s not a wide angle, it isn’t worth using. If this has been your outlook on things, you may be overlooking some beautiful potential images.
Of course, you don’t have to be a landscape photographer to enjoy using telephoto lenses. Portrait photographers often employ the “zoom in, stand back” rule in order to capture their subjects’ faces in a more flattering way. Or, if you’re a sports/wildlife photographer, a telephoto lens can help you focus on the smallest details of your scene, bringing your viewer face-to-face with a distant subject.
Telephoto lenses don’t work for every image, though. If you want to show a wide field of view, they certainly don’t work (unless you resort to a multi-row panorama). Or, if you’re trying to exaggerate the size of nearby objects — such as the foreground in a landscape — there are typically better tools for the job.
However, if you want to show people the details and scale of a distant scene or isolate your subject with a shallow depth of field, a telephoto should be at the top of your list. For many people, it will be the most-used lens in your kit.
(If you enjoyed this article, you may also want to read How to Use Wide Angle Lenses.)
The post How to Use Telephoto Lenses appeared first on Photography Life.


