
For many of us, when we begin our photography journey our first images are often “close-ups” of our babies.
Then, as they grow older, we continue shooting them from the same perspective, our perspective. Our perspective consists of us shooting mostly from in front of them.
Have you ever tried to vary your point of view? I don’t necessarily mean shooting from above, below, behind or at eye level. Even though these different perspectives add variety to your pictures, I want to invite you today to think about the point of view in the story.
I don’t necessarily mean shooting from above, below, behind or at eye level. Even though these different perspectives add variety to your pictures, I want to invite you today to think about the point of view in the story.
The point of view (POV) in photography is simply the editorial choice you make each time you take a picture, to tell and strengthen a story.
When considering the point of view from a storytelling perspective:
- Do you want to tell a story from the narrator’s perspective, a participant’s perspective or from the viewpoint of an observer of the story?
- Do you want the viewer to contemplate something or to be part of the action?
- What do you want to showcase in the particular scene that you are about to capture: emotion, connection, action, quest, plot, a happy ending or struggle?
One thing that I want to emphasize is that there is no right of wrong POV because each POV will simply tell a different story. The thing that is important is to know what you want to say and then be sure your POV helps you to say it.
In this tutorial, I will show you either a single image, or a series of images of the same moment, and will discuss how the point of view strengthens the image.
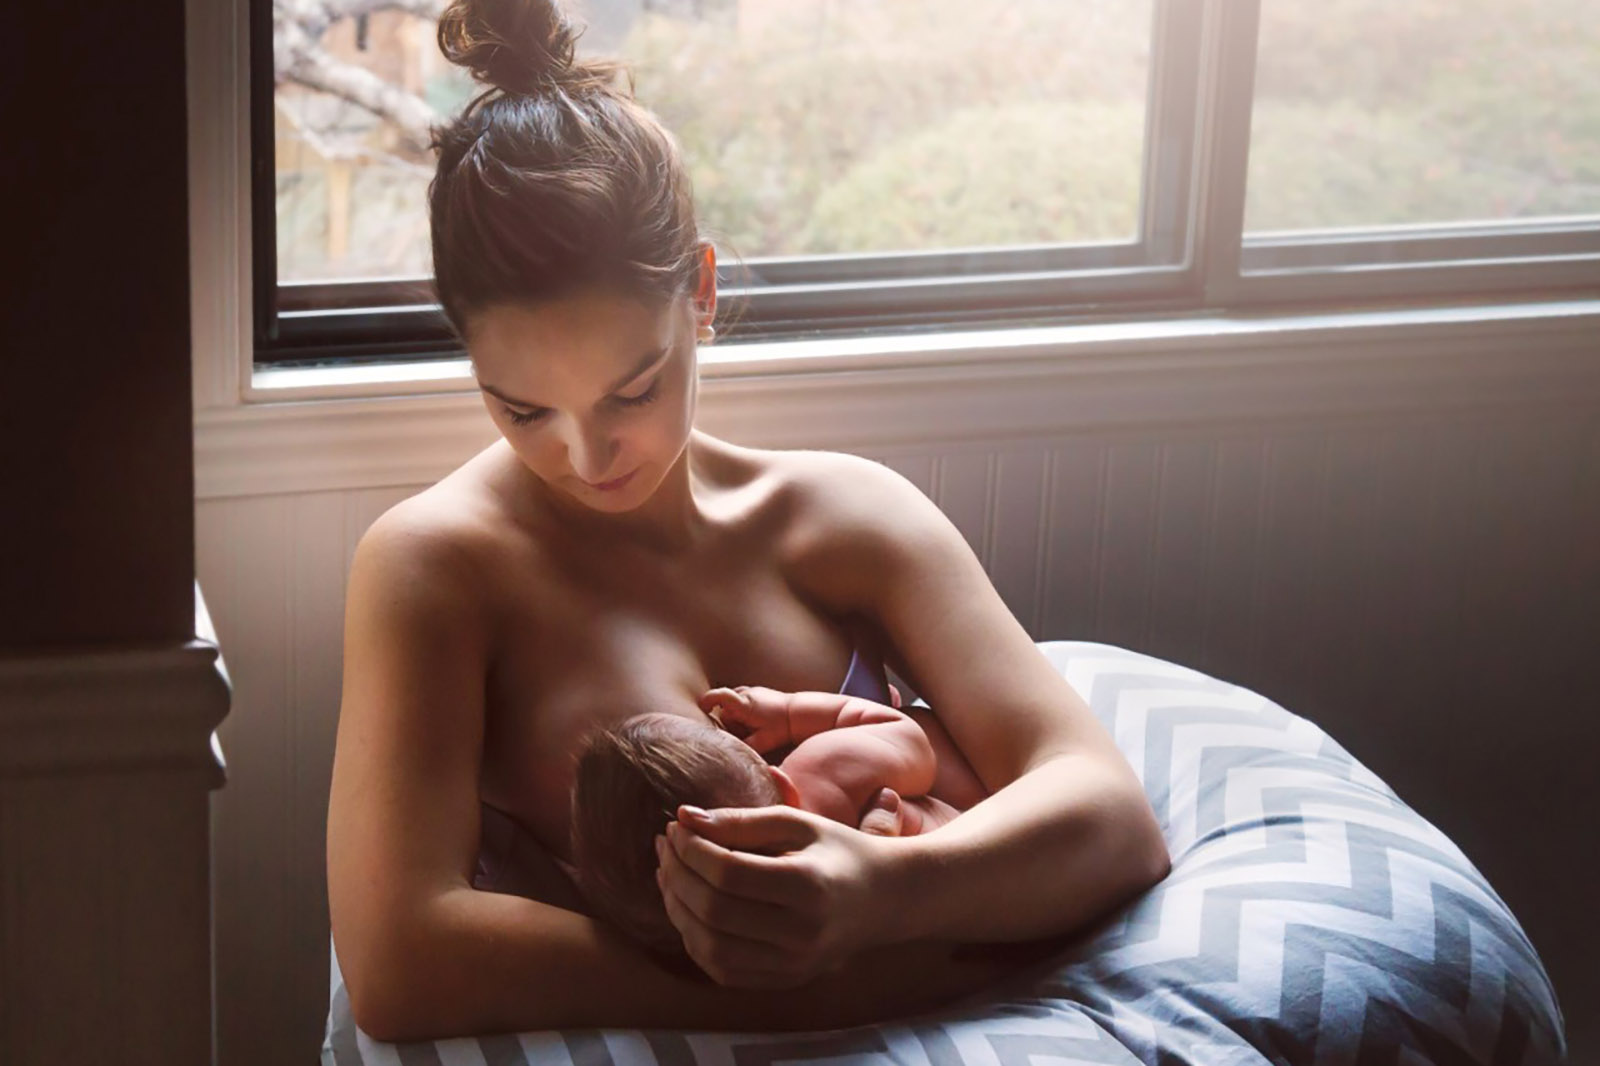
Shooting to show connection: choose a POV where the eye contact or the hands are the star.
One way to illustrate connections in your story is to include eye contact or your subject’s hands in your image. The eye contact can be with you or between the people within your frame. You can achieve it by being close to your subject or at a distance, depending on what you are trying to showcase. Filling your frame with the connection can really have a deep impact on the viewer.
The eye contact can be with you or between the people within your frame. You can achieve it by being close to your subject or at a distance, depending on what you are trying to showcase. Filling your frame with the connection can really have a deep impact on the viewer.
In this picture, I wanted to highlight this new mother’s gaze and her gently touching her baby’s hair. I also loved the light that was in this bedroom and I thought it helped contribute to the connection. So instead of filling the frame, I backed up a little and showed the entire scene, carefully framing the subjects so as not to include other elements that would have been distracting. I chose to shoot this from slightly above to flatter mom’s face and showcase the delicate light on her shoulder, bringing feminity to this image.
In this one, the point of view showcases the love and the energy of the boy. Having them so close to the camera makes the emotion almost tangible.

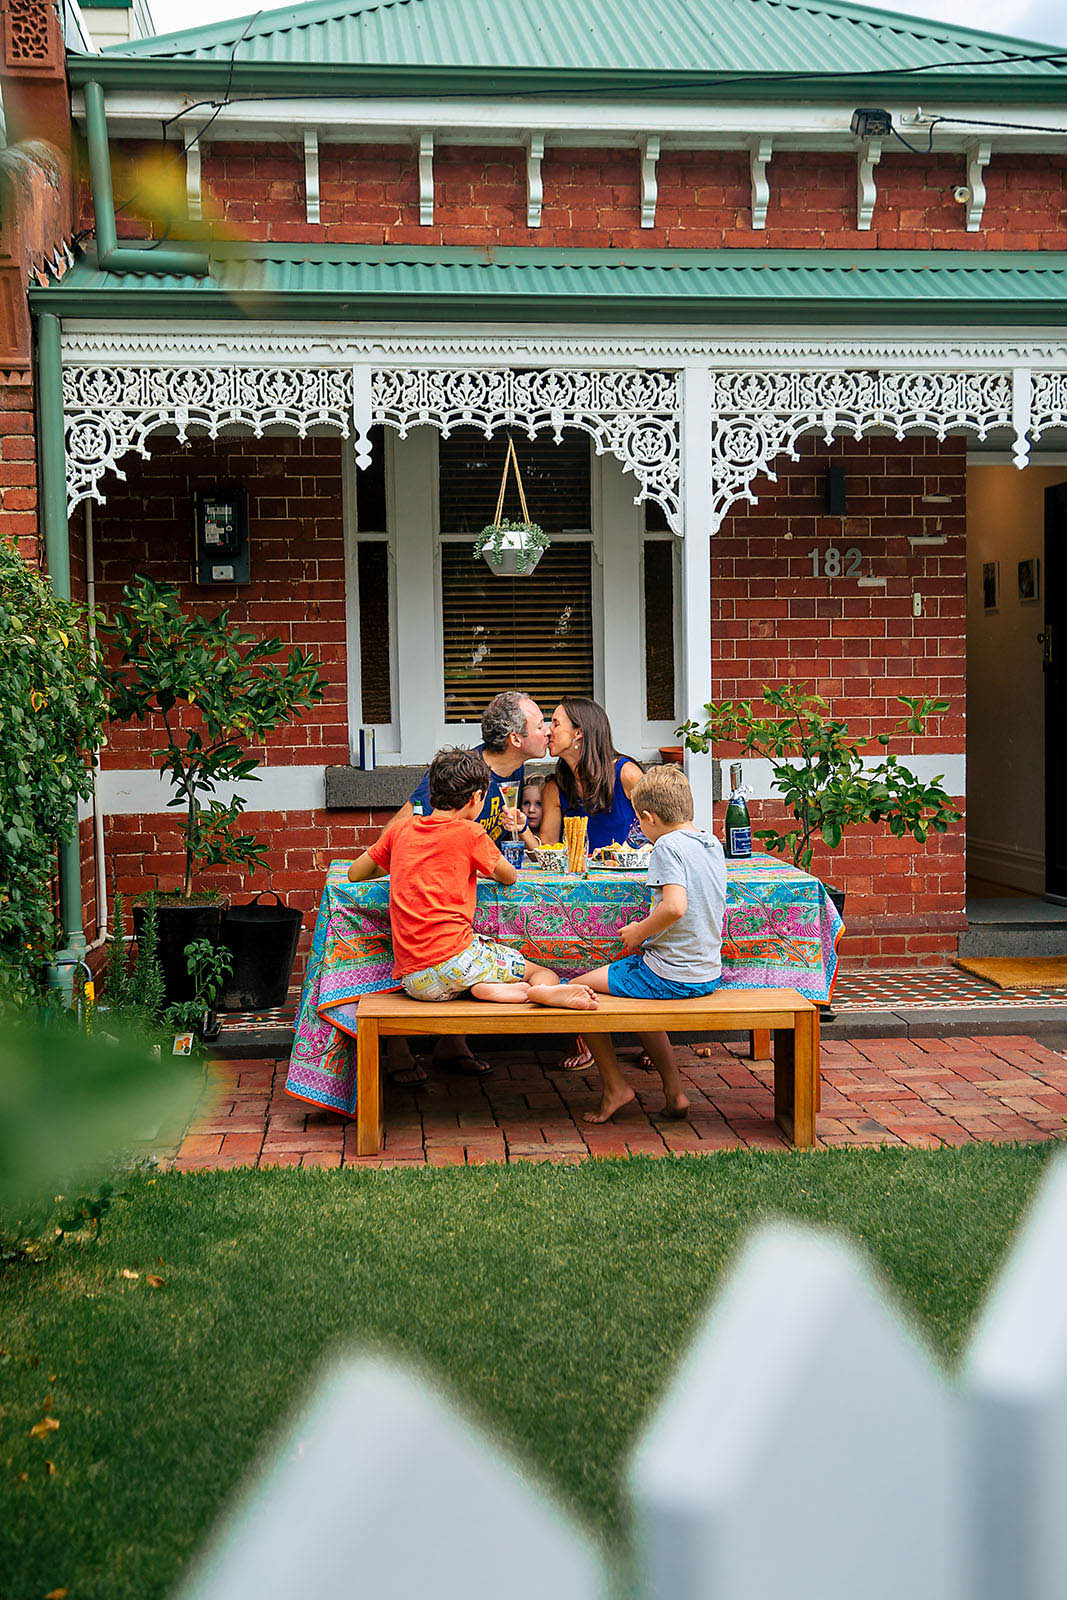
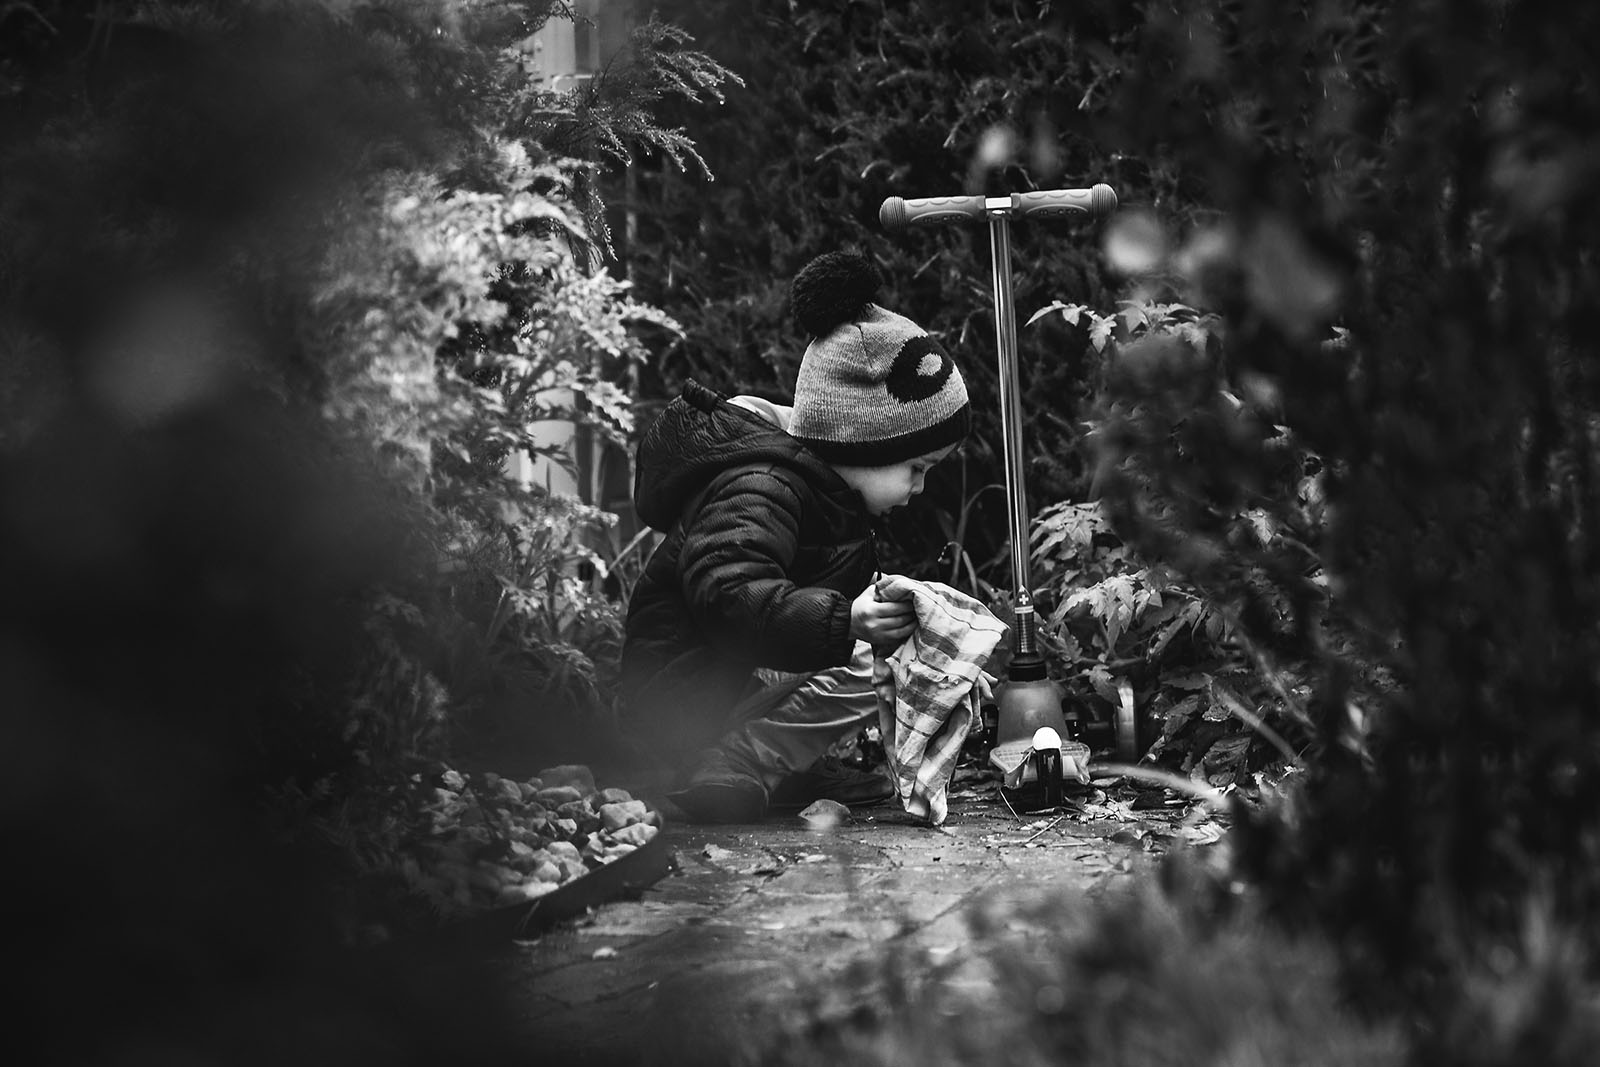
Shooting from the point of view of a voyeur to show things that you are not supposed to see, good or bad!
This point of view can be achieved by shooting as if you were hidden like paparazzi. You can use a door frame, window, mirror, or foliage to shoot through to suggest that you are “peeking in” on a scene. This point of view is effective when you see something naughty, bad behavior, or when you capture a stolen moment!
In this picture, I shot through the door frame and included the door in my image to help the viewer feel that my kids are doing something out of their parents sight and more specifically, something that they are not supposed to do! (Although I did provide the water bottle on this occasion for my image)

Here, I was trying to get a family picture in their new courtyard. After a quick celebratory toast, they decided to kiss. Thankfully I was still holding the shutter button and stole this tiny moment.
In this image, I didn’t want to disturb my son while he was drying his scooter. He hated my camera in those days so I preferred to hide behind the foliage. This POV allowed me to capture the concentration on his face which really added to the story.
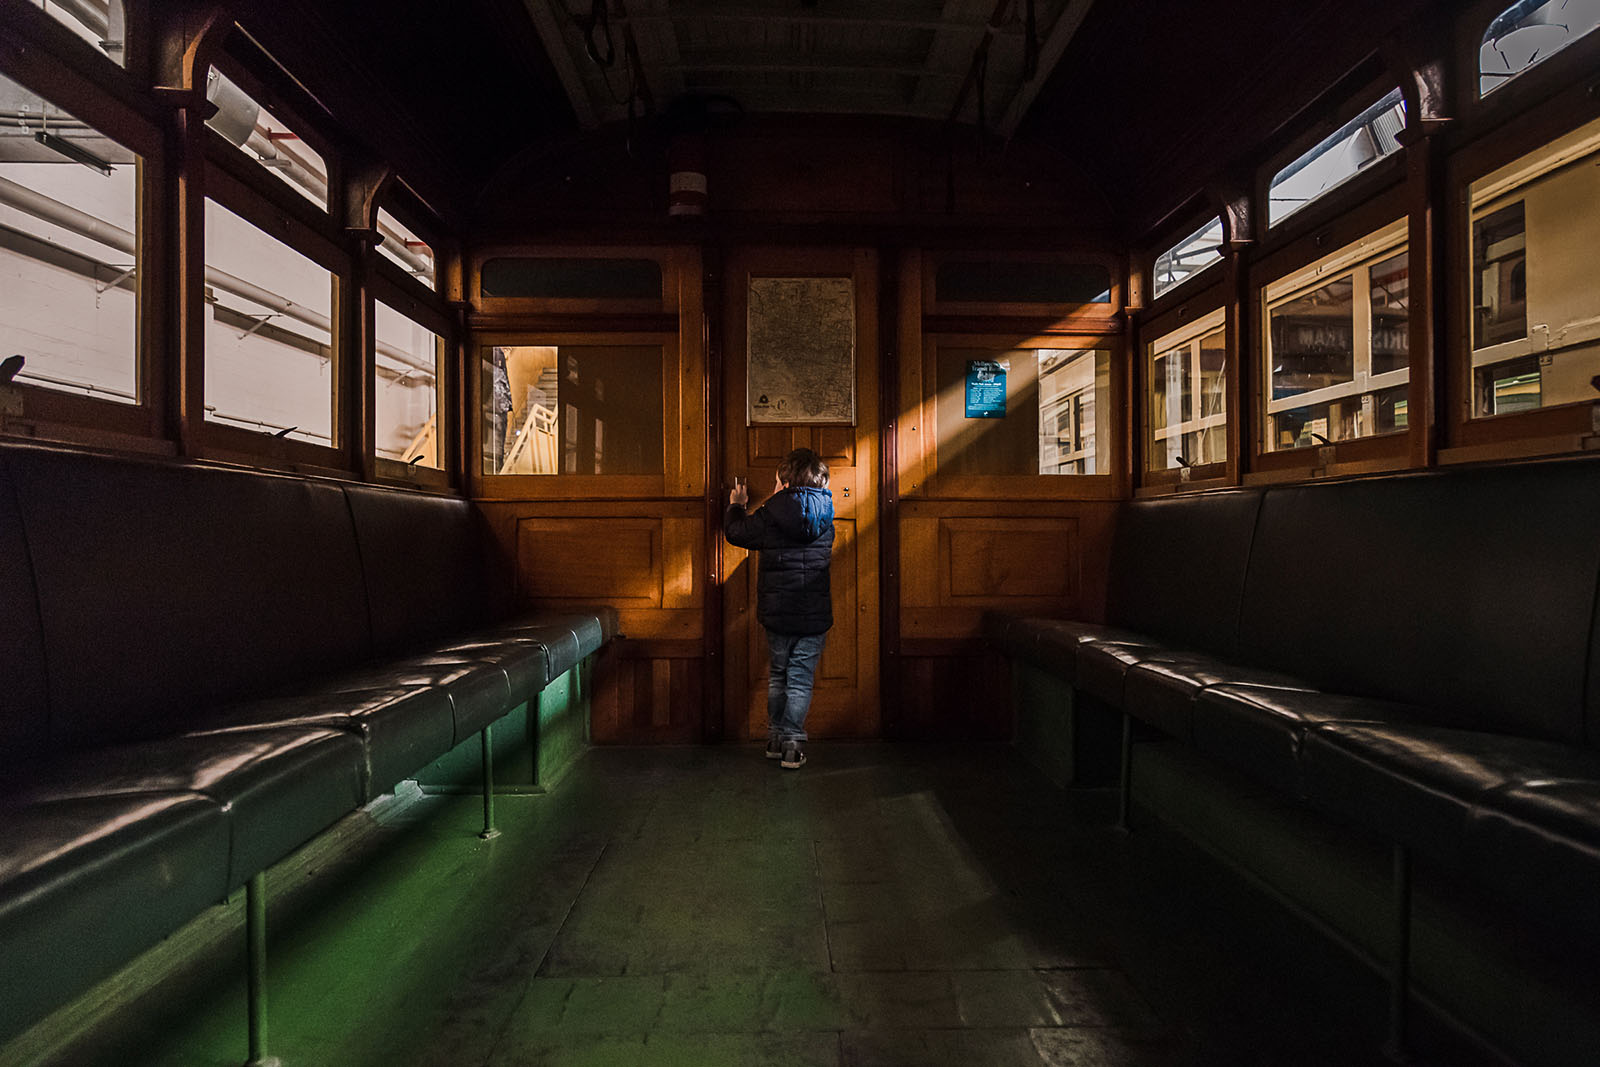
Shooting from behind – the tricky one!
For the last year, because our family has been living in another country, I have been very drawn to taking images of my children from behind. Why? Sometimes, it is because I want to do more of a landscape photograph and I don’t want their faces to detract from the scene.


Or I need their back to tell the story, as shown here.


Shooting from your point of view while being involved in the action.
In this shot, I was literally behind dad and daughter, experiencing the activity. As you can see, my camera even got soaked! That’s why for me, the story is told from a narrator’s point of view. This is, of course, a participatory image as you can almost feel the water hitting you behind your screen!

Shooting from below to emphasize a character in your story.
Here, instead of following the “villain”, I chose to place myself in a narrator’s point of view to focus on the emotions on their faces and to make the viewer feel something. I was also slightly below them to make my son look bigger and to be sure to get his evil expression!
Actually, this picture is my son’s favorite! He laughs aloud each time he sees it on the screensaver!

Shooting from a distance to capture a contemplative moment or to use the environment to add a storytelling element.
In all these pictures, I needed the environment to tell the story. Here the story is not about a connection, it’s more about an atmosphere.


Case study 1: same point of view, two images
These two pictures are the same frame, but cropped differently.
This is the original. My first thought was to get low to capture the sun to add to the story. In my mind, the sunlight was enhancing the joy in this moment. This POV, to me, is more about the joyful atmosphere instead of focusing on their connection, even though the connection is undoubtedly there.

Back at home, I decided to try this thigh crop, “just to see”. In my opinion, this picture really showcases their connection and the fun they were having together.
I’ve included this example to illustrate that with the exact same point of view, you can tell a different story, sometimes it is very subtle and sometimes it detracts. Choosing how much environment you put in your frame should aways be in your decision process because it can make or break your image.

This POV, where I was slightly more on their right and shooting at sand level, broke the image. There is too much environment, bringing distracting elements into the frame and the mother’s body position is unflattering. Also, we can’t see the daughter’s face very well. In the previous shot, I positioned myself better in order to hide this distracting man!

Case study 2: two different POV – one sleeping baby
Although a few months between images, these photos are of the same baby in the same crib but from two different point of views.
In the first one, I was above her and using the crib as a leading line and as a framing element. My only thought when I composed this image was “she is gorgeous while she is sleeping”. Nothing more.

In this shot, I chose to shoot very close to her and at her eye level through the cot. It created a blurred foreground that suggests dreaminess.
Each time I look at this picture, my thought is “She is so calm, lost in her dreams. I want to pat her cheek but I don’t want to wake her”. To me this is really a stolen moment.

Case study 3: 3 perspectives on a fun moment
Finally, here is an example of 3 pictures taken within 10 seconds, capturing the same moment, from different points of view.
From behind and down low, the fun activity and movement are showcased and it emphasized the height of this human pyramid. Including the sun also contributes to the feeling of joy and happiness.

Being in front of the subjects and at their eye level, I was able to showcase more of the action and the struggle. I chose not to include the sun, instead choosing to enhance the feeling of the “struggle”. This is a subtle difference but it does change the story.

From below and in front of them, the emotion and the connections are highlighted because we can see their faces and their smiles. Being below them adds some drama, enhancing their height and suggesting an increasing risk of falling over!

On that note, I encourage you to try new points of view in a very deliberate way. When you are shooting a scene, try to give it a title and ask yourself if your actual point of view contributes to telling the story to a complete stranger. If not, what can you change?
I can’t wait to see the point of view you will choose in your story!
The post How and why to change the point of view in a photograph appeared first on Clickin Moms.


