
As many of you probably know, having a camera with you at all times isn’t always possible. As much as you might try, there will be times when you want to take a photo and don’t have a camera at hand. Or do you? Pretty much everyone these days has a phone in their purse or pocket that’s capable of taking photos. While you may dismiss your phone’s capabilities as a camera, don’t be so quick to judge. In this article, I’ll cover the basics of cell phone photography, including the camera basics and some of the differences between a few available camera apps. In a future article, I’ll cover using apps to post-process the images that you capture.
– updated January 25, 2017 –
1) A Camera Is A Camera… Or Is It?
In many ways, it doesn’t matter whether you use a professional DSLR or a cell phone to capture an image… the basics of photography remain the same. You still want to consider important factors that go into creating an image like your subject and composition, as well as the quality of light you have to work with.
In many ways though, cell phone photography requires you to be a little more aware of the equipment that you’re using. For example, on a cell phone you’re pretty much stuck with the default lens. It might have distortion and/or flare issues, as well as smudges on the lens from using your phone as, well, a phone. You’ll also have a variety of apps that you can use to take pictures, all of which perform differently.
2.1) A Few Notes Before We Get Started
First, a few assumptions. I’m going to assume everyone reading this has used the camera on their cell phone before, so I’m going to skip over steps like downloading and installing apps, opening the camera app and reviewing images. I’m also going to assume that most people are using a phone or operating system that’s fairly modern. I’m sure that there are some of you reading this who will not have the features or capabilities that I mention, and I’m sorry that you’ll be somewhat excluded from the technical aspects of this conversation.
One last note… most of my screenshots and app suggestions will be from my personal experience with an iPhone and my wife’s Samsung Galaxy Note5. I am not purposely excluding other Android or Blackberry users. Pretty much everything that I discuss will apply to photography using any cell phone. Unfortunately, most Android devices will have subtle differences in controls within the default camera app, so I find it easiest to just refer to what I know (which is currently an iPhone 7+ running iOS 10.2) and let you translate for yourself depending on which phone and OS you’re using.
2.2) The Basics Of Cell Phone Photography
As I already mentioned, the basics of cell phone photography are simply those of photography, so I won’t be going into detail on those here. Let’s discuss what makes using a cell phone for photography unique and what you need to know to get started. For this discussion, we’re going to assume you are using a phone with a touchscreen, rear camera and the ability to download and install apps. We’ll also assume you’re using the rear camera, not the front-facing camera.
There are some important things to know before you get started taking photos with a cell phone. Everything is controlled through the touchscreen, so it’s best to familiarize yourself with the interface of your particular camera first. Most cell phones will only shoot in JPEG, although some manufacturers are starting to add RAW capabilities. Also, most cell phones only have one non-interchangeable fixed focal length lens, although some manufacturers are starting to add dual lenses. In these dual lens setups, one lens is a wide angle while the other is a normal or telephoto (on the iPhone 7+, they have 28/56mm equivalent focal lengths).
Another thing that’s unique to cell phone photography is the use of apps. All phones will come with a basic camera app, but you also have the ability to download and install more advanced camera apps. Additionally, different social media apps also come with their own built in camera within the app. Which one should you use? I’ll get to that in a bit. First lets discuss how you actually create images with a cell phone.
2.3) Creating Images With A Cell Phone
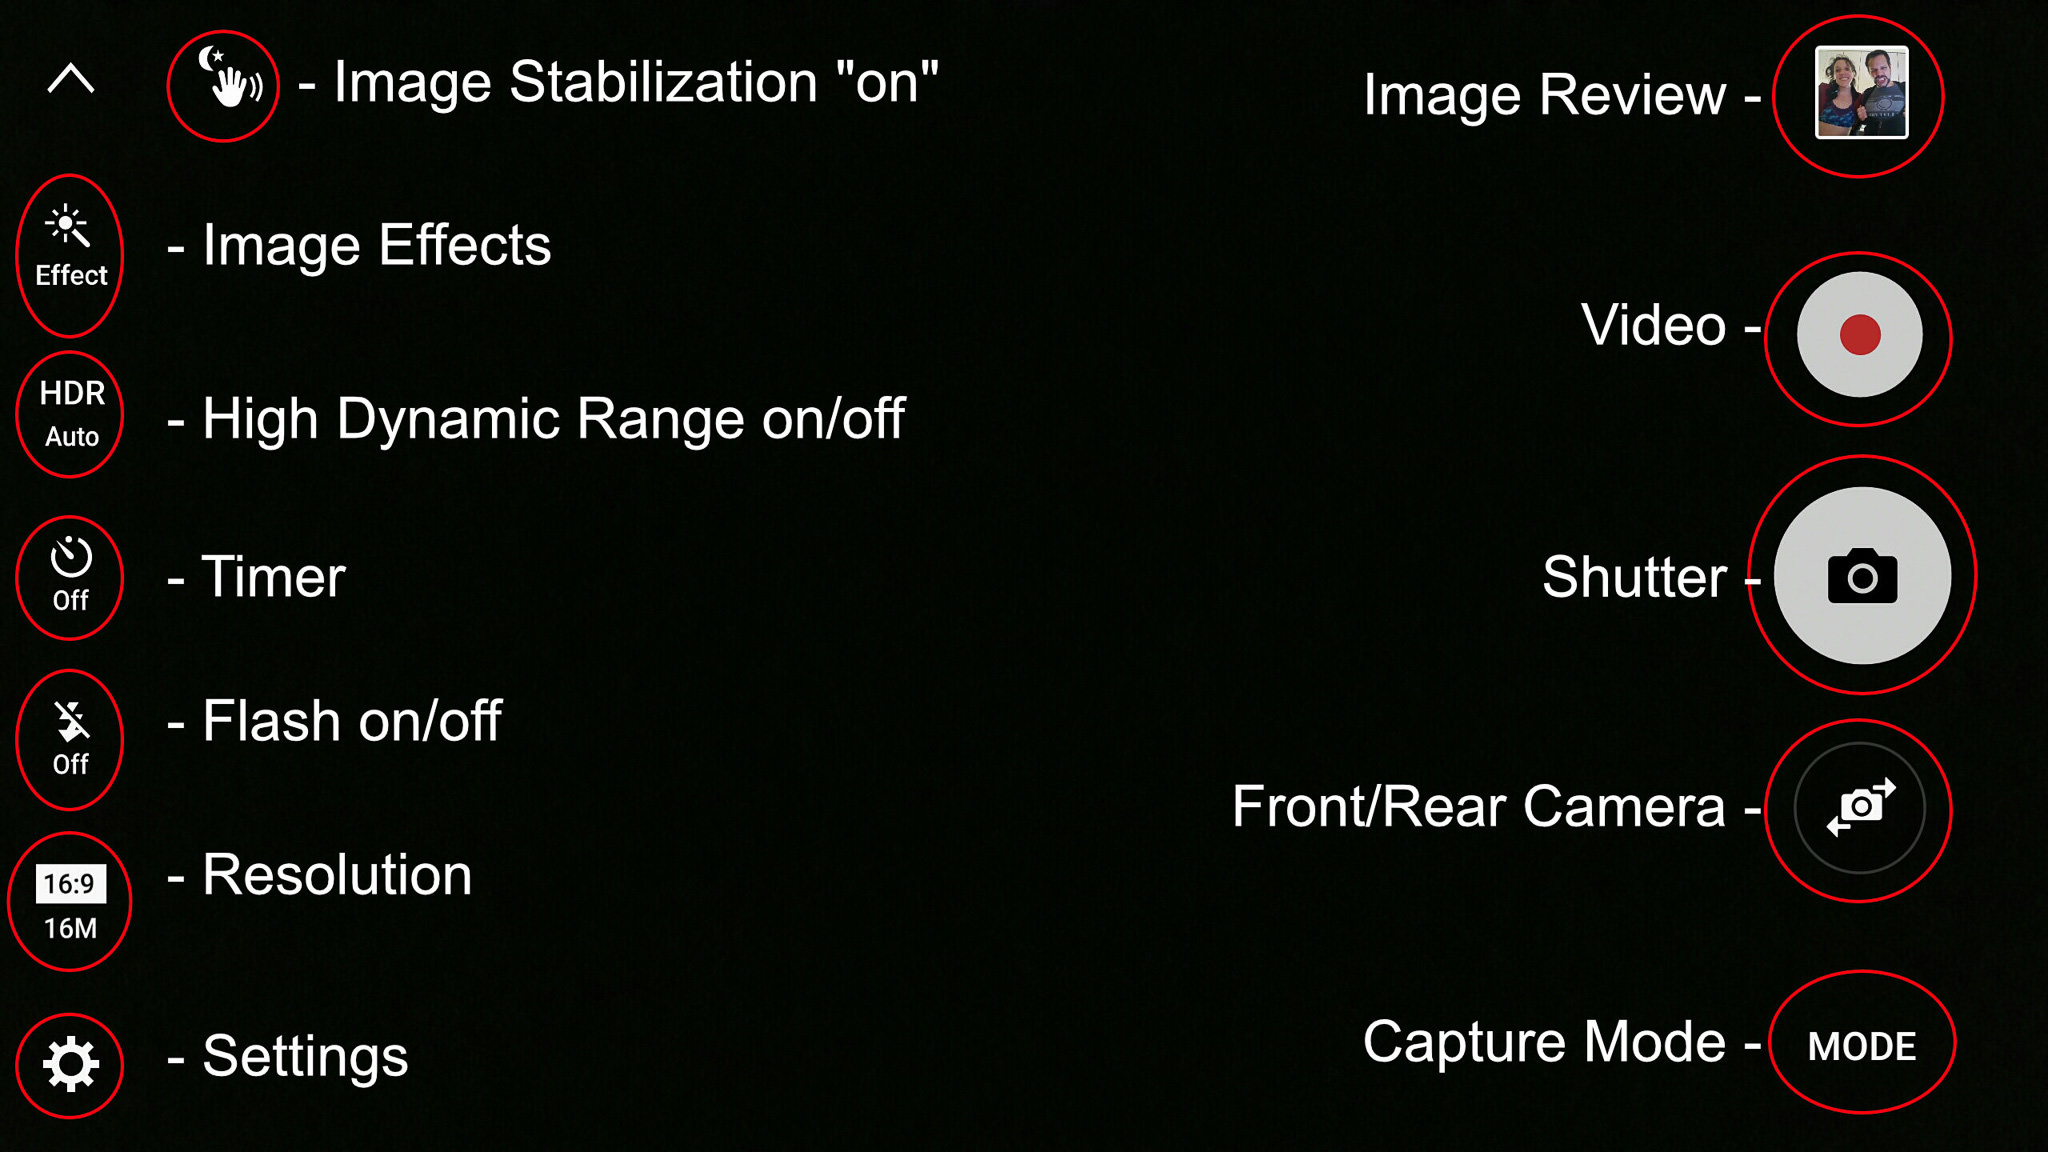
Now it’s time to grab your cell phone and open the camera app. On many phones there is a shortcut you can use to access the camera app without even unlocking your phone. I would highly suggest learning this for your particular phone so that you are able to quickly take photos without first having to unlock your phone. Once you’re in the camera app, you’ll see a variety of controls. Take a look at the iPhone screenshot below. You’ll see a lot of different icons and the label I’ve added for each one.

Default iPhone Camera App Controls
If you’re using an Android device, you might see something like this instead.
Samsung Galaxy Note5 Camera App Controls
Fortunately, you don’t really need to concern yourself with these controls. I’ve found that for the majority of the photography I do, I really don’t need to change anything shown here. Occasionally I’ll turn on the flash if I’m photographing a person in a dark place. I also sometimes use the timer or switch to the front camera, but otherwise I let the camera decide when to use HDR in an image and never use Live Photos or in-camera filters.
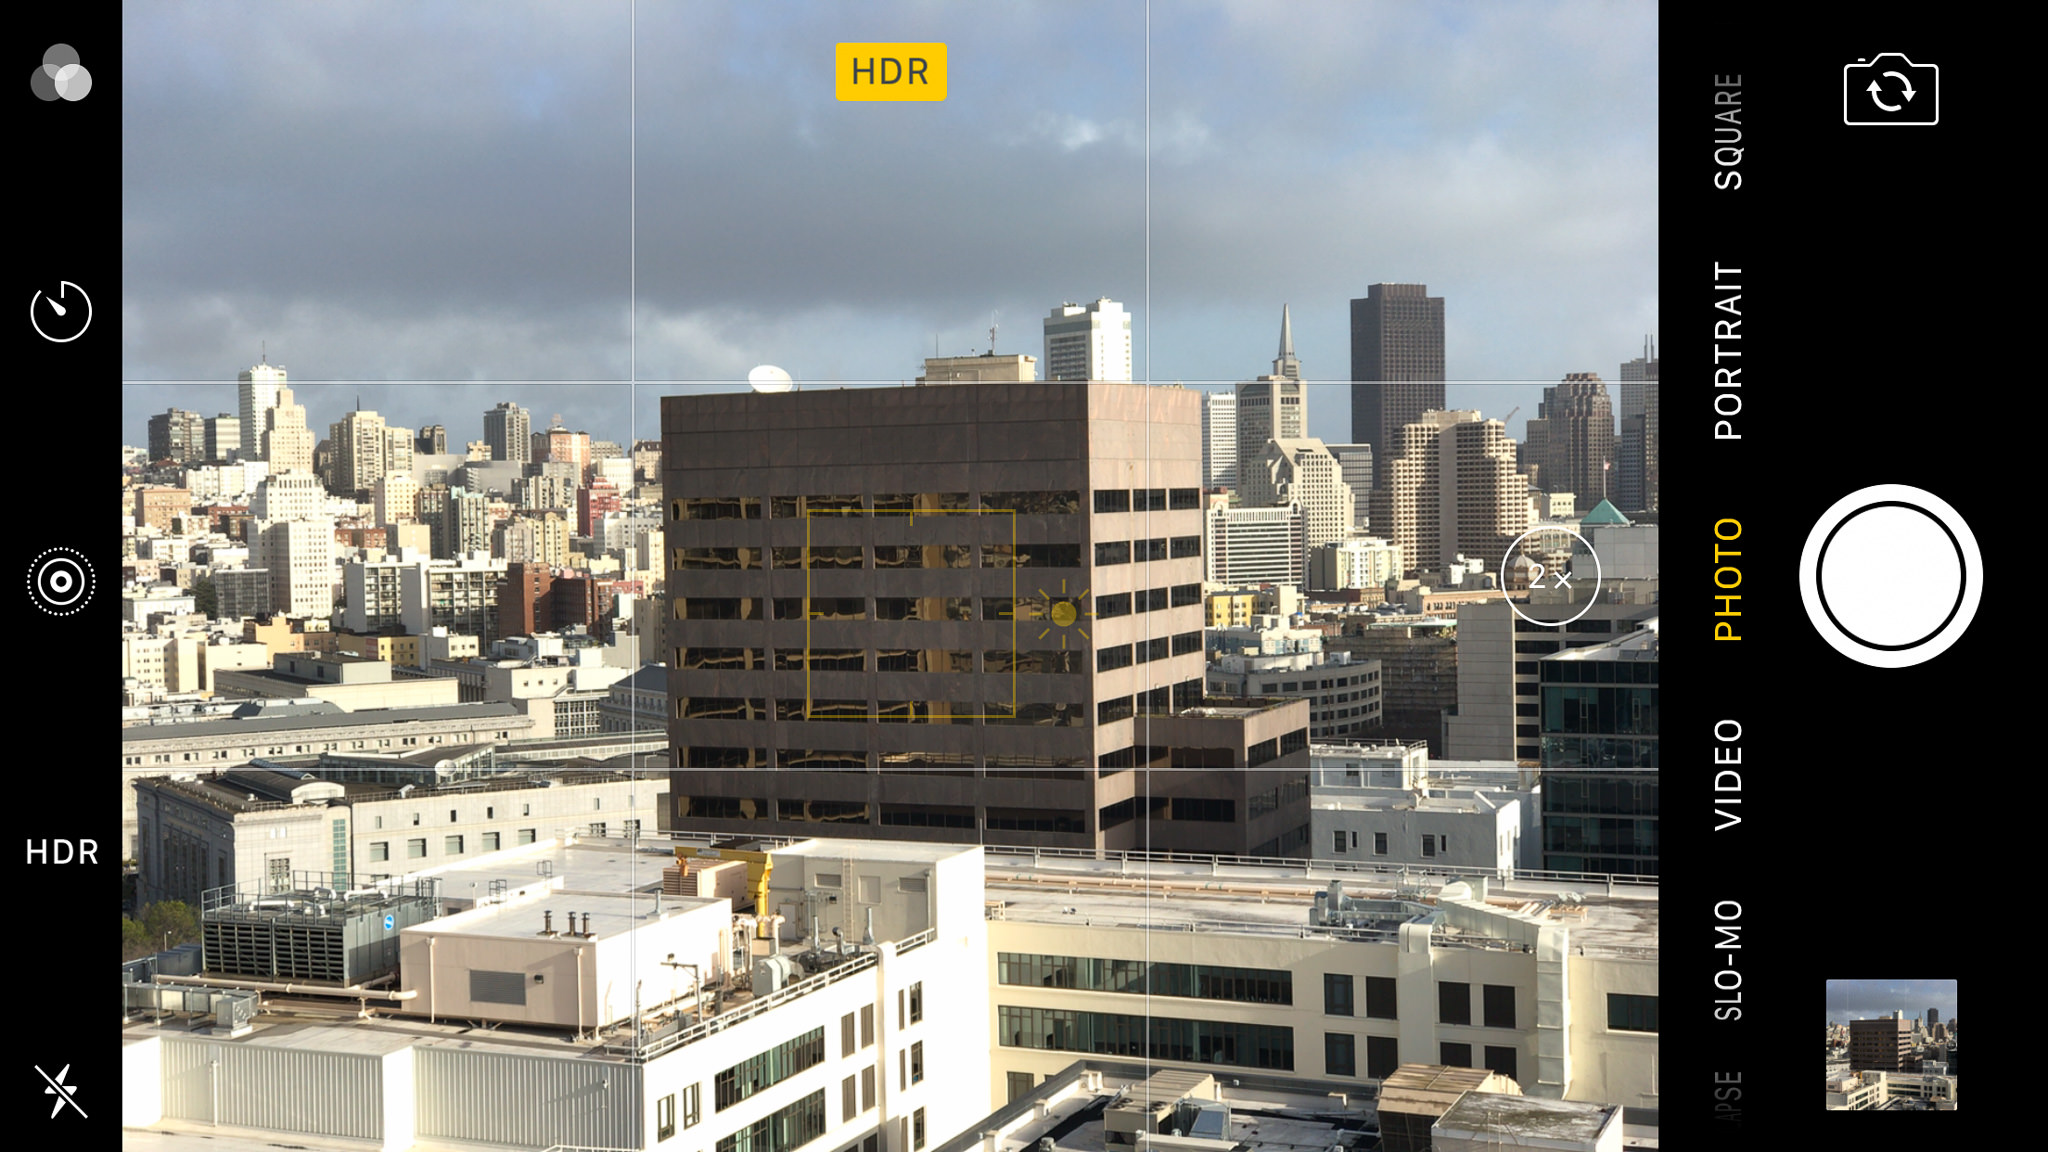
Of course, there is more to cell phone photography than just pressing the big round button and letting the camera make all of the decisions for you. One of the biggest things you can do to immediately improve most photos taken with your phone is to tell it where to meter. Here you can see the default exposure for this scene:

Screenshot of default camera app with normal metering
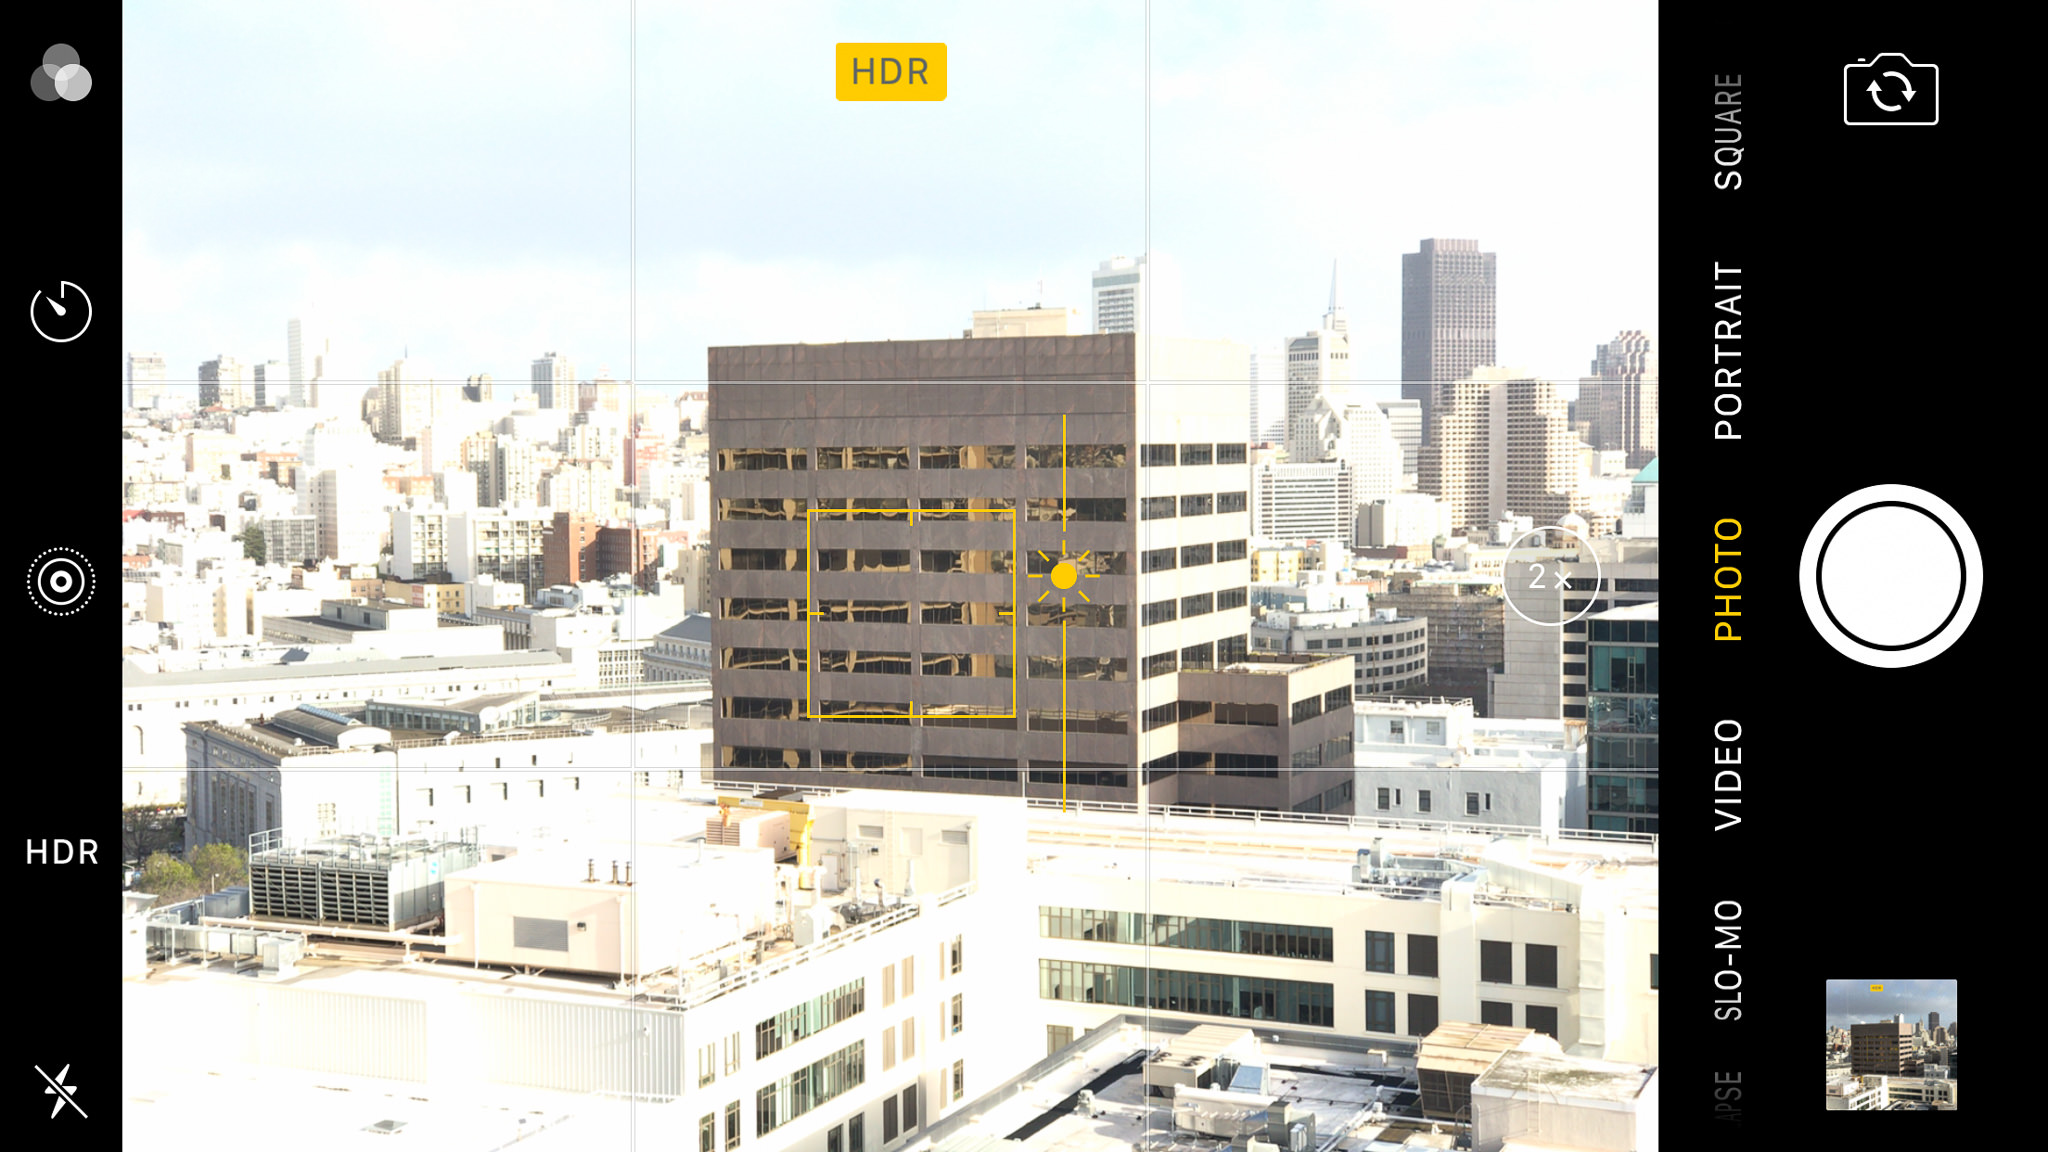
You can adjust that exposure by touching the screen on the part of your image that you want to be properly exposed (note: your phone will also focus in that same spot). Let’s say I want the shadowy side of the building to be properly exposed. If I touch the dark building, the overall exposure of the image increases. Notice that a square appeared on the building where I touched my screen:
Screenshot of default camera app with metering point selected
Unfortunately, I don’t think any default camera apps give you control over settings like shutter speed and ISO, but most do allow you to adjust the exposure by dragging your finger up or down on the screen. Once you’ve touched an area of the screen and the exposure has adjusted, touch and hold your finger outside of the square and drag it up to increase exposure or down to decrease exposure. This should give you more precise control over the exposure of your final image. One word of warning: this adjustment typically resets each time you take a picture, so be prepared to adjust your exposure multiple times if you plan to take more than one photo.
Screenshot of default camera app with increased exposure

Screenshot of default camera app with decreased exposure
If you do want to have the same exposure (and focus) for every photo you take, press and hold the screen until you see something like this:
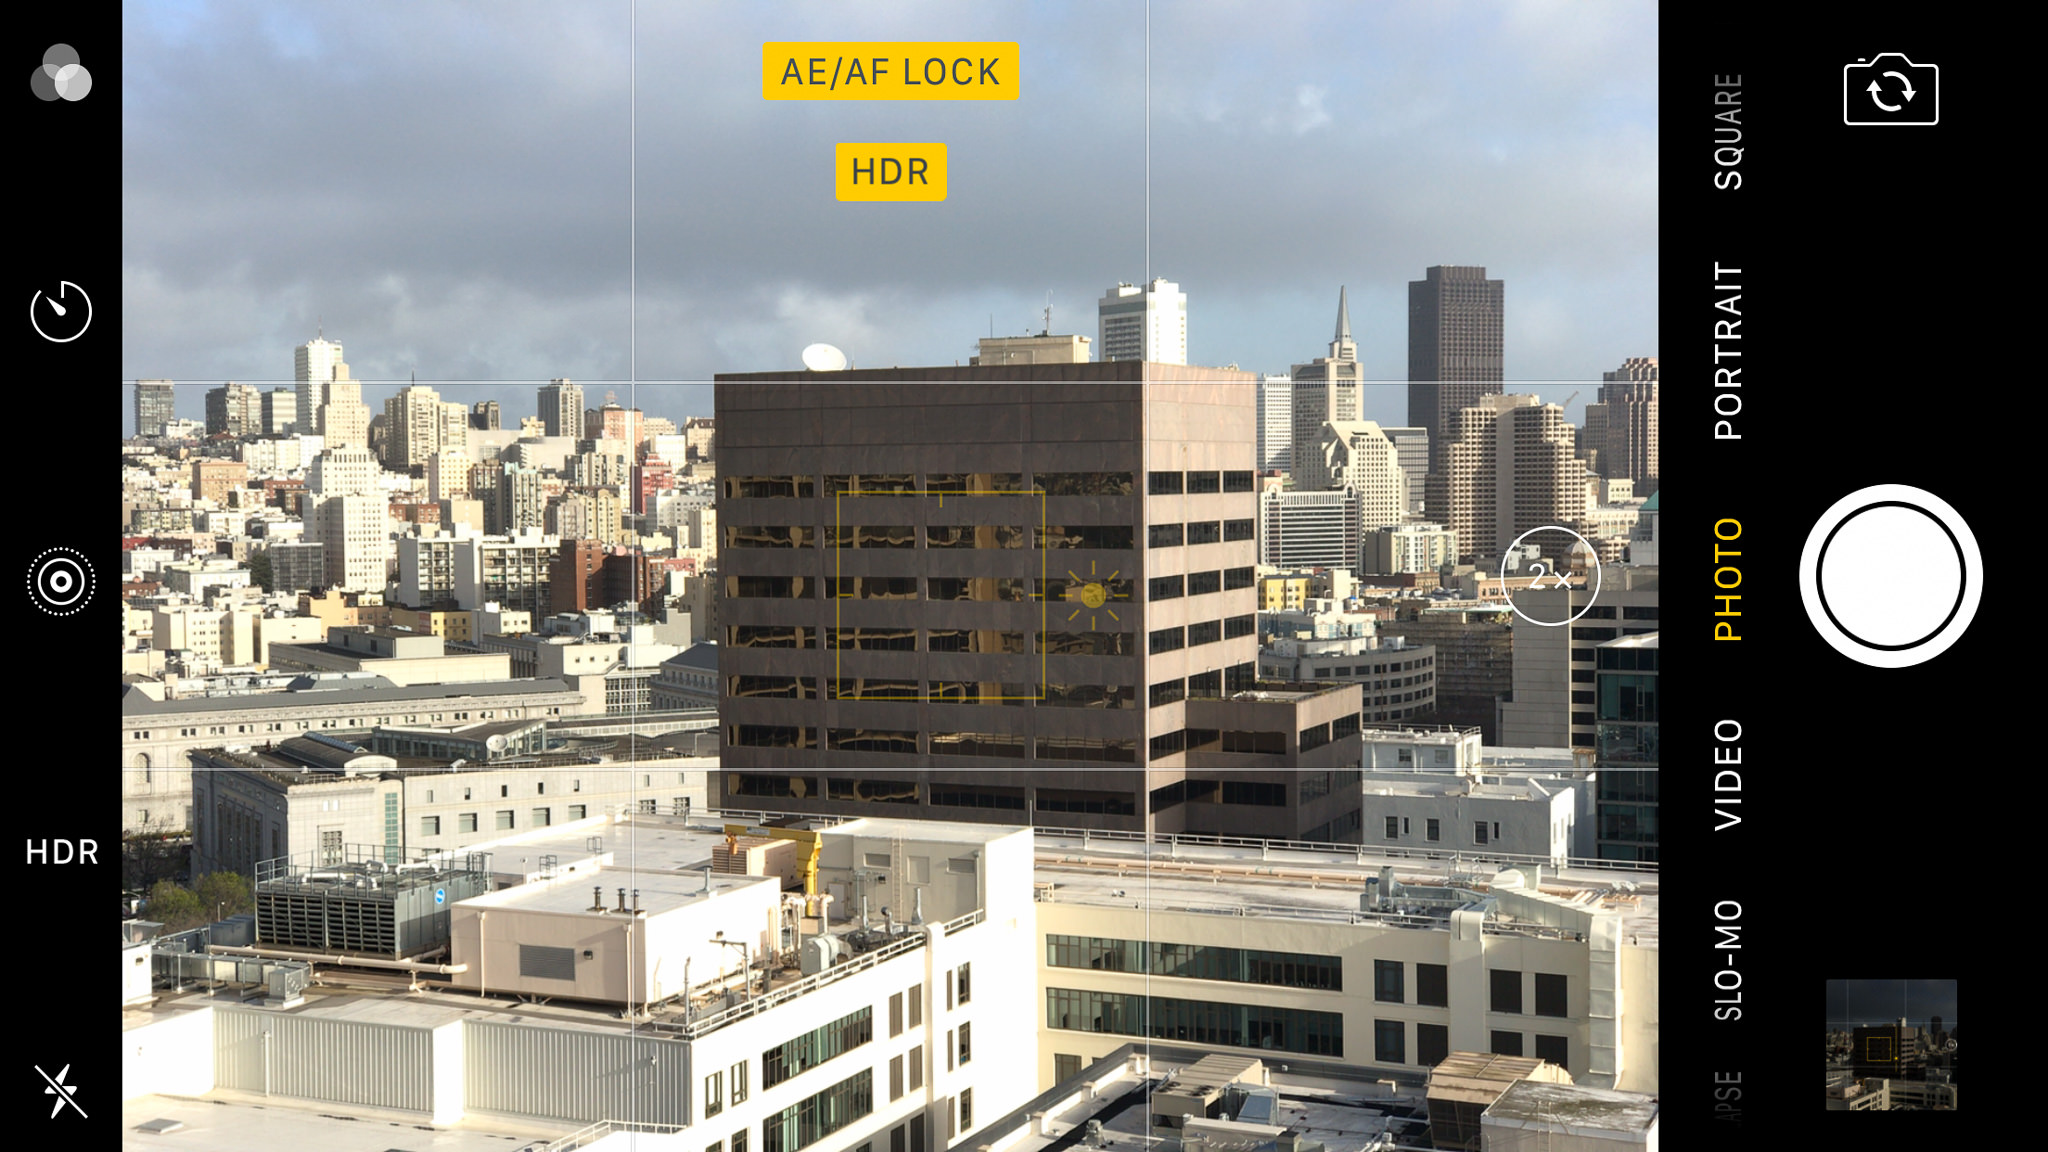
Screenshot of default camera app with AE/AF Lock enabled
When you see AE/AF Lock, your phone has locked the focus and exposure and you can take multiple images without the settings changing. To return the focus and metering back to normal, simply touch anywhere on the screen again.
Cell phones are also able to focus surprisingly close to subjects. This can make them great for photographing flowers and other small objects with a lot of detail. Again, you’ll want to frame your subject, tap the screen where you want the point of focus to be, adjust exposure and take the image. You’ll find, as with macro photography, any movement of the camera will be amplified relative to your subject, so if you’re photographing something very close up, be prepared to take a few images before you get one that is properly focused.
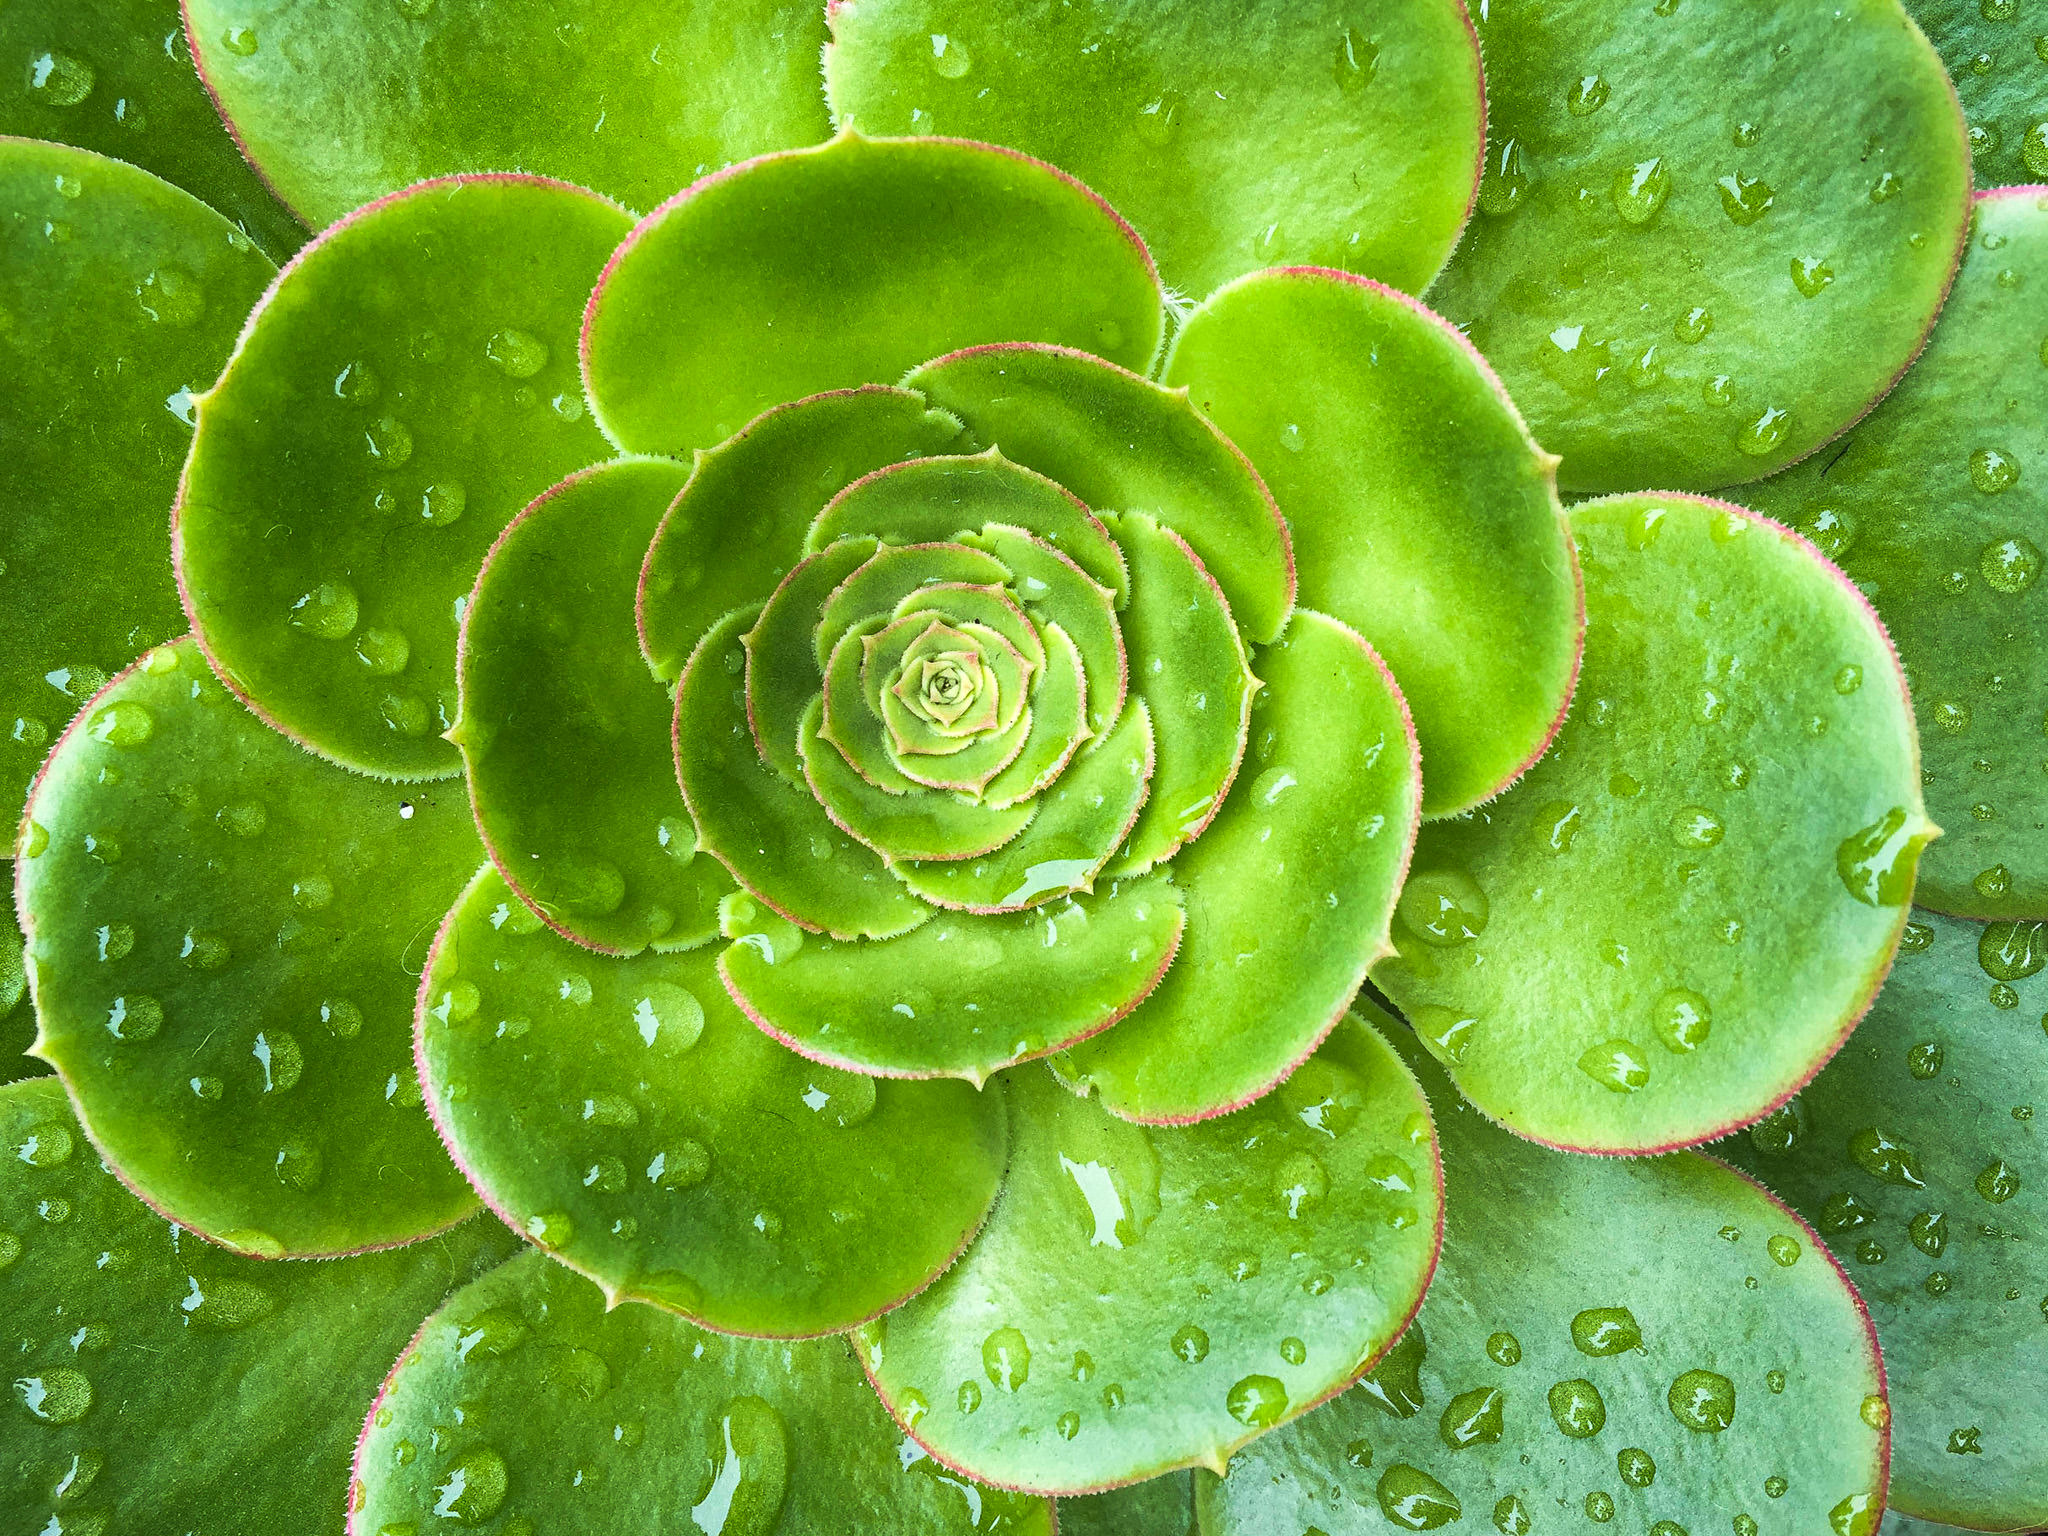
iPhone 6, 4.15mm, ISO 40, 1/120, f/2.2
3.1) Using Advanced Camera Apps
For most people, the default camera app will be enough for them to create images that they’re happy with. For those who want more control over their camera settings or maybe just a different interface, there are many different third-party camera apps out there.
One of the first that I tried out when I started to get more serious about phone-ography is an iOS-only app, Camera+. One of the most attractive features of Camera+ is that it has a manual mode, giving you full control over shutter speed and ISO. If you decide to shoot in Auto mode, you can independently set the focus and exposure points. It also has adjustable white balance, which is a feature that I feel is sorely lacking in most default camera apps.
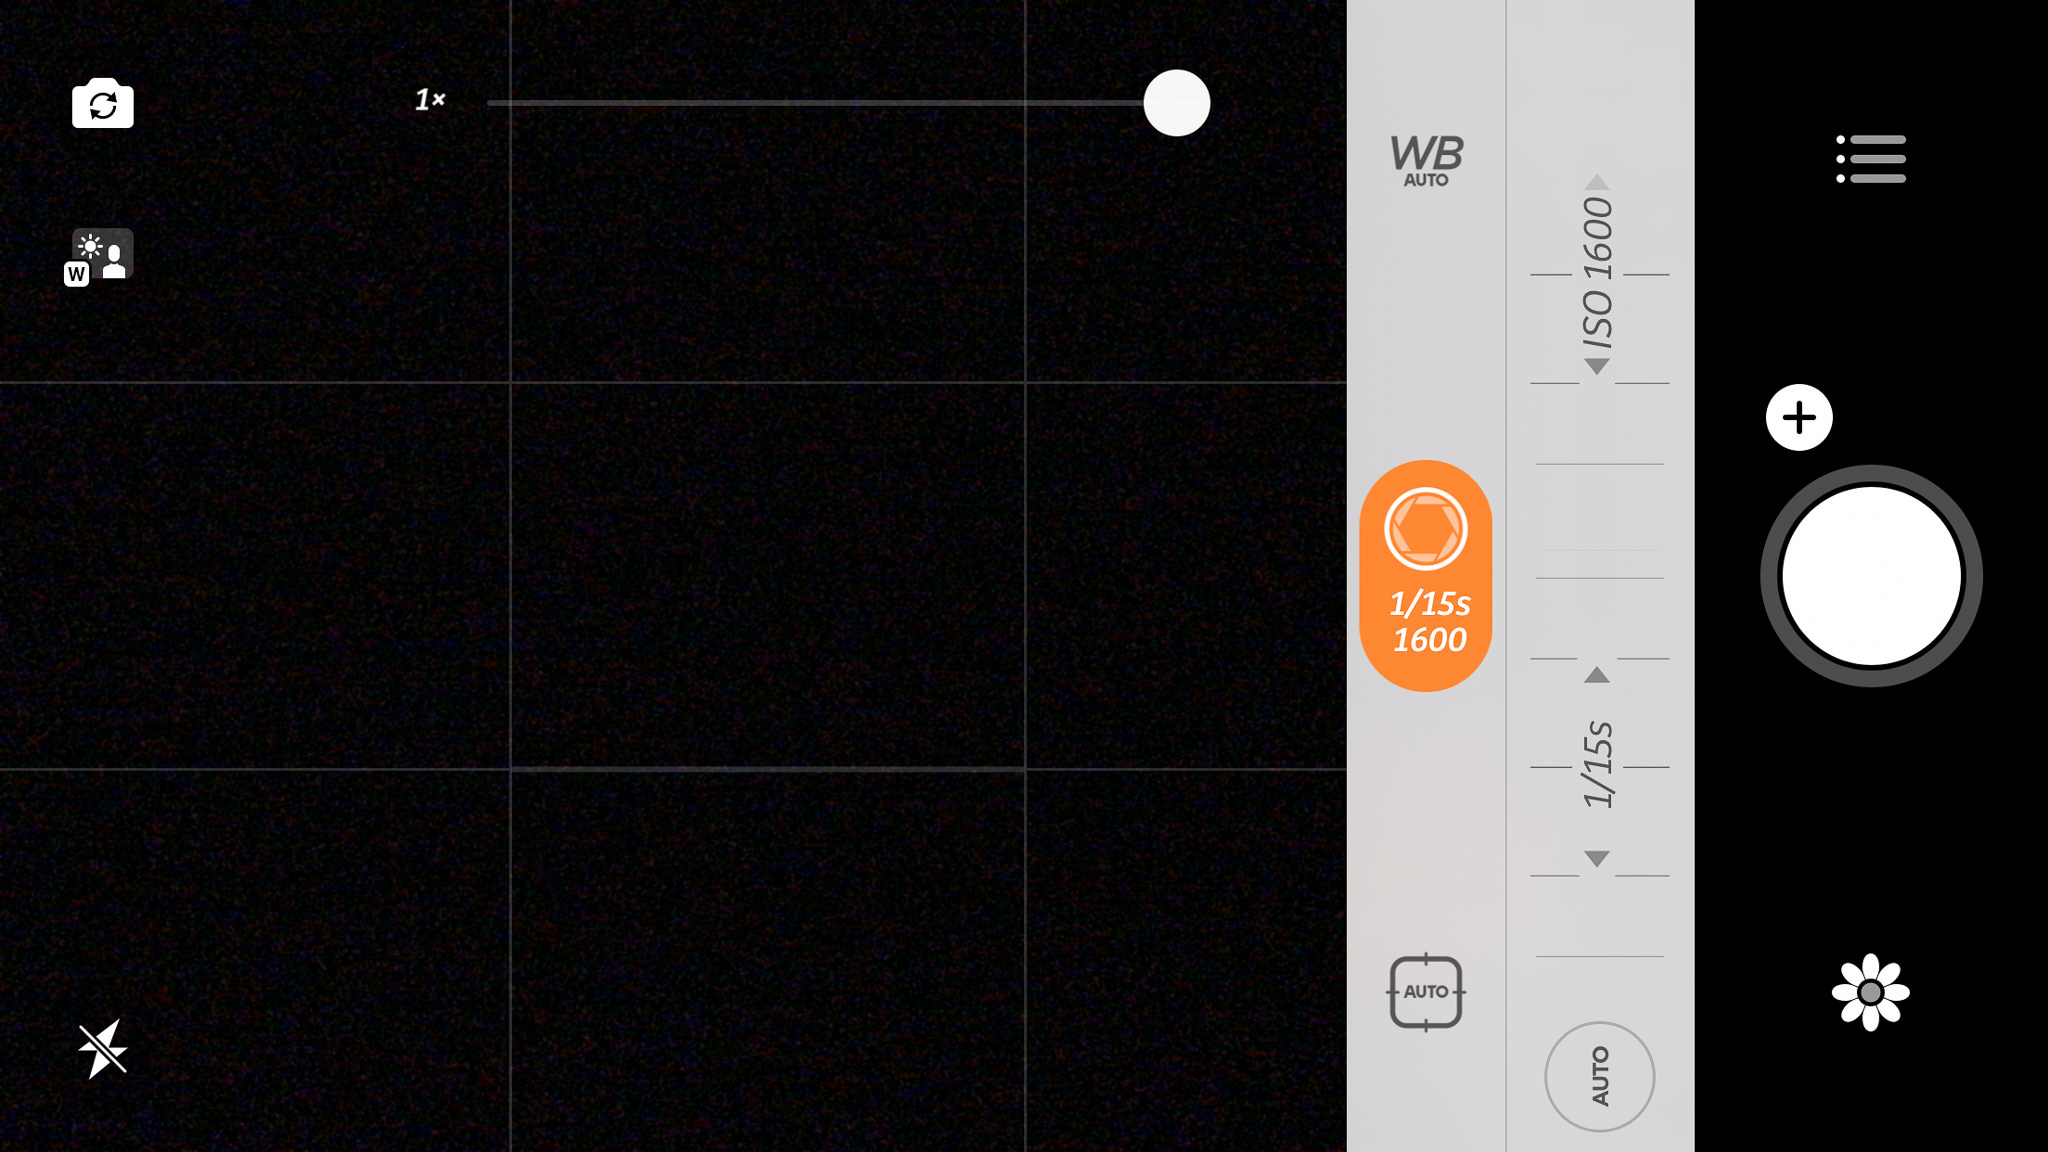
Camera+ Manual Mode Screenshot
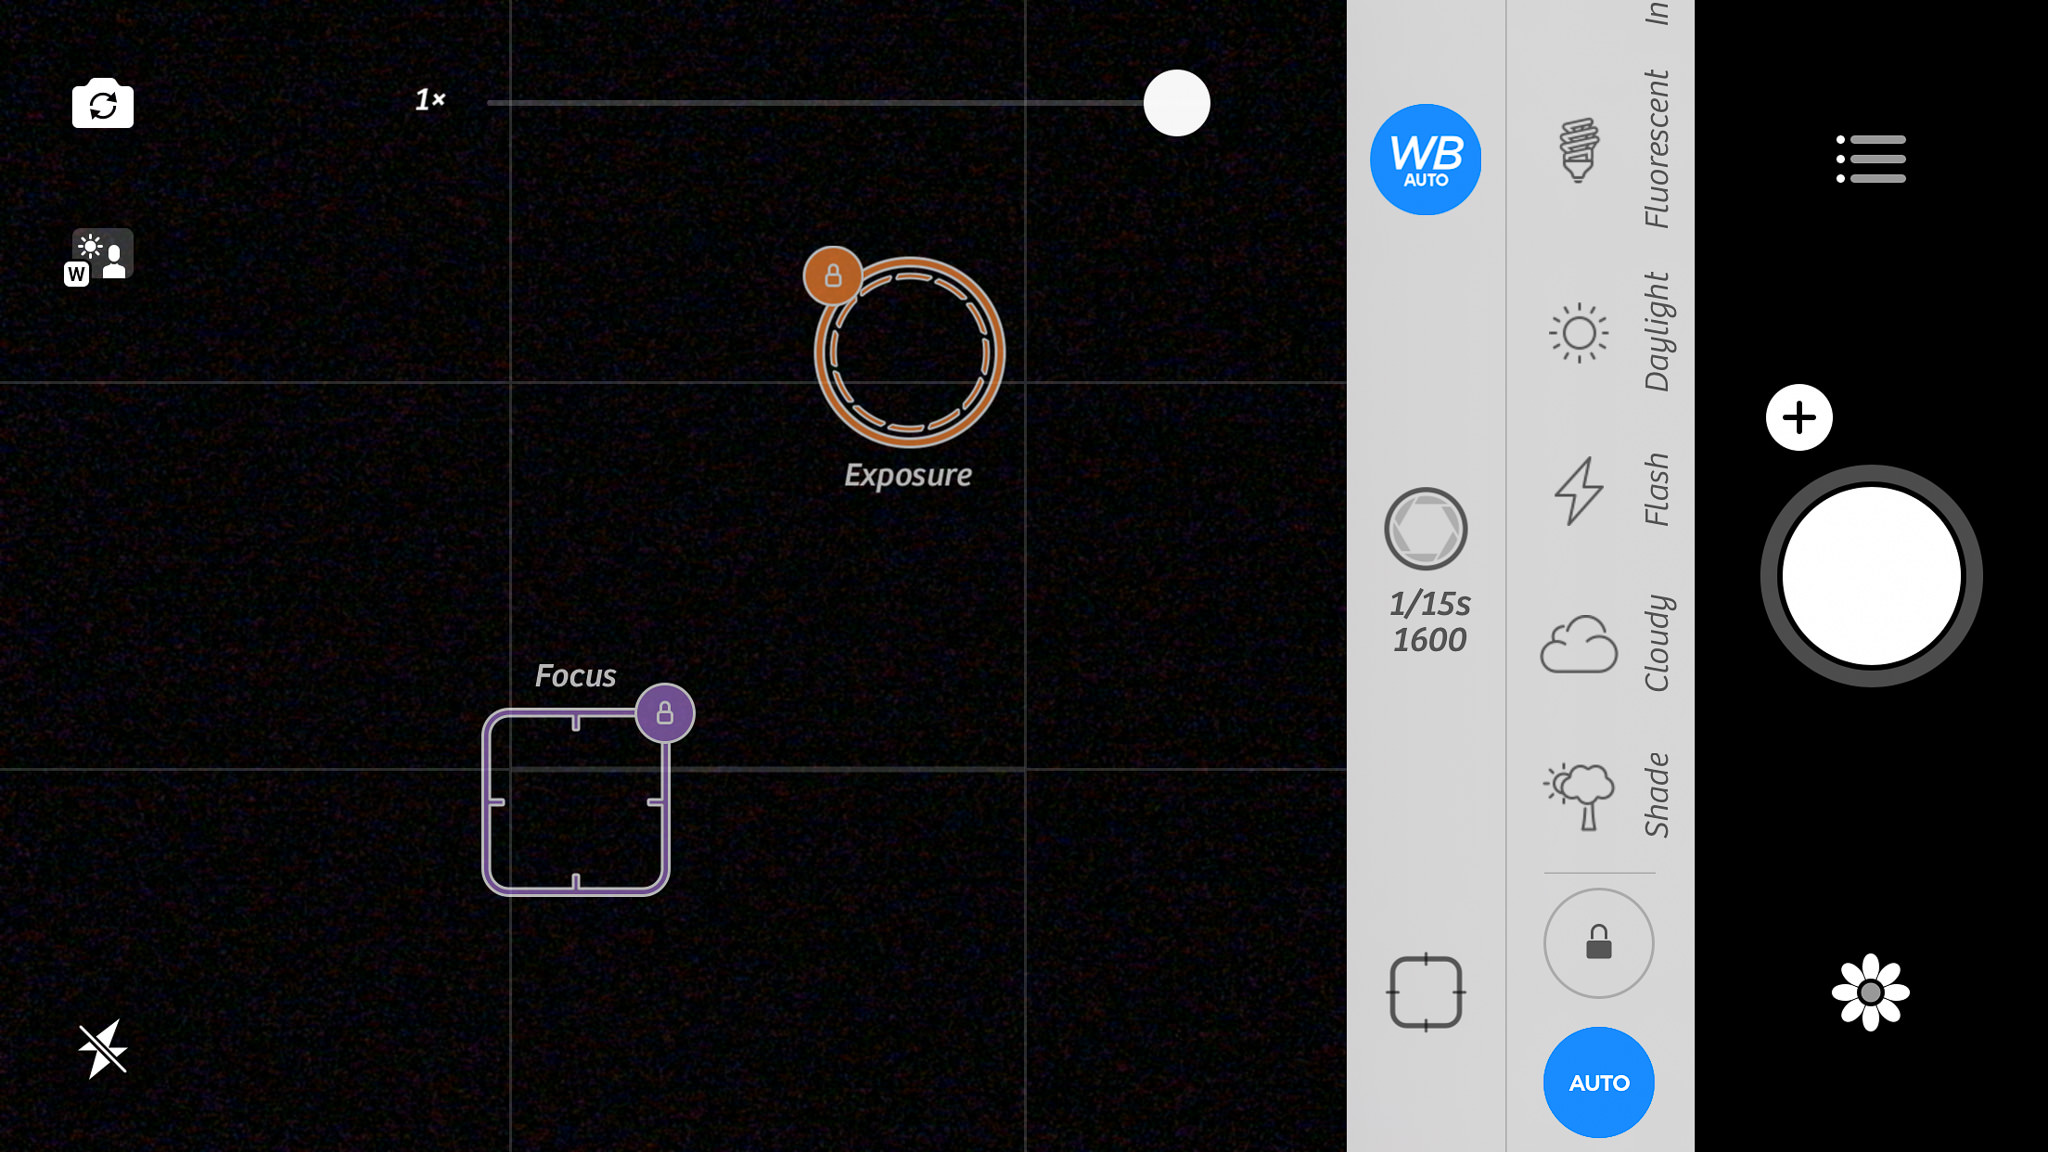
Camera+ Different Focus and Exposure Points
One of the least obvious apps that’s available for both iOS and Android that offers full manual controls as well as DNG capture is Adobe Photoshop Lightroom for Mobile. It may not be a dedicated camera app, but the camera is full featured and a great example of a cell phone camera done right.
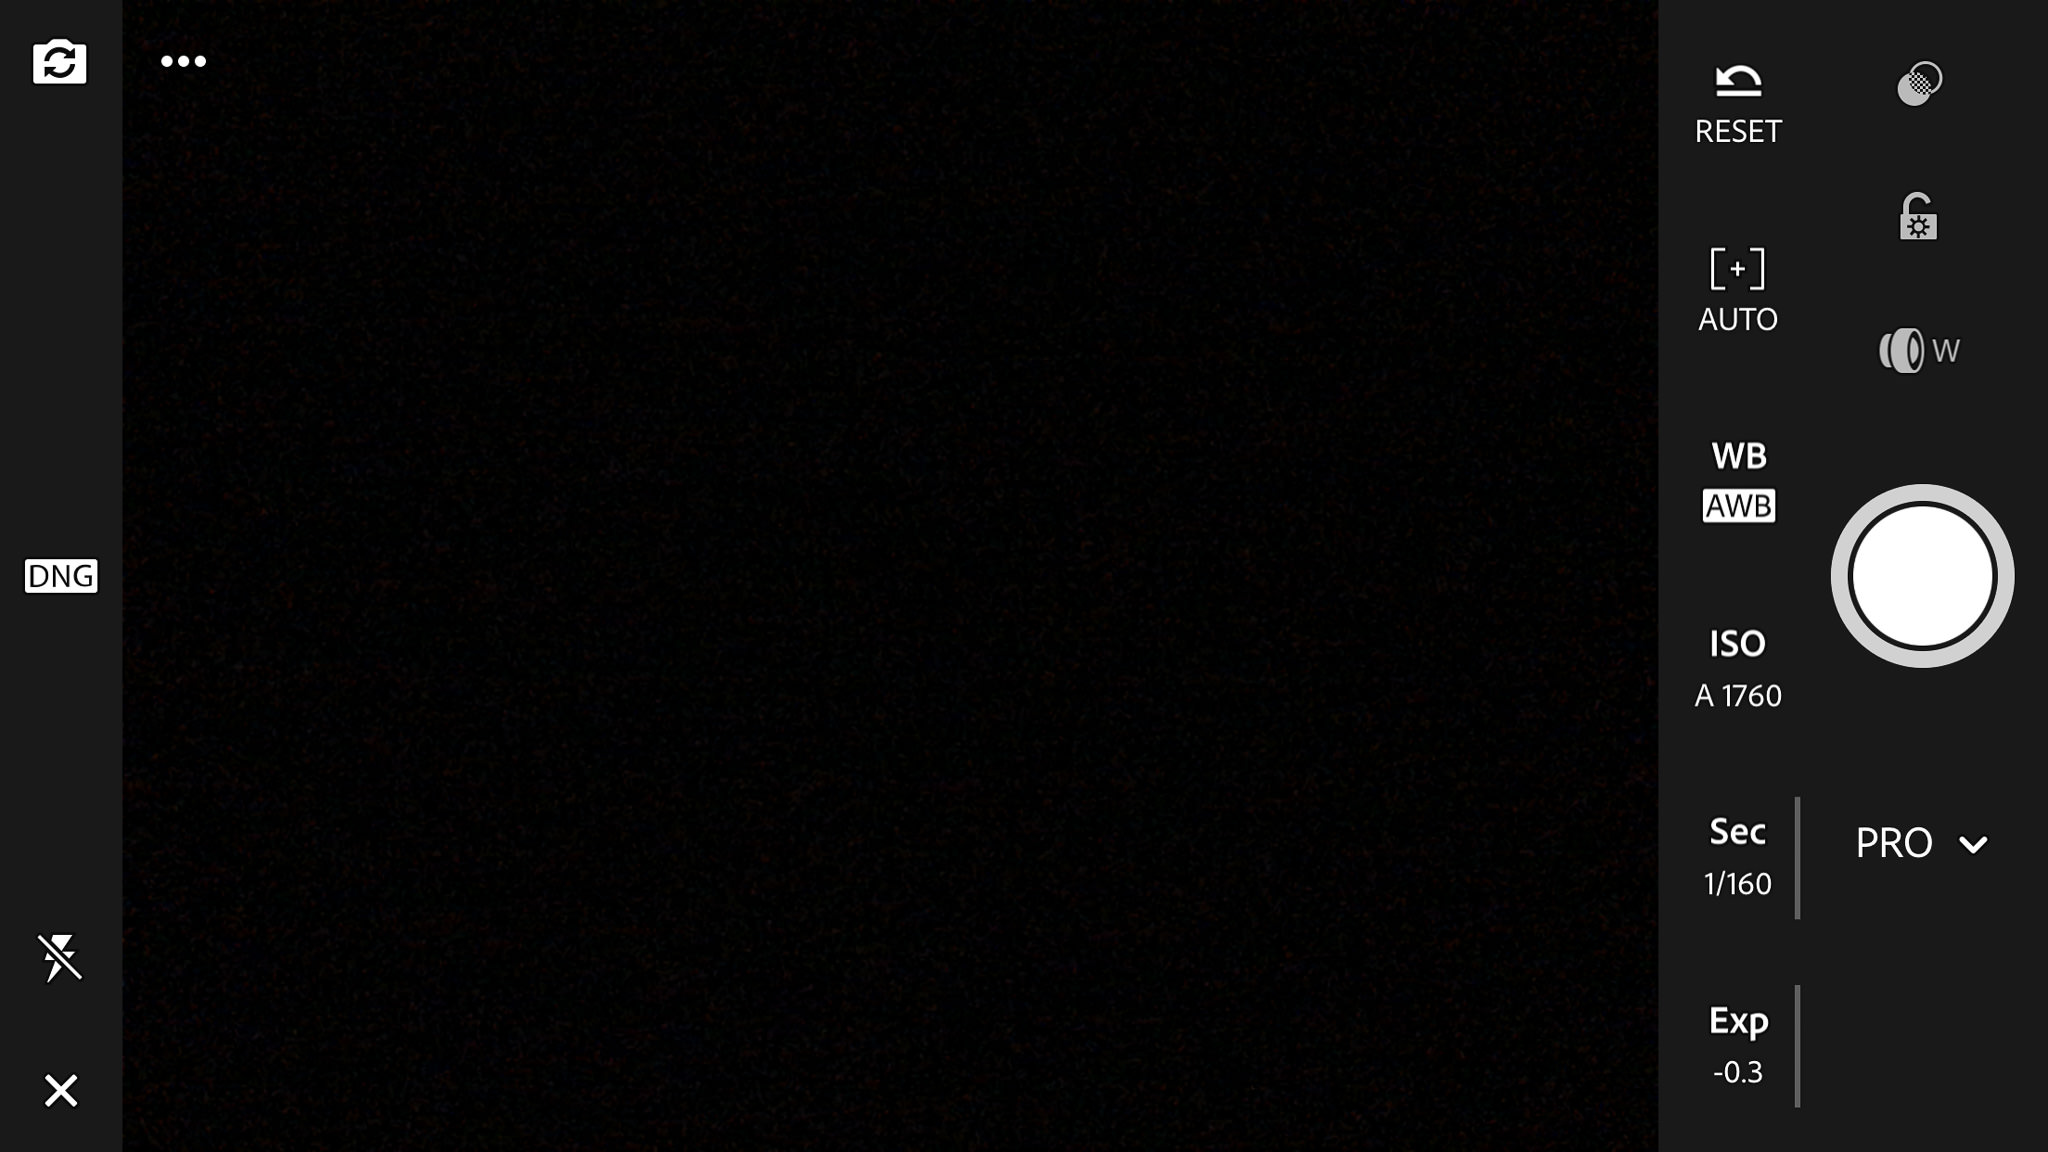
Adobe Photoshop Lightroom Mobile Camera Screenshot
Of course, there are countless different camera apps out there, but ultimately they all more or less do the same thing. When choosing the best one for photography, I’d suggest you focus on a clean, easy to use interface that lets you quickly create images that you’re happy with. For most users, including myself, this is going to be the default camera app.
3.2) Using Cameras Within Other Apps
Not all cameras are created equal. Just as some apps offer more controls than the default camera app, some also offer fewer. Not only that, but some also create photos of inferior quality. For example, photos taken with dedicated camera apps should use your camera’s full resolution and lower ISOs and JPEG compression. Apps with built in cameras (such as Facebook) will typically use the resolution that works best for the app and higher ISOs to prevent motion blur.
Compare these two images. One was taken with the default iPhone camera app while the other was taken and saved within Instagram Stories. Unfortunately, Stories does not record the camera settings, so I don’t know what ISO was used, but you should be able to tell that it’s definitely of lower image quality. It’s also much lower resolution (4032×3024 vs 1280×720). While they didn’t look any different on the screen of my phone, they do look a lot different when seen on a computer screen. Be sure to compare the detail in the wood grain and the cat itself.
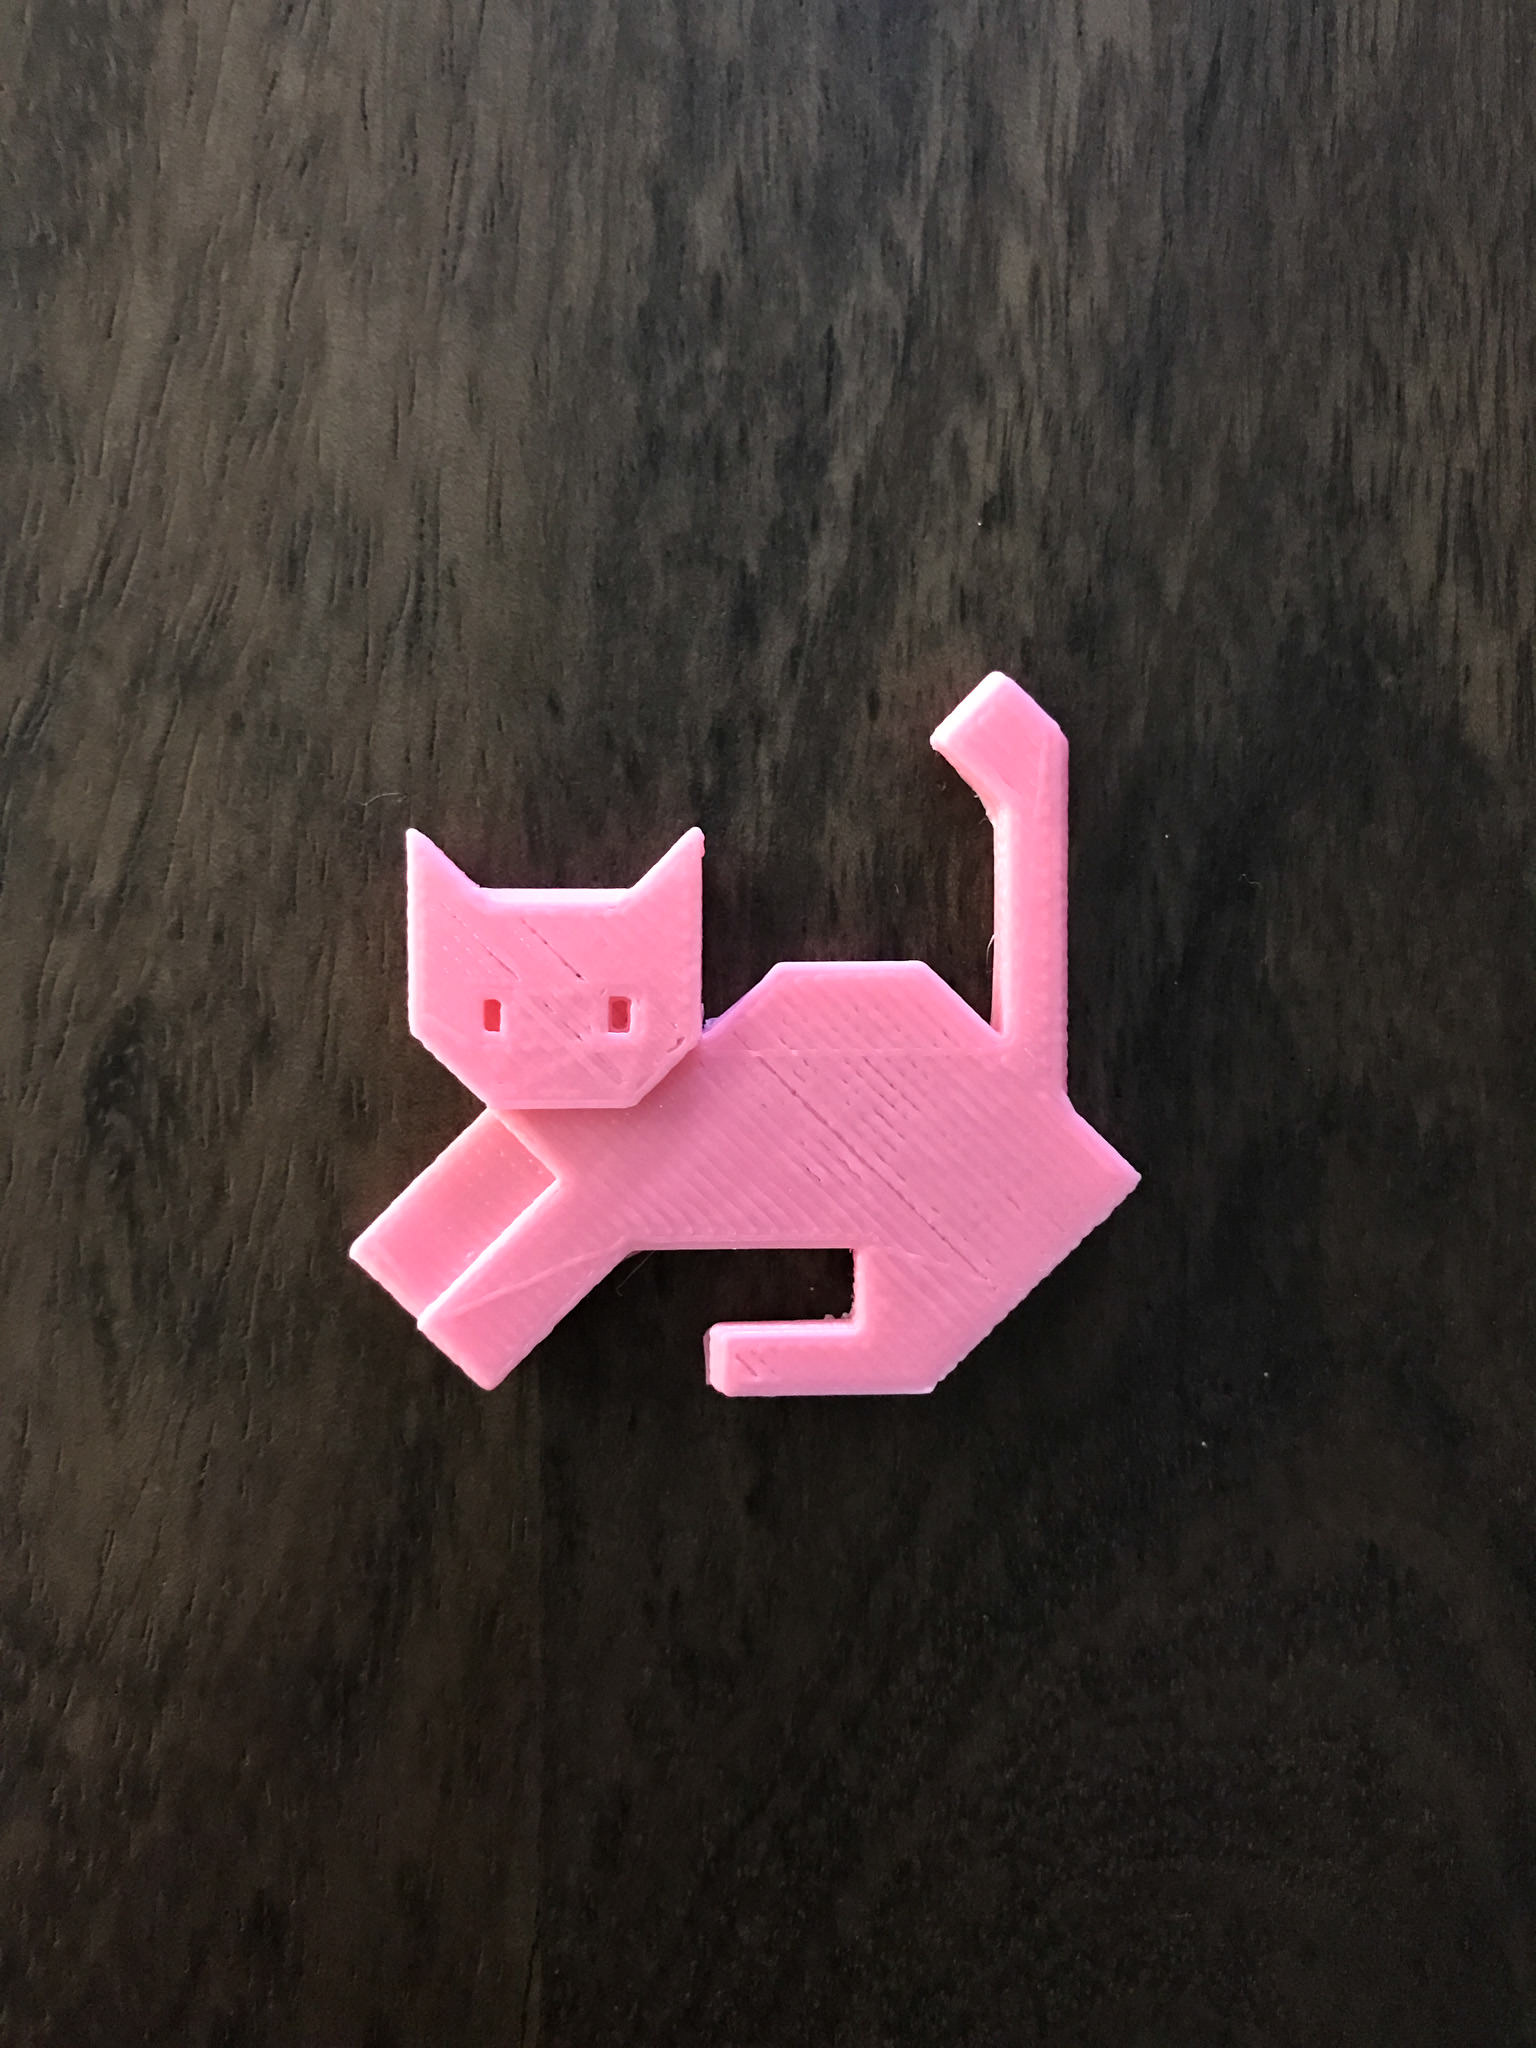
3D Printed Cat – Native iPhone App
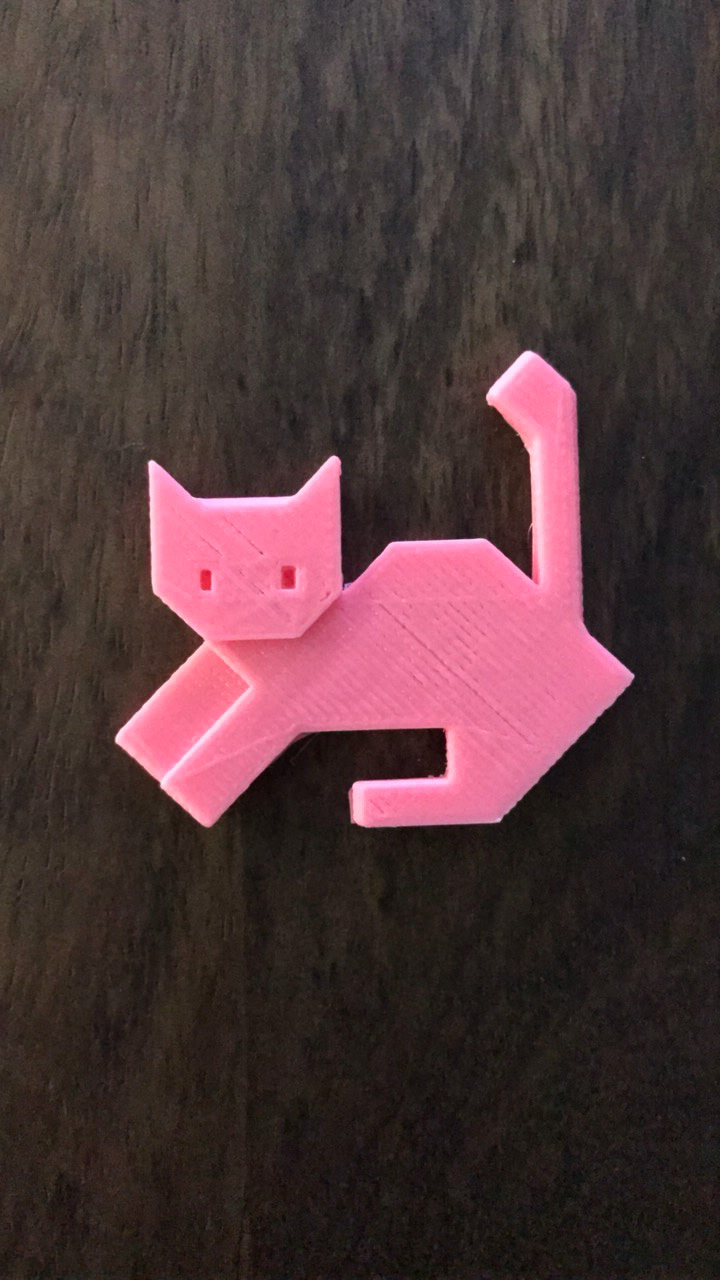
3D Printed Cat – Instagram Stories App
Many apps like Facebook and Instagram also have limited camera controls and often by default don’t save photos taken through them. Almost all social media apps will allow you to post images that were taken outside of the app, so unless you only want to take a photo for quick sharing, I’d highly recommend using a dedicated camera app.
4) Other Considerations
Image Organization: In addition to deciding which app you plan to use for photography, you’ll also need to keep track of the images you’ve taken. Some apps create unique folders where they store images, meaning you might not be able to view all of your images in the same place. Other apps won’t actually show images that were taken with them until they are exported, meaning you might have taken a photo but won’t be able to view it with the rest of your images until you export it out of the app.
Sensor Limitations: The actual capabilities of a phone’s sensor is another major consideration. You’ll never achieve the same results with a phone that you will with a DSLR or mirrorless camera, so don’t go in with the same expectations. The high ISO performance and dynamic range capabilities are not in the same league, but of course, this should be pretty obvious. I mean, it is a phone after all.
Add-On Lenses: If you want to use something besides the standard lens, you might look into purchasing an add-on lens for your cell phone. They come in many different types, from macro to telephoto, so there’s surely something out there to fit your needs. Just be sure to do your research and read some reviews before your purchase anything, as the quality can vary greatly from manufacturer to manufacturer.
Smudges: Speaking of lenses, be sure to keep your phone’s lens free of smudges. These can often degrade image quality, as well as add streaky lens flare if there are any bright light sources in the image. I’ll often find my lens covered in fingerprints, so I’ve made it a habit to wipe it off before taking any images.
Lens Flare: Lens flare can also be an issue for cell phones. With no lens hood and the lens being flush with the exterior of the phone’s body, flare can occur quite often. Most of the time you should be able to hold up one hand to prevent the sun from hitting the lens, but sometimes it’s unavoidable. Also, due to the coatings and special materials that some lens covers are made from, flare will occasionally take on a color cast. Here’s an extreme example from my iPhone 5 review.
iPhone 5 @ 4.13mm, ISO 50, 1/950, f/2.4
Lens Distortion: Most cell phones lenses tend to distort near the edges of the frame. This is especially visible when you’re photographing a person from a few feet away with the phone in portrait mode. Be careful not to allow lens distortion to ruin an image.
Alternate Shutter Buttons: Most cell phones should also have a physical button that triggers the camera shutter when the camera app is open. For example, on an iPhone, the volume buttons trigger the camera shutter. I find myself using this feature when I only have one hand available for taking photos or am holding the phone in an unusual way.
Press Lightly: Regardless of whether you use the simulated shutter button within the app or a physical button on your phone, be careful of how hard you press. Many people will “peck” at the screen with their finger, causing the phone to move when an image is captured, thus creating a blurry image.
Capturing HDR Images: I have my phone set to auto-HDR mode, which means that it will capture a scene in HDR if it needs to. I also have the setting turned on that saves a normal version of each image that is captured in HDR. I do this because sometimes I prefer the non-HDR image over the HDR image. I end up with two images, but have made it a habit to review images at the end of the day and delete extras so I don’t fill my phone’s storage with duplicate photos.
Photographing Action: Using the phone on your camera to photograph action can be quite tricky, but not impossible. If you’re in a low light situation, you can forget about it (unless you want blurry photos). If you have plenty of light to work with, your best option would be to shoot a burst of images. Due to the significant “shutter lag” phones have, you probably won’t capture the peak of the action with a single shot. By shooting a burst (just hold down the shutter button), you greatly increase the chances of getting the shot you want.
Optical vs. Digital Zoom: Unless you have an optical zoom on your phone (typically only available if your phone has more than one lens), you should probably ignore the zoom option. Once you start using a digital zoom, image quality quickly deteriorates. For serious photography, you should refrain from using digital zoom.
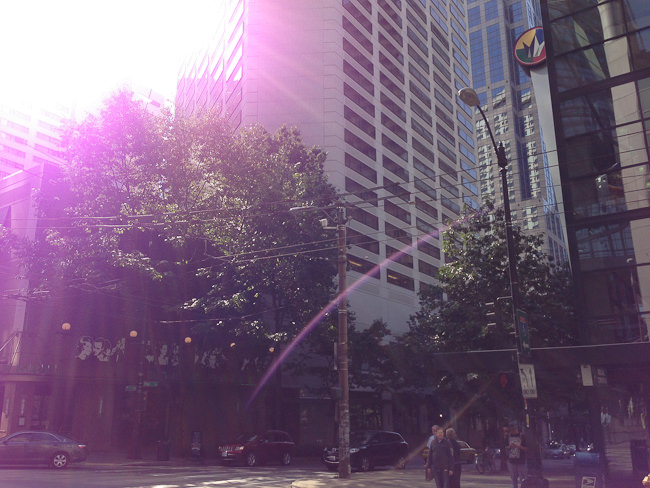
Low Light Photography: Low light photography with your phone is difficult, but not impossible. Your phone will usually set the shutter speed quite low, which means there’s a greater chance of motion blur. Of course, if you’re aware of this, you can compensate. Here’s an image I created by panning with the streetcar as it rolled along the tracks of Market Street in San Francisco.

iPhone 7 Plus, ISO 100, 1/6, f/1.8
5) Conclusions
If you’ve been ignoring the camera feature on your cell phone because you think it’s not capable of producing good results, you should definitely give it another try. Most modern cell phones have great cameras that can produce surprising results. Of course, you have to realize that it does have limitations and not expect it to perform miracles. With a little practice, though, you might just start leaving your “real” camera at home once in a while.
If you find that the default camera app doesn’t offer you enough control over the camera settings, you might try downloading an advanced camera app. These can offer a variety of different options that are missing from the default camera app, including full manual controls over exposure and RAW capture mode.
Regardless of if you choose to use the default app or download something more advanced, make sure you take the time to familiarize yourself with it. Just like with an expensive DSLR, you won’t be able to create the best photos possible if you aren’t familiar with all of the options available and how to use it.
If you prefer to use a “real” camera, by all means feel free. There’s no question that DSLRs and mirrorless cameras are superior to the cameras found on any cell phone today. But, if you don’t want to be weighed down by carrying around a bunch of heavy and expensive gear, you might try heading out one day armed with only your cell phone. Personally, I find a certain type of freedom when I’m out walking around with only a phone in my pocket. There are times I wish I had my DSLR with me, but usually I’m completely content seeing what I can create with just a cell phone.
6) Images
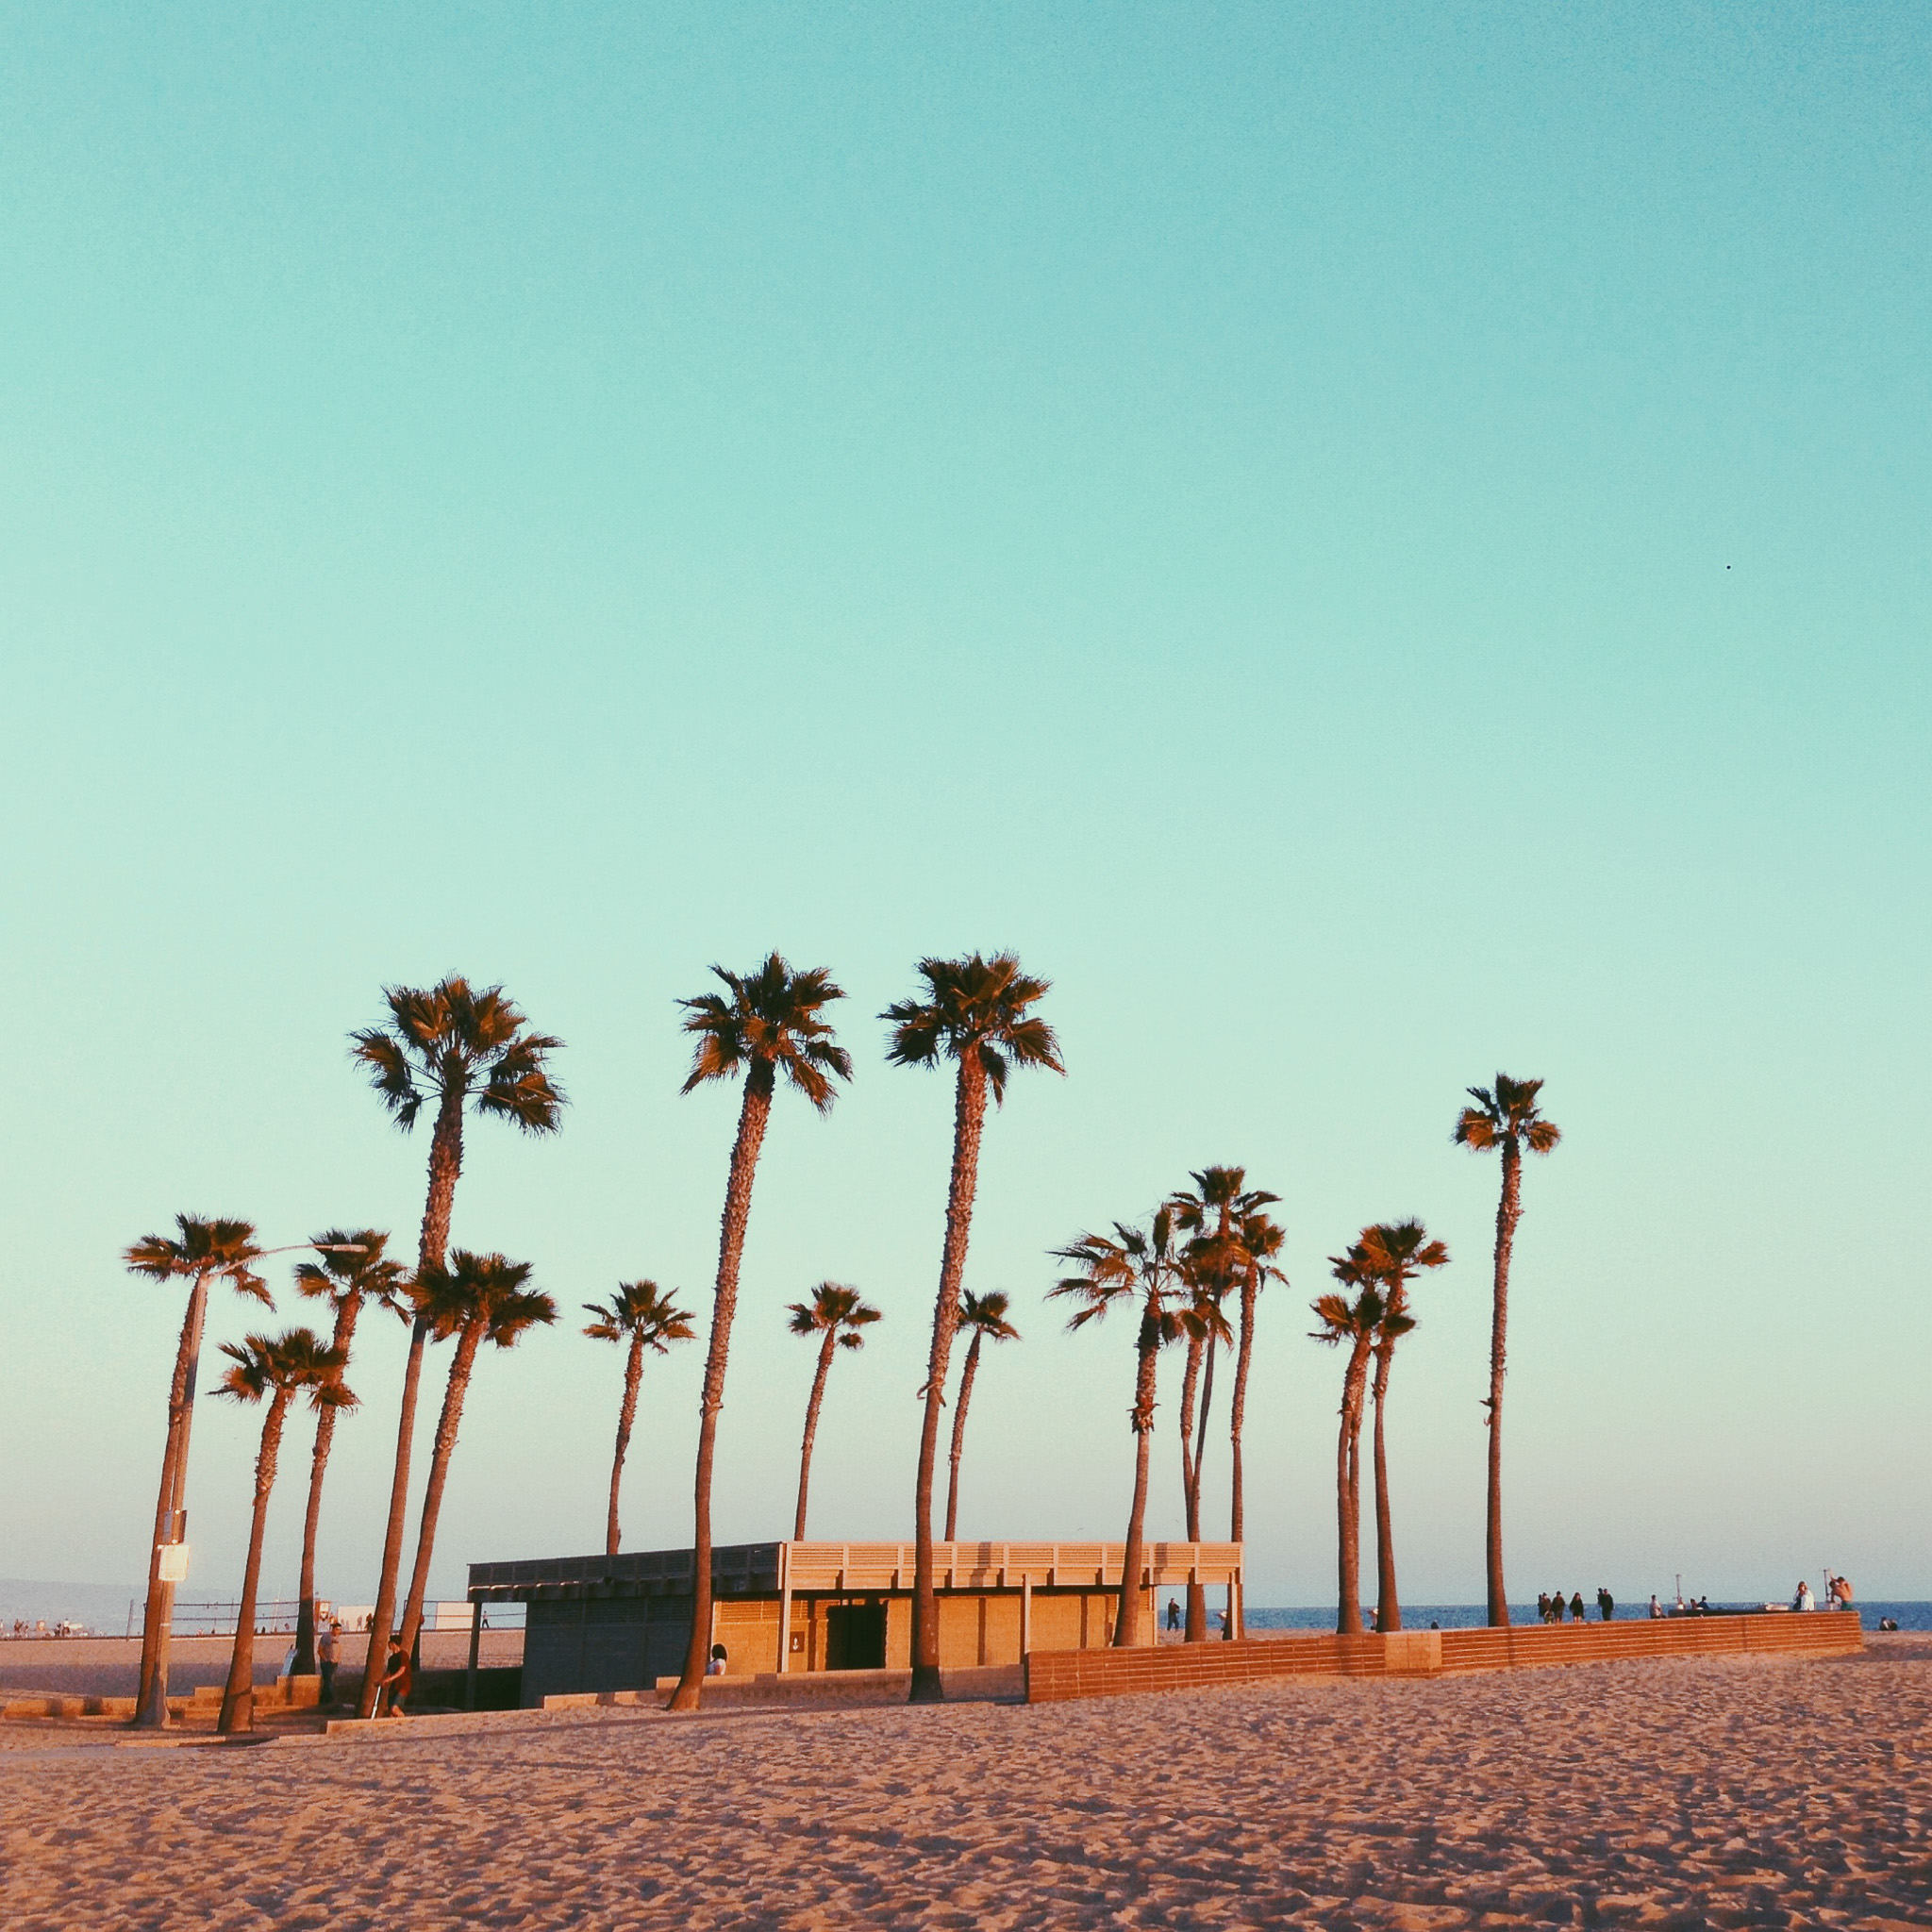
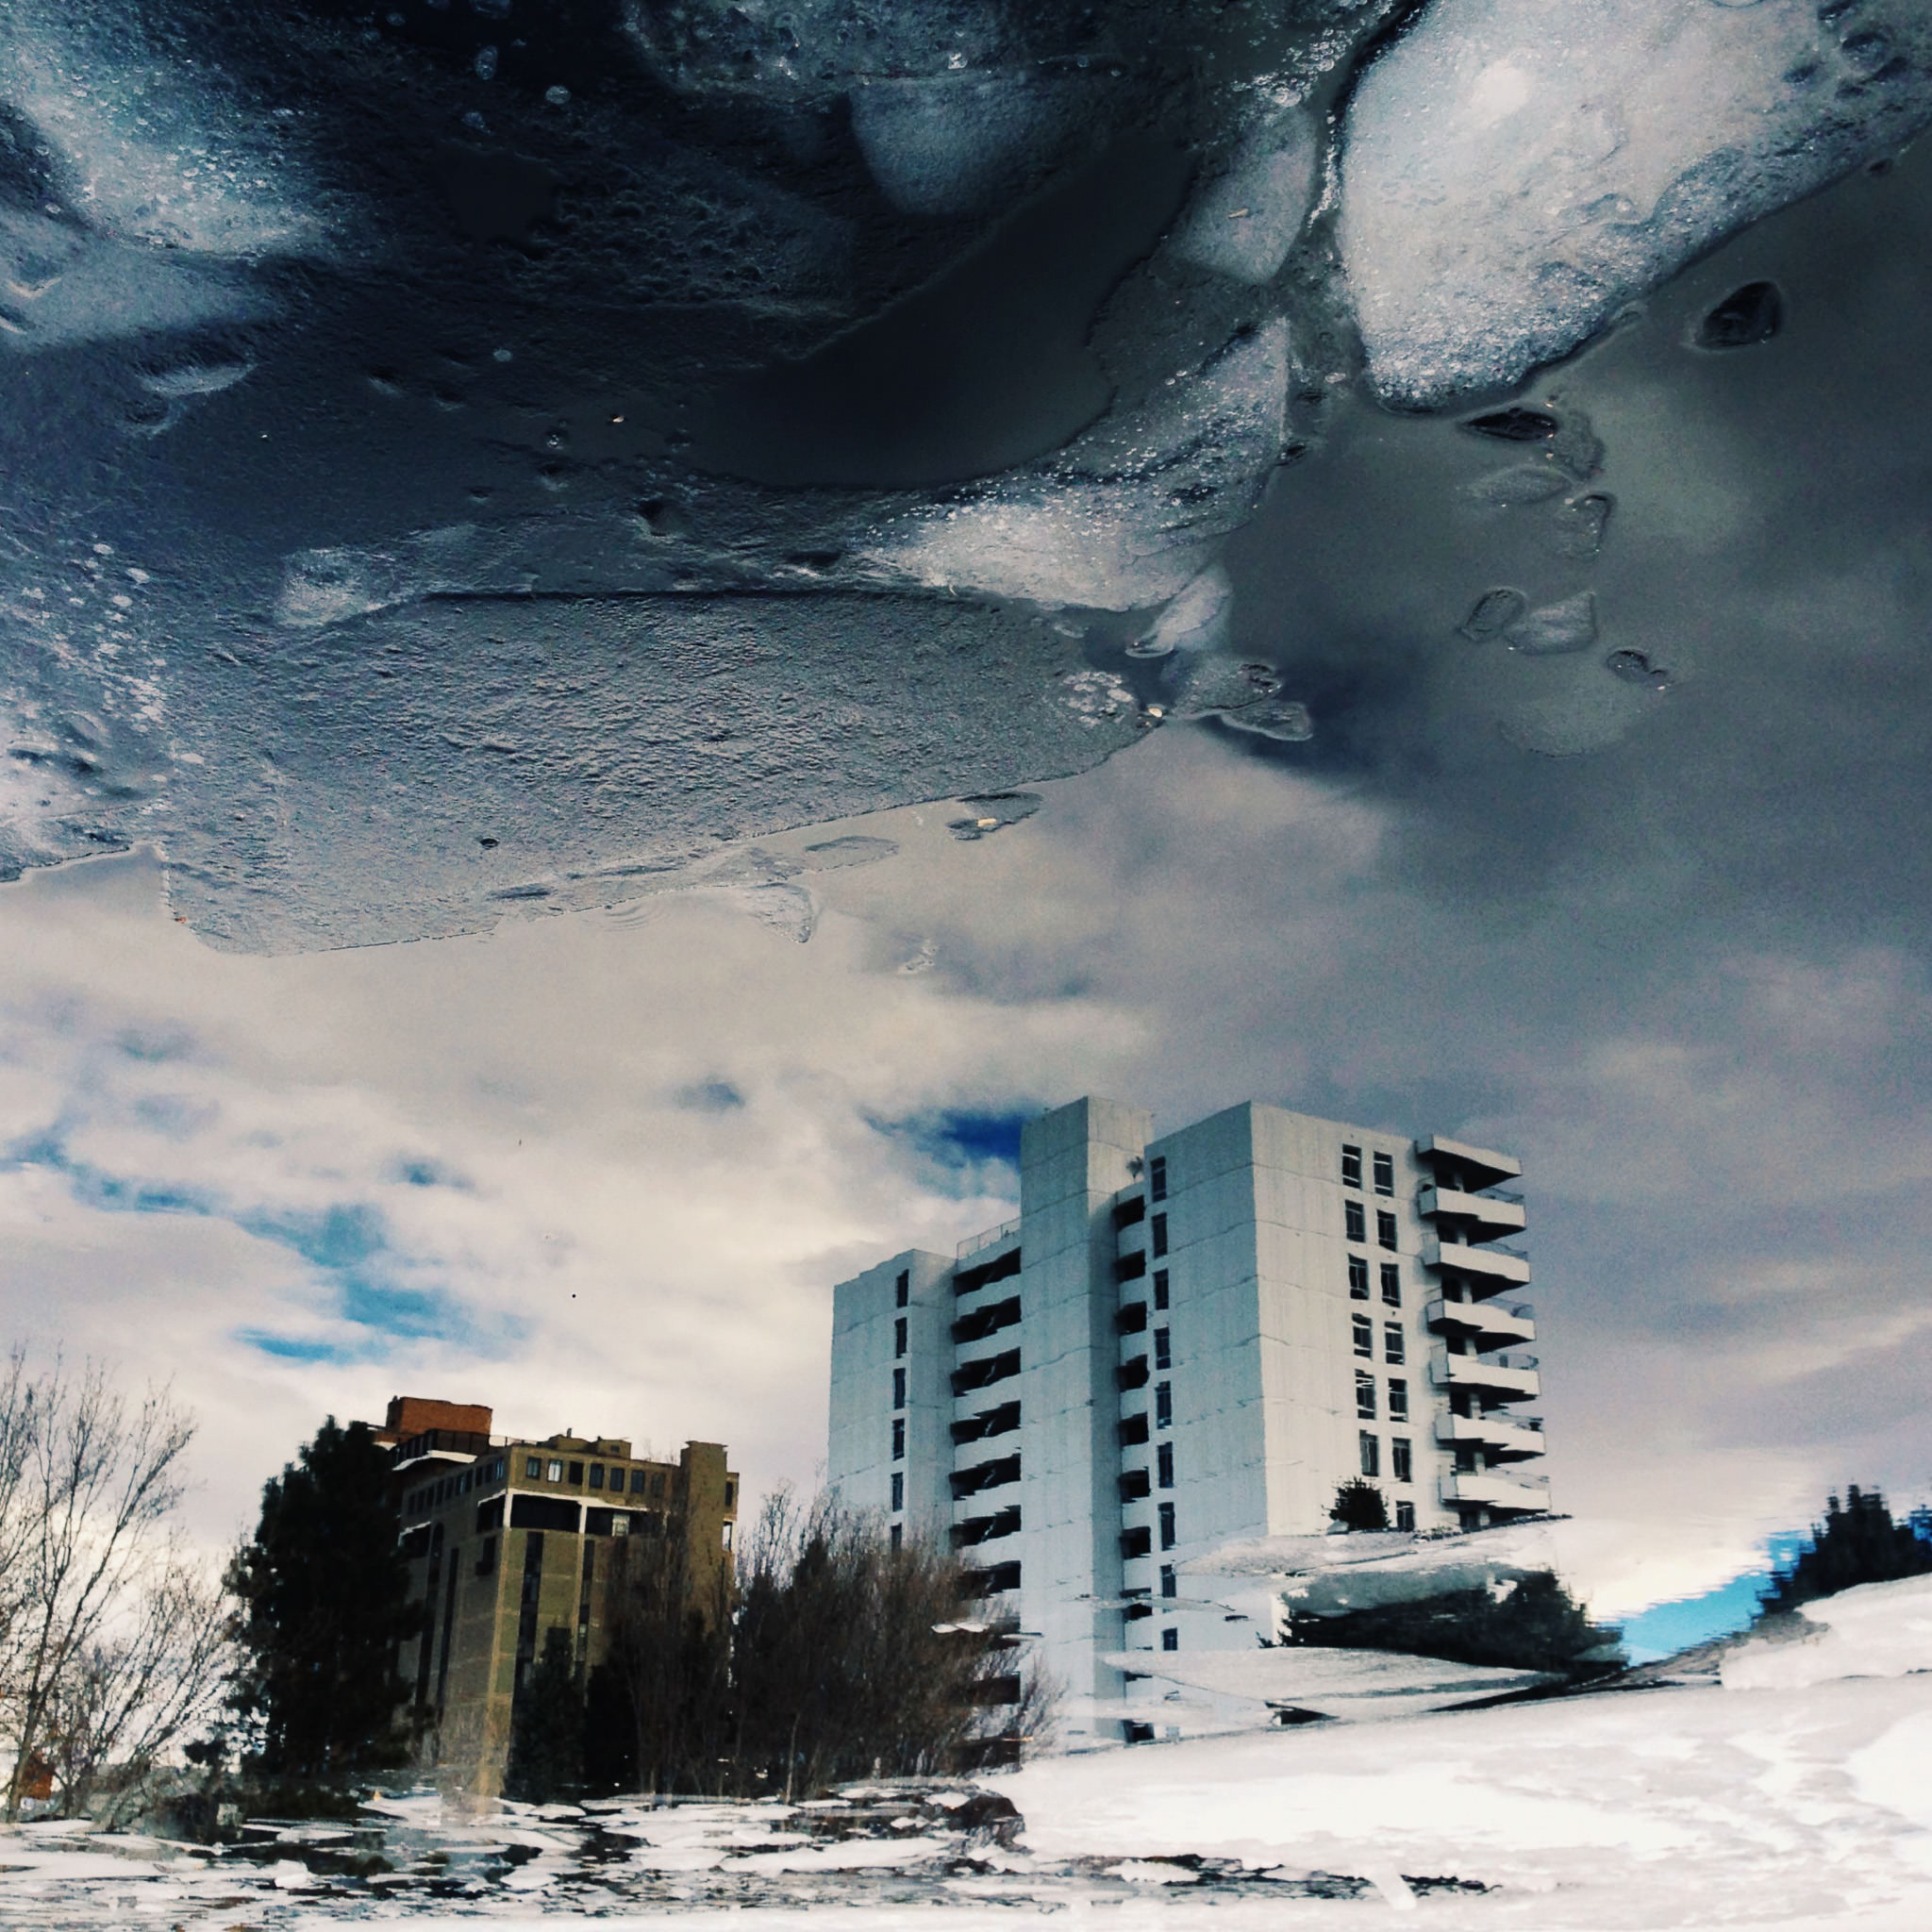
In a future article, I’ll cover a few of the different apps that are available for editing photos. For now, here are a few images that I’ve taken (and edited) with my cell phone. Hopefully they demonstrate that modern phones are indeed capable cameras that should not be dismissed as unusable for personal photography.

iPhone 5, 4.12mm, ISO 100, 1/20, f/2.4
iPhone 5, 4.12mm, ISO 50, 1/460, f/2.4

iPhone 5, 4.12mm, ISO 50, 1/40, f/2.4
iPhone 5, 4.12mm, ISO 50, 1/370, f/2.4

iPhone 5 @ 4.13mm, ISO 50, 1/25, f/2.4

iPhone 6, 4.15mm, ISO 32, 1/720, f/2.2

iPhone 6, 4.15mm, ISO 32, 1/320, f/2.2

iPhone 7 Plus, 3.99mm, ISO 20, 1/1500, f/1.8

iPhone 6 , 4.15mm, ISO 32, 1/250, f/2.2
The post Cell Phone Photography – Part 1: Capturing Images appeared first on Photography Life.


