
Light, shapes, lines, forms — the foundations of photography. No matter what subjects you shoot, you’ll end up working with these features for every photo that you take. Architectural photography, though, takes it to another level, with its perfect geometrical lines and shapes that are hard to find anywhere anywhere else in the world. In this article, I will cover everything from indoor architectural photography to outdoor “urban landscapes” and cityscapes, including some tips and tricks that I use all the time in my own photos.
A quick note: Apologies that we have not posted an article this past week. Nasim and I have been in New Zealand since the beginning of December, and it has not been possible to publish anything without wifi. Our articles may still be sporadic until we get home at the end of December, so we appreciate the wait. For now, we have published all our backlogged articles from recent days. Hopefully, the photos we bring back from this trip will be worth it!
1) Camera equipment
No matter which images you want to capture, the first thing that many people consider is camera equipment. For architectural photography, you can take good photos with any equipment, but there is some gear that certainly works better than others.
Tripods and Support
First, the most important piece of equipment you can own as an architectural photographer is some type of camera support. This helps you take well-lit and sharp photos even in dark buildings, or for nighttime shots outdoors. A tripod is the most obvious choice, and it’s what I use more than anything else. However, some places (especially a lot of cathedrals and museums) restrict your tripod use. So, you have to pick something else.
On one hand, a lot of people gravitate towards monopods, which are a good way to add some extra stability to your shots. However, monopods don’t stand completely still, so they aren’t the ideal choice in low-light situations. Compared to handholding, they’re good, but a solid tripod will let you use much longer shutter speeds. (See: How to Use a Monopod.)
Other people prefer to use a miniature tripod instead. Often, buildings that restrict full-size tripods are perfectly fine with small ones, since they don’t take up as much space or bother other visitors. This varies from place to place, but it holds true more often than not. However, miniature tripods restrict your camera position to very low angles, unless you hold your tripod against something like a wall or bench (which may lead to blurry photos if you aren’t perfectly steady).
Finally, consider something like a stabilizing clamp. There are versions available from Manfrotto (requires additional adapters, and is relatively large) and Really Right Stuff. This piece of equipment lets you attach your camera directly to railings, tables, benches, and so on — allowing a bit more flexibility than a miniature tripod. These are permitted almost everywhere, since they clearly aren’t tripods. However, you need to be somewhere that has the right places to clamp your gear, or you simply won’t be able to use them at all.
Lenses
As is true for every genre of photography, lenses are critically important for architecture and cityscapes. Wide angle lenses let you emphasize the spaciousness of an interior, and telephotos let you zoom into tiny details in distant urban landscapes.
Don’t restrict yourself — good architectural photos can be taken at any focal length. Although wide-angles are more popular (since they tend to work better indoors), I always recommend carrying a telephoto lens with you as well. I have gotten many of my favorite architectural shots by focusing on small, interesting details in the distance.
NIKON D7000 + 105mm f/2.8 @ 105mm, ISO 1600, 1/15, f/2.8
The gold standard for architectural photography, however, is a tilt-shift lens. These lenses let you fix a common problem when photographing architecture: the building appears to lean backwards. You definitely can correct this issue in post-processing, but you’ll lose sharpness and may not get a perfect correction. Take a look at the comparison below:
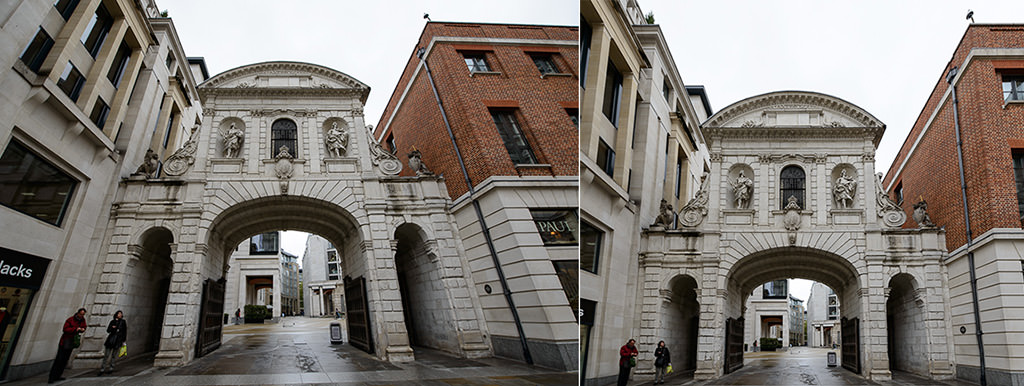
In this case, the photo on the left clearly looks tilted, while the photo on the right — although not perfect — appears much straighter. Tilt-shift lenses do this in-camera rather than in post-production, which leads to a sharper image and potentially a better correction.
Unfortunately, tilt-shift lenses are quite expensive. Nikon’s newest 19mm tilt-shift lens is $ 3400! Even used tilt-shifts can run in the $ 1500 to $ 2000 range, putting them out of budget for most photographers.
That’s why I don’t use a tilt-shift lens; I simply use the wide-angle lens I already own. Although I sometimes need to correct a photo’s perspective in post-processing, that’s a good enough solution in most situations.
If you have a wide-angle and a telephoto, that’s all you really need. Some photographers also like using mid-range lenses for architectural shots; it simply depends upon your personal preferences. For me, though, something like a 16-35mm works for indoor photography, and a telephoto like the 70-200mm works for cityscapes. You can’t go wrong with any kit that covers a similar range.
Cameras
For architectural photography, your camera isn’t hugely important. You don’t need a top-of-the-line focusing system to capture indoor scenes, and all modern cameras have enough pixels to capture lots of detail. Whatever you currently have should be enough.
There are a few features that are nice for architectural photography, though. If your camera has a tilting LCD screen, for example, you’ll be able to take photos of ceilings much more easily. The other nice feature is dynamic range. If you have a new camera with great dynamic range, you’ll be able to take photos without resorting to HDR or exposure blending in difficult situations (which, when there are windows in your photo, could happen somewhat often).
Finally, if you plan to shoot a lot of handheld architectural photos, your camera’s low-light performance is obviously important (as would be your lens’s vibration reduction). Hopefully, though, you will be able to use some form of camera support most of the time.
Overall, though — as mentioned above — you can take good landscape photos with any equipment. It’s much more important to find interesting buildings and good light. Use the best gear you can, of course, but don’t be discouraged if you’re missing an item or two.
2) Camera settings
It is important to use the right camera settings for any genre of photography, and architectural photography is no exception. In fact, with all the extreme variations of light that you may encounter, proper exposure here is arguably even more important than usual.
The main problem with architectural photography is the extreme brightness of window light. If you want details both inside and outside a window, you must resort to extreme recovery in post-processing, or, more often, blending multiple exposures together into one.
Of course, some buildings are much simpler. If you aren’t dealing with extreme differences in dynamic range, simply expose how you normally would. Set your camera to its base ISO (assuming you are on a tripod), use an aperture that gives the desired depth of field, and let your shutter speed fall wherever it gives you the proper exposure.
If you do need to work with multiple exposures, you’ll need to bracket your photos. Keep your ISO and aperture the same for each shot, but use a range of different shutter speeds — one that exposes the window properly, one that exposes the interior of the building, and as many as you need in between (separating each photo by 2/3 or one full stop of light).
Finally, a plea: more than any other genre of photography, people abuse HDR without limits for architectural images. If you do combine multiple exposures together, try not to cross over into Candy Land colors. I always work my hardest to make an image look completely natural, even when multiple exposures are combined into one. (Lightroom’s new HDR feature is one of the best available if you are trying to maintain a sense of reality.)
3) Working with the light
Photography is light — it’s as simple as that. When you’re taking architectural photos, the best way to get a good image is to make the most of the light in your scene.
Indoors, this means that you should photograph a scene with light that complements the building’s design. In modern buildings, the architect likely put a lot of effort into the shape and appearance of the light, and you won’t have any major problems. Older buildings might not work as well, but, as always, it depends upon the place. For example, some of the best light you’ll ever find is in centuries-old churches and cathedrals lit entirely by large windows.
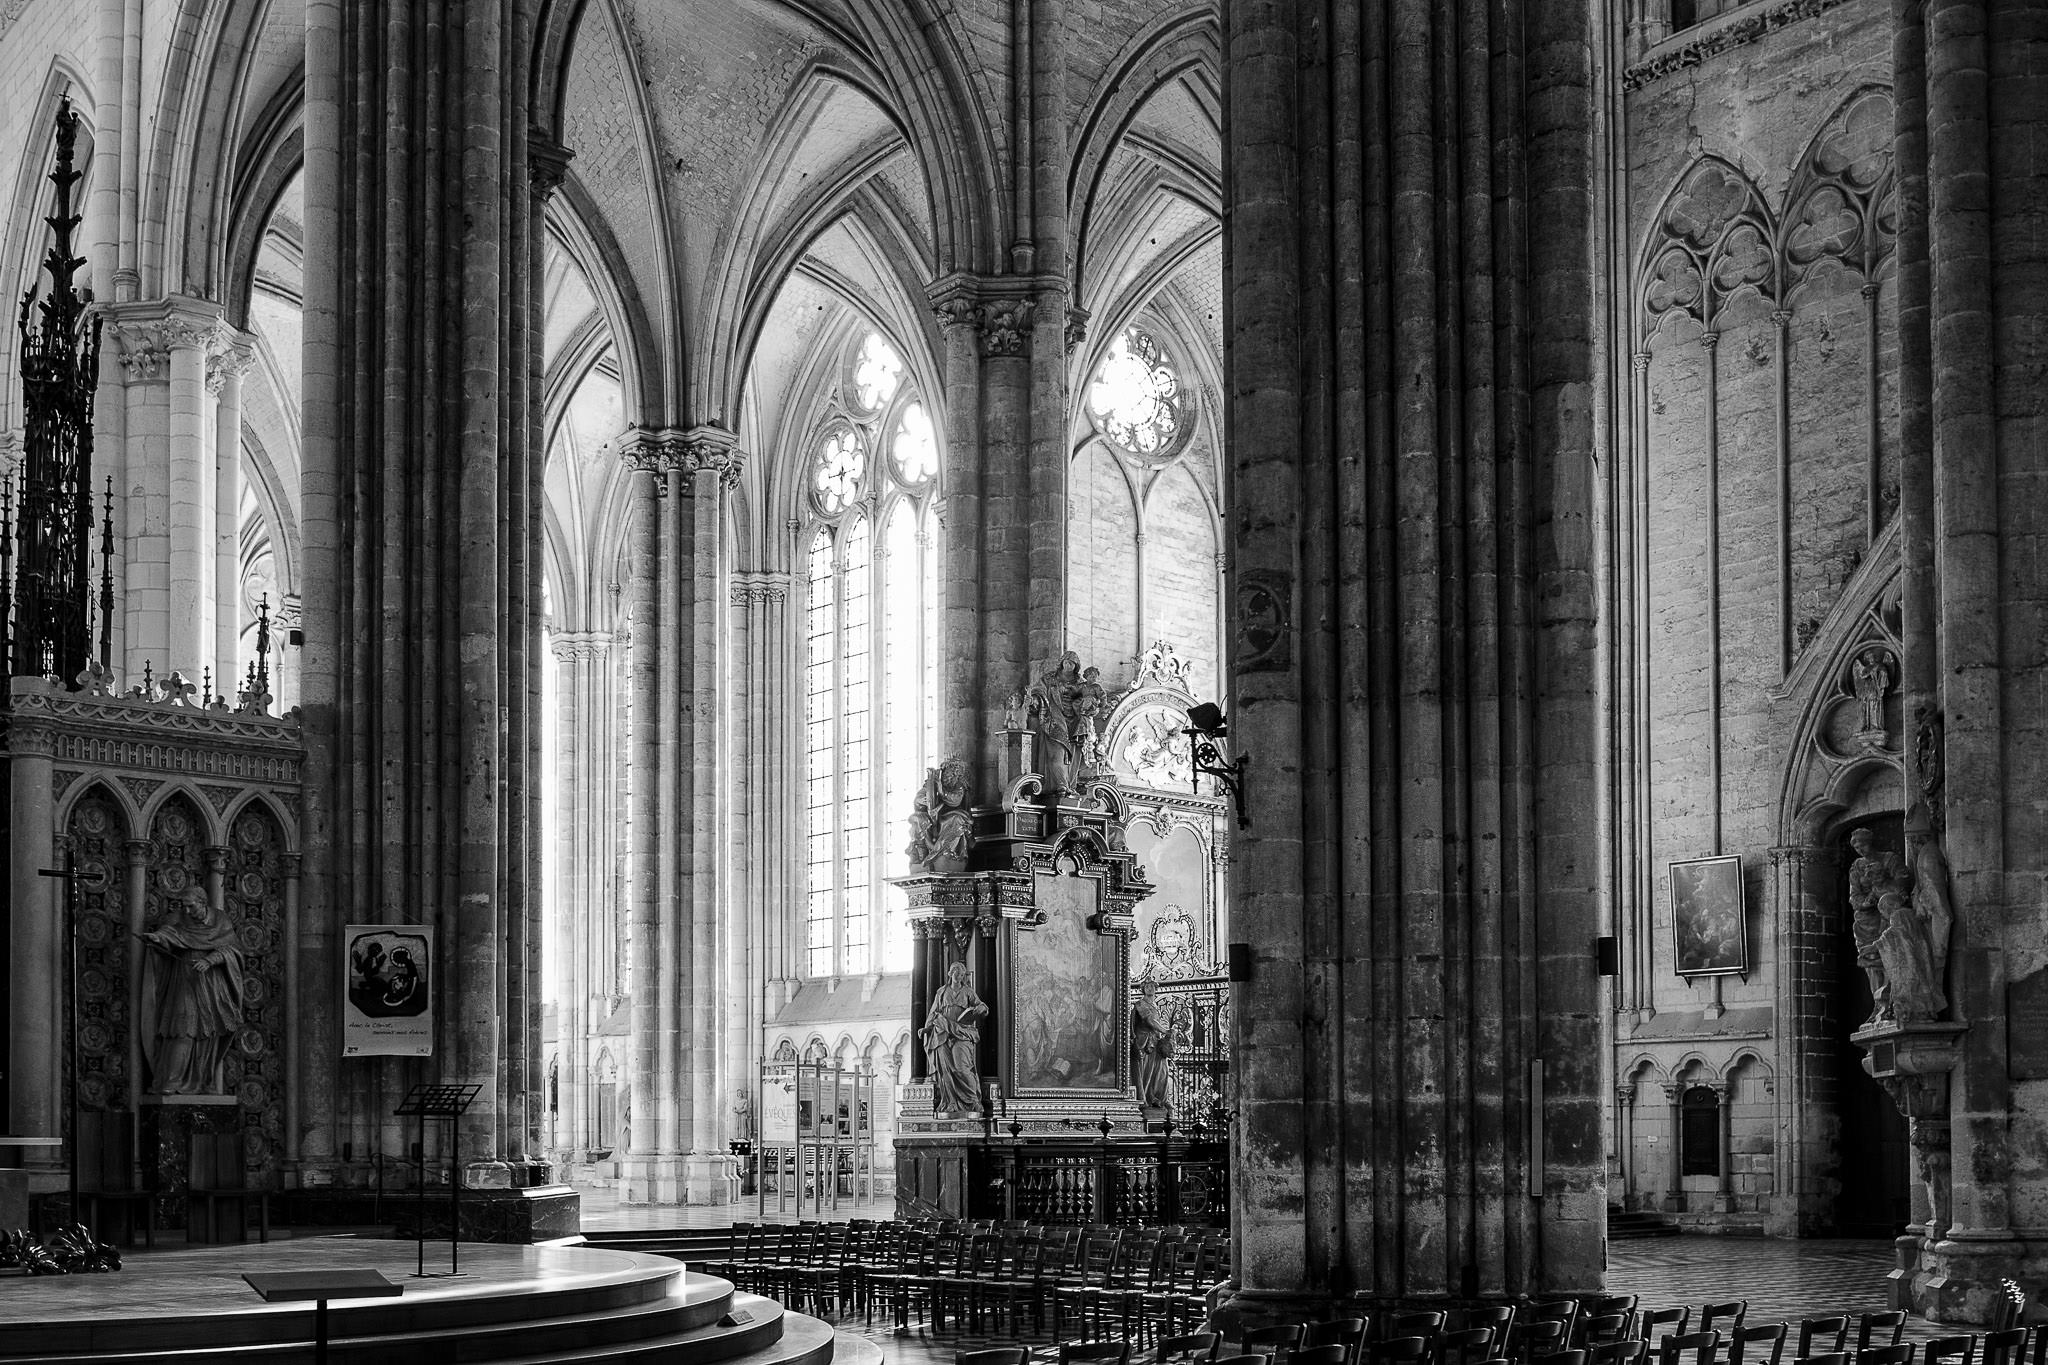
NIKON D7000 + 24mm f/1.4 @ 24mm, ISO 200, 1/80, f/2.5
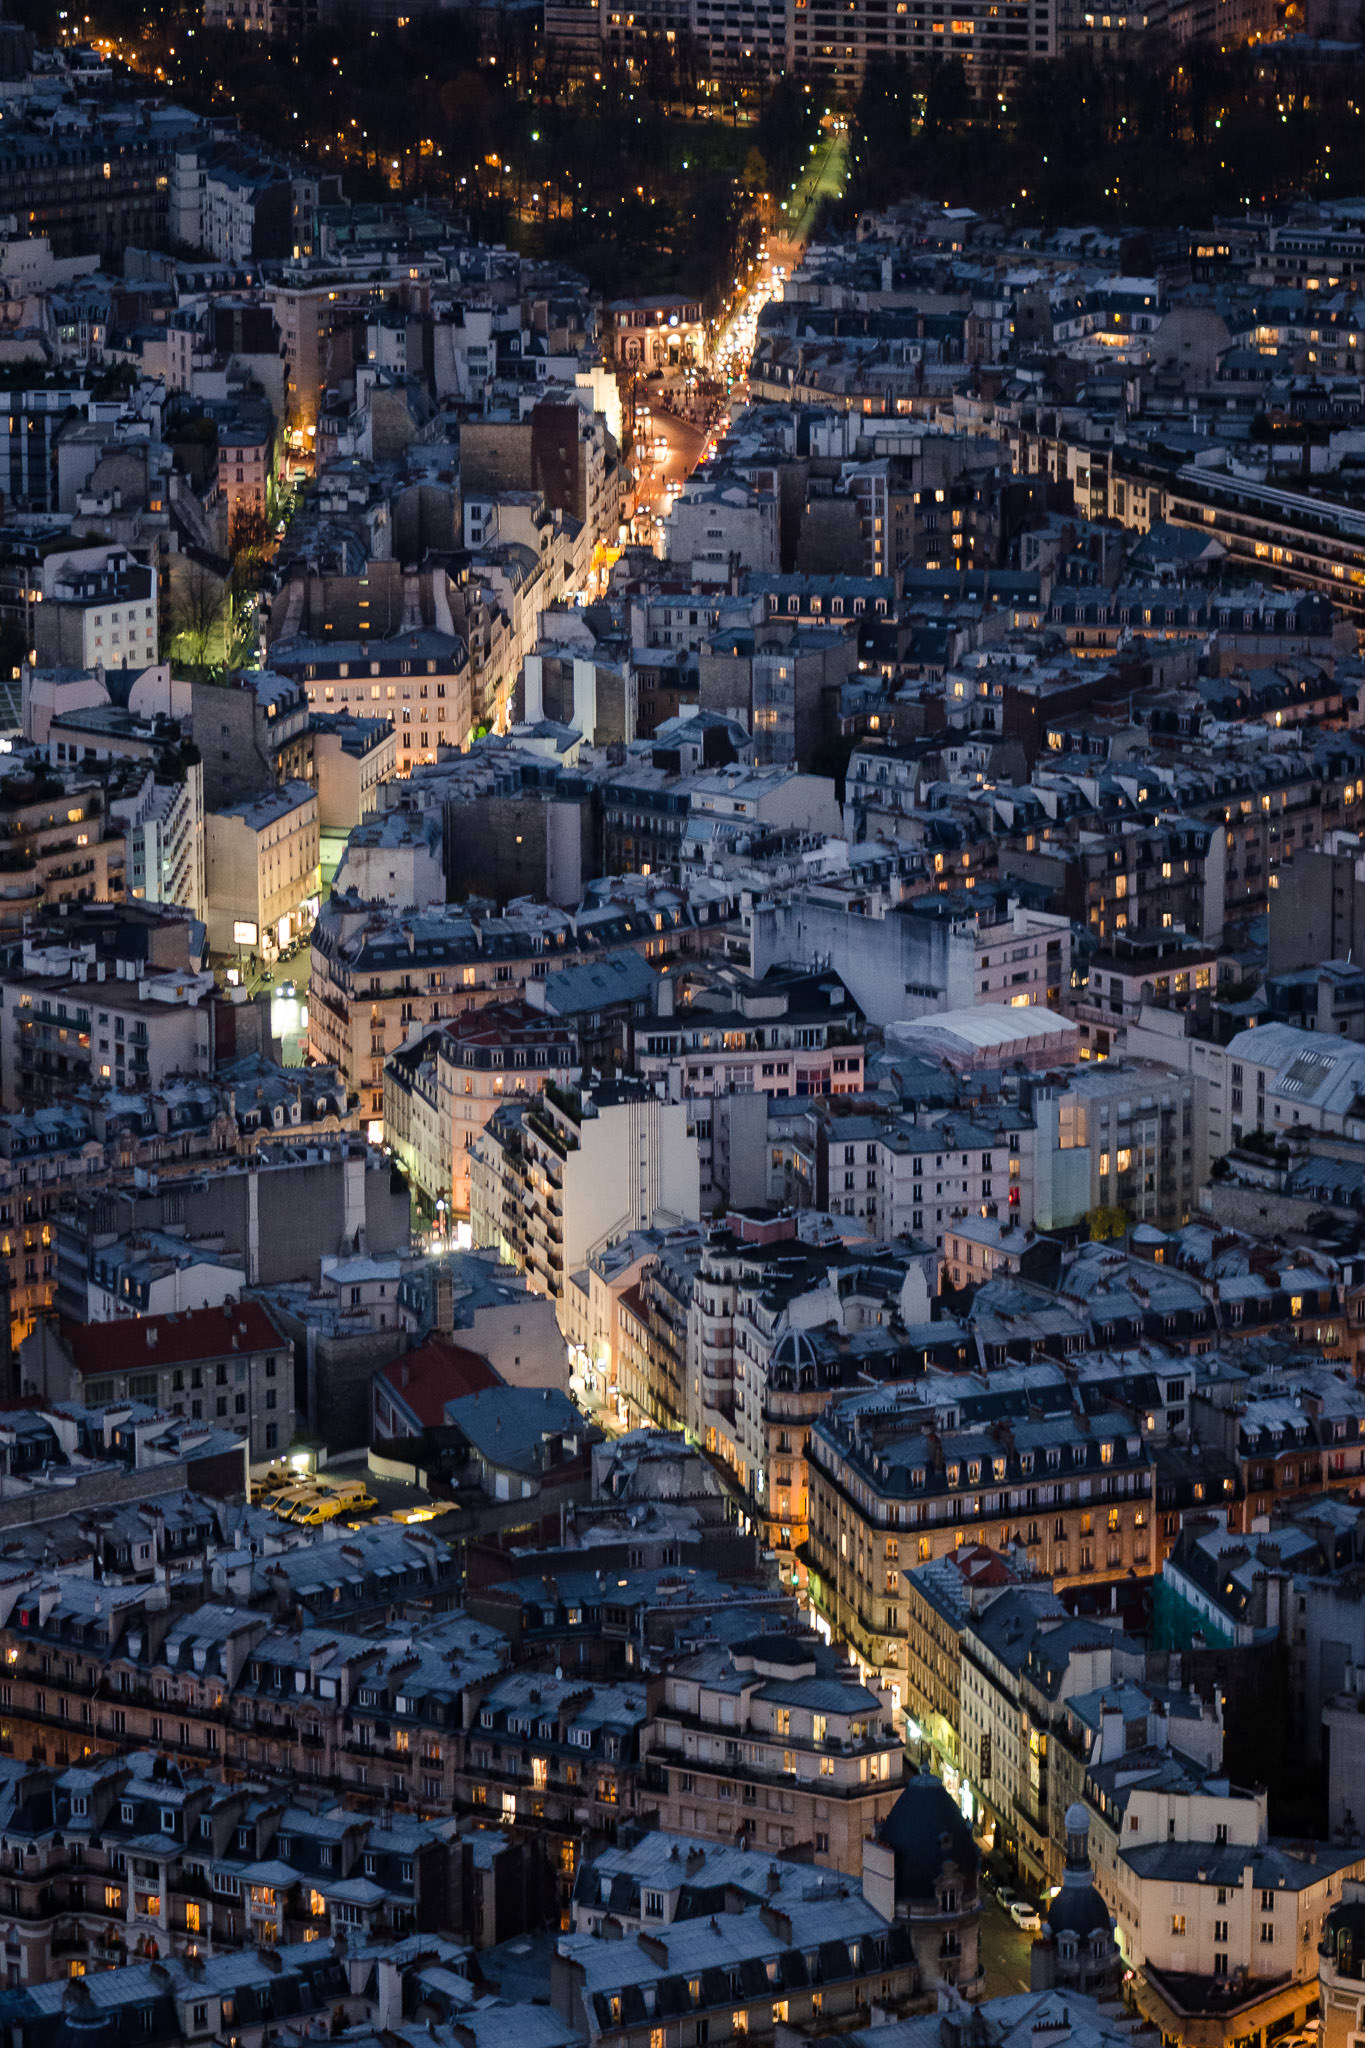
For outdoor architectural photography, everything is about the interaction between the sun and the building’s own lights. After sunset, for example, the dark sky and bright orange lights can complement each other beautifully, leading to fantastic images. This is one of my favorite times to take cityscape photos.

NIKON D7000 + 24mm f/1.4 @ 24mm, ISO 360, 1/50, f/1.4
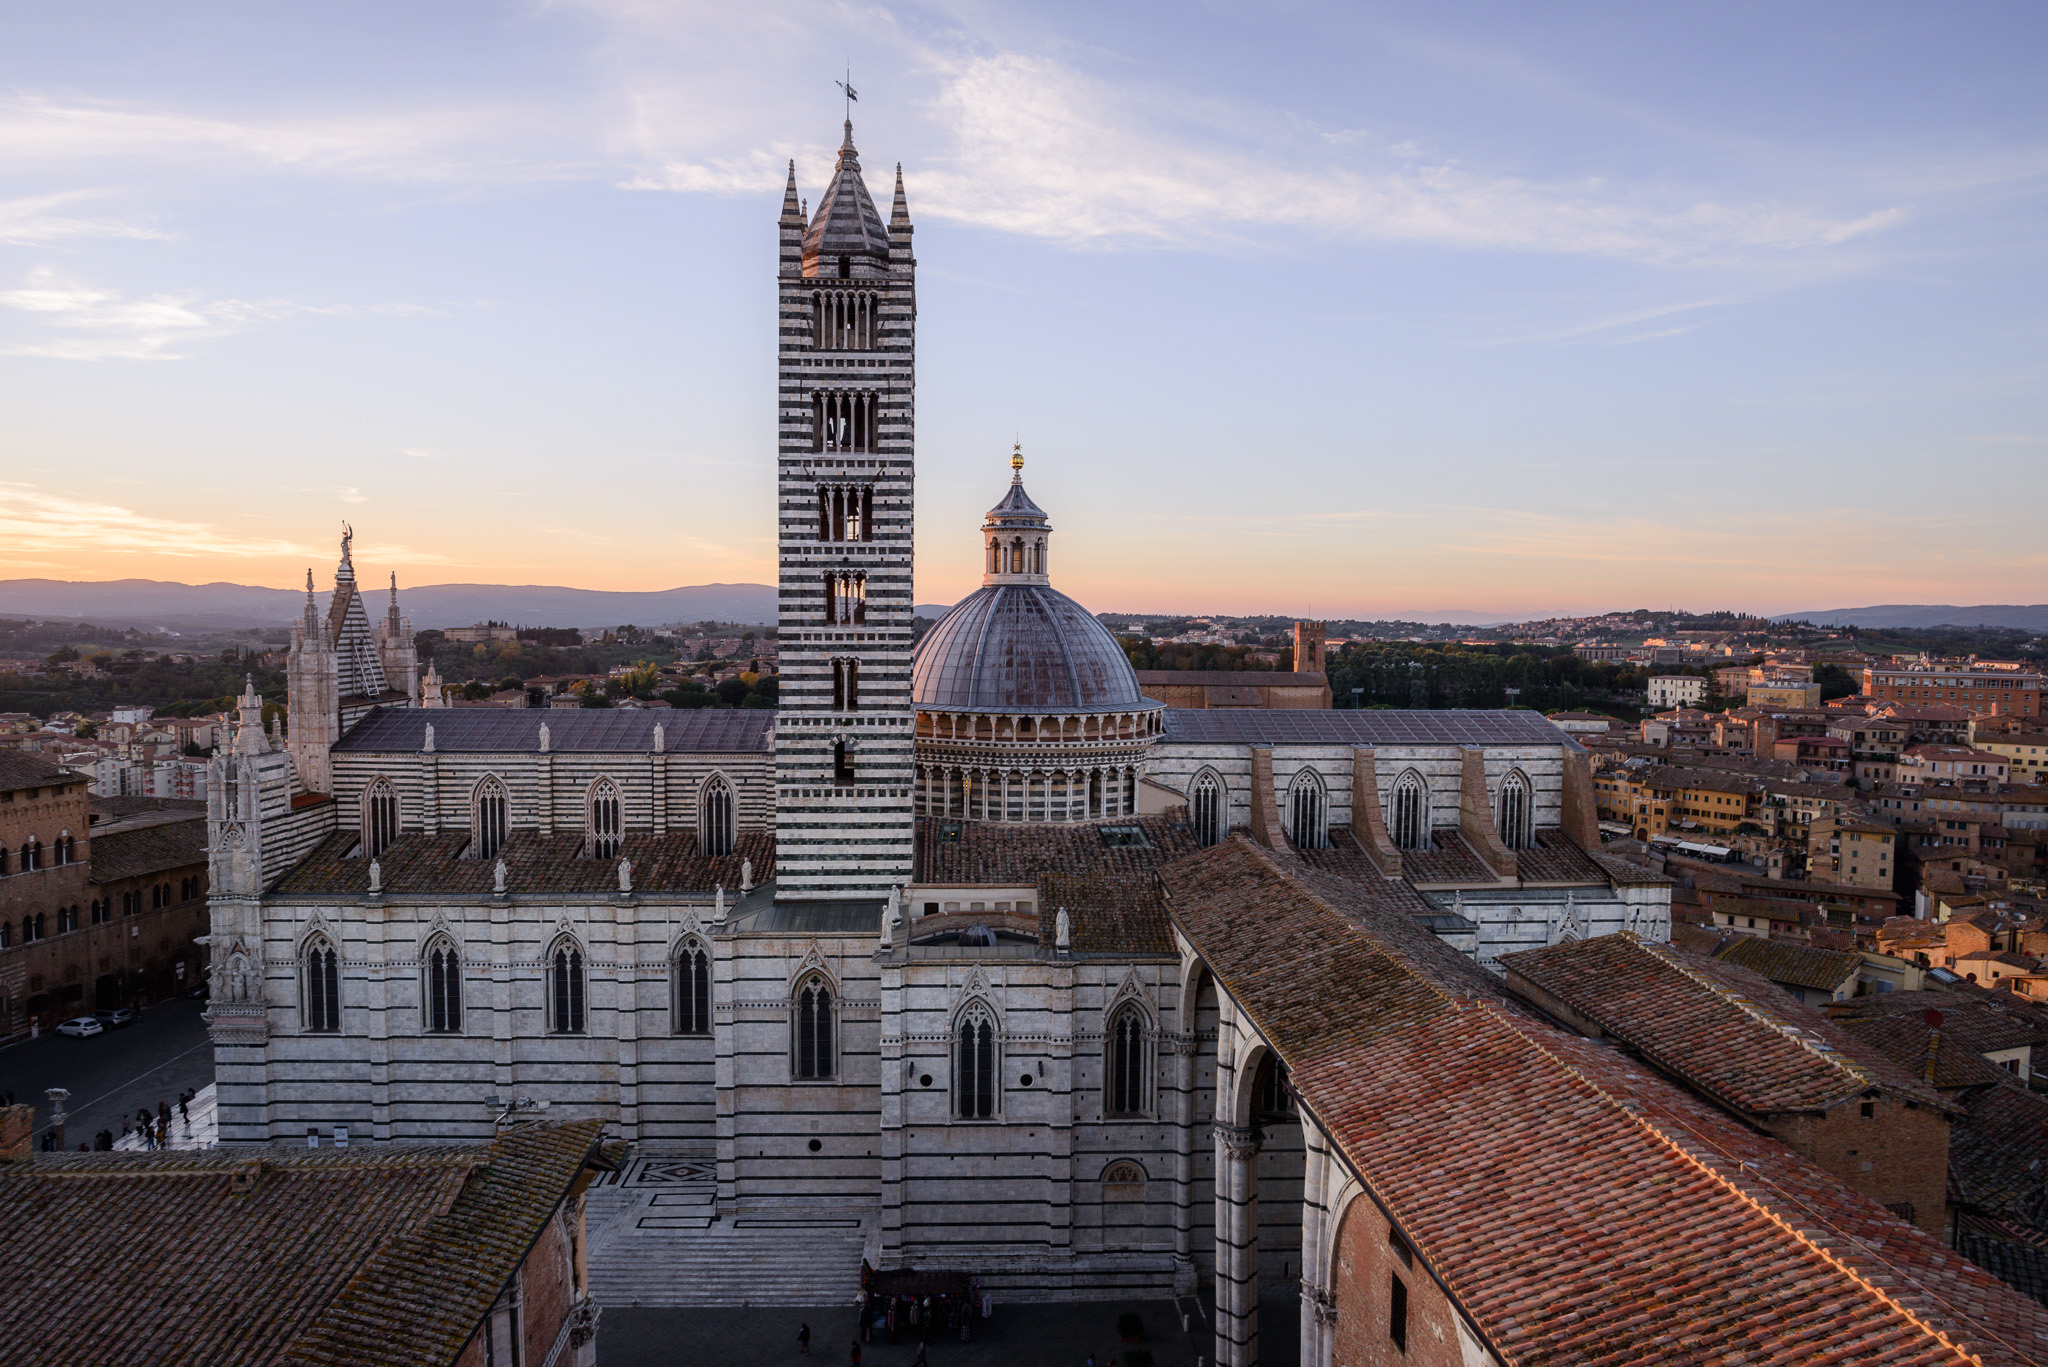
Other times, you may be photographing a building that doesn’t have any built-in external lights. In that case, just like normal landscape photography, the sun is all that matters. Try photographing buildings like this at sunset or sunrise — the times of day with the most unusual light and colors in the sky.

NIKON D800E + 20mm f/1.8 @ 20mm, ISO 100, 1/60, f/8.0
Finally, remember that architectural photography is all about geometry. Make the most of lines, shapes, and symmetry — very few genres of photography let you work with such perfect forms and patterns. In fact, a lot of architectural photography ends up looking abstract, which I think is fantastic. If you find an interesting detail in a building, even if it is difficult to put into context, you could end up with some great images.
4) Getting rid of people
If you’re photographing a popular building, chances are good that people will end up in your photo. Sometimes, there’s nothing wrong with this. In fact, I have seen several great images that feature a person inside a grand work of architecture, putting the entire image into scale and providing a center of interest. Other times, though, you’ll want your architectural photos to include nothing but architecture, and that’s also valid.
The simplest way to remove people in your photo, assuming that they are relatively small and unobtrusive, is just to clone them out in Photoshop. However, not everyone likes using Photoshop to change the way a scene appeared, and other photos simply don’t work well for this type of manipulation — the people in your photo may cover important details that Photoshop cannot successfully bring back.
For that reason, a lot of architectural photographers like to own neutral density filters. These filters are simply dark sheets of glass, not tinted any color, that force your camera to use longer shutter speeds than normal. This doesn’t sound like a great solution, but it actually works quite well. If your neutral density filter lets you take a 30 second exposure, anything moving in the image will appear completely invisible! So, all the people in your scene will be blurred our of existence, assuming that they don’t sit or stand still during most of the exposure.
Finally, if you don’t have a neutral-density filter, you can simulate its effects by taking multiple photos from the same position, waiting a few minutes from shot to shot. Then, open the resulting images as layers in Photoshop. For every person in the frame, simply erase or mask them out, revealing the layers below (where, since they were taken a few minutes later, any people have moved out of the way).
None of these solutions is perfect, but you need to do something if there are people blocking important parts of your photo. For architectural photography more than any other genre, you’ll want to keep these tools in mind.
5) Conclusion
Architectural photography is a tremendous amount of fun, and it’s something you will be able to practice in nearly every city that you visit. If you live in a city, consider taking some architectural photos of nearby buildings — it’s a great way to keep your photographic eye in practice.
Architectural photography works best if you are interested in the basics: lines, patterns, and light. It’s also a fantastic genre if you enjoy abstract photography, since many buildings are patterned in ways that seem very unusual when taken out of context.
With all these positives, it’s no wonder that architectural photography is so popular. Hopefully, the tips in this article will help you make the most of your next shoot. Feel free to leave a comment below if you have any questions.
NIKON D800E + 20mm f/1.8 @ 20mm, ISO 160, 1/50, f/9.0
The post Architectural Photography Tutorial appeared first on Photography Life.


