
Most of you are probably already familiar with the different tools that are available to use while editing your images in post-processing software. I’m referring to the various brushes and filters that can be found in Lightroom, Capture One Pro and other similar programs. Well, did you know that in addition to using these tools to adjust things like exposure and saturation, you can also use them to add a bit of color to your images? In this post I’ll show you a few of my favorite ways to use these tools along with some subtle additions of color, which will make your image editing a bit more colorful. Keep in mind… I’m a Lightroom user, so I can’t promise that these techniques are available in all post-processing software.
Adding Color To Your Tool Effects
In Lightroom, it’s very easy to add a bit of color to the tools that you’re already using. I’ve talked with photographers who never even noticed that there’s an option to add color while editing a tool’s effect. In Lightroom, this works for all of the tools that use effects, including the Graduated Filter, Radial Filter and Adjustment Brush.
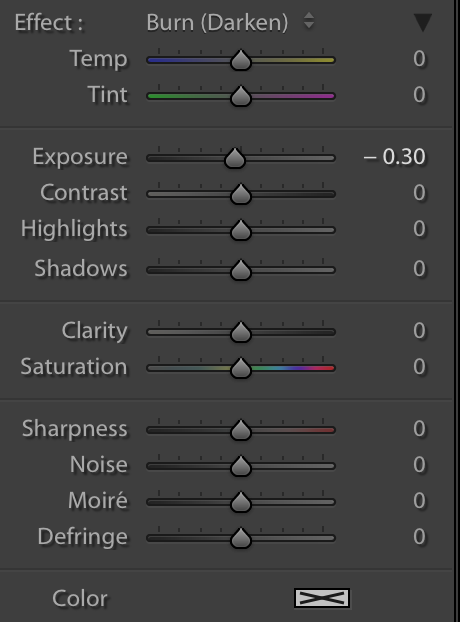
To add or adjust color, click on the grey box with an “X” on it next to the word “Color”. A color picker will pop up.
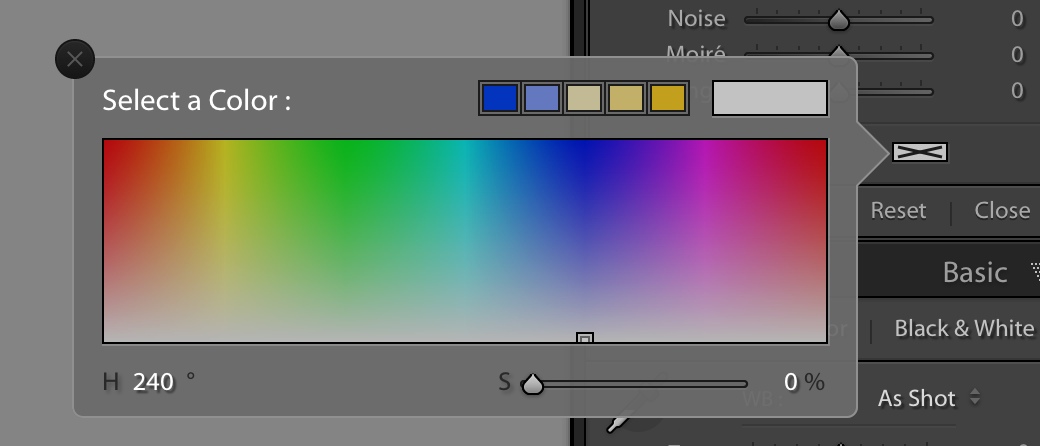
From here, you can manually choose a color by clicking anywhere in the box. You can also manually set a hue and saturation by entering numbers in the “H” and “S” values at the bottom of the box. Finally, you can use the eyedropper tool to sample a color that’s already in the image by clicking inside of the color picker box and dragging the eyedropper onto the area of the image that you you want to sample.
Enhancing Colors That Are Already There
One of my favorite ways to use color in my images is to enhance colors that are already there. When would you want to do this? I typically do this to foliage that I want to make look a little more lush, but you could just as easily use this technique on a blue sky or even on warm sunlight.
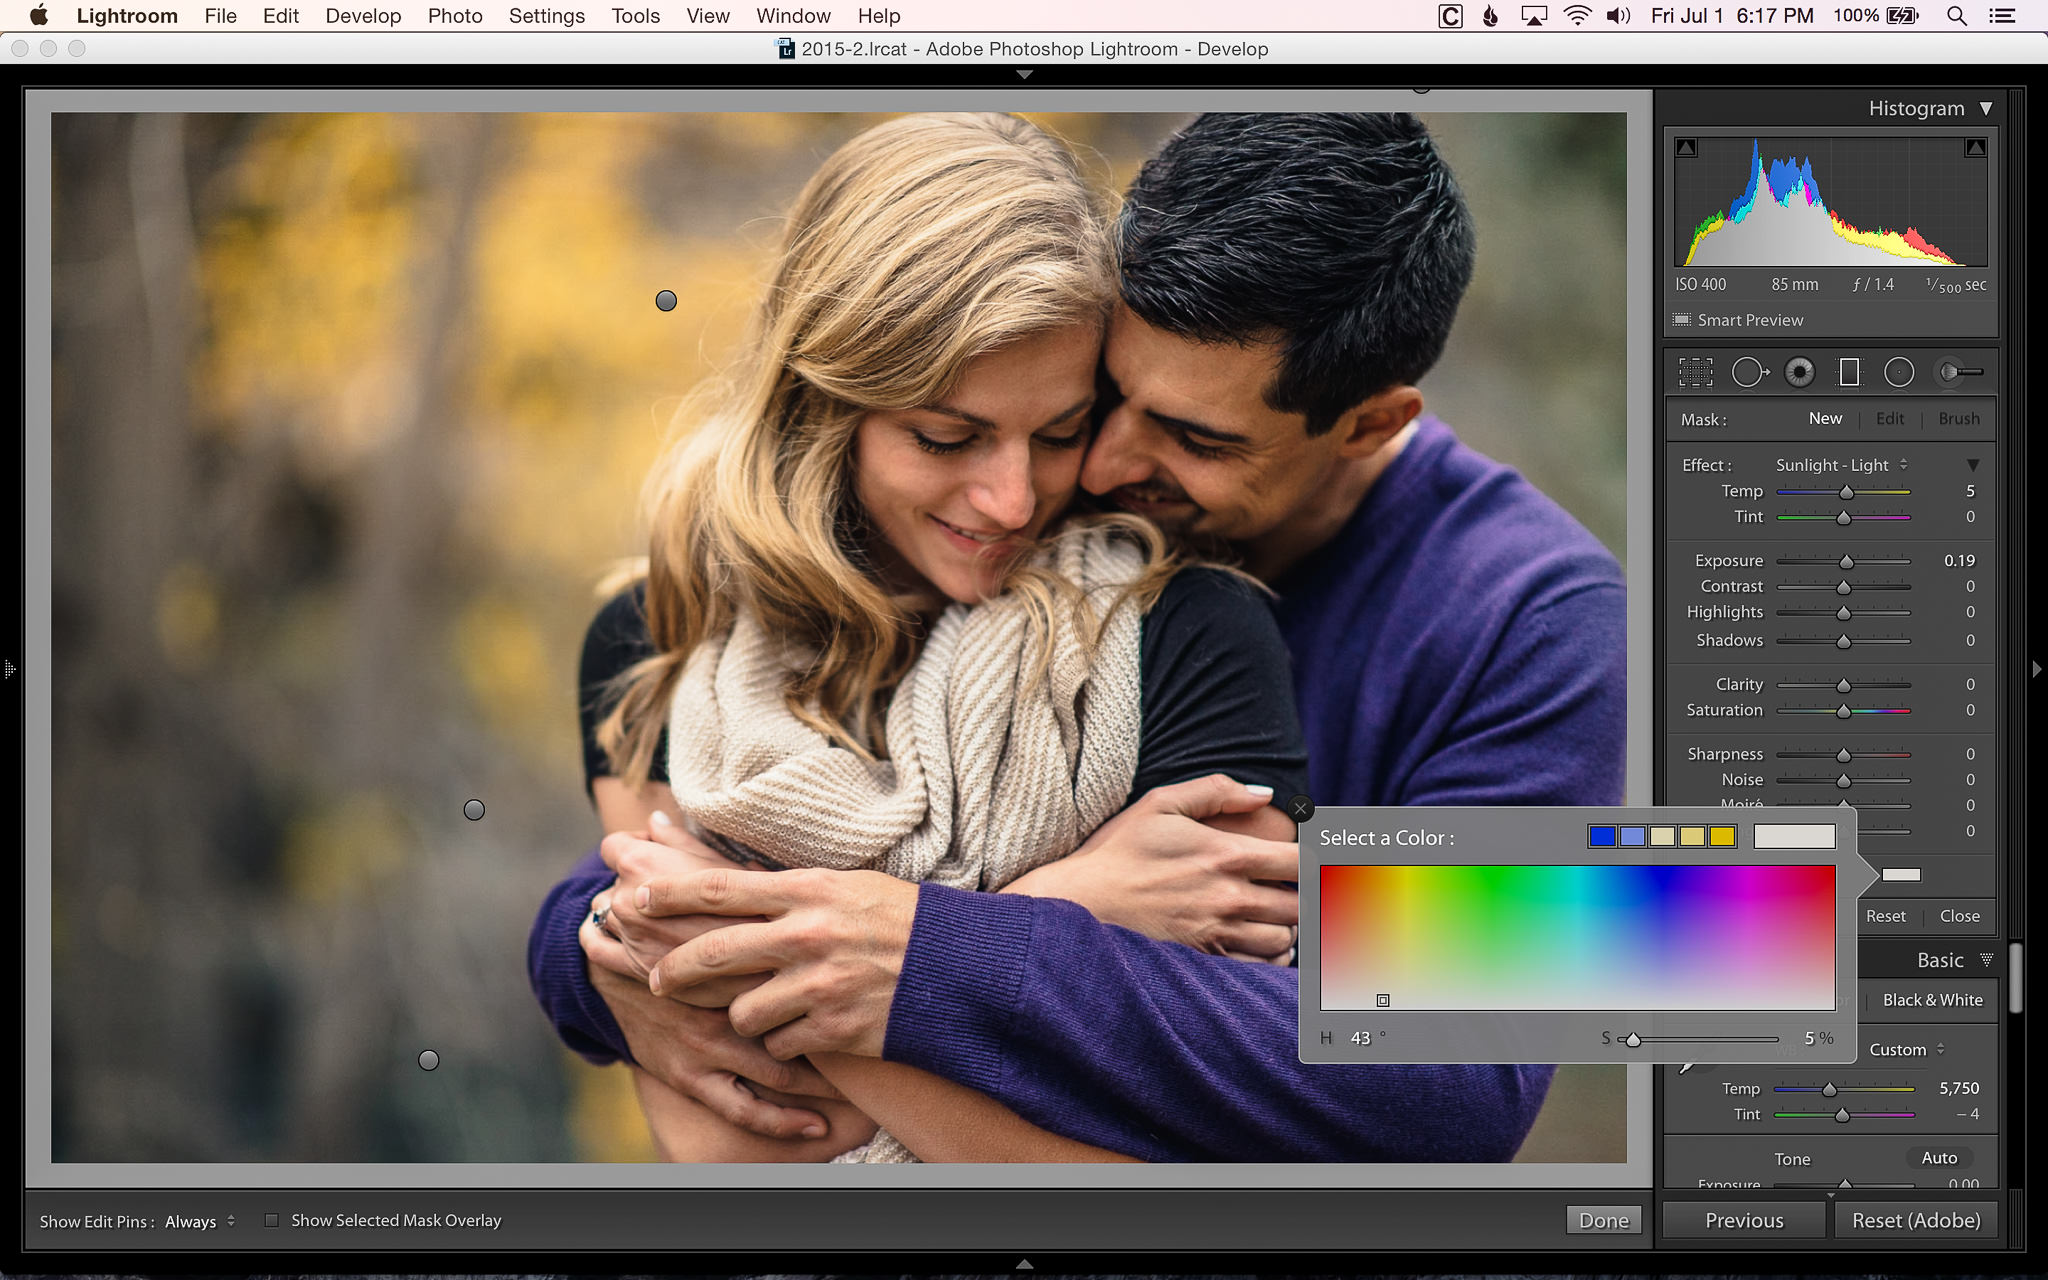
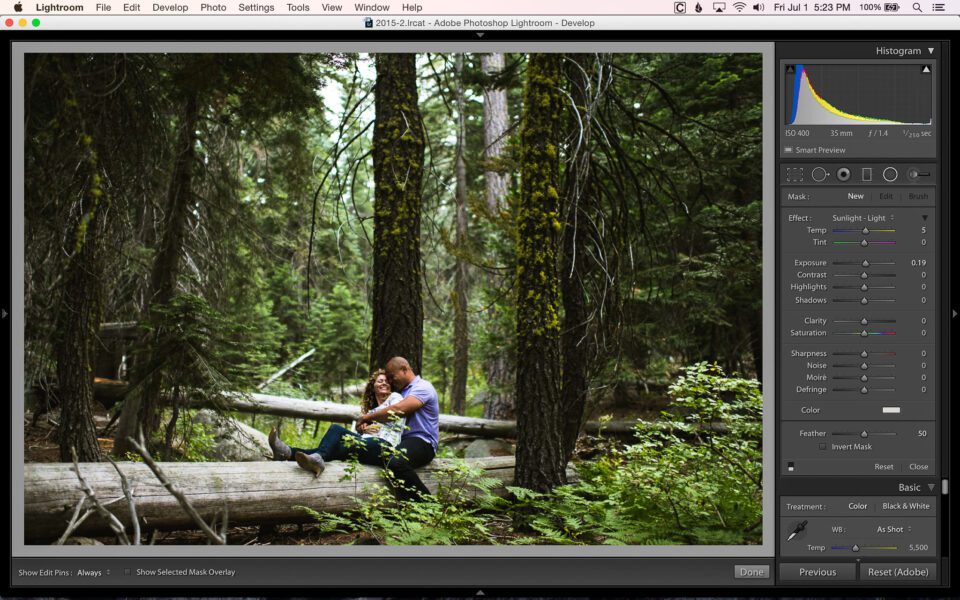
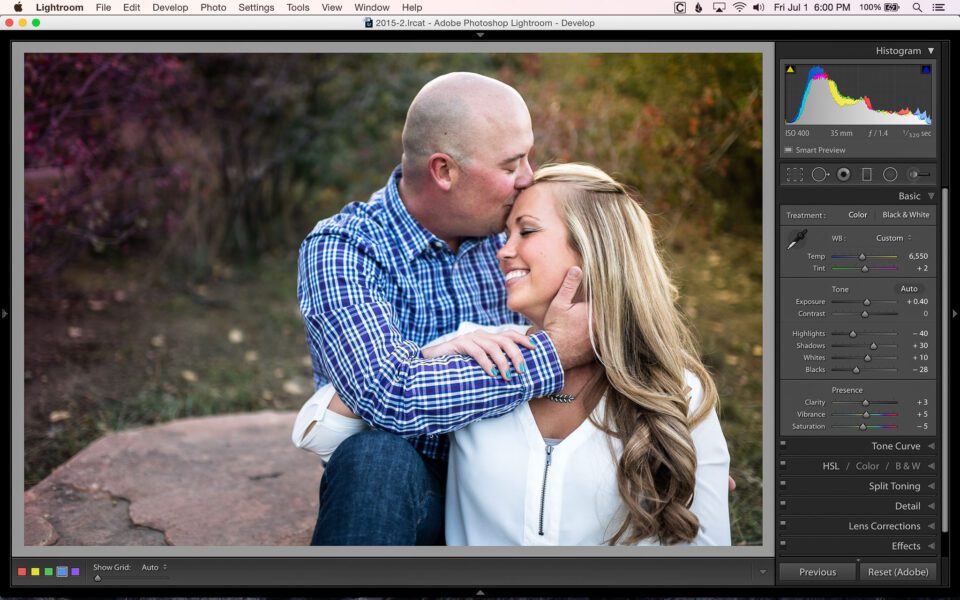
Take this image for example. As it is, it doesn’t look too bad, but I thought it needed a bit more color and that the focus needed to be shifted a bit more to the couple. Can you tell what was done?
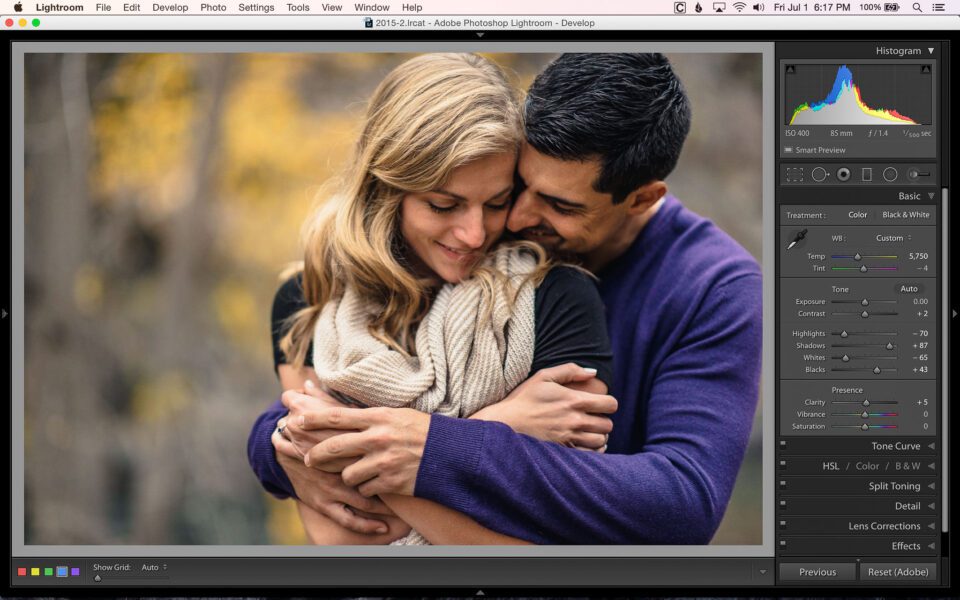
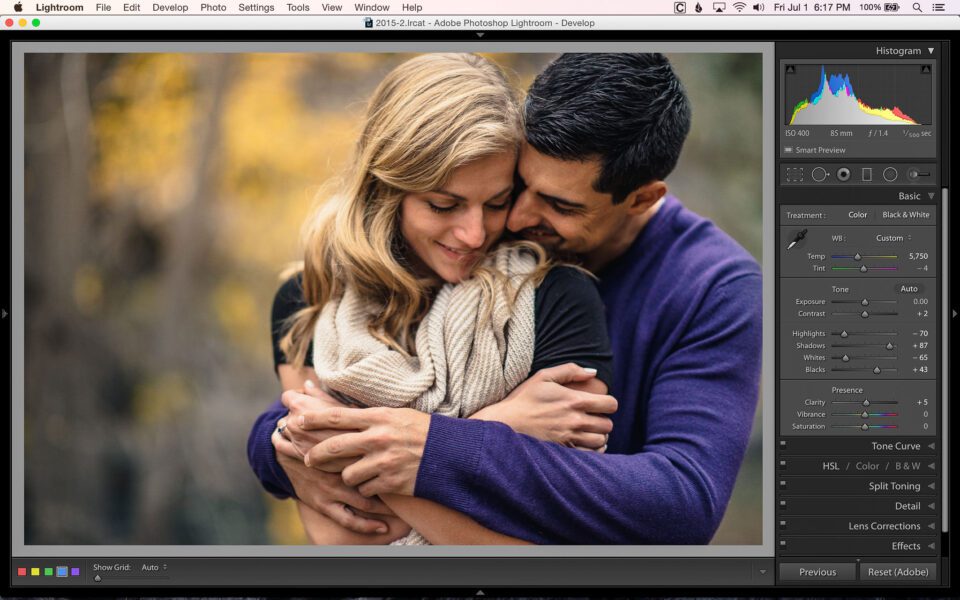
To start, I added two graduated filters to darken the lower-left corner of the image. I find I prefer to add a few smaller filters (especially when burning) that are staggered instead of one strong filter. This allows me to stagger the effect a bit more than I can with only one filter. Once that was done it was time to add a bit of color. On the upper-left corner of the image I added a graduated filter increased the exposure just a bit, as well as a slight warming of color temperature and a touch of yellow color. On the upper-right corner of the image, I reduced the exposure just a bit and added a touch of green. Here’s the image of the different pins for the graduated filters, as well as the settings for my “Sunlight-Light” preset that was used in the upper-left of the image.
Adding Colors To Enhance The Scene
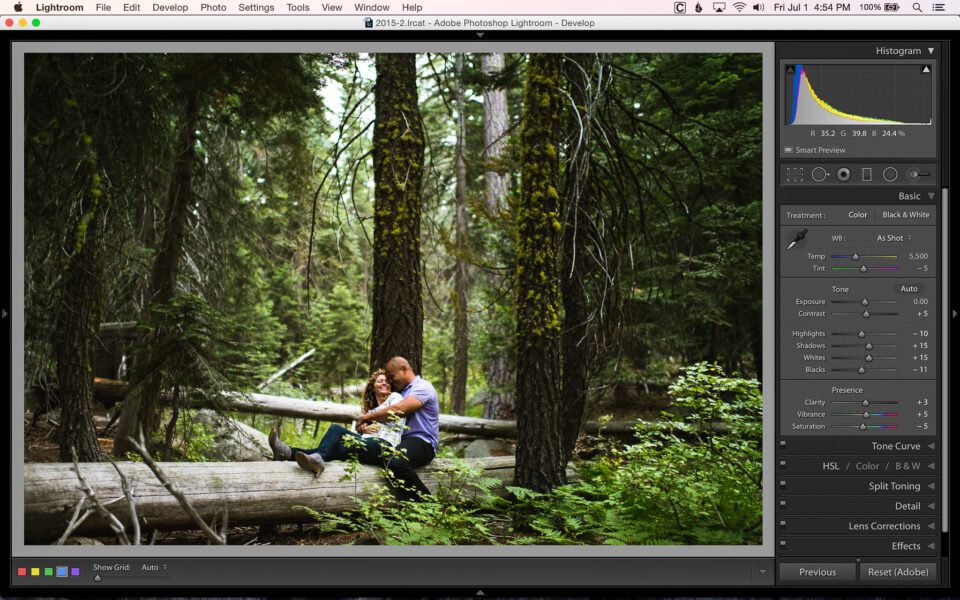
You can also add colors to a scene in order to enhance what is already there. You might remember this image from our How Was This Picture Made series. Take a look at the before and after and then I’ll explain what I did and why.
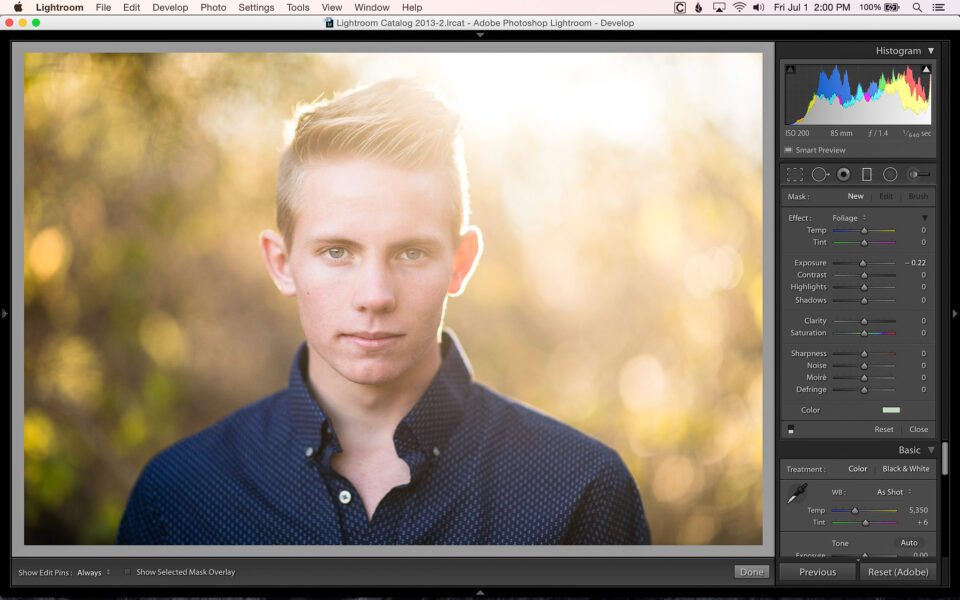
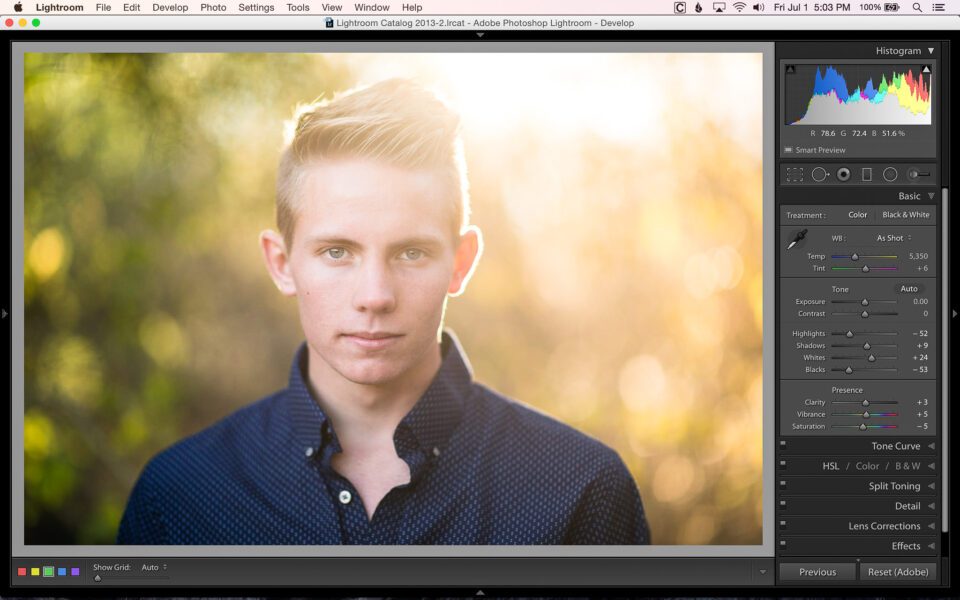
You should be able to tell that I added some green to the left side of the image and some warm, red color to the right side of the image. Again, this was done because I felt that the original image was a little flat and that adding a bit of color would really make my subject stand out. The green on the left essentially mimics the trees that are behind him (which lost most of their color due to the flare), while the red/yellow on the right enhances the flare of the sun bursting through the trees.
Using Colors With The Adjustment Brush And Radial Filter
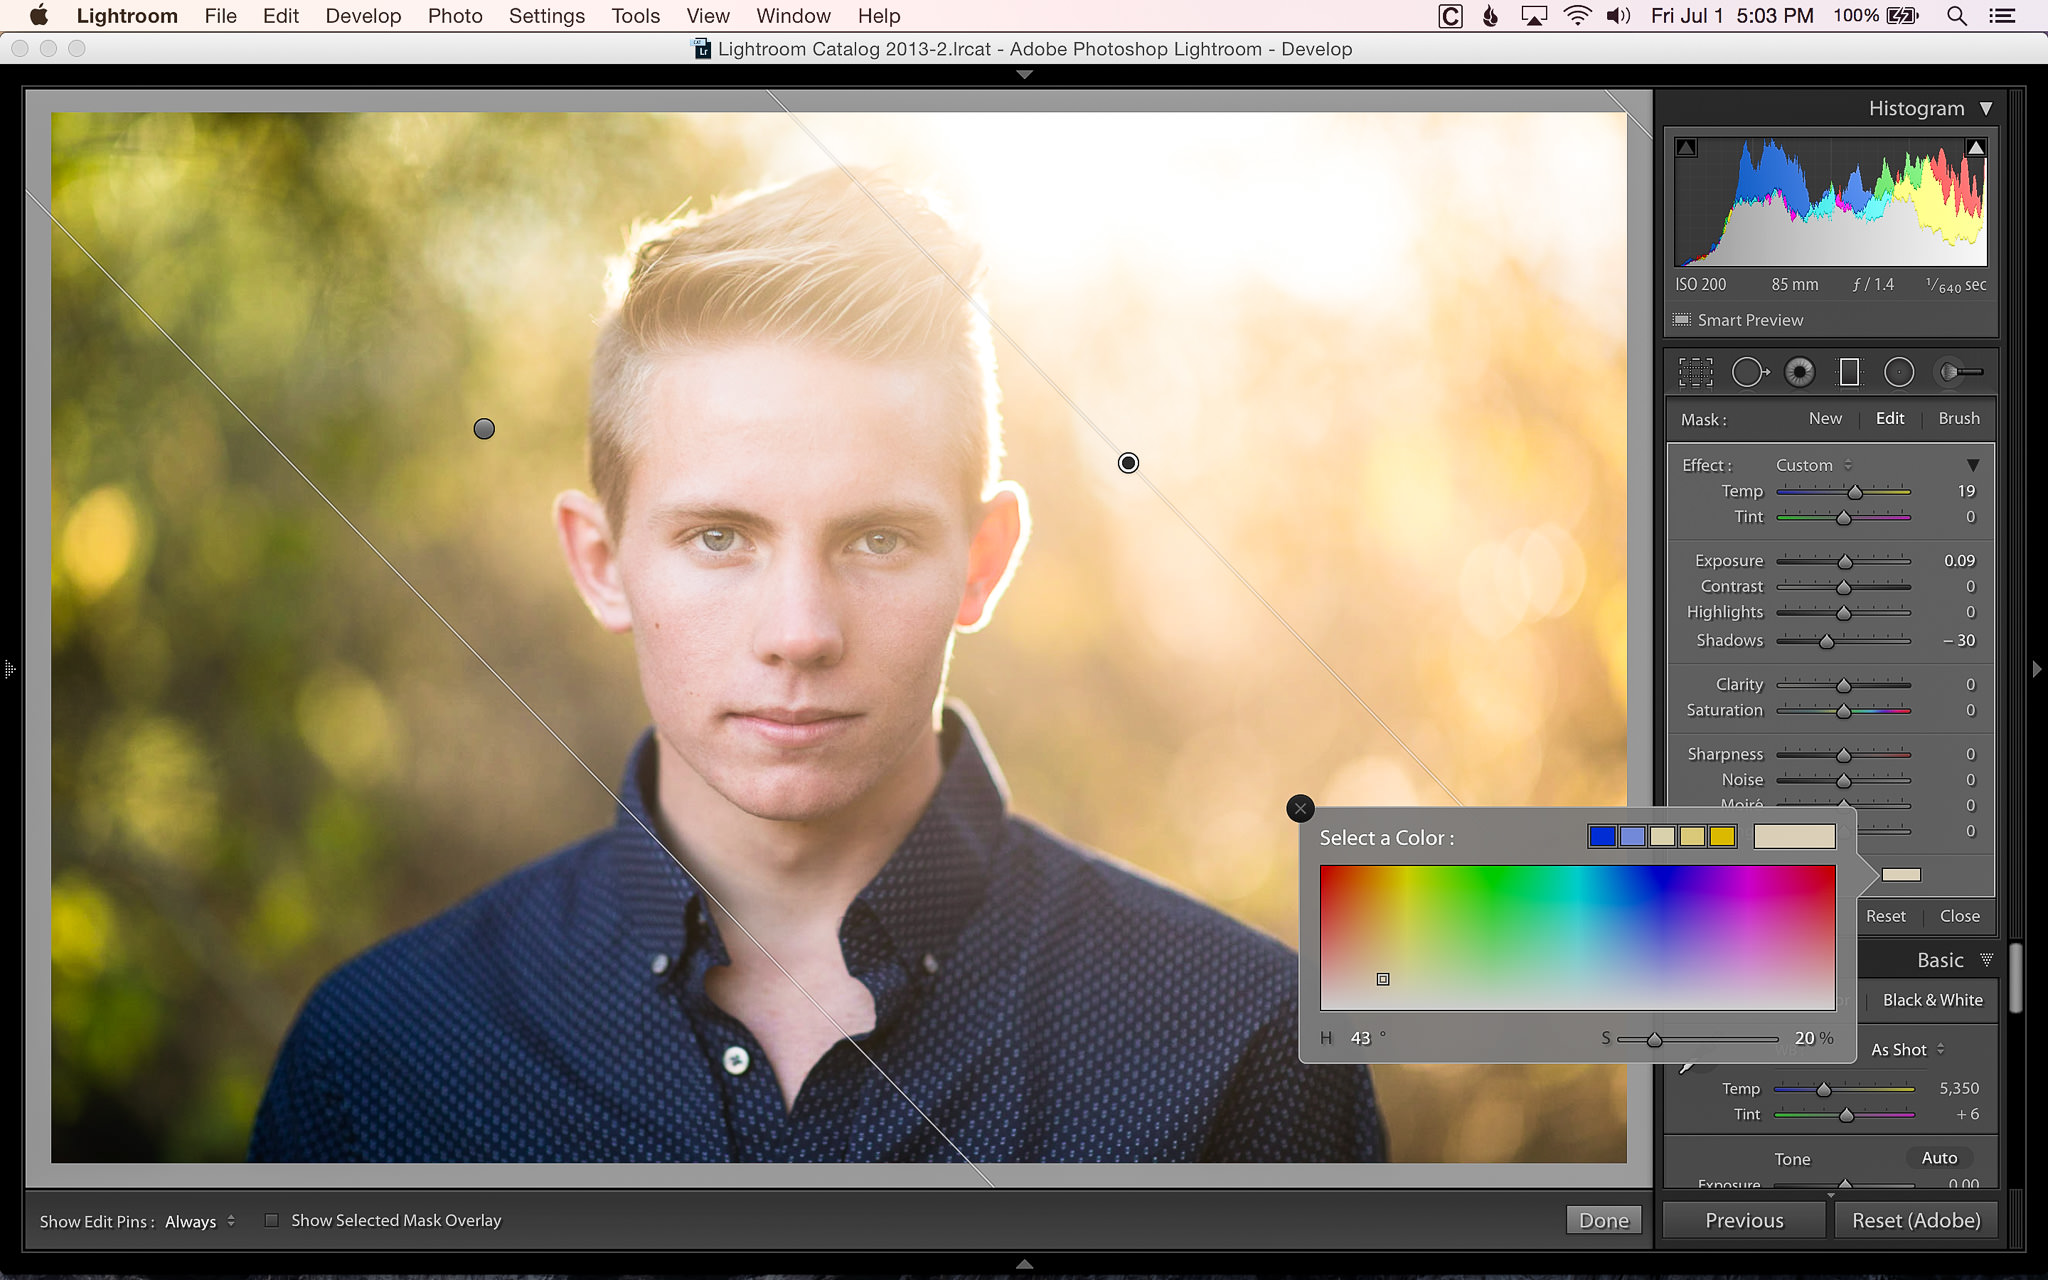
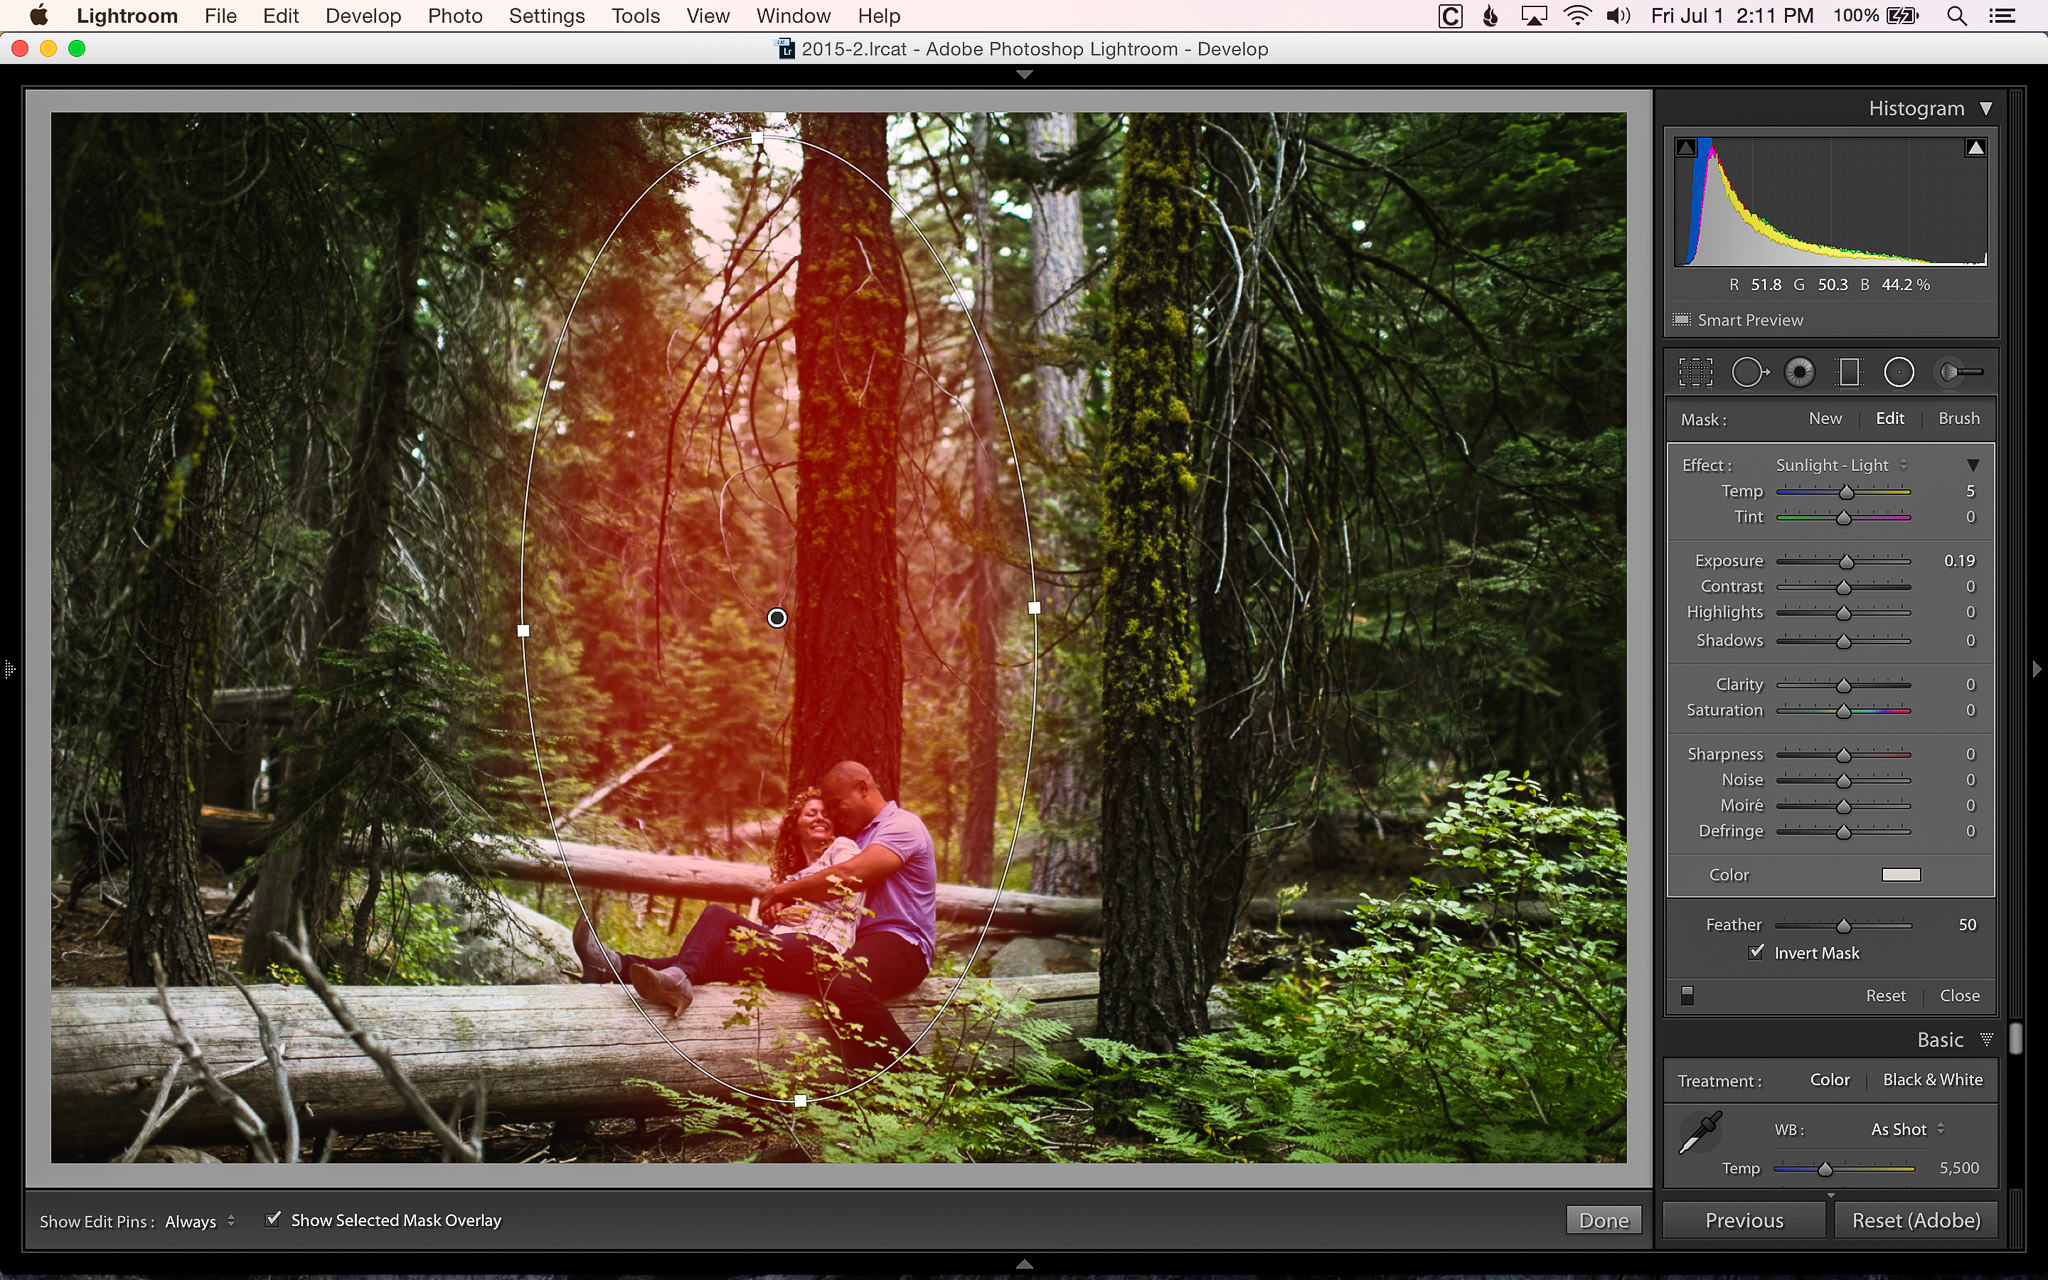
Don’t feel like you’re limited to only using the graduated filter to add color to an image. You can add color with the adjustment brush and radial filter as well. Here’s an image where I used both the graduated filter and radial filter to add color. Can you tell what was done?
By now, you could probably tell that I used a graduated filter to both darken and enhance the greens in the image. I also used the radial filter to add a nice, warm patch of light coming down on my subjects. To do this, I chose the same “Sunlight-Light” preset that I used in the first image. I first inverted the mask so that the effect would apply to the area inside of the filter and not the entire image. Then I added the filter so that the “light” just washed over them, imitating the effect of some nice, warm light spilling through the trees. I could have just as easily used the adjustment brush to do this and had a similar result.
Things To Watch Out For When Adding Colors
Once you start using this technique, you’ll find it hard to stop, but don’t get too carried away! For example, when adding color into a scene, you’ll want to be careful about “spill”. In this image, I made sure to erase the green and red off of my subject using the erase brush in the Graduated Filter tool. Here you can see the mask for the green graduated filter. If I hadn’t erased a portion of it, it would have gone across his face, tinting it green.

Another thing you’ll want to be careful of is using too much color. The point of adding color is to enhance the image. Adding too much color, or the wrong color, can easily detract from the image. In this image, the before is my original edit, with just enough green and “sunlight” to improve the look of the image. The after has an over-saturated sunlight effect on the right and the red on the left doesn’t really work with the image, even though the bush on the left does have a bit of red in it.
Happy Editing!
I hope that you’ve found this introduction to adding color to your images informational and helpful. Once I realized that this was possible, I found myself using it in on many images from every session. Regardless of what type of photography you do, hopefully you’ll be able to use these techniques and add a splash of color to your images as well!
If you found this helpful, it’s only one of many tips and techniques that you’ll find in our upcoming video, PL Level 1: Workflow and Post Processing Basics. Keep an eye out for an early-July release date!
The post Adding A Splash Of Color With Your Post-Processing Tools appeared first on Photography Life.


