
Yellowstone National Park. That is really all one needs to say to get the message across. What could very well be the most photographed National Park in the world needs no introductions. Yellowstone harbors all of the elements that make the “West” of the United States such a compelling area for photographers. It’s combination of landscapes, geothermal activity and wildlife is a photographers dream. And yet, for a place with so many splendors, you would think I would not get so many questions on how and when to photograph massive park.
For all it’s many wonders, Yellowstone happens to actually be a difficult place to capture properly, especially if one is to do so in a unique non kitsch way. The geothermal landscapes are restricted by boardwalks. The lighting is often harsh. You are often taking a photo with a hundred other people that are taking the exact same picture. And let’s face it, Yellowstone has been photographically chewed over and over again, making it a unique challenge to create something new. In this article, I will try to highlight how I personally attack the challenge of photographing Yellowstone National Park, and I will do so in a sort of one day itinerary in the hopes of answering some of the many questions that I get asked so often.
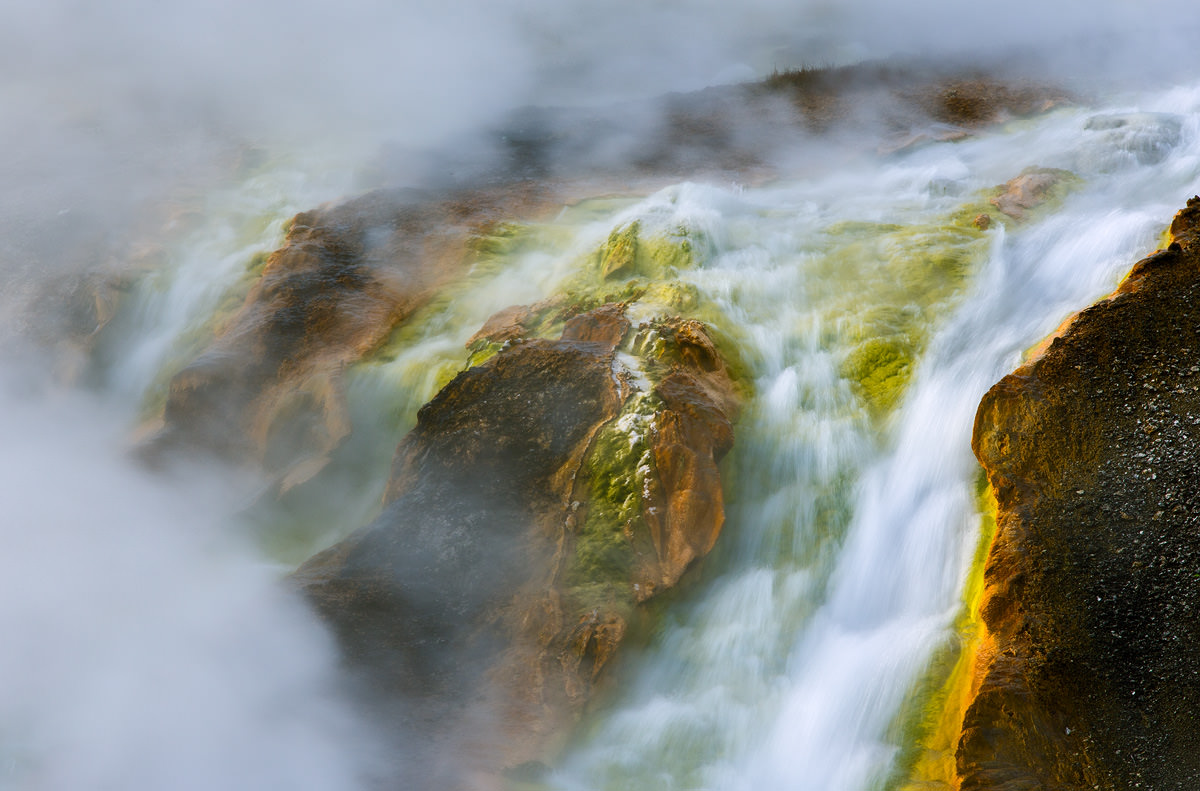
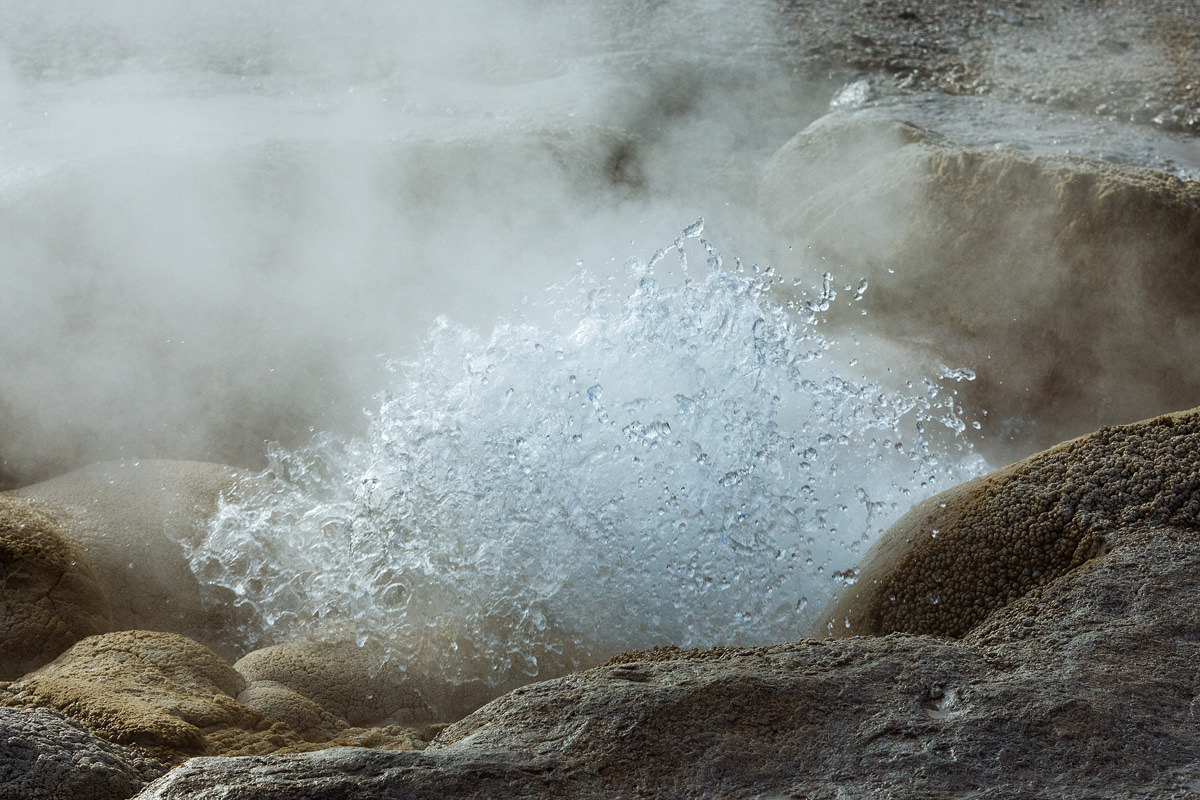
Canon EOS-1D X @ 235mm, ISO 100, 1/10, f/25.0
© Dvir Barkay
My first rule of thumb with Yellowstone is a rather simple one. Do not visit the park in the summer. There that is the rule.
Oh you want a reason? Well the crowds are unbearable, the lighting is harsh, and wildlife activity is less pronounced. By far my favorite time to photograph Yellowstone is during the latter stages of Fall or during late September. The lighting is best, with the warm fall color palette perfectly contrasted by the ever increasing stormy weather that adds an element of intrigue to the landscapes.
My mornings start at around 5AM, or around one hour and a half before sunrise. I try to be ready to go an hour before sunrise and will often be on the road long before there is any light outside. The beauty for landscapes in the early Yellowstone morning, especially during the fall months, is the expansion of the steam in the crisp cold morning air. With each thermal feature sending steam right into the heavens, the whole landscape transforms into some surreal scene right out of a fairy tale.

SLT-A77V @ 50mm, ISO 50, 4/10, f/9.0
© Dvir Barkay
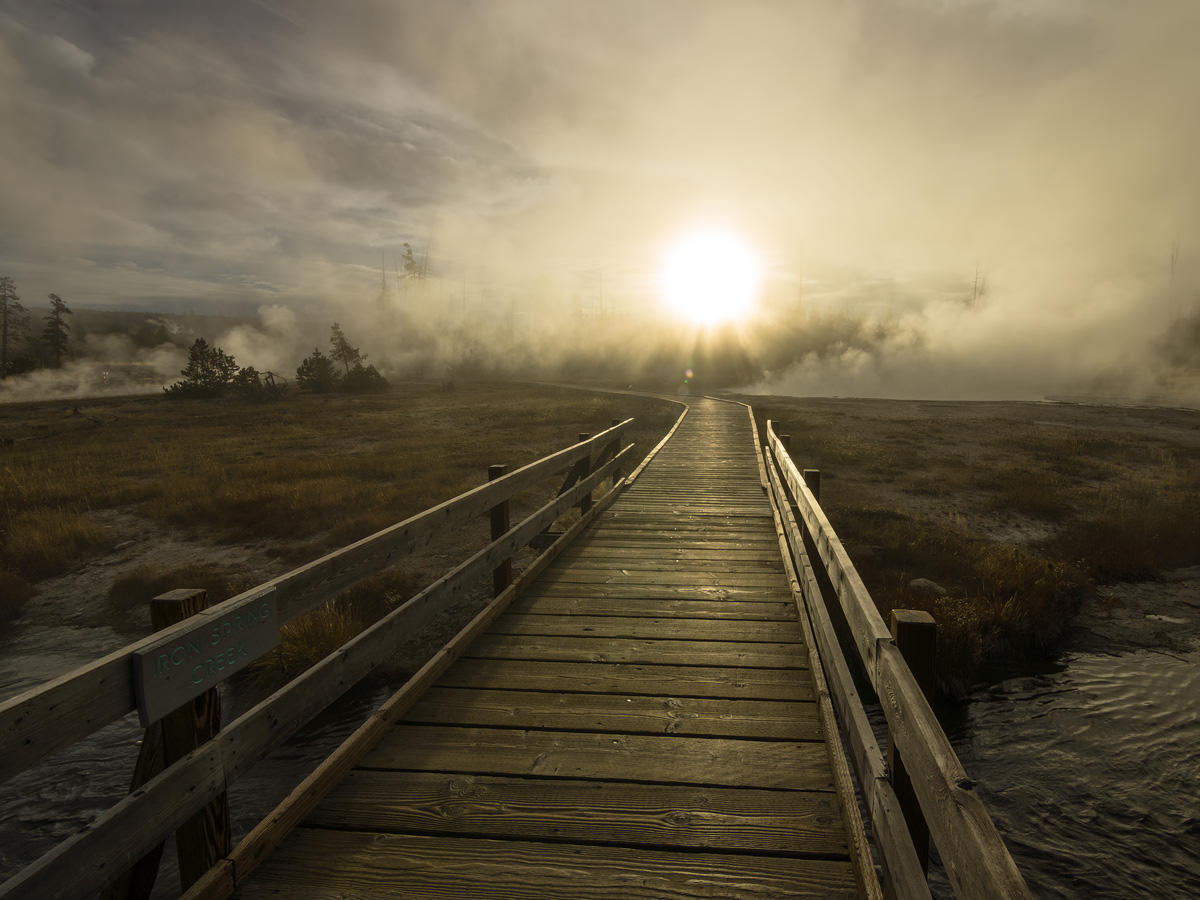
SLT-A77V @ 11mm, ISO 50, 1/50, f/16.0
© Dvir Barkay
I try to select a specific basin that I feel works best during the morning hours (there are some that are far better later in the day), and make it my mission to spend the next few hours doing my best to capture the said basin in all it’s early morning glory. Which basin you choose is up to you, but I tend to prefer the smaller basins for they allow for more unique photos and maybe even a chance to take wholly unique shot (not an easy accomplishment in Yellowstone). While wide angles work well in the basins. I feel that the boardwalk heavily restricts the creative freedom and as such, I often go for my telephoto lenses (70-200) to help isolate my subjects. Another tip is that while lens flare is a very real issue, do not be afraid to shot into the sun during these hours. The combination of steam mixed with the rising sun can create a very absorbing atmosphere that really helps accentuate the sense of wonder so prevalent in Yellowstone’s landscapes.

Canon EOS-1D Mark III @ 125mm, ISO 200, 1/500, f/5.6
© Dvir Barkay
The morning hours are also fantastic for finding and creating great wildlife shots. Whether the morning is clear or overcast does not matter in my opinion. Wildlife can be photographed well in almost any weather, providing the subject is a worthy one. But sometimes the weather can add an element of intrigue on it’s own. And in Yellowstone, the cool steamy mornings can help create wonderful wildlife shots if you can find wildlife around the thermal features.
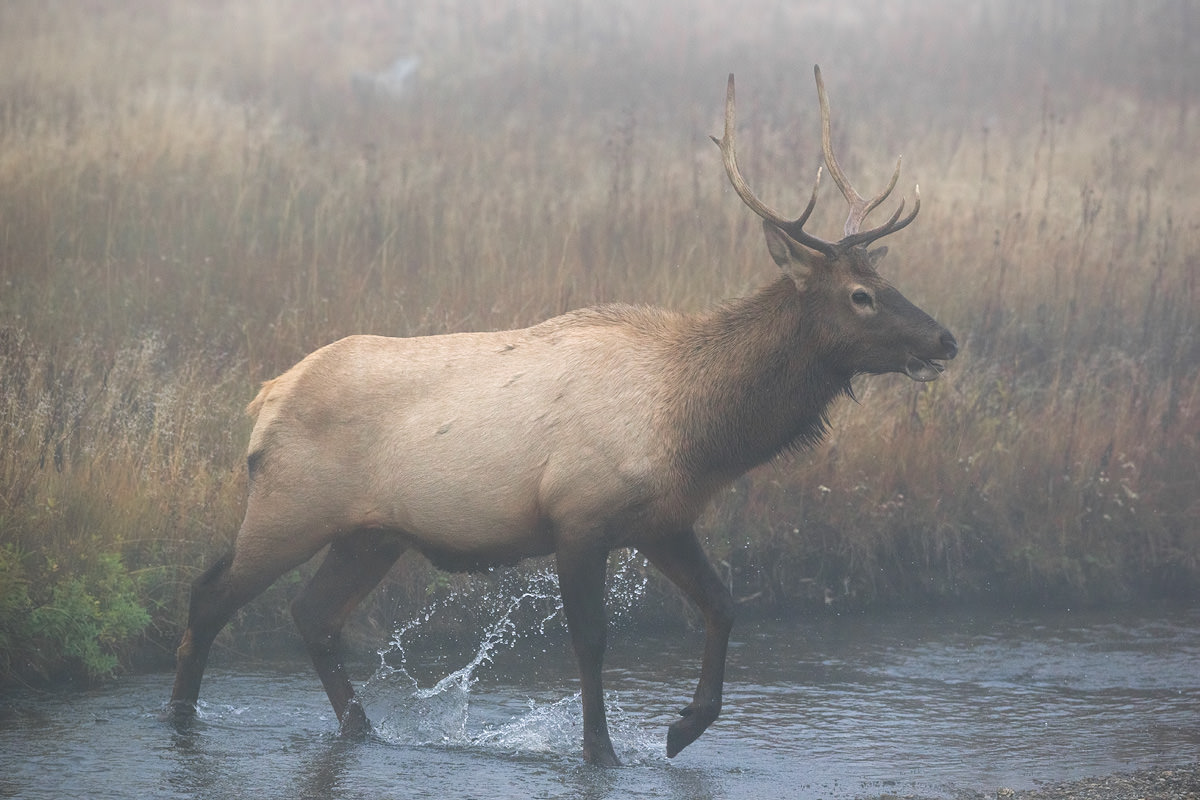
Canon EOS-1D X @ 300mm, ISO 1600, 1/1250, f/4.5
© Dvir Barkay
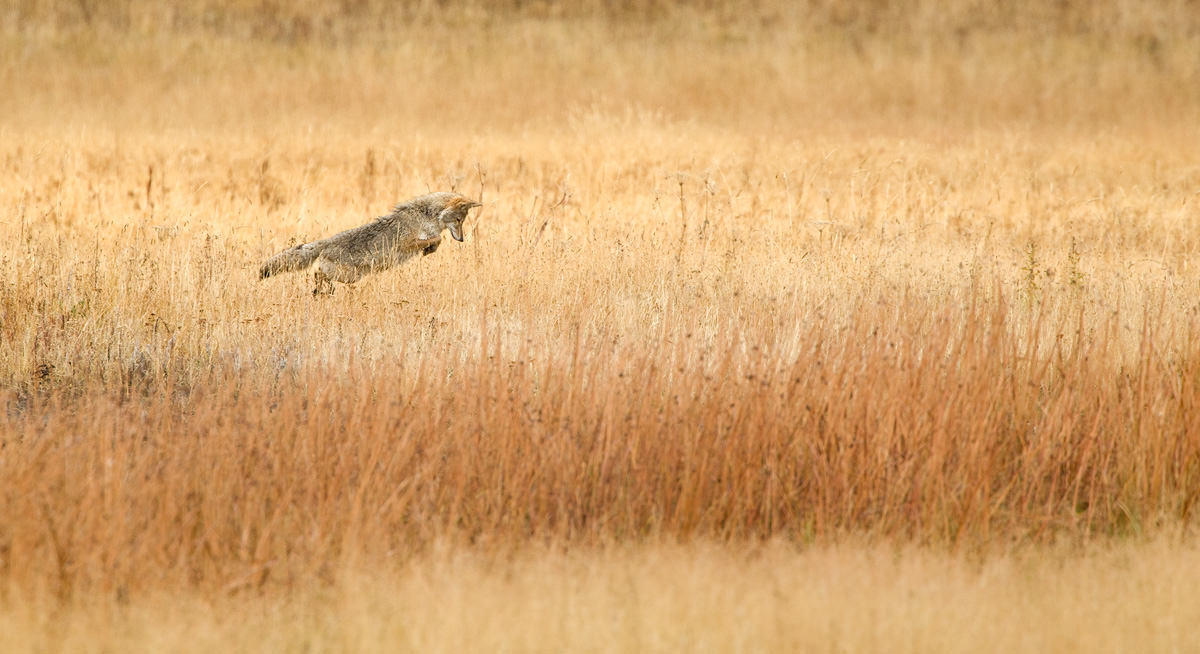
Canon EOS-1D X @ 600mm, ISO 800, 1/1600, f/8.0
© Dvir Barkay
So you just spent a few good hours of the morning taking photos in pleasant light, but now come the dreaded midday hours. Photographers fear midday like the plague, and like trolls we turn to stone as the sun gets high enough with it’s powerful rays taking away all of the subtlety of the landscapes. And yet, not all is lost during the midday hours. Quality landscapes can still be attained, and wildlife is still very much active during the middle of the day. Midday calls for even more concentration on minute details and for more intimate views. As such, the wide angle lens usually spends the noon/afternoon hours in the camera pack in favor of the tele-zoom range.
Canon EOS-1D Mark III @ 98mm, ISO 500, 1/640, f/7.1
© Dvir Barkay
I tend to concentrate mostly on wildlife during the middle of the day, but with enough luck and some nice clouds you can still capture beautiful views. I have taken some of my favorite landscapes during the central portion of the day as I was looking out for wildlife. Lamar Valley in Yellowstone is especially wonderful for it’s combination of grasslands and rolling hills, all surrounded by beautiful mountain peaks. Remember to use polarizing filters, especially so during the middle of the day, for they really help add a bit of nice soft contrast to high contrast shots.
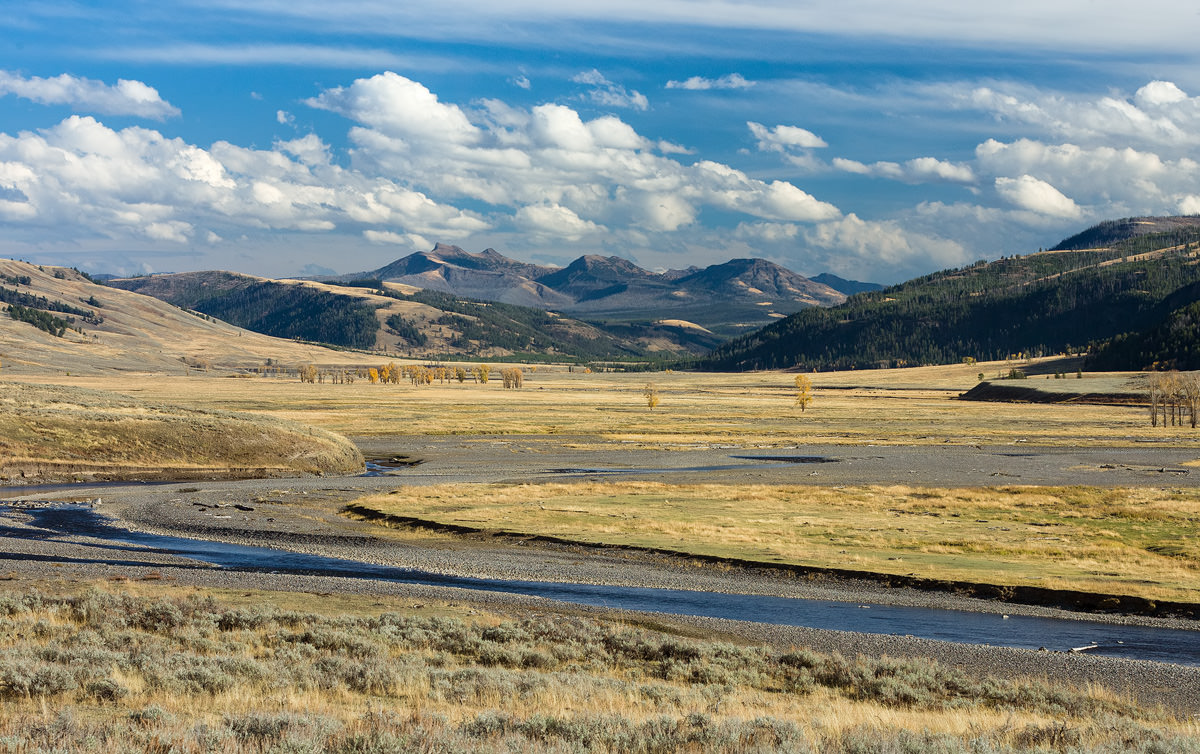
Canon EOS-1D Mark III @ 88mm, ISO 320, 1/250, f/8.0
© Dvir Barkay
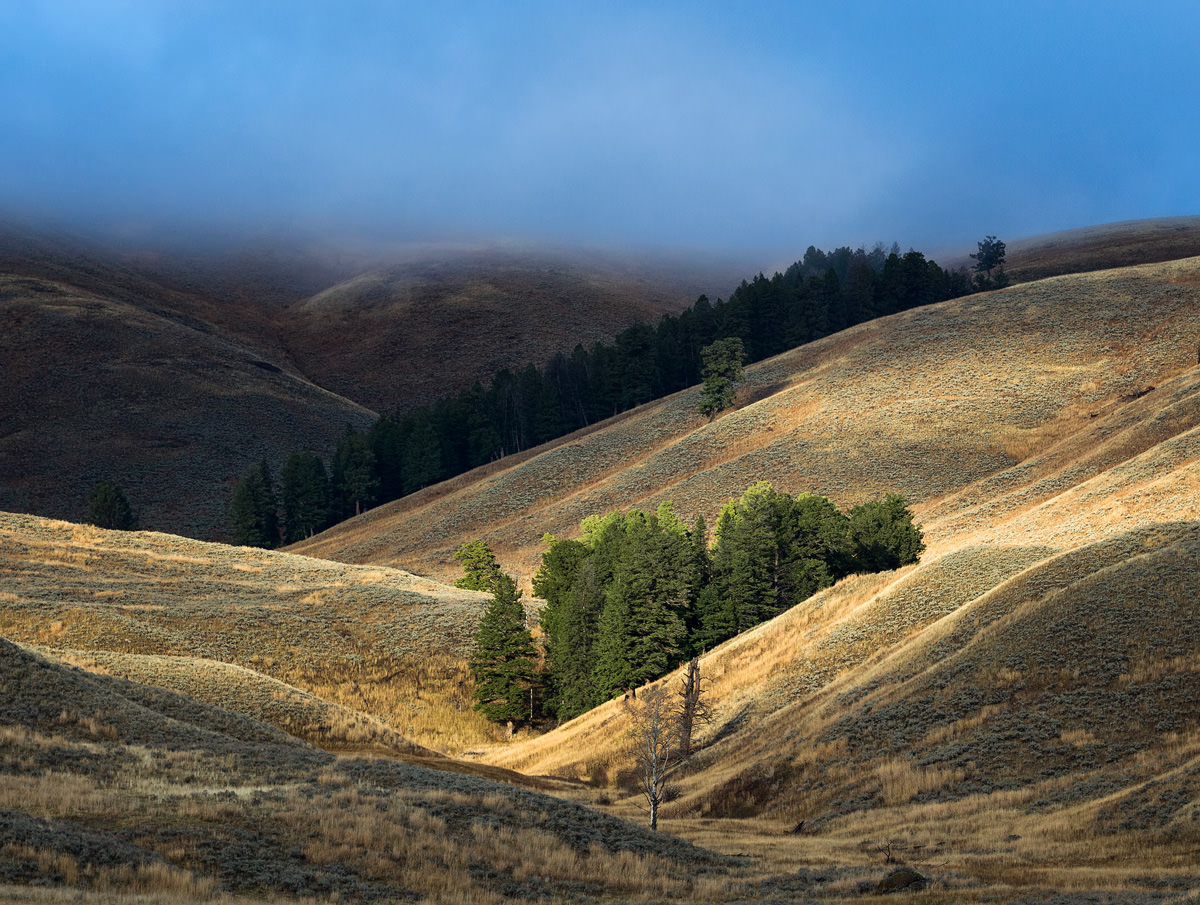
Canon EOS-1D Mark III @ 135mm, ISO 200, 1/200, f/5.0
© Dvir Barkay
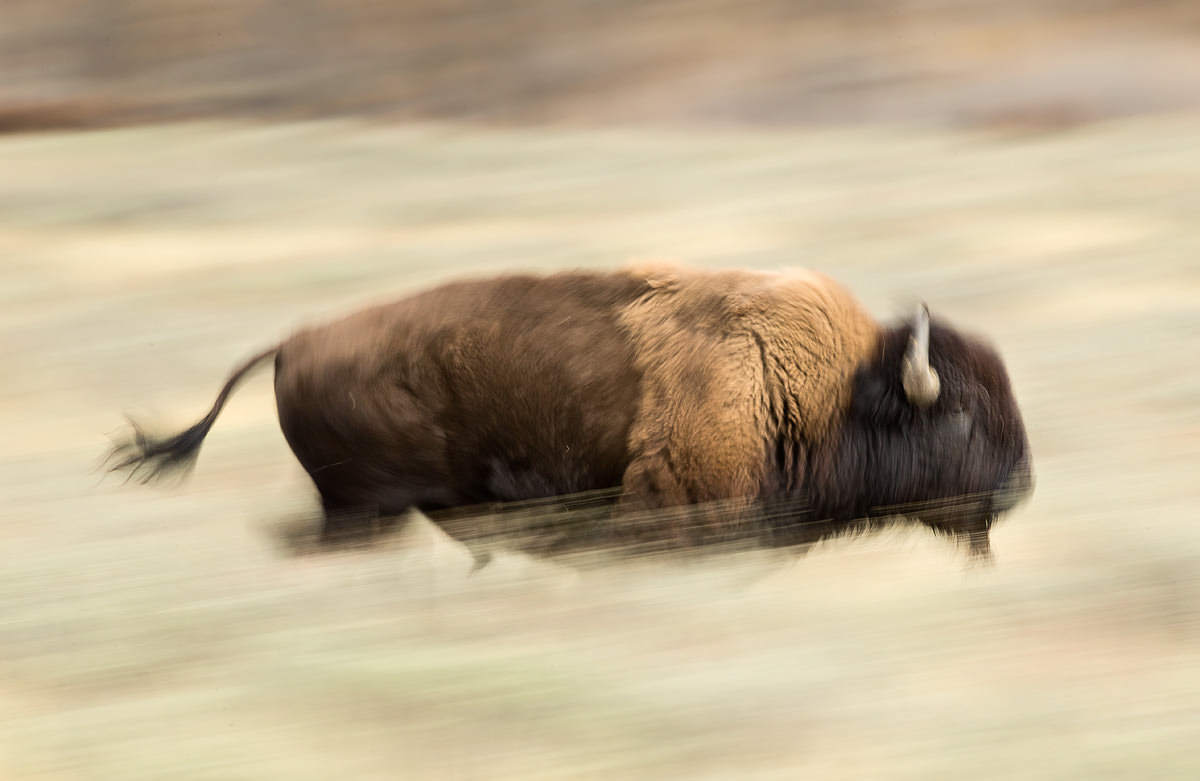
Wildlife, especially the larger herbivores are still widely available subjects during the midday hours and this ability to spend a great amount of time with them should be utilized. So often do I see photographers stop for a few minutes and leave a scene without giving mother nature time to work it’s magic. An example is the set below, where I spent hours with the herd of Bison, and what started out as rather simple Bison shots like this one.
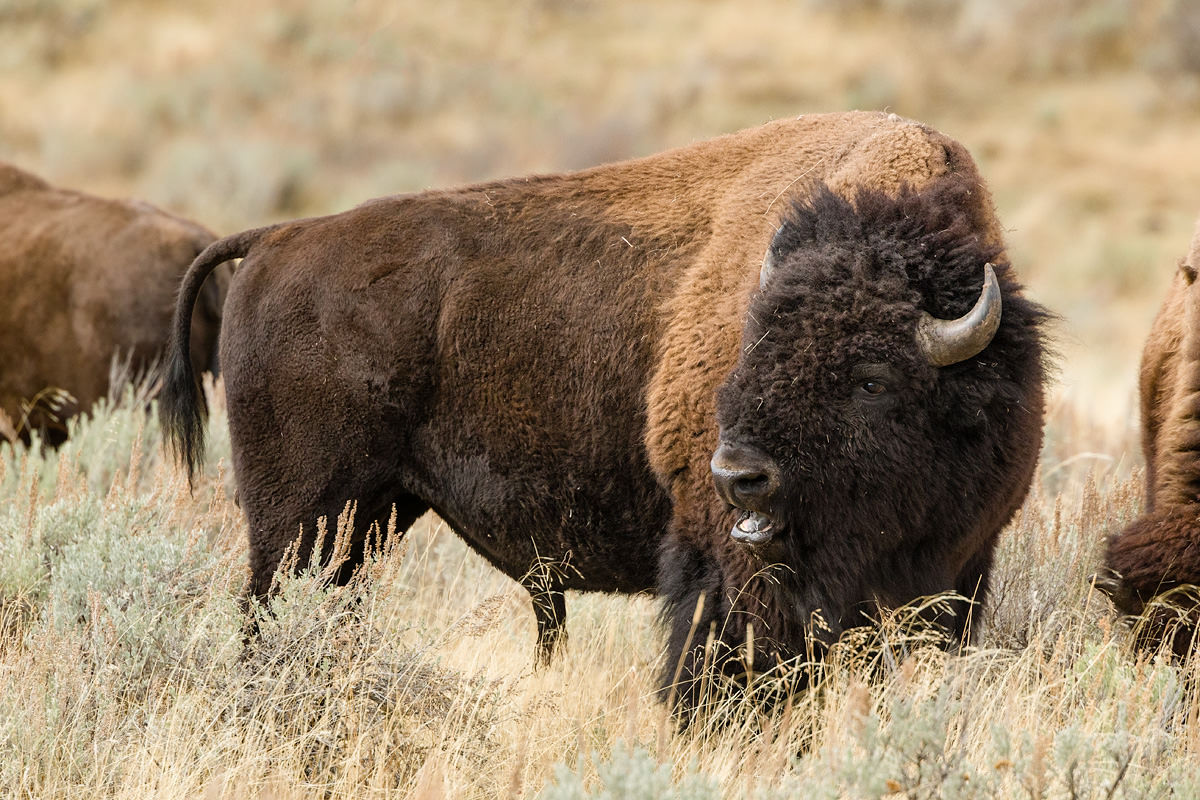
Canon EOS-1D X @ 600mm, ISO 3200, 1/1600, f/8.0
© Dvir Barkay
Turned to these…
Canon EOS-1D X @ 600mm, ISO 100, 1/15, f/16.0
© Dvir Barkay
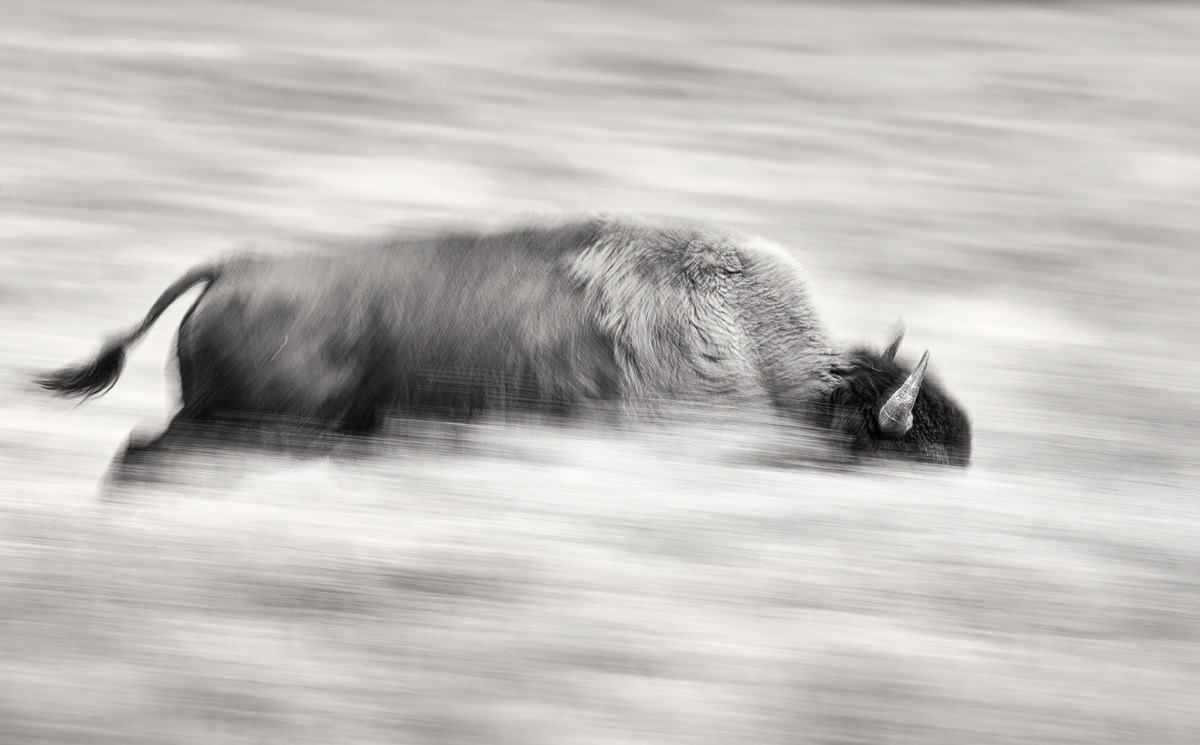
Canon EOS-1D X @ 600mm, ISO 100, 1/15, f/16.0
© Dvir Barkay
Or even this…

Canon EOS-1D X @ 600mm, ISO 1000, 1/1000, f/9.0
© Dvir Barkay
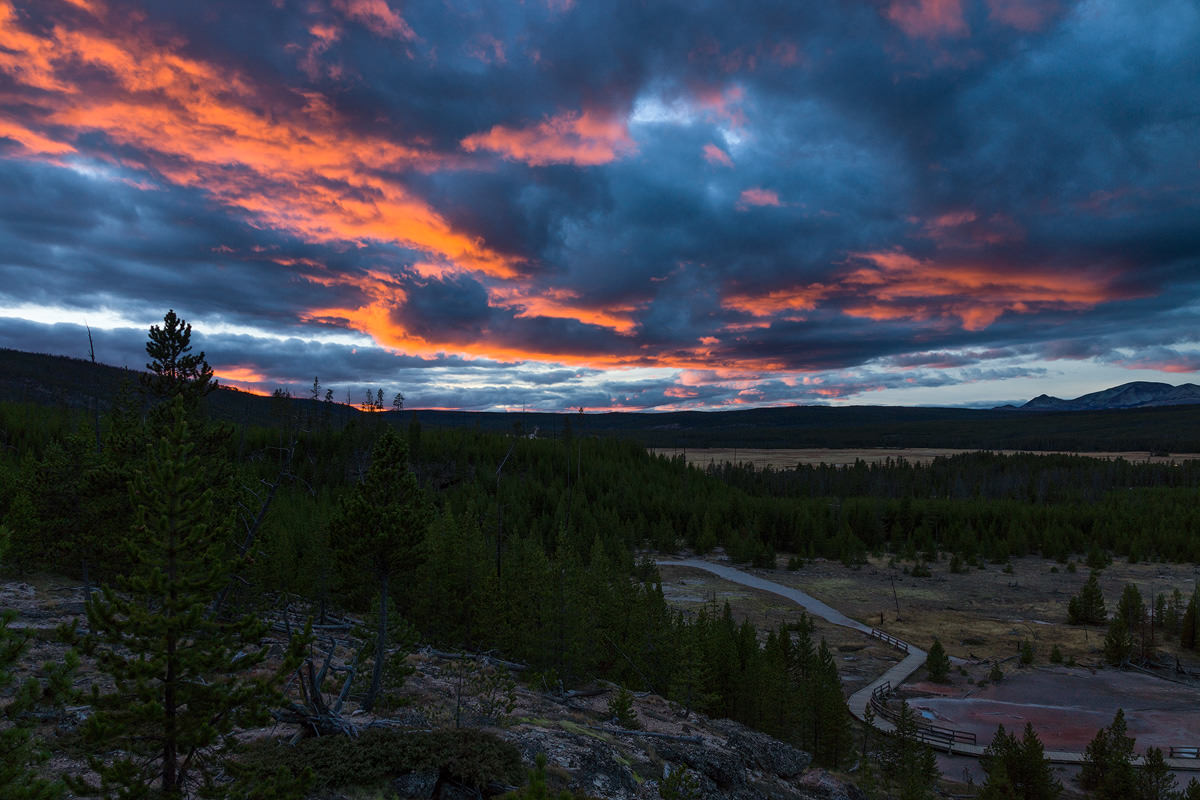
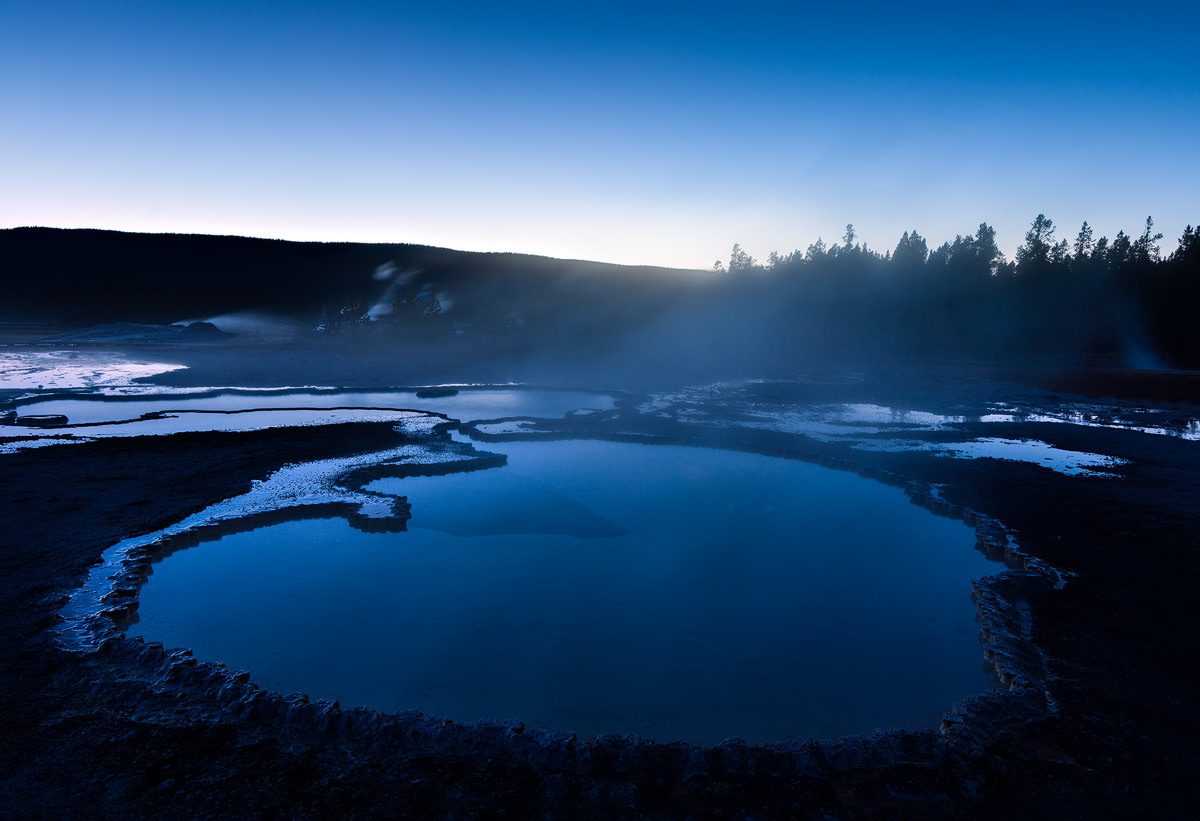
As the day comes to an end, my priorities again shift towards landscapes. I feel like some basins are especially beautiful during the afternoon/sunset and dusk hours. I especially like Norris and Upper Geyser Basins during dusk because they both offer simple and elegant compositions that really show off Yellowstone’s geothermal wonders. It is also during this time of the day that the wide angle and regular zoom lenses come out of the bag, for the great clouds that often come during the late day hours are best captured in a dramatic wide angle fashion.

SLT-A77V @ 16mm, ISO 50, 1/3, f/14.0
© Dvir Barkay
SLT-A77V @ 16mm, ISO 50, 6/10, f/9.0
© Dvir Barkay
The telephoto lens is still very much useful during this time of day, especially if you wish to isolate one of the features. I recommend going around with two cameras rather then switching lenses, for the air is the geyser basins is a recipe for damaging your gear.
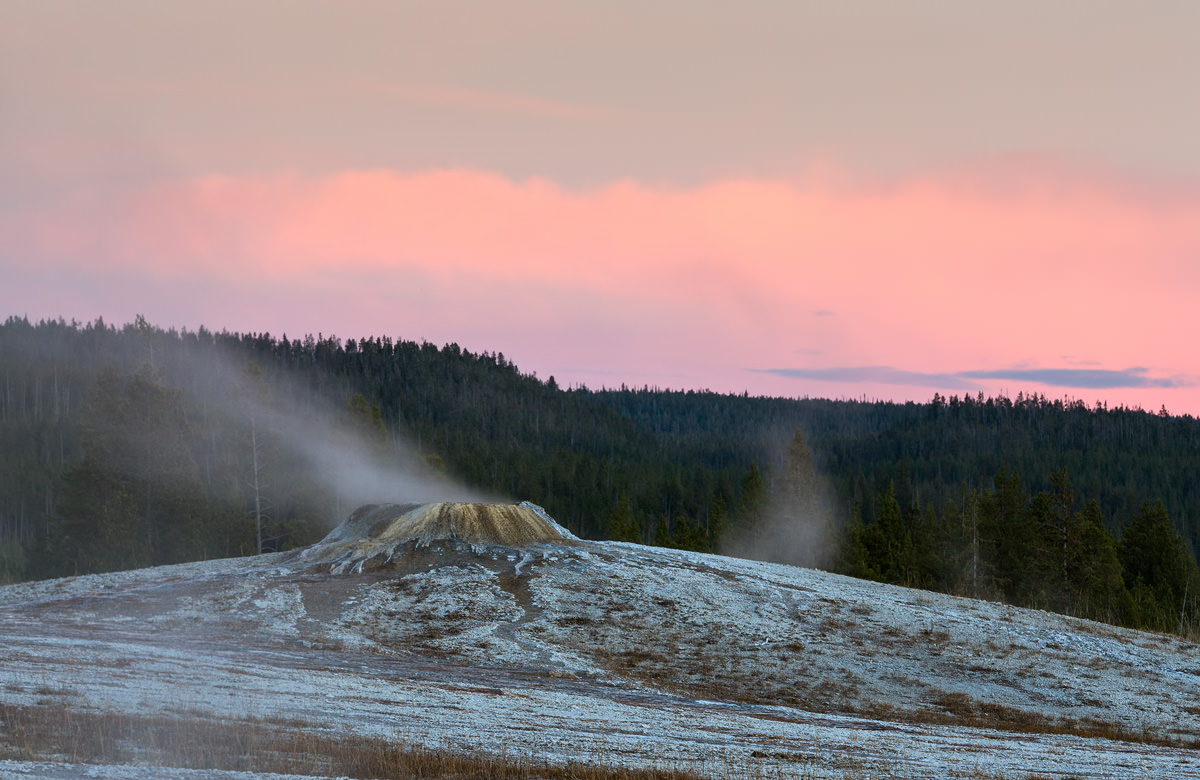
Canon EOS-1D Mark III @ 210mm, ISO 100, 16/10, f/20.0
© Dvir Barkay
While sunsets will help bring the more dramatic color tones that can be had in Yellowstone. I prefer the colors at dusk even more. The air is very different in Yellowstone from what many are used too, and dusk’s are often extremely blue in coloration. An example can be seen in distant mountains. You will often see blue casts in photos of distant mountains, but that is an unnatural color cast caused by the camera and should be removed (I rarely see it removed). But in Yellowstone, the distant mountains often turn into an actually blue tinge during dusk. I tend to leave my white balance set to sunset during this hour to help extenuate the blues, if I feel the color cast get overly blue, I might change things to cloudy white balance.
SLT-A77V @ 16mm, ISO 50, 6/1, f/11.0
© Dvir Barkay
While many people go to sleep once the sun sets. My day is still not quite over. Yellowstone is a very beautiful place at night, and it takes a camera sensor, a tripod, and a remote shutter to fully show this beauty. I tend to keep track of all the major geyser eruption times so that I can set some sort of basic schedule. And I make sure to also keep an eye for nighttime eruptions. A good flashlight is incredibly important for nighttime shots, not only for its light painting ability, but also to aid in focusing and for setting everything up.
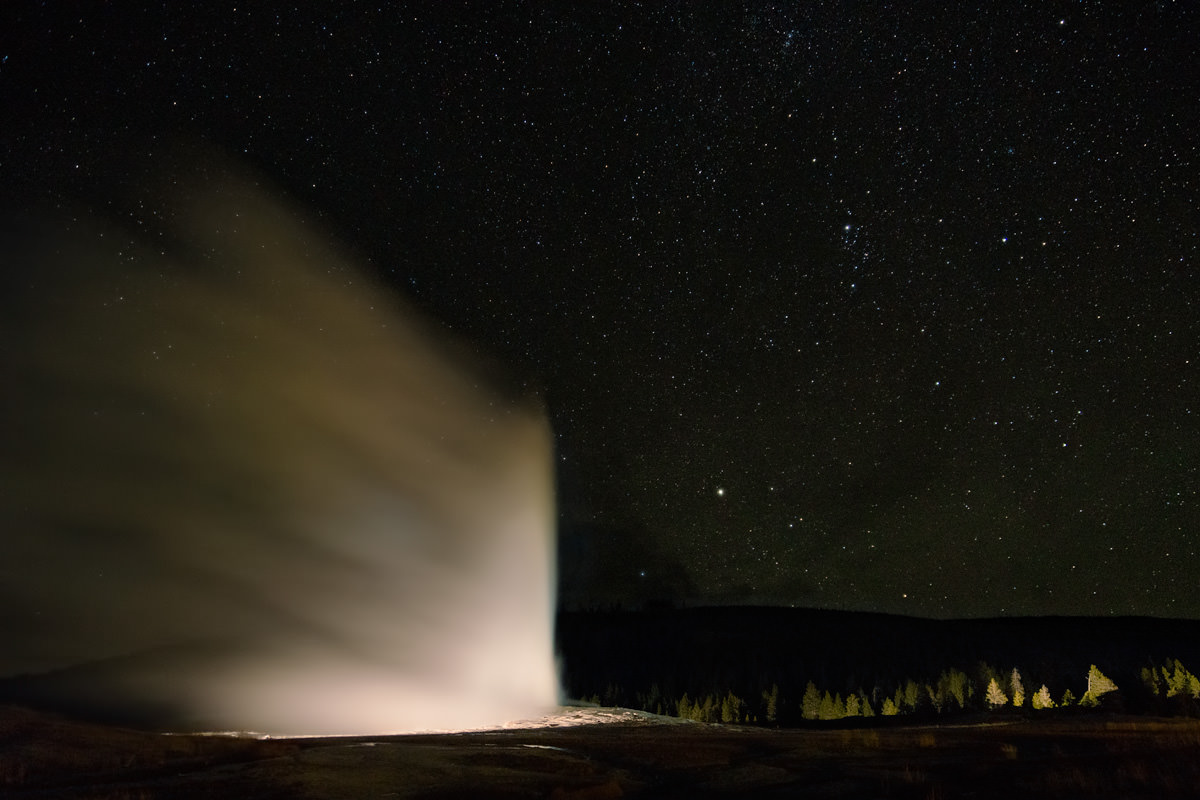
SLT-A77V @ 16mm, ISO 1600, 15/1, f/2.8
© Dvir Barkay
As you might have guessed by now, I don’t sleep a whole lot when I am on a photography trip in Yellowstone, there is just so much to photograph at all hours of the day. While you do not have to follow such a demanding schedule, taking bits of what I do can ensure a more productive time in the park. As I always advise people, make sure to enjoy your trip first and foremost, and the photography will follow suit naturally. If the light is bad, just enjoy what happens to be one of the most beautiful and unique landscapes on earth. If the light is great, take a few good shots, and give yourself at least a couple of minutes to enjoy the scenes that unfold before you with your own eyes. And if the light is truly great, just take as many photos as you can 😉
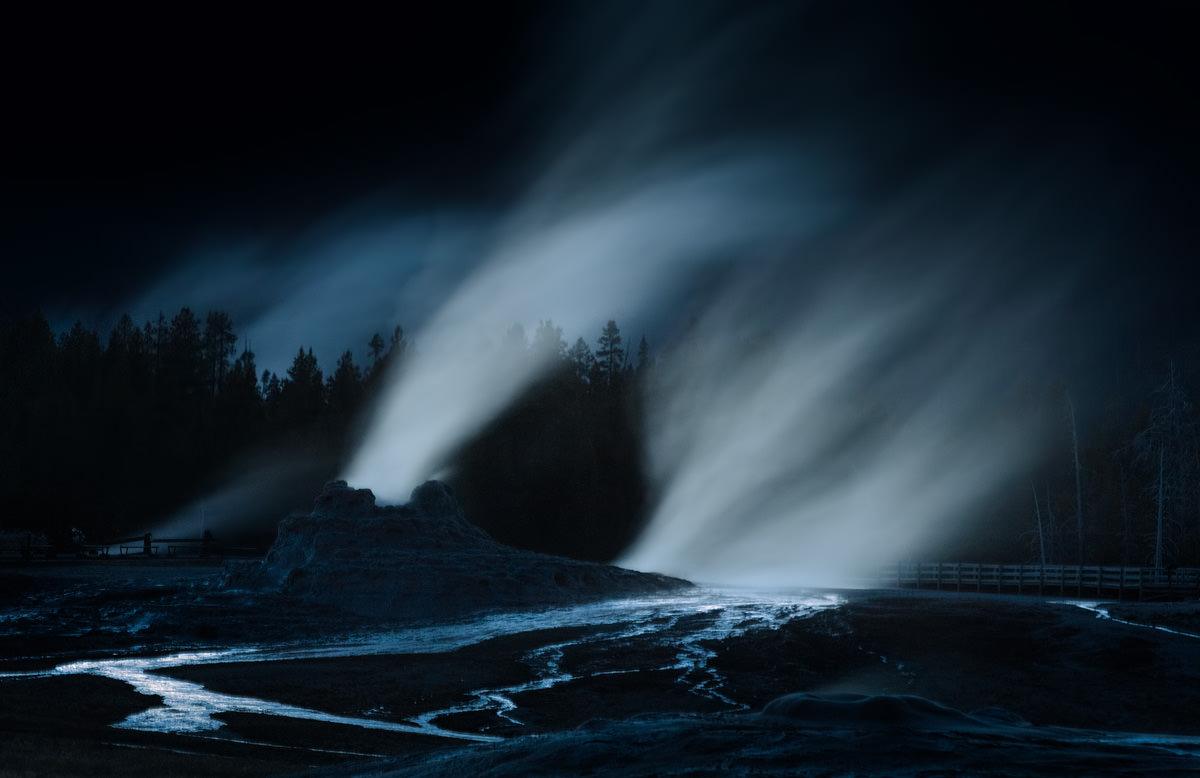
Canon EOS-1D Mark III @ 280mm, ISO 100, 15/1, f/8.0
© Dvir Barkay
This guest post was submitted by Dvir Barkay. To see more of Dvir’s work, please visit his website.
The post A Day in Yellowstone appeared first on Photography Life.


