
I love black and white.
I love the timelessness of it, I love how it so simply gets rid of distractions or colors I do not prefer or enjoy together.
I like how it draws your attention to something completely different in each photograph than where it was drawn in color.
I love how it so beautifully can add depth and intimacy.
And I love, love printing them because they go so effortlessly in all decor.
If you scroll through really great black and white photographs, you will find that so many artists take it in many directions, so the tips I share with you are not universal in the ‘right way’, but they are tips in showing you a beautiful way to do black and white. My love for black and white photography has always been constant but my ability to create one the way I wanted was not. With time, experience and learning I have been able to create black and whites that are strong and often my favorites.
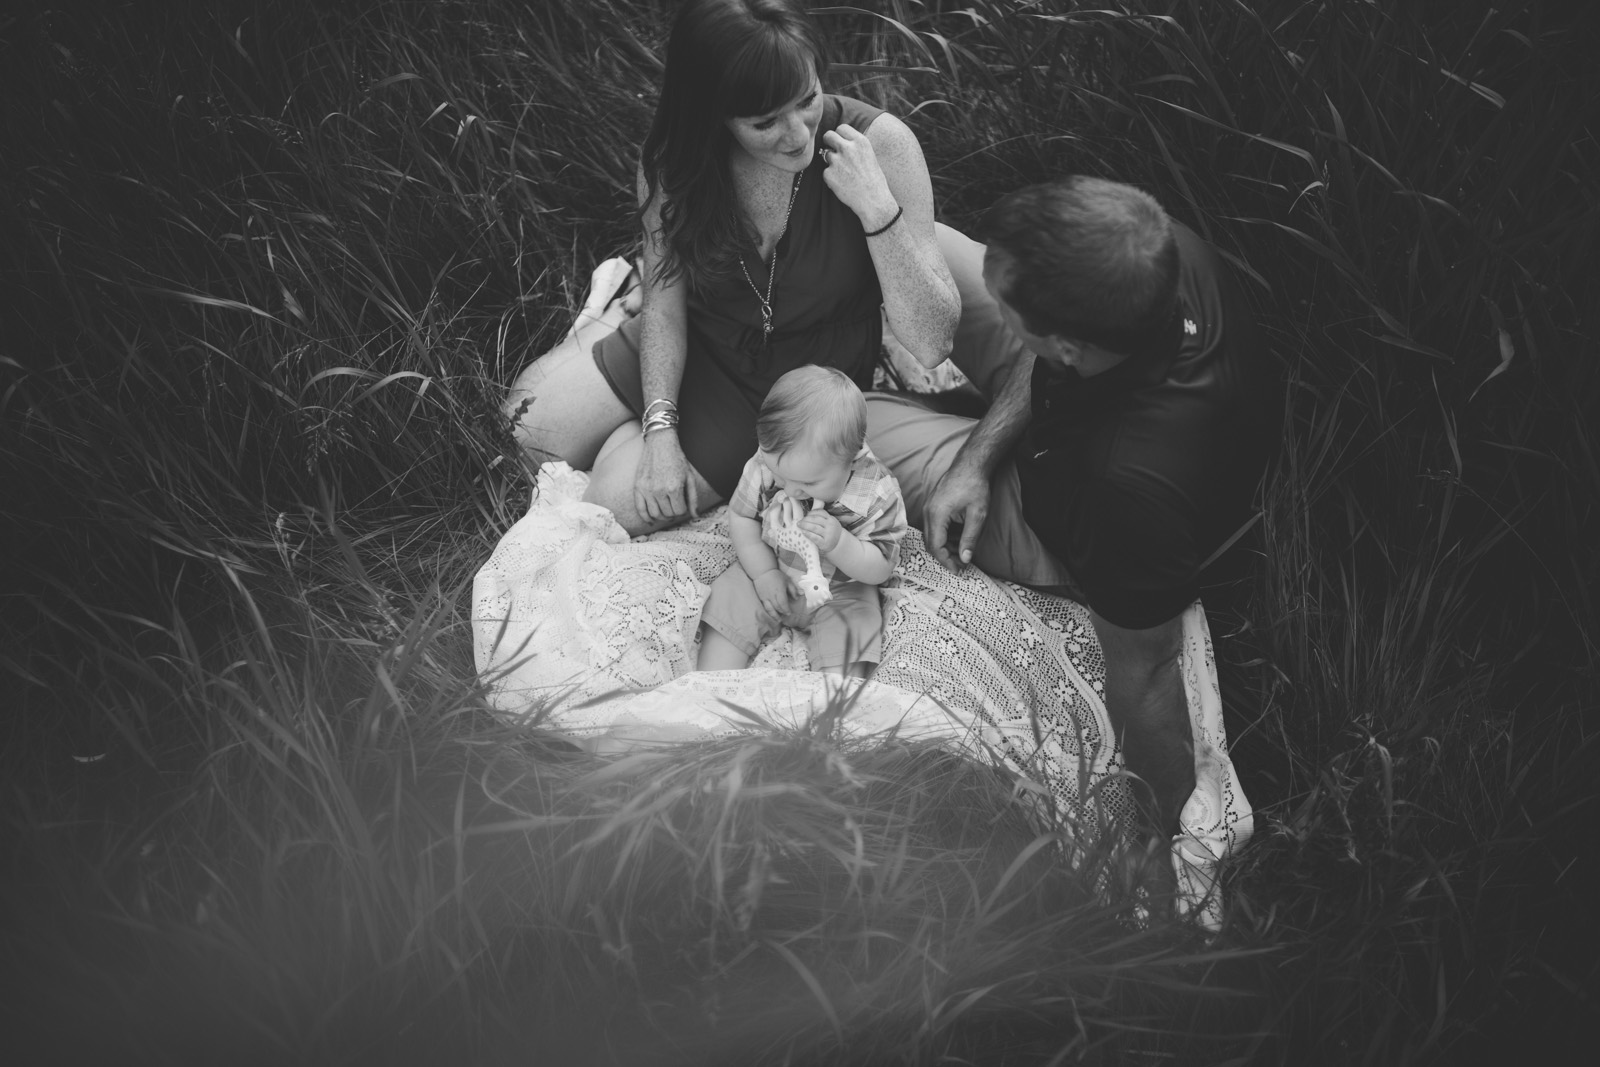
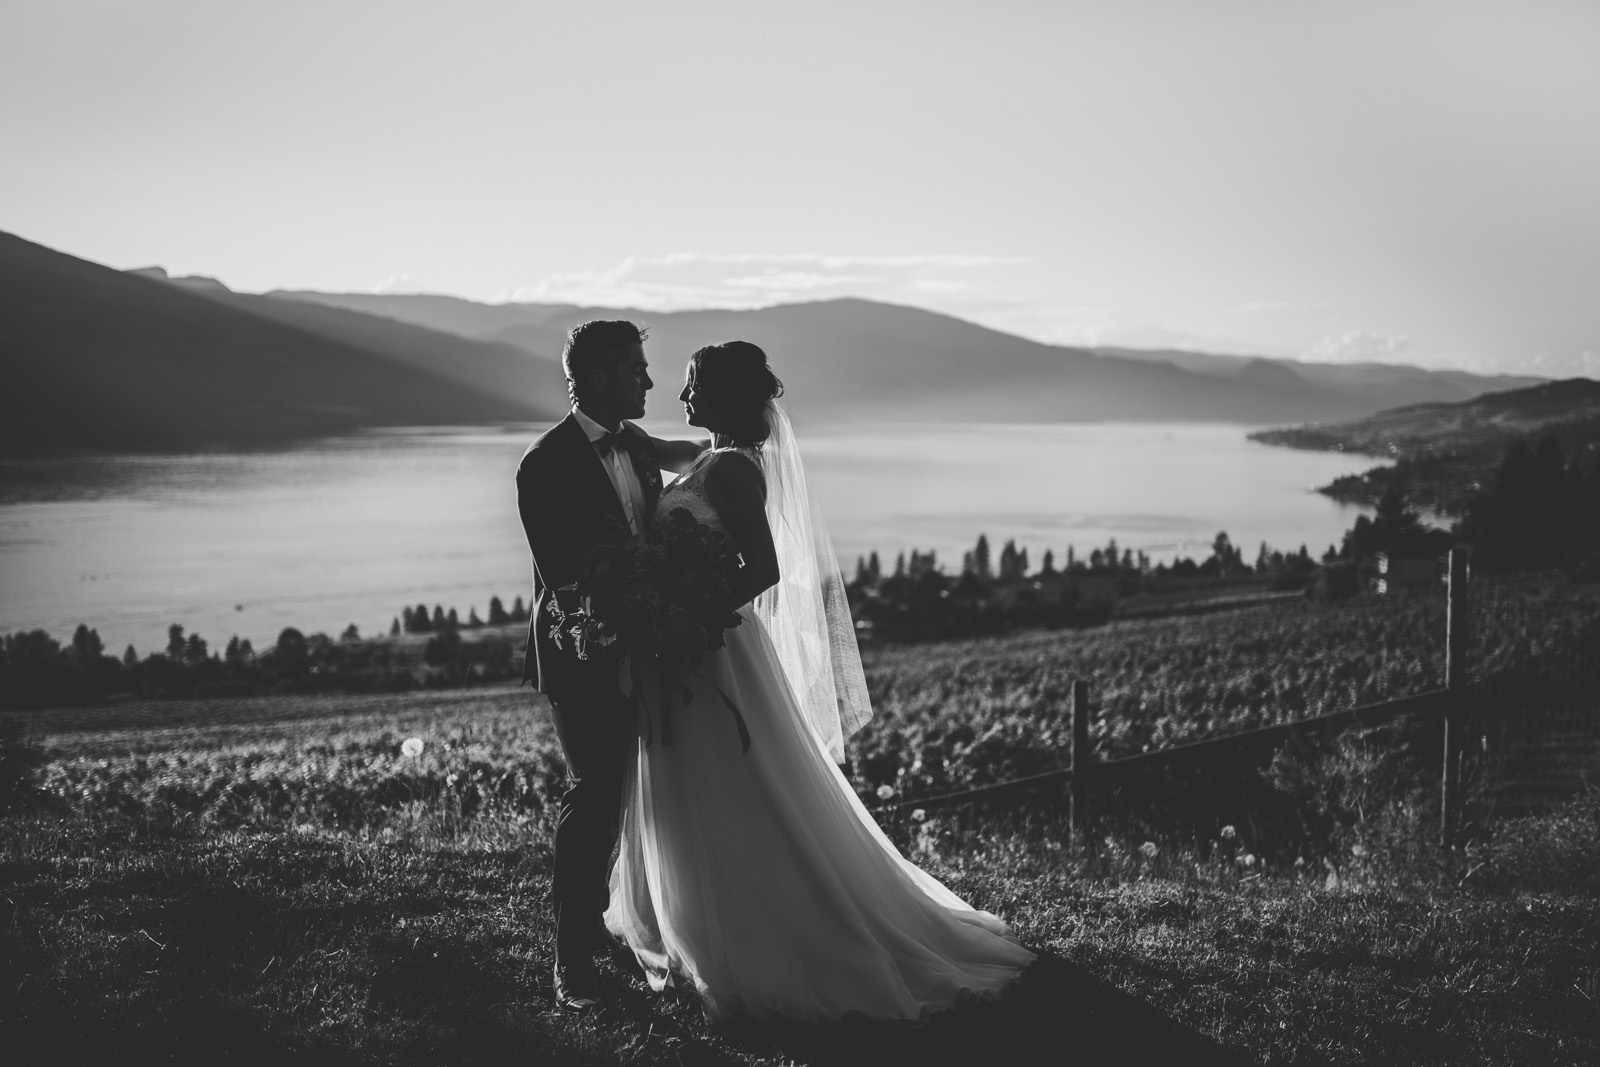
1. Chase shadows
When taking a photo, look for a lot of shadows and contrast. I love the contrast you get with cloudy skies in your background but some of my favorites are photos with layers of shadows with little to no bright spots.
To do this, avoid having any sky, instead looking for areas where trees or foliage fill up your background. If you’re indoors, ensure there are no light sources coming through in your background. You can also shoot towards the ground as there is no light coming from there; long grasses and earth can give you added darkness and depth.
2. The matte effect
Clip your blacks and whites either with the tone curve or sliders. On your tone curve it will look a bit like an s curve as your highlights will drop down at the top and your shadows will be brought up on the bottom of the curve.

I usually use both. This will take out the blackest of blacks, and the whitest of whites giving it a more matte feeling. You can add back in a lot of black, it will give you more darkness, but it will not let your blacks get as deep, depending upon how much you have clipped.

Related: 4 Lightroom secrets to great black and white images
3. Use your brush and radial tools
You can add in clarity for a more raw and gritty black and white or to draw attention to certain areas of a photograph. Folds in a long dress, waves in hair, or hands held together are beautiful examples of this. You can lower contrast on any faces or skin that appears too harsh. Or lower a large area of contrast with the radial tool when looking for a softer black and white photograph.

4. Manage highlights
Although I think that so many times the bright, whiter parts of a photograph are what can ‘make it’, going in with a highlighter brush and dropping highlights even after you’ve done so with the tone curve or sliders to ensure nothing is getting close to overexposed will help lend to the softer matte feeling in the photograph. You have to watch as you slide though as you will see there is a point where you can take it too far – it will go from matte to dull with no luminance. You want to make sure you don’t get there and if you do, bump the highlights back up a bit.

Related: Before and After: a black and white edit in Lightroom
5. Remove distractions
Once you have established where you want your viewer to focus, I often look around for spots that can draw you away from that. They are usually other bright spots near the edges of your photograph. Sometimes I will crop or, if possible, I will clone them out. Whether it be a bright reflection from a fridge door or bright spots of sky coming through trees and leaves, minimizing distractions is just another way to strengthen your photograph and draw your viewer in, exactly where you want them.

Related: How to use the clone tool in Lightroom

6. Sharpness
If the photograph seems to need a little pop, I up the sharpness and slide it over so it’s just sharpening your prominent edges.
7. Custom vignette
Avoid adding vignetting but instead, use the radial tool to do so. You will have so much more control and will avoid an obviously vignette for any semi-trained eye. Making sure vignettes are off center help lend it a more natural look.

8. Practice makes perfect
Don’t expect to master anything from one article or class. Use the information you gather from various sources and play. You will gain a better understanding of what is happening in different types of light and backgrounds simply by paying attention when you convert a photo to black and white, which will help you have a better eye and ability to foresee what you are shooting for and ending up with. Over time, you will find yourself tweaking even the best advice to find what exactly suits you and your style and make it your very own.


The post 8 tips to get the perfect black and white photo appeared first on Clickin Moms.


