
You’ve traveled around the world, battled jet lag and lost luggage, showered and stepped out onto an unfamiliar street, camera in hand.
Now what?
For many, it becomes instantly overwhelming – foreign languages and signs, bustling streets, every scent new, colours and textures about. You snap away but at the end of a long day, reviewing those shots, you feel they just aren’t doing it justice.
They’re snapshots. They’re “meh.”
Travel photography is a lofty term but it doesn’t need to feel out of reach. What it takes is a bit of extra planning, some mindfulness, a willingness to abandon the tourist path, and a little bit of vulnerability.
You’ll need to abandon prescribed tourist agendas, though, and push yourself to go a little further, try new things, and be open to different experiences. If you can do that, read on.
1. Learn to notice
Here’s what I see a lot of when I travel: a bus pulls up, and three dozen people unload. They walk around with their camera in front of their face and snap away until someone blows a whistle and says it’s time to go.
Everything they saw, they photographed. What they have done is successfully documented how something looked, often with sterile precision. There’s no heart behind it, no thought behind it.
You can see a place and never experience it – we’ve all done it. You can see famous sites and cross them off your to-do list, but not get a sense of the pulse of a place, the details and the people and the culture that brings it to life and makes it different from anywhere else.
Learning to notice these things will instantly improve your images. There’s no magical recipe for this but if you practice being mindful, being present, to put the camera down (gasp!) and look around, really try to notice the events going on around you.
Forget the beautiful church or the famous promenade and look for the moments happening: the woman sweeping her street in the late afternoon; the man having a cigar outside his stoop; a street musician pausing for a cold drink between songs; children prancing around a back alley; the clatter of espresso cups on marble tables.

On a busy street in Pushkar, India, a man reads his morning paper. I noticed the coke signage, and the hindi language paper, and his pink headwrap all standing out to be admist the crowd, and went from there.
2. Find the good light
Now, you may think this is obvious. And from the comforts of your home, it may be. You know your seasons and where to be for nice golden light, or sunsets, or the times your city is best or not. When we travel, it’s not so easy. If you’re taking a trip specifically for yourself to make travel images, then plan accordingly: early mornings, late evenings, rest in the afternoon, understand the times of day and how the light will change. Better yet, plan your trip to avoid long, hot, and harsh summer days but find an off-season (bonus,
If you’re taking a trip specifically for yourself to make travel images, then plan accordingly: early mornings, late evenings, rest in the afternoon, understand the times of day and how the light will change. Better yet, plan your trip to avoid long, hot, and harsh summer days but find an off-season (bonus, less crowds!) that might yield better light.
However, for many people reading this, what’s actually happening is your family is taking a vacation – or perhaps non-photographer friends have invited you along on a trip, or to a wedding – and you’re hopeful to capture some “travel” shots while abroad.
This is more difficult because you’ll be working around other people’s schedules, and often these trips take place during high seasons with long, harsh sunny days. Your best bet is to turn in early, and creep out at the crack of dawn; or bid them adieu at happy hour and make your way somewhere for sunset.
If you are with family, and have kids to work around, do enlist a partner or grandparent to take over at those times of day – you may be exhausted to haul out of bed at 5am, but I guarantee you’ll find empty, golden streets and locals starting their days invigorating and thrilling once you’ve stepped out the door.
What you don’t want to do is shoot mid-day (unless it’s overcast). You’ll likely be hot, whatever you’re photographing will be shadowy and poorly lit, and probably there will be heaps of tourists in your way.

By staying late in the day in a Masai village, I was able to capture portraits out of the harsh daylight and rather bathed in that glorious, golden Tanzanian sun.
3. Limit your postcards
I get it. Why travel across the world to not make the photo that you’ve looked at all your life?
The Taj Mahal, the Eiffel Tower, Angkor Wat, Machu Picchu – whatever monument is iconic for that place. If you have a dream of photographing these things, then go get your postcard shot (the classic image of that place).
But then, challenge yourself. How can you photograph it that’s different? Doing a bit of research on other people’s photographs before you go can help tremendously.
What’s overdone? What’s unique? On arrival (hopefully in good light!), put that noticing concept into play. Can you shoot it around a corner? In a reflection? With people in front or passing by? From higher up, or very low?
Changing your perspective can do wonders for the creative spark.
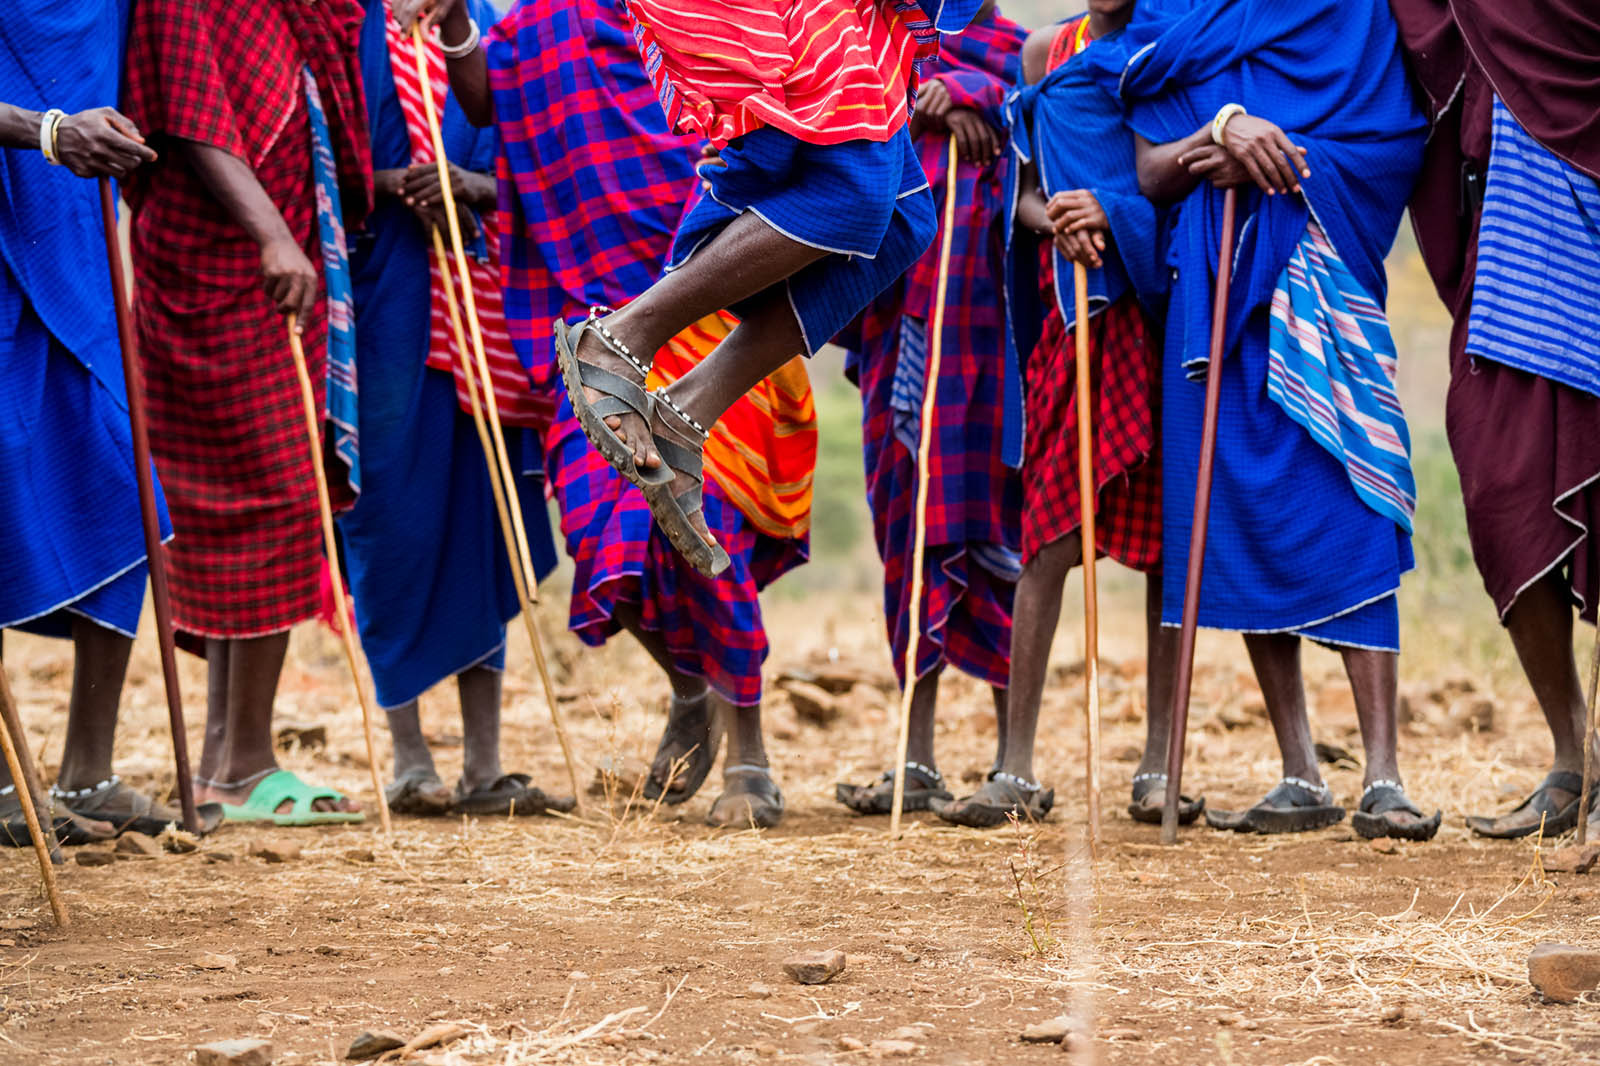
A standard Masai shot would be the men jumping. Instead, I got closer and framed the shot to highlight the colourful clothes and their hands and feet.
4. Declutter your shot and know your subject
When we travel, a whole new world opens up to us and every facet of it is fascinating and draws us in. However, an image with too many elements in it feels overwhelming to the viewer, a bit chaotic, busy, and the viewer doesn’t quite know where to look or what the subject is.
If you don’t know what your subject is, your viewer won’t.
This leads to snapshots, not composed images. You can declutter by ensuring your photo has nice clean edges (no random objects poking in, chopped off limbs, half a doorway, etc), and then make sure your subject is clear (sharp, well-lit, positioned on the Rule of Thirds, and so forth).

I noticed this bright blue wall and Che graffiti first. Then I worked around some parked cars and street vendors, and waited for the right moment where no cars passed by, but one little old man did. Even though there’s a person in the shot, it’s clear the subject of this image is the Che graffiti, from it’s placement, sharpness, and the fact that the man biking is blurred.

5. Don’t shy away from the human element
You don’t even need to be “into” portrait photography to benefit from meeting locals. But if you are, making travel portraits is about breaking down walls: language barriers, cultural standoffishness (them, or you), not wanting to intrude or anger (generally you).
The trick is to ask first, photograph second. Sneaking shots generally leaves people:
- annoyed by insensitive tourists
- frustrated they didn’t know they were being photographed (would you like it?)
- often cluttered and disorienting shots with no clear subject because you are shooting fast (hoping you won’t get “caught”).
I will pause to add that there are those who make beautiful candid street photos, without intruding or annoying people. That just takes practice and a lot of instinct and lightning fast control over your settings and your vision for a photo (as the moments can unfold very quickly).
Candid aside, making portraits of locals isn’t scary. It takes a little bit of guts to wave hello, give a broken greeting in the local language, point to your camera, and shrug or gesture. It helps if you grin like a fool. The majority of the time people will say yes.
If they say no, so be it. If they say yes, compose quickly (so have some idea in your mind what you’re after) and here’s the step people skip: show them the photo. Bond, laugh, call them beautiful. Maybe ask for one more try, as they may loosen up after seeing what a nice photo you made.
If you aren’t into travel portraits, saying hello to locals will always still help. It will pull you away from tourist traps and into the daily, real lives of people.
They may invite you for tea – say yes. They may want to show you something you wouldn’t have known was there. They may show off their children or their home. It’s all a peek behind the curtain into real life.
This will always yield more unqiue, original images than staying on the broad and “Safe” tourist path. If you have kids, let them meet and play with local kids – that’s a great “in” to the culture too!
For both portrait-lovers and avoiders alike, adding a human element will almost always elevate a travel photo. Find a nice scene, and wait. Wait for someone to cross in front or though, and see how that adds to the moment. You’ll likely be pleasantly surprised. (And generally, this doesn’t make locals feel like you’re being sneaky, as they just happen to be passing through a scene you were already making a photo of).

Think asking one person for a portrait is scary? Try eight people, at 5am! And yet, they obliged me and gave me many thanks when I showed them the image.
6. Get closer
You can see where all these steps are leading now. The more you truly experience a place and be vulnerable, the stronger your images will be. One thing I notice often when teaching travel workshops
One thing I notice often when teaching travel workshops is people stay at a safe distance. The shots feel wide, empty, unintentional, and distance. Viewers of your images will sense that distance; hesitation translates easily into images. Draw them in by getting closer. Use a longer lens if you must, perhaps a wide aperture to really hone in on subjects. Try filling up your frame – forget the sky and the street, fill your frame with textured walls, fruits, signs, patterns, local writing (if another language especially). For people portraits, lean in, go for head and shoulder portraits over full body. It implies an intimacy and an intentionality to the photo.
Draw them in by getting closer. Use a longer lens if you must, perhaps a wide aperture to really hone in on subjects. Try filling up your frame – forget the sky and the street, fill your frame with textured walls, fruits, signs, patterns, local writing (if another language especially). For people portraits, lean in, go for head and shoulder portraits over full body. It implies an intimacy and an intentionality to the photo.
For people portraits, lean in, go for head and shoulder portraits over full body. It implies an intimacy and an intentionality to the photo.
In every aspect, lean into your shots both physically and with a bit of zoom. It will leave your viewer feeling your shots are purposeful, intimate, intentional details and scenes of this place.
Sure, a big wide shot of San Marco Plaza in Venice will scream “Italy,” but a close up of a weathered hand on an espresso cup down some back alley might carry more weight in the long run. Everyone has a big shot of the Plaza. Notice, learning to see those details, decluttering your shots, and getting closer – you’ll come away with stronger images every time.
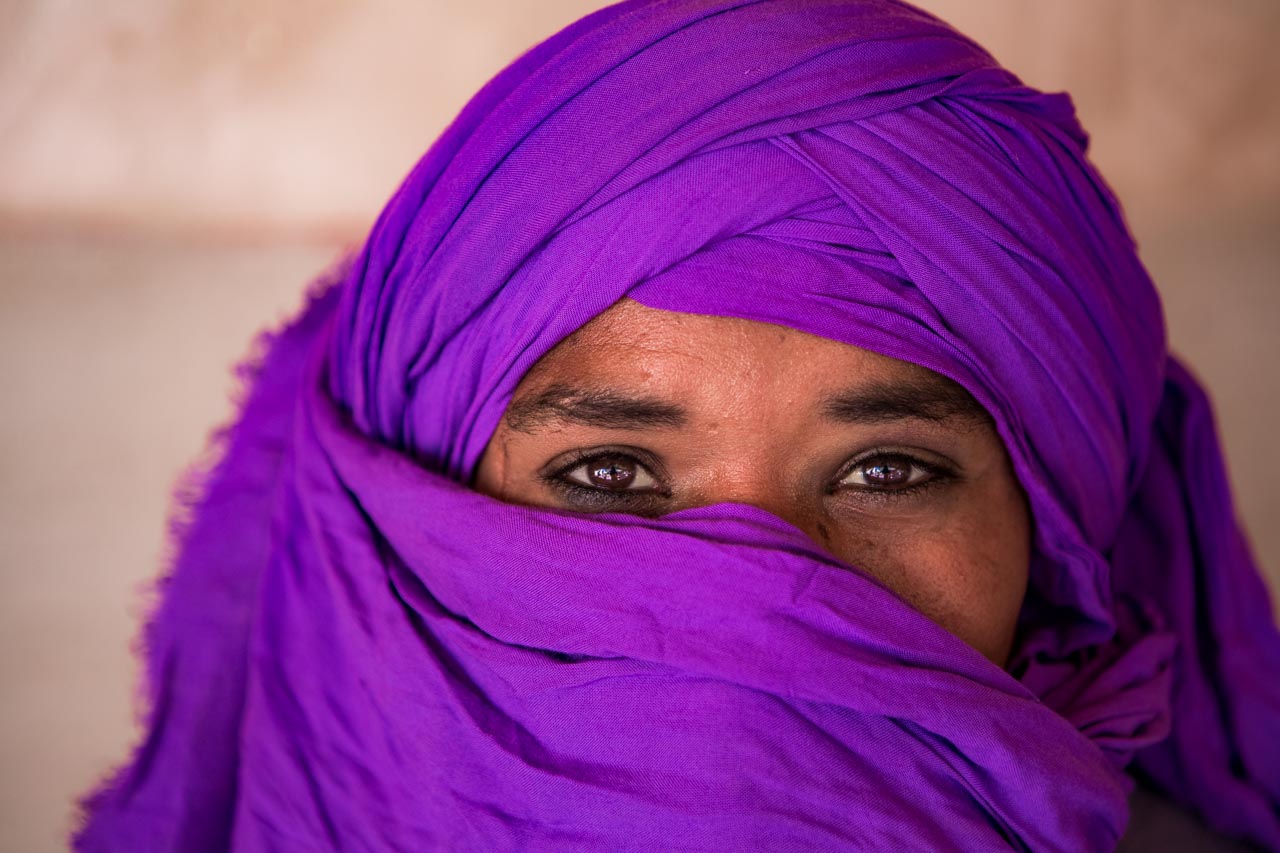
The eyes have it. This berber in Morocco was adorned in purple, but for me, the image was all about those beautiful eyes. Any further back and they’d have lost their dominance in the frame.
7. Practice at home
An often overlooked suggestion that makes total sense once you put it into practice. Striking out on your home turf and acting as if it’s a new place will prepare you for when you are abroad.
Skills like quick creative decision making, getting used to long days on food, cultivating your sense of exploring, getting lost, and being open to what might be around the next corner can all be honed at home, when there’s no pressure.
If you’re traveling with kids, practice with kids around. If you’re traveling with non-photographer friends, try to practice when you’re all out together – do you have the confidence to excuse yourself to make a photo, even with them all watching, for example?
If you can’t excuse yourself at home to make a photo, you’ll struggle to break away when on the road. Except on the road, there’s no do-overs usually. So if making travel photos is something you’re passionate about, practice all of the above steps at home as much as you can.

Even at home, I strike out to sharpen my skills for the road. Tofino, BC.
The post 7 tactics for more powerful travel photos appeared first on Clickin Moms.


