
I don’t like to play favorites.
Really, I don’t.
The love I have for all the panels and filters and brushes in Lightroom is equal, just as the love I have for my children is equal. Except that’s a lie.
The radial filter has my heart, but my love is justified. This handy little tool can do all the things. All. The. Things. But let’s back up just a bit.
When I first began my journey in post processing, I learned the basics and I steadfastly stuck to them. There was no venturing off into the Effects Panel or dabbling in Split Toning.
However, it wasn’t long before I started to get a little curious about what all those other mysterious tools could do for my photos. They shouldn’t be that intimidating, right? It was then that I met my true love, the radial filter.
Lightroom’s radial filter can be found in the Develop module towards the top right of your screen. It’s indicated by a circle and it is found between the Adjustment Brush and the Graduated Filter.
To use the radial filter, make sure it is selected and then simply choose your effect. The great thing here is that you’re not limited to just one; select as many as you like.
Want to increase exposure and clarity? No problem!
Want to decrease your shadows but bring up the highlights a bit? You got it!
Next, go to your image and click and drag a circle or oval around the section where you are wanting the effects to take place. Keep in mind that you can place your effects inside the circle/oval or outside of it. To place your effects inside the circle, make sure to check the Invert Mask box.
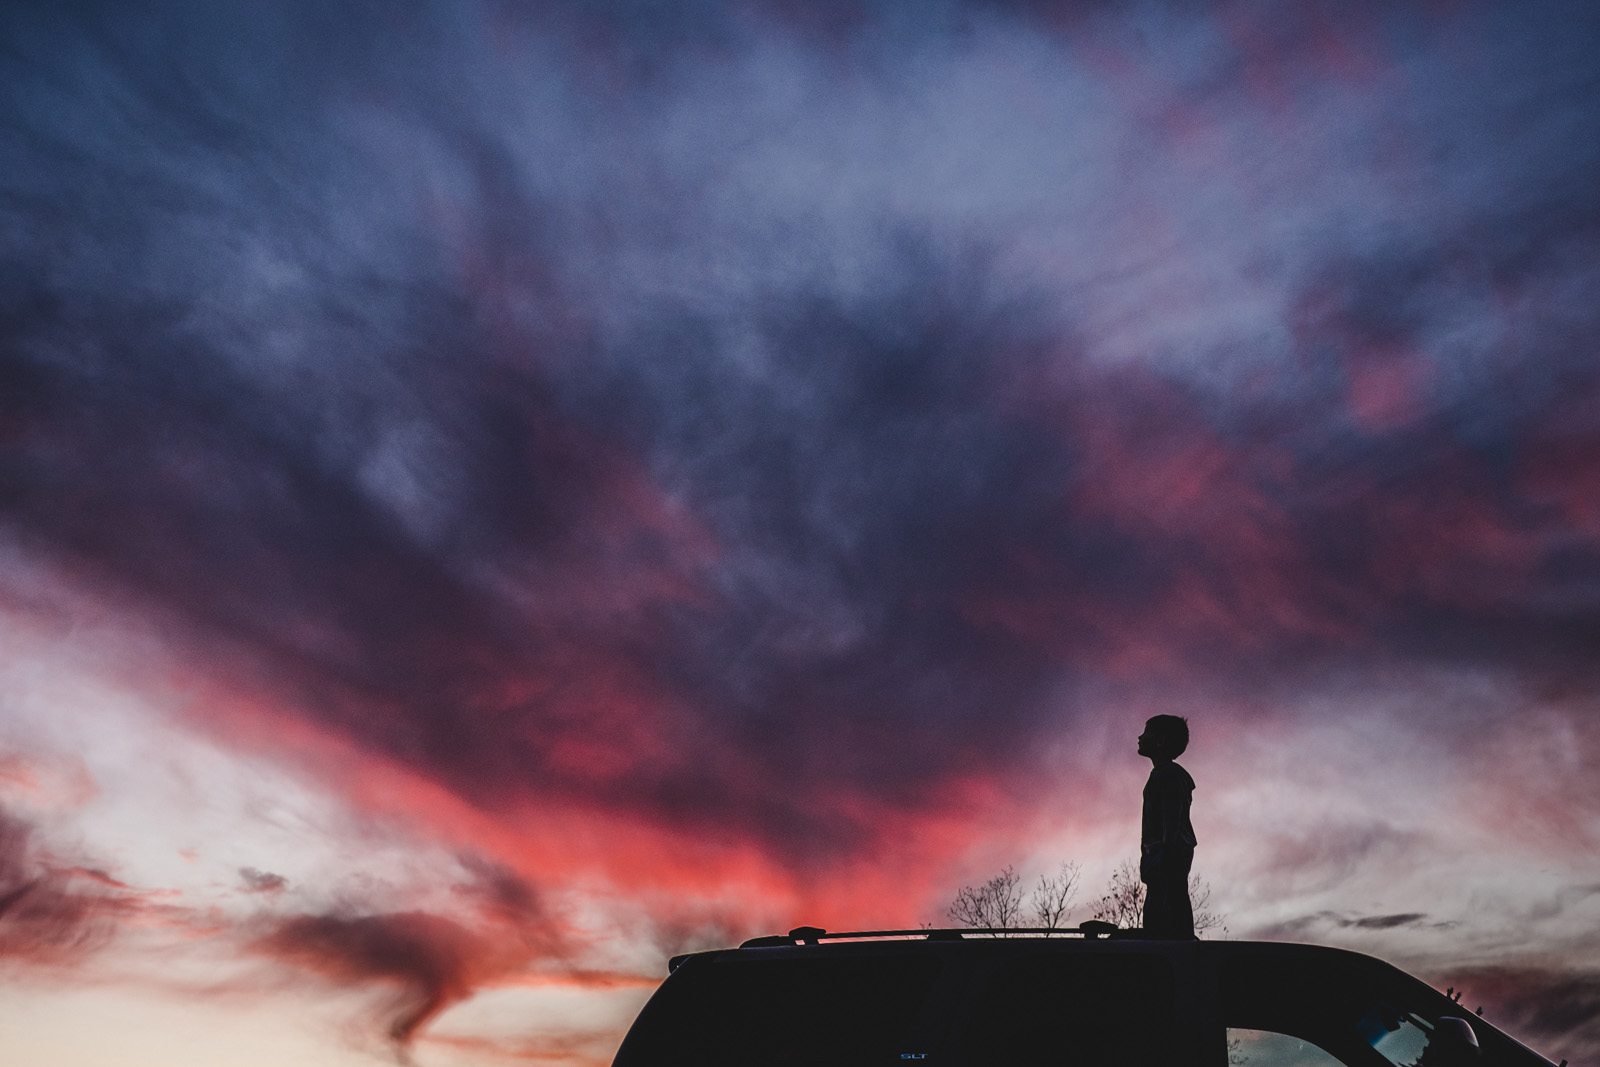
When I first started experimenting with radial filters, I mainly used them to slightly darken the areas around my subject, and I still love it for this purpose.


Settings for above image:
- Radial Filter around my son.
- Exposure -0.87
- Shadows +100
- (Even though I decreased the exposure in order to make my subject pop, I brought up the shadows to keep some of the detail in the branches of the trees.)
It is such a quick, easy and effective way to make your subject subtly pop.
When I use the radial filter, I almost always leave the Feather slider around 90-95 and drag my circle to be quite large. This just means that the effect you are applying will be heavily feathered and will subtly and gradually change.
Try adding a radial filter and taking the Feather slider all the way down to 0 and you will see what I mean.

Settings for image above:
- Radial Filter – Feather 0
- Highlights -77
- Clarity +82
Settings for image above:
- Radial Filter – Feather 94
- Highlights -77
- Clarity +82
By making a large circle and keeping my feather up in the 90s, the desired effect will be much more natural looking and a lot less noticeable.
I used the radial filter to bring down exposure and shadows around my subject for a long time before I started getting creative and really pushing the limits to see what this one little tool can do for me. But once I started experimenting with it, I was blown away with the possibilities.
So without further ado, here are five ways to use the Radial Filter that will transform your images with just a few clicks.
1. To brighten eyes
Yes, I know I can brighten eyes with the adjustment brush, and I do sometimes. But unless I am working on an extreme closeup, I tend to the like the results better using a radial filter.
You can use the Iris Enhance Effect with a radial filter, but sometimes simply lifting the shadows on each eye is sufficient. Like I mentioned before, I will keep the feather slider nearly all the way up and make my circles larger than my subjects eyes.


Settings for image above:
- Radial filter around each eye.
- Exposure +0.77
- Clarity +10
- Invert Mask checked.
2. To make my subject pop
I had been using the radial filter for a long time with the intention of making my subject pop by deepening the background, but it took a while before I realized I could do this in reverse as well.
If my background is already the way I like it and I don’t want the shadows or exposure pulled down anymore, it’s time to get to work on my subject. I will frequently lift shadows, and sometimes exposure and clarity too, on my subject if they are caught in the shadows when shooting.
For this image of my son eating a s’more, the details I wanted to capture are lost, but with a few quick radial filters, the image is exactly the way I had it pictured in my mind.


Settings for image above:
- Radial Filter around my son’s mouth.
- Tint -12
- Exposure +1.25
- Shadows +47
- Saturation -23
- Invert Mask checked.
- Radial Filter around the s’more.
- Clarity +100
- Invert Mask checked.
3. To make my background pop
I do love to make my subject pop, don’t get me wrong. But sometimes a background just begs to be seen and my radial filters are there to help me make sure that happens.
In this image, I loved the texture and color in the reflection on the water, and I really wanted that to be the focus of the image. However, adding a ton of clarity and saturation to the entire image didn’t appeal to me because I wanted to keep the integrity of my son’s skin tones and softness intact.
Radial filter to the rescue!


Settings for image above:
- Radial Filter around my son.
- Exposure -0.64
- Shadows -44
- Clarity +54
- Saturation +69
- Second Radial Filter around my son.
- Exposure +1.00
- Shadows +44
- Clarity +14
- Invert Mask checked.
Here’ s another image where I really wanted to play up the fun and whimsical vibe of the background, but didn’t want to ruin my sons’ bodies with a bunch of adjustments that I wouldn’t normally use on them.
The radial filter was perfect to keep them nice and clean while getting a little dramatic with their surroundings.


Settings for image above:
- Radial Filter around my sons.
- Exposure +0.69
- Contrast +38
- Clarity +100
- Saturation +100
4. To selectively change white balance
White balance can sometimes be the bane of my existence. I hope I’m not the only one. It’s even worse when it’s not consistent throughout the frame. Enter the radial filter.
In this particular image, there were two types of light coming in from two different windows with varying warmth. If I warmed up the entire image, my son would be much too yellow. A quick radial filter on the window to the left allowed me to selectively warm up the white balance in that section of the frame as much as I needed to in order to balance out the image.


Settings for image above:
- Radial Filter around the window.
- Temp +100
- Invert Mask checked.
- Radial Filter around my son.
- Exposure +34
- Shadows +43
- Invert Mask checked.
5. To hide sore eyes
I’ll do anything to avoid pulling my images into Photoshop. Lightroom for life! But while the cloning tool in Lightroom is adequate, it’s not quite as capable as cloning in Photoshop (or in my case Photoshop Elements).
But I’ve found a way to get rid of eye sores and distractions in Lightroom while avoiding cloning altogether. Can you guess what it is? Yep! A radial filter.
If there is a distracting element in my frame that might be hiding in the shadows, a quick radial filter to lower shadows and sometimes even exposure or clarity will do the trick just fine.


Settings for image above:
- Radial Filter around the object in the lower left corner.
- Exposure -0.29
- Shadows -92
- Invert Mask checked.
- Radial Filter around boy in red shorts.
- Exposure +0.84
- Shadows +54
- Invert Mask checked.
- Radial Filter around boy towards bottom of frame.
- Exposure +0.93
- Shadows +58
- Invert Mask checked.
Everything and the kitchen sink
Sometimes I just want to let loose and go crazy. In life and with my photos. On those days, one radial filter will just not do.
With photos that have a lot of texture and mystery, I like to add many radial filters to adjust different things in different parts of the frame. It’s fun for me to get creative and bump up clarity in certain sections while bringing down highlights somewhere else.
Or maybe I want to really saturate one small section of the frame while bumping up contrast in a different area. This little tool is so handy in helping me bring my artistic vision for a photo to life.
I wouldn’t suggest going this wild on all your photos, but you will know when you come across a photo that will be able to stand up to all the filters you throw it’s way.
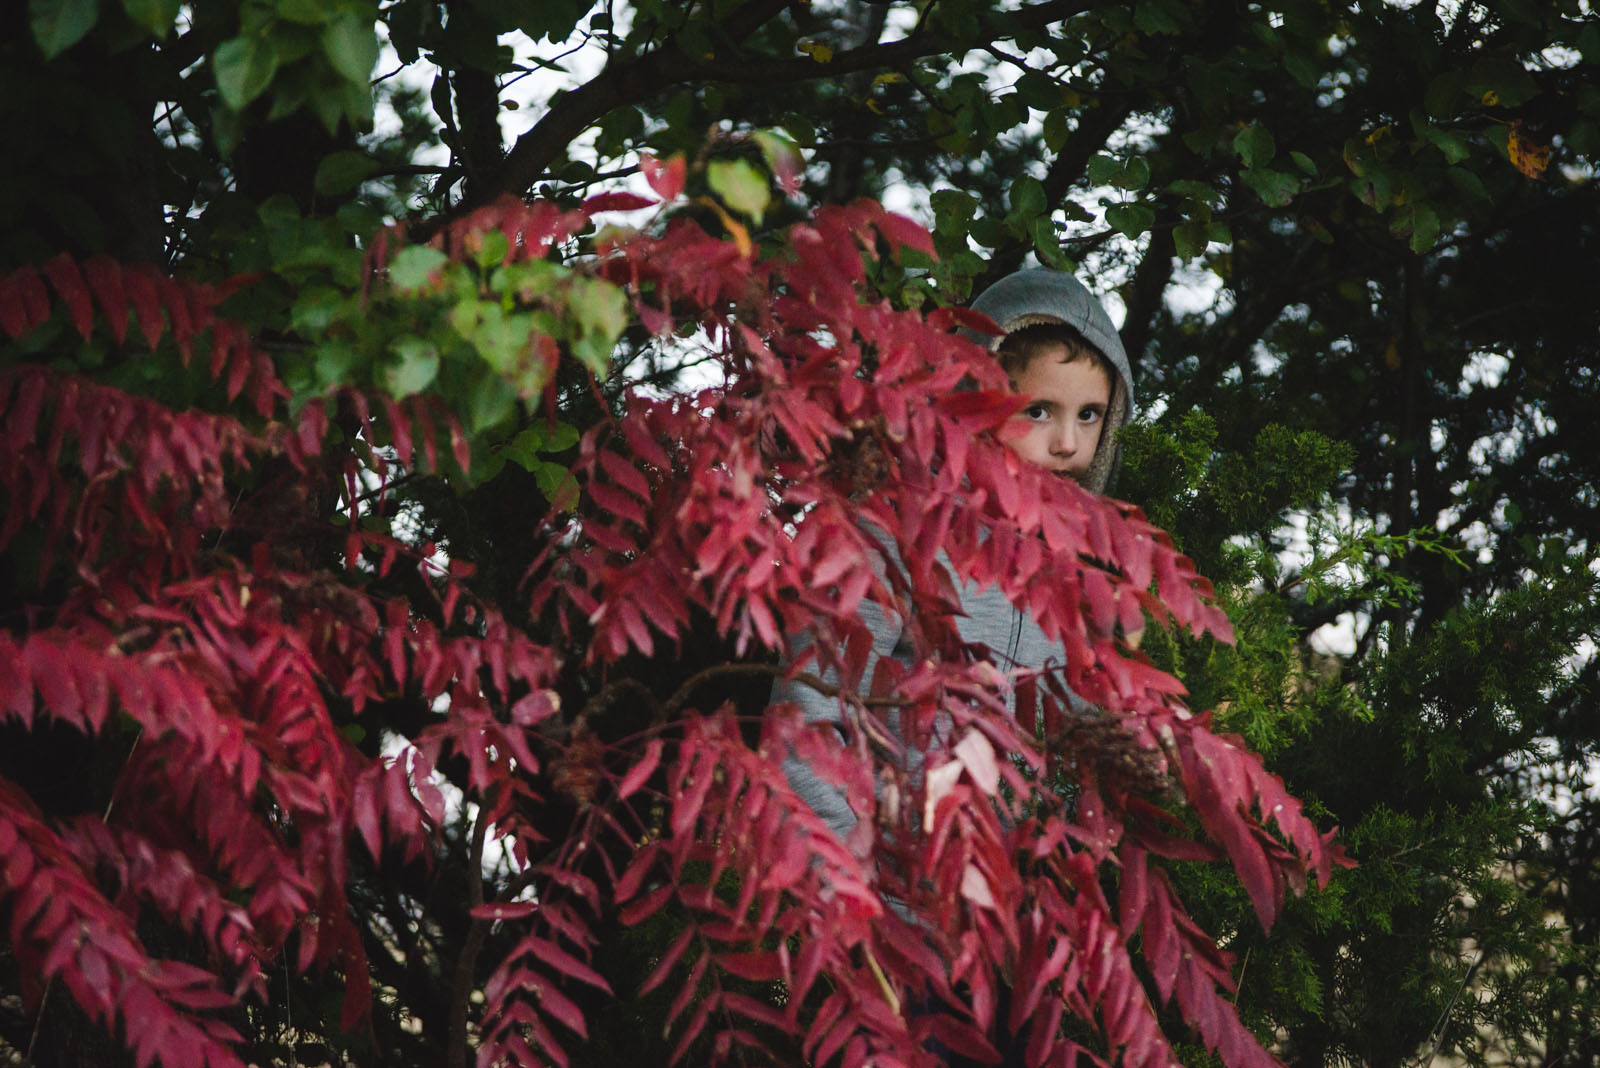

Settings for image above:
- Radial Filter around my son’s face.
- Highlights +33
- Invert Mask checked.
- Radial Filter around my son’s body
- Temp +23
- Exposure -1.90
- Contrast +24
- Highlights -27
- Shadows +100
- Saturation +51
- Radial Filter around leaves bottom right.
- Exposure +0.70
- Clarity +89
- Saturation +60
- Invert Mask checked.
- Radial Filter around large portion of the left side of the frame.
- Clarity +89
- Saturation +71
- Invert Mask checked.
- Radial Filter around red leaves toward the bottom of the frame.
- Clarity +89
- Saturation +48
- Invert Mask checked.
In almost all of the instances we’ve talked about here, it’s important to reiterate that I almost always keep the Feather slider around 95 and I drag my circles rather large to keep the effect subtle.
However, there are a few times I will bring the feather slider down in the teens, and that is usually if I’m wanting to add the effect to something that is oval or circular in shape and I need the results to be drastic.
For example, it could be an image shot from above of my son drinking hot cocoa with a heaping amount of marshmallows. I could throw a radial filter on the top of that mug of coffee, bring the feather all the way down and lift the shadows and add all the clarity I want.
The more you play around with this handy little tool, the more you will be able to recognize when and where it will be able to help you achieve your artistic vision.
Now, I’m an old-school, Lightroom 5 kinda gal, but if you are using the Adobe Creative Cloud version of Lightroom, your radial filter has even more options.
After applying your circle, you have the option of masking on even more of the desired effect outside of your circle, and you are also able to erase portions of it inside of your circle. If you have this feature and you love it, don’t tell me about it. I’m clinging to my beloved Lightroom 5 for as long as I can.
So as you move forward with your post-processing adventures, don’t leave the sweet, unassuming radial filter out of your bag of tricks. We covered five ways this tool can transform your images, but if I know my little radial filter, when it comes to it’s capabilities, we’ve barely reached the tip of the iceberg.

The post 5 Ways to use one Lightroom tool that will make your photos pop appeared first on Clickin Moms.


