I’m a Lightroom girl.
I do 95% of my editing within that program.
Lightroom gives me the full creative power I need to bring my images to life.
However, there are a few situations where Photoshop can deliver a result that is stronger or faster than what I can do in Lightroom. In these situations, I do my Lightroom work first and then I bring the image over to Photoshop for a quick fix.
Once my Photoshop fix is done, I bring the image back to Lightroom to finalize and export.
Before heading into Photoshop
Before heading into Photoshop to make any of the below edits, I first complete my Lightroom edit. I work my way down the Develop panel making both global and local adjustments, ensuring that I have the color or black and white conversion as I want it.
Once I’m satisfied with the overall edit, I take the image into Photoshop for some final fine-tuning and polish.
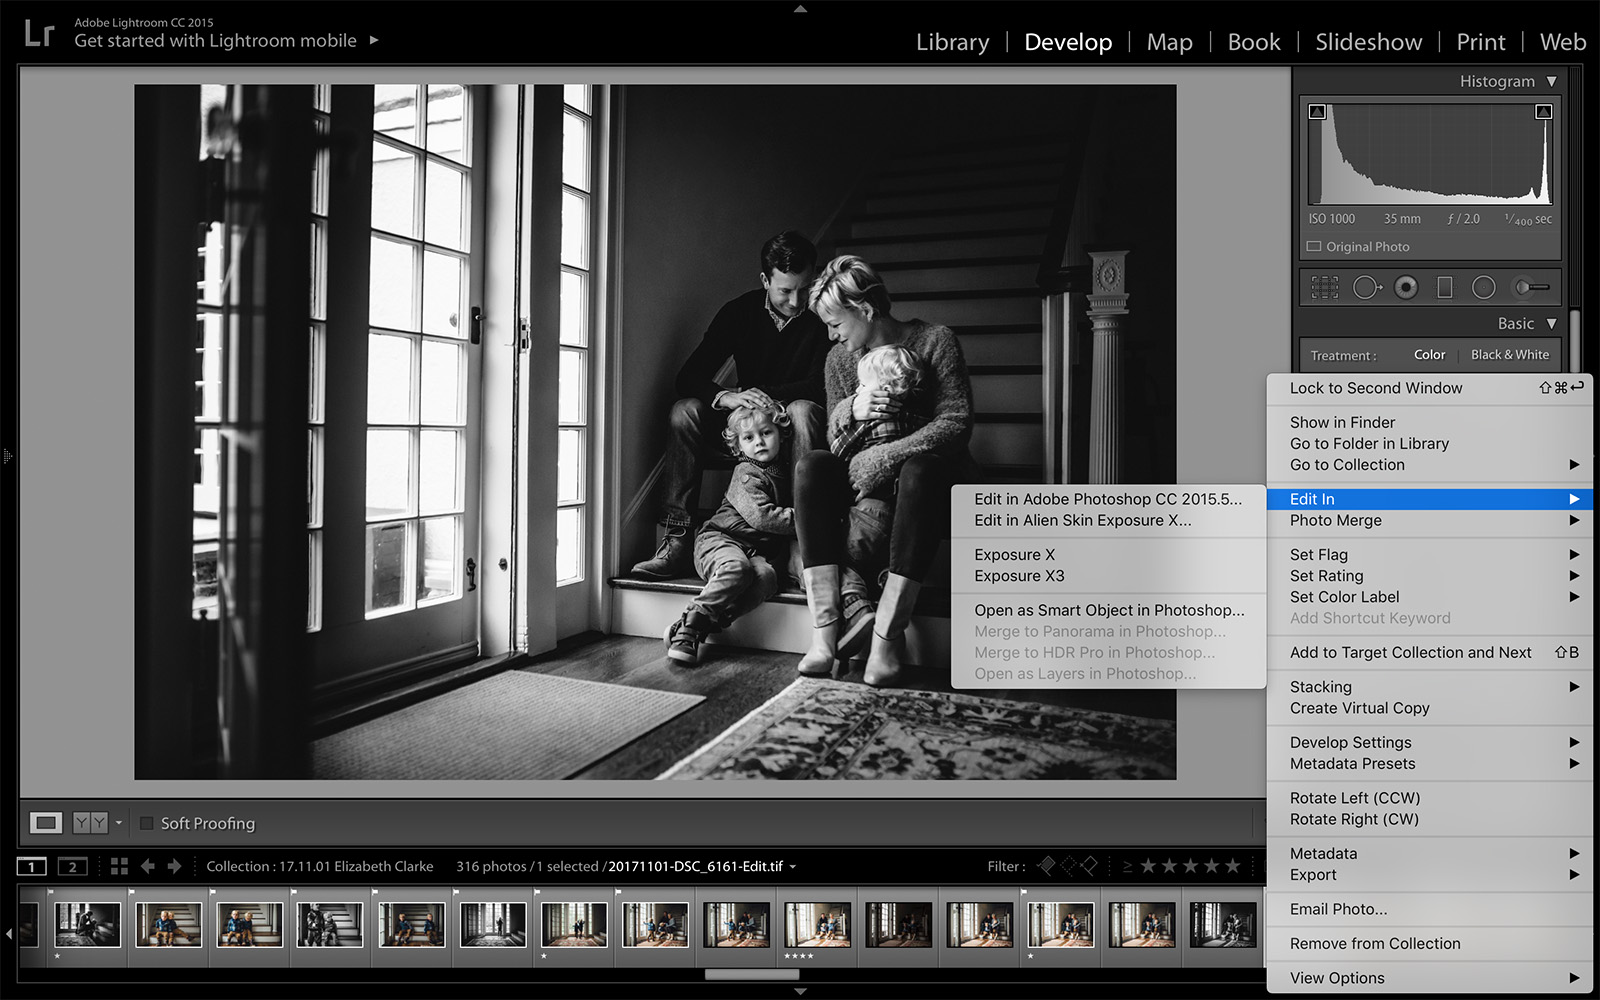
For those of you new to Photoshop, to take an image into Photoshop from Lightroom simply right click on the image thumbnail on the bottom of your screen and click “Edit in Photoshop”.
Once the image opens in Photoshop right click on the initial layer of the image and click “duplicate layer”. This will leave your original image in tact underneath your edits in the event that you want to undo some of your changes.
When you are done making your edits, simply click “save” and it will automatically save the image back down to Lightroom.

Photoshop fix #1: Spot removal
While the spot removal tool in Lightroom has improved with each Lightroom update, nothing is quicker and smoother at removing spots than the Spot Healing Brush Tool in Photoshop.
Whether it’s a scratch, a flyaway hair or newborn baby acne, I find the Spot Healing Brush Tool to be quicker and more accurate than the spot removal tool in Lightroom.
After taking the image into Photoshop, click on the Spot Healing Brush tool. You can use the key that looks like this “[“ to make the correction circle smaller, or “]” to make the circle bigger.
You can click on a single spot to erase it, or drag the tool to erase something longer like a scratch on the skin. This brush automatically samples from the area around the imperfection to ensure the correction is a proper color match.

After erasing all of the little imperfections, simply click save to bring the image back down to Lightroom.


Photoshop fix #2: Patch tool for removing unwanted objects
The Patch Tool is great for repairing larger areas or for removing distracting elements within your image that may not correct as well with the Spot Healing Brush.
The Patch Tool is located in the same spot as the Spot Healing Brush tool. Right click on the Spot Healing brush and select the Patch Tool from the menu.
To use this tool begin by drawing a circle around the area you wish to correct. Then drag this area in any direction toward the part of the image you would like to correct with. (Note: Check to see that “Source” is selected in the upper menu bar before dragging the selection).
Photoshop then blends the pixels from the destination area into the original selection, erasing the unwanted object.

For example, if you are removing a power outlet from a wall, circle the power outlet and then drag the selection to the blank wall located above the power outlet. The patch tool should automatically replace the power outlet with blank wall.
If the tool did not full erase the object you were trying to remove, circle it again and repeat the process. When you are satisfied with the replacement, hit Cmd + D on mac and Ctrl + D on PC to deselect the area.


Photoshop fix #3: Eyes that sparkle
There are many ways to enhance the eyes, but I’ll walk you through one method that is relatively quick and straightforward, but yields captivating results.
After taking the image into Photoshop, click on the Magnifying Glass to zoom in on the eyes of the image. Then click on the Magnetic Lasso tool.
This is one of my favorite tools in Photoshop because it makes selecting any part of the image super quick and easy. (Note: If you are only seeing the Lasso tool and not the Magnetic Lasso, right click on the Lasso and a small menu will appear with the Magnetic Lasso option.)
Using the Magnetic Lasso select the area around the eye. To select both eyes at the same time, after completely circling one eye, hold down the Shift key and then circle the other eye.

Once both eyes are selected go to Layer -> New Layer Via Copy on the top menu.
Then go to Filter -> Other -> High Pass. The High Pass filter is a sharpening filter that gives very nice results when used carefully and selectively. I usually set the High Pass filter to 10, and then adjust the opacity as necessary in the layer panel if 10 makes the eyes look unnatural.
After clicking on High Pass, the eyes will look foggy, so you will then want to go to the Layer panel, and change your layer blending mode to Soft Light.


Photoshop fix #4: Content aware fill to extend your background
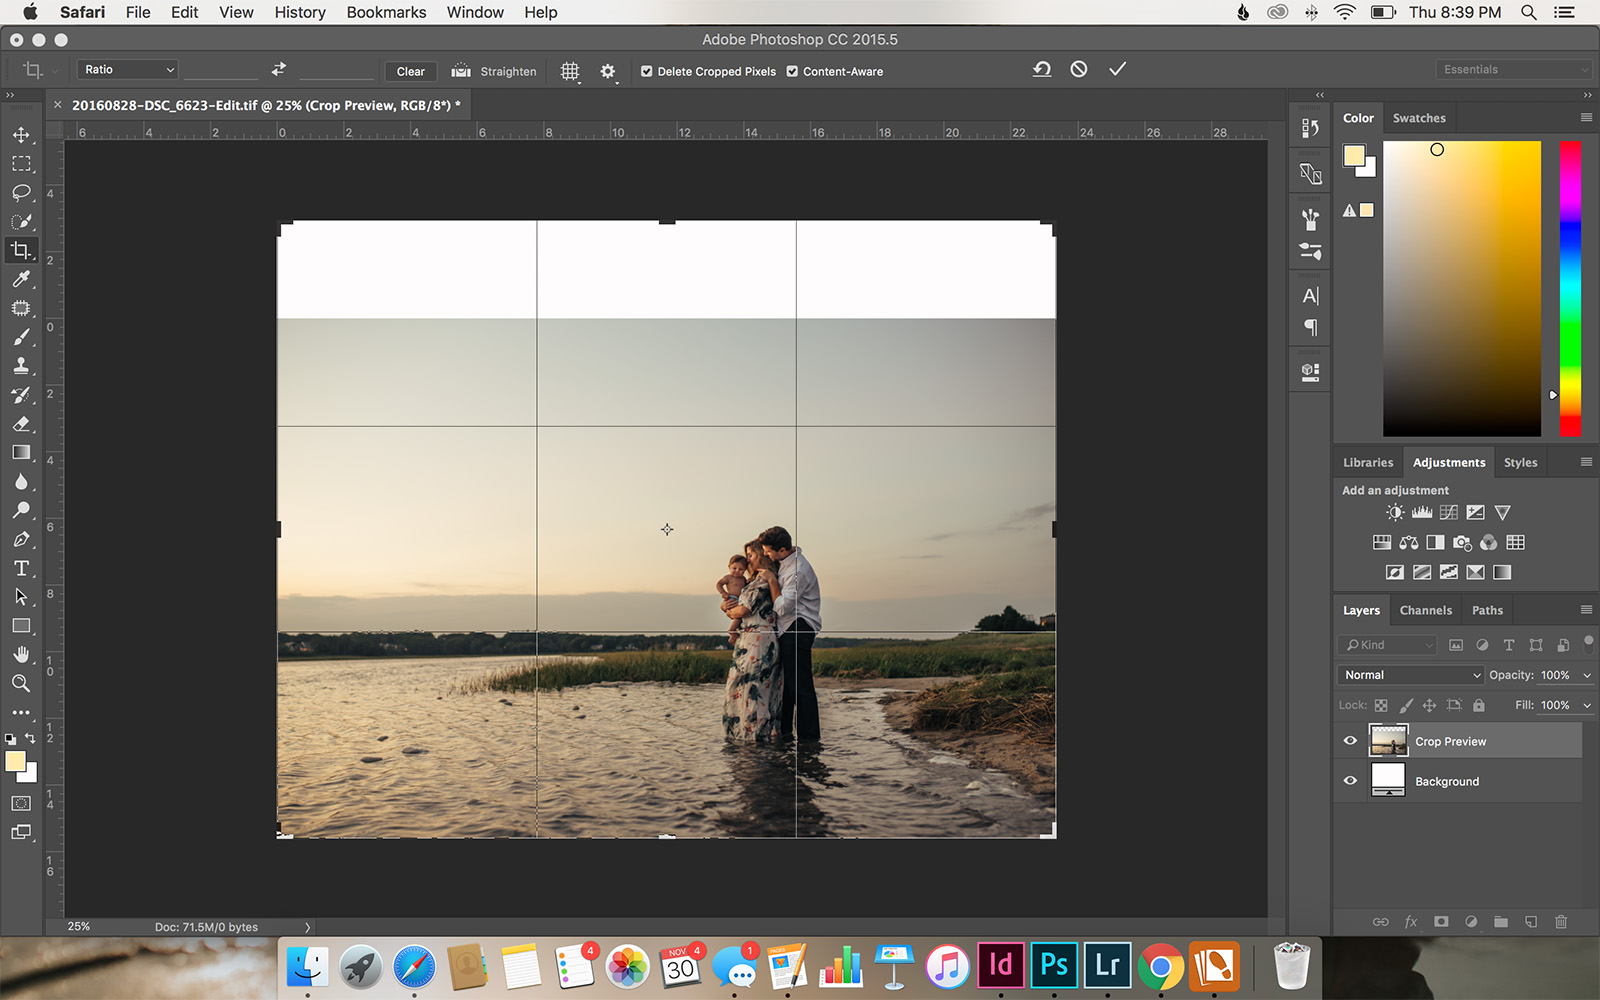
Sometimes you may find yourself needing just a bit more sky or background than you actually shot. For example, your client may request an image that you captured in a 4×6 ratio as an 8×10, and to print properly at this size without changing the vision you had for the image, you may need to extend your background.
The easiest way to do this in Photoshop is with Contentment Away Fill. After opening the image in Photoshop, click on the Crop tool.
From there, simply drag on the part of the image you would like to extend. If it’s the sky, drag the crop up until you reach the size you need. If you find the whole image is continuing to move at the same scale you started with, click the Clear button on the top menu bar.
On the top menu bar you will also want to make sure Content Aware is checked. Then hit enter and the tool will automatically fill the area in using the information it has gathered from the pixels around it.

Please note that this works best when you have a relatively simple background. Even then you may find that you need to clean up the new area a bit more.
To do this, use the Patch Tool we talked about in Fix #3 to select the areas that still need a little smoothing and cleanup.


Lightroom will always be my go-to editing program, I just love ease at which it gives me complete creative freedom over my editing process.
However, by incorporating a few simple Photoshop tricks into my workflow, I’m able to add an additional layer of polish and creativity, thus allowing me to fully realize my vision for each image.

The post 4 Quick Photoshop fixes for the Lightroom user appeared first on Clickin Moms.


