
Whether you’re a beginner opening up Photoshop or Lightroom for the first time or a more seasoned photographer, this collection of editing tips from the pros will leave you trying out a few new things in your digital darkroom.
Lightroom editing tips:
The Graduated Filter
In Lightroom, I use the Graduated Filter to enhance directional light. I place the Graduated Filter on the light source and move the Exposure slider just a touch and at the same time, use the Graduated Filter to deepen shadows to pop that directional light even more!
In the examples provided, you can see in the before photo that the light is in front of the little girls face to the right but could use some help to be brought out. In the after photo, you can see the beam of light more clearly as it now makes a path to her.

before

after
I love to use the Graduated Filter in Lightroom to enhance my clouds. This tool allows me to enhance the depth, bring back the exposure and details that are often lost when shooting for exposure on my subjects.
You simply click the Graduated Filter, drag the filter on your image and play with the different sliders until you achieve the look you desire.

before

after
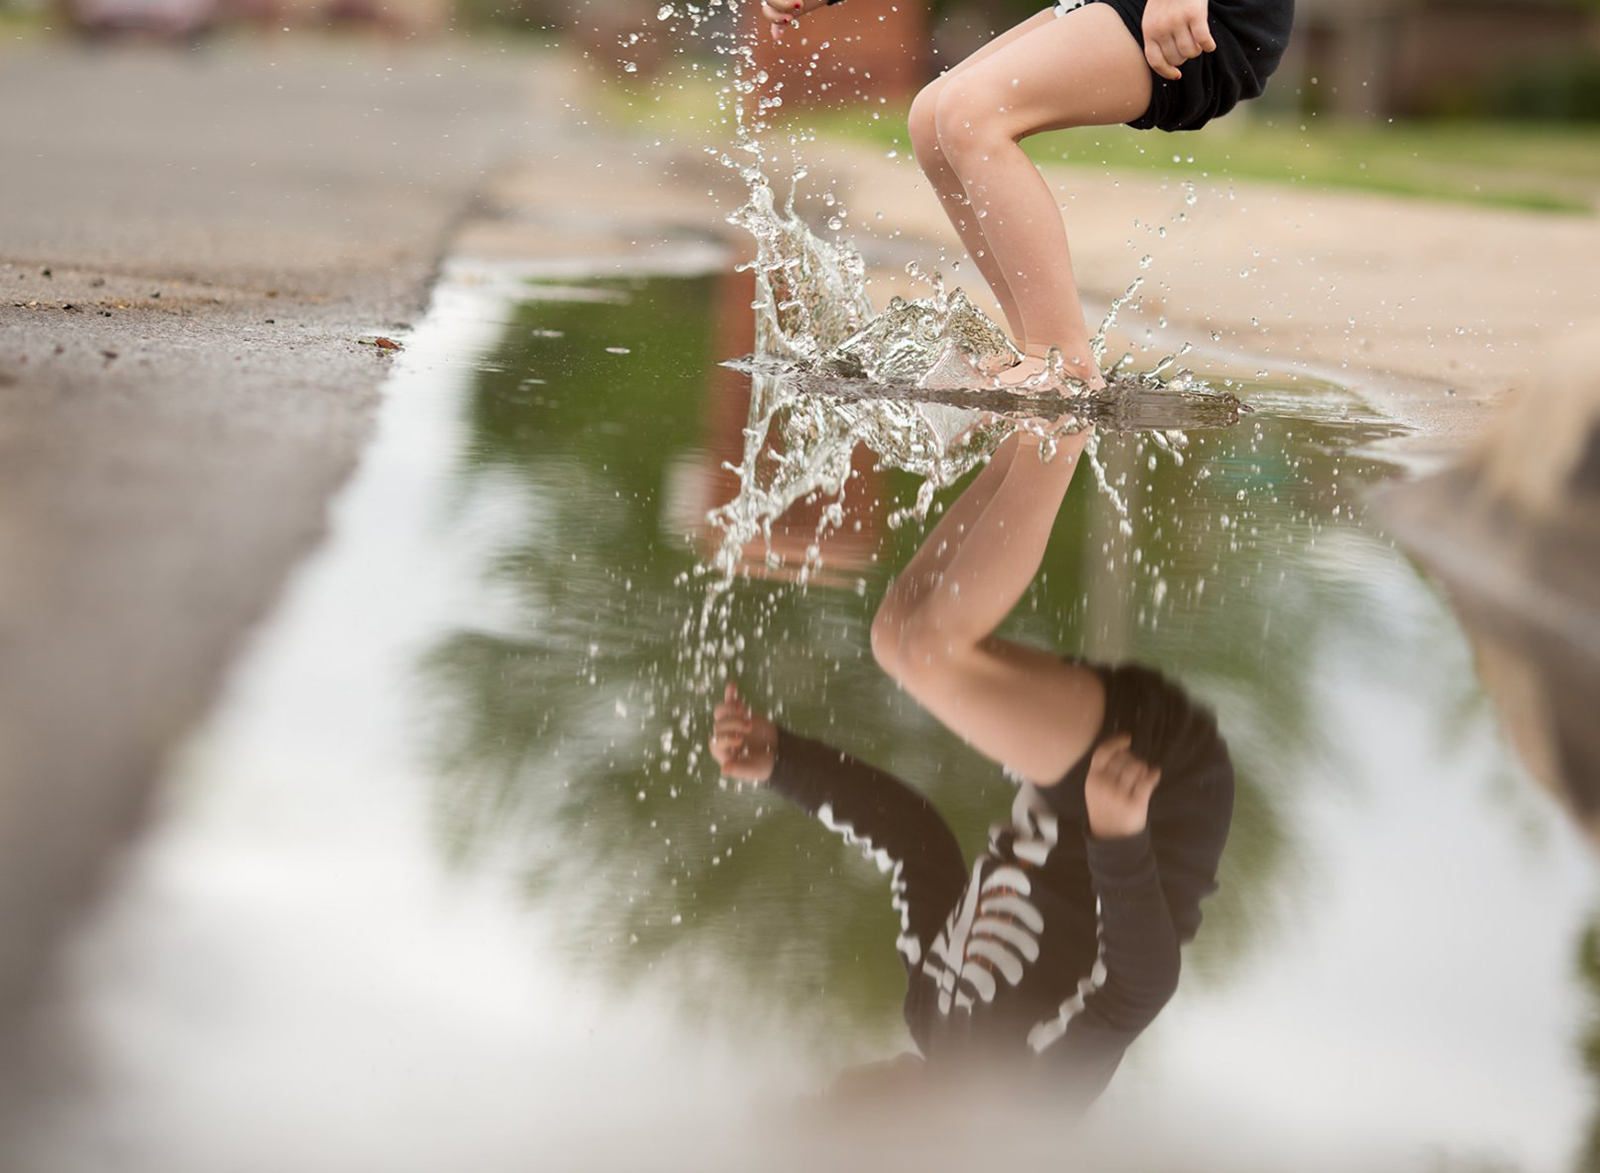
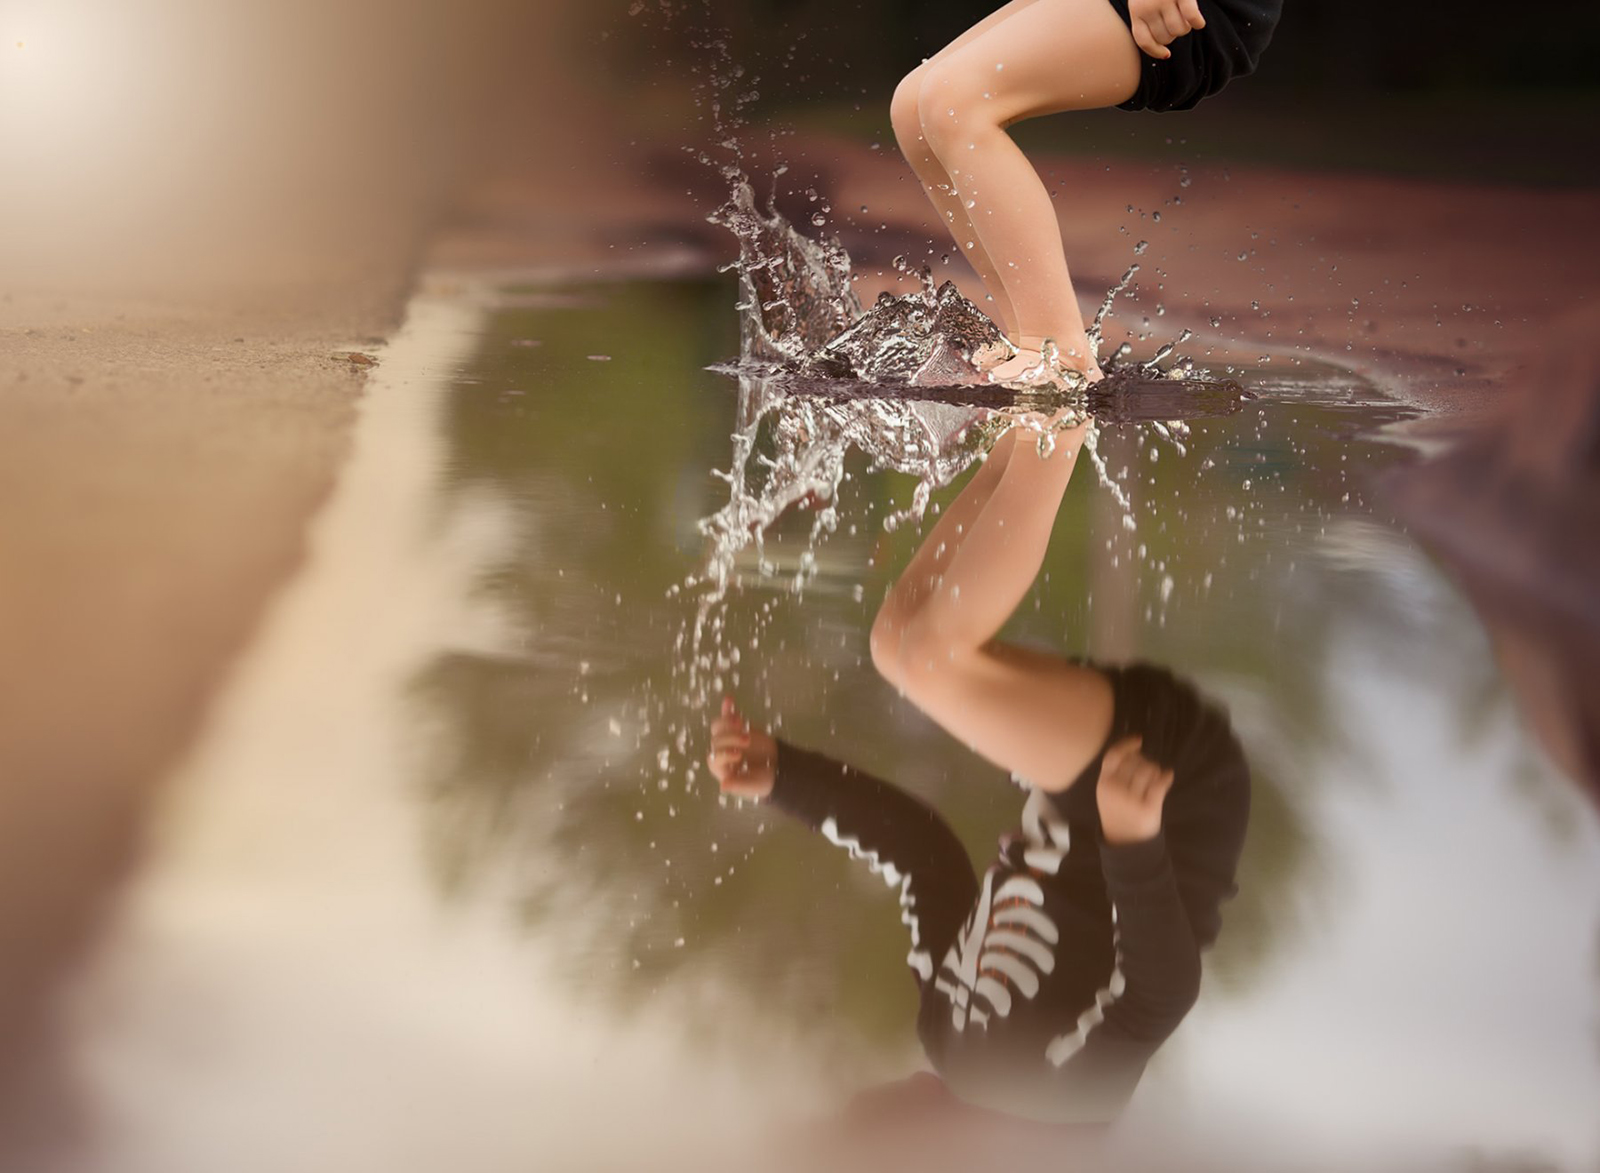
The Clarity slider
One of my favorite Lightroom editing tips is adding clarity when converting to black and white. This can bring out texture and details, especially with hair, eyes, freckles in portraits, as well as water droplets and other elements with texture.
You can add clarity globally as well as with a brush to add extra clarity in specific areas. In this photo, I raised clarity +35 globally, then brushed on extra clarity on her eyes and freckles.

before

after
Straightening a photo
I use this trick in most of my in-home sessions as a quick fix to straighten my images. If you go down to Transform and then Auto, it will automatically straighten the photo and lines and is such a time saver!

before

after
Split Toning
I love to use Split Toning to enhance the shadows and highlights of an image. This image was taken at sunset, so I wanted it to really have an organic glow. After brightening this image just a bit, I went to Develop and then Split Toning and added some warmth to it by applying an orange tone to the shadows at about 8% saturation.

before

after
HSL Panel
When I am editing images that were shot in direct sun and include greenery and blue sky, I like to play with the Saturation and Luminance sliders in the HSL Panel to really make the colors pop.
I will typically decrease the saturation of yellow by 15 to 20 points to keep the grass from looking too neon, and then increase the saturation of blue by 20-30 points. Sometimes I even adjust aqua by a few points, to enhance the blue of the sky.
Then if it still needs some pop, I will increase the luminance of the greens by 15-20 and sometimes decrease the blue and aqua by a few points to give the sky that bright happy blue color that we love to see during the day ")

before

after
When I was a beginner, I had a breakthrough in editing when I learned to control the colors I wanted in my photos. A great way to do the is with the sliders in the Color Panel. In this photo, I disliked the bright yellow and green. I took down the saturation of both, reduced the red saturation on her arm where she was sunburned, added grain, and used the Clarity Brush.
Play with the sliders until you figure out what colors are pleasing to your eye. Remember, it’s all subjective and it’s your art, so don’t be afraid to try something different.

before

after
Whites slider
When I want to make a subject pop in the frame, one of my go-to tricks is a radial filter and/or adjustment brush paired with an aggressive Whites slider setting in Lightroom.
I find that the selective brightening with the Exposure slider can look unnatural if used aggressively, potentially even creating a telltale halo or introducing noise to brightened shadows. However, because the Whites slider only targets the brightest tones, it leaves the shadows alone and adds fantastic punch and separation to my highlights. Here, the only difference between Before and After are a few Radial Filters with the Whites slider set at +100:

before

after
The Angle tool
I love using the Angle tool in Lightroom to straighten my horizon lines, found under the Crop and Straighten tools in Lightroom. You simply click the Angle tool and drag a line on the horizon in your image. This tool straightens your entire image for you in just one little step.
Danielle Awwad

before

after
Dehaze slider
When converting to black and white in Lightroom, I love to use the Dehaze slider to increase the contrast and bring out the tones in an image. Here is an example where the Dehaze slider has been increased to +51.
Lindsay

before

after
Flip
I do my best to compose well in camera, however, sometimes once I pull an image into Lightroom I’ll find that I prefer a flip of my composition. Luckily this is really easy to do in LR. In the main menu I select Photo then scroll down to Flip Horizontal. Done. Super easy and quick!

before

after
Blue Primary slider
When I edit a picture taken during the golden hour in Lightroom, I love to increase the Blue Primary saturation in the Camera Calibration panel to warm up my picture. It will make everything glow without making it too orange, which I find can often happen when increasing the temperature. I will also often lower the blue luminance in the HSL panel to bring out that beautiful blue sky.

before

after
Tone Curve
In Lightroom, I like to use the Tone Curve to add contrast to my images and help them pop a bit. To do this, I make a slight S shape on the curve by bringing the highlights up, and the shadows down. A little bit goes a long way here, and the results are pretty incredible. In the examples below, the only difference is a Tone Curve adjustment.

before

after
Distortion slider
I don’t own a fisheye lens, but sometimes I like to pretend that I do. In Lightroom, I simply play with the Distortion slider in the Lens Correction panel so that it creates a rounded horizon line.
When doing this, always watch out that it does not distort your subject, however. I will do this when I have several frames of the same pose and want to add variety to a session or to add a little spice to a fun picture.
Julie Audoux

before

after
Photoshop editing tips:
Liquify tool
In Photoshop, I like to use Liquify to even out/straighten a grass line in the background. Simply duplicate your background layer, go to Filter, and select Liquify. Select the Forward Warp tool, then, using a large brush, gently push down on the side that needs lowered (or up on the side that needs raised). Once it looks level, click OK and you’re done! You can add a layer mask to that layer if you need to mask anything off that was affected that you didn’t want moved.

before

after
Adding sun flare
One of my favorite tricks in Photoshop is adding sun flare to an image. Once you have imported your picture into PS and have made all your other adjustments, you simply go to the menu and click on Filter. Then, scroll down to Render and click on Lens Flare.
A Lens Flare box will pop up and give you a few options on the type of lens flare you would like to add. Once you have chosen your type of flare, you will see a crosshair on your image in the flare box. Simply move the crosshair to where you would like the flare to start. You also have the ability to adjust the brightness slider to get the flare exactly as you like. Last, click on “OK” and you are good to go.

before

after
Gradient Fill layer
I like using a Gradient Fill layer in Photoshop to gently brighten my subject and pull my viewer’s eye to the center of the frame.
To add the Gradient Fill layer, make sure you have white selected as your color, then go to Layer > New Fill Layer > Gradient. Then click OK. I choose the Radiant Gradient with the angle at about 30. I then change the opacity of the layer to around 10-15%. It’s a subtle change but you can play around with it to suit your photos!

before

after
Sometimes I like to give my photos a soft, dreamy feel, yet I want my subject to pop. The way I achieve that in Photoshop is by adding a Gradient Fill to my image. I click on the Gradient Fill option and then once the window pops up, I click on the Gradient Color options for a custom selection.
I first choose a Color Fill by double clicking on the Color Fill box and then using the selection tool to choose a color from the photo’s background. I then click on the 2nd Color Fill box and choose a color that is slightly lighter than the first color I chose to give me a subtle gradient. Once I’m happy with those choices I click OK then select Radial Gradient and click the box that says Reverse. I scale the size of the gradient to how I like it (different for each photo) and click OK. I then erase the gradient off of my subject and usually decrease the opacity to eye.

before

after
Clone and Stamp tool
I love to use the Clone and Stamp tools in Photoshop to delete distractive elements, accidental subjects in the frame, or clone parts of the background to add on to atmosphere. It’s simple and fast to use.
To start, just go to the left side panel and choose the Clone or Stamp tool. With the Stamp tool, you’ll need to choose sample from the background what you wan to clone on another part of the image with pressing Alt enter. With the Clone tool, this will simply generate the background by merging surroundings (just choose the size at the top according to what part you want to clone out). You can modify your picture as much as you want.

before

after
Hue/saturation layer
In Photoshop I like to add a Hue/Saturation adjustment layer and select the yellows to change the color of my grass. I prefer my grass bluer so I move the hue towards the right and then I usually deepen the tone of the grass by moving the Lightness slider to the left. Occasionally I will add or subtract saturation. After I change my grass color, I make sure to brush it off any skin or other yellows in the image with a layer mask.

before

after
Lasso tool
While I love candid shots of kids, Moms typically like to have a few photos in their gallery of everyone looking at the camera (preferably smiling!) and we all know that as the kids increase in number, that proves to be more difficult to catch. While shooting, I make sure to have at least a few good shots of everyone so that, if need be, I can use the Lasso, Copy/Paste tool in Photoshop to swap heads from photos later.
Using the Lasso tool, I circle around the subject that I wish to move, typically circling more of the background than I need, then I copy. Opening the photo I wish to place it in, I paste my selection. Then I lower the opacity of the new layer and line up the subject as closely as possible. I zoom in and erase back the unneeded area that was copied and flatten image.
Megan DeShazo

before

after
In situations where I want symmetry on the left and right I use the Lasso tool to select the desired section and then copy and paste it in place (Edit > Copy, Edit > Paste). I then activate the selection by hitting Command + T (on a Mac) and then Flip it horizontally (Control + Click on a Mac). Then just slide it to the other side of the image and mask off any lines that appear. This is great to create paths in fields, etc.

before

after
Warm Photo filter
In Photoshop, I always add a Warm Photo filter at the end of my edit. I simply click on the Photo filter Layers, choose Warm Photo Filter and then, I play with the opacity. I am usually between 15% and 50%, depending on the image.

before

after
Painting
When removing distracting elements from an image, start by painting the element the same color as the surroundings. When we remove the color, the object will blend in and it will require much less cloning or healing to “remove” the object.
Clean up any remaining hints of the object using the clone or healing tools.
before
after
The post 20 must-use editing tools in Lightroom and Photoshop appeared first on Clickin Moms.


