What is Coaching?

Basically, it help you to reach self- realization in which you not only truly know yourself but also within this knowledge own a comfortable feeling and understanding of the person you discover.
Your coach engages in a collaborative alliance with you to establish and clarify purpose and goals and to develop a plan of action to achieve those goals. They will establish an understanding of what is really important to you in life and subsequently enable you to take charge of your life; to construct and act upon action plans that will help you to realize these priorities. Put simply, coaching is about helping you to create and work towards the grandest version of the greatest personal vision you have; to achieve success – success being the continuous realization of a worthy goal or ideal.
You will be guided through a detailed process beginning with the need to re-evaluate your present position, who you really are, where your priorities lie and the need to make a definite and conscious decision about the future you would like to create. With the help of a personal life coach you really can re-shape your life, overcome all the obstacles and live the life that you love.
Coaching is essentially a conversation – that is, a dialogue between you and your coach. Within a productive, results-oriented context, coaching involves coaching you to access what you already know. The reality is that you have the answers to all your questions – asked and unasked. Your coach provides the essential assistance, support and encouragement to seek and find these answers; to guide you towards asking the right questions, and deal with the answers.
Coaching also incorporates learning and yet a coach is not a teacher and will not necessarily know how to do things better than you but this does not matter. Your coach will observe patterns – set the stage for new actions and then work with you to put these new, more successful actions into place. This involves learning through various coaching techniques such as listening, reflecting, asking questions and providing information. Finally, and most importantly, your coach will help you learn how to become self-correcting and self-generating. That is, you will learn how to correct your own behaviour, generate your own questions and find your own answers.

Posted in What Is Aperture | Tagged | Leave a comment

How to deal with harsh sunlight when taking photos

So, you’ve been hanging out in the shade for awhile now, but starting to feel like maybe there’s a whole lot of life happening outside of golden hour and the shade of a tree?

You’re right. Welcome to midday full sun!

Welcome to a whole new world of possibilities and creative challenges! Amazing things are happening at all hours of the day and you deserve to have them recorded and preserved as beautifully as the overcast and shady areas (that just makes sense, right?)!

See the Beauty

Morning light pouring through the windows of a still dark house. You literally cannot beat the beauty in this scenario. It so beautifully captures the innocence of childhood, the stillness of the morning, and the promise of a new day. Sometimes I just watch to find what interesting shapes might cross its path. Other times I just happen to discover something sprawled out appreciating it’s warmth. It happens every day and you are a fortunate person to have spent any amount of time appreciating all of the loveliness spilling into your house.

pic of mom holding baby in a blanket outside by Twyla Jones

My rules for midday:

1. I love shooting wide open and the intimate, isolated feel it brings to an image. And that’s the only decision I need to make. I’m focused only on exposing for the highlights to bring a dramatic, contrasty feel to my images. And so I chase. I chase them through the water, the fields, and the sand. I’m watching for every beautiful moment that wraps up a childhood. A hand outstretched to tag his brother, extraordinary finds from the oceans blue, colorful sodas to celebrate a day at the beach. You will be absolutely amazed at all the beauty to be found in some 2 pm sunshine.

photo of a boy standing on a beach on a sunny day by Twyla Jones

2. My other favorite type of harsh light comes filtered through the forest in strong beams. Upon entering, you’ll find it dappled over every tree and bush… don’t turn away. Ask your subject to turn into and bask in its gorgeous stream. Highlight your favorite parts of their face and body while letting everything else fall into darkness. Use flowers and leaves to interrupt its flow and tattoo their natural beauty onto the body of your subject. It’s a natural spotlight that can elevate the beauty and intimacy of the woods.

woman in a red dress in the middle of trees by Twyla Jones

3. Sunshine isn’t scary! Harsh light is an essential tool to be mastered and appreciated just like back button focusing (you’re doing that, right?). Pay special attention to the lines and shadows it creates as the things you love the most eclipse its path. What was your favorite part? What about that moment really spoke to you and told YOU a story you just want to hold onto a little longer. There’s nothing to be afraid of, you just have to change your perspective and look for the beauty in all the ordinary things happening around you everyday that are telling your story whether you are watching or not.

mom holding baby girl in a field of purple flowers by Twyla Jones

Amazing things are happening at all hours of the day and you deserve to have them recorded and preserved as beautifully as the overcast and shady areas. Learn how!

The post How to deal with harsh sunlight when taking photos appeared first on Clickin Moms.


Clickin Moms

Posted in Photograpy How To | Tagged , , , , | Leave a comment

5 Simple Lightroom Tips You Might Not Know About

Adobe Lightroom is arguably the most widely-used image editing software around these days. While most of our readers are probably quite familiar with it, a piece of software as complex as Lightroom is sure to have some tricks and features that not everyone knows about. What I’d like to do today is share a few of those with you. If some of these are new to you, enjoy having some new tricks up your sleeve! If these are old news to you and you already knew them all, please leave one of your favorite tips or tricks in the comments section.

1) When making adjustments to an image, view the thumbnail to make sure the effect is not overdone

This works the best when dodging or burning, but can also work well with other adjustments such as vignetting and color or exposure gradients. Let me show you what I’m talking about:

Obvious halos around my subject

Obvious halos around my subject

In the above image, if you look at the large view of the image, it looks pretty good. If you look at the small thumbnail in the upper-left corner in the Navigator section, you can see obvious haloing around my subject that is caused by sloppy dodging. Of course, if you know what to look for, you can see it in the larger image (I also exaggerated a bit for this example), but there have been times I’ve been editing and only been able to see the halo in the small image.

Why is it so much more obvious in the smaller image? It’s a simple case of downsampling. When you reduce the size of an image, some aspects of the image can be minimized (such as noise), while others can get accentuated (such as sharpening). I won’t go into detail here about downsampling, as there are plenty of articles on this site that do just that. All you need to understand is that looking at a smaller version of an image might reveal information that you might miss in a larger version of the same image.

Tool mask turned on

Tool mask turned on

In this case, by pressing “O” and revealing the mask overlay, you can see that I obviously colored outside of the lines. Now I can erase my dodging from where it doesn’t belong and I won’t have halo around my subject in my final image.

Removed excess dodging and halo

Removed excess dodging and halo

2) For more precise image straightening, hide the side panels

This is a trick that I picked up from Photography Life’s own Spencer Cox, and now I can’t live without it! Straightening an image in Lightroom can be an imprecise endeavor. Moving the Angle slider in the Crop panel isn’t very accurate or easy to control. Clicking in the grey area outside of the image and rotating with your mouse is more precise, but can still sometimes make larger adjustments than are desirable.

Straightening an image - small view

Straightening an image – small view

A simple way to make even more precise adjustments while straightening an image is to hide the side panels in Lightroom by pressing “Tab”. This will make your image take up the entire screen. Now when you rotate the image, it moves much more slowly, giving you precise control over the straightening process.

Straightening an image - large view

Straightening an image – large view

When you’re done straightening your image, simply press “Tab” again to unhide the side panels.

3) Hold down the Alt/Option key when making adjustments to see more information

This trick works great when you’re trying to fine tune adjustments to your image. You can use it when adjusting exposure, highlights, shadows, whites, blacks and even sharpening. Simply hold down the “Alt” key (on PC) or “Option” key (on Mac) while moving the adjustment slider. This replaces the image with other information, such as blown highlights, lost shadows or your sharpening mask.

Clipping while adjusting highlights

Clipping while adjusting highlights

Clipping while adjusting exposure

Clipping while adjusting exposure

Sharpening mask

Sharpening mask

Why would you want to do this? When you’re making adjustments, being able to see exactly when highlights start to blow out or when you have your sharpening mask precisely how you want it can make your editing process much easier and more consistent.

4) Get more consistent exposure adjustments by using the RGB values

In our Photography Life Level 1: Workflow and Post Processing video course, we discuss how viewing conditions and screen calibration can affect the final exposure of your image. If you can’t avoid working in different lighting conditions or using different displays, you need a way to ensure that your images have consistent exposures.

Using RGB values for consistent exposure

Using RGB values for consistent exposure

When I’m editing any type of skin, I pay close attention to the RGB values in the upper-right corner, directly under the histogram. From experience, I know that if I hover my cursor over a person’s forehead and the average “R” value is around 80 for lighter skin or 70 for darker skin, the exposure for their skin should be where I want it to be. In this particular image, I metered near her eyebrow for this value of “R 82.2”. The rest of the values on their faces ranged between R 75-85, which is great for skin. Knowing this, I can get a good exposure for their skin regardless of the conditions I’m working in or my screen’s calibration.

You can refer to these RGB values for your own editing, regardless of what type of photography you do. With a little observation, you should be able to find a value for a part of your image that you can always refer to (maybe a blue sky or green leaves). Then, regardless of the conditions you’re editing in, you can consistently set the exposure for an important part of your image.

Keep in mind, this only works for the specific part of the image you’re reading the value from. For example, I might be able to get a person’s skin looking perfect, but the sky might be completely blown out. This is simply another tool that you can use while editing, not a magic bullet for perfect overall exposures.

5) Change your camera profile

This is something that I learned from Nasim while we were creating our Post Processing video. It’s not necessarily a trick, but it is something that I was completely unaware of, simply because I had never explored it. In the Lightroom develop module, on the right side if you go all the way to the bottom to the Camera Calibration section, you’ll see a drop down selection named “Profile”. By changing this, you will adjust the way the image looks without affecting any of the other settings, such as exposure, curves, HSL, etc…

Camera Profile options

Camera Profile options

Although it’s found at the bottom of the screen, this can be a great starting point when editing your images. I know that this is the first step of Nasim’s editing process, done before he ever even adjusts the exposure. Changing this setting can make your RAW images look a lot closer to the way they looked on the back of your camera. In the example below (I figured I’d throw in a landscape just to give you a break from wedding photos), you can see the difference between the default setting of Adobe Standard and the updated setting of Camera Standard. This was the only adjustment made to the image, which is otherwise straight out of the camera.

Conclusion

With a piece of software as complex as Adobe Lightroom, there are bound to be features that go unnoticed or tricks that can be used to make photo editing easier. Maybe you never knew you could hold down “Alt” to see more information about the changes you’re making to an image. Maybe it never occurred to you that by making the image larger on the screen it would become easier to straighten. Hopefully by reading this article you picked up a thing or two that will help make your time spent in Lightroom a little bit easier.

The post 5 Simple Lightroom Tips You Might Not Know About appeared first on Photography Life.

Photography Life

Posted in Photograpy How To | Tagged , , , , , | Leave a comment

The Question of “Good Enough” Image Quality

One of the largest debates in the world of photography is split into two main camps. On one side are people who strive to take photos with the highest technical level of image quality — in everything from their equipment to their camera settings — for most of their photos. The other side of the debate says that photographs are more about the subject and emotion of the scene, and the image quality is only a minor factor. Neither side is always right or always wrong, of course, but this is a question worth discussing. When does image quality truly matter, and when is “good enough” more than enough?

1) Genres of Photography

More than anything else, I am a nature photographer. I do take occasional pictures of people, but the backbone of my portfolio is of the great outdoors — from macro scenes to grand landscapes. That also means that my perspective on this question is a bit one-sided.

Not all genres of photography have the same image quality concerns. For example, many street photographers intentionally shoot with grainy film (or add film-style filters in post-production) to make their images appear grittier and timeless. I haven’t worked with this genre enough to have a well-considered point of view.

So, this article focuses primarily on nature photography. Similar compromises exist in every field, from weddings to still-life, but this article is mainly geared towards people who shoot landscapes.

Spencer-Cox Hazy Mountain Valley

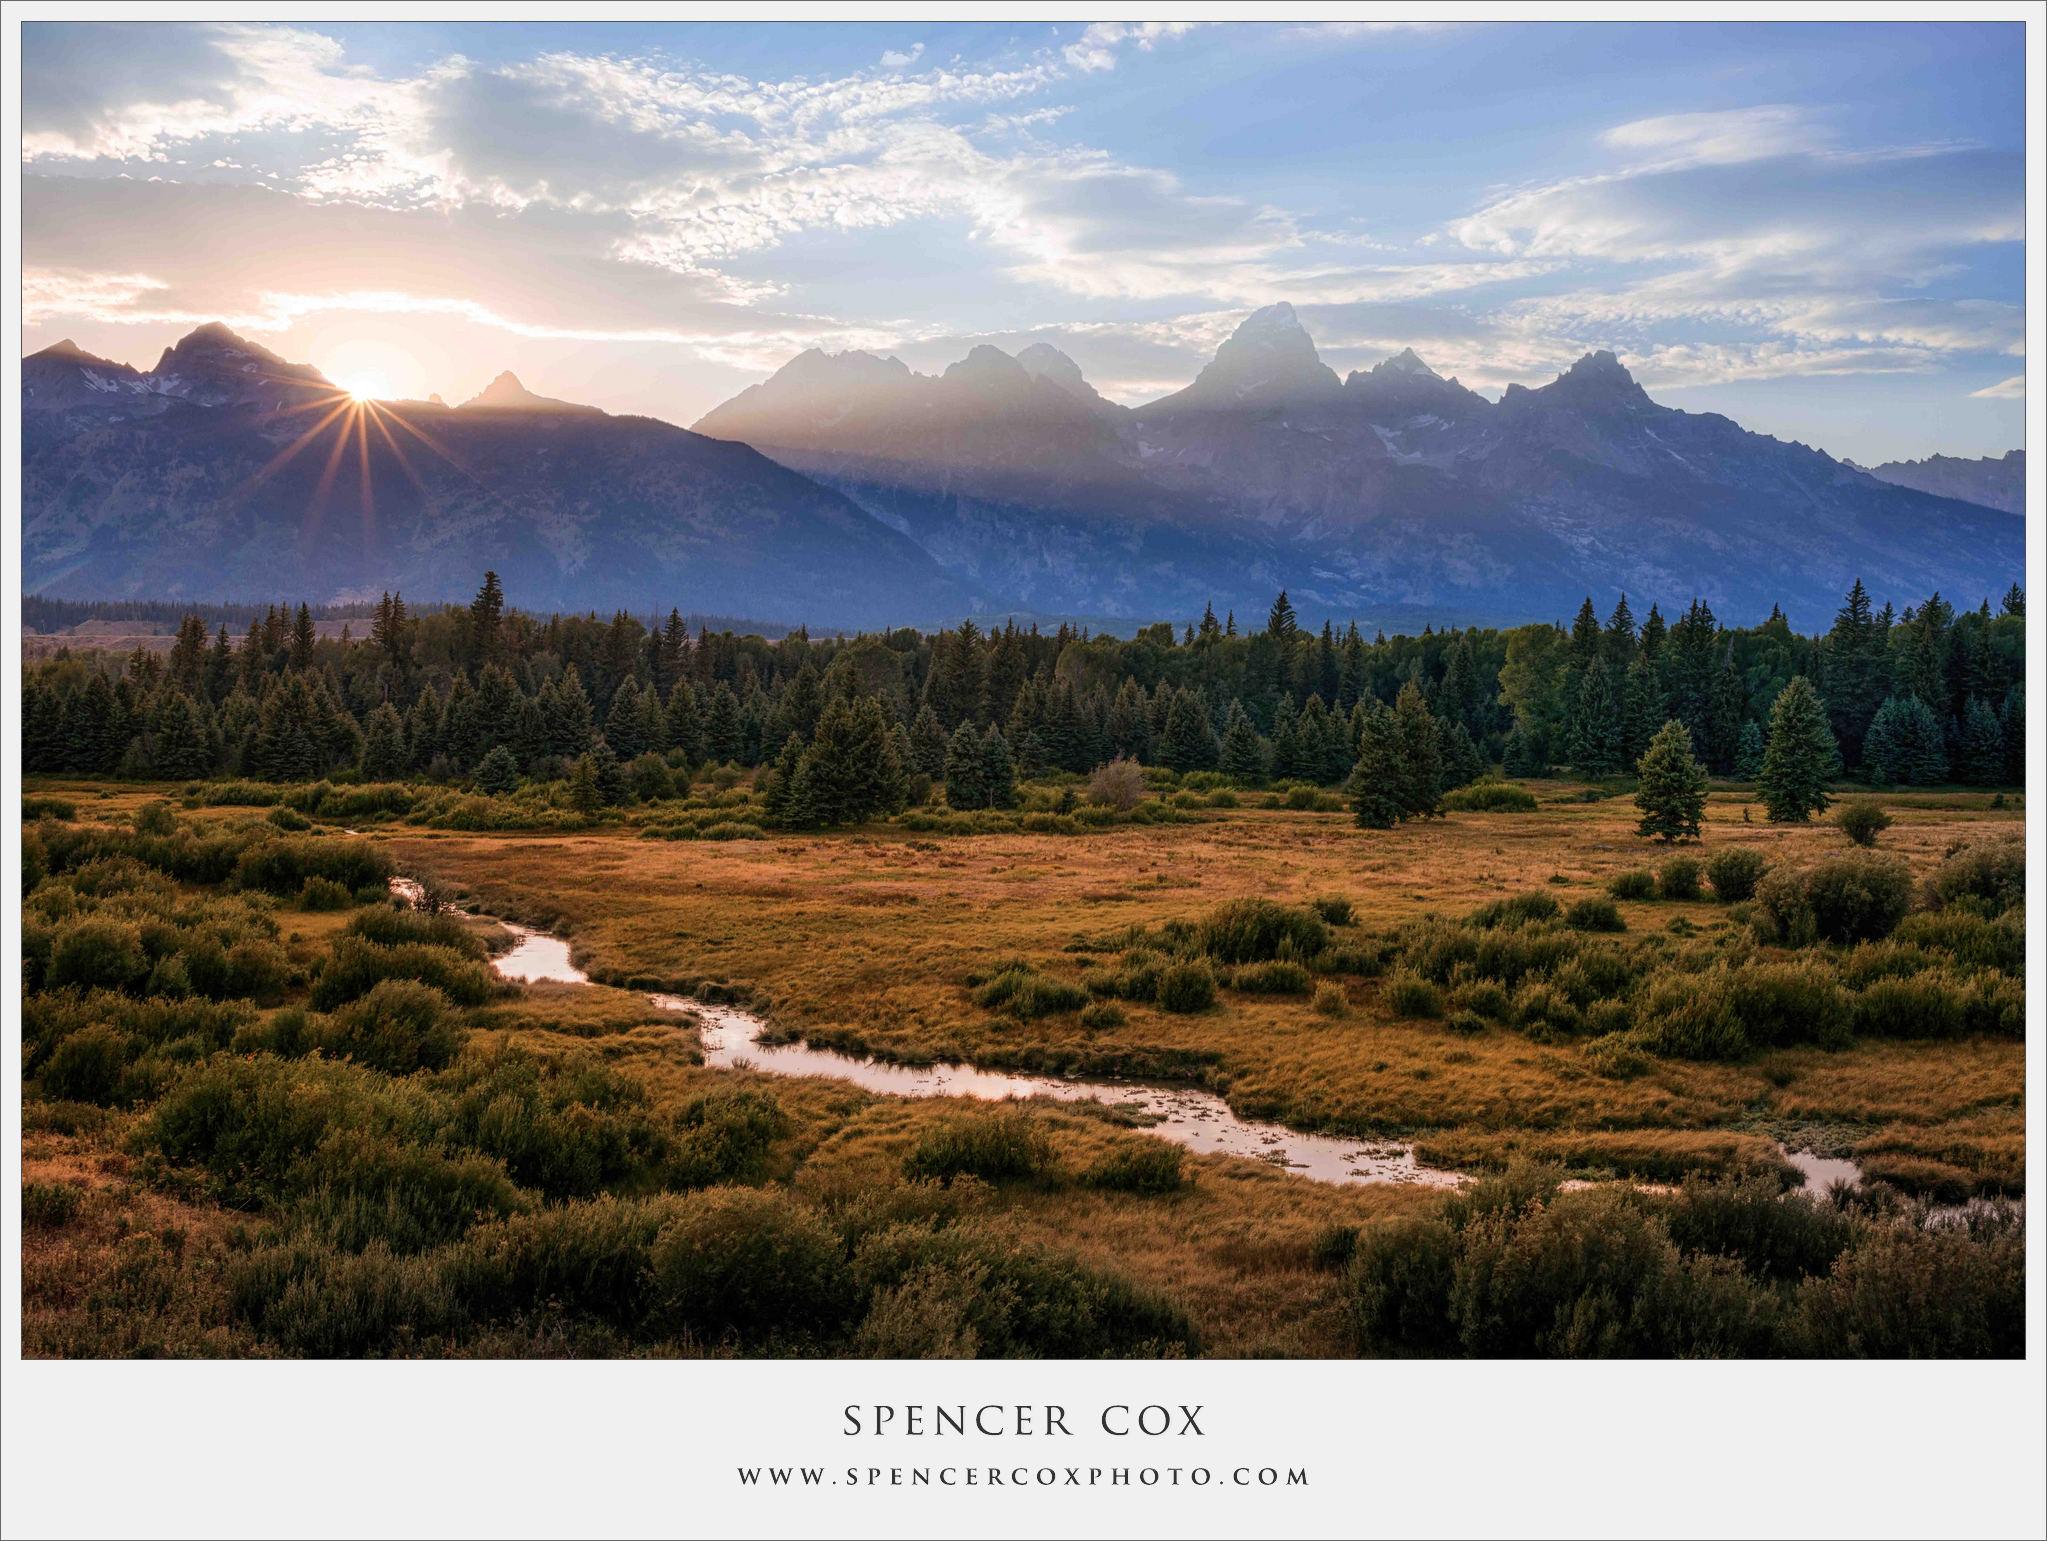
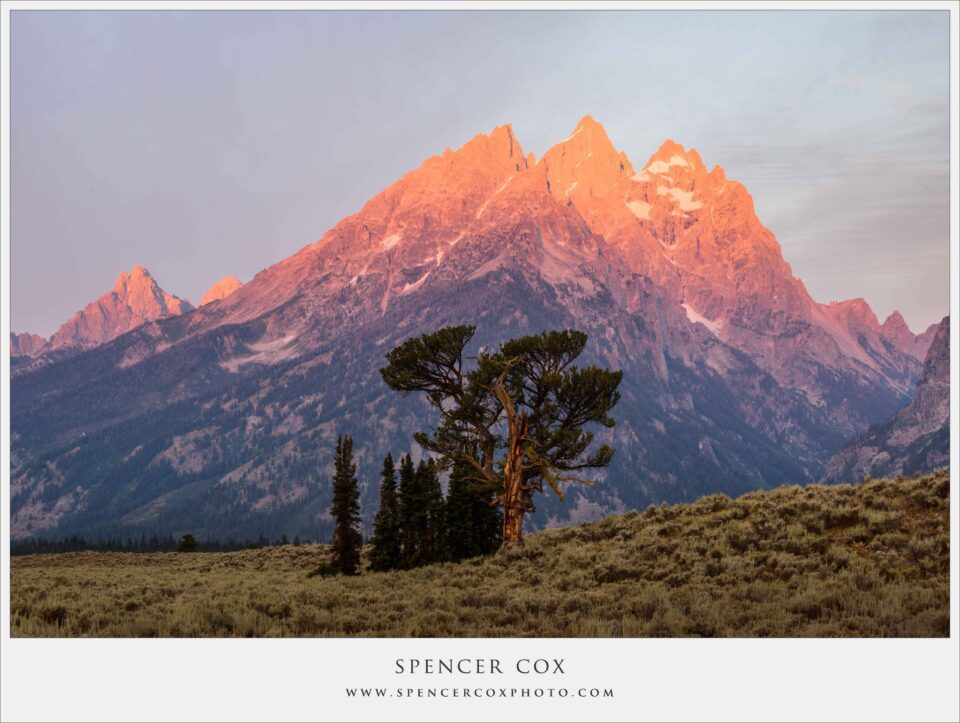
NIKON D800E + 35mm f/1.8 @ 35mm, ISO 100, 1/100, f/16.0

2) Comparing Famous Photographers

This is one of the major questions of landscape photography, and it makes sense that famous photographers fall on different sides of the “good enough” image quality line. On one end of the debate was Ansel Adams, history’s most famous landscape photographer, who (among other photographers) catapulted the idea of technical perfection into mainstream practice.

Other landscape photographers fall into a different camp. Galen Rowell is one of the more recent famous landscape photographers, and his work is also iconic. Yet, Rowell was known to take pictures with nothing but a simple 35mm camera with a cheap wide-angle lens and lightweight telephoto zoom. Why? Because he had mountains to climb.

The crux of this debate deals with the reasons people are willing to forego the “best” equipment in favor of other options. Although all photographers are different, this typically boils down into a few main factors: weight, price, and speed.

Galen Rowell needed the light weight and quick use of 35mm cameras. Many of his famous mountaintop and climbing photographs wouldn’t have been possible with heavy equipment. Sure, the technical quality of his photos suffered a bit, but his subjects were more important than the size of his film grain.

Ansel Adams, on the other hand, didn’t go on the same technical climbs that Galen Rowell was known for scaling. Instead, he had assistants — and occasionally a mule — to carry his gear long distances. Adams wasn’t sedentary by any means, and he backpacked quite a bit, but most of his landscapes were still reachable with his large and heavy equipment.

So, who took better photos? I’m not going there! These two incredible photographers simply had their own styles, and different types of gear suited them differently. Ansel Adams never would have gotten such large and dramatic prints with a handheld camera — especially in the mid-1900s — and Galen Rowell couldn’t have climbed to some of his most famous photos while carrying forty pounds of camera gear.

Ansel Adams Grand Canyon

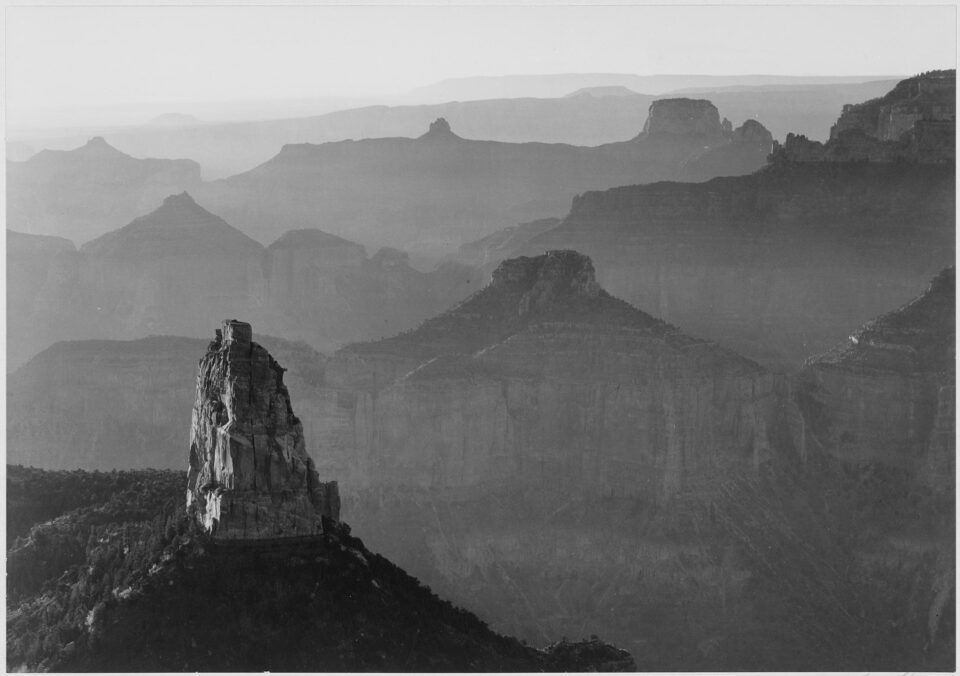
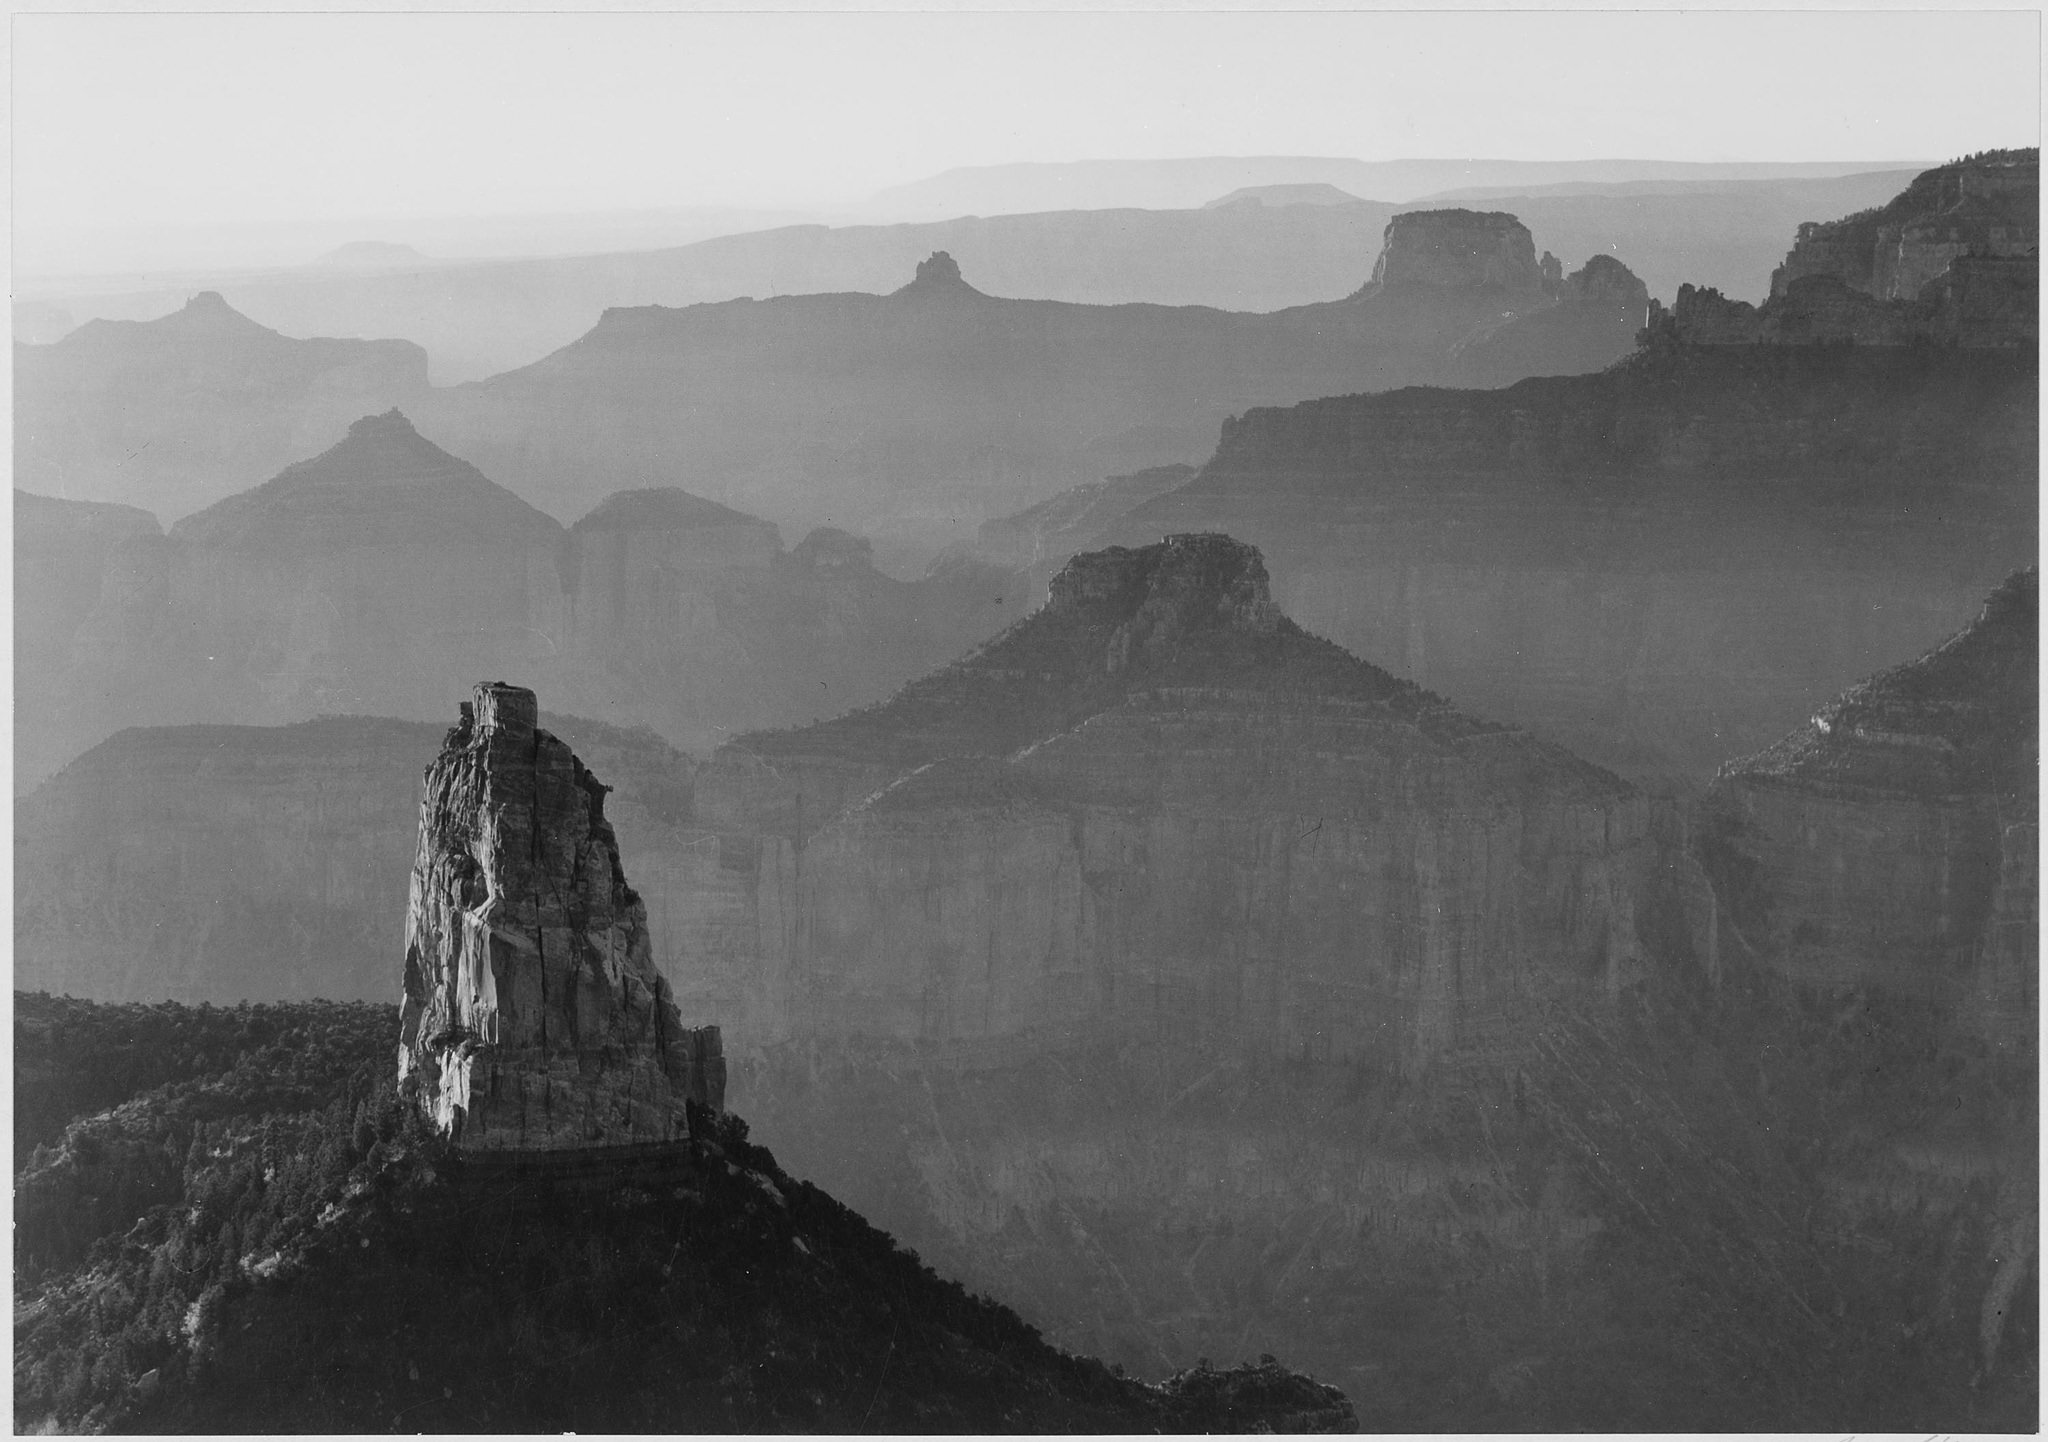
Ansel Adams took this photograph of the Grand Canyon. This image is in the public domain.

3) Camera Settings

Between Ansel Adams and Galen Rowell, the main image quality difference was due to the camera equipment that they used. This matters in your own photos, of course, which is why camera manufacturers offer so many different choices. However, another variable is at play: the amount of time that you take to set the proper camera settings.

At first, this seems like a no-brainer. Obviously, if you have enough time to take your photo, it makes sense to use the best possible camera settings. Right?

Maybe not. Do you use UniWB and check the histogram for every shot, making sure that you always expose to the right? Do you always measure the distance to your closest subject and focus at double that distance, the hyperfocal point? Do you choose the aperture that provides the mathematically best compromise between diffraction, lens sharpness, and depth of field?

For most photographers, the answer is no. I wrote those articles, and I still rarely take my photos with proper hyperfocal distance, the ideal aperture, and perfect ETTR, all at the same time. I may — and typically do — one or two of these things, but the whole set would take ages for every photo.

Plus, things don’t stop there! I could focus stack every single image at f/5.6, since that’s the sharpest aperture on my lens. I could take a set of five bracketed exposures just to make sure that my exposure is as perfect as can be. While we’re at it, why not make every image a panorama? That way, I could get triple the pixels (or much, much more with a multi-row panorama).

And there’s the other problem. Even though memory cards can fit thousands of photos, no one wants to spend thirty minutes on a single landscape image — especially when it might not turn out well. Once you start searching for the absolute best image quality, you rapidly begin to change the fundamental way that you take pictures, and not in a positive way.

So, “quick” camera settings make it easier to photograph a scene — and, most likely, take many other photos in the same amount of time. Sometimes, as crazy as it sounds, I even put away my tripod when the light is at its best. I then set down my camera bag and run to the best possible location, taking photos from the best vantage point before the light fades away.

Spencer-Cox Storm Geyser

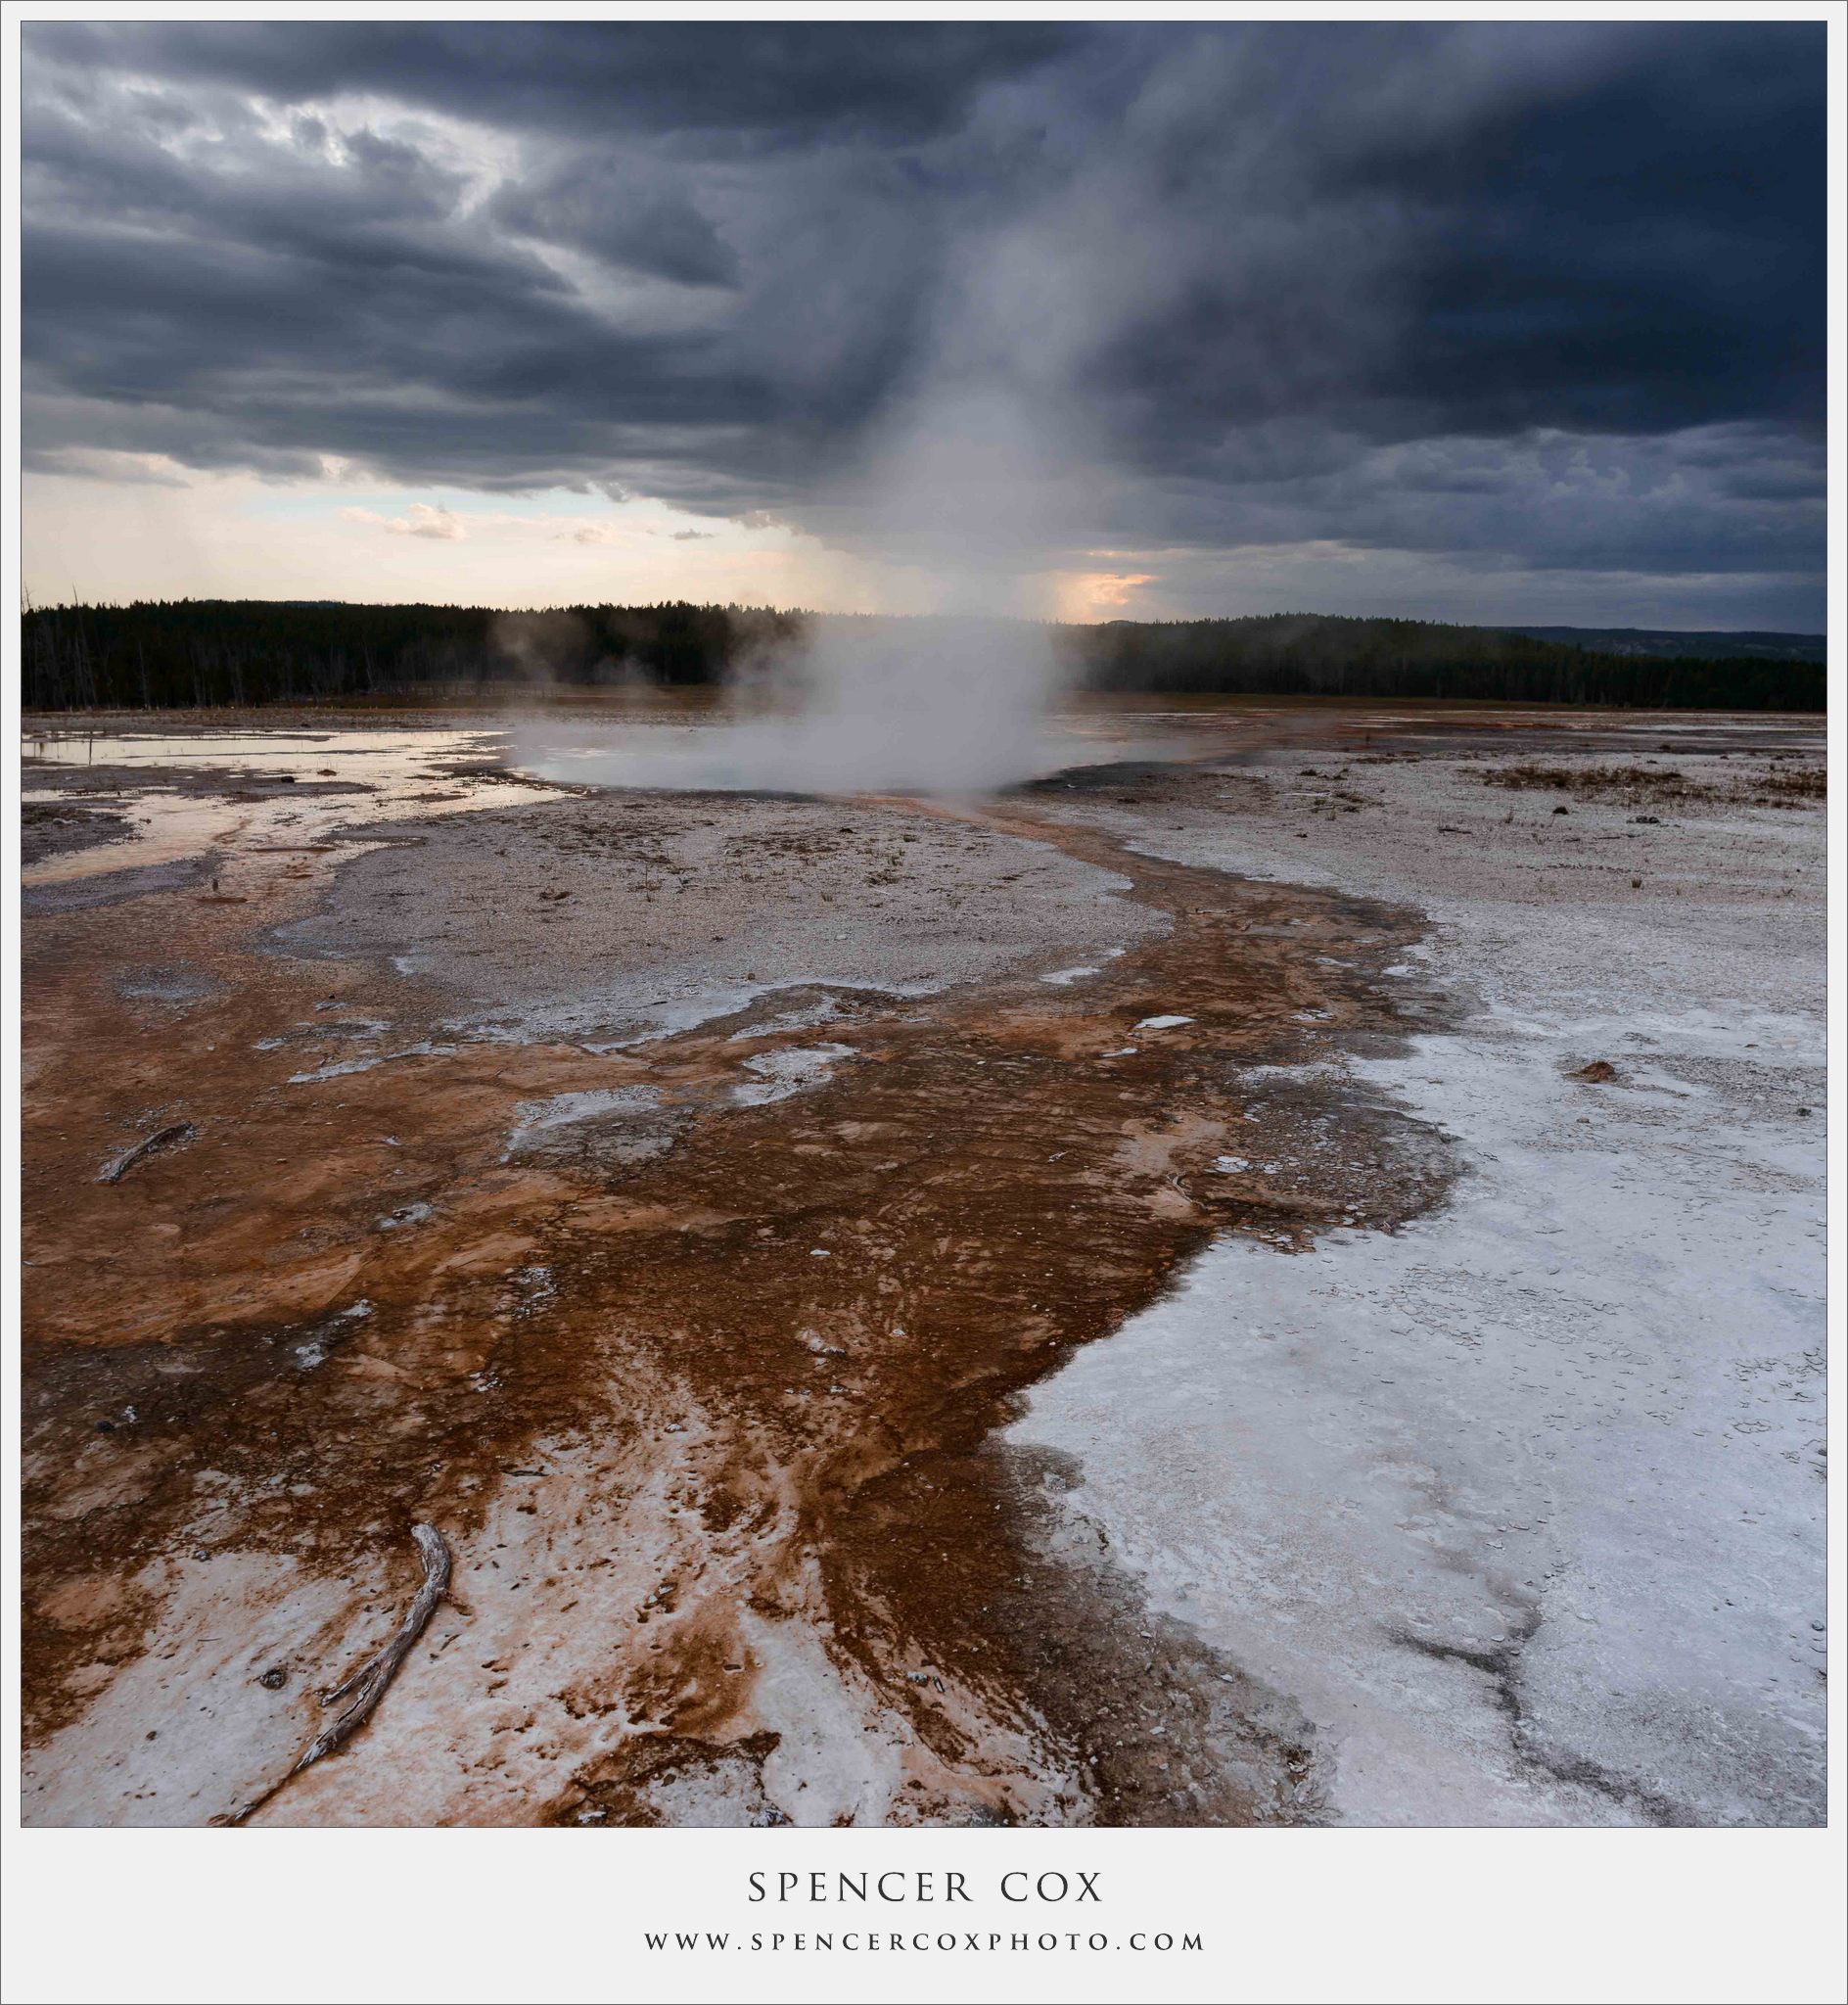
NIKON D800E + 20mm f/1.8 @ 20mm, ISO 110, 1/50, f/7.1
I took this photo without my tripod and used a relatively wide aperture of f/7.1. Here, the bottom corners are ever-so-slightly less sharp than the rest of the photo. Is that a problem? Not for me. I’m happy to have this image in the first place, and the difference wouldn’t be noticeable at any reasonable print size.

Yes, I would prefer to have a photo taken from a tripod. But, in the long run, is there anything wrong with one stop higher ISO, or a slightly wider aperture? I take 95% of my landscape photos with a sturdy tripod, if not more, but there’s always occasion to put it down and run to the best vantage point as fast as possible.

Of course, this isn’t an excuse for photographing everything at the wrong shutter speed, without a tripod, and at bizarre ISO values. Instead, it presents another question. Do you want to take a landscape photo that, in all likelihood, uses settings that will work just fine? Or, do you plan to eke out every possible pixel of image quality for large prints and high-resolution displays?

4) The Effects of Modern Technology

Modern cameras have driven image quality forward throughout the past decade in two main ways: number of pixels and low-light image quality. These two variables may be crucial for your work, or completely unimportant, but there is no doubt that these are the main still-photography features that camera manufactures are interested in iterating. (Matters like dynamic range and color depth are certainly important to camera manufactures, but they aren’t advertised in the same way as pixels and high ISOs.) How does this change the way we look at image quality today? If anything, it makes the two camps even more divided.

For one, it is now much easier for photographers to print high-quality images several feet or meters wide, even without paying thousands of dollars for camera equipment. Until the past five or ten years, that was very difficult. Although 35mm film has a surprising amount of detail, it doesn’t have the same resolution as modern digital sensors. (Film obviously has other advantages for some photographers, of course.)

At the same time, it is easier to carry lightweight camera equipment and shoot at higher ISOs than ever before, still taking relatively high-quality images. If you want to hike up the side of a mountain, mirrorless cameras — and even some point-and-shoots — have incredible quality today.

So, where does this leave us? It’s easier to take ridiculously-high-quality photos today, but it’s also easier to take “good enough” photos with equipment that is still very lightweight. This is surely a good thing, but it does make our decisions more difficult.

Spencer-Cox Yellowstone Morning Mist

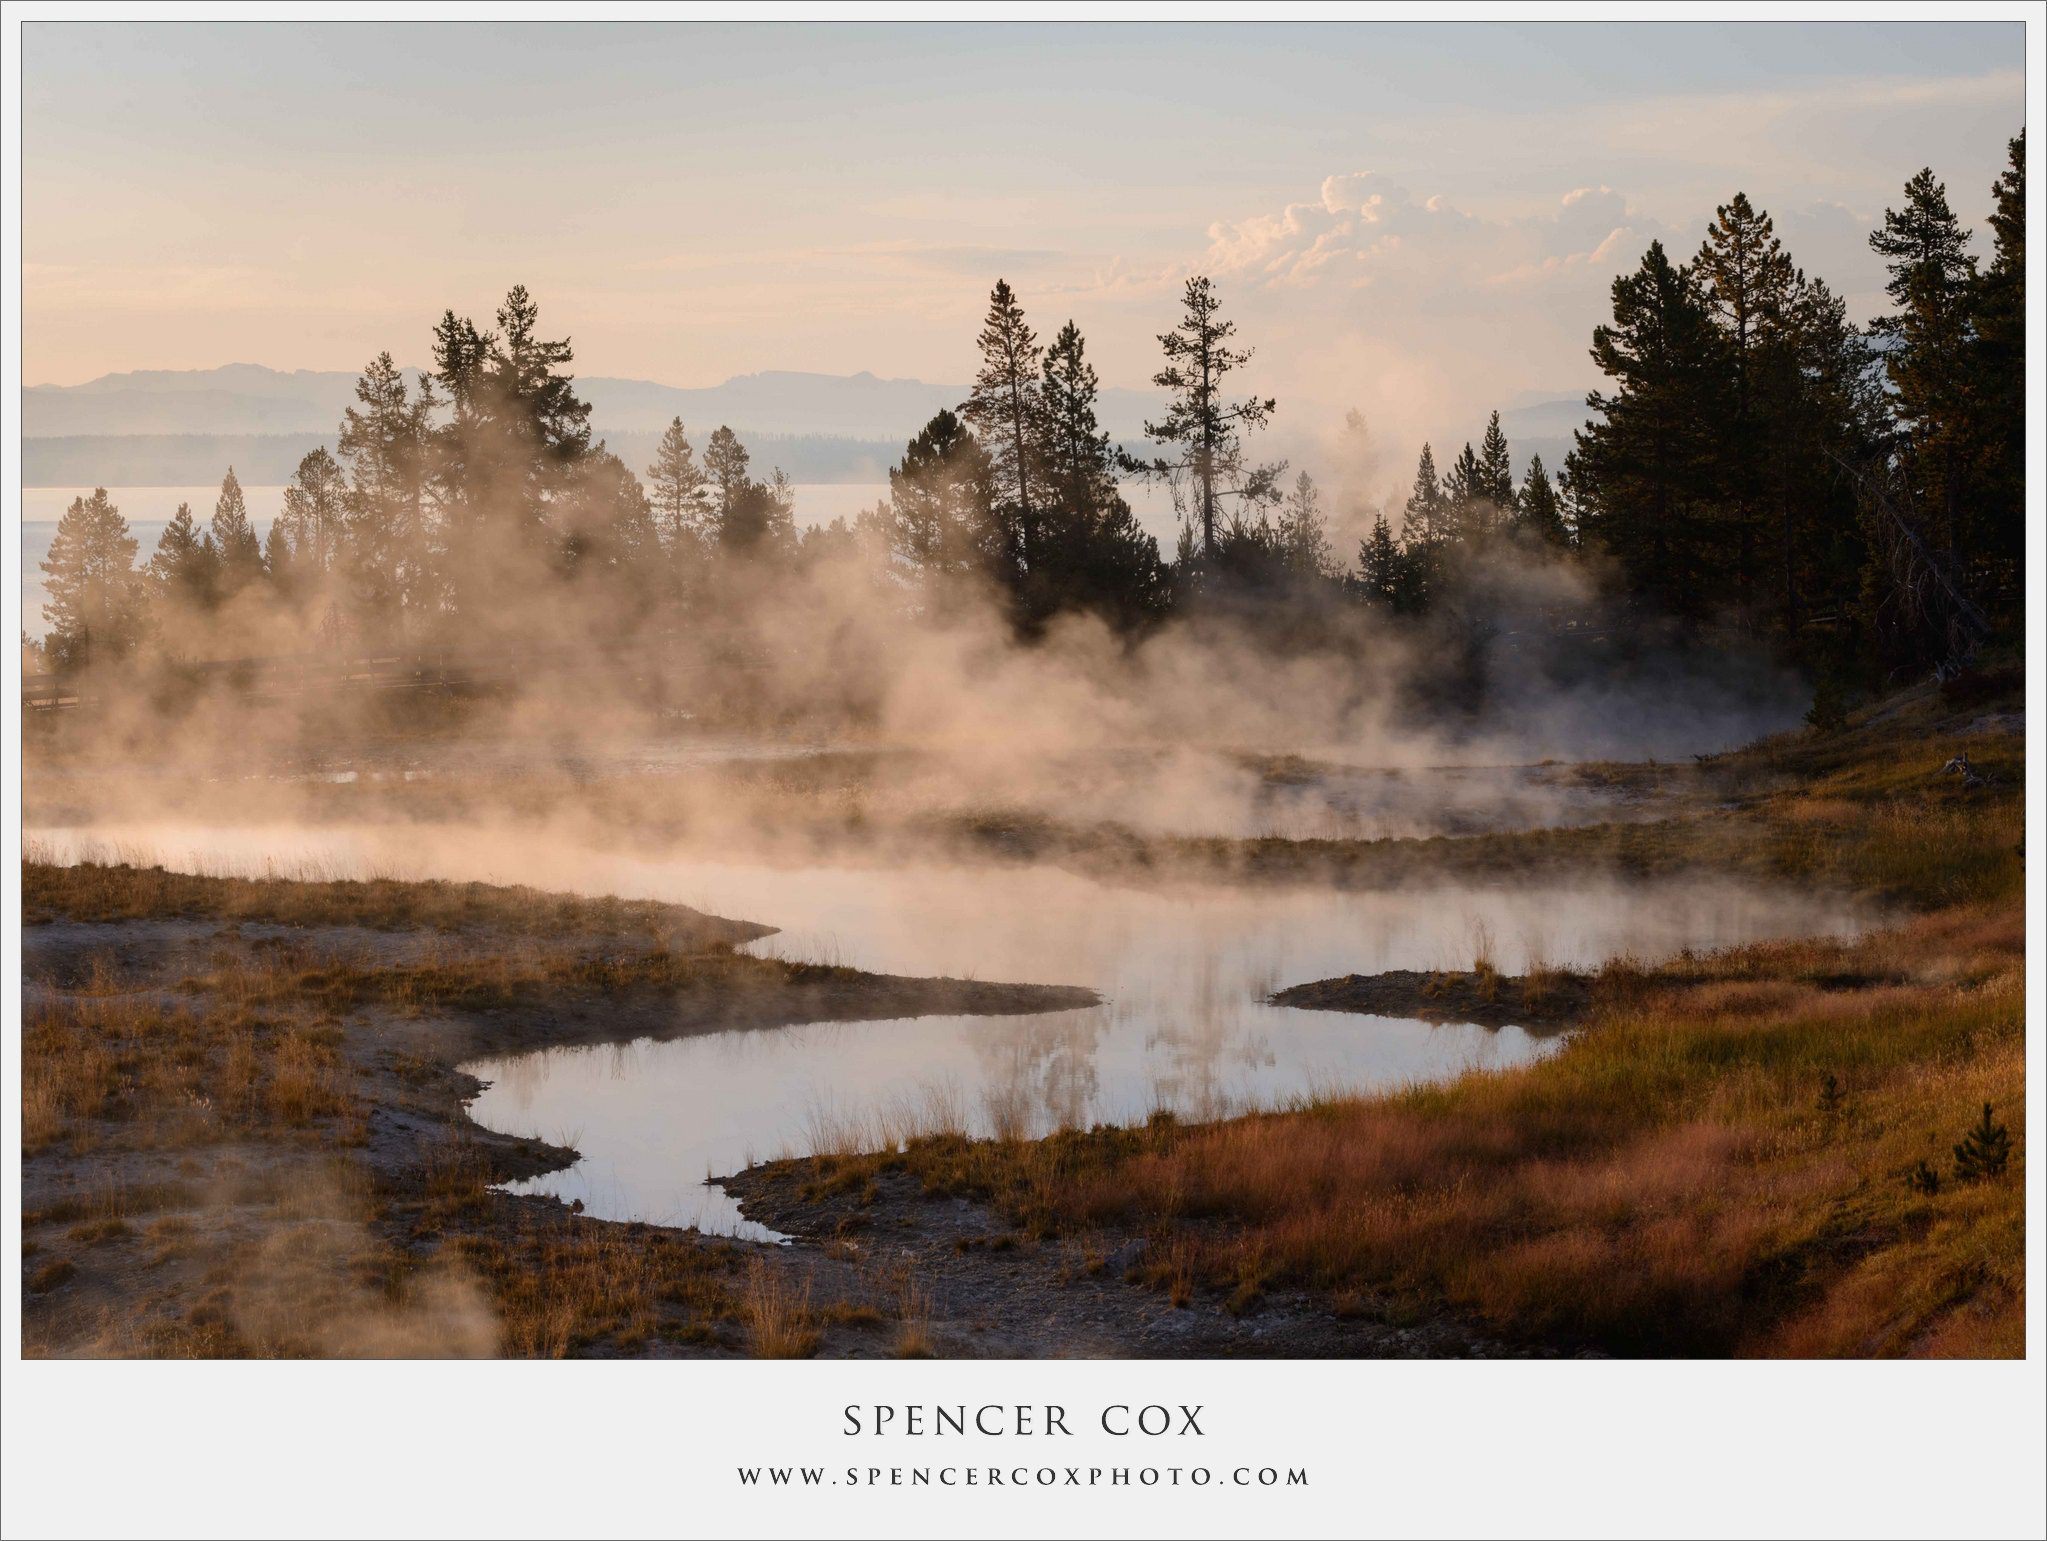
NIKON D800E + 70-200mm f/4 @ 82mm, ISO 100, 1/15, f/16.0

5) Compromise

In the end, everything is a compromise. Image quality is a sliding scale; the more quality you get — typically — the slower you will need to work. Achieving the perfect balance can take years of trial and error, but most photographers find their fit at some point along the way.

My own photography can serve as an example. Surprisingly — or not — I shoot most landscapes on my Nikon D800e at f/11 or f/16. I absolutely understand the effects of diffraction from these settings, but there is a huge benefit: I don’t need to take extra time to check my depth of field for every photo. I already know that I have enough, no matter the landscape.

Why am I willing to make this particular compromise? It’s simple. After printing dozens of my photographs at large sizes, from 24 inches to 60 inches wide, I realized that the difference is too small for me to care. Not everyone will make the same judgement call, but that’s what this ultimately is: a judgement call. An aperture of f/16 adds some pixel-level blur, but it also makes it easier to take more compositions in the same amount of time. Ultimately, I realized, this nets me a greater number of successful photos.

Spencer-Cox Warm and Cold

NIKON D800E + 70-200mm f/4 @ 70mm, ISO 100, 3/5, f/16.0
This was shot at f/16. Would f/8 have provided enough depth of field? Maybe, and maybe not. (This was a telephoto shot, which complicates the question.) Because I shot at f/16, though, I didn’t have to worry about depth of field — only composition.

As with everything in photography, the real goal is to go out and answer this “good enough” question yourself. Do you routinely print enormous photos on acrylic? Ideally, you would shoot with a high-resolution camera — even medium format — or perhaps a 4×5 or 8×10 film camera. Do you sell digital downloads of your work at 1920 x 1080 resolution? By all means, get a lightweight camera that makes it easier to reach interesting places.

That’s why today is such a good time to be taking pictures. As much as we like to find fault with new cameras and lenses, the fact is that we have more options than ever before. In everything from cameras to tripods, manufacturers offer an incredible range of options: price, size, image quality, and every other possible variable.

Although too many choices can make our decisions more difficult, it also means that we are able to take the photos we want with much less compromise than in the past. As a community, that is something we should embrace to its fullest.

The post The Question of “Good Enough” Image Quality appeared first on Photography Life.

Photography Life

Posted in Photograpy How To | Tagged , , , , | Leave a comment

How to Pick a Good Portrait Photographer

So you’ve decided it’s time for some nice family photographs, or maybe your daughter needs her senior high school portraits, or you want to capture the beauty of your new baby boy. It’s time to find a photographer that will give you the images you want at a price you can afford.

Relax: there’s lots of good news here! You can get a top-notch photographer for surprisingly reasonable amount of money. And since each photographer has his or her own style, you should be able to find someone whose images you admire.

Unfortunately, many people don’t put a lot of thought into choosing a photographer, which will usually lead to disappointment and frustration. But by following a few simple steps and spending just a few minutes online, you will greatly increase your chances of finding a photographer you like at a good price.

First: be aware that there are too many people who bought a big, black camera and started advertising professional photography services on Craig’s List. Ownership of a big camera (otherwise known as a Digital Single-Lens Reflex camera, or DSLR) does not make someone a professional photographer. The advent of digital photography, combined with the relatively low prices of DSLRs in the last 5-10 years, has spawned a generation of “wannabe” photographers. There are two major drawbacks to this situation: clients have been increasingly frustrated with the quality of images they get from these novice photographers, and the photography profession’s reputation has suffered. True professional photographers cringe at the proliferation of inexperienced, unqualified novices.

Fortunately there are a few simple ways to spot someone masquerading as a professional:

1. First and foremost, look at the image portfolio/gallery they display on their webpage or advertisements. If there are no images, beware! This is a huge red flag. If there is an image portfolio, examine the portraits closely. There should be many images, not just three or four – many images will give you a more accurate idea of the photographer’s style and consistency. There should be a variety of poses and types of images – this demonstrates experience and creativity. No two images in the portfolio should be of the same person – this indicates the photographer has no experience and just had a friend model for him/her to establish a portfolio.

2. Do the photographer’s images look similar to the pictures you take with your camera at home? If so, this person is not a true professional. Images taken by an experienced photographer with proper lenses and lighting will look dramatically different than anything you can do with a small point & shoot camera. The backgrounds should be very blurry, so the subject of the portrait stands out in sharp relief. There should be plenty of light in the subjects’ eyes to avoid the “raccoon eyes” created by overhead sun. Tip: if the subject’s face is in direct sunlight, there is a good chance the photographer is not an experienced professional. Very few pros will ever photograph a subject’s face in direct, full sunlight.

3. Does the photographer have a webpage? What’s the web address? A proper professional will invest the relatively small amount of money necessary to purchase and host his or her own domain name. For example, www. photographersname.com or www. businessname.com. If the person has a web address that includes the words “freewebs” or “blogspot” or “wordpress”, then the person has a free site and was not willing to spend even the minimal amount required to have a professional domain name and webpage. What does that say about the person’s attitude towards their business and equipment?

4. What does the photographer charge? When searching for a good portrait photographer, the most important thing is not price. You can spend $ 50 on a portrait session but hate all the resulting images. And you can spend $ 200 on a session and love all the pictures, use them as Christmas pictures, and display them in your house for years. Between these two scenarios, which was most cost effective? To a certain extent in photography, you get what you pay for. True professionals will charge according to their experience and level of equipment. If you see an advertisement for free portraits, or a portrait session for $ 50, or a $ 100 session that includes a $ 50 credit towards prints, this is a hint that the photographer is not experienced or in demand.

5. What type of photography does the person claim to do? Generally speaking, you want a photographer who somewhat specializes in portraiture. It is common for portrait photographers to also shoot weddings. But I would be wary of someone who says they do portraits, weddings, corporate headshots, architectural photography, events, commercial photography, fashion, sports, fine art, and wildlife photography!

Once you’ve used these tips to make a list of legitimate photographers, focus on style. This is the most important part of selecting a portrait photographer. Photography style is a very personal thing. Someone who is considered to be the best photographer in the world might take portraits of your family that you hate, depending on their style. Some photographers shoot exclusively black and white, or use a tilt/shift lens to blur large portions of the image, or use PhotoShop to significantly alter the original look of the image. Others might take close-up shots of your child’s shoe or hair ribbon instead of focusing on the face. Some might only shoot in their studio with formal backgrounds, while others shoot outdoors or at your house. This is all a matter of style and is crucial to finding a photographer you’ll be happy with.

Now it’s time to contact the photographers to get more information. How long have they been a professional photographer? Do they attend seminars, take classes, read photography books, and otherwise constantly seek to improve? Do they teach classes, publish articles, or are they otherwise demonstrably admired by their peers?

More practically, must you shoot the portraits in their studio, or will they come to your house with all their equipment? How many changes of clothing will they allow? What prices do they charge for the package you want? These details will help you make a final decision.

Once you’ve decided on a photographer and agreed upon the details of the shoot, you should expect to sign a contract and pay a deposit to reserve the photographer’s time.

Elizabeth Morrison is a professional photographer in the Charlotte, North Carolina area. Her photography studio, Elizabeth Morrison Photography LLC, specializes in contemporary family photography, particularly newborns, families, children, and high school seniors.
http://www.elizabethmorrisonphotography.com

Posted in How To Photograph | Tagged , , , | Leave a comment