Which Camera Settings Affect RAW Photos?

Most of us think we have a good understanding of the camera settings that affect your RAW photos — it seems like common sense. However, the more that you look into it, the more complicated that this topic gets. In fact, no matter how much you know about your camera, chances are good that you have a few misconceptions about the camera settings that affect your RAW photos. Does high-ISO noise reduction change the way your camera records a RAW file? What about long exposure noise reduction? Color space? Or Active D-Lighting, for Nikon users? The answer to two of these four examples is yes. In this article, I will cover all the noteworthy camera settings that affect your camera’s RAW files, including some that you may not expect.

If you are just starting to learn about RAW photos, check out our guide to RAW versus JPEG before going any further. This article gets a bit technical.

1) Focusing and Lens Settings

Every setting on your lens — vibration reduction, focus distance, focal length, aperture — always affects your RAW photos. The same is true for all the in-camera autofocus settings, since they change where and how your camera focuses.

2) Aperture and Shutter Speed

It is inarguable that your choice of aperture and shutter speed affect your RAW photos. If you are still working on these concepts, read our guides to aperture and shutter speed.

3) ISO

This one is trickier than it may seem; skip to the last sentence of this section if you are just learning photography.

If I take two photos with different ISO settings (but the same aperture and shutter speed), can’t I just brighten the darker photo in post-production? At its simplest, your ISO setting amplifies the data that your camera records. The same is true when you brighten a photo in post-production — you simply amplify the data that you captured.

However, although this is true in theory, things are messier in practice. Some cameras are essentially “ISO-less” (or ISO invariant), where it doesn’t matter what ISO you set in the camera, so long as you don’t blow out any of the highlights. This generally includes modern Nikon and Fuji cameras. Other cameras, like those from Canon, are not ISO-less at all. Brands like Sony and Olympus tend to be in the middle, where they are mostly ISO-less, but you will see a slight difference between — for example — ISO 6400 and ISO 100 brightened in post-production.

This isn’t an article about ISO, but it is safe to say that things are starting to get tricky. However, even if you have a Nikon or Fuji camera, don’t feel like you need to change how you use your ISO setting. Why not?

On one hand, ISO affects your metering. If you are locked at ISO 100 in Aperture-Priority mode, for example, you might end up with ridiculously bad shutter speeds. (Even in manual mode, the meter will guide you incorrectly, although it obviously won’t change the settings for you.) Plus, by using nothing but base ISO, the photos on your camera screen will be completely useless, even though you can brighten them in post-production. And, ISO absolutely affects your RAW photos if you use a value so high that it blows out your highlights.

With a few reservations, then, it’s safe to say that ISO affects your RAW files, even if your camera is ISO-less.

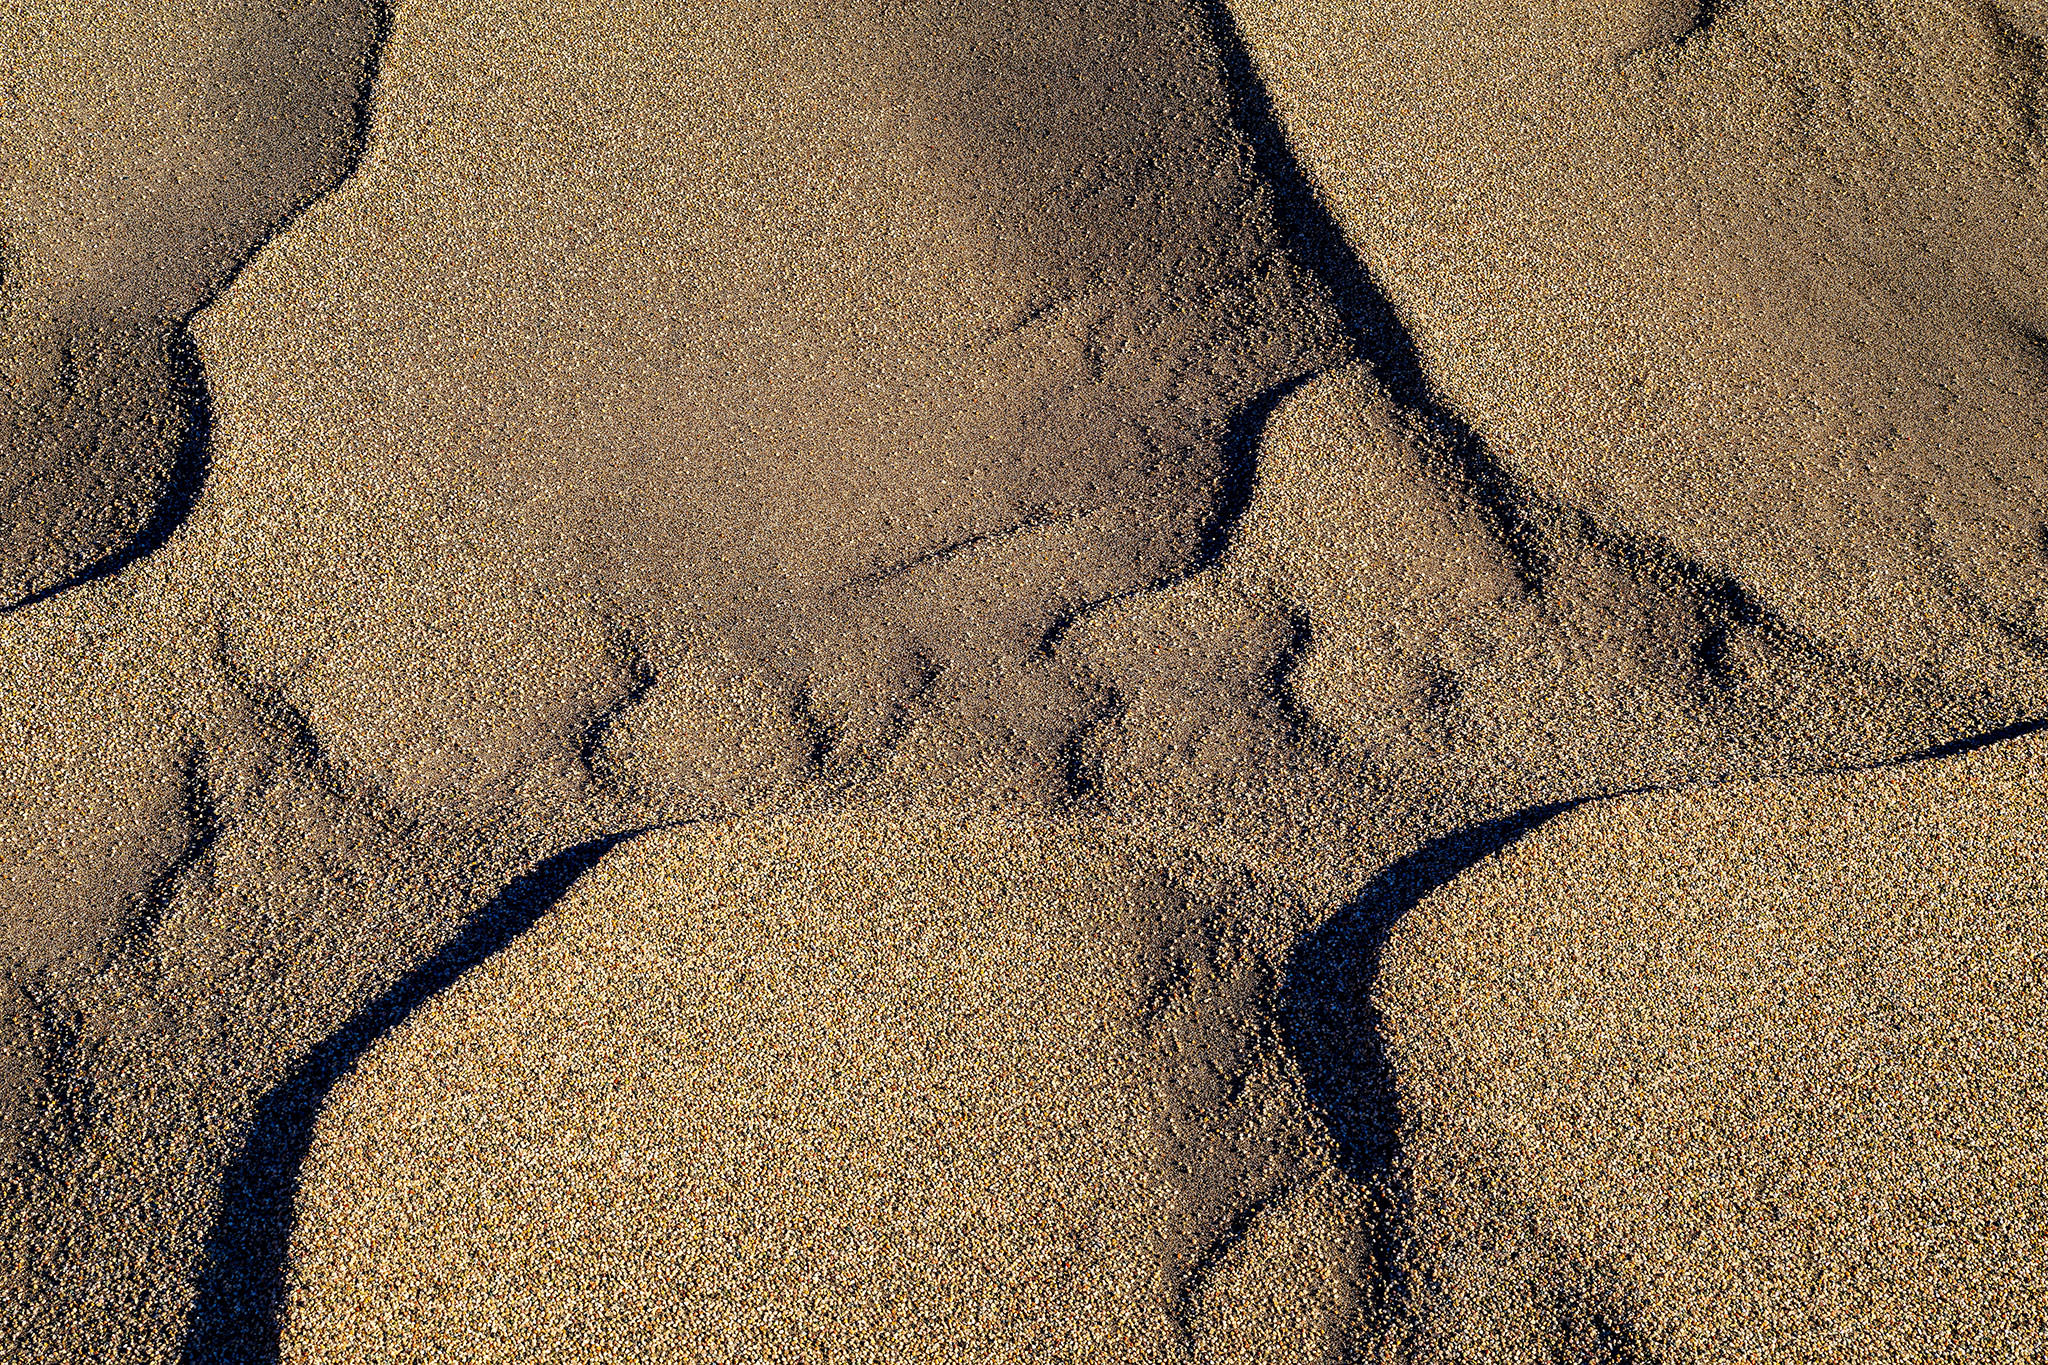
4) Long Exposure Noise Reduction

Every time that you take a photo with a long shutter speed, your image is prone to increased noise and hot pixels (frozen, bright pixels in the photo). Long exposure noise reduction aims to fix this.

With this setting enabled, your camera will take two photos every time that your shutter speed is longer than one second. However, you don’t need to keep your camera still the entire time. Only the first photo actually records the scene in front of you. For the second photo, your camera takes a photo with the shutter closed, recording a completely black image — that is, except for noise.

Your camera then subtracts out the hot pixels and noise, using the black image as a reference. This is a very useful feature! If you shoot photos at night, you’ll likely see a noticeable benefit from using your camera’s long exposure noise reduction.

Luckily, this setting does affect your RAW photos. I use it all the time for Milky Way shots.

Spencer-Cox Moonset

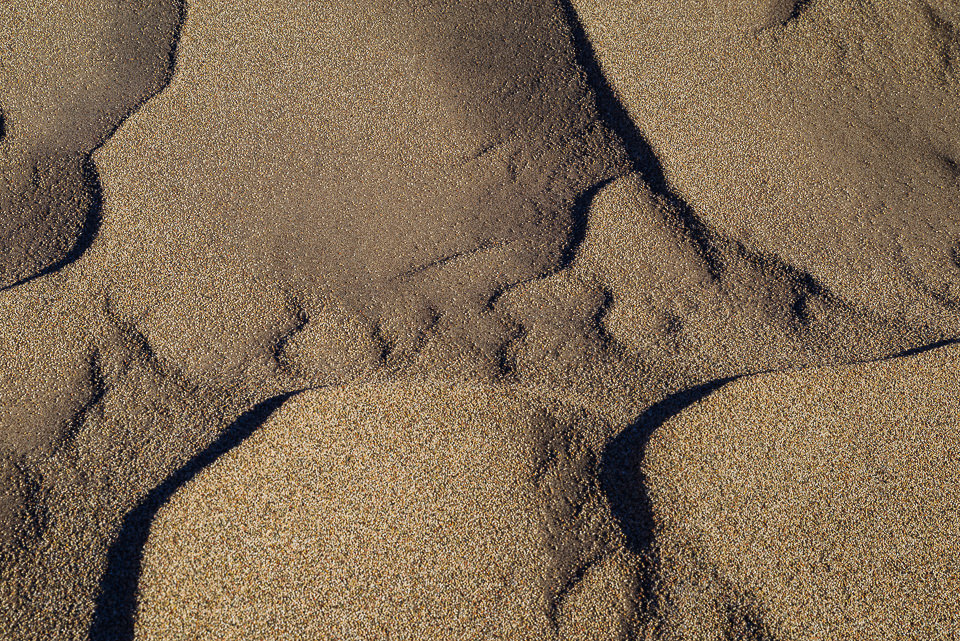
NIKON D800E + 20mm f/1.8 @ 20mm, ISO 1600, 15/1, f/1.8

5) Image Area

Image Area is another name for the in-camera crop of your photos.

If you have a full-frame Nikon camera, for example, you are probably familiar with the built-in DX crop that you can choose to use. My Nikon D800e also has a 4×5 crop setting, which changes the typical 24×36 millimeter sensor into, effectively, a 24x30mm sensor by ignoring any data on the left and right extremes of the frame.

Obviously, this crop changes how the photo looks on the back of your camera screen — just like your Picture Control settings do. However, is it possible to recover the remaining Image Area data once you import files onto your computer?

The answer, unfortunately, is no. If you choose the 4×5 in-camera crop, you won’t be able to recover the missing pixels on the left- and right-hand sides of your photo.

In some ways, this is a good thing. If you know that you’ll have to crop your photos quite a bit in post-production, you can switch to the DX crop and save a bit of file size, as well as some time spent cropping later. However, if you accidentally end up shooting 4×5 photos for an afternoon, you won’t be able to get that data back.

Not all cameras have built-in crop modes. For example, the Canon 5D Mark IV always records a 6720 x 4480 pixel photo if you are shooting RAW.

However, if your camera does have a built-in crop mode, it does affect the RAW data that your camera records.

6) Live View Versus Viewfinder

Here’s a fun one.

Have you ever noticed that your camera’s metering is different in live view than in the viewfinder?

I just pulled out my DSLR for a test. Using the viewfinder, the meter fluctuated between recommending a four second exposure and a three second exposure. This isn’t problematic — the proper exposure was probably somewhere between the two, and it isn’t unusual for the camera’s meter to jump around just a bit.

What is interesting is that the meter was totally different in live view. Instead of fluctuating between three and four seconds, it stayed, unchanging, at 2.5 seconds. That’s a difference of roughly half a stop. (The video below starts with the camera’s viewfinder, then switches to live view. Note the change between three seconds and 2.5 seconds.)

What’s behind this? In fact, the underlying metering system changes as you switch to live view! When you shoot with the viewfinder, a dedicated light meter in the camera is what measures your exposure. When you shoot in live view, the camera actually reads the data on the image sensor itself, calculating a meter reading from that. Often, the two readings will disagree slightly.

This difference typically doesn’t matter. The two exposures will be similar or identical in nearly every case. However, if you are in a particularly difficult lighting situation, be aware that the choice between live view and your viewfinder actually does have an effect on the metering system.

So, the answer is another yes — your choice does affect the RAW capture, simply because it affects your camera’s meter. However, if all your other settings are the same (say, you shoot in manual mode), the actual RAW data won’t change as you switch to live view.

7) Active D-Lighting

If you have a Nikon camera, you may have come across the Active D-Lighting setting. At its face, this seems like a JPEG-only setting. And, for the most part, that’s exactly what it is.

Assuming that you don’t change any other settings, your Active D-Lighting has no effect on the RAW data itself. However, it’s a bit more complicated than that.

Depending upon your Active D-Lighting settings, you will change your camera’s metering significantly. I don’t know why Nikon chose to have a JPEG setting affect the metering for RAW photos, but that’s what it does.

At the highest possible Active D-Lighting setting on my camera (Extra High), my metered exposure was a full stop darker than normal! Without Active D-Lighting, I had an exposure of 1/5 second. When I turned it on, the exposure was 1/10 second.

Again, Active D-Lighting does nothing to the RAW data itself. It only affects your camera’s meter. However, the effect is so significant that you need to be very careful to avoid ever setting Active D-Lighting if you shoot in RAW.

8) Picture Control Settings

These have no effect on your RAW photo, or on your camera’s metering. Whether you shoot in Vivid mode or Neutral mode, the RAW photos themselves will be identical.

There is a brief caveat. Even in RAW, your Picture Control does affect the way the photo looks on the back of your camera screen. So, if you switch to the Monochrome Picture Control, the photos on your LCD will be black and white. Once you bring the photos into Lightroom or Photoshop, they’ll be back to their normal, color versions. However, if you happen to use Nikon’s own software, you’ll see the black and white version by default (though you can change it back to color).

Also, if you rely on the histogram or blinkies on your camera screen, your Picture Control settings do have an effect. The Vivid mode with added contrast, for example, makes your highlights appear completely white sooner than they really are. So, if you are trying to Expose to the Right, pay attention to the Picture Control that you use.

In general, though, Picture Control has no effect on your RAW photos.

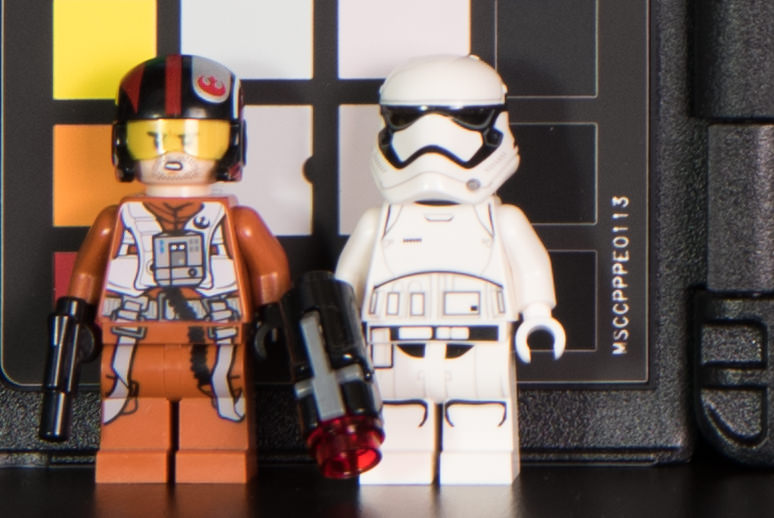
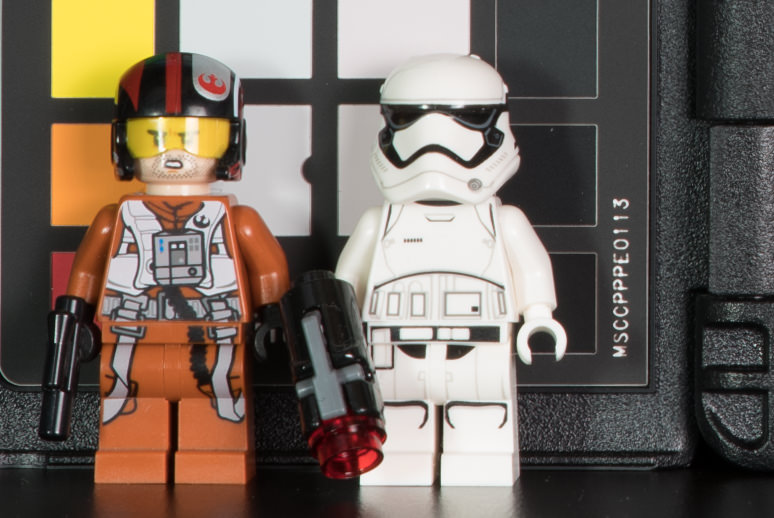
9) High ISO Noise Reduction

Unlike long exposure noise reduction, this setting does nothing for RAW photos. Whether you set it or not, the RAW photo will be exactly the same. (Again, like Picture Control settings, the photo on the back of your camera screen will look different. Still, that is just a preview of your final photo, not the RAW data itself.)

10) White Balance

This works essentially the same way as your Picture Control. It still has no effect on the RAW data or your metering, but does change the way that your images appear on the camera’s LCD (as well as your in-camera histogram).

The only difference is that non-Nikon software typically does default to the white balance that you used in-camera. So, if you shoot a lot of photos at once (say, a wedding photographer), it does pay to get white balance right in the field — you’ll have less post-processing work to do later.

However, white balance has no effect on the actual RAW data that your camera captures.

11) Color Space (AdobeRGB versus sRGB)

This is exactly the same as your Picture Control settings. Contrary to what some notable photographers have said, it doesn’t matter whether you use AdobeRGB or sRGB in camera for RAW photos, unless you are specifically interested in the effects on your histogram (which are relatively small).

I keep mine at AdobeRGB simply because it doesn’t hurt the histogram, and occasionally improves it a bit, but there is really almost no difference here at all. Either way, your color space has absolutely no effect on the RAW data itself. (RAW files capture more colors than what fits within sRGB or AdobeRGB, anyway).

12) Conclusion

So, how do all these settings stack up? Here’s the final tally:

Affects the RAW data itself:

  • Focusing and lens-related settings
  • Shutter speed and aperture
  • ISO (with a few caveats)
  • Long exposure noise reduction
  • Image area

Affects your metering, but not the RAW data:

  • Viewfinder versus live view
  • Active D-Lighting

Affects only the preview on your LCD screen and the in-camera histogram, not the metering or RAW data:

  • Picture Control settings
  • High ISO noise reduction
  • White balance
  • AdobeRGB versus sRGB

Hopefully, this has been interesting and helpful. The exact names of these settings may be different depending upon your camera brand. I use Nikon, so all the names are written accordingly.

Note that I do not have access to other brands of camera at the moment to test their equivalent settings. It is possible that there are slight differences for other brands — for example, Nikon may be the only manufacturer whose Active D-Lighting affects your camera’s meter. I don’t have any way to test this at the moment, but there’s an easy fix: simply turn this setting off for RAW photos, no matter which camera you use.

Let me know in the comments if you have questions about other settings.

The post Which Camera Settings Affect RAW Photos? appeared first on Photography Life.

Photography Life

Posted in Photograpy How To | Tagged , , , | Leave a comment

How Was This Picture Made #11: The Answer

It has been a while since I posted the “How was this picture made #11?” article, where I showcased a very high resolution image of sand particles with tons of detail. The image was massive in size and resolution when I extracted it out of Lightroom. In fact, the image was so big, that I had to downsize it to 4096 pixel long resolution in order to keep the size at less than 10 MB with as much JPEG optimization as I could. When dealing with so much detail, even the highest JPEG compression levels will still yield large files, since there is so much pixel-level data. And that’s what you get when you have an image produced from a sensor that moves one pixel at a time in order to create a super high resolution image! And combined with the power of focus stacking multiple images, you get insane levels of detail from a macro shot like this. So how did I do it? Let’s talk about the specifics of this particular shot.

Sand and Pebbles

I have already kind of revealed the answer in the opening paragraph – the image was captured by the Pentax K-1 DSLR, the camera that has the amazing pixel-shift technology capable of creating extreme details, something typical sensors with a bayer filter are unable to reproduce. Stephen Bennion, great job at guessing the setup! 🙂 The lens that I used was the Pentax 24-70mm f/2.8, which is basically a re-branded Tamron 24-70mm f/2.8 with its VC disabled. Although I had the Pentax 70-200mm f/2.8 with me as well, it would have been a bit too long to use for this particular shot, since I was pointing my camera directly down from my tripod. I zoomed to around the 70mm mark to get the details and the tight framing I wanted and at that distance and focal length, it would have been impossible to capture all the details in the frame from the center all the way to the extreme corners, even if I stopped down significantly. I personally try to stay away from small apertures past f/11 for these kinds of shots, because diffraction can seriously hurt resolution, so my choice was to take multiple shots focused at different areas of the frame, then stitch them together for a single shot in Photoshop.

Before I talk about how I did that, let me first talk about the advantage of the pixel shift technology, particularly for such shots. What kind of additional detail can cameras such as the Pentax K-1 add? Just take a look at the following two images (studio scene to soon be published in the upcoming Pentax K-1 review):

I know what you are thinking – one looks like blurred mess, almost like an out of focus image, while the other looks quite detailed in comparison. But I can assure you, both images are 100% in focus. The “before” image was shot with the Nikon D810, whereas the “after” image was shot with the Pentax K-1. The difference is literally in the bayer pattern – even without an anti-aliasing / low-pass filter in place, the Nikon D810, which is supposed to be a camera that can produce tons of detail, is not capable of providing full pixel-level details of the scene. The Pentax K-1, on the other hand, has the ability to shift its sensor one pixel at a time (thanks to its IBIS), in order to resolve every bit of detail available. Now that’s amazing!

Of course this pixel shift technology does not work for every type of scene, especially if there is a lot of subject movement. However, for static shots like this and when there is no wind, pixel shift technology is absolutely amazing. In fact, the detail level one can get with such a mode is pretty darn close to what a medium format camera can do, once images are down-sampled.

Now imagine the potential of using pixel shift, along with focus stacking for a single composite. And that’s exactly what I did here. I started out by focusing on the bottom edge of the frame, then moved up bit by bit, by capturing a total of 6 images. Take a look at the following sequence of the last three images:

Focus Stack (2) Focus Stack (3) Focus Stack (4)

As you can see, there is a slight change of framing between the three shots. And that’s the unfortunate issue you are going to get with most lenses – when you focus at different areas of the frame, there is a potential for a change in focal length, which can mess up the framing! This means that if you were to take such images to Photoshop and try to automatically stitch them, they might not stitch properly due to alignment issues.

After right-clicking the six images in Lightroom and selecting “Open as Layers in Photoshop” and letting Photoshop do its initial work, I selected all layers, then went to Edit->Auto-Align Layers:

Auto Align Layers

What this does, is align layers and cut off parts that are not present in all layers. After the process was complete, I cropped the image a little bit to only be left with the full image. Next, I visited Edit->Auto-Blend Layers and picked “Stack Images”. I deselected both “Seamless Tones and Colors” and “Content Aware Fill Transparent Areas”, since I did not need them.

Once blending was done, I ended up with layer masks on top of each layer. Although Photoshop did a wonderful job, I still selected a soft brush and brushed off the abrupt edges manually from some areas. The image was ready and it only took me about 3-5 minutes to get this all done.

The pixel shift technology offered by some modern cameras is amazing. If manufacturers continue to work in advancing this feature a bit further by taking quicker shots and processing them, finding ways to blend images better and take care of other issues and limitations, this will be a very desirable feature to have on every camera.

Pentax has done an amazing job with the K-1. If Pentax had a comparable lens line-up to Nikon, I would seriously consider switching. The Pentax K-1, being a sub-$ 2K full-frame camera, offers so much amazing technology, that it is now becoming a reference camera when it comes to rich set of features, image quality, dynamic range and overall performance. I hope Nikon and Canon wake up from their deep sleep and shake the industry once again. Abandoning the Nikon 1 mirrorless system or releasing cameras such as the EOS M5 that can barely compete with other mirrorless offers won’t get the two far…

The post How Was This Picture Made #11: The Answer appeared first on Photography Life.

Photography Life

Posted in Photograpy How To | Tagged , , , | Leave a comment

Sigma 85mm f/1.4 Art, 12-24mm f/4 Art and 500mm f/4 Sport Announcement

More Photokina announcements are rolling in today and this time it is Sigma, with its headline-grabbing releases of upcoming Art and Sport-series lenses. With stellar lens designs such as the 35mm f/1.4 Art and 50mm f/1.4 Art lenses, we have been waiting for Sigma to release an 85mm f/1.4 Art lens for quite sometime now, so Sigma has finally delivered. The new 85mm f/1.4 Art promises to be a superb lens both in terms of sharpness and bokeh. Although Sigma is yet to provide MTF charts and lens construction images, the fact that there is no aspherical element in the lens design is an indication of the lens being optimized to yield pleasant-looking bokeh without onion rings, something that has plagued other Art-series Sigma lens designs. Its price is a bit steep at $ 1,199 MSRP, but it is still $ 400 cheaper than its Nikon counterpart.

Sigma 85mm f1.4 Art

The 12-24mm f/4 Art looks pretty solid as well, considering that it is designed for full-frame cameras. It rivals primarily with Canon’s 11-24mm f/4L lens rather than Nikon’s 14-24mm f/2.8, since those extra 2mm of focal length differences are huge. And price-wise, it is not a cheap lens either – at $ 1,599 MSRP, it is pretty darn close to Nikon’s 14-24mm, although if you were to compare it to Canon’s $ 3K 11-24mm f/4L, is is still quite a bargain. With a number of aspherical and low dispersion glass elements, this should be a stellar wide-angle lens though. As expected from such a lens design, the front element of the lens is huge, making it impossible to mount filters. You would need to get something like the WonderPana with those huge and expensive filters in order to be able to mount them.

Sigma 12-24mm f4 Art

Lastly, another surprise is the Sigma 500mm f/4 Sport DG OS HSM lens, a flagship super telephoto lens designed specifically for sports and wildlife photographers. This one looks quite attractive as well, but with lack of key specifications like its weight, it is impossible to say how it will be able to compete with both Nikon’s and Canon’s flagship 500mm f/4 lenses, both of which have fluorite elements and other optimizations to keep their weights very low. However, its street price of $ 5,999 definitely makes it look attractive compared to the big name brands, who sell their 500mm f/4 lenses at much steeper prices.

Sigma 500mm f4 Sport

All three lenses will be available in October and you can pre-order them using the links below.

Official Announcement

Here is the official announcement:

Cologne, Germany – September 19, 2016 – Sigma Corporation of America, a leading camera, DSLR lens, flash and accessories manufacturer, unveiled its new 85mm F1.4 DG HSM Art, 12-24mm F4 DG HSM Art and 500mm F4 DG OS HSM Sport Global Vision lenses at the Photokina 2016 event (hall 4.2, stands B020, B028 and C029).

“We are thrilled to announce three state-of-the-art additions to the Global Vision line. The Sigma 85mm 1.4 Art has been a highly requested lens and we are very confident those customers who have been waiting for us to deliver this lens will be more than pleased with the superior optical performance and zero compromise,” states Mark Amir-Hamzeh, president of Sigma Corporation of America. “In addition, the re-engineered 12-24mm F4 and highly competitive 500mm F4 Sport lens both embody the world-class performance our Global Vision lenses are known for. We look forward to seeing the incredible images our customers will create using these new Sigma lenses.”

Sigma 85mm F1.4 DG HSM Art – The Ultimate Portrait Lens
Delivering the ultimate in creative expression, the new Sigma 85mm F1.4 Art lens is engineered to support the highest resolution sensors on the market with an exceptional degree of sharpness. The high-performance optical system is purpose-built by Sigma R&D to produce the attractive bokeh effect sought after by discerning photographers. The lens’ advanced architecture features two SLD (special low dispersion) glass elements and one glass element with a high rate of anomalous partial dispersion and refraction. A re-engineered AF system brings 1.3X the torque of its predecessor, while other features such as a full-time manual focus override have been added, which can be controlled when the focus ring is rotated, even during continuous AF.

The Sigma 85mm F1.4 DG HSM Art lens supports Canon, Nikon and Sigma mounts. The Nikon mounts feature a brand new electromagnetic diaphragm.

The Sigma 85mm F1.4 Art lens will be available in late October and retails for a recommended street price of $ 1199.00 USD.

Sigma 12-24mm F4 DG HSM Art Ultra-Wide Angle Zoom for the Era of Ultra-High Resolution Digital Cameras
Boasting the renowned Global Vision image quality from center to edge, the new Sigma 12-24mm F4 features the largest aspherical glass mold in the industry, offering photographers an ultra-wide angle zoom with virtually no distortion, flare or ghosting. Encompassing the long history of Sigma wide angle lens development expertise, the new 12-24mm F4 performance highlights include constant F4 brightness and the brand new Sigma AF system with 1.3X torque boost. The 12-24mm F4 features lens elements made with FLD (“F” Low Dispersion) glass, which is equivalent to calcium fluorite in performance. Combined with an optimized power distribution, the result is outstanding image quality from center to edges. With a minimum focus distance of 9.4 inches at 24mm, photographers can compose incredible close-up shots with expansive backgrounds.

The all new Sigma 12-24mm F4 DG HSM Art lens supports Canon, Nikon and Sigma mounts. The Nikon mounts feature the brand new electromagnetic diaphragm.

The Sigma 12-24mm F4 Art lens will be available in late October and retails for a recommended street price of $ 1599.00 USD.

Sigma 500mm F4 DG OS HSM Sport Lens – Pro Fast-Aperture Prime Super Telephoto
The flagship Sigma super telephoto 500mm F4 Sport lens incorporates the very latest in Sigma optical technology and innovation. Designed for the professional sports and wildlife shooter, the ultra-durable lens features magnesium alloy components, a carbon fiber hood, a water and oil resistant front element, and is dust and splash proof. The 500mm F4 features a drop-in rear filter slot for polarizers, UV and other critical filters. To help prevent damage during shooting and maintenance, the lens is also compatible with the exclusive SIGMA Protector LPT-11 (sold separately).

The lens incorporates two FLD and one SLD glass elements, while the optimized power distribution helps minimize spherical aberration and axial chromatic aberration. The optical system also effectively minimizes transverse chromatic aberration, which can affect the edges of the shots taken in the telephoto range. In addition, image quality remains exceptional when the lens is used with a Sigma Telephoto Converter (sold separately).

Other key performance features include Sigma’s two-mode Optical Stabilizer for enhanced performance when shooting handheld for still subjects or panning and tracking for moving subjects. There is also a customizable AF “return” function for setting the focus position of one’s choice and returning to that preset distance.

The all new Sigma 500mm F4 supports Canon, Nikon and Sigma mounts. The Nikon mounts feature the brand new electromagnetic diaphragm.

The Sigma 500mm F4 Sport lens, in Canon and Sigma mounts, will be available in late October. The Nikon mount will be available in late November. The 500mm F4 will retail for a recommended street price of $ 5999.00 USD.

All Sigma Global Vision lenses, including the new 85mm F1.4 DG HSM Art, 12-24mm F4 DG HSM Art, and 500mm F4 DG OS HSM Global Vision lenses, can be updated with the latest lens firmware from a workstation or laptop using the Sigma Optimization Pro software and Sigma USB Dock (sold separately).

Tested for Optimum Performance
Sigma lenses are born of well thought-out design concepts, exceptional Japanese craftsmanship and manufacturing, and advanced lens performance testing and evaluation. To this end, Sigma has developed its own A1 proprietary MTF (modulation transfer function) measuring system using 46-megapixel Foveon direct image sensors. Even the most elusive high-frequency details are within the scope of Sigma’s quality control inspections. Every Global Vision lens is A1 tested, analyzed and approved before leaving the factory, ensuring maximum performance out of the box.

For more information on Sigma’s industry leading testing, please visit http://blog.sigmaphoto.com/2012/a1-mtf-testing-for-new-sigma-lenses/

Pre-Order Links

As usual, you can pre-order your copy of the above lenses from our trusted partner B&H Photo Video:

  1. Pre-order Sigma 85mm f/1.4 Art from B&H Photo Video
  2. Pre-order Sigma 12-24mm f/4 Art from B&H Photo Video
  3. Pre-order Sigma 500mm f/4 Sport from B&H Photo Video

The post Sigma 85mm f/1.4 Art, 12-24mm f/4 Art and 500mm f/4 Sport Announcement appeared first on Photography Life.

Photography Life

Posted in Photograpy How To | Tagged , , , , , , | Leave a comment

Life Magazine Cover April 26, 1968 Paper Framed Print 1 5/8″ Natural Espresso Wood Grain 22×26 Photo On Paper

Life Magazine Cover April 26, 1968 Paper Framed Print 1 5/8″ Natural Espresso Wood Grain 22×26 Photo On Paper


Life Magazine Cover April 26, 1968″ is an art print by Alfred Eisenstaedt from The Life Premium Collection. Get photo prints of “Life Magazine Cover April 26, 1968” in a variety of frames, styles, and materials. Photographer Bio Alfred Eisenstaedt (1898-1995), or Eisie to those who knew him, received his first camera as a gift from his uncle at 14, a few years after moving to Berlin from Poland with his family. At 17, he was drafted to the German army. His interest in photography blossomed while recovering from a shrapnel wound. He became a regular at museums, studying light and composition. By 31, he was a full-time photographer. In 1933 he was sent to Italy where he shot the first meeting between Hitler and Mussolini. Two years later, when Hitler came to power, Eisie immigrated to America. Soon after arriving in New York, he was hired along with three other photographers-Margaret Bourke-White, Thomas McAvoy and Peter Stackpole-by Time Inc. founder Henry Luce for a secret start-up venture known as “Project X.” Six months later, Life magazine premiered on November 23, 1936. The first issue sold for 10 cents and featured five pages of Eisie’s pictures. His most famous photo was the kiss in Times Square on V-J day, about which he said, “I was running along the street grabbing any and every girl in sight. Whether she was a grandmother, stout, thin, old, didn’t make any difference. None of the pictures that were possible pleased me. Then, suddenly in a flash I saw something white being grabbed. I turned and clicked the moment the sailor kissed the nurse.” Over his career, Eisie shot a total of nearly 100 covers for Life magazine and some 10,000 prints. The Life Premium Collection From one of the most iconic magazines ever to hit the shelves comes The Life Collection – an archive of some of the most recognizable imagery of the 20th Century. Documenting events in politics, culture, celebrity, the arts and the American experience, these compelling and provocative photographs include the works of some of the greatest photographers capturing some of the greatest moments in history.

Price: $
Sold by Photos.com by Getty Images

Posted in Family Photography | Tagged , , , , , , , , , , , , , | Leave a comment

Picasso Drawing With Light Canvas Traditional 1 5/8″ Matte Black 24×29 Photo On Canvas

Picasso Drawing With Light Canvas Traditional 1 5/8″ Matte Black 24×29 Photo On Canvas


picasso Drawing With Light” is an art print by Gjon Mili from the Masters collection. Get photo prints of “picasso Drawing With Light” in a variety of frames, styles, and materials. Photographer Bio Emigrating to the United States from Albania in 1923, Gjon Mili is regarded as the first photographer to use electronic flash and stroboscopic light to create photographs outside of a scientific context. A true pioneer of the artform, Mili’s photographs of dancers, athletes, and pictures or performances have shaped our understanding of how movement too rapid or too complex for the eye to discern is captured in the still image. Mili’s career as a photographer for Life Magazine spanned four decades and saw the publication of thousands of his photographs, taking him around the world; from collaborations with Pablo Picasso, to the incarceration of Adolph Eichmann, to original photos from Broadway plays.

Price: $
Sold by Photos.com by Getty Images

Posted in How To Photograph | Tagged , , , , , , , , | Leave a comment