4 ways to get ready to photograph your summer like a pro

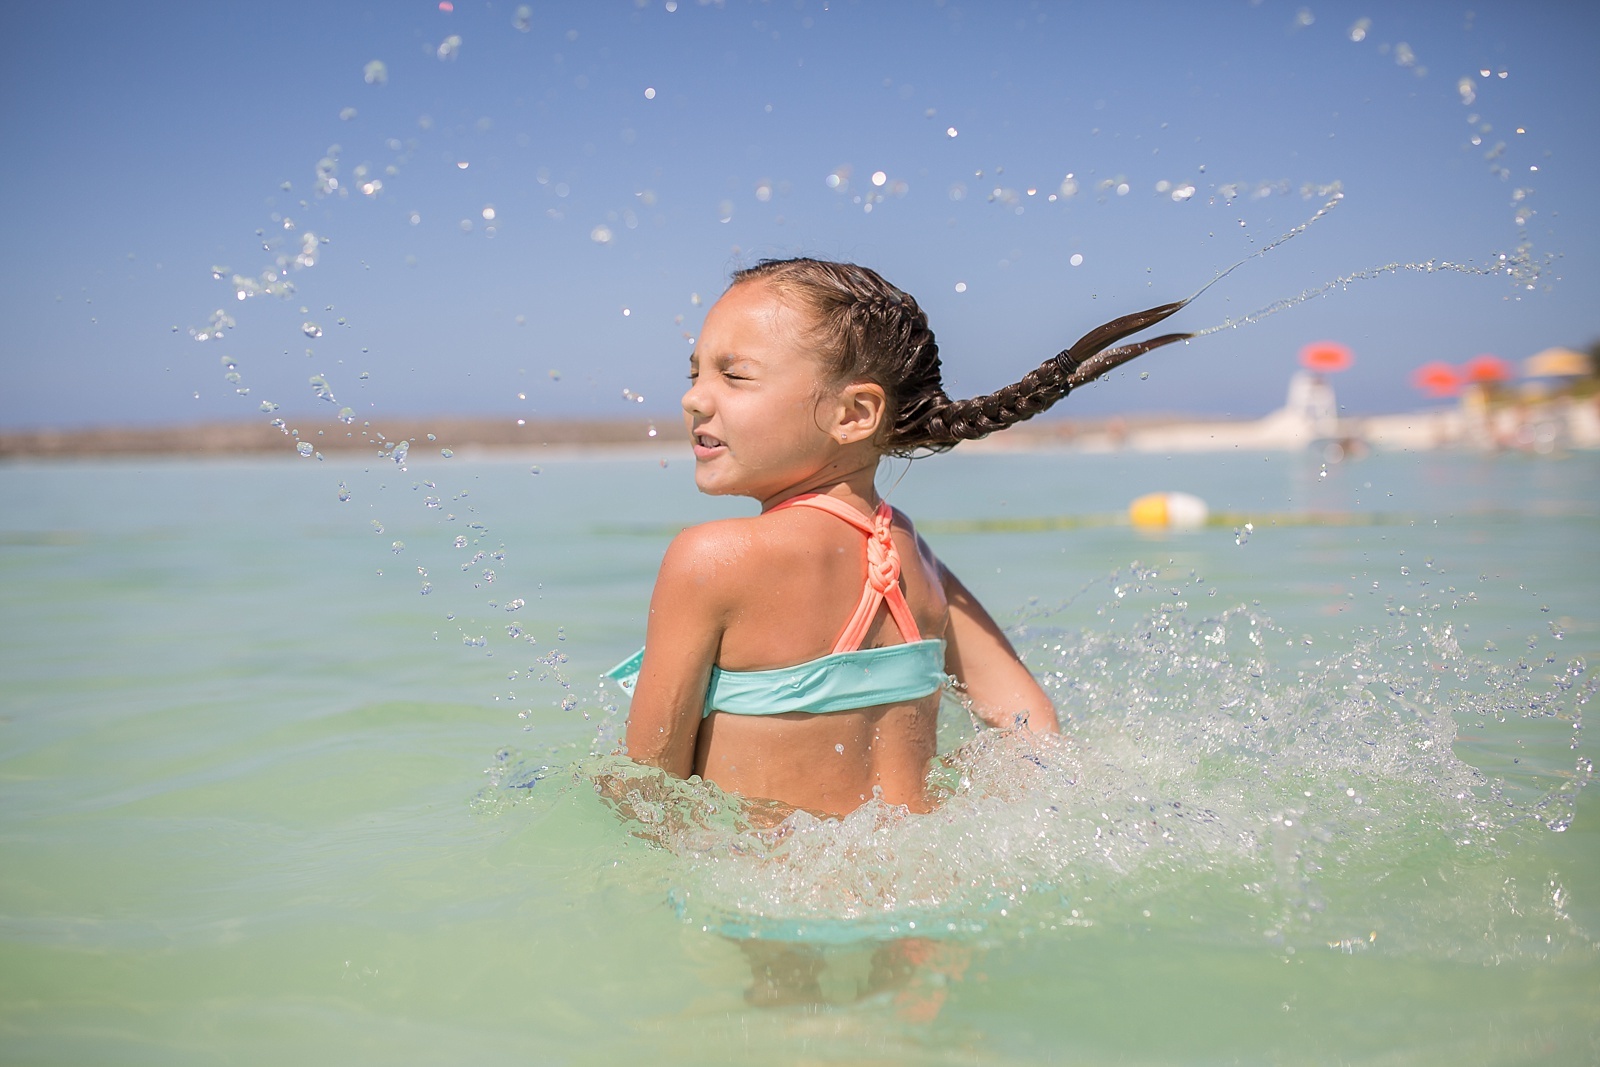
I don’t know about you, but my absolute favorite time of year to photograph is summer.

The short, cold, dark, and often uninspiring days of winter behind me, I am re-energized by the promise of long, hot, sunny days and the feelings of freedom and ease that summer brings.

I know that the family photographs I make between June and September will be my best of the year.

Days spent outdoors, the perfect mix of adventure and everyday routine, and plenty of family togetherness make for a very good life. And nothing sets the stage for amazing family photographs better than the good life.

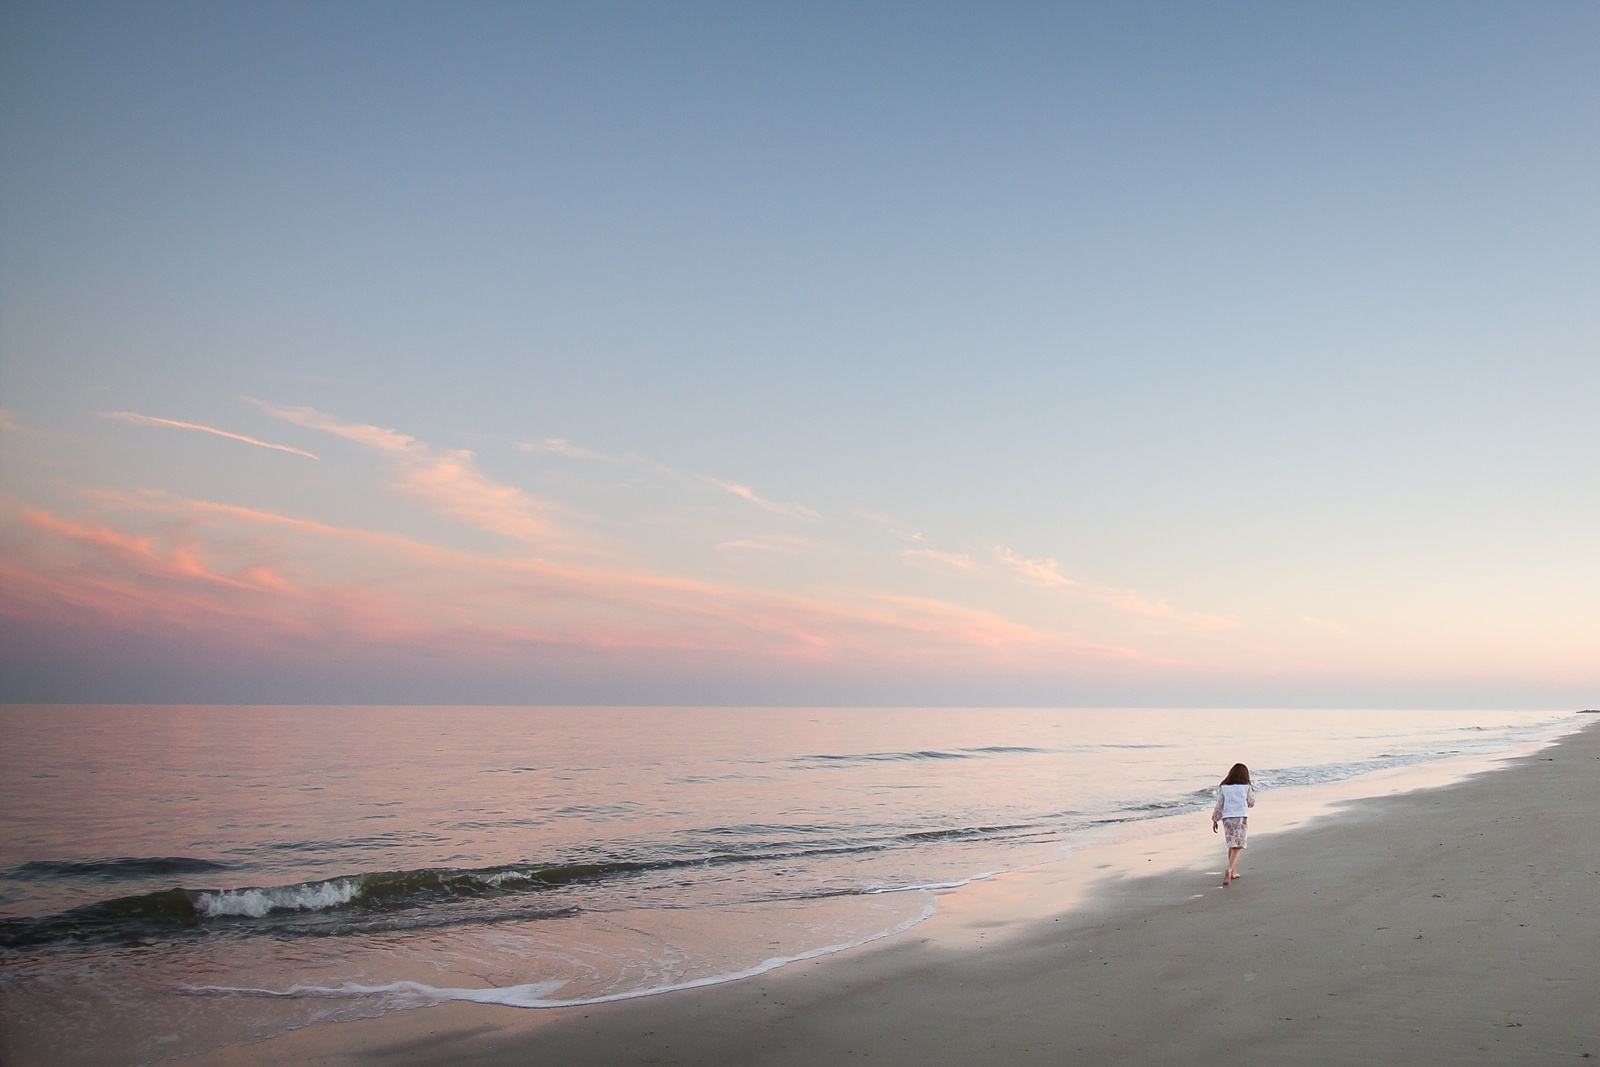
Well before the official start of summer, Memorial Day Weekend for those of us in the United States, I start to get excited by the occasional warm days where the thermometer rises a bit, giving us a glimpse of what is to come.

And though I cannot bring myself to seize these days as vigorously as my kids, who prematurely trade in their warm leggings and boots for shorts and flip flops, my enthusiasm grows and I begin to think ahead about what I want from my summer photographs.

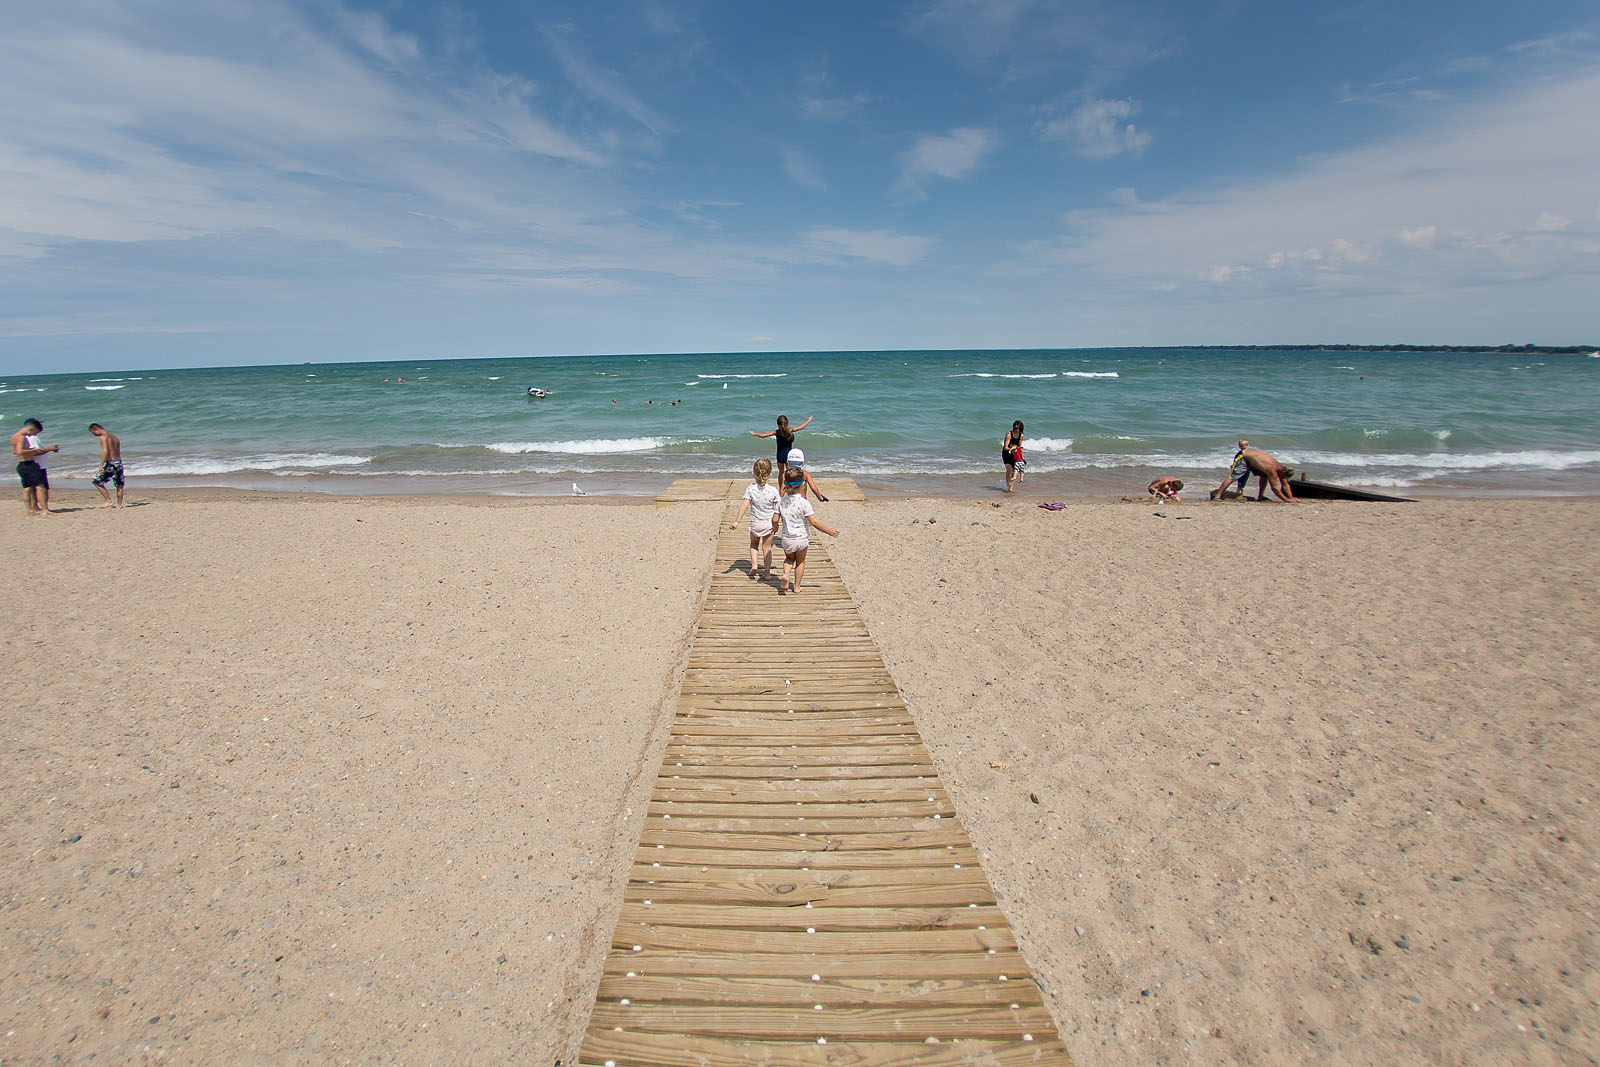
For me, preparation is incredibly valuable. Almost all of my personal family photography is in the documentary style. This means that I rarely pose my subjects or set up scenes. I take the action before me as it is and work to capture the moment authentically and in a way that makes a strong photograph.

And though I want my images to appear as if they were captured naturally and with ease, we all know that capturing just the right moment and just the right way is almost never easy, especially where kids are involved.

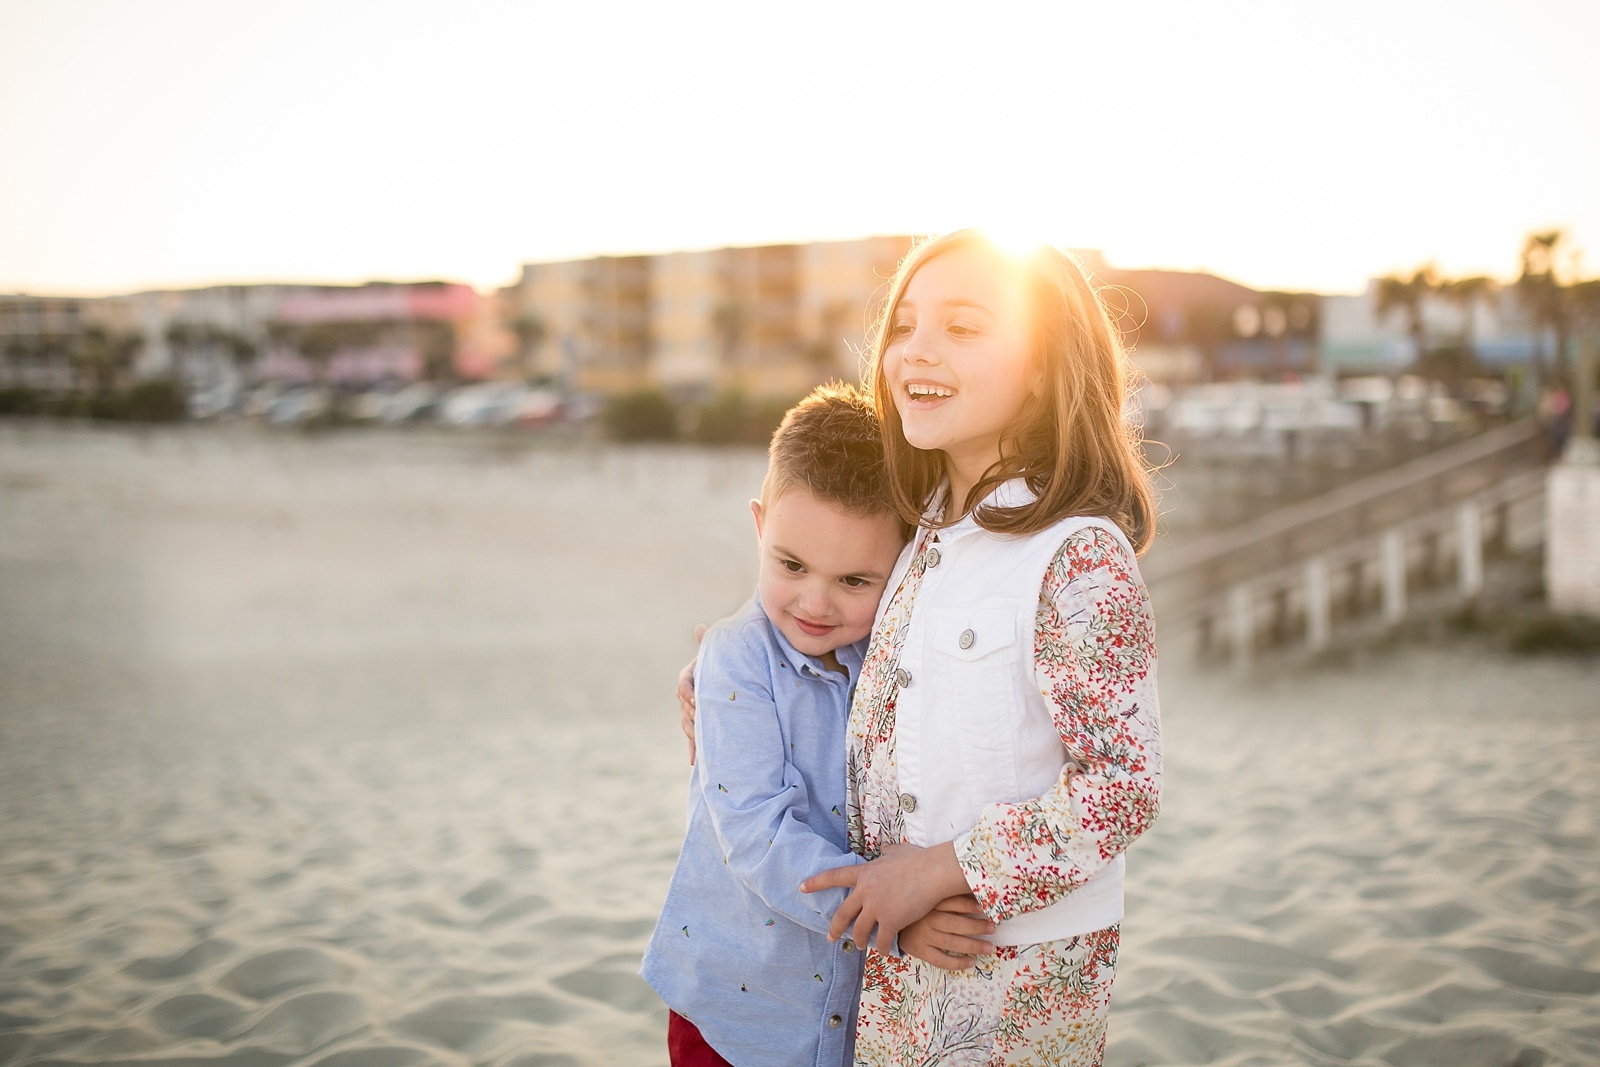
Taking the time to plan now enables me to seize the abundant opportunities of summer as they arrive. Planning also enables me to produce a more intentional body of work that documents the people, places, and things most important to me and my family.

luck is where opportunity meets preparation

Without planning, I’m afraid I won’t get lucky. And in documentary photography, lucky is everything!

Regardless of your style, a little preparation can go a long way towards achieving better photographs. Here are a few tips to help you prepare now to capture your best summer ever:

1. Write out your bucket list

Take some time to think about what it is that you want to capture this summer by setting aside some time to brainstorm your bucket list. This is not a casual bucket list downloaded from the internet, rather a very personal bucket list just for you.

Begin the process by closing your eyes and envisioning your summer. Where are you? Who are you with? What do you see, hear, smell, and feel? Get in close and look at the details in your mind then step back and take in the entire scene. Write out every idea that comes to mind, censoring nothing.

You can always go back and refine your list later. Be both vague and specific. As you continue to visualize your summer, think about how your everyday routines will change, what special events or milestones will occur, what old traditions will you uphold and what new ones might you start.

Think carefully about what it is about these things that you want to remember. Are there old photographs you want to recreate, perhaps to show growth or change, particular groups of people to capture together, signs, foods, or landscapes that will best tell your story? Write it all down then place this list on your phone, in your car, or somewhere you can see it daily. Refer to your list regularly, cross off items as you go, and continue to add to it as new ideas come to you.

Regardless of your style, a little preparation can go a long way towards achieving better photographs. Here are a few tips to help you prepare now to capture your best summer ever:

2. Get your gear ready

Now that you know what you want to capture, make sure that you have the equipment you need and that it is ready to go.

Now is a good time to take inventory of your gear and clean it up. Inspect your camera and lenses and give them a good cleaning. Send them off for service if necessary. Then decide if you need any additional gear. Perhaps a particular lens would make all the difference.

Before going all in, consider renting it from a local shop or online retailer for a week or two. Renting lenses is also a great option for travel, either out of necessity – you need a super long lens for your whale watching expedition, or for fun – perhaps renting a tilt-shift to bring along on your week at the beach.

To hold your gear, a lightweight bag is a must! There are a million choices from shoulder bags to backpacks to small cases that fit into your larger purse. Try a few in the store and decide what works best for you.

Stock your bag with essential cleaning supplies like a rubber bulb blower, lens cleaner, and microfiber cloths. Knowing you are prepared to remove sand, dirt, and other icky stuff will help prevent any reluctance to take out your camera in a messy situation.

And since summer is synonymous with water, consider investing in a waterproof camera, housing (I use this one with my Fuji X100t), or bag. There are a host of options in all price ranges.

Depending on where your adventures may take you, you may consider purchasing (or borrowing from a friend) a polarized filter and/or a tripod. Finally, don’t forget to make sure you have an extra battery and plenty of memory cards.

Regardless of your style, a little preparation can go a long way towards achieving better photographs. Here are a few tips to help you prepare now to capture your best summer ever:

Regardless of your style, a little preparation can go a long way towards achieving better photographs. Here are a few tips to help you prepare now to capture your best summer ever:

3. Have a personal growth goal

Is there something you have been wanting to learn or improve in your photography? The summer is the perfect time to work on your skills.

Set a goal (or several) and devise a plan to achieve it. Take a class, read some books, or commit to daily practice of skills you want to improve. Be intentional about learning and growing.

Last summer, I seized the opportunity to learn DSLR video by taking an online class that coincided with our beach vacation. It was perfect timing. The more relaxed days afforded me the time to practice and the film I made of our trip is priceless to me.

Regardless of your style, a little preparation can go a long way towards achieving better photographs. Here are a few tips to help you prepare now to capture your best summer ever:

4. Plan for your final output

Think about what you want to do with all these awesome photographs you will take. I hate the idea of all these memories sitting on an outdated hard drive somewhere 20 years from now.

Without a little planning, the business of life will invariably interfere with the daunting task of printing or otherwise presenting your work. Take the time now to consider what you want to do with your images. Perhaps you plan to blog your images, print them, create a slide show, or even sell them through your stock collection.

Then devise a strategy for organizing and storing your photographs in a way that will enable you to easily export for your final output. I myself love photo albums, especially from Artifact Uprising and Nations Photo Lab, and create an album of our beach vacation every summer. As a Lightroom user, I take full advantage of the tag feature to label my images. For example, after culling and editing my vacation photos, I go through and tag my favorites “beach book.” When I’m ready to create my book, I simply sort out those images, cull a little more if necessary, and then I’m ready to create my album.

Regardless of your style, a little preparation can go a long way towards achieving better photographs. Here are a few tips to help you prepare now to capture your best summer ever:

With a little advance planning, the photographs you make this summer will be your best ever. Start now, as summertime is just around the corner!

take-better-pictures-with-the-help-of-the-Clickin-Moms-photography-forum

The post 4 ways to get ready to photograph your summer like a pro appeared first on Clickin Moms.


Clickin Moms

Posted in Photograpy How To | Tagged , , , , | Leave a comment

5 ways to make it look like you’re on a private beach when you’re not

Do you ever look at beach pictures and think that you could never take images like that because your only option for beach photography is the public beach?

Well, that’s completely untrue, because I do it all the time!

With a few simple tips you’ll learn to shoot on a beach like no one else is there.

1. Zoom in

This is probably the easiest and most obvious tip, so let’s get it out of the way first. Check out the number of people on this beach. No way right? Well…you just have to zoom in.

I knew there wasn’t going to be any long shore images here, so I just went to the least crowded part of the water and got a few shots of my daughter.

Do you ever look at beach pictures and think that you could never take images like that because your only option for beach photography is the public beach? With a few simple tips you’ll learn to shoot on a beach like no one else is there.

If I zoom out a bit, you see the very crowded beach, but since I’ve moved so far away from the crowd it’s not horribly distracting.

Do you ever look at beach pictures and think that you could never take images like that because your only option for beach photography is the public beach? With a few simple tips you’ll learn to shoot on a beach like no one else is there.

2. Get to the beach early or stay late

The least crowded time of the beach is going to be between 8am-10am or around sunset, 7pm-9pm. We definitely make it a point to visit the beach during these hours.

I usually can find a less crowded spot on the beach and get some good images. Here, I was able to crop the people right out of the image. This was taken on a public beach right near the pier.

Save

Do you ever look at beach pictures and think that you could never take images like that because your only option for beach photography is the public beach? With a few simple tips you’ll learn to shoot on a beach like no one else is there.

Do you ever look at beach pictures and think that you could never take images like that because your only option for beach photography is the public beach? With a few simple tips you’ll learn to shoot on a beach like no one else is there.

pullback

3. Wait it out

I really wanted to take some pictures under the pier, but so did everyone else. At times it was so crowded I knew it wasn’t even worth it.

I was keeping an eye on it and noticed at one point the space was open. I called my daughter over and told her we needed to be quick. We still had to wait for a few people to walk by, but eventually we had a clearing and left only a few people to remove from the final image.

Do you ever look at beach pictures and think that you could never take images like that because your only option for beach photography is the public beach? With a few simple tips you’ll learn to shoot on a beach like no one else is there.

Do you ever look at beach pictures and think that you could never take images like that because your only option for beach photography is the public beach? With a few simple tips you’ll learn to shoot on a beach like no one else is there.

pullback

4. Take a walk

Take a walk on the beach and look for a spot where no one is around. This area was near the parking lot of the public beach and not really a desirable place to set up your umbrella for the day. However, it’s a great spot for some beach shots.

Do you ever look at beach pictures and think that you could never take images like that because your only option for beach photography is the public beach? With a few simple tips you’ll learn to shoot on a beach like no one else is there.

Do you ever look at beach pictures and think that you could never take images like that because your only option for beach photography is the public beach? With a few simple tips you’ll learn to shoot on a beach like no one else is there.

Do you ever look at beach pictures and think that you could never take images like that because your only option for beach photography is the public beach? With a few simple tips you’ll learn to shoot on a beach like no one else is there.

5. Remove people using Photoshop

This is probably the most time consuming but the most rewarding. This is my big secret in getting that look of the private beach. I’m going to include several final images with the pull back and then include an editing video to show you how I do it.

Do you ever look at beach pictures and think that you could never take images like that because your only option for beach photography is the public beach? With a few simple tips you’ll learn to shoot on a beach like no one else is there.

final image

Do you ever look at beach pictures and think that you could never take images like that because your only option for beach photography is the public beach? With a few simple tips you’ll learn to shoot on a beach like no one else is there.

pullback

Do you ever look at beach pictures and think that you could never take images like that because your only option for beach photography is the public beach? With a few simple tips you’ll learn to shoot on a beach like no one else is there.

final image

Do you ever look at beach pictures and think that you could never take images like that because your only option for beach photography is the public beach? With a few simple tips you’ll learn to shoot on a beach like no one else is there.

pullback

With a combination of these tips you can get the private beach look. I hope this will help you gain the confidence to pull out that camera out even if you have some unwanted people in the frame.

Save

The post 5 ways to make it look like you’re on a private beach when you’re not appeared first on Clickin Moms.


Clickin Moms

Posted in Photograpy How To | Tagged , , , , , | Leave a comment

26 photos of weather that will take your breath away

Winning image above by Jamie Bates

Who doesn’t love a contest?

Every month on the photography forum, we throw out a theme and leave it up to members to interpret it in their images. Last month, we chose the theme ‘Weather’.

What resulted was an amazingly beautiful collection of pictures that allowed us to catch a glimpse inside the lives of the members. We’ve compiled a few of them here for you to enjoy and we want to congratulate Lindsey for winning a live Breakout seat from Click Photo School with her image above!

Alaina Carr

Alaina Carr

Alyssa Ahern

Alyssa Ahern

Amanda Bradt

Amanda Bradt

Amy Bartley

Amy Bartley

Andrea Johnson

Andrea Johnson

Anita Perminova

Anita Perminova

Becca

Becca

Beth Cagnoni

Beth Cagnoni

Dana DiSalvo

Dana DiSalvo

Gen Palmer

Gen Palmer

Ilaria Cossettini

Ilaria Cossettini

Iris Bergmann

Iris Bergmann

Jennifer Nobriga

Jennifer Nobriga

Jenny Brake

Jenny Brake

Jenny Rosenbring

Jenny Rosenbring

Jenny Rusby

Jenny Rusby

Kristen Ryan

Kristen Ryan

Mabel Chow

Mabel Chow

Mel Karlberg

Mel Karlberg

Michelle Stoddard

Michelle Stoddard

Renata Plaice

Renata Plaice

Shelby Zavala

Shelby Zavala

Sonja Stich

Sonja Stich

Stefanie Berry

Stefanie Berry

Tarah Sweeney

Would you like the opportunity to be featured in next month’s photo share here on the Clickin Moms Blog and possibly win a prize? For our next contest, we’ve asked for your best ‘Close Up’ photos which you can submit here.

Not a member of the forum? Don’t forget that you can sign up today risk-free!

take-better-pictures-with-the-help-of-the-Clickin-Moms-photography-forum

The post 26 photos of weather that will take your breath away appeared first on Clickin Moms.


Clickin Moms

Posted in Photograpy How To | Tagged , , , , | Leave a comment

How I edit backlit beach photos in Lightroom and Photoshop

Shooting at the beach in the summer is one of my favorite ways to capture summer memories for my family. 

We are so fortunate to live within 4 miles of the beautiful Lake Michigan shoreline in Holland, Michigan.

We often visit during the heat of the day, but when I notice there is going to be a beautiful sunset we pack up to head for an evening swim. My favorite way to shoot at the beach is with backlighting as the sun sets over the lake, however, this adds some challenges with exposing my images.

With strong backlighting, we often have to pick what we want to expose correctly – our subjects or the sky.

We could, of course, use additional equipment to properly expose both with the addition of a reflector or off camera flash, but personally neither of those methods work well for me at the beach. It’s not my favorite past time to chase my children with a reflector while trying to shoot and lugging more equipment to the beach on top of what the children have already deemed “necessities” is not my idea of fun.

Shooting at the beach in the summer is one of my favorite ways to capture summer memories for my family. With strong backlighting, we often have to pick what we want to expose correctly - our subjects or the sky. This is how I edit those potentially difficult photos.

before

Shooting at the beach in the summer is one of my favorite ways to capture summer memories for my family. With strong backlighting, we often have to pick what we want to expose correctly - our subjects or the sky. This is how I edit those potentially difficult photos.

after

For this reason, I choose to deliberately underexpose my subjects, and overexpose my sky knowing I will have to use post processing to achieve my vision for the image.

Finding the balance between underexposing your subjects enough to minimize blowing out the sky and not underexposing them so much that they cannot be brought back without significant noise and quality issues, can be hard. Shooting in RAW will help editing since it gives you more data to work with and greater flexibility with bringing back highlights and opening up shadows.

Practice makes perfect with this technique and I promise it gets easier to judge the line between underexposure/overexposure as you deliberately work with this technique more. Practice also helps with knowing how well your camera will handle the noise that will be introduced when you open up the shadows on your subjects.

I have included my process for editing my beach shots that are backlit in the video below.

While I use Lightroom and Photoshop to achieve my vision, my process can be easily adapted to the combination of Adobe Camera Raw and Photoshop.

The post How I edit backlit beach photos in Lightroom and Photoshop appeared first on Clickin Moms.


Clickin Moms

Posted in Photograpy How To | Tagged , , , , , | Leave a comment

Beyond boyhood: Photographing your son’s tween and teen years

As my boys transitioned out of boyhood and into their tween and teen years, I quickly realized that I needed a different approach to photographing them.

I mean, they have a social life now and all!

So I went on a mission to start capturing them in a more intentional and creative, yet unobtrusive, way. One that would represent them and who they are while satisfying my need to be creative and artistic.

Along the way, I’ve found some things that have made this mission a little easier and a little more fun. I hope these little discoveries will encourage you to keep picking that camera up and photographing your older boys, too.

There is so much to love about this age, and I’ve found that it is really so fun to connect with them and capture this time in their lives – I promise it is so worth it!

1.  Observe and show interest

When my boys were younger, I was almost always actively engaged in the playtime or activity happening in front of my camera. As they’ve become older and more independent, I’ve tried to respect their space and their time with friends, so I’ve become much more of an observer with my photography.

I observe and wait for the right moment.

However, I cannot rely solely on observation to get good images. I have to be involved and show interest, too. Otherwise, I just feel like I’m spying on them – ha! Believe me, if they know you are interested in what they are doing, they will happily engage with you and will likely let you photograph them as much as you want.

For example, I was able to capture this image because I could hear my boys playing ping pong downstairs with their friends. We had just set the table up, and I knew I wanted to get an image of them playing, so I went down with my camera and started asking them about the game.

After a few minutes, I said I was going try to get some pictures of them. If I had started shooting without talking to them first, they may have felt like I was trying to be sneaky and would have been uncomfortable. Because I showed that I was interested first, I was able to capture a very natural moment.

As my boys transitioned out of boyhood and into their tween and teen years, I quickly realized that I needed a different approach to photographing them. Along the way, I’ve found some things that have made this mission a little easier and a little more fun.

2. Turn photography sessions into mother-son date nights

Make photography fun for both of you, and carve out some time to have some one-on-one conversation with your son while capturing great images at the same time.

Choose a couple of locations that you think might be interesting to your son. I feel like urban-like settings with lots of lines and color are great for this age. Natural settings can work, too, especially if your son loves the outdoors. Whichever type of location you choose, make sure it has plenty of opportunities for interaction and exploring.

Let your son help you choose where to go, and enjoy the outing. Afterward, have a fun dinner or dessert somewhere. They love the attention, and, let’s face it, we don’t get much time alone with them anymore. Plus you’ll have awesome photos to remember it.

I knew this location would be great for getting good images of the boys with all of the lines and colors, so when we were in Florida last year, we decided to make it a fun family evening. The bonus for them was that they got to see a live alligator, too!

As my boys transitioned out of boyhood and into their tween and teen years, I quickly realized that I needed a different approach to photographing them. Along the way, I’ve found some things that have made this mission a little easier and a little more fun.

3. Be respectful of their feelings and concerns

Be respectful of anything that boys this age might be struggling with about themselves – acne, braces, glasses, their height/weight, etc. I know it seems like boys don’t really care about these things, but I assure you that at least some of them do and may not be comfortable talking about it.

So, even if it doesn’t seem to me like it should bother them, if they’ve told me that it does, then I either shoot in a way that makes them feel more comfortable, agree not to share it anywhere, or just put the camera down.

When my son first got his braces and was getting used to them, he preferred to smile without showing his teeth. Because he had told me this, I never pushed him to do otherwise.

He is used to them now, and it doesn’t bother him anymore. But if I had pushed the issue, implying that I didn’t respect his feelings, he would have been way less likely to have let me photograph him, and I would not have this image of him that I love.

As my boys transitioned out of boyhood and into their tween and teen years, I quickly realized that I needed a different approach to photographing them. Along the way, I’ve found some things that have made this mission a little easier and a little more fun.

4. Make a list of images you would like to capture

To help me focus on this project, I wrote out a list of images that I wanted to get during this stage in their lives. I have a lot of that list memorized now, but I do look back at it often as well. This list has been so helpful in deciding if I even want to get the camera out. It also gives me something to shoot when I’m feeling uninspired.

Make a list of images that you would like to capture for your own boys during these years. Some ideas might be your boys’ interests/hobbies/sports, images that convey their unique personalities, and connections/relationships with friends and family.

Think about all of the ideas on your list and how you can photograph them in a unique or creative way.

My 14-year-old plays several different instruments, with guitar being one of his favorites. On my list was the idea to capture his concentration and devotion to learning guitar this year, so when I saw that he was practicing in some fun light, I asked if I could sit with him.

I listened for a while and then started photographing him until I found this perspective. It satisfied my idea to capture not just the guitar, but the concentration and devotion as well.

As my boys transitioned out of boyhood and into their tween and teen years, I quickly realized that I needed a different approach to photographing them. Along the way, I’ve found some things that have made this mission a little easier and a little more fun.

5. Embrace their personalities and emotions

From my own experience and from chatting with other parents, it seems pretty common that boys in this age group can be goofy, loud, and energetic in one moment and quiet, pensive and reserved in the next. I personally find that there is more of the goofy, loud and energetic end of the spectrum at our house – I mean, seriously, what is so funny???

But there are definitely days when the mood is more somber.

Instead of only picking up the camera when there are smiles and laughter, try to embrace whatever personality and temperament is present at the time.

This speaks truth about my boys and their relationship with each other. They are full of so much energy!! They are always goofy, always teasing, always laughing. And, just like here, my oldest is often completely annoyed about something his little brother has done.

As my boys transitioned out of boyhood and into their tween and teen years, I quickly realized that I needed a different approach to photographing them. Along the way, I’ve found some things that have made this mission a little easier and a little more fun.

It seems like my 12-year-old lives to be social. He wants to be around others all the time. My 14-year-old is more like me and is perfectly content being alone sometimes. He can definitely be loud and full of energy, too, but I wanted to be sure to capture the reserved side of him, also.

As my boys transitioned out of boyhood and into their tween and teen years, I quickly realized that I needed a different approach to photographing them. Along the way, I’ve found some things that have made this mission a little easier and a little more fun.

6. Be cautious in sharing online

This may be the most important thing to remember about photographing these in-between years for your boys. These years are a roller coaster of ups and downs for them in many ways.

On top of that, social media is typically a huge part of their lives, and, unfortunately, also one of the most difficult things for them to learn to navigate. One questionable photo, even if it doesn’t seem questionable to you, could provide some mean-spirited kids (or adults) with ammunition to make your boys’ middle and high school lives fairly miserable.

Before I share any images on any social media outlet, I always ask my boys for their permission.

If they don’t like an image for any reason, I just don’t share it. I want them to know that I respect them and that they can trust me. I will still keep the image for myself and print it for our personal books, but it doesn’t get shared anywhere online.

The awesome part of this process is that sometimes the boys will really love one of the photos. Then they not only allow me to share it, but they want me to send it to them so that they can share it, too. Love, love, love when they are proud of one of their images!

I’m constantly reminded of the limited time we have before these boys will be on their own, so more than anything, I hope that you can just have fun photographing these crazy years with your boys!

take-better-pictures-with-the-help-of-the-Clickin-Moms-photography-forum

The post Beyond boyhood: Photographing your son’s tween and teen years appeared first on Clickin Moms.


Clickin Moms

Posted in Photograpy How To | Tagged , , , , , , | Leave a comment