Lightroom 6.14 vs CC 7.1 vs 7.2 Performance Comparison

Lightroom CC 7.2 Update

Adobe Lightroom is known to be a disappointingly slow post-processing tool, especially when it comes to basic operations such as importing, preview generation and image culling, as well as more advanced operations that involve using features such as spot healing. Adobe’s development team is aware of these issues and the company says that it is committed in delivering updates that will make Lightroom faster. The latest version of Lightroom Classic CC 7.2 has been delivered a couple of days ago and it seems like this release is mostly focused on improving Lightroom performance. I decided to see how much faster Lightroom has actually gotten by measuring its performance on a typical laptop, as well as on a desktop PC. Let’s take a look at how Lightroom 6 and CC 7.1 stack up against the most current version CC 7.2.

[Read More…]

Photography Life

Posted in Photograpy How To | Tagged , , , | Leave a comment

How to photograph your child’s dance show or play

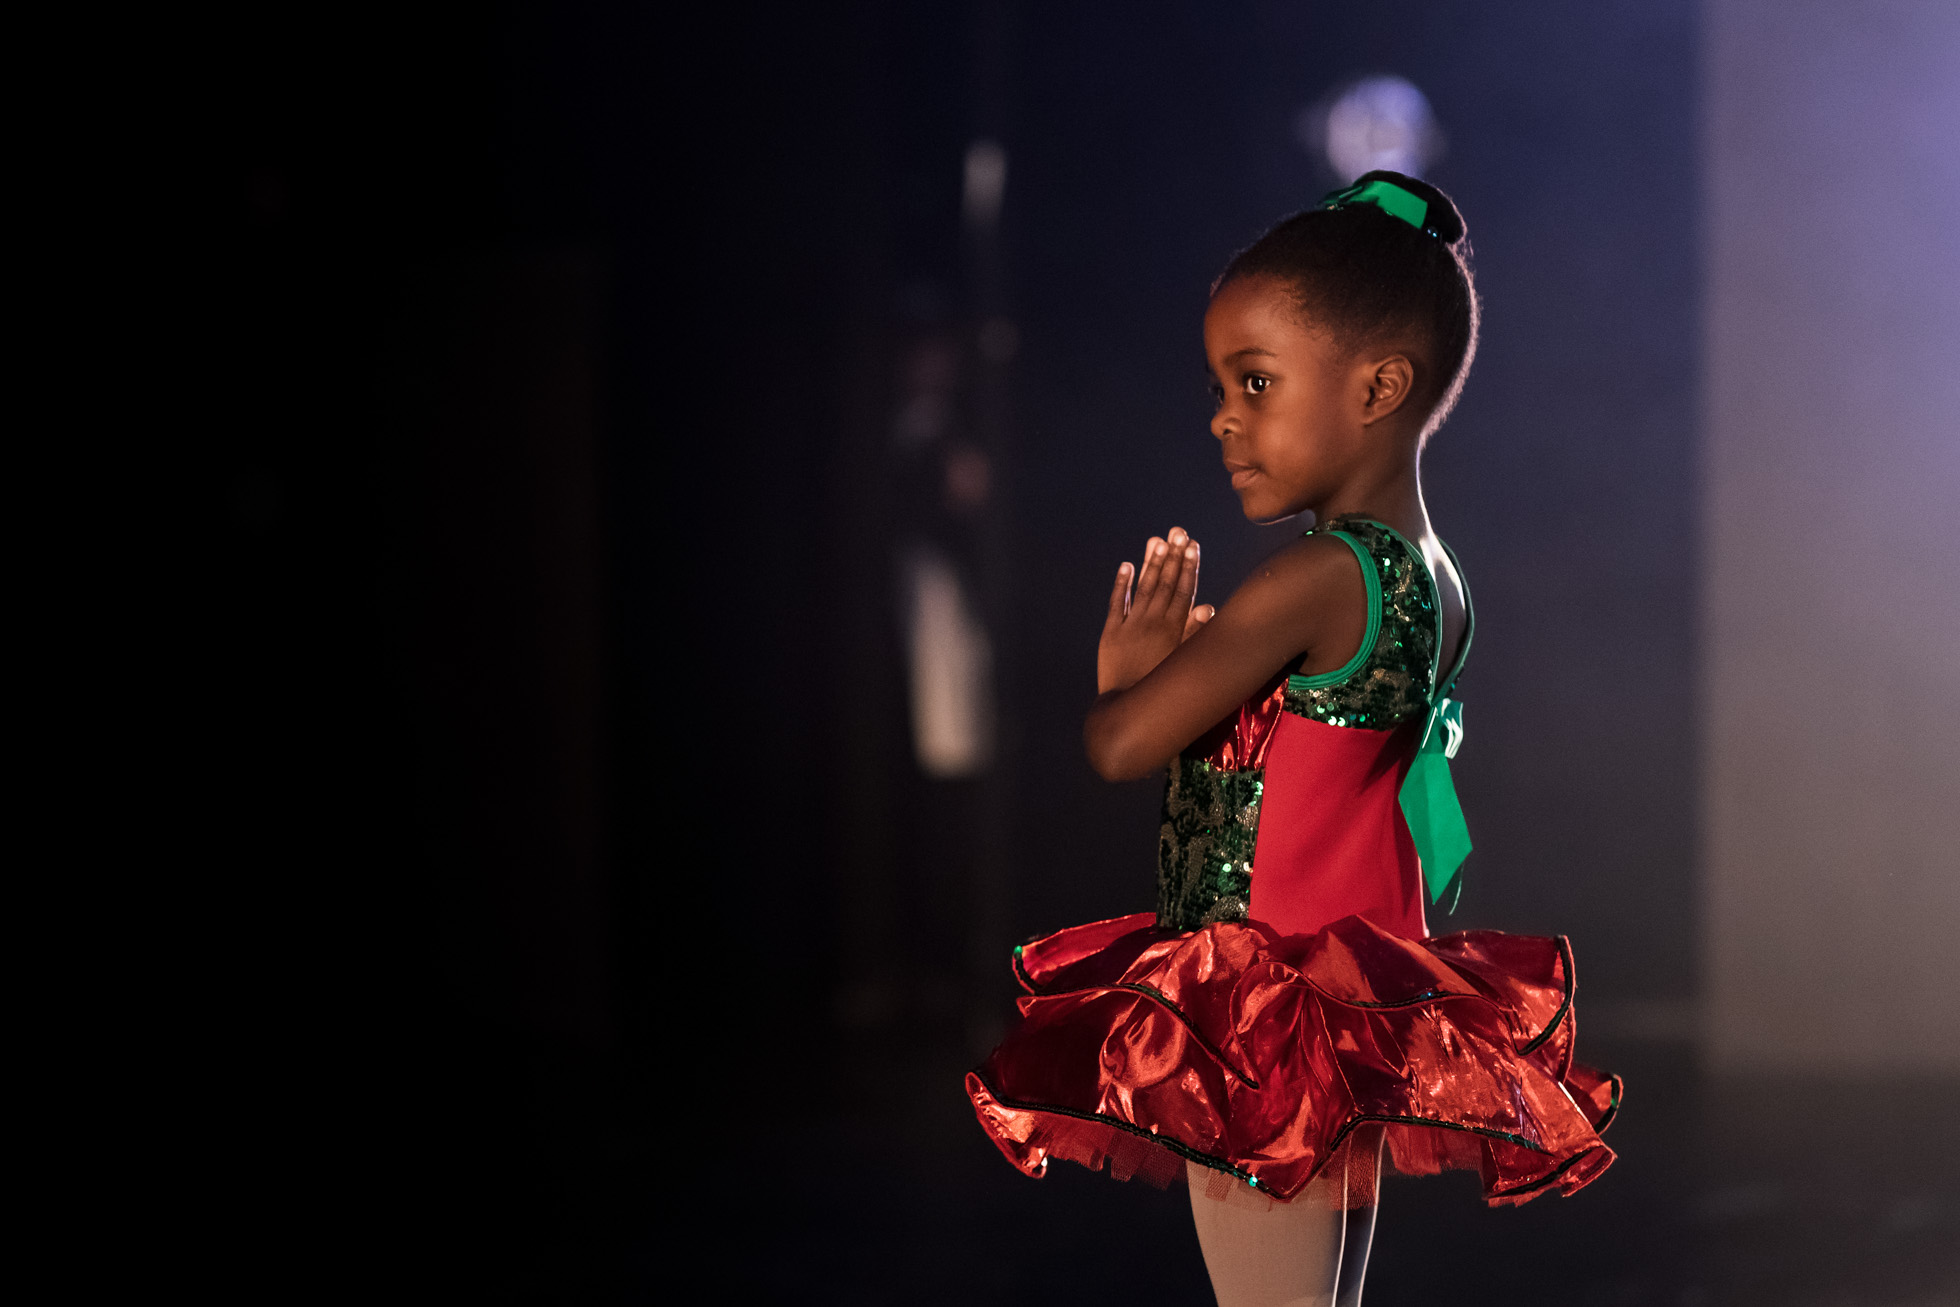
If you have the chance to get backstage at your child’s dance shows, do it.

It’s the perfect opportunity to take your camera along and capture some memories from the behind the scenes. (With permission from the dance school of course)

Luckily my girls usually perform their shows at the theater two or three times over a few days so that gives me the chance to sit and enjoy the show in the audience at least once. Then for the rest, I’ll be backstage with my camera.

I want to share some tips with you on how to successfully capture some beautiful moments in what can be a tricky scenario.

1. Lenses

I prefer to use prime lenses. A 35mm and an 85mm are great choices for this.

However, it does get a bit fiddly trying to swap lenses every so often. By the time you’ve switched your lens the moment is over and you’ve missed your shot.

I managed to get around this by taking two cameras with me, one with a 35mm and the other with an 85mm but I would definitely recommend using a zoom lens such as a 24-70mm as it’s easier and less weight to carry around.

2. Settings

Stage lighting can be challenging. It’s going to be dark, it’s also going to be very bright. I recommend shooting RAW in manual mode with spot metering so you have full control over your exposure.

I set my ISO around 2000, aperture around f/2 and adjust my shutter speed as needed. I don’t like to go too slow with my shutter speed though as the dancers move around quickly at times and I like to keep my photos sharp.

I usually set my white balance to auto as the lighting changes so much it’s one less thing to have to worry about and adjust whilst shooting.
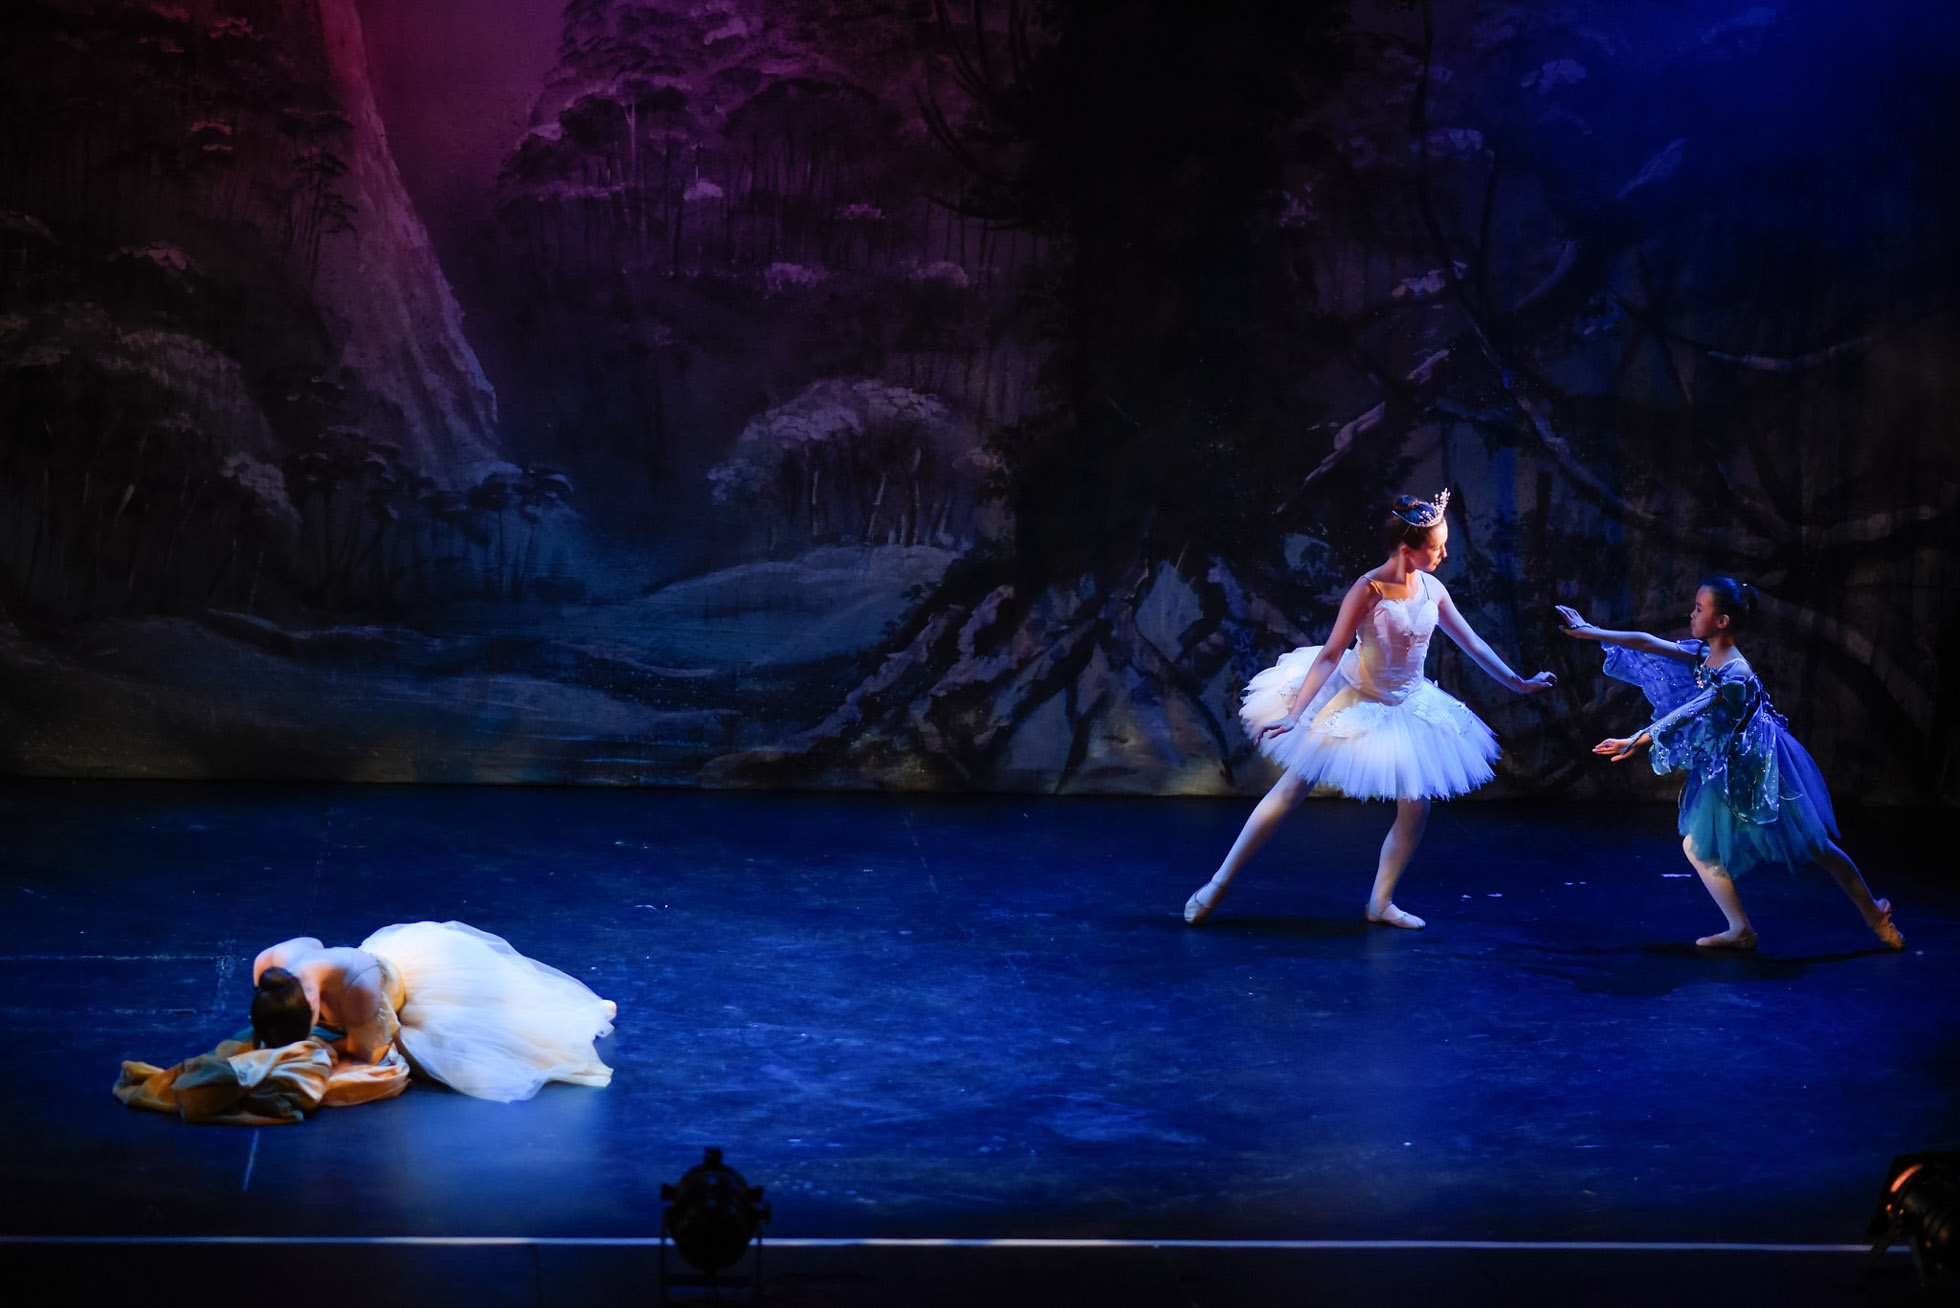
3. Perspective

Change your perspectives throughout. Move around and get shots from different angles. Use a wide angle lens for group shots on stage or zoom in for a close-up.

If you have the chance to get backstage at your child’s dance show or play, it’s the perfect opportunity to take your camera along and capture some memories from the behind the scenes.

It’s also important to get an audience perspective but this can be difficult as there’s no room for you to stand in the auditorium while the audience is seated. Rehearsals are perfect for these type of shots as the seats are all empty and you can stand wherever you need to.

If you have the chance to get backstage at your child’s dance show or play, it’s the perfect opportunity to take your camera along and capture some memories from the behind the scenes.

If you have the chance to get backstage at your child’s dance show or play, it’s the perfect opportunity to take your camera along and capture some memories from the behind the scenes.

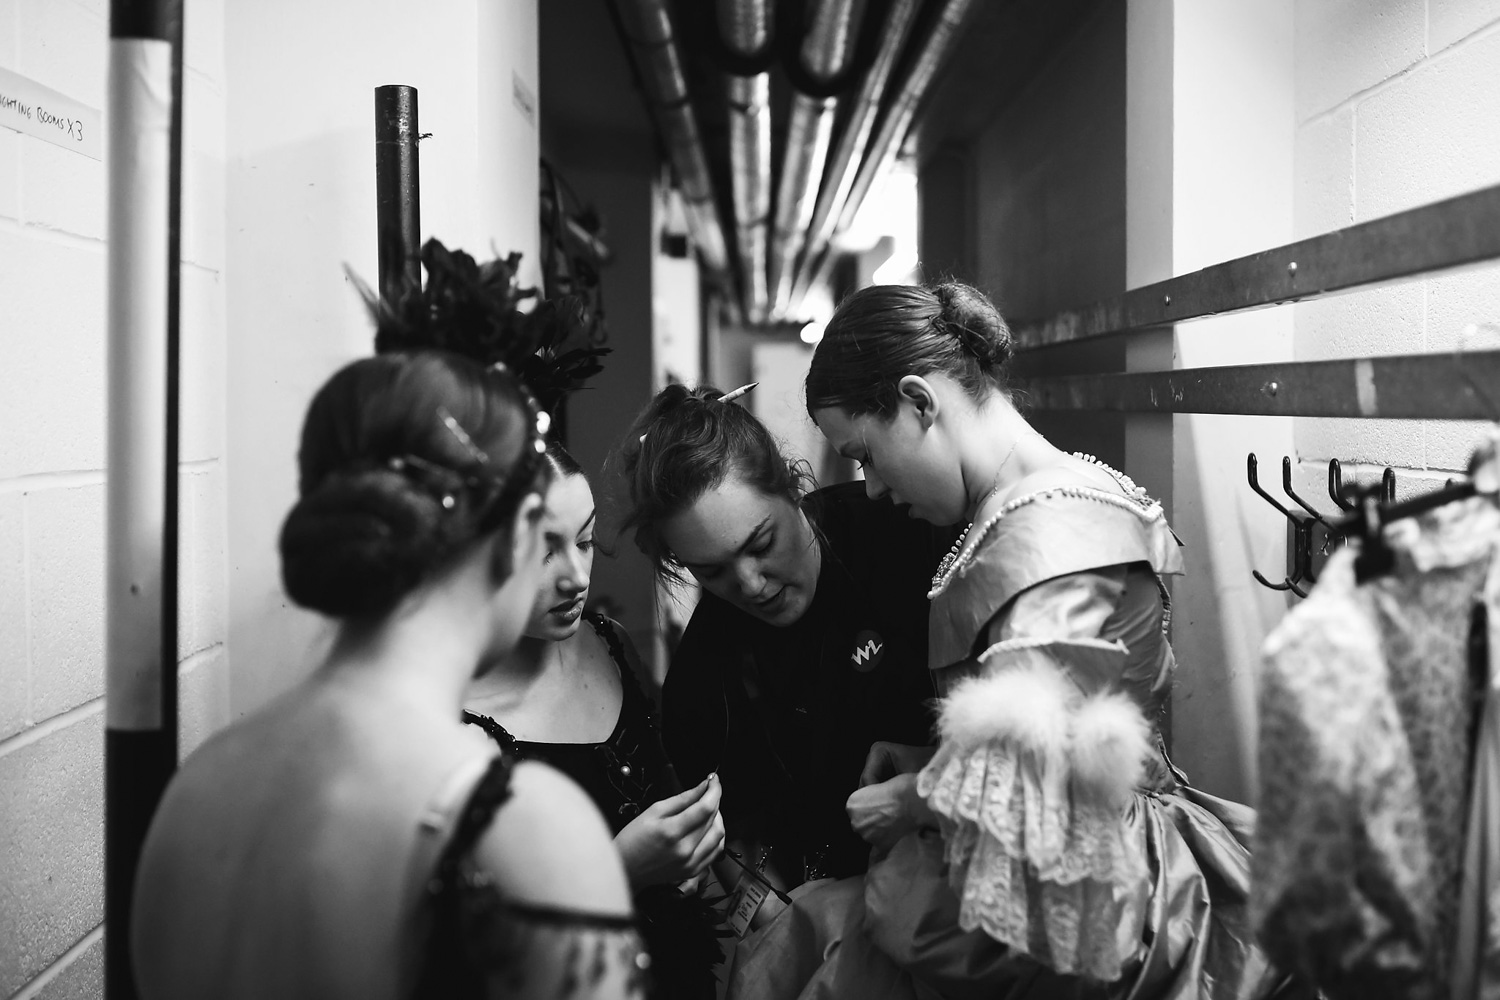
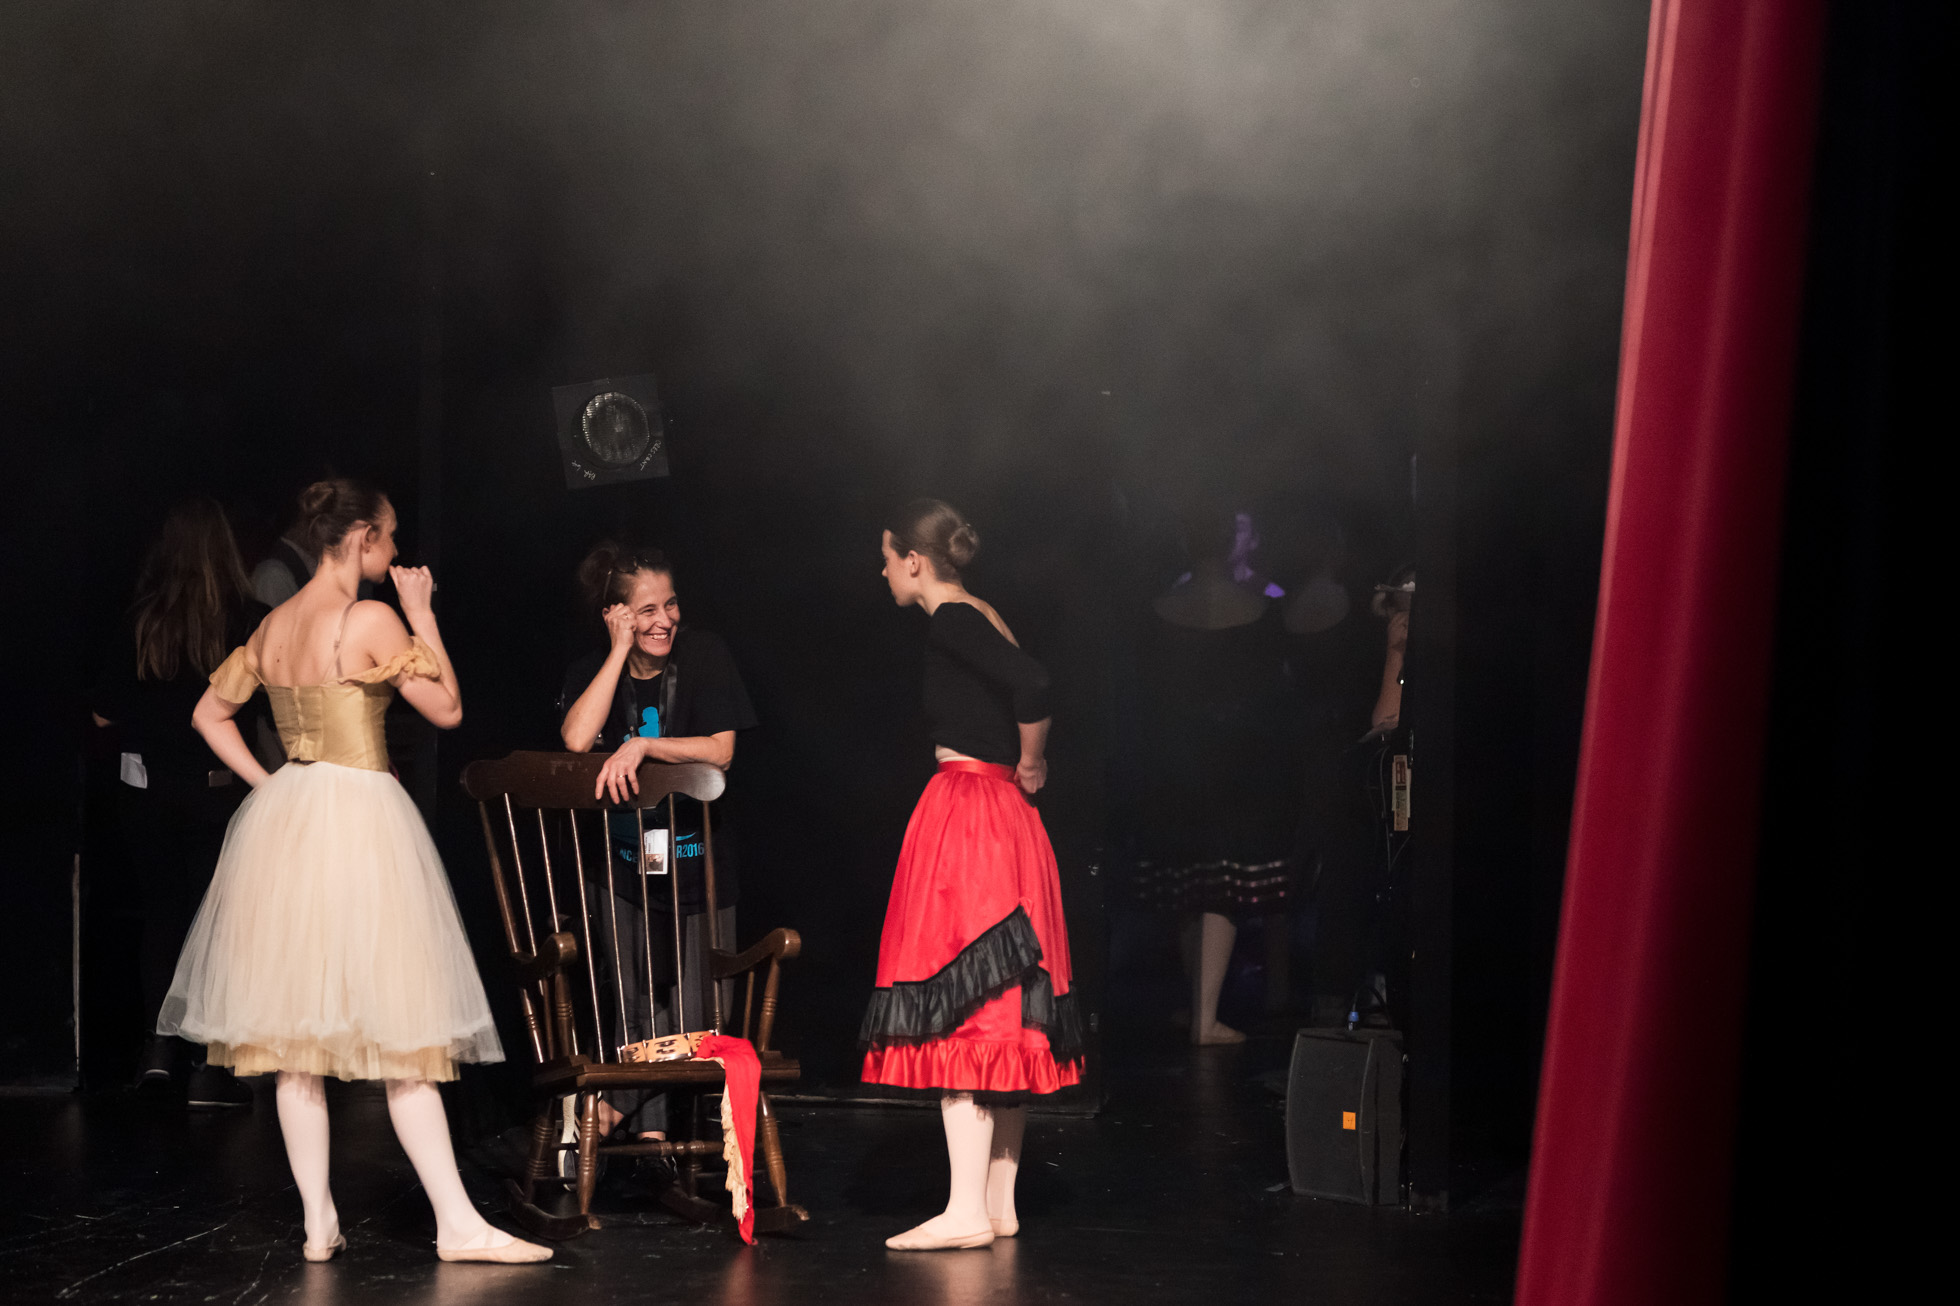
Try to capture some of the true in-between moments that happen backstage. It can get so busy with everyone rushing around with costume changes and it’s part of the event you want to capture. Be sure to stay hidden and out the way but keep watching for those moments.

If you have the chance to get backstage at your child’s dance show or play, it’s the perfect opportunity to take your camera along and capture some memories from the behind the scenes.

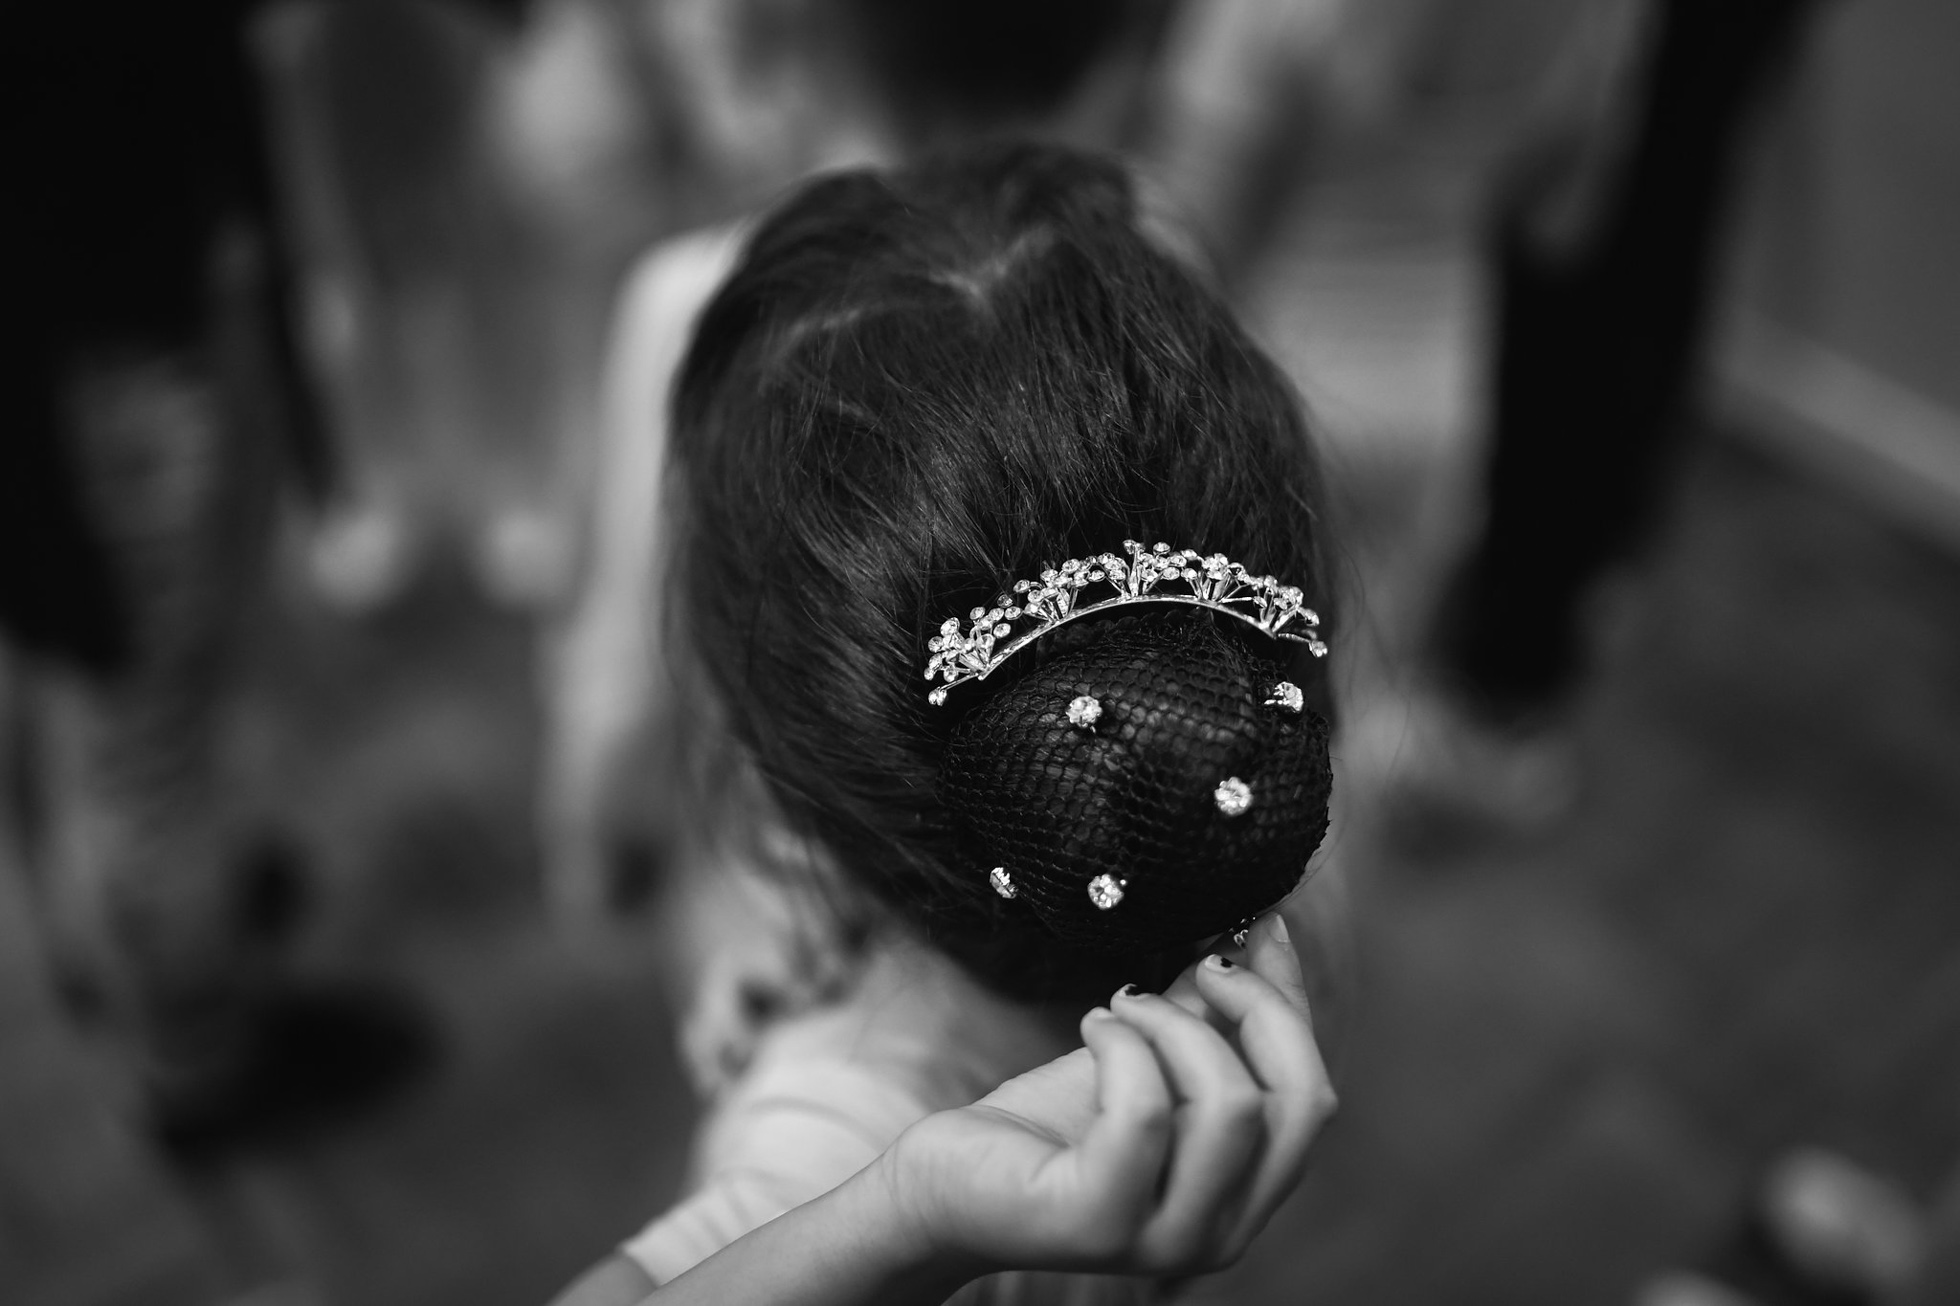
Don’t forget the details! A well composed detail shot can also tell part of the story.

If you have the chance to get backstage at your child’s dance show or play, it’s the perfect opportunity to take your camera along and capture some memories from the behind the scenes.

If you have the chance to get backstage at your child’s dance show or play, it’s the perfect opportunity to take your camera along and capture some memories from the behind the scenes.

4. Composition

Placing your subject and other elements in certain places in the frame can make a very pleasing photograph and helps to create a good storytelling image.

Look around to find different objects, lines or doorways to use as framing. Try using the rule of thirds or adding negative space. Using these techniques helps to draw the viewer’s attention to your main subject.

This is also a great opportunity to get some creative shots using backlighting to create silhouettes.

If you have the chance to get backstage at your child’s dance show or play, it’s the perfect opportunity to take your camera along and capture some memories from the behind the scenes.
Using the rule of thirds.

If you have the chance to get backstage at your child’s dance show or play, it’s the perfect opportunity to take your camera along and capture some memories from the behind the scenes.
Using negative space to help frame my subjects.

If you have the chance to get backstage at your child’s dance show or play, it’s the perfect opportunity to take your camera along and capture some memories from the behind the scenes.
By adding other important elements into the frame such as the red curtain, helps give a sense of environment. This was taken right after the first act when the curtain dropped.

5. Editing

Adding some contrast and decreasing the blacks and shadows in Lightroom/PS is pretty much all is needed. I also add some noise reduction to reduce the grain caused by the high ISO. If I find I’ve underexposed slightly to save highlights, I’ll need to bump up the exposure in post too.

If you have the chance to get backstage at your child’s dance show or play, it’s the perfect opportunity to take your camera along and capture some memories from the behind the scenes.

If you have the chance to get backstage at your child’s dance show or play, it’s the perfect opportunity to take your camera along and capture some memories from the behind the scenes.

Converting to black and white is also a favourite.

If you have the chance to get backstage at your child’s dance show or play, it’s the perfect opportunity to take your camera along and capture some memories from the behind the scenes.

If you have the chance to get backstage at your child’s dance show or play, it’s the perfect opportunity to take your camera along and capture some memories from the behind the scenes.

If you have the chance to get backstage at your child’s dance show or play, it’s the perfect opportunity to take your camera along and capture some memories from the behind the scenes.

Join the Clickin Moms photography forum

The post How to photograph your child’s dance show or play appeared first on Clickin Moms.


Clickin Moms

Posted in Photograpy How To | Tagged , , , , | Leave a comment

Fuji GFX 50S Firmware 3.00 Announcement

GFX_Front_63mm _EVF

One of the most amazing things about Fuji as a company, is their commitment to photographers who invest in their systems. Each time Fuji makes a camera announcement, it also goes back and adds some features to some of its existing cameras. A number of cameras have been previously improved with the “Kaizen” philosophy and I have seen cameras completely transform thanks to continuous firmware updates. Last year, after having a chance to test and review the GFX 50S, I decided to invest in my first medium format system. I fell in love with this camera and its superb image quality, and I have been using it ever since when traveling all over the world. Today, Fujifilm announced a firmware update version 3.00 for the GFX 50S, which adds a new “Focus Bracketing” feature, which allows automatic focus stacking of images through the camera.

[Read More…]

Photography Life

Posted in Photograpy How To | Tagged , , , | Leave a comment

Fuji X-H1 vs X-T2

Fuji X-H1 vs X-T2

The Fujifilm X-H1 is the top of the line camera in Fuji’s X-series line-up. But before its release, the Fuji X-T2 was arguably the most feature-rich choice and certainly a popular mirrorless cameras among many enthusiast and professional photographers. As a current or prospective X-T2 owner, or potentially as someone interested in the new Fuji X-H1, you might be wondering how it compares to the X-T2 in terms of features, ergonomics and specifications. We have put together this X-H1 and X-T2 comparison specifically to help you make the right choice, so let’s get started!

[Read More…]

Photography Life

Posted in Photograpy How To | Tagged | Leave a comment

Fuji X-H1 Announcement

Fuji X-H1

Today Fujifilm unveiled yet another line in the X-series mirrorless cameras, the Fuji X-H1. This is a significant release for the company, because the X-H1 is the first Fuji camera to feature a 5-axis in-body image stabilization (IBIS), something many Fuji photographers have been waiting for. Fuji has long been criticized for not incorporating IBIS into its camera bodies to take advantage of its lenses that do not have optical image stabilization, so the company responded with a camera that is capable of providing up to 5.5 stops of stabilization. When compared to the Fuji X-T2, the X-H1 gains quite a few new exterior and interior features. It has a larger, heavier and more durable magnesium alloy construction, a higher resolution electronic viewfinder and a touchscreen tilting LCD. The big changes, however, are mostly in the internals of the camera. Aside from IBIS, the X-H1 has a powerful dual processor, allowing up to 4K video at up to 29.97p @ 200 Mbps with an internal F-Log capability, which is impressive (although the recording time is limited to 15 minutes – 30 minutes with a grip). The Fuji X-H1 now features an electronic front-curtain shutter feature, which was previously only available on the Fuji GFX 50S. Lastly, the X-H1 has a superior autofocus system, with improved phase detection AF sensitivity and other autofocus tweaks to make it both faster and more reliable. Price-wise, the X-H1 will retail for $ 1,899 MSRP and if you want to add the vertical grip that can accommodate two additional batteries, you will be able to purchase the combo at $ 2,199.

[Read More…]

Photography Life

Posted in Photograpy How To | Tagged , | Leave a comment