How to Quickly Even Out the Sky in Post-Processing

If you have previously photographed outdoor scenes, you have probably come across images that have an uneven sky. It can happen when photographing landscapes with wide-angle lenses, and it can be particularly visible when using a polarizing filter. The latter cases can be quite difficult to deal with in post-processing, often resulting in failed attempts to save those images. Thankfully, there are some great post-processing tools available that can help. Today, we will take a look at how you can use Lightroom and Nik Software’s Viveza (now part of DxO) to quickly fix uneven skies in your images.

Photography Life

Posted in Photograpy How To | Tagged , , | Leave a comment

Great Deals on Nikon Z, D850, Fuji Gear

Nikon Z6

Retailers like B&H, Adorama, and Amazon have announced sales on some of the most popular camera equipment today, including the D850 and Fuji X-T2. Some camera shops are also promoting an offer for the Nikon Z6 and Z7: trade in one of your working cameras, and get $ 200 (Nikon Z6) or $ 400 (Nikon Z7) off your purchase – plus the value of the camera you traded. Especially for such new cameras, these are exciting offers to see.

Photography Life

Posted in Photograpy How To | Tagged , , , , , | Leave a comment

How to Quickly Even Out the Sky in Post-Processing

If you have previously photographed outdoor scenes, you have probably come across images that have an uneven sky. It can happen when photographing landscapes with wide-angle lenses, and it can be particularly visible when using a polarizing filter. The latter cases can be quite difficult to deal with in post-processing, often resulting in failed attempts to save those images. Thankfully, there are some great post-processing tools available that can help. Today, we will take a look at how you can use Lightroom and Nik Software’s Viveza (now part of DxO) to quickly fix uneven skies in your images.

Photography Life

Posted in Photograpy How To | Tagged , , | Leave a comment

What to do when you get a new camera

Perhaps you just found a shiny new DSLR under the Christmas tree. Maybe your family invested in a nice camera so that you can document all the ages and stages of your kids. Or maybe you have finally decided to really learn how to use that fancy camera that’s been sitting in a box since last year. 

However you found yourself with that new piece of equipment, we are so excited for you! Photography is the foundation of who we are at Clickin Moms and we just love it when someone discovers the joy of taking pictures. 

We also know how overwhelming it can be when you get that new camera in your hands. There are so many buttons, so many menus, a whole new language to learn, and that’s before you even take the first picture!

But don’t worry, we are here to help. Follow these simple steps and you will be well on your way to using that camera confidently.

canon-camera-box-on-table-with-flowers
photo by Clickin Moms Mentor Kristin Dokoza

Open the box

We aren’t kidding! Sometimes just opening the box can be a little intimidating when getting a new piece of equipment.

Don’t be afraid. Open the box and dig in. Take inventory of what is in there and make a list of things that you may need before you start taking pictures.

Most DSLRs will come with the camera body, a battery, charger, user manual, warranty information, and a bunch of protective packaging. Some cameras will come with a lens while others will just come with the camera body.

Pro tip: Keep all of the packaging in a safe place. Should you ever want to sell your camera (and you likely will one day!), having the original box will allow you to sell it more easily.

boy-taking-pictures-in-flowers-and-greenery-by-natalie-greenroyd
photo by Clickin Moms Mentor Natalie Greenroyd

Read the manual

No, it’s not likely going to be the most exciting piece of literature you will ever read. However, your manual is the definitive guide on your camera. It’s worth spending a few hours to get to know your new best friend!

The manual will tell you how to safely use your camera, where to find specific functions, and will break down all those menus. You may even find that your camera can do things that you didn’t know it could do!

Join Clickin Moms today

Taking the time to flip through your manual now will make using your camera easier. And the more comfortable you feel with your camera, the sooner you can start taking the pictures of your dreams!

Pro tip: Most manufacturers also keep digital copies of camera manuals online. You can type in a specific term and the online manual will point you in the right direction.

must haves

OUR BEGINNER PHOTOGRAPHY ESSENTIALS

A “Nifty Fifty” lens

The 50mm f/1.8 lens is a versatile lens that won’t break the bank. Its wide aperture lets it perform well in low light and get that beautiful background blur we all love and it is perfect for the beginner photographer.

A stylish camera bag

It is important to protect your new camera and while there are lots of options, we like camera bags that have a little bit of style. Not only do they look fashionable, but they also don’t scream, “I have expensive equipment here!” as you take your camera around town.

Memory cards

You will need memory cards to take photos with your digital camera. Read your manual to find out what kind of card your camera needs and then buy one that writes fast and has a good amount of storage. There are lots of options at a wide range of prices, so it’s good to talk to your local camera store about your needs before buying.

phone-with-pinterest-board-on-screen-by-chanel-french
photo by Clickin Moms Mentor Chanel French

Surround yourself with inspiration

One of the best ways to motivate your photography is to surround yourself with photographs that inspire you. Keep a Pinterest board of photographs you love and make notes on what you admire about each shot. Follow other photographers on Instagram. Keep photography books on your coffee table.

Of course, your first shots with that new camera aren’t going to look like the shots that you admire so much. Those photographers’ first shots didn’t look like that either! However, keeping beautiful photography around you all the time will help train your eye to see what makes a photo beautiful. This helps you as you seek out your own photo opportunities.

Need some inspiration? Check out our 100 Photographers to Watch list!

flat-lay-of-camera-gear-by-chanel-french
photo by Clickin Moms Mentor Chanel French

Get the extras

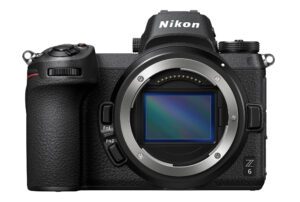
Not everything you need to use your camera will come in that one box. You may need memory cards, a camera strap, a padded bag, extra batteries, and a lens!

Take the time to do some research on what items will work best for your needs. Memory cards, for example come in various sizes and speeds and you will want to make sure that the ones you get work well with your specific camera body.

We like to go to our local camera store when looking for all the extras as the staff there knows exactly what works and can point us in the right direction quickly. Bring your camera with you and they will set you up with everything you need.

Pro tip: Don’t be afraid to show a little personality! Items like camera straps and bags are where you can have a little fun with your gear and there are no shortage of styles from which to choose.

kids-on-bed-playing-with-toy-camera-by-lisa-tichane
photo by Clickin Moms Mentor Lisa Tichané

Find educational resources

Photography, while it is wonderful, is not easy. No one picks up a camera for the first time and starts taking the photographs of their dreams!

Instead, photography requires you to invest time in learning. You have to figure out the exposure triangle, white balance, composition, editing, and so much more.

That isn’t to scare you off! Rather, it is to encourage you when things don’t feel intuitive straight away. There is A LOT to learn when it comes to photography and no one expects you to be an expert without some help.

There are a lot of places to find photography education, but of course our favorite is Clickin Moms. With thousands of tutorials written by some of the best professionals in the industry, it’s a one-stop-shop for all things photography.

Even better, we are a community that is ready to help you no matter where you are in your photography journey. If you have a question, you can simply ask it in our forum and our members and team of mentors will be there to help.

Pro tip: The Clickin Moms tutorial forum is broken down into specific categories. Whether you want to learn about camera basics, photo editing, studio lighting, or anything else, start in the forum category that fits your needs and then search from there.

woman-taking-pictures-with-girl-asleep-in-backpack-by-meg-loeks
photo by Clickin Moms Mentor Meg Loeks

Start taking pictures

You didn’t get that camera to let it collect dust. You got it so that you can take pictures and that’s just what we want you to do!

Once you have your camera battery charged, your memory card in the slot, and a lens attached, turn that camera on and take some photos. Play with your settings and see what you can capture. These aren’t going to be the best pictures you ever take, but the best way to learn is to dive right in.

Practice picking focus points. See what happens as you switch through the various automatic modes. Try putting the camera in manual mode and see what happens. Keep a list of things that work and things that you find challenging.

Pro tip: Try taking your first pictures of a stationary object. We love taking photos of our kids, but when you are trying to learn something new, it can be helpful to have a subject that can’t move or complain!

Getting a new camera is so exciting and we want you to take pictures you love. We know that following these simple first steps will have you well on your way to capturing the world around you and we can’t wait to see where your camera takes you!

Clickin Moms online photography forum information

The post What to do when you get a new camera appeared first on Clickin Moms blog: Helping you take better pictures one day at a time.


Clickin Moms blog: Helping you take better pictures one day at a time

Posted in Photograpy How To | Tagged | Leave a comment

How to get blurry backgrounds in your photographs

I have an admission to make. I didn’t buy a DSLR to just capture my kids’ smiles. Point-and-shoot cameras accomplished that task sufficiently. While I didn’t understand exactly what made a DSLR camera better than a point-and-shoot, I did know the photos were better. 

Because they had a blurry background.

That’s right. I wanted a DSLR camera to get blurry backgrounds. For me, that is what the difference between a “professional photo” and a snapshot. 

And I know that I am not alone! Maybe you have seen those photos on Instagram and on holiday cards and wanted to be able get that gorgeous blur. Perhaps like me you invested in a brand new camera so that you could take those kinds of pictures. 

Join Clickin Moms today

One of the first lessons I learned in my pursuit of blur is that the camera isn’t what is going to make the difference. It’s how the photographer uses the camera, lenses, and all of the settings. 

And it’s not always easy. Sometimes you get that blur you are after but your subject is also blurry! And that’s definitely not what we want.

To get the results you want, you first have to understand depth of field and the focal plane and what variables will affect them both. And I am here to help! Let’s work together to decode the vocabulary and fully understand how to get that blurry background. And then you can go out and get photos you will love (blurry background and all).

family-walking-through-trees-kelsey-farnham

What is a focal plane?

The focal plane is the area in your photograph where your subjects will be in the sharpest focus. Picture it as a thin imaginary window pane that reaches from left to right across your photo. When you choose a focus point while taking a picture, that is where your focal plane will land. Anything along that imaginary plane will be in sharpest focus.

You will want to keep the focal plane in mind when positioning multiple subjects and when choosing your focal point in-camera. I always like to focus on the inside corner of an eye for portraits as that his the most important feature to have nice and sharp.

kids-walking-through-wooded-area-by-kelsey-farnham

What is the depth of field?

The depth of field is the area surrounding your focal plane where your subject still appear acceptably sharp. The smaller your depth of field, the more blurry your background (and foreground) will be. The larger your depth of field, the more the area around your subject will be in focus.

For large groups of people, you will want a larger depth of field so that everyone is in focus. In landscape shots, you usually want an even larger depth of field. You want to get everything in focus over a great distance. For portraits of single subjects, you might want a narrower depth of field. This keeps everything else blurry and draws the focus right to your subject.

You can adjust the depth of field by choosing the appropriate aperture.

family-by-fence-dancing-together-kelsey-farnham

What affects depth of field?

There are three main variables that will affect your depth of field (and your ability to get blurry backgrounds). Aperture, distance, and focal length. Understanding how these three variables work is the key to getting blurry backgrounds in your photos.

Aperture

Aperture, also known as the f-stop, is the hole within the lens that allows light to travel into the camera. You can adjust the aperture and make that hole larger or smaller. This will let more or less light into the camera as well as making the depth of field deeper or shallower.

The larger the aperture (and the smaller the f-stop number), the more shallow the depth of field. The smaller the aperture (and the larger the f-stop number), the more broad the depth of field.

Every lens has a top and bottom limit on how small or large the aperture can be. Look up the specifications of your lens to know the limits.

It is important to note that changing your aperture will also effect the exposure of your image. As such, you will need to make adjustments with your shutter speed and/or ISO to accommodate the changes in your aperture.

Distance

Distance between the camera, subject, and background is another important factor that will affect the depth of field and blur. The closer you are to the subject, the thinner the depth of field will at any given aperture. The further your subject is away from the background the more blur you are going to be able to get at any given aperture.

I really wanted to take a picture of the princesses with my aperture set to f/1.4. However, because they were on different focal planes and my depth of field was so shallow, they were out of focus.

I was able to move back a few feet and take the picture with my aperture at f/1.4 and they were in focus! I cropped the picture to make the princesses appear that I was closer than I was but you can see how just creating distance will make the depth of field deeper.

Similarly, if you want a background to appear blurrier, try moving your subject further away from it. This will allow you to use the camera settings you already have dialed-in while changing what will be in focus in your photograph.

Focal length

The focal length of a lens is how “zoomed in” your images are. It determines how much of a scene the camera can see. The higher the number, the more zoomed in picture will look. 

There are two types of lenses. A prime lens has a fixed focal length. A zoom lens that will cover a range of focal lengths. The aperture on a zoom lens may change as you change the focal length. Or your zoom lens could be a fixed aperture zoom that will stay at the same aperture throughout the range of focal lengths. Be sure to check the specifications of your gear.

The longer the focal length, the narrower the depth of field at any given aperture. The shorter the focal length, the broader the depth of field will be at any given aperture. Telephoto lenses will give you a lot of blur at a given aperture while wide angle lenses will have more in focus at the same aperture.

All of these examples are taken with prime lenses: 35mm, 50mm, 85mm and a 100mm. I kept my aperture at f/2.8 in every shot. I also kept the camera in the same spot for each shot so you can compare the different focal lengths easily.

The BEST way to understand depth of field, focal plane, and how to get that beautiful blur (the pros call it “bokeh”) is to practice. Your set up doesn’t need to be fancy! Just grab a couple toys and practice changing the aperture, distance, and focal length. The more you try new things in a controlled setting like this, the easier it will be to choose your settings when the kids are doing something adorable in front of the camera.

You have everything you need to get that gorgeous blur in your own photographs. So let’s go out and capture it!

Clickin Moms online photography forum information

The post How to get blurry backgrounds in your photographs appeared first on Clickin Moms blog: Helping you take better pictures one day at a time.


Clickin Moms blog: Helping you take better pictures one day at a time

Posted in Photograpy How To | Tagged , , | Leave a comment