When to Use Bracketing for the Best Results

HDR in High-Contrast Scene

One of the most useful techniques in photography is called bracketing – in other words, taking multiple photos of the same subject with different camera settings. Commonly, bracketing is about changing your exposure: one photo at the meter’s recommendation, plus one under and one over. But exposure isn’t the only variable at play here. Below, this article explains everything you need to know about bracketing, including how and when to use it to take the best possible photos.

Photography Life

Posted in Photograpy How To | Tagged , , | Leave a comment

Canon RF 24-105mm f/4L IS USM Review

Canon RF 24-105mm f4 Mirrorless Lens

The Canon RF 24-105mm f/4L IS USM is the first kit lens introduced with the new EOS R full-frame mirrorless system. The term ‘kit lens’ is misleading, though, as the Canon RF 24-105mm f/4L IS USM bears Canon’s L designation and promises professional-level performance. At the time of publishing this article, the only other RF zoom lens is the bulky and expensive Canon RF 28-70mm f/2L lens, which is a much more specialized offering. The RF 24-105mm f/4, on the other hand, is a generalist lens in many ways. Its focal range works well for landscape photography, portraiture, photojournalism, travel photography, and many other genres.

Photography Life

Posted in Photograpy How To | Tagged , , , | Leave a comment

A professional photographer’s tricks for getting kids to look at the camera

Let’s start with a very important thing: getting kids to look at the camera is NOT my first priority during a photo session. My favorite images are rarely the ones where the child is actually looking at me.

You can’t deny the emotional impact of an image where a young kid is grinning at Mom with sparkling eyes while she smiles back at him adoringly. For me, this will always be stronger to me than a looking-at-the-camera portrait. The authenticity of a candid shot where you can feel that the child is blissfully unaware of the photographer’s presence is pretty much unbeatable.

Image01 black and white photo of mom hugging daughter lisa tichane

That being said, when delivering a full gallery to my clients I always aim at incorporating several shots with direct eye contact. There are two reasons for this.

The first is that as cliché as it may sound, the saying that “the eyes are the window to the soul” is true! A portrait with deep, strong eye contact will give you a glimpse at a child’s true self and it’s something I love to capture.

The second reason for including this kind of portrait in a gallery is that eye contact is a powerful visual invitation. It pulls the viewers in like nothing else does. You look at the picture and you feel like the subject of the image is looking right at you. This creates a strong connection that every photographer wants her audience to feel.

As a kids photographer, the most important viewer to your images is the parent of this child. The parents will connect even more deeply with the gaze of their little loved one. This is why portrait photographers often refer to those eye-contact portraits as the “money shots.” They are pretty much irresistible to the parents!

Image02 small child looking into camera lisa tichane

Most of the time, those looking-at-the-camera portraits will happen organically during the session. You shouldn’t have to force it too much.

However, if you feel that the end of the session is coming fast and you don’t have the eye-contact shots you are dreaming of, here are a few tips to make them happen.

Join Clickin Moms today

Cover1 child in striped pajamas sitting in high chair lisa tichane

Do your homework

You don’t want to underestimate how important it is to know your little clients before meeting them. During my pre-session consult I always ask questions about the children’s personality. I ask about their interests, favorite characters, games or sports.

A family session doesn’t last long. Everything you can do to help you connect with your little subjects as soon as you meet them will be priceless for the rest of the session. If the child feels that you genuinely want to be his friend, he is much more likely to interact with you and look at you during your time together.

Image03 boy in yellow shirt looking up at camera lisa tichane

Ask questions

When kids are old enough to talk and have a real conversation with you, asking questions is your best chance to get them engaged.

This is where your pre-session homework is going to be helpful. Ask questions about those things you know they love and they will be unstoppable! The more passionate they are about a given subject, the cuter the expressions you are going to capture.

Image04 small girl giggling and covering mouth lisa tichane

You can also spice things up by throwing silly questions into the mix (“Does Dad wear diapers too?!”). I love the giggles you can get by being a little creative with your questionnaire!

Image05 girl with curly hair smiling at camera lisa tichane

Be noisy

When photographing babies, talking to them will usually work to get good eye contact. But when you make fun, unexpected noises you will hold their attention even more.

Some noises might make the baby look at you with a weird puzzled expression. Be sure to get creative and experiment with lots of noises to find the one that will make the baby smile! Don’t hesitate to ask the baby’s parents for advice. They will know which noises/songs make their baby happy!

Image06 baby in white sheets lisa tichane

With toddlers and older kids, changing your tone is a great trick to get their attention. Be super loud, or whisper as low as you can. The change of tone will surprise them enough to look at you and check out what’s going on!

Image07 girl with blonde hair smiling at camera lisa tichane

Play peek-a-boo

This very simple trick works with pretty much any age! Toddlers absolutely love it, but even older kids won’t resist if you ask them to hide themselves behind a tree (or wall, door… you name it!) and peek. I will never tire of the irresistible smiles that this activity brings!

Image08 boy in orange shirt peeking from behind wall lisa tichane

Be silly

With younger kids, being silly yourself will go a long way. I love putting a random object on my head (a sock is my silly go-to) and pretending I’m not seeing it. Then being loudly surprised when it falls off on the floor.

Making a fool of yourself is a great (and fun) way to keep the kid’s attention on you!

Image09 girl on white bed smiling lisa tichane

Be the goal of the race

Another simple but effective trick is to challenge your subjects to a race. Have them run as fast as they can towards you. If you are the goal of their race, they will naturally keep their eyes on you while they run. This will allow you to capture fun images filled with movement, happiness and eye contact!

Image10 kids running through yard laughing lisa tichane

Have a helper behind your shoulder

Sometimes with young, fast-moving kids you need a helper to keep their eye contact. Ask Mom or Dad to do silly things behind your shoulder. This will catch their attention and draw their gaze in the right direction!

I owe this gleeful smile to the Mom who was playing peekaboo behind my back:

Image11 baby smiling at camera lisa tichane

Countdown

A countdown will usually do the trick too as long as what is happening at the end of the countdown is irresistibly fun.

I often ask parents to hold their kid’s hands to make him swing. I tell the child, “Be ready! At the count of 3 you will fly in the air! Oooooooone… Twooooooo…”

Be prepared to snap during the countdown, the child will most likely keep his eyes on you with the cutest look of anticipation on his face!

Image12 black and white photo of toddler holding parents hands lisa tichane

Be the master of the game

Kids love to play more than anything else, so use that to your advantage! Any game will do as long as YOU are the judge deciding who wins or lose.

As soon as you start the game, the kids will keep an eye on you to be sure they are doing well and see if they won or not. These are perfect occasions for you to get eye contact portraits!

I love playing Simon Says during my photo sessions. Not only is it an opportunity to create fun images (“Simon says: Hug your sister real tight! Simon says: Everybody upside down!”), but it’s also the perfect way to have them look at the camera every time they are waiting for the next instruction!

Image13 child somersault on bed lisa tichane

The dinosaur living in my lens

This trick can only be used once during a session, so use it well! I always joke about the dinosaur (or ladybug, or whoever is more likely to raise the child’s curiosity) living in my lens. Then I ask the child if she can see it.

I love the fact that even if the kids don’t believe me (which is the case most of the time!) they can’t resist taking a peek anyway, just in case!

Image14 boy looking up at camera black and white lisa tichane

Look at me

If you want the kids to look at you, the easiest way to do it is simply to invent a game where looking at you is one of the rules!

I play this game all the time: I will ask the child to lay down on the bed while I stand overhead. Someone (usually Mom or Dad) will surprise them with a tickle on the feet, and they should NOT laugh. There is only ONE important rule to this game: they have to keep their eyes on ME at all times to prevent them from checking if Mom or Dad is coming.

I owe most of my favorite portraits to this game. The expressions of anticipation are usually priceless, and the crazy giggles after the tickling attack are a must!

Image15 girl in heart shirt laying on bed smiling lisa tichane

Photographer’s toys

Some photographers use little toys like lens pets, whistles or finger puppets to pull the child’s attention towards the lens. I owe this fabulous moment to a cute plush snake tied around my lens (who was badly misbehaving, as you can tell!).

Image16 kids laying on ground with heads together smiling lisa tichane

I have to admit that I stopped using those toys several years ago after a couple sessions during which the toy became a source of frustration. Instead of looking at the toy the kids wanted to touch or hold it and were pretty upset about not being able to keep it in their hands for the whole session! So be aware that those tricks won’t work all the time with all kids.

Now it’s your turn! Share your favorite tricks to get kids to look at the camera in the comments of this article so that we can inspire each other!

Become a Member of Clickin Moms

The post A professional photographer’s tricks for getting kids to look at the camera appeared first on Clickin Moms blog: Helping you take better pictures one day at a time.


Clickin Moms blog: Helping you take better pictures one day at a time

Posted in Photograpy How To | Tagged , , , , , , | Leave a comment

Equivalence Also Includes Aperture and ISO

Bear Hat Mountain

I know, I know. After the 2012-2017 Great Equivalence War, photographers everywhere agreed never to utter that word again. Nasim’s famous quote, “Everyone is right, everyone is wrong,” has been etched both into the peace treaty and into the hearts of millions. However, as we near the two-year anniversary of the ceasefire, it seems that isolationist thoughts – i.e., that equivalence is isolated just to focal length – are resurfacing again. Let’s stop this madness before it’s too late.

Photography Life

Posted in Photograpy How To | Tagged , , , | Leave a comment

What is Golden Hour and why do photographers love it?

Golden Hour. Magic Hour. Whatever name you call it, this time of day is universally loved by photographers. 

Even if you are not a photographer, there is no denying the brilliance of this special window of the day. I have been there time and time again and every time I am bedazzled by the light. It leaves us spellbound as it transforms and infuses even the the unlikeliest of subjects and into sublime works of art. 

As photographers we are natural lovers of light. Photography at its core is “light drawing.” And so it is no surprise that when the light is consistently beautiful, we get a little excited!

But what is Golden Hour? And what makes it so darn good ?! Let’s explore this phenomenon together and see how it can add a little magic to our photographs.

amber talbert_young girl with hair blowing in wind at sunset

Golden Hour defined

The simple explanation is that this first hour after sunrise and last hour before sunset. 

At these times of day, the angle of the sun hits about 6 degrees and intermingles with our atmosphere. The water and dust just above the horizon line soften and scatter the blue and violet rays. This scattering creates a warm and visually dimensional glow. 

Join Clickin Moms today

To our eyes, the results are undeniably beautiful. And in-camera the results are so remarkable that many of us professional photographers and artists have made golden hour an integral part of our style.

child playing with sand in hands at sunset amber talbert

The possibilities of Golden Hour

Low and directional, this soft light can add so much to your photos. No matter the genre you choose to photograph, this light can make it better.

For portraits, Golden Hour magically erases blemishes. The soft, diffused light blurs imperfections and even adds the perfect touch of a glowing tan.

Even more, it can help tap into emotions. Used as dreamy backlight, Golden Hour sun can evoke nostalgia and happiness, and a sense of youth.

Try shooting from different angles to take full advantage of Golden Hour light. See how you can control haze, lens flare, and the color of the light by changing your position in relation to the sun. You will be amazed by the variety of effects you can get!

child playing with water hose at sunset amber talbert

The diversity of Golden Hour 

The light is fleeting and ever changing at this hour. And while it does go fast, this diversity is one of the very reasons we photographers love it!

As the sun moves quickly toward the horizon, we see a rapid change in the angle, color, and intensity of the light. This allows for a diversity in photographic possibilities that might not be available at other times of day.

At the beginning of Golden Hour, you will notice that the light is harder and the shadows are deeper. This is because the sun is hitting your subjects from a higher angle. As the sun moves lower in the sky, the shadows soften.

Even better, each day’s Golden Hour can be different from the next depending on environmental variables. A few clouds can make a big difference in the appearance of Golden Hour light in your camera!

While this variation could make it seem as though Golden Hour is unpredictable and frustrating, I have found it to be a gift! The changing character of the light allows us to tell our story with distinction in each frame. As the light changes throughout the hour, the emotion of our images changes, too.

must haves

OUR GOLDEN HOUR PHOTOGRAPHY ESSENTIALS

sigma 85 mm 1.4 dg hsm art lens

A portrait lens

One of our favorite ways to use Golden Hour light is to use it for portraits. That’s why we love this Sigma 85mm f/1.4 ART lens! It is the perfect focal length for flattering portraits and it makes the most of that warm, dreamy Golden Hour sun.

canon EOS 5D Mark IV full frame Digital SLR camera body

A full frame camera

While there should be plenty of light hitting your sensor with Golden Hour sun, we have found that a full frame camera is much more capable when getting creative with this type of light.

bubbles

Bubbles

We love how environmental elements can add texture and visual interest in Golden Hour photos and bubbles are sure to add fun for your subjects, too!

children playing with bubbles outside at sunset amber talbert

Photographing in Golden Hour

While there is no question that taking photos during Golden Hour is magical, you will want to go into this with a plan.

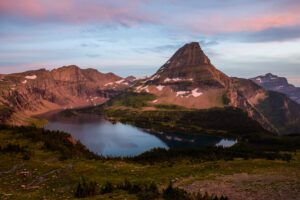
Be sure to choose a location that takes full advantage of Golden Hour light. While anything looks beautiful during this magical hour, I like to choose a spot that will allow the light to be central to the photograph.

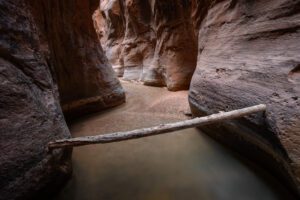
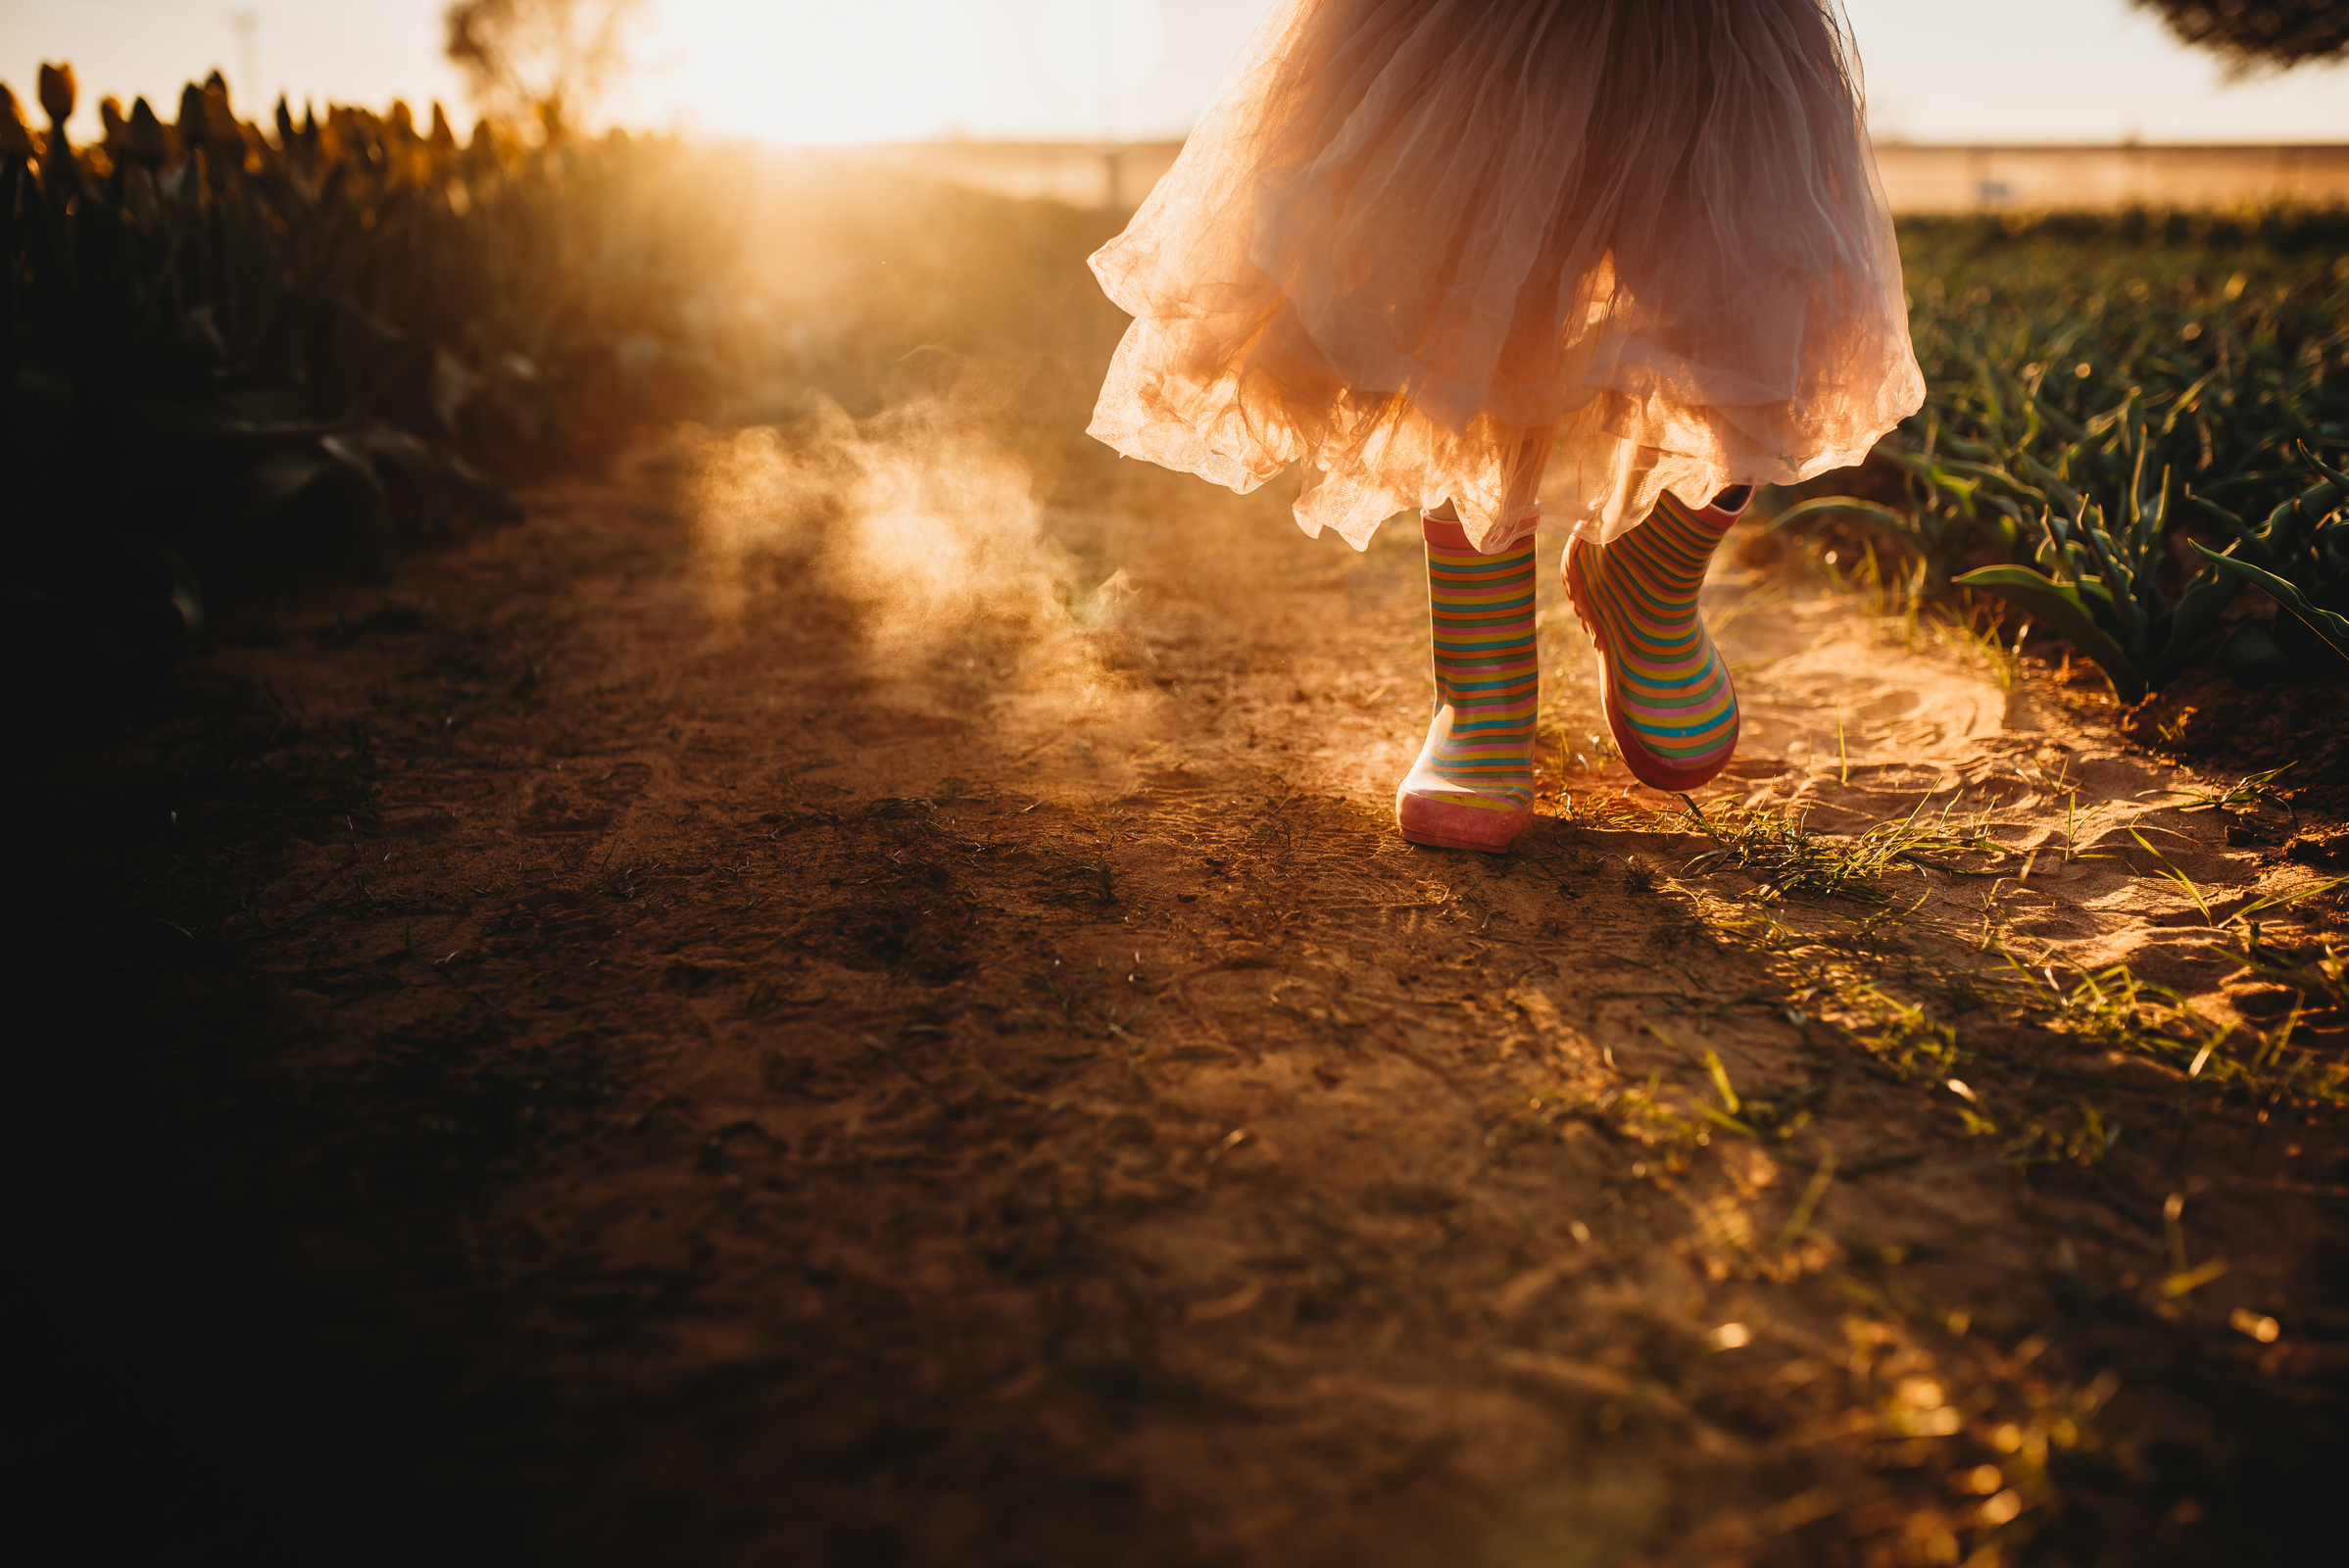
Areas with tall grasses, dusty roads, and leafy trees are all ideal. These environmental elements will add texture to your photos as they catch the light.

When I get to my location, I like to start by finding a playful pocket of light while the sun is at its highest point. Here you can take a variety of images where the light is filtered by trees or peeking out from behind buildings. This light is dramatic and allows you do have distinct separation between your subject(s) in the light and the environment in the shadows.

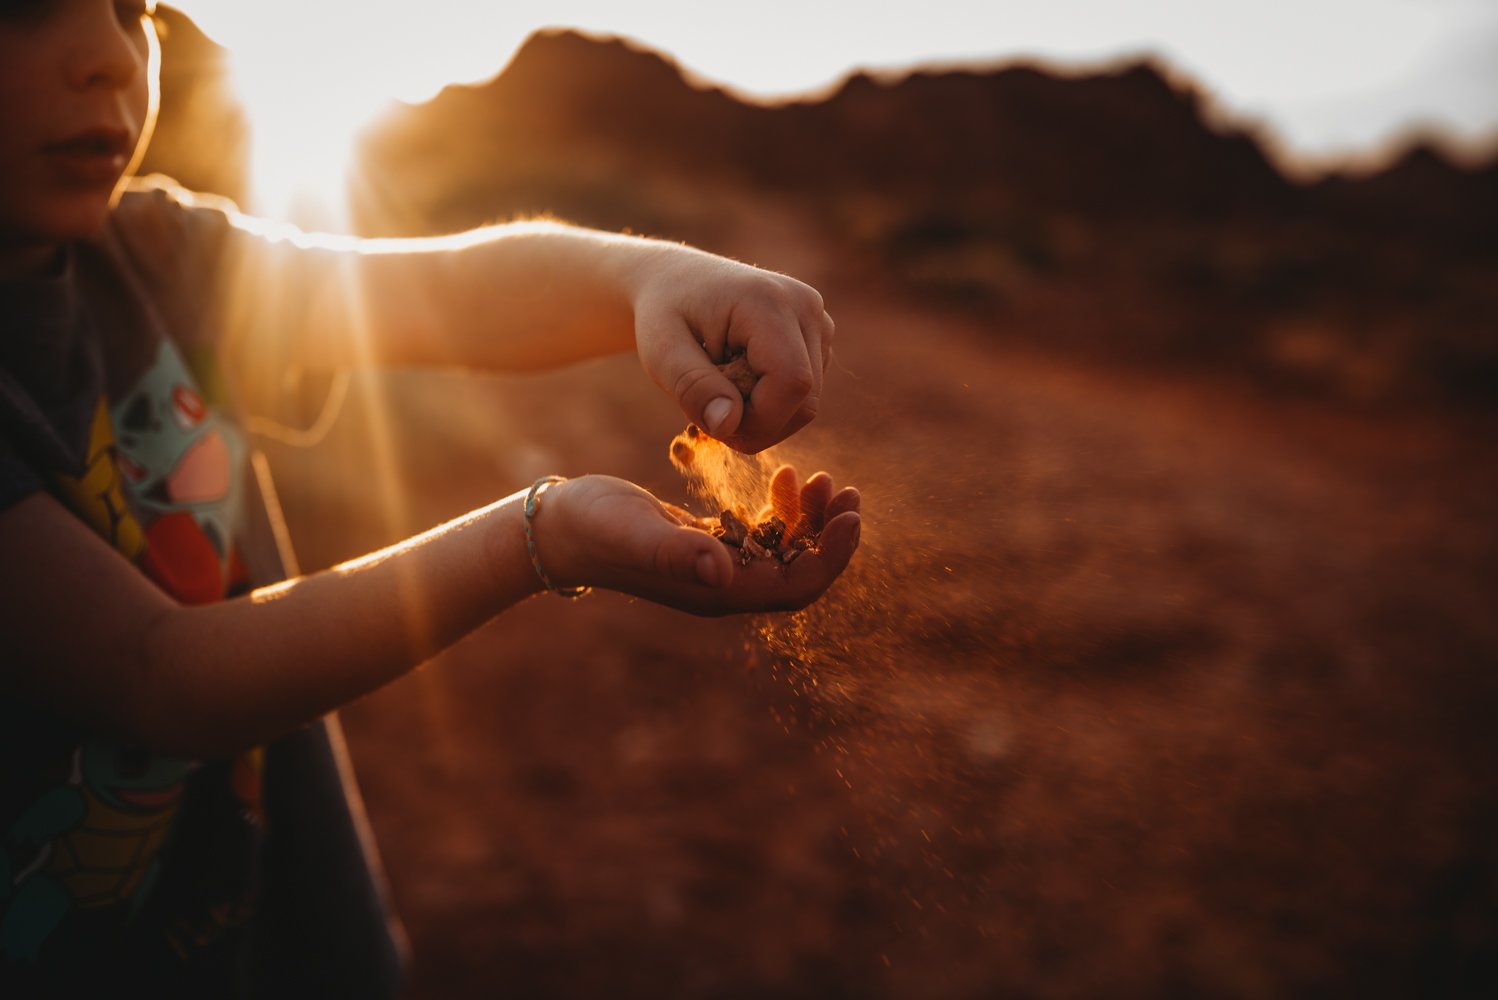
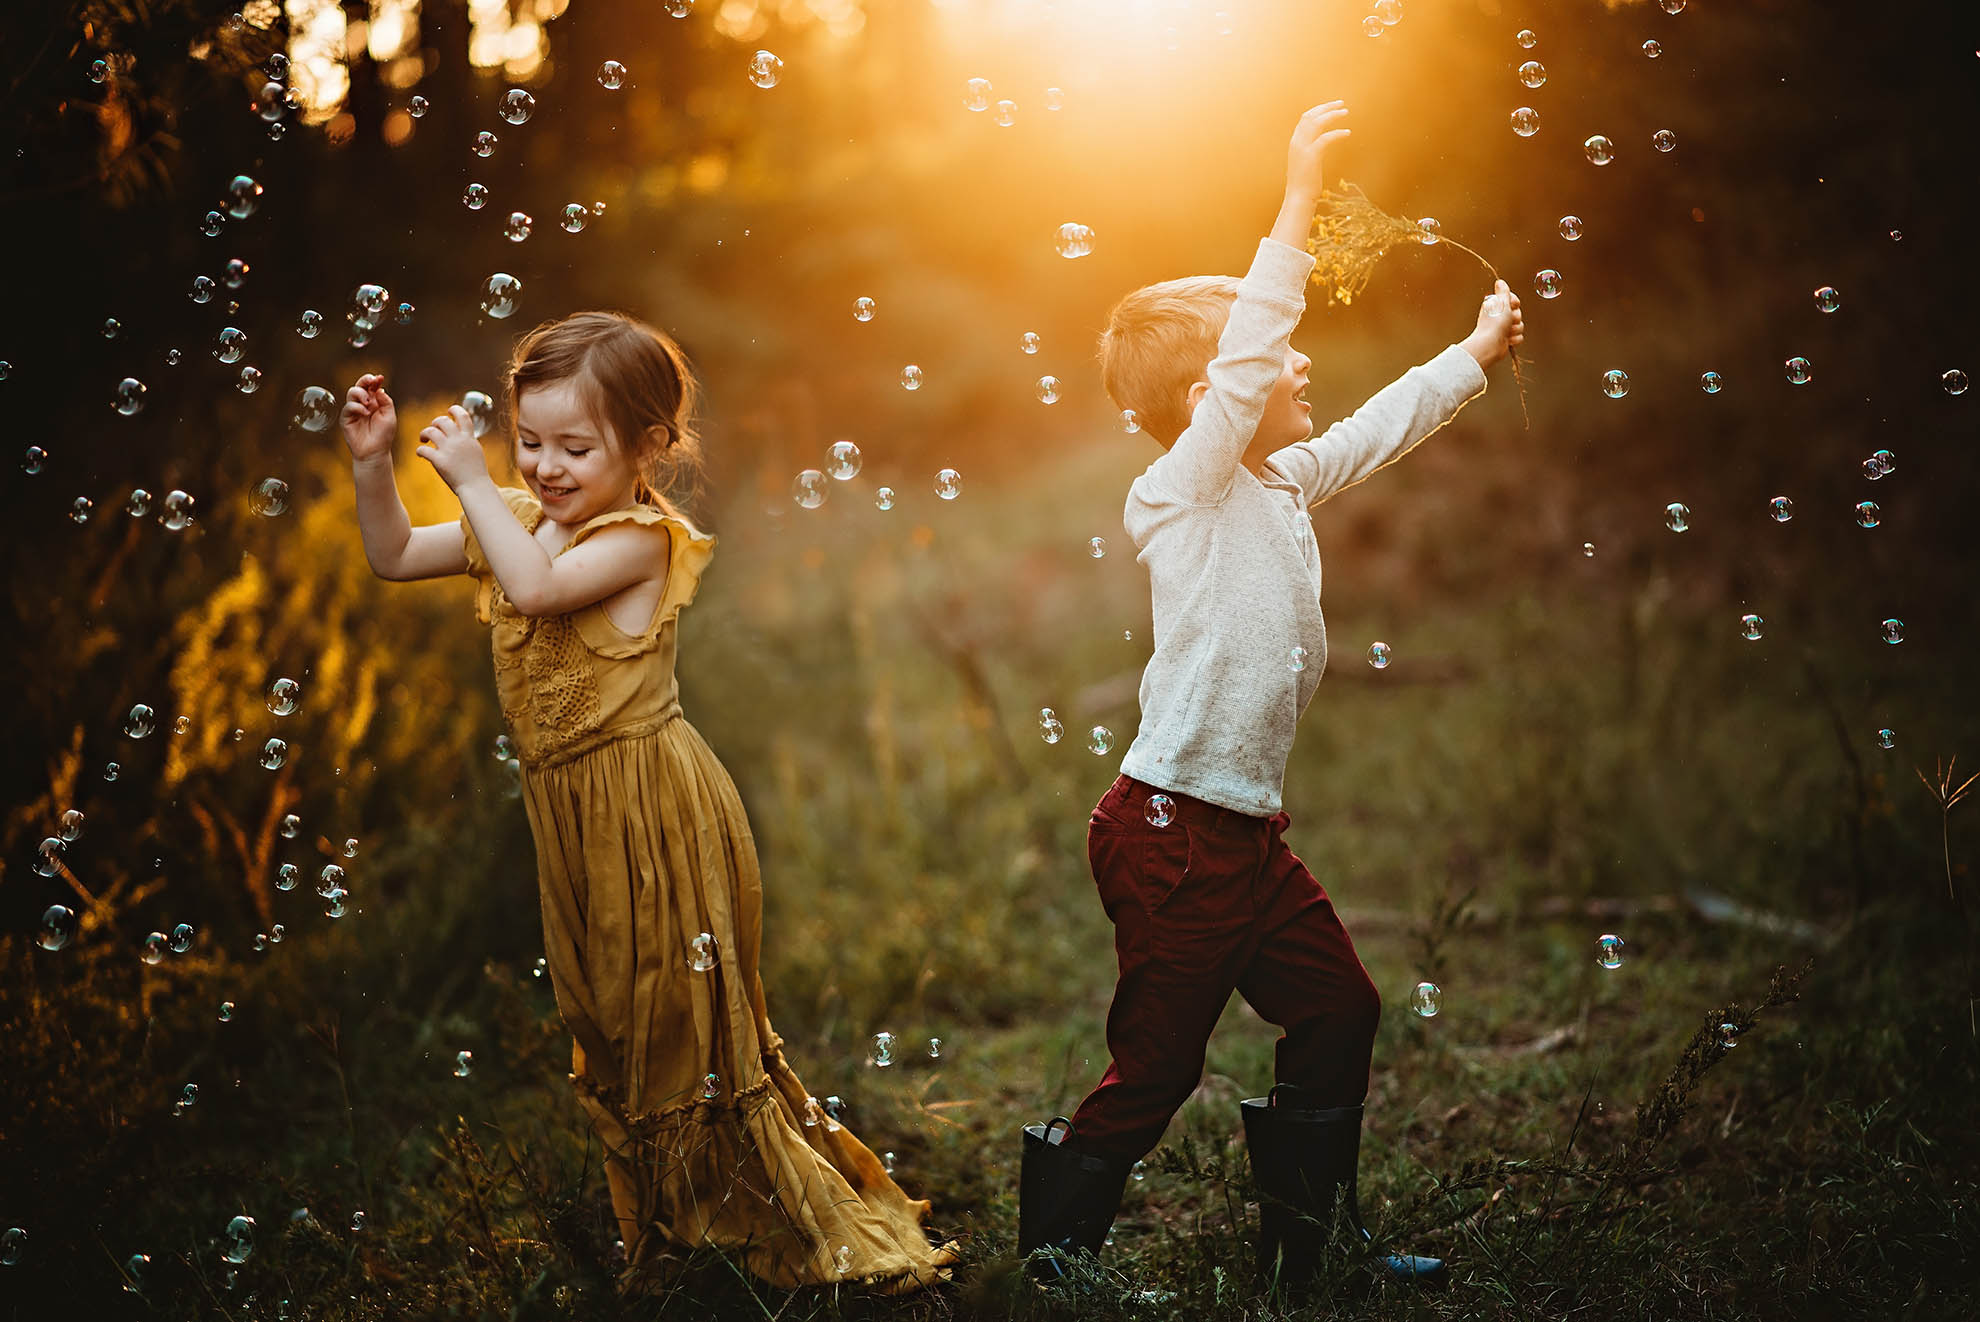
As the hour moves on, I love to add props that can really highlight the beauty of the light. Flowing dresses, bubbles, and glitter and good to keep on hand as they can filter and reflect the light in a way that really lets it shine.

Be sure to keep an eye on your camera settings as the sun moves toward the horizon. The light will be diminishing and you don’t want to have underexposed images because you forgot to adjust your ISO.

amber_talbert_child floating in open water at sunset

The emotion of Golden Hour light

As photographers, we have the opportunity to be storytellers. As artists we should be compelled to move our viewers with emotion. We can connect people to how they felt in a moment by capturing their memories.

There are many ways to evoke emotion in your photographs. Facial expression, body language, and light all play a role in making the viewer feel.

Golden Hour light is a powerful way to tap into emotion. The warmth of the sun translates to the emotional warmth of a moment. Hazy backlight can feel dreamy and nostalgic. Pockets of light can feel dramatic and theatrical.

The key is to use the light with intention and combine it with all of the other variables of the frame. When you harness Golden Hour in that way, you will create images that are not only beautiful, but also powerful.

child in tulle dress and rainboots walking on dirt path at sunset amber talbert

There is no question why photographers, both hobbyists and professionals, adore Golden Hour. Its beauty is unparalleled. It encourages us to be creative. And it allows us to create photographs that are emotionally driven while also being universally flattering.

The key is to use Golden Hour in a way that coincides with your vision and style. I encourage you to go out with your camera in that first and last hour of the day and experiment. Have fun with that warm light and see what effects you can get in your camera. And discover for yourself why Golden Hour is so magical and why YOU love it.

Become a Member of Clickin Moms

The post What is Golden Hour and why do photographers love it? appeared first on Clickin Moms blog: Helping you take better pictures one day at a time.


Clickin Moms blog: Helping you take better pictures one day at a time

Posted in Photograpy How To | Tagged , , , | Leave a comment