Call me old fashioned, but nothing brings me greater joy in photography than a beautiful portrait. And I find myself especially drawn to those portraits that utilize a single light source.
I hear all the time from other photographers who lament, “My house has terrible light!” or “I don’t have enough light to work in.” And yet, if you have a single window, you can create my favorite kinds of photographs!
And with just the smallest adjustments around that window, you can achieve so much versatility in your portraits. The possibilities are truly endless.
Let’s explore together how to use just one window to create photographs you adore.

Light & portraiture
When it comes to creating a strong portrait, the foundation should always be light. As photographers, we are all light seekers. Light is essential to the photographic process.
We know that natural light is never constant. It changes hour by hour, day by day and season by season. If you were to study the light from one window in your home throughout the day, you would notice how drastically it can vary.
Weather can alter the natural light streaming through a window. Then there are things like the direction the window is facing, trees or other objects outside a window, and the paint color of a room.
Create a one window studio in your home with this *member exclusive* tutorial!
When I’m studying the light from a window, the first thing I pay attention to is the sun. Where is the sun in relation to the window I want to shoot near?
The direction of the window makes a huge difference in the light quality. North facing windows will always have soft light because the sun never directly shines through them. South facing windows will often have direct sunlight for a good portion of the day (as long as it’s sunny).
Consider how the direction of the light shining through a window at any given time affect your subject’s features. See how those features change at different times of day by the same window. You will be amazed at the variety you see!

White balance
It’s important to also pay attention to the temperature of the light too. As you know, the sun rises in the east. So the sun is shining through my east-facing windows in the morning versus in the evening where it’s setting in the west. Therefore, the light tends to be much warmer in the morning and cooler in the evening.
Other factors like paint and floor color will affect the white balance and color casts in your portraits. Are the tones within the room cool or warm? Do you see the walls reflecting off of other surfaces in the room? Study how your subjects look in any given room and make adjustments as needed.

Study the shadows
Before a portrait session, I like to do the “hand test.” It’s a great way to study how the light is falling and adjust your settings prior to putting your subject in place.
I simply hold my hand where I plan to photograph my subject. I first adjust my exposure and white balance. Then I study the shadows.
This is one of the single most important things you can do when studying light. How are the shadows falling across my hand? Are they soft and subtle or are they dark and dramatic? In what direction are the shadows falling? How do these things change as I move my hand in relation to the light?
If you don’t see shadows on your hand, chances are you are shooting in flat light. You want the presence of shadows because it’s going to give your image depth and dimension. It will make your two-dimensional photo feel three-dimensional.

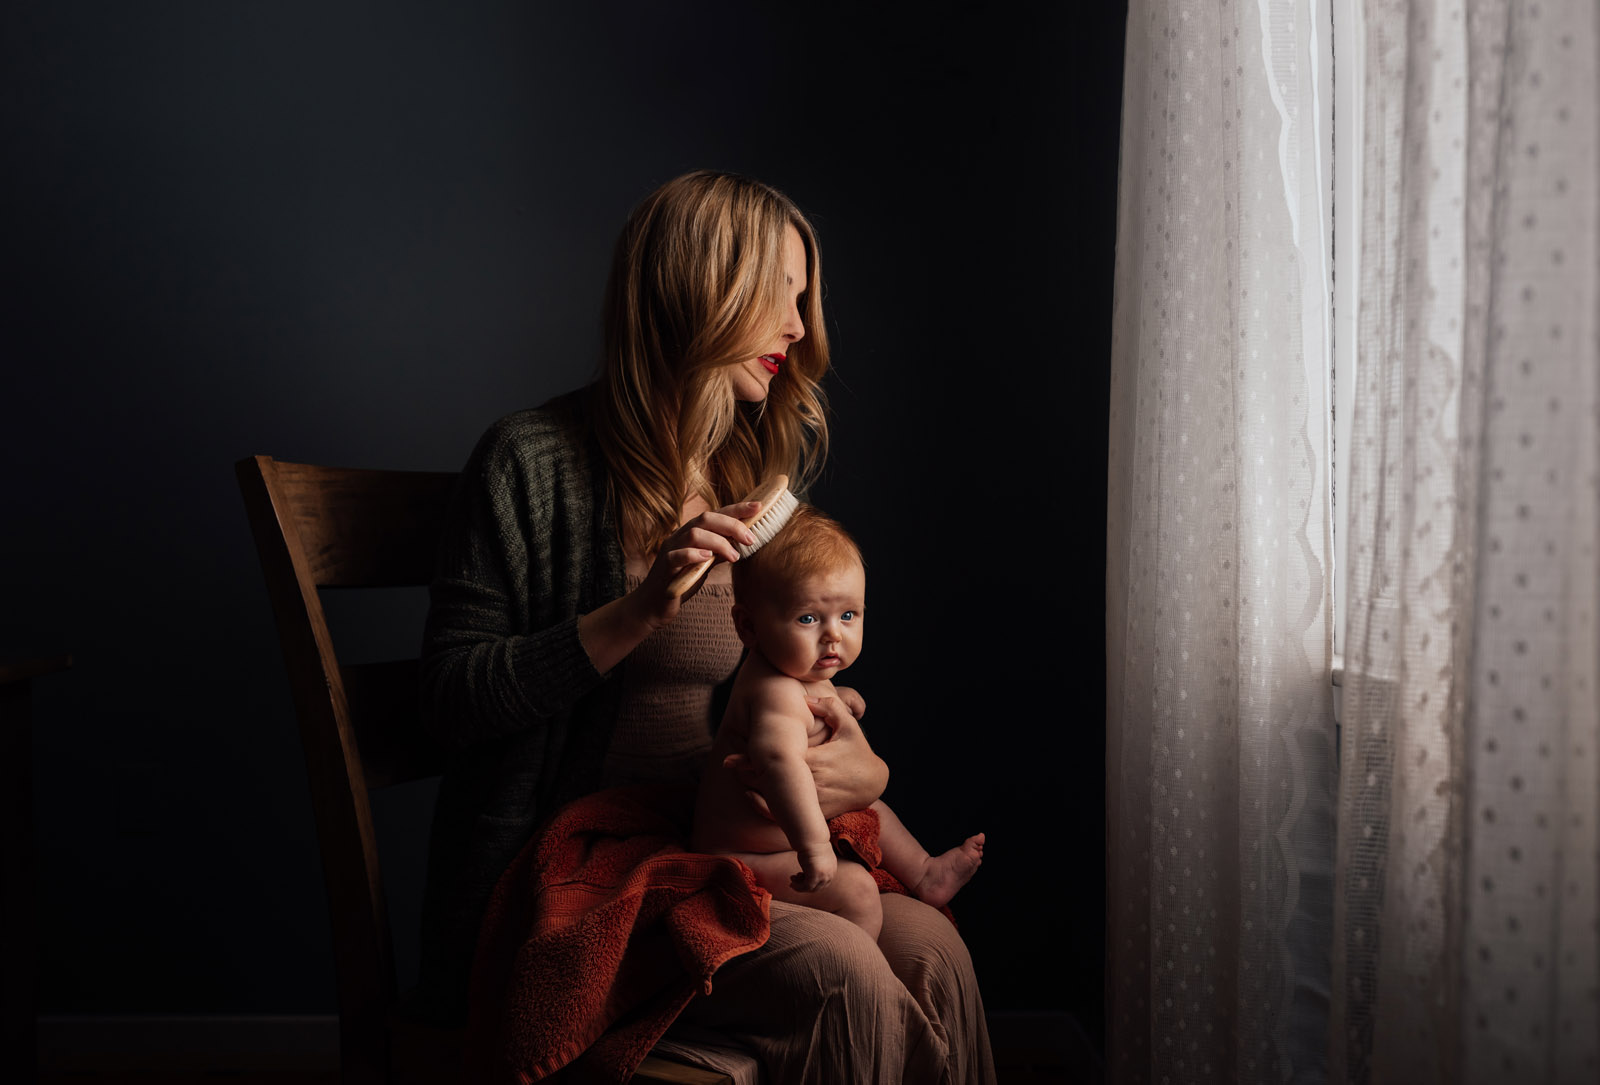
The closer you place your subject to the window the more dramatic the light will be. This strong tonal contrast between light and dark is called Chiaroscuro.
By placing your subject right next to a window you will have a dramatic light fall off. That makes your background nice and dark while isolating your subject.
If you are striving for more even light throughout the scene, consider placing your subject farther away from the window.
Once you are ready to photograph your subject, study how the light is falling on his or her face. This is so important when photographing a portrait as the face is the first thing the viewer will see. Making slight adjustments to your position or your subject’s position can greatly alter how the light is falling on his/her features.

The importance of catchlights
Another important aspect to pay attention to is catchlights. This is especially true if your subject is looking directly at the camera.
Related: What are catchlights and why is it important to have them?
Catchlights are simply the reflection of light in your subject’s eyes. Without them your subject can tend to appear lifeless.
We have all heard that famous saying, “The eyes are the window to the soul.” They are often the first thing the viewer looks at. This makes it that much more important to bring them to life with catchlights.
In a window portrait setting, should you notice that your subject’s eyes do not have catchlights, simple adjustments can make all the difference. Just turn your subject slightly more toward the window until you see that light reflecting on his/her eyes.

Light manipulation
Of course there are situations when the light in your window isn’t doing what you want it to do. That doesn’t mean that you can’t still use that window for a beautiful portrait!
For example, let’s say you have a south facing window and the light is too harsh for your liking. Simply placing sheer, white curtains in the window will help to soften the light.
White curtains are a great tool to have on hand because they won’t have color casts and allow for light to filter through.
There can be other times when other windows in the room make it so that you can’t get the single window light effect that you desire. You want directional light from the window so that your subject is isolated and your background is nice and dark, but the room is too full of light to get that to happen.
In these situations, consider putting up blackout curtains on the other windows to block the light from competing windows. When I go to a client’s home for a lifestyle session, I always bring curtains with me and a set of clamps to alter the light if I need to.

Ideal gear for portraiture
When I think of a classic portrait, many of us imagine a single subject filling the frame while looking directly at the camera. However, there are so many unique ways to photograph a portrait simply using just one window.
My ideal lenses for a portrait tend to be a 50mm or 85mm. These don’t distort subjects’ features and create beautiful images.
However, you might want to shoot an environmental portrait with more of the setting in the frame to tell about the subject’s activity or personality. Here, a wide angle lens like a 24mm or 35mm is going to work best. It allows you to get more of the scene in the frame to tell more about the person you are photographing.

Get creative with your perspective
When photographing with just one window, it can be easy to feel limited by your space. But slow dow and try to imagine all of the difference ways that you can compose your scene.
Get your “safe shot” first. Typically, that’s going to be your classic portrait shot in a vertical or horizontal orientation. Then consider other ways to photograph your subject. Move around your subject and see how the light changes as you change your perspective.
My go to window light is typically side light. I love how dramatic it can be. I often place my subject at a 45 or 90 degree angle from the window. The strong highlights and deep shadows tend to give images depth and dimension while exuding a romantic atmosphere and calm mood.
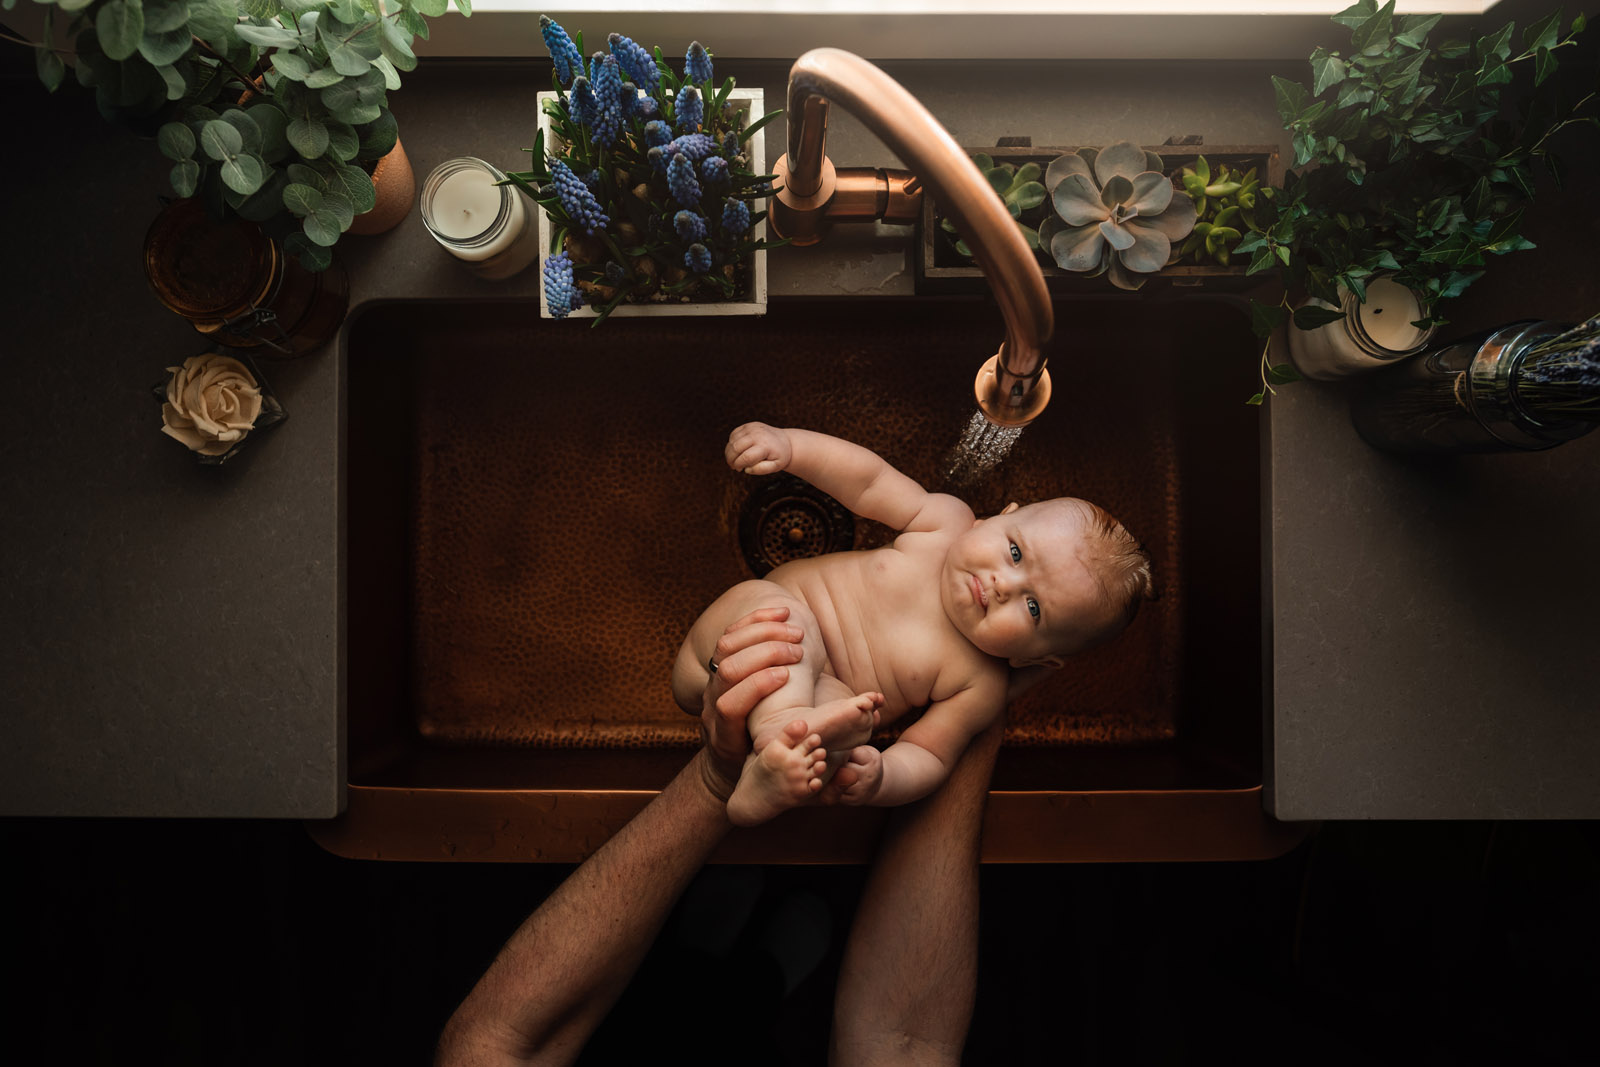
Another perspective to take into consideration when photographing portraits near a window is from above or the birds eye perspective. This is a great way to simplify your frame and eliminate any distractions that may be in the room. Again, a wide angle lens like a 35mm or 24mm and a stepping stool is helpful here to allow for more environment within your frame.
You can even use backlight in a single window portrait session! It can really make an image feel warm and magical. I recommend having your highlight alert turned on in-camera for something like this (check your camera’s manual if you don’t know where this is). It’s easy to blow highlights and clip blacks in this type of light. By having your highlight alert turned on and checking your cameras histogram, it helps you ensure that you maintain detail within your frame.

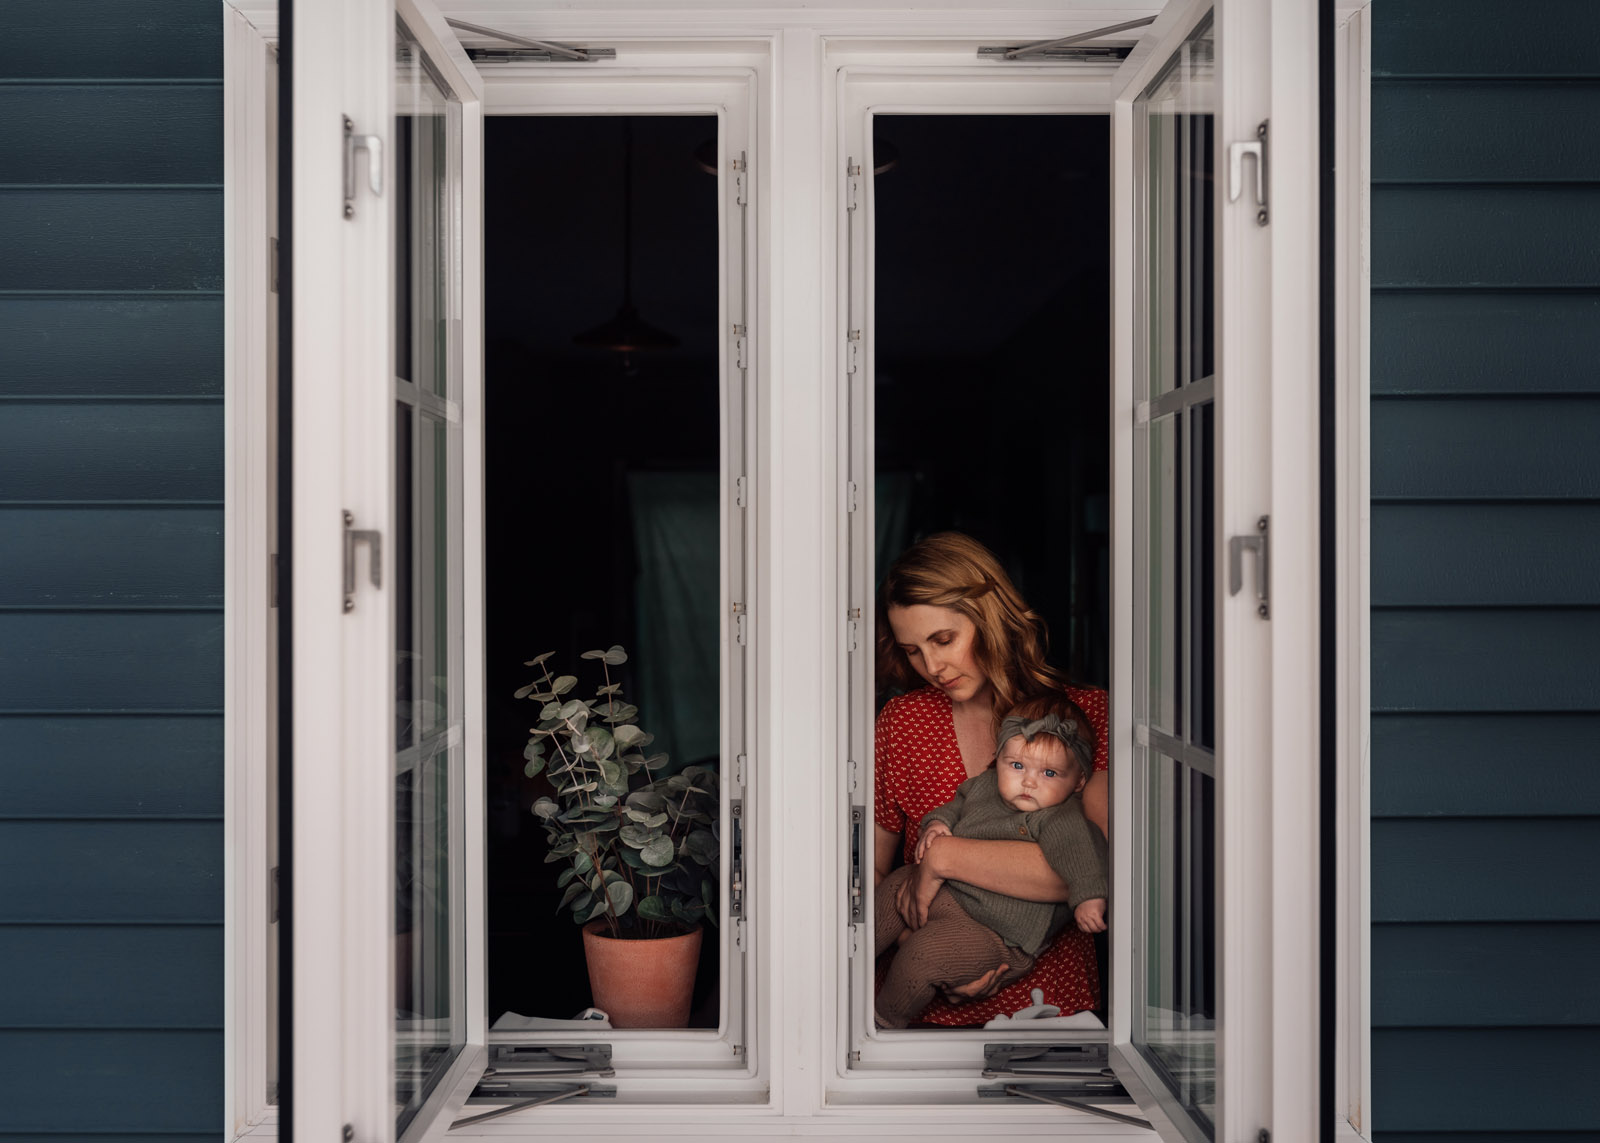
And you don’t need to stay inside with your subject when shooting through a window. Try shooting through a window from the outside! Consider shooting through a window or screen or opening the window to photograph your subject. The framing of shutters and a window frame can be fantastic compositional elements.
Never underestimate the power of a simple, classic portrait. One single window can give you so much versatility in one session. The key is to slow down and make adjustments to your position to capture different types of light and composition. From a traditional portrait to birds-eye-perspective, there are a lot of possibilities with just one window.
Light from a single window can be incredibly inspiring. You just have to get a little creative! I can’t wait to see how you use these tips and tricks in your own portrait photography and want to hear all about how you use window light in the comments below!

The post How to create beautiful portraits with light from one window appeared first on Clickin Moms blog: Helping you take better pictures one day at a time.
Clickin Moms blog: Helping you take better pictures one day at a time


