***This tutorial was posted on our expansive photography forum; however, we think it’s so rad that we just had to share with you, too***
… AND you may just bring in oodles of clients, too!
For real, these Valentines are always a huge hit and last year convinced 15 families to schedule sessions with me. How awesome is that?!
Even better, my kids really love making them ![]() .
.
There’s a few steps in the process here but I promise it’s fun and easy.
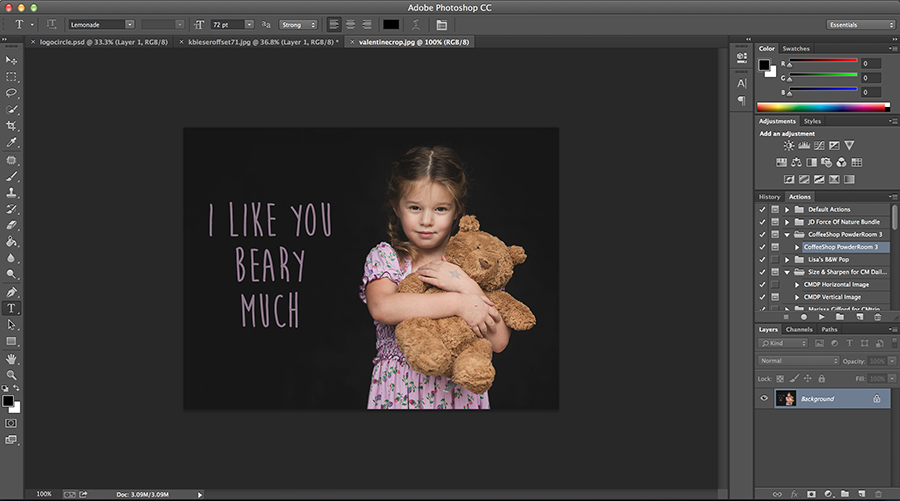
First, crop your photo to a 4 inch x 3 inch rectangle:

Add some cutesy Valentine’s text (I just used the color dropper tool on her dress to get the lavender):

Create a new document that is 4 inches x 6 inches:
You might also enjoy: 20 photos full of love that we adore

Copy and paste your photo onto the new document. Create a new solid color fill layer (again, I just used the color dropper tool to get the lavender color):

Add the text you would like on the back of the card. Press command + T and rotate it 180 degrees:

Your printed cards should look like this:

I had Annie sign hers before we assembled everything:

And then I folded them because I am a bit of a control freak and wanted the lines to be straight ![]()

Get treat-sized bags of a school-approved snack… and get extras because your little one will probably want some, too ![]() .
.
You might also enjoy reading: 10 Valentine’s Day pictures you need to take


Staple the cards to the tops of the bag:

And watch as your child beams with pride:

And make a few extras… I have actually had principals and teachers from other classes request our Valentines!

Hope this helps inspire you and you have the happiest of Valentine’s Day! ![]()
Tell me, what are some of your creative ways for making Valentine’s Day cards for the kiddos?

The post How to make the cutest Valentines in Photoshop you ever did see… appeared first on Clickin Moms.


