
You know it but it’s worth restating – light is extremely important in photography.
In fact, using light creatively may be the most important difference between a snapshot and a purposeful, well-thought-out photograph.
A great way to learn how to use light creatively is to look at master artists’ use of light. Perhaps one of the greatest artists to study is painter Rembrandt van Rijn.
Rembrandt’s portraiture paintings specifically display a very distinct use of natural light. This lighting has evolved into a popular photographic technique known as Rembrandt lighting or the Rembrandt triangle.
But what exactly is Rembrandt lighting? Why is it so desirable?


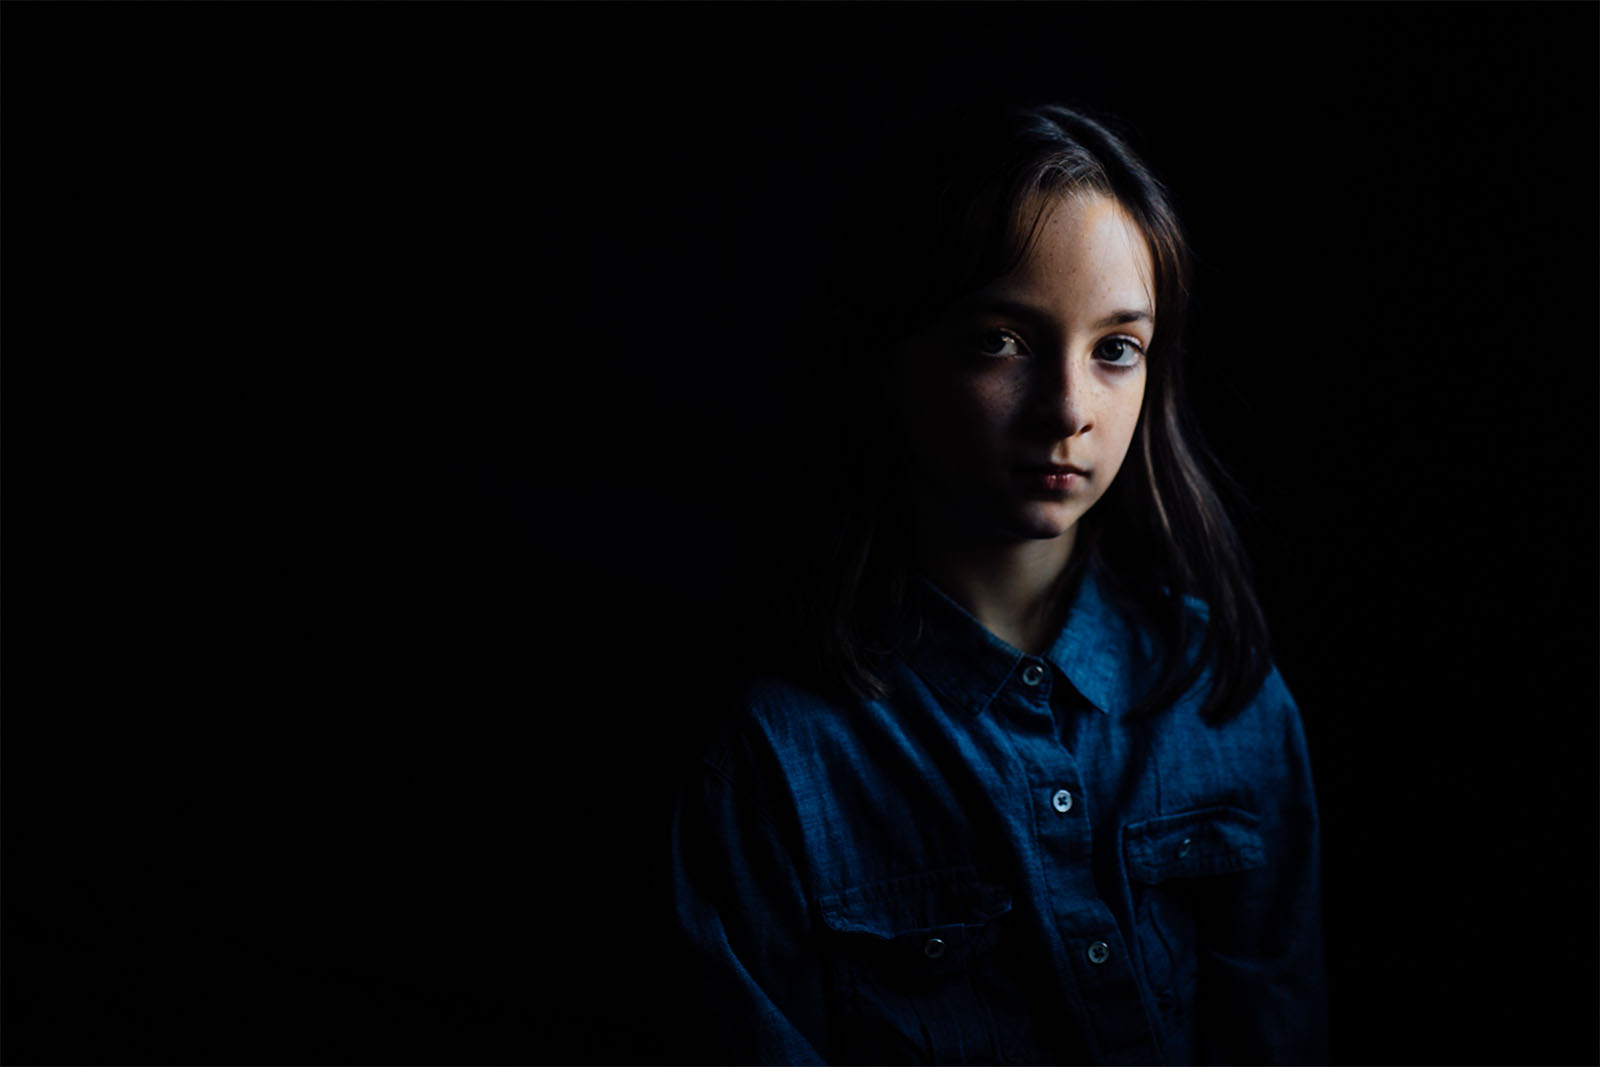
Simply put, Rembrandt lighting is achieved when there is a tiny triangle of light falling beneath your subject’s eye on the shaded side of their face.
The reason this lighting technique is so popular is because of the dimension and depth it adds to portraiture. That is what makes a photograph so interesting and pleasing to the eye.
Another important aspect of Rembrandt lighting is the mood it creates. Usually this lighting technique is expressed best in a dark and dramatic portrait, making facial expressions important.
It typically wouldn’t make sense for your subject to have a big cheerful smile in this dramatic light. Make sure you set the right mood for your subject when using this effect.
The two most important things to consider for Rembrandt lighting are light and composition/subject placement. With subject placement, your subject must be placed in a way so that light is falling on their face in the right way.
Pick your light source.
Rembrandt lighting is most easily achieved with directional light. This means that the light should be coming from one direction or one source (i.e. one window).
It’s easy to believe you have bad light in your home. Remember though, one window with light coming in is all you need to use this technique.

Place your subject.
Once you’ve picked your room with directional light, the next step is to place your subject in front of your window at about a 45° angle. If your window is slightly higher than the eye level of your subject, the effect is much more defined.
Once your subject is at a 45° angle to your window then you need to make little tweaks to their face placement until you see the light falling just right. Also, remember that the closer your subject is to the light source, the more dramatic your image will be!

Mind your exposure.
Be purposeful with your exposure. Because the lighting is so dramatic, there’s a good chance of overexposing or underexposing.
Make sure that you are exposing for your subject’s skin. It may mean losing details in the shadows but many prefer this creative effects in order to set a darker mood. Just make sure you are not losing detail on your subject’s skin.
Rembrandt lighting is no doubt a flattering and interesting way to light your subject. Even if you feel this effect may be too dramatic for your taste, it’s still a great exercise to try out!
Challenge yourself with Rembrandt lighting and see what you can create!

The works not in the public domain are being showcased purely for educational purposes and all copyright and other IP rights remain with the original artist and/or licensee(s).
The post What is Rembrandt lighting and how to get it with one window appeared first on Clickin Moms.


