
Work smarter, not harder. If you’re like me and find yourself working on documentary video productions or short films with a documentary style, inevitably you will end up having to add still images to your video edit. So many stories and historical commentaries can be communicated with still images, so it makes total sense to use them. If you’ve done it a few times, you’ve probably mastered using basic keyframes to create the “Ken Burns” effect, but if you’ve done it more than a few times, you know how tedious this can get, especially in a long documentary. I’m going to share with you a method for taking the tedious part out of it.
The basic idea is as follows: by getting all of your still images at a consistent size, you can create “motion favorites” in your NLE for all of your favorite motion effects. Then, you can simply drag and drop those motion effects onto still images and you’re done! Here’s the long of it: (that’s what he said?)
1. Get your still images together.
You can use either Lightroom or Photoshop for this, and it will likely be the step that takes the most work. BUT, if you do it right, everything else will go smoothly.
If your edit is in HD and you want to do some subtle motion moves with the photos (like a zoom in/scale up for example) pick a resolution of something like 2500px wide. If your photos are all from the same camera and haven’t already been cropped, then they should already have the same height resolution. If they have been cropped or come from varied sources/cameras, use a cropping tool to make their aspect ratio consistent. (This is important, because if they aren’t consistent, your motions might reveal black frame edges when you didn’t want them.)
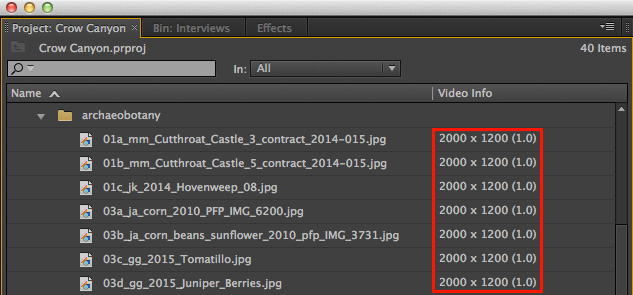
Once you have your images in a consistent aspect ratio, set up a batch export or photoshop action and make jpegs out of them, all with the same width.
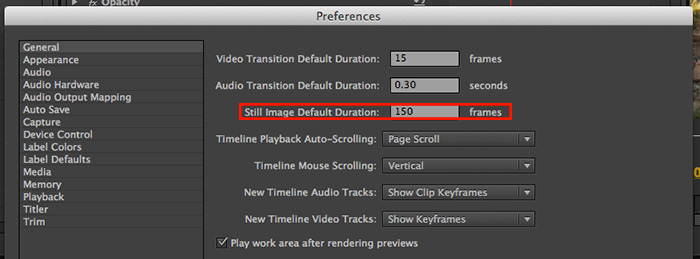
2. Before you import any stills, set the duration.
To set the duration of time that your stills will appear in Premiere, open your preferences and in the first panel, the third option lets you set that. All of the still you import now should have the same duration and if you set it close to how long you want to use them in your edit, you’ll save a little bit of time when it comes to slicing and dicing.
3. Open two images in your NLE.
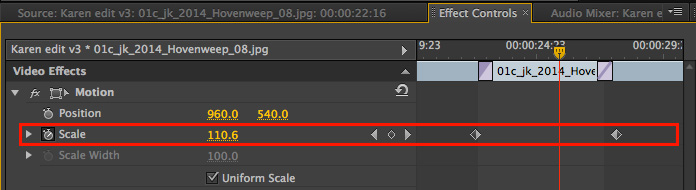
Plop a couple of your photos into a sequence, and keyframe each of them as you see fit, for whatever duration of time that you will most likely want to display them for in the edit. It’s easy enough to tweak the keyframes for time later, (more on the keyframe timing in a moment) but I usually set mine up for about five seconds. As far as the motion effect, I typically do one that is a scale up and the other is a scale down.
4. Save your keyframed motions.
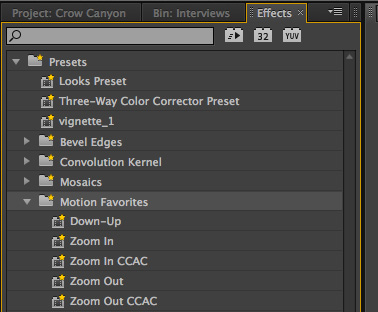
Once those animations both look good, you want to save those motions as favorites. Every NLE is different, but here is how you do it in Premiere and FCX. If you’re using Premiere, you’ll have an option to anchor the keyframes to either the in or out point of the clip, but what’s more useful for simple animations is the option to “Scale” them over the duration of whatever clip they are applied to– this means you won’t have to tweak the keyframe placement on clips of a slightly varying length. Name your effects something so that you can easily understand what it does– when you go to use it in future projects this will help tremendously.
5. Add them to your still images as needed!
If you did it right, now you can add your photos onto your timeline where you want them, then add these motion favorites to any image that you exported earlier, and they should move the exact same way as the first image you set up.


