
We are very excited to announce the release of our second video course, Level 1: Workflow and Post-Processing. After months of hard work and many sleepless nights, we were finally able to wrap the course up and make it available for purchase. After receiving a lot of positive feedback on our first video, we decided to take it up a level and deliver something we are truly proud of. The result is a 14-hour educational course that will surely satisfy your hunger for photography knowledge for quite a while. In this course, we pick it up right where we left off last time; from the moment you insert your memory card into your computer, all the way to the image export process. We go over each step of the photography workflow process, provide detailed information on different post-processing tools available on the market today (along with the overview of the most popular ones), and give you in-depth coverage of Adobe Photoshop Lightroom. In addition to the above, you will also learn how to properly organize your images and your Lightroom catalogs, find out about computer hardware required for post-processing, and even learn how to properly backup and export your images. To make it easy for you to follow the course, we are providing all relevant raw images, so that you can try all the tools we teach you to use. Without a doubt, this is one of the most detailed and complete courses you will find on both workflow and post-processing!
While the course is aimed at beginners, there is plenty of content for intermediate-level and even more advanced photographers. At the end of the course, both John and I show our ways to edit images through case studies. John starts out with a sample image culling and editing process in Lightroom, while I perform detailed post-processing of a landscape image in Lightroom, then use another image to perform more complex editing involving such techniques as dodging and burning, selective sharpening, contrast and color adjustments in Photoshop. To get an idea of what to expect out of this course, please check out the trailer below:
Here is the outline of the video, along with the length and relative size of each chapter:
00) Course Introduction: 01:38 (51 MB)
01) Introduction to Workflow: 06:23 (198 MB)
02.1) Computer Hardware: 26:37 (827 MB)
02.2) Monitors: 25:10 (781 MB)
03) Importing Images: 14:25 (443 MB)
04) File Management: 01:18:33 (2,640 MB)
05) Image Culling: 29:02 (885 MB)
06) Introduction to Post-Processing: 17:49 (552 MB)
07) Software Overview: 09:47 (296 MB)
07.1) Capture One Pro Overview: 25:45 (762 MB)
07.2) DxO Optics Pro Overview: 10:43 (325 MB)
07.3) ACDSee Pro Overview: 12:56 (391 MB)
07.4.1) Lightroom In-Depth – Modules and Navigation: 45:05 (1,364 MB)
07.4.2) Lightroom In-Depth – Develop Module: 03:19:16 (6,443 MB)
07.4.3) Lightroom In-Depth – Catalogs: 31:27 (956 MB)
07.5) Photoshop Overview: 58:38 (1,810 MB)
08) Backup: 21:01 (652 MB)
09) Exporting Images: 37:07 (1,138 MB)
10) Printing and Publishing: 05:24 (168 MB)
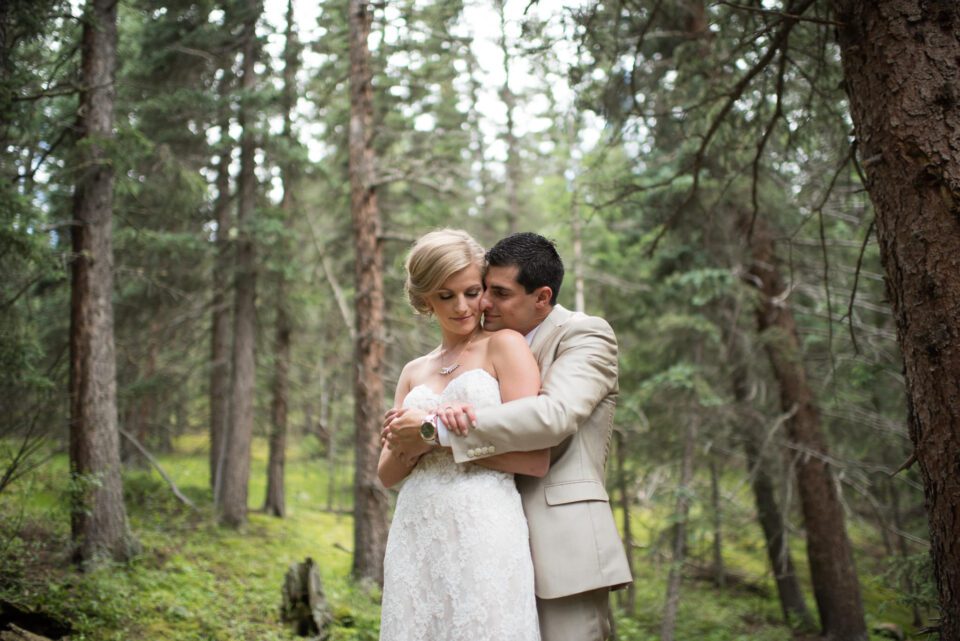
11) Case Study – Wedding Workflow and Culling (John): 28:08 (798 MB)
12) Case Study – Portrait Editing in Lightroom (John): 15:12 (478 MB)
13) Case Study – Landscape Editing in Lightroom (Nasim): 01:06:07 (1,894 MB)
14) Case Study – Landscape Editing in Photoshop (Nasim): 01:17:12 (2,348 MB)
As you can see, the course is very detailed and extensive – we cover everything we know about proper workflow and we spent quite a bit of time covering both Lightroom and Photoshop.If you would like to find out more about what’s covered in the video, check out this Table of Contents document for details.
Each of the chapters is recorded in High Definition at 1080p, 23.9 fps in MPEG-4 format. The total size of the tutorial is roughly 26 GB. For those who have issues with Internet bandwidth, or those who are planning to watch the content on smaller devices, we decided to also provide lower resolution videos in 720p resolution – the total download size is roughly 15 GB (single ZIP file). Both downloads have the necessary material to follow the course (such as raw images, Lightroom catalogs, etc).
The entire course can be downloaded instantly (digital download versions) or if you choose the USB version, you will get both.
Who is this Course For?
As you can probably tell, we’ve designed the course in the same format as a photography workflow. Since both John and I use Lightroom heavily, we put a heavy emphasis on it in the course and shot over 7 hours of Lightroom content alone. In fact, if you are not interested in the workflow process, just the chapters on Lightroom should teach you quite a bit, as we literally go through each and every slider and option you will find in the Develop Module! And we don’t just show you how to edit images – we even go into more advanced Lightroom content, such as file and catalog management. The beauty of the course is that it is not just aimed towards beginners – there is solid content for even more advanced photographers, who want to explore post-processing and other related topics in more detail. In the case study section of the course, both John and I show you our day-to-day workflows and how we edit images. And we are planning to release more case studies in the future!
Consider our courses as solid investment in your photography education. Now that we have two full courses that cover all the basics, we will be taking education to the next level from here. We have huge plans for this project and the idea is to make a few foundation courses today, so that we can keep taking your photography training to higher levels in our future courses. From here, we will move on to more complex training material. The good news is that we won’t be repeating any of the basics in those higher tiers, so there won’t be any duplication of efforts. So the courses will follow a university-style program with a good amount of pre-requisite material that is recommended to master first before moving up to the next level.
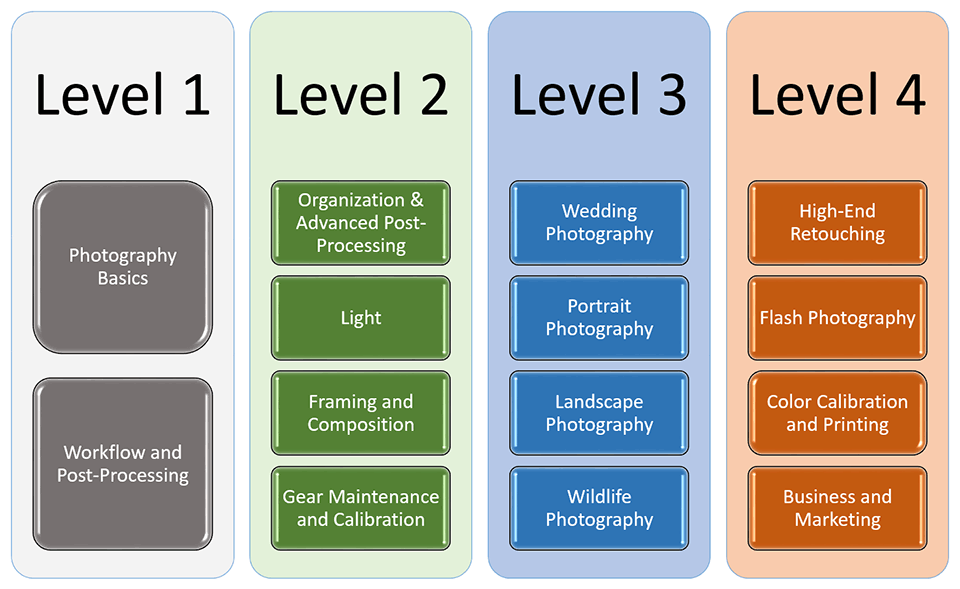
Here is what we have in the plans today in terms of future courses:
Sample Images
Below are the three images we used for post-processing in our case studies – you can see how the images looked before and after the editing process. Here is an example of what can be done to a portrait in Lightroom with just a few minutes of editing (John’s case study):
I chose a rather difficult image to work with in Lightroom (captured while filming the Level 1 Photography Basics course) and I go into quite a bit of detail on how to fix lens problems and make subtle adjustments in Lightroom to convert bland-looking images into something much more pleasing to look at:
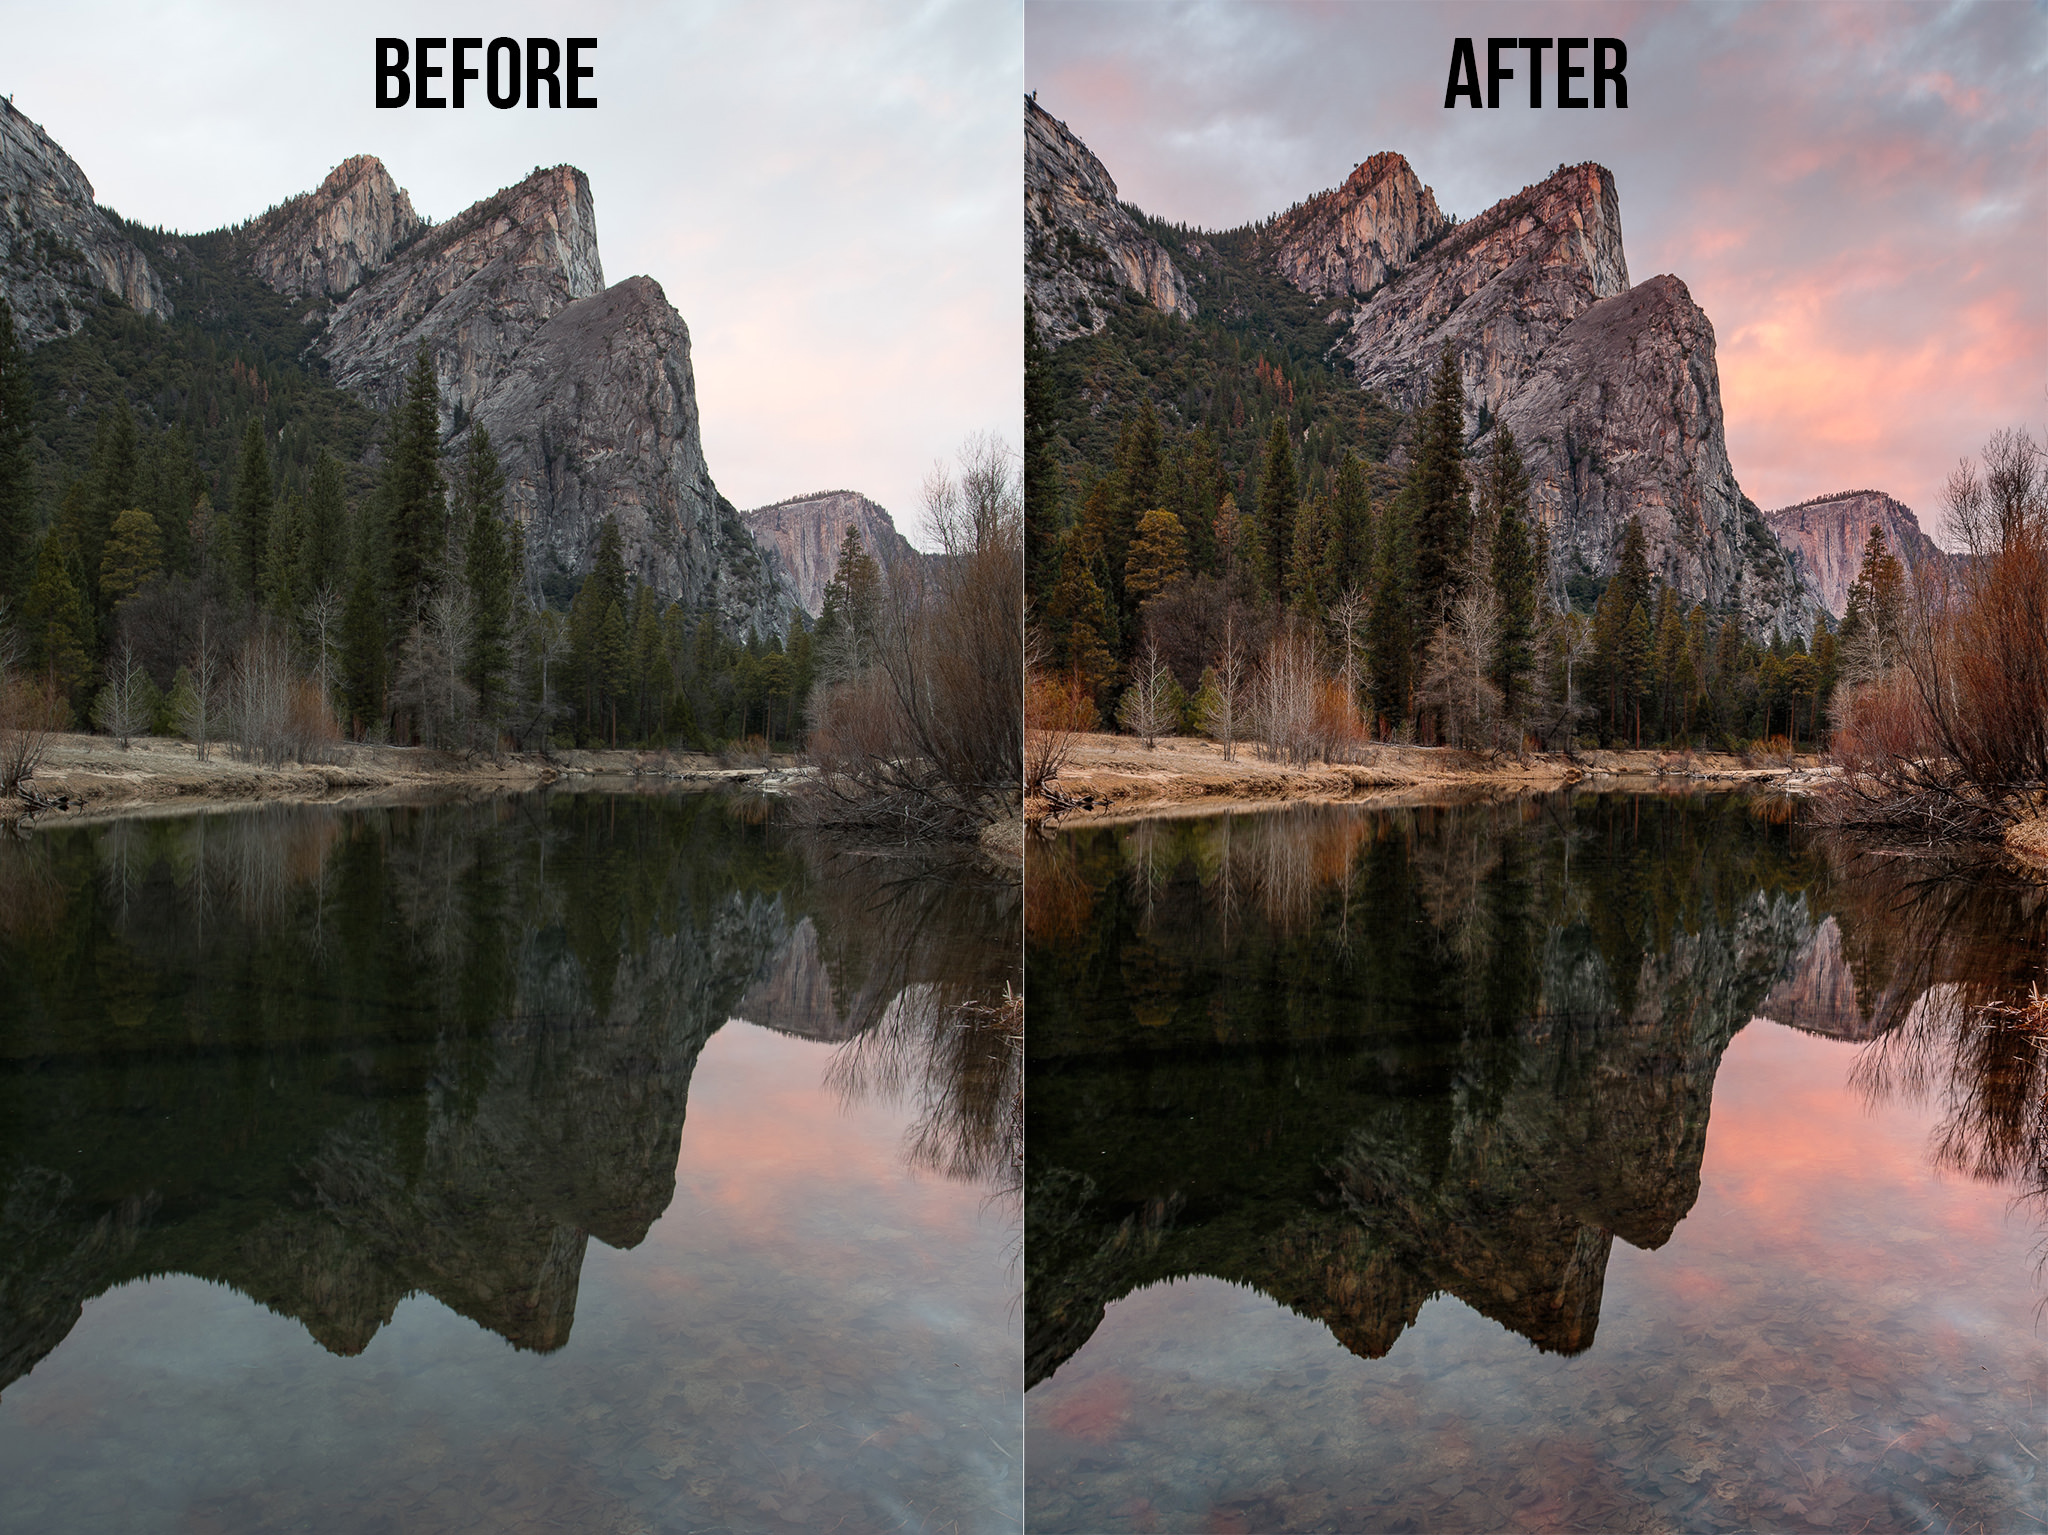
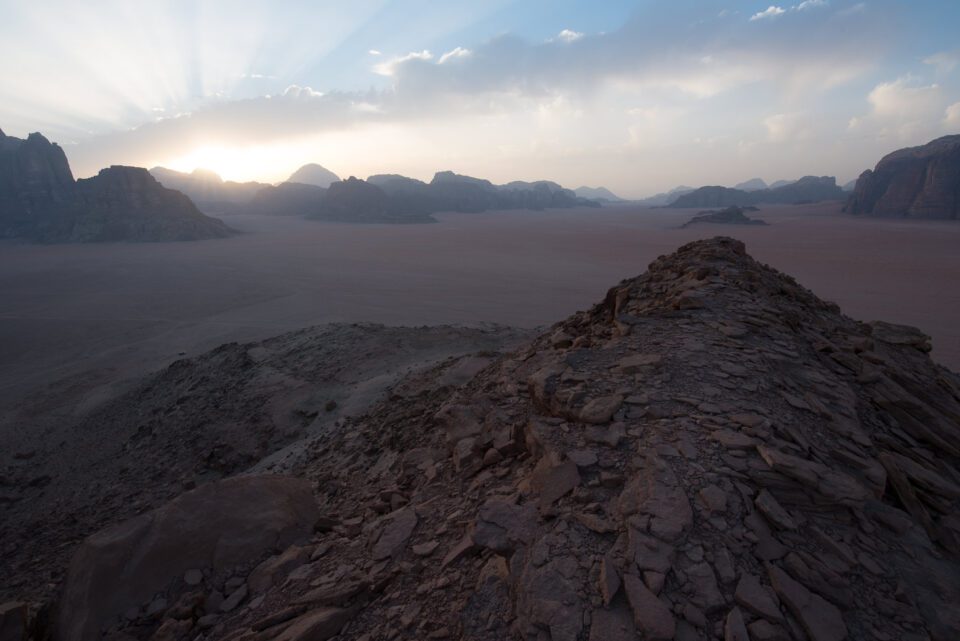
And lastly, here is another dramatic landscape, but this time after it got a few tweaks in Photoshop:

100% Satisfaction Guarantee
We are confident in the quality of the material presented in this course and we back it up with a 100% satisfaction guarantee. If you are unhappy about your purchase, we will gladly issue a full refund.
How to Buy
If you are interested in buying this course, we currently have a special launch discount, bringing the price down from $ 149 to $ 129. If you have previously purchased our first video, you should have already received an email from us with an additional discount to bring the price down to $ 99. And the best deal is for those who want to buy both Level 1 courses – for a limited time, the bundled price will be $ 198.
Below are the purchase links for all three:
- Level 1: Camera Basics – $ 129 ($ 149 regular)
- Level 1: Workflow and Post-Processing – $ 129 ($ 149 regular)
- Level 1 Bundle – get both for only $ 198 ($ 248 regular)
The above discounts will expire on August 1, 2016.
We would love hear your feedback! Please let us know if you have any questions or comments in the section below!
The post PL Level 1 Workflow and Post-Processing Announcement appeared first on Photography Life.


