
While it seems that adding watermarks to images does little nowadays to deter image theft, watermarks can still be very useful for photographers and business owners for promoting their work and their brands across websites and social media. Unfortunately, for those who are just starting out, adding a simple watermark to images can be a rather painful experience, especially if they are not already familiar with the process using such software tools as Photoshop. Thankfully, Adobe has made it easy to add watermarks to images in Lightroom, allowing one to not only add a watermark to a single image, but also to apply it to all images during the export process, which can save a lot of time and frustration when dealing with batches of images. In this article, I will show how to use the built-in watermark tool that is readily available in Lightroom in order to quickly add watermarks to images.

Tasman Glacier, New Zealand at Sunset. Image watermarked via Lightroom.
NIKON D810 + 24-120mm f/4 @ 32mm, ISO 64, 1/4, f/8.0
1) Why Watermark Images?
The first question you might ask yourself is – should you watermark your images? There are many opinions on this matter. Some argue that watermarks prevent theft (which I and many others disagree with), allow self-promotion and help build brand recognition, while others argue that adding watermarks spoils the viewing experience and does more harm than good. Let me quickly point out what I think about watermarks and when they should and should not be used.
- Unless your watermark visibly takes up the entire photo like in the image below, it can often be easily removed in Photoshop using standard tools. So if you are worried about theft and copyright infringement too much, either do not post your images online or post them in a small size with a gigantic watermark all over it. You will fend off all potential thieves for sure. I immediately close sites that show icon-sized images with huge watermarks. And I know that I am not the only one out there…

Big and Ugly Watermark
- On a more serious note, if your objective is self-promotion and building brand recognition (which should be your primary goal when adding your watermarks), then come up with a good strategy to add watermarks without spoiling the viewing experience (see tips below). This means making your watermarks small, but recognizable and placing them in a good, open corner spot in photographs close to image borders.
- Well-known photographers rarely put watermarks on their photographs, because they want to deliver the best (and unobtrusive) viewing experience. They also often post large images that occupy the whole screen. Why aren’t they worried about copyright? Because they are known and their images are recognized. If such photographs or “works of art” are stolen or reproduced elsewhere, the offenders would most likely be reported and caught quickly. Am I saying that unless you are a well-known photographer you should be adding watermarks to your photos? Of course not. I believe you should worry less about theft and focus more on making better photographs.
- If watermarks are used properly, they can help promote your work instead of doing harm. You are not a stock photo agency, so stay away from large watermarks that span across your photos.
- And for all those “right-click disable” folks out there that do it on their websites – you are only spoiling the browsing experience of your visitors. I hate not being able to right-click and open links/images in new pages on websites and blogs. It is about time for you to understand, that if someone really needs to steal your image, they can just press the “Print Screen” button on their keyboards, then paste the screenshot in Photoshop and crop it to their liking!

Before I move on to specific instructions, I would like to provide some watermarking tips and best practices:
- Try to use a graphic logo instead of plain text for watermarks. If you do not have a logo yet, use short text with your name and Copyright © symbol.
- When using text watermarks, try not to add the word “photography” at the end of your name. If your name is not unique (just search Google), then either come up with a nickname or use your URL (below).
- If you have a short URL, you can post your website address instead of your name.
- When using text watermarks, use a standard and recognizable font rather than some gothic/italic/handwriting font that is impossible to read.
- Try not to use multiple lines of text for watermarks.
- Semi-transparent watermarks always look better and more professional than bold copyright imprints. If you decide to use a watermark, make it 60% or less transparent.
- Another good watermarking method is to add some space underneath each photo and then put your copyright information there. But you would have to use Photoshop and record actions in order to do that (not covered in this article).
- Put your logo/text watermark in the corners of your photos. Top-left, top-right, bottom-left and bottom-right locations typically work the best.
- If you do not feel like sharing your camera settings, remove your EXIF data from images, but only keep your copyright and contact information. This would just be an additional copyright protection layer for you in case your image is posted elsewhere.
2) The Watermark Position Dilemma
Because of the nature of photographs and their colors and patterns, finding a good placement for your watermark can be a problem. Where should it be placed and how? As I have pointed out above, the best locations for standard watermarks are near the top and bottom corners of your photos (unless you chose to add extra space to the bottom or the side of your photographs in Photoshop or other third party software). Which corner should you use for watermarks? I would say all of them! Why? Because every photo will be different and while one corner might work for one photo, that same corner might not for another. A gray watermark will not be visible on a photo with a gray corner where the watermark is placed. So you have two options – either to use a different shade of color that is visible in the same corner, or move the watermark to a different location. I prefer the latter for consistency, but it is totally your choice.
Now moving your watermark in photos would be extremely inefficient if you had to change your watermark every time you need to move it. That’s why the best method is to create multiple watermarks in Lightroom and put them in multiple locations. For example, I have 4 different Lightroom watermarks that I called “Top-Left”, “Top-Right”, “Bottom-Left” and “Bottom-Right”. All watermarks are the same (PL logo in white) – they are just positioned differently.
3) Creating a Text Watermark in Lightroom
Let’s go through the process of creating a text watermark in Lightroom. To access the watermark function in Lightroom, you can go to “Edit->Edit Watermarks…” (Lightroom->Edit Watermarks on Mac) or you can also access it from Lightroom’s Export window. I normally access it via the export window, which can be found in File->Export or pressing CTRL+SHIFT+E:
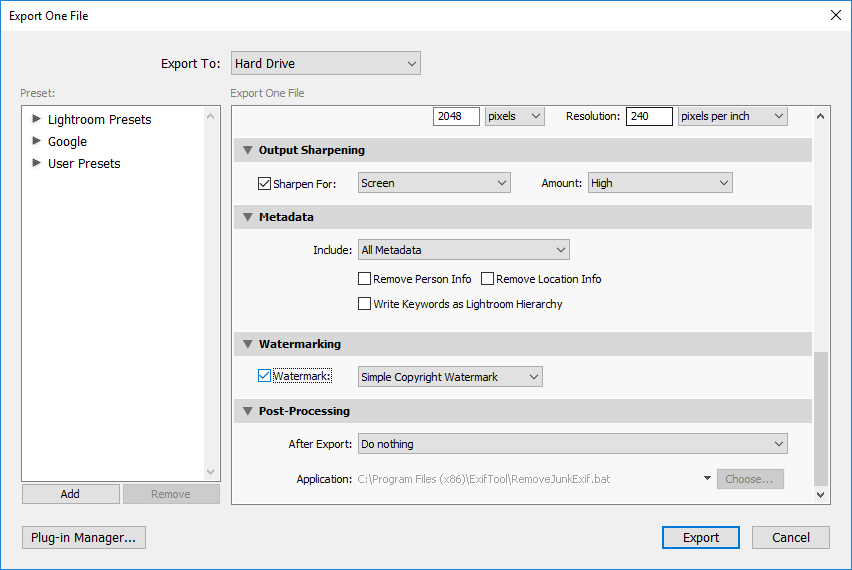
Once it comes up, scroll down and find “Watermarking”. Next, check the box in front of “Watermark:” and then select “Edit Watermarks…” from the drop-down menu. The “Watermark Editor” will come up that looks like this:
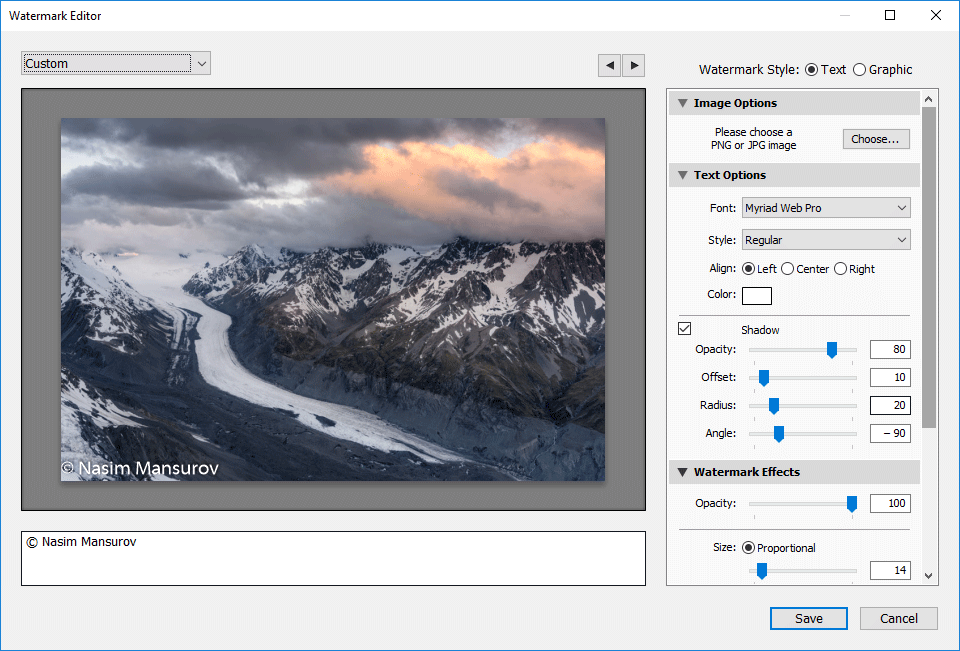
The watermark editor is very easy and intuitive to use. The left bottom section is where you type the text and you can change the layout on the right side of the window. Let’s get started with typing the text. Put the copyright symbol (copy-paste it from here – © or press ALT + 0169 on PC / OPT + G on Mac) first, then put your name afterwards. On the right side of the screen, choose your desired font under “Text Options”. I personally like the “Myriad Web Pro” font, but you can use whichever font you want, as long as it is legible. Choose the style and alignment, then pick the color of the text. I would recommend to keep the color white, since colors rarely look good in text watermarks. The default Shadow settings should work fine, but if you want to make changes to the way the shadows appear, you can do that in this screen. Now scroll down till you see “Watermark Effects”:

As I have pointed out before, you do not want the copyright watermark to be 100% visible, so it is best to make it semi-transparent. I typically use 50% opacity, but you can play between 30-80% to see what works for you. Keep “Proportional” size instead of “Fit” or “Fill”, and 10% typically works great. If your copyright text looks too small, increase the value to a bigger number.
The next task is to pick an “Anchor” point, meaning where your copyright will be located. As I have pointed out above, it is best to keep it in the top left/right and bottom left/right corners. Start with the top-left corner. Remember, our objective is to create 4 watermarks with different locations. Next, click “Save” and the “New Preset” window will pop up:
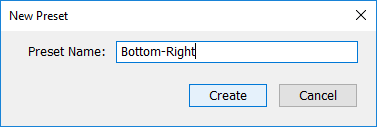
Give it a meaningful name that will be make it easy to understand the location of the type of watermark. I called mine “Bottom-Right”, as shown above. Click “Create” and you will be returned to the Export screen.
Now repeat the task three more times and create 3 other watermarks for “Top-Left”, “Top-Right” and “Bottom-Left”. At the end, your “Watermarking” drop-down should look something like this:
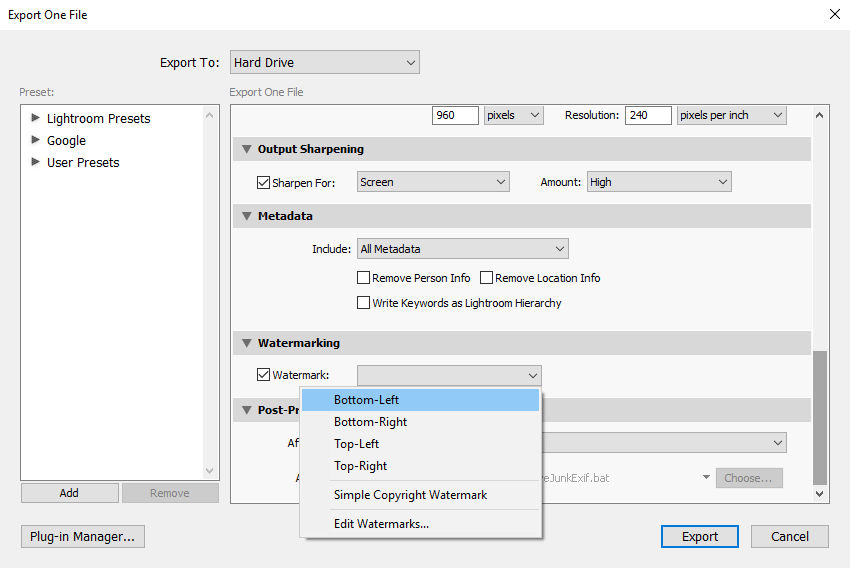
Now that you have the text watermarks created, how do you use them? Just select a bunch of photos in Lightroom, bring up the export window, then select one of the watermarks and click “Export”. That’s all!
Here is how I normally do it:
- Select all photos to be extracted in Lightroom
- Bring up the Lightroom Export window (CTRL+SHIFT+E / CMD+SHIFT+E)
- Select the “Bottom-Right” watermark (works best for most images)
- Click “Export”
- Once images are extracted, go through each one and identify the ones where logo does not look good or is invisible
- Select the images that need to have a different watermark placement, then bring up the export window once again and pick a watermark for a different location
- Click “Export” again and then overwrite the existing photo
You might need to repeat the steps 5-7 multiple times until you get the watermarks placed well. That’s all there is to it. Now let’s talk about graphic watermarks with logos.
4) Creating a Graphic Watermark in Lightroom
Now let’s move on to the cool stuff, which is adding a graphic watermark with your logo to images in Lightroom. No matter how good you make the text watermark look, it will never match a good-looking graphic logo. But to accomplish this, you will need your brand / company logo in a transparent format like PNG or GIF. Your logo cannot be in JPEG format, since JPEG has no support for transparency. If you had your logo developed professionally, you should have the original logo in vector/EPS format. You might also find a transparent PNG/GIF file in the same folder. If you cannot locate one, it is very easy to export your logo to a PNG format, as long as you have the source file. A transparent logo should look like this when opened in Photoshop:
![]()
Since we will be making your watermark semi-transparent, it is best to have the image in white rather than black. For a quick conversion in Photoshop, simply press CTRL+I / CMD+I to invert the logo colors:
![]()
Now export the image from Photoshop by going to “File->Save for Web & Devices” and then pick “PNG-8” on the top drop-down. Make sure that “Transparency” is checked, as seen below:
![]()
Once you have the file ready, you are now ready to use it in Lightroom. Oh and by the way, make sure that you are using a large version of your logo (at least 250 pixels wide). If you make it too small, your watermark will not look good when exported out of Lightroom, since Lightroom will have to up-size it for large photographs. If you use a high-resolution PNG image, Lightroom will automatically down-size it during the export process.
Let’s now pick some photos and bring up the Export dialog box in Lightroom by pressing CTRL+SHIFT+E. Make sure to check the box in front of “Watermark:” under “Watermarking”, then select “Edit Watermarks…” in the drop-down menu. A new window called “Watermark Editor” will come up:

In order to use a graphic logo, we need to make sure to select “Graphic” on the top right corner of the window. Under “Image Options”, click “Choose” and find the logo you exported earlier. Once the file is chosen, you will see the logo show up right away on your photo preview on the left. You will also notice that the “Text Options” are now grayed out. Scroll down till you get to “Watermark Effects”:
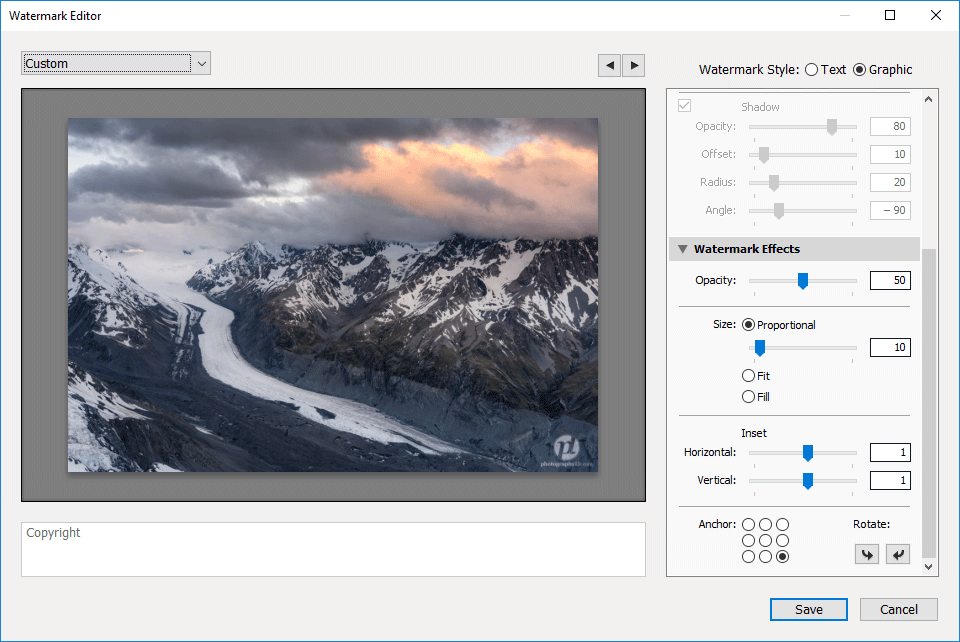
Just like with the text watermark, you have to pick the right opacity – I normally leave mine at 50-60%. The size should stay “Proportional” and 10-15% size works great for most situations. If your logo is too close to the border, you can move it up/down and left/right by changing the “Inset” values in “Horizontal” and “Vertical”. In the above case, I went ahead and set +1 for both horizontal and vertical inset values, so that the logo is slightly moved from the edge of the image. Pick one of the Anchor points again (start with Bottom-Right) and then save the Preset with a new name like “Bottom-Right Logo”.
Now open up the Watermark Editor again, change the Anchor to bottom-left, click Save again and give it a name like “Bottom-Left Logo”. Do the same for top-left and top-right. Once you are done, you should have four watermarks for different watermark locations.
Now try to export a couple of photos and see how you like the result:
- Select all photos to be extracted in Lightroom
- Bring up the Lightroom Export window (CTRL+SHIFT+E / CMD+SHIFT+E)
- Select the “Bottom-Right” graph watermark (works best for most images)
- Click “Export”
- Once images are extracted, go through each one and identify the ones where logo does not look good or is invisible
- Select the images that need to have a different watermark placement, then bring up the export window once again and pick a watermark for a different location
- Click “Export” again and then overwrite the existing photo
Here is how my image looks like with the “PL” logo watermark:
Watermark Applied to Image via Lightroom
The good news, is that you can use the above method for both vertical and horizontal images, so you do not have to extract your verticals separately. If all four corners are very bright and the white logo does not work, make another transparent logo in black and create additional watermarks. When watermarking very bright photos, use the black logo with 50% transparency and it will look great.
That’s it! Let me know if you have any questions and I would love to see how your logo comes out!
The post How to Watermark Images in Lightroom appeared first on Photography Life.


