
If you like taking landscape photos at night, you’ll surely be familiar with one of the main challenges: successfully focusing on the stars. Often, you can’t use autofocus, since there isn’t enough light for your camera’s focusing system to lock onto anything. Unfortunately, even manual focus doesn’t always work, which means you may need to use some out-of-the-box techniques to make it work. This article goes through some of the most useful tools that you have at your disposal.
1) Focusing on the Moon
Moonlit nights have their positives and negatives for landscape photography.
On one hand, if the moon is out, you may be able to capture the landscape with enough light to see clearly. Plus, the moon is more than bright enough for your autofocus system to lock on. However, too bright of a moon (especially a full moon) will make it harder to capture detail in the Milky Way, since it often lowers the sky’s overall contrast.
You won’t always be able to plan a photoshoot around the moon. However, if you do happen to take pictures while it’s bright, this is one of the best ways to acquire proper focus on the stars. Simply put your camera on a tripod, enter live view, magnify the image as much as possible, and manually focus until everything looks sharp. (If you want to save time, you can use autofocus — in live view or through the viewfinder — although it likely won’t be as accurate as magnified manual focus.)
One other thing to mention: Use the center region of your photograph for focusing. Why is this? Due to field curvature, your “plane” of focus may not be a plane at all — it could be curved. Typically, it is more important to have the sharpest possible stars in the center of your image than all the way in the corners, which will likely be darker due to vignetting anyway (and less sharp due to coma). By focusing on the moon with your center point, you’ll ensure sharp stars in the center, even if you happen to change your composition and not include the moon.
(The only corollary to this point is if you know the exact characteristics of your lens’s field curvature and feel the need to correct it as much as possible. In that case, you may choose to focus somewhat incorrectly in the center of the image — typically by focusing a bit farther than necessary — so that the blurriness is spread more evenly throughout the sky, rather than the center being in focus and the corners being noticeably out of focus. You’ll already know if this applies to you; most people will just want to use the center point without any additional adjustments, since it’s quicker and gives fine results on most lenses.)
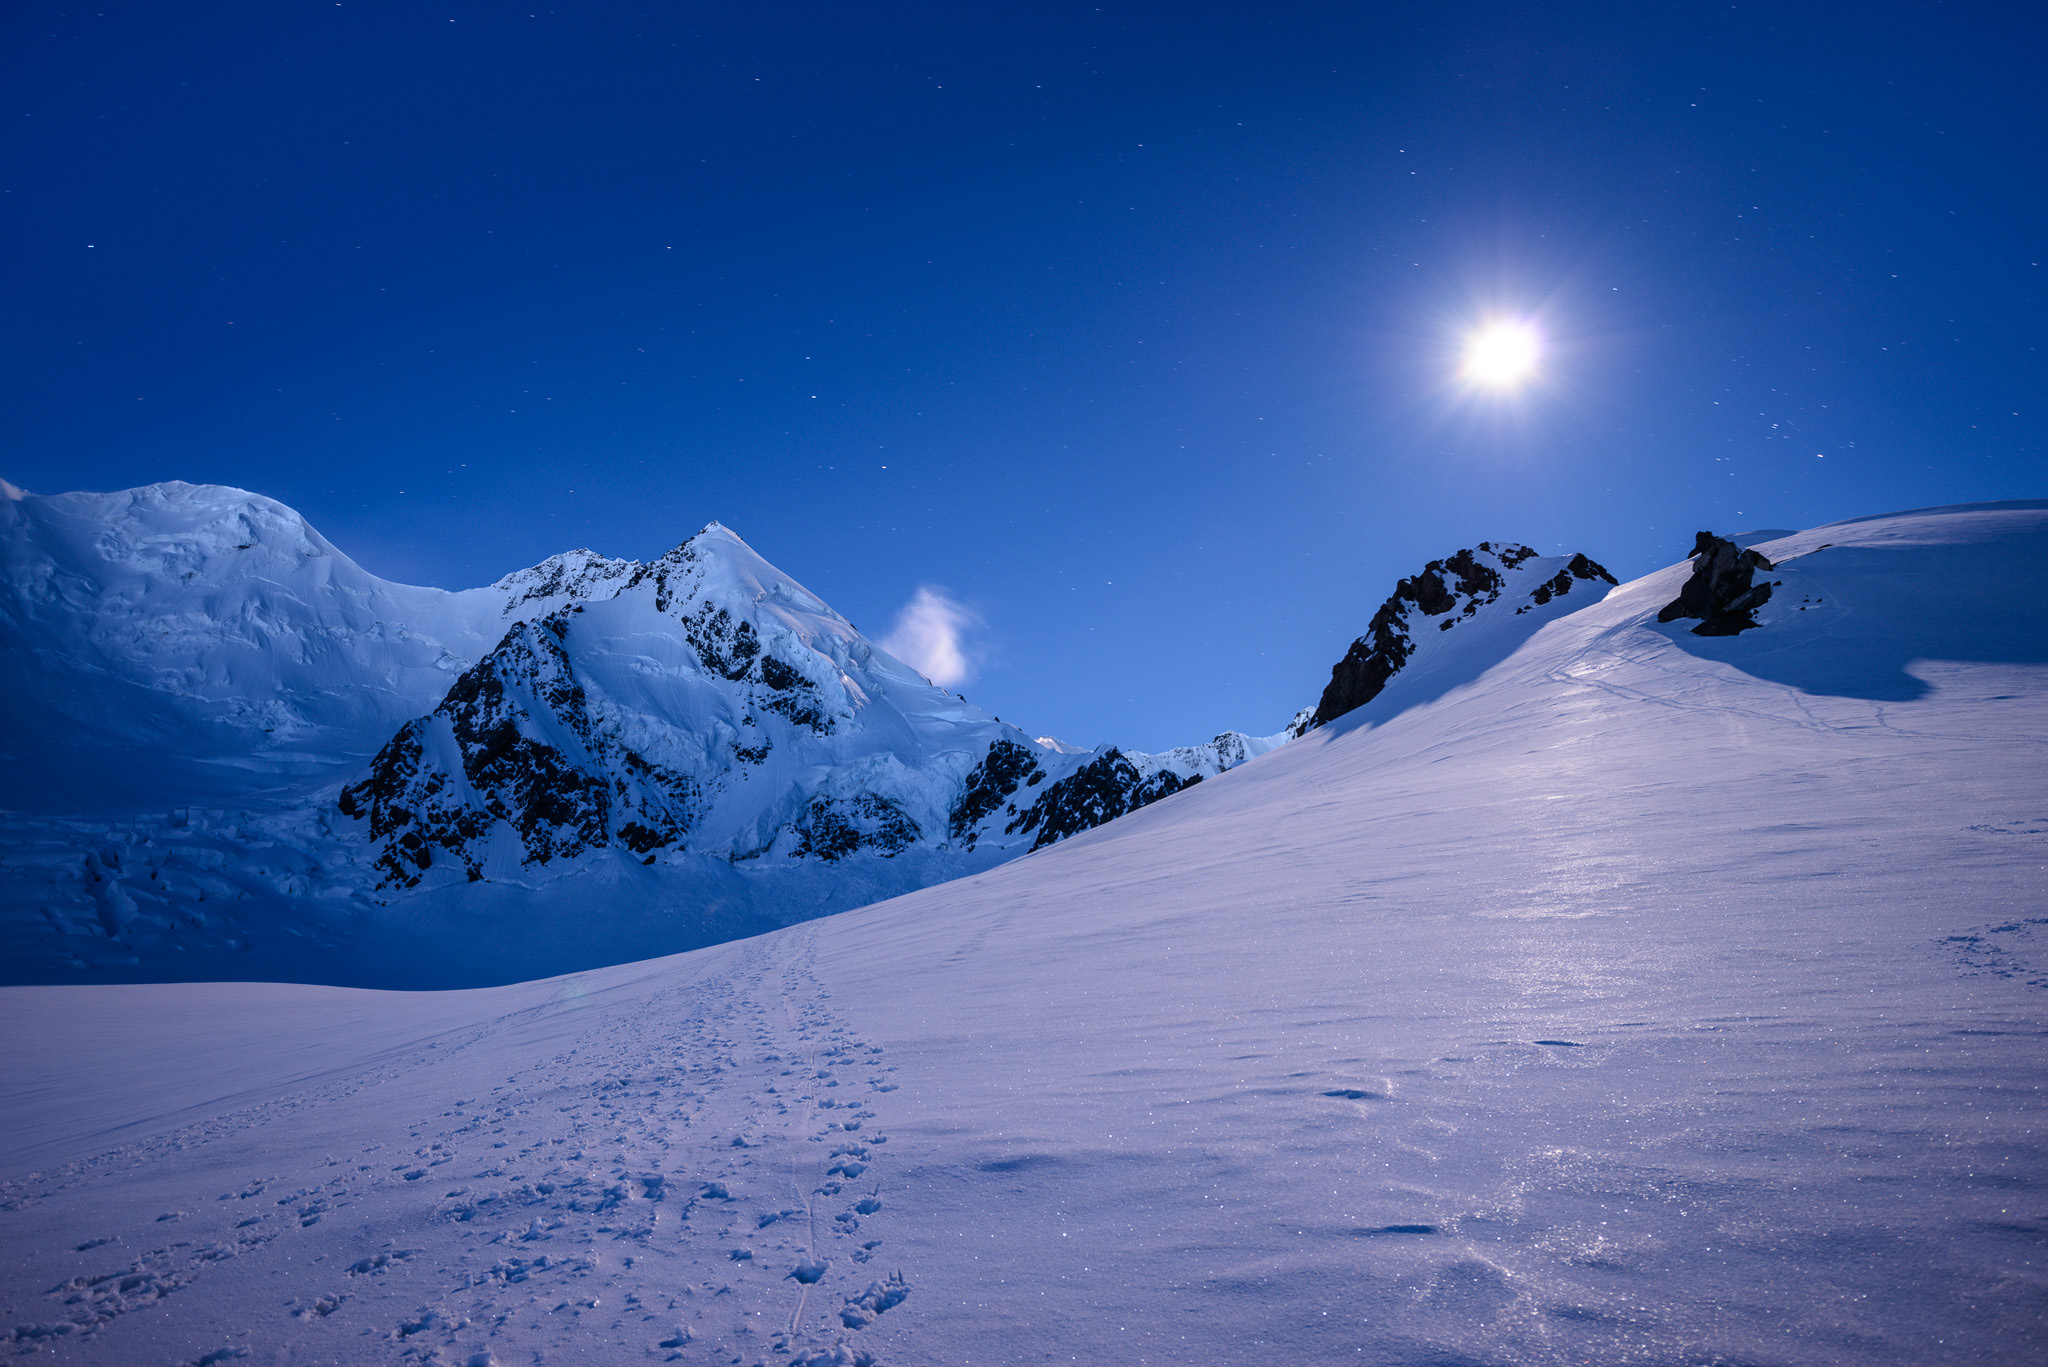
NIKON D800E + 14-24mm f/2.8 @ 24mm, ISO 100, 30 seconds, f/4.0
2) Lights in the Distance
Just as the moon provides a bright point in the sky for focusing, so do buildings or other distant lights in the background.
This won’t be the case everywhere. In fact, in places with the darkest skies (and, comparatively, the brightest stars), it is unlikely that there will be a lot of buildings or distant lights on the horizon. However, if there are, make use of them!
It’s not just buildings that count. If there’s a distant road with car headlights, it can make a great subject for focusing. Often, even if there isn’t a moon, I find that I can focus on a faraway source of light for exactly the same effect.
Of course, no matter how you focus in the distance — even if the moon is bright while you’re taking pictures — be sure to review your photos at full magnification to see if the stars are sharp. Usually, a good guide is to see whether or not the stars in the center of your image have a green or magenta fringe around them. If there is a visible color fringe, even a slight one, your focus is at least somewhat incorrect. (If the fringe is green, focus slightly more in the distance. If the fringe is magenta, focus slightly closer.)
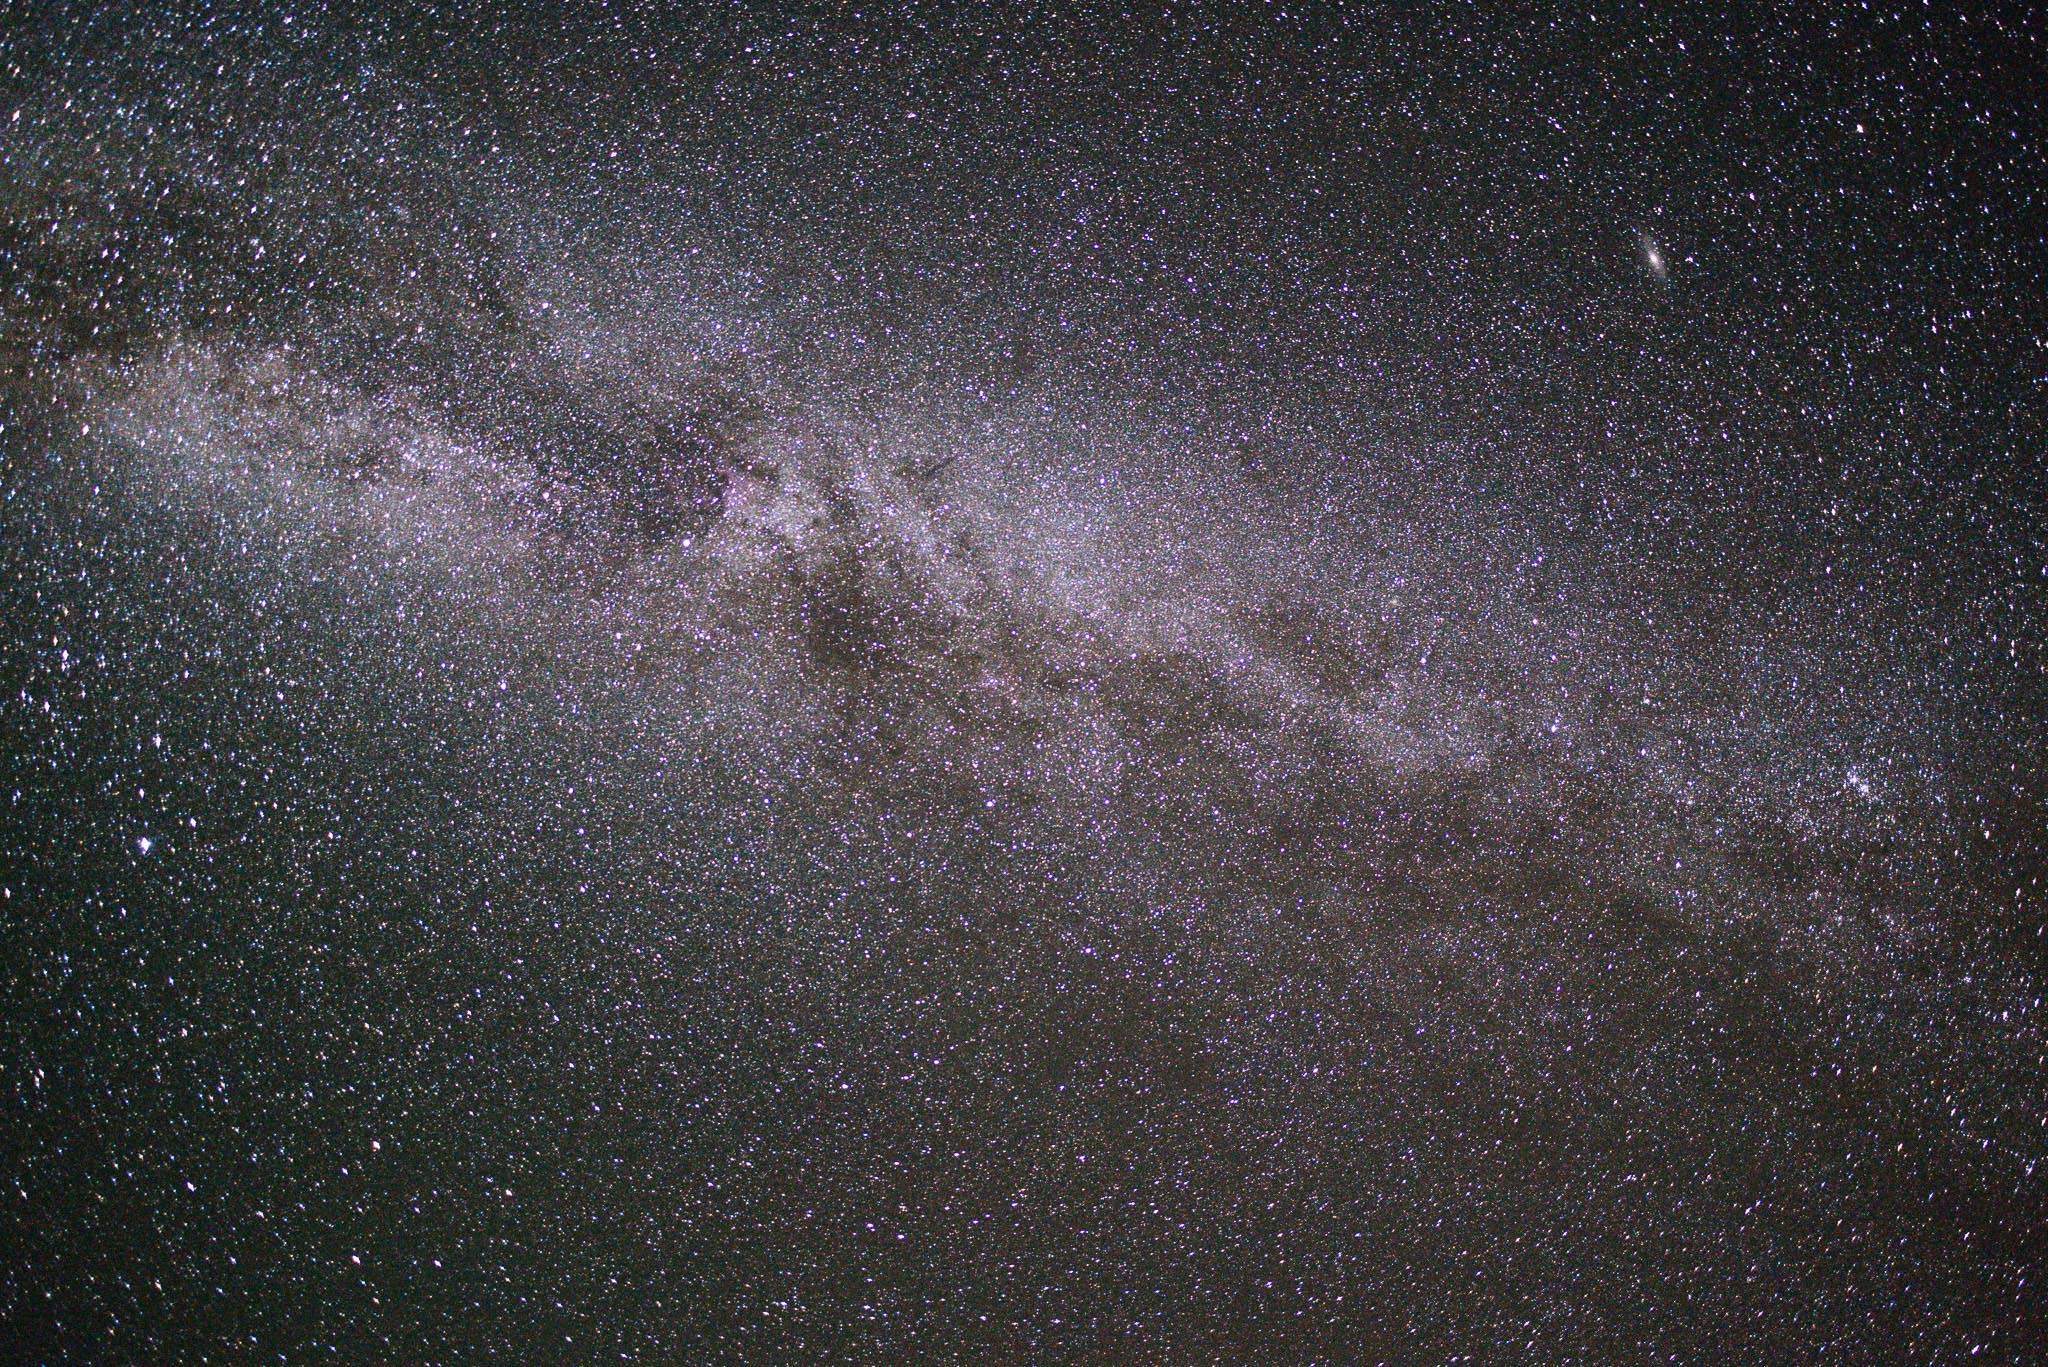
This image is focused a bit too far. Notice how all the stars have a magenta tint around them — that indicates I missed focus.
3) Using a Flashlight
If the moon isn’t out, and if there aren’t any lights in the distance, focusing will be trickier. However, there are still some ways to get a good shot.
My personal favorite is to use a bright flashlight and shine it on any object in the distance. The farther the better — stars are so far away that you’ll want to focus on something that is, effectively, at infinity. (In practice, with a wide-angle lens, something that’s 25 feet or 7.5 meters away should be good; it depends upon your aperture and focal length, though, so you should test this yourself.)
You’ll need a bright flashlight for this. Your phone isn’t nearly good enough, unfortunately, but there are some pocket-sized flashlights that provide enough light.
If all you have is a phone, though, you aren’t necessarily out of luck. Do you have a friend with you? Get them to take your phone, run a bit into the distance (again, 25 feet or so typically works), and then shine the light on their hand or face. Now, focus on them! It’s fine if you need to change your composition in order to do so, since you can always switch back when you’re done.
Even if you’re taking pictures solo, and all you have is your phone’s flashlight, you may be able to prop it up somewhere in the distance and shine it on an object for focusing. You’ll have to see; this strongly depends upon the landscape.
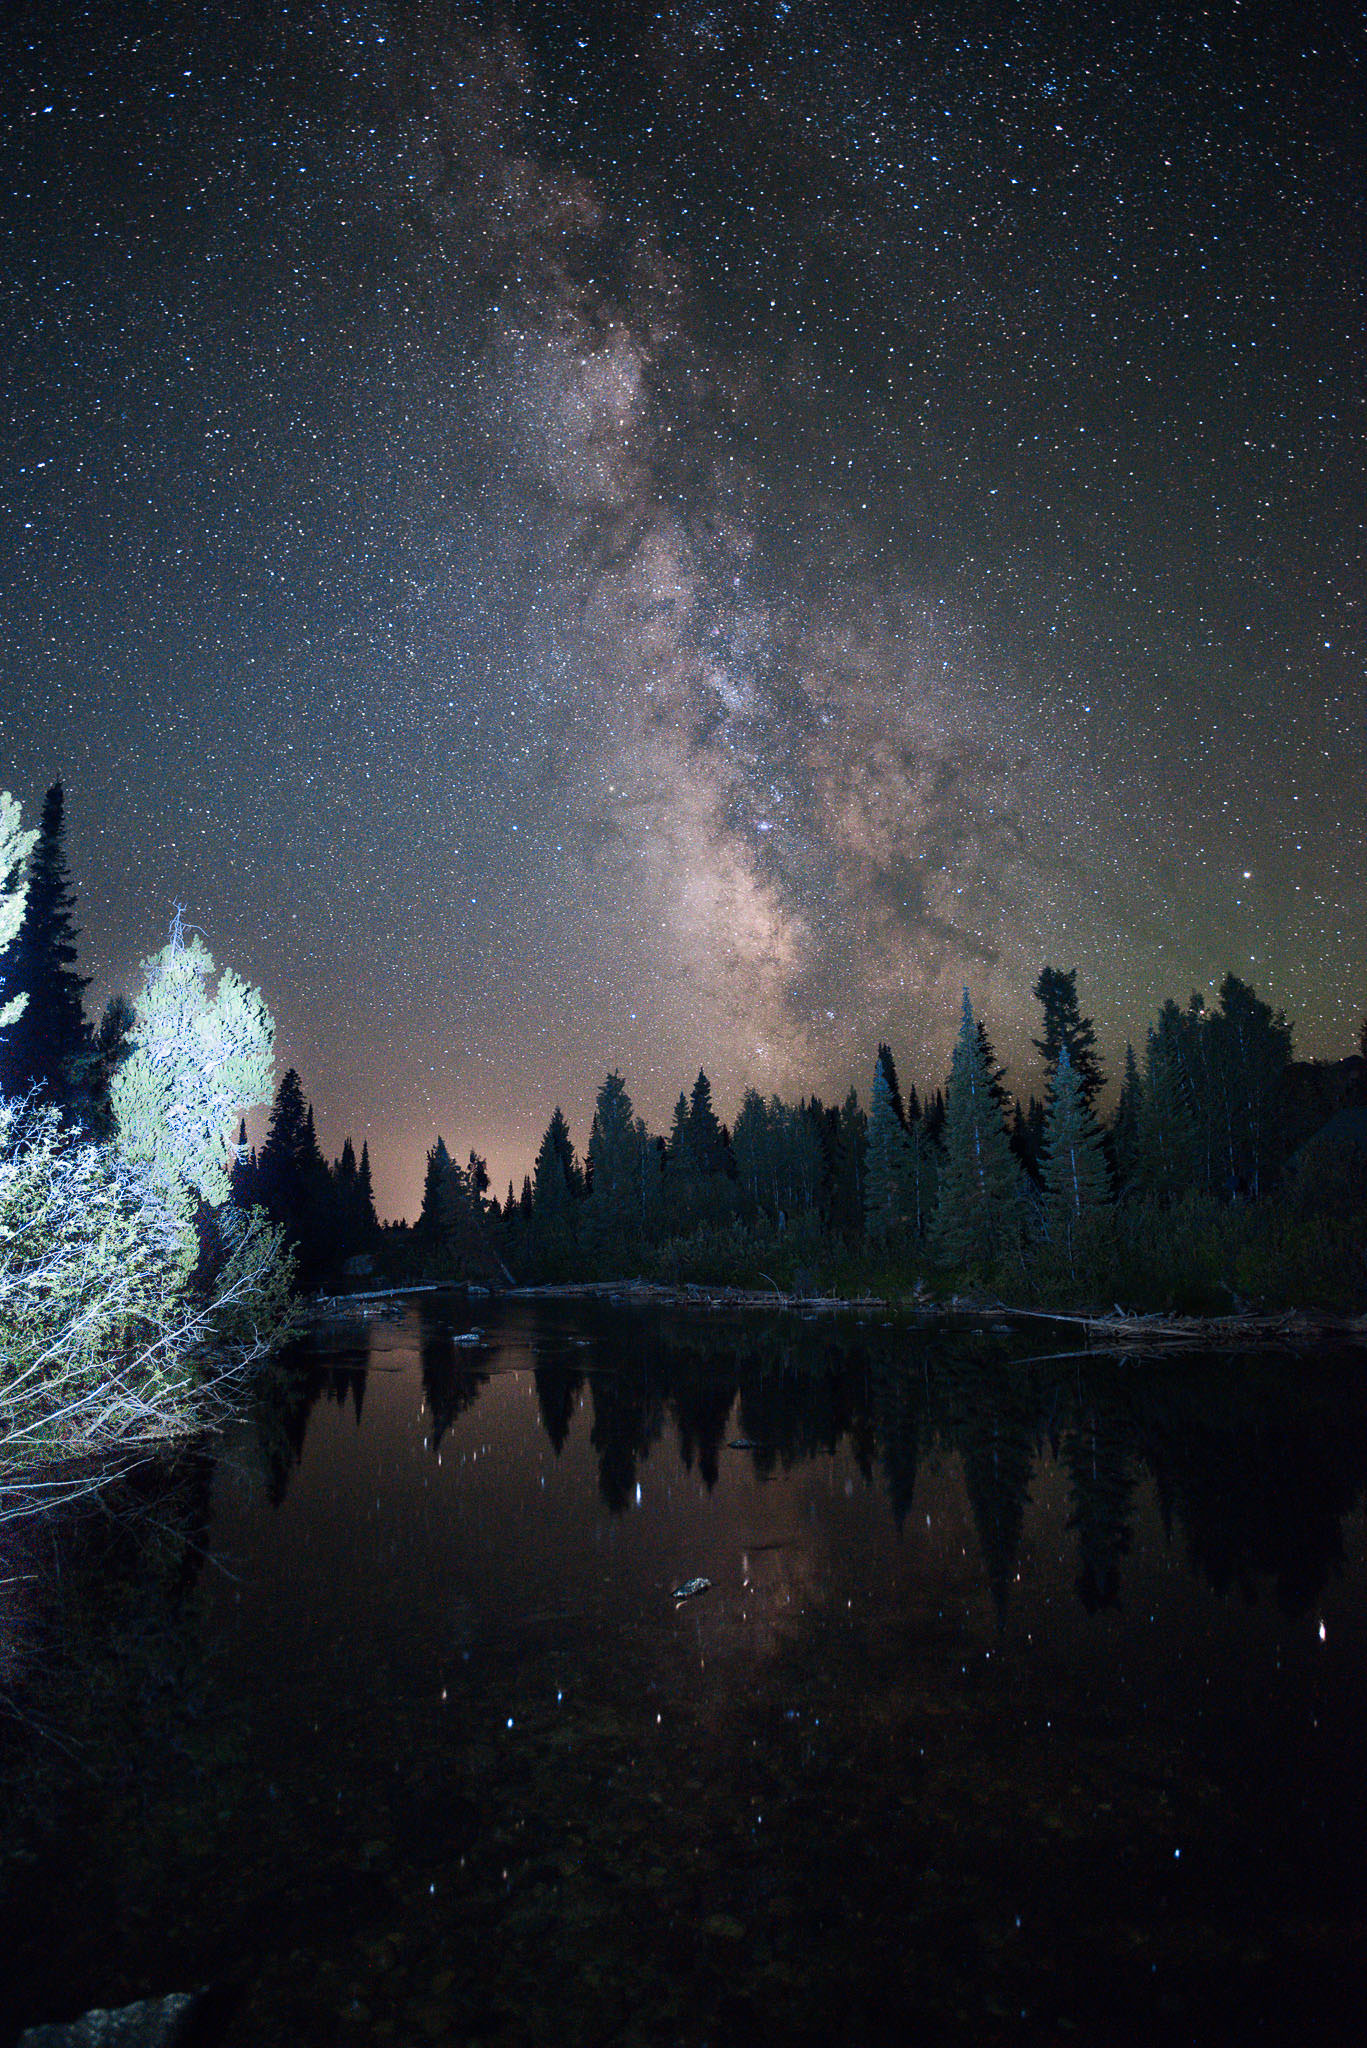
Here, I focused on the tree, which was fairly far away, by shining a bright flashlight. At a focal length of 20mm and an aperture of f/2.2, both the tree and the stars are sharp, as you can tell by the lack of color fringing. (Obviously, this isn’t my final photo of the scene, since the brightness of the tree is incredibly distracting.)
4) Finding Bright Stars
If worse comes to worst, you’ll always be able to use the stars as a focusing aid.
Bright stars (or planets such as Venus) can be just barely bright enough to focus on successfully, and you could get some very sharp results.
Part of this depends upon your lens. Wide-aperture lenses will make everything brighter, and medium or telephoto lenses will magnify the size of any stars in your image. With lenses like that, focusing on the stars is easiest. However, it can be done with most any equipment — it just takes some work.
If you want to use this technique, there are a few steps to go through. First, take a moment to search for the brightest star or planet in the sky. Once you’ve found it, compose it in the center of your image and zoom into full magnification in live view. Then, use manual focus. To tell if the star is in focus, pay attention to its size — when the star is as small as possible, it will be in focus.
Also, you can use your lens’s longitudinal chromatic aberration to your advantage. This is the effect I described earlier — out-of-focus regions of your image take on a green or magenta tint. By zooming into live view at full magnification, you can move your lens’s focus ring slowly forwards and backwards, paying attention to the colors of the stars. When the star doesn’t have an obvious tint, it is likely to be in focus.
However, as hard as you try, it isn’t always possible to focus accurately on a bright star. There are a couple things you can do to combat this uncertainty.
First, an interesting product on the market is the “SharpStar2,” a filter that intentionally adds a diffraction pattern to stars (or other bright points of light in your photo). As the star moves in and out of focus, this pattern changes shape; you can focus on the star by aligning the diffraction pattern perfectly. We aren’t affiliated with Lonely Speck, and I’ve never tried the SharpStar myself, but I know of some photographers who use one with success. If you do a lot of nighttime photography and have a lens that accepts filters, you might want to check it out.
Second, no matter what technique you use, it’s a good idea to take some test photos to ensure that you’re doing everything right. However, at night, a test photo can be dozens of seconds long — it may be more time than it’s worth. So, what do you do?
Simply use a very high ISO and take much shorter photos. These aren’t photos you’ll actually keep later; they’re purely to test focus quickly. I often shoot at ISO 12,800 or ISO 25,600 with a five-second exposure purely to make sure that my focus is accurate. This is especially important if the brightest object in the image is just a star, and you don’t have something like the moon to focus on reliably. Or, if you have an older camera with poor live view, you’ll especially want to rely on this technique.
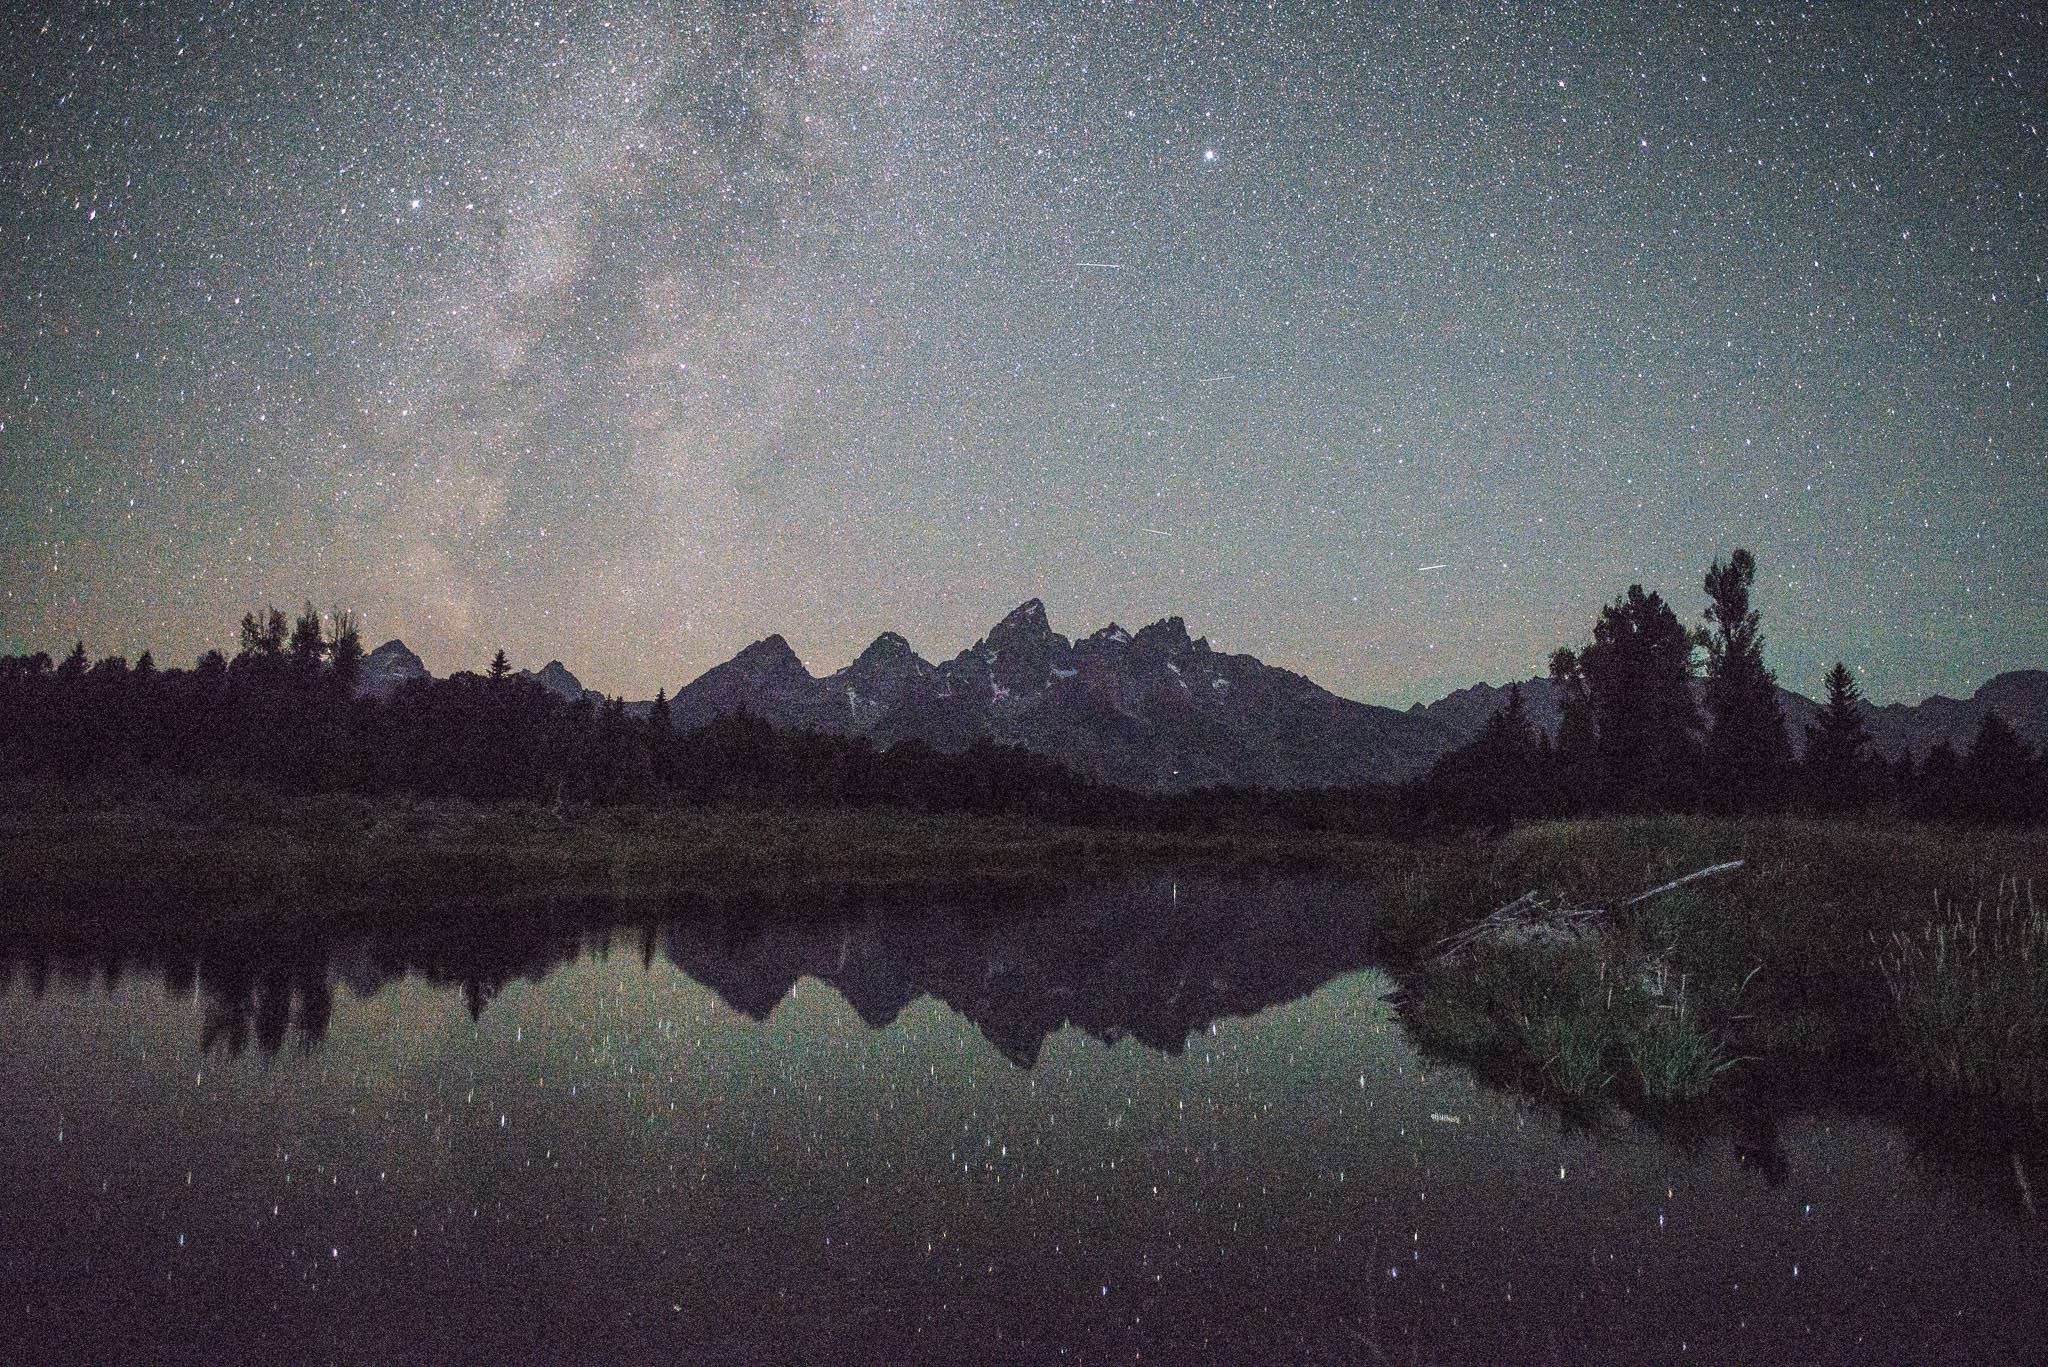
This image was shot at ISO 12,800 and a six-second exposure. My focus is pretty good, but it’s not perfect. Again, note the (somewhat fainter) magenta tint. Since this exposure was so quick, it only took a few seconds to realize that I had to change my focus, rather than a full-length 20 or 25 second exposure.
5) Infinity Focus on Your Lens?
Many lenses have a focusing scale with a little infinity symbol to help you focus.
At night, this seems like it would be incredibly useful — after all, as I mentioned earlier, you’ll only capture sharp stars if your lens is focused at infinity (or close enough not to tell the difference).
Unfortunately, there’s a problem with the infinity symbol on your focusing scale: often, it won’t be accurate at all. With my personal copy of the Nikon 20mm f/1.8, for example, the actual point of infinity focus occurs when the focusing ring is turned noticeably past the center of the infinity symbol on my focusing scale; on zoom lenses, the infinity point may even change as you zoom in and out. All lenses will be different. At a minimum, though, you’ll need to test to see if you can use yours accurately before putting it into practice. I have yet to see someone who solely uses this method to acquire focus (although it can be a good starting point when you zoom into live view and focus manually on a star).
What about lenses with a hard-stop point at infinity? These tend to be better, but, again, you’ll want to test and make sure that yours actually works before using it for something important. Lenses are all built with different manufacturing tolerances, and I have seen some lenses in the past where the hard-stop “infinity” point isn’t perfectly accurate. For very wide lenses (and those with smaller maximum apertures), you’ll have more tolerance on this front. But if you’re using something like a 24mm f/1.4 or 35mm f/1.4 with a hard stop at infinity, I would be very cautious using it in the field without testing ahead of time.
Finally, once you do successfully lock focus, it’s a good idea to secure your focusing ring with gaffer’s tape, which typically doesn’t leave residue on your lens. That way, your focus will stay locked in place all night. (Though it is always a good idea to check every dozen shots that your focus is still accurate.)
6) Conclusion
Focusing on stars at night isn’t an easy task, but it can be done. Always carry a flashlight; if the moon (or other distant lights) aren’t out, you’ll still have a way to focus reliably in the distance. Worst case scenario, just focus on the stars themselves — make sure to find a bright one, and take some test photos to ensure that your focus is accurate.
Nighttime photography is always tricky, but it’s worth the effort. Landscapes look spectacular under the stars, and I’ve taken many of my favorite photos while most people are asleep. More than anything, experiment! Focusing at night is a skill that can take some time to learn. Go out, find a beautiful scene, and take some photos for yourself.
The post How to Focus for Star Photography appeared first on Photography Life.


