
As my son entered preschool, I noticed that he was becoming increasingly interested in my camera and taking his own photographs.
Whether it is our camera phone or DSLR, children naturally want to imitate us. During this period, I tried to find ways to nurture his interests but also noticed his preschool cohort was exploring photography in a similar way.
Finding ways to encourage our kids to express themselves through photography can be a fun, engaging way to share what we love doing. Our preschool model encourages parents to share their interests so I proposed creating an interactive photo booth for the children.
Although I put together a photo booth for the preschool crowd, the formula could easily be adapted for a birthday party or an afternoon activity with friends. With a few adaptations, you could make the setup better suited for your intended audience.
The Setup
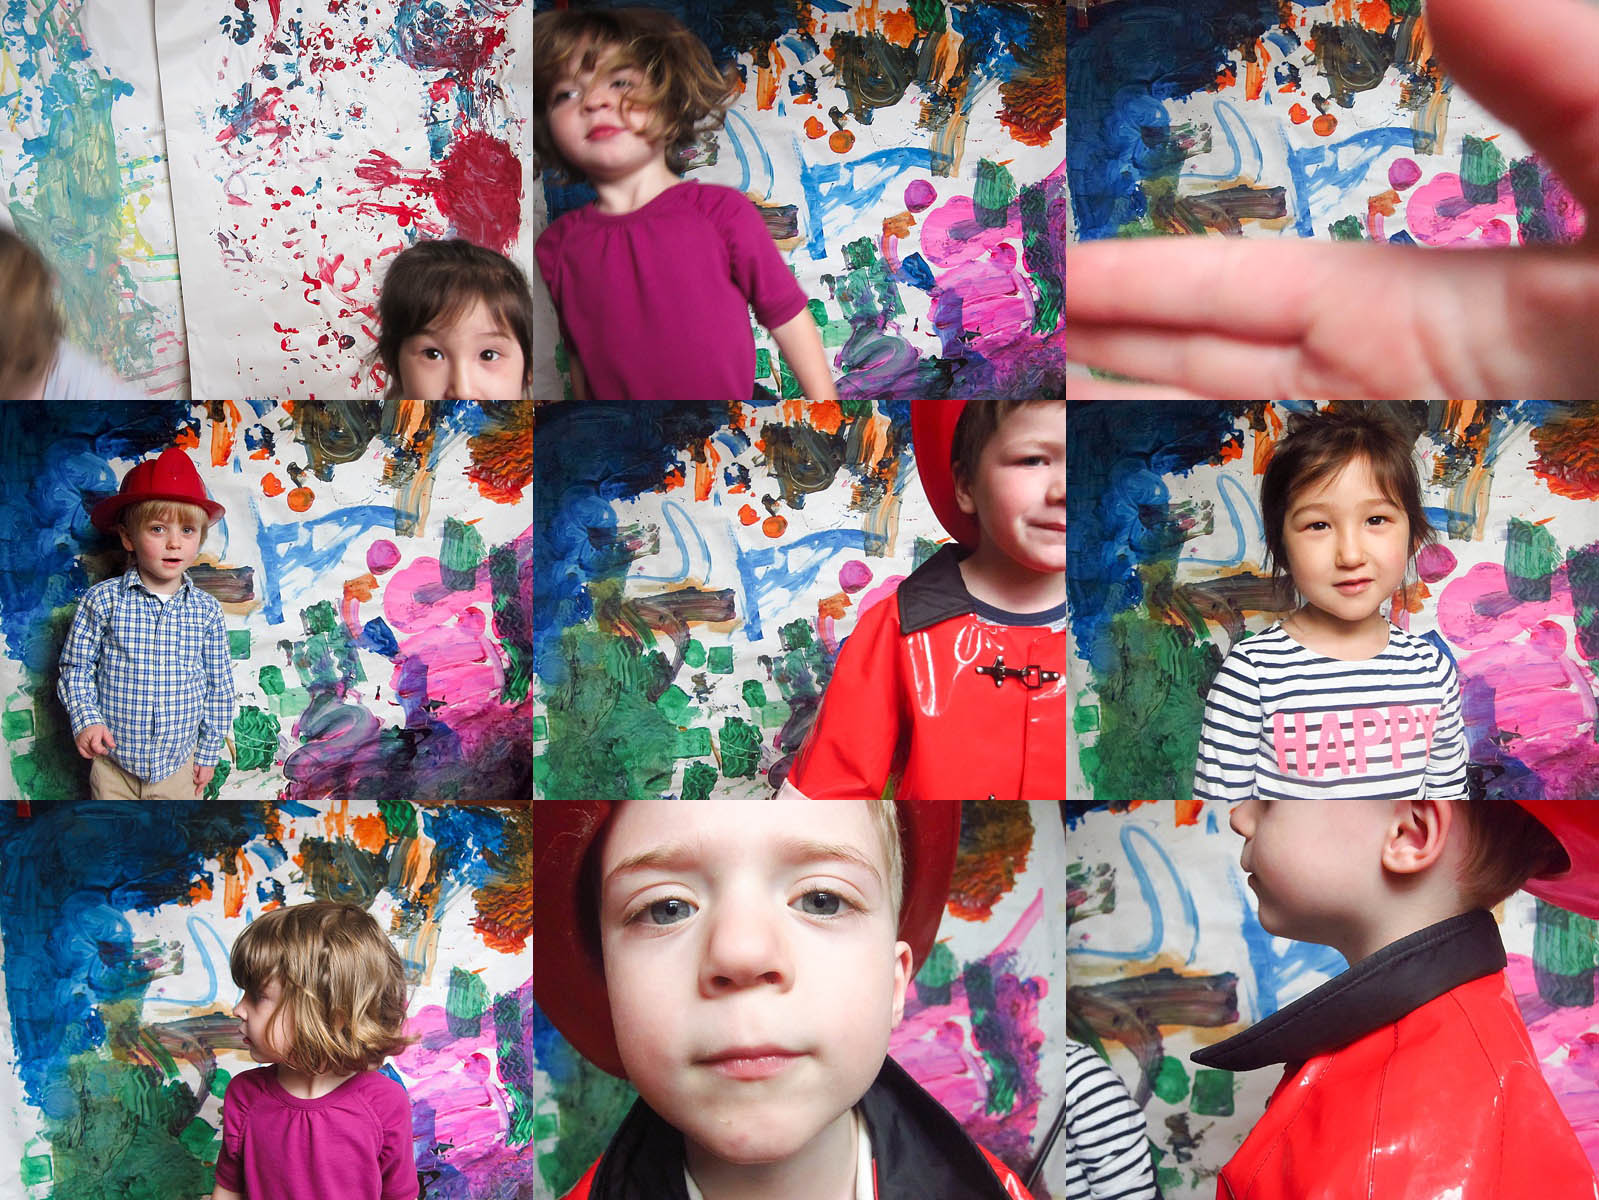
The setup was very simple: backdrop, natural light from a window and a camera. In the photo below, you can see that there was a small window. Even though there wasn’t a lot of light in the room, this one window was all I needed.
For stability, I set up the camera on a tripod and then used tape on the floor to indicate where the kids should stand.

The kids took turns taking photographs of each other; however they were more interested in using the camera than actually being in the photos. I did my best to not intervene except to periodically check the camera settings and realign the camera angle.
The Supplies
Here are the supplies that I used; however, not all of them necessary and you can create your own modifications.
Backdrop: To keep the activity child-centered, I used artwork created by the children. There were large pieces of paper painted by them at school.
Backdrop stand: To hold the backdrop in the area I wanted, I brought in my stand but the paper could have been easily just taped to a wall or hung from the ceiling.
Tripod: I was worried about about the camera dropping so I elected to keep the camera on a tripod. Since the kids were so excited about using a real camera it helped keep the camera in one place and created a natural line for turn-taking.
Weights: Since I have a light-weight tripod, I hung weights inside a bag to give the tripod additional stability.
Camera: I decided to use an old point-n-shoot over a phone camera. Mainly I thought the kids would be excited to use an actual camera. Since many of the parents only use their phones, it would be a new experience for the kids.
Props: Initially, I thought props such as hats, glasses, and play dress up clothes would be needed but we quickly ditched these props. The kids didn’t need them. When I have done this activity with adults, I have found the opposite to be true. Adults seem to prefer having something silly to use and it makes them more likely to participate.


The Challenges
During the activity, the kids had a lot fun taking the photos so much that no one wanted to be in them; they only wanted to use the camera. There are two other notable challenges that I addressed the second time we did the activity in the class.
Set your settings: For ease of use, I put the camera in auto mode but I made a novice mistake, forgetting that in this mode that the camera would lower the shutter speed to make up for the low light conditions inside thus a lot of the photos were blurry.
The point-n-shoot I own allows me to set my shutter speed, aperture, and ISO so I made sure to use this feature resulting in sharper photos. Every so often I would double check the settings since the kids ended up changing them after pushing buttons.
Use a wide backdrop: Initially, I just taped two pieces of paper together but the backdrop wasn’t wide enough. The kids were not paying attention to what they were photographing so the classroom instead of the backdrop was in the final image. A wider backdrop allowed from a larger margin of error.

The Results
The first time I looked at the photos, I couldn’t help but laugh. There were extreme closeups, photographs of hands, blurry faces, etc. There were even a few happy accidents.
Ultimately, it wasn’t about the outcome but having a little fun.

The post How to easily create a photo booth for a kids event appeared first on Clickin Moms.


