
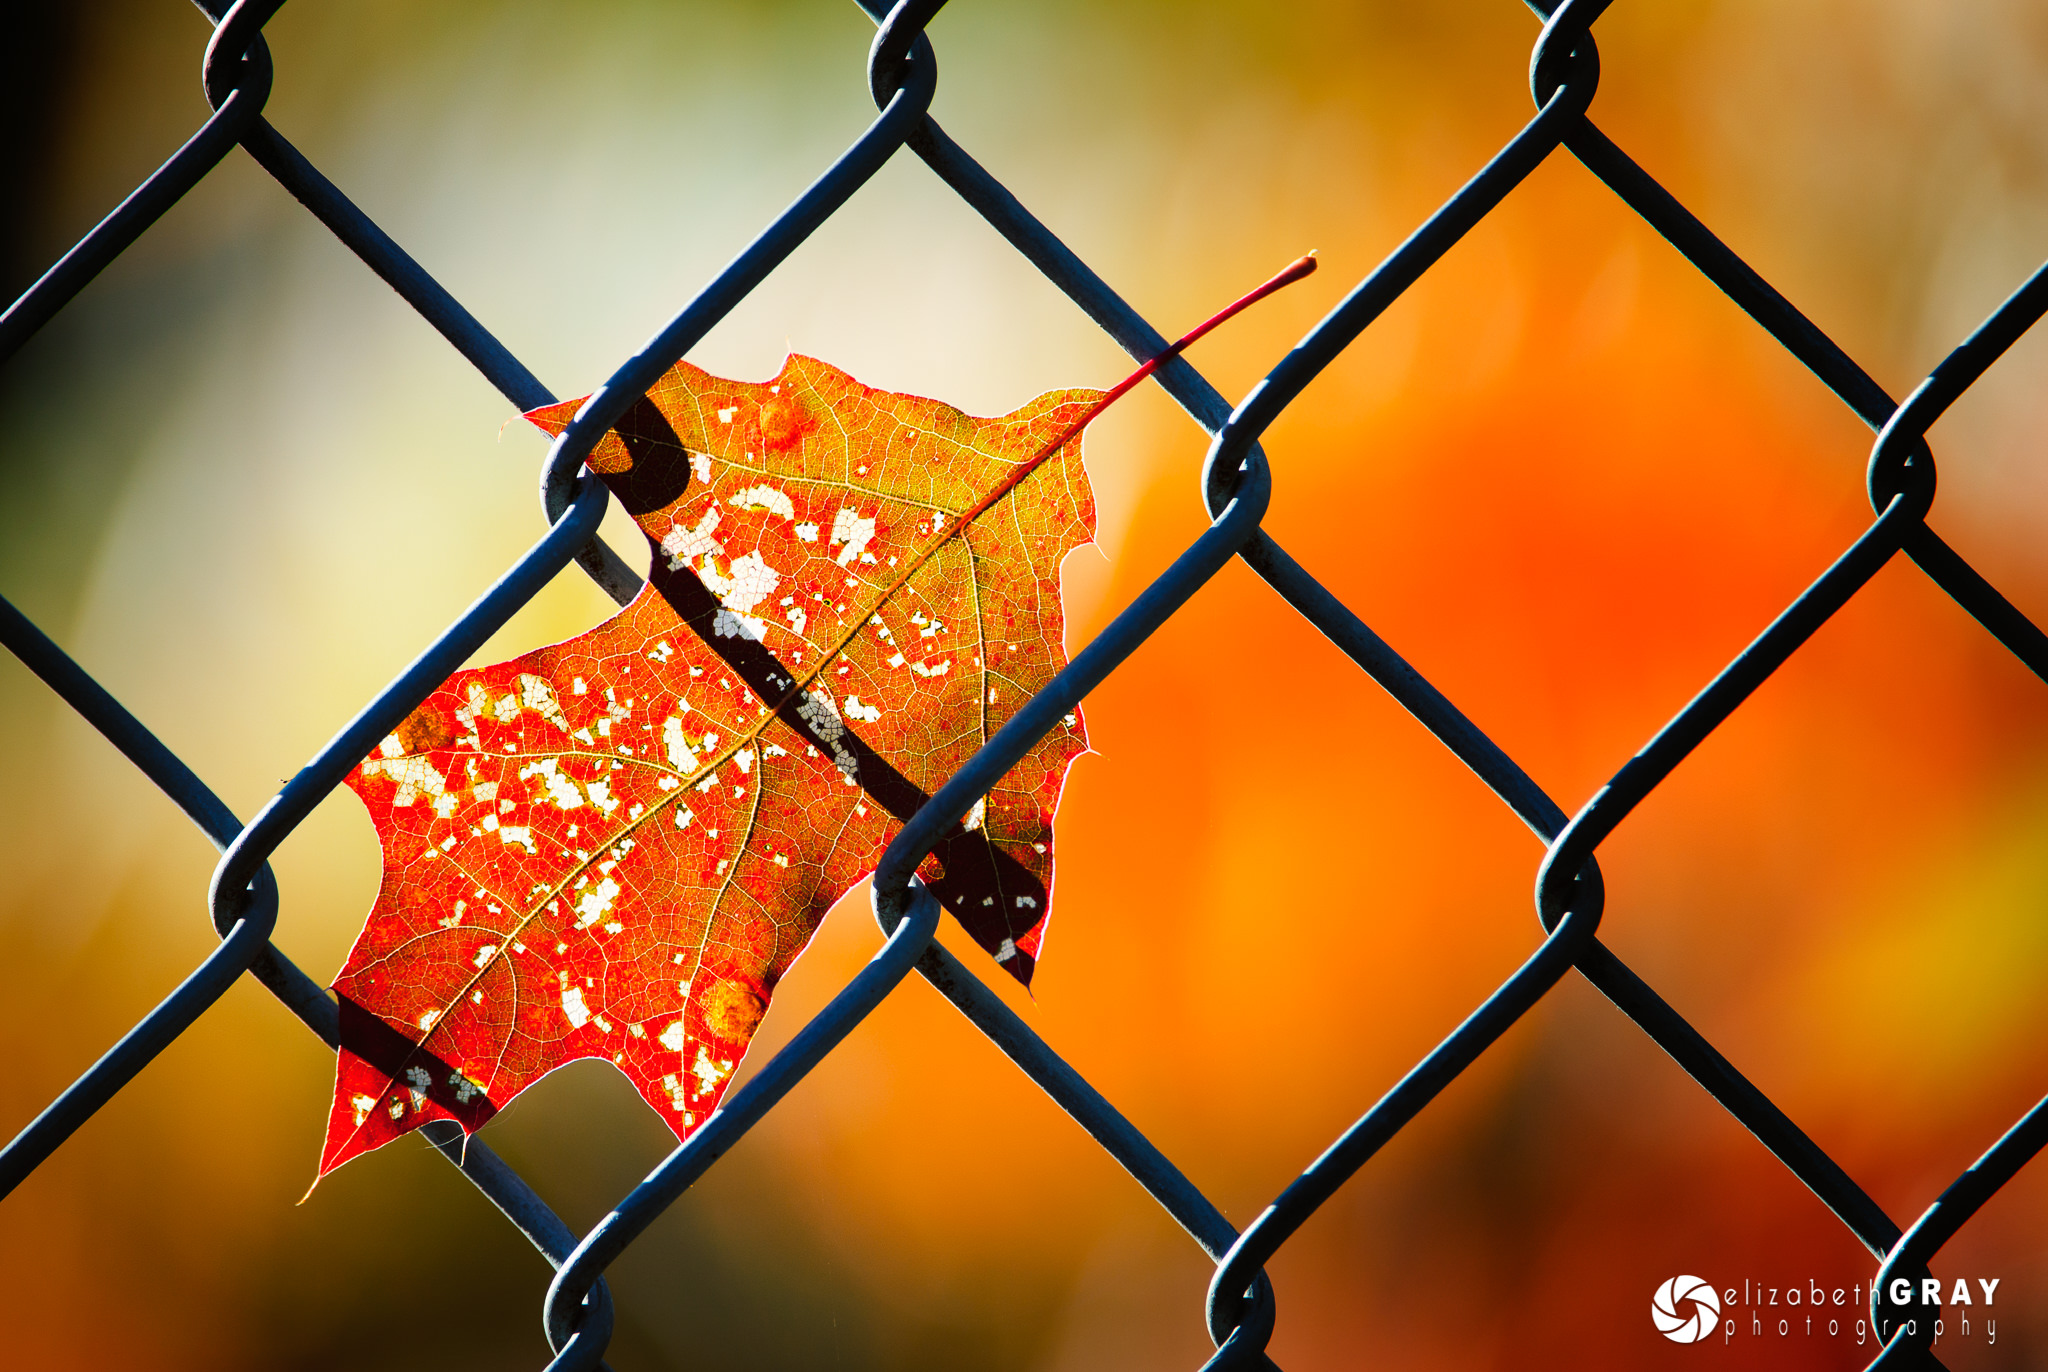
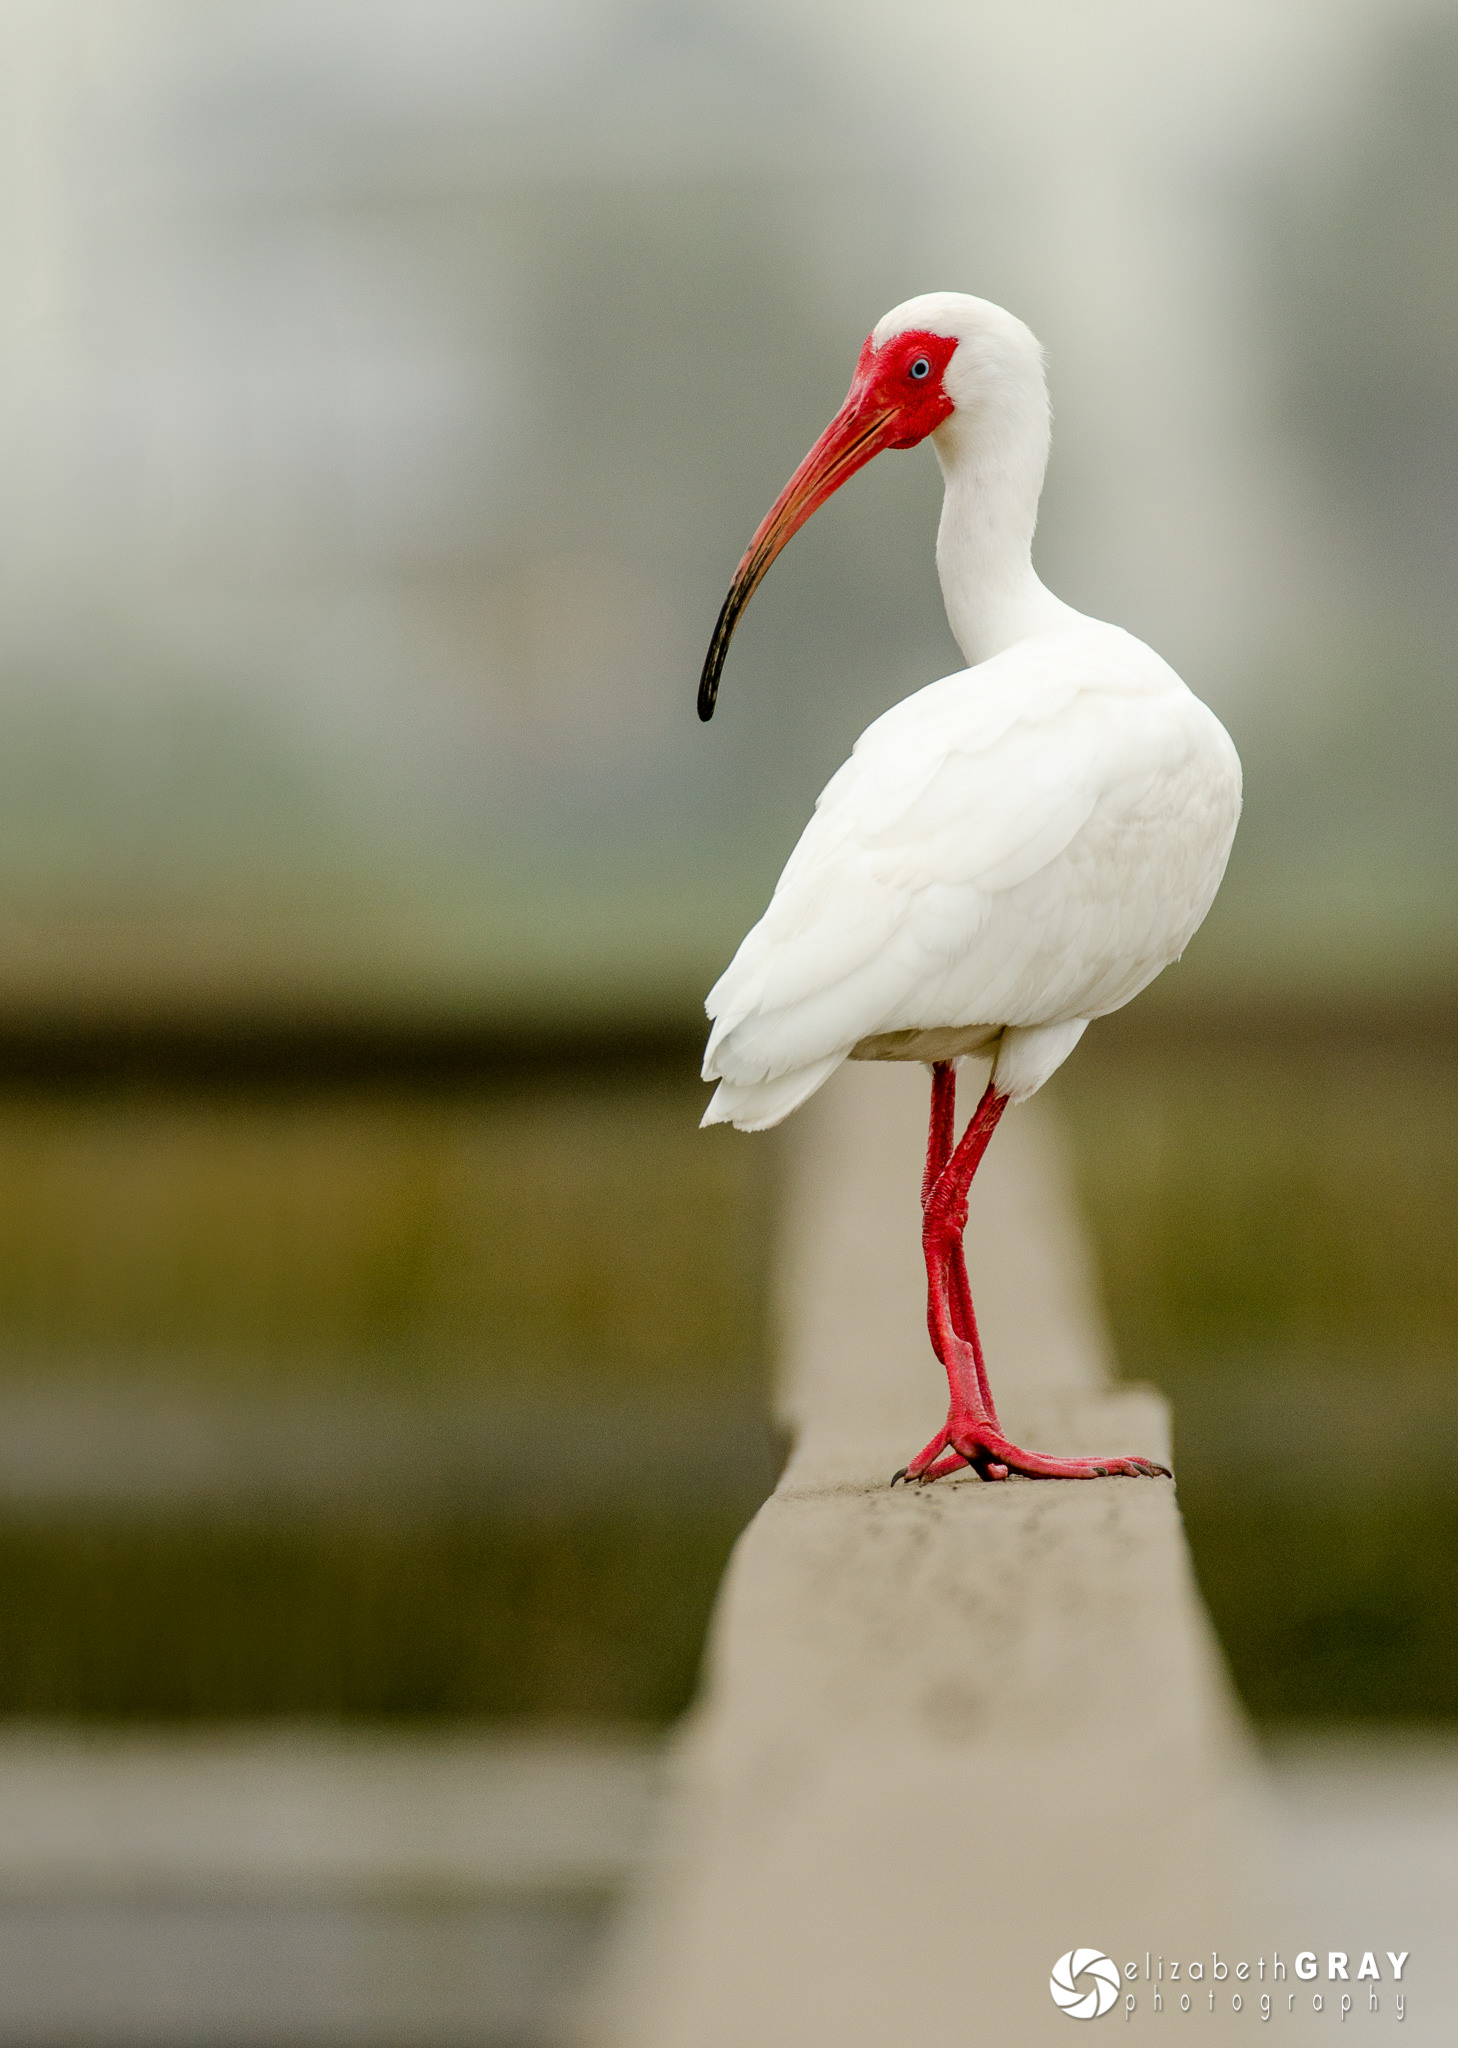
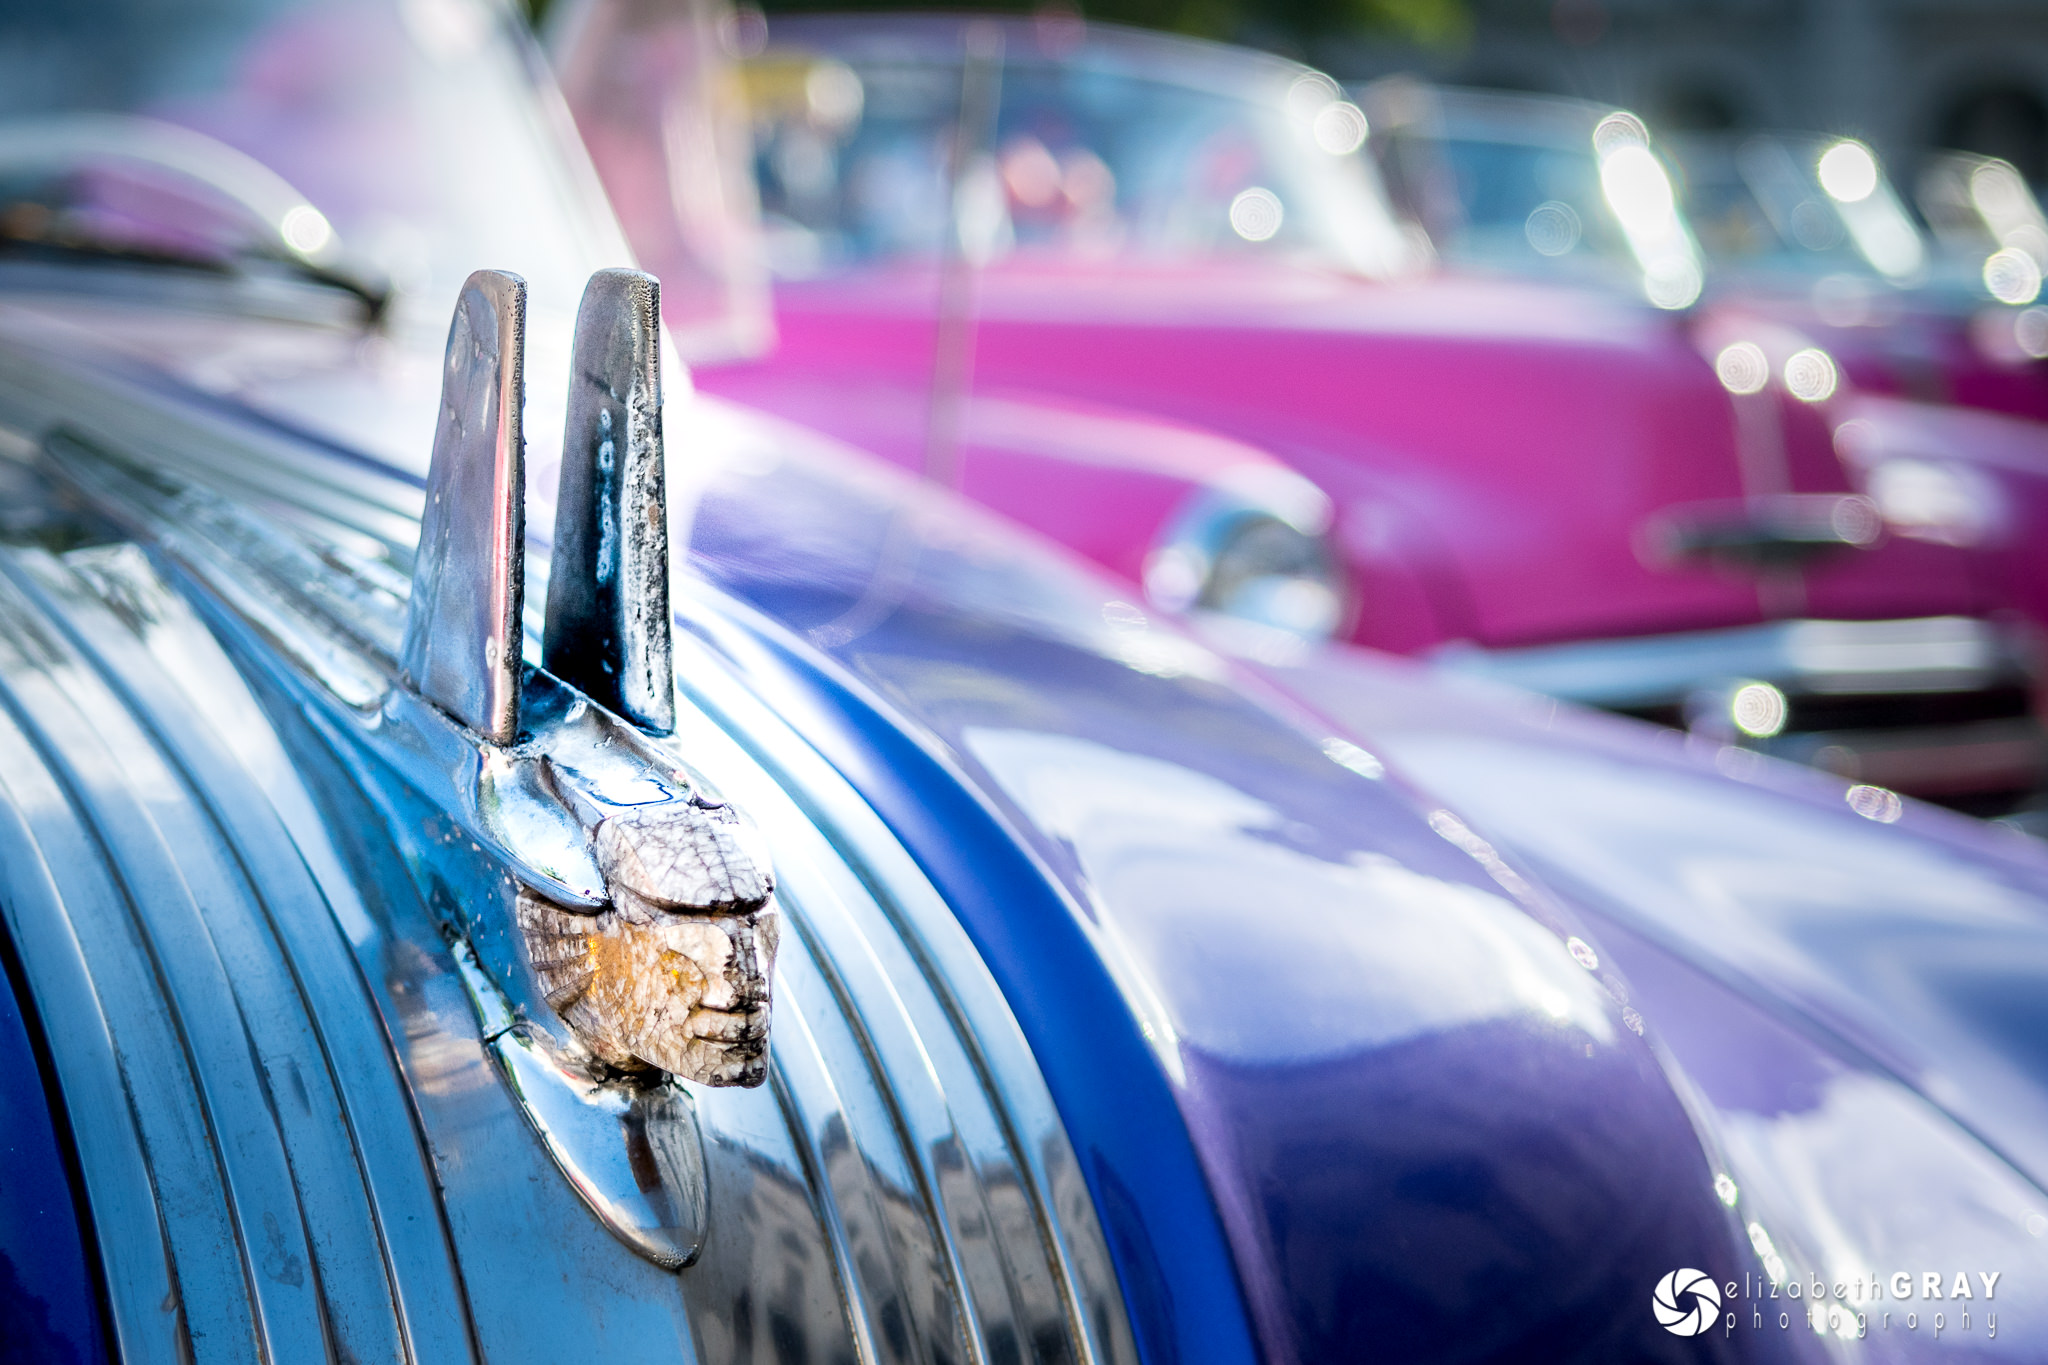
There are many combinations of aperture, shutter speed, and ISO that will correctly expose an image. With all those combinations, which one is the right one? If you leave your camera in full program mode, your camera will pick a combination for you. However, letting your camera have complete control is not why you bought an expensive DSLR or mirrorless camera! Learning how to adjust the settings and modes on your camera before you click the shutter will give you the upper hand. You will end up capturing images creatively, rather than by chance. Read on to find out how aperture, shutter speed, and ISO affect the look and feel of a photograph and how to choose the best camera settings to take creative control of your images.
1) Introduction
In my last article on the Exposure Triangle, I talked about what aperture, shutter speed, and ISO are and how they work together. Before I talk about how to choose a creative exposure, let’s discuss how aperture, shutter speed, and ISO visually affect the look of an image. For more technical information on aperture, shutter speed, and ISO, take a look at Nasim’s excellent “Beginner’s Guide” articles on the site.
2) Aperture
Out of the three exposure variables, aperture is the one that controls the depth of field in an image. That is, how much of the scene in front of, and behind what you focused on is acceptably sharp. The wider the aperture, the narrower the depth of field and the less of the scene that is in focus. A narrow depth of field works well to isolate a subject. Portrait photographers often use this technique to separate their subject from a busy background.
In these first two images, I was able to isolate the main subjects using a wide aperture (relative to the focal length of the lens). Notice how the backgrounds are completely blurred out.
NIKON D7000 + 200-400mm f/4 @ 400mm, ISO 200, 1/400, f/5.0
NIKON D7000 + 200-400mm f/4 @ 460mm, ISO 400, 1/1000, f/6.3
In these next three images, I used selective focus to draw your eye to the subject while still leaving some details in the backgrounds. This helps to give a sense of context to the images.
NIKON D500 + 17-55mm f/2.8 @ 32mm, ISO 200, 1/2500, f/3.2

NIKON D500 + 17-55mm f/2.8 @ 50mm, ISO 500, 1/200, f/3.2
X100T @ 23mm, ISO 500, 1/100, f/2.0
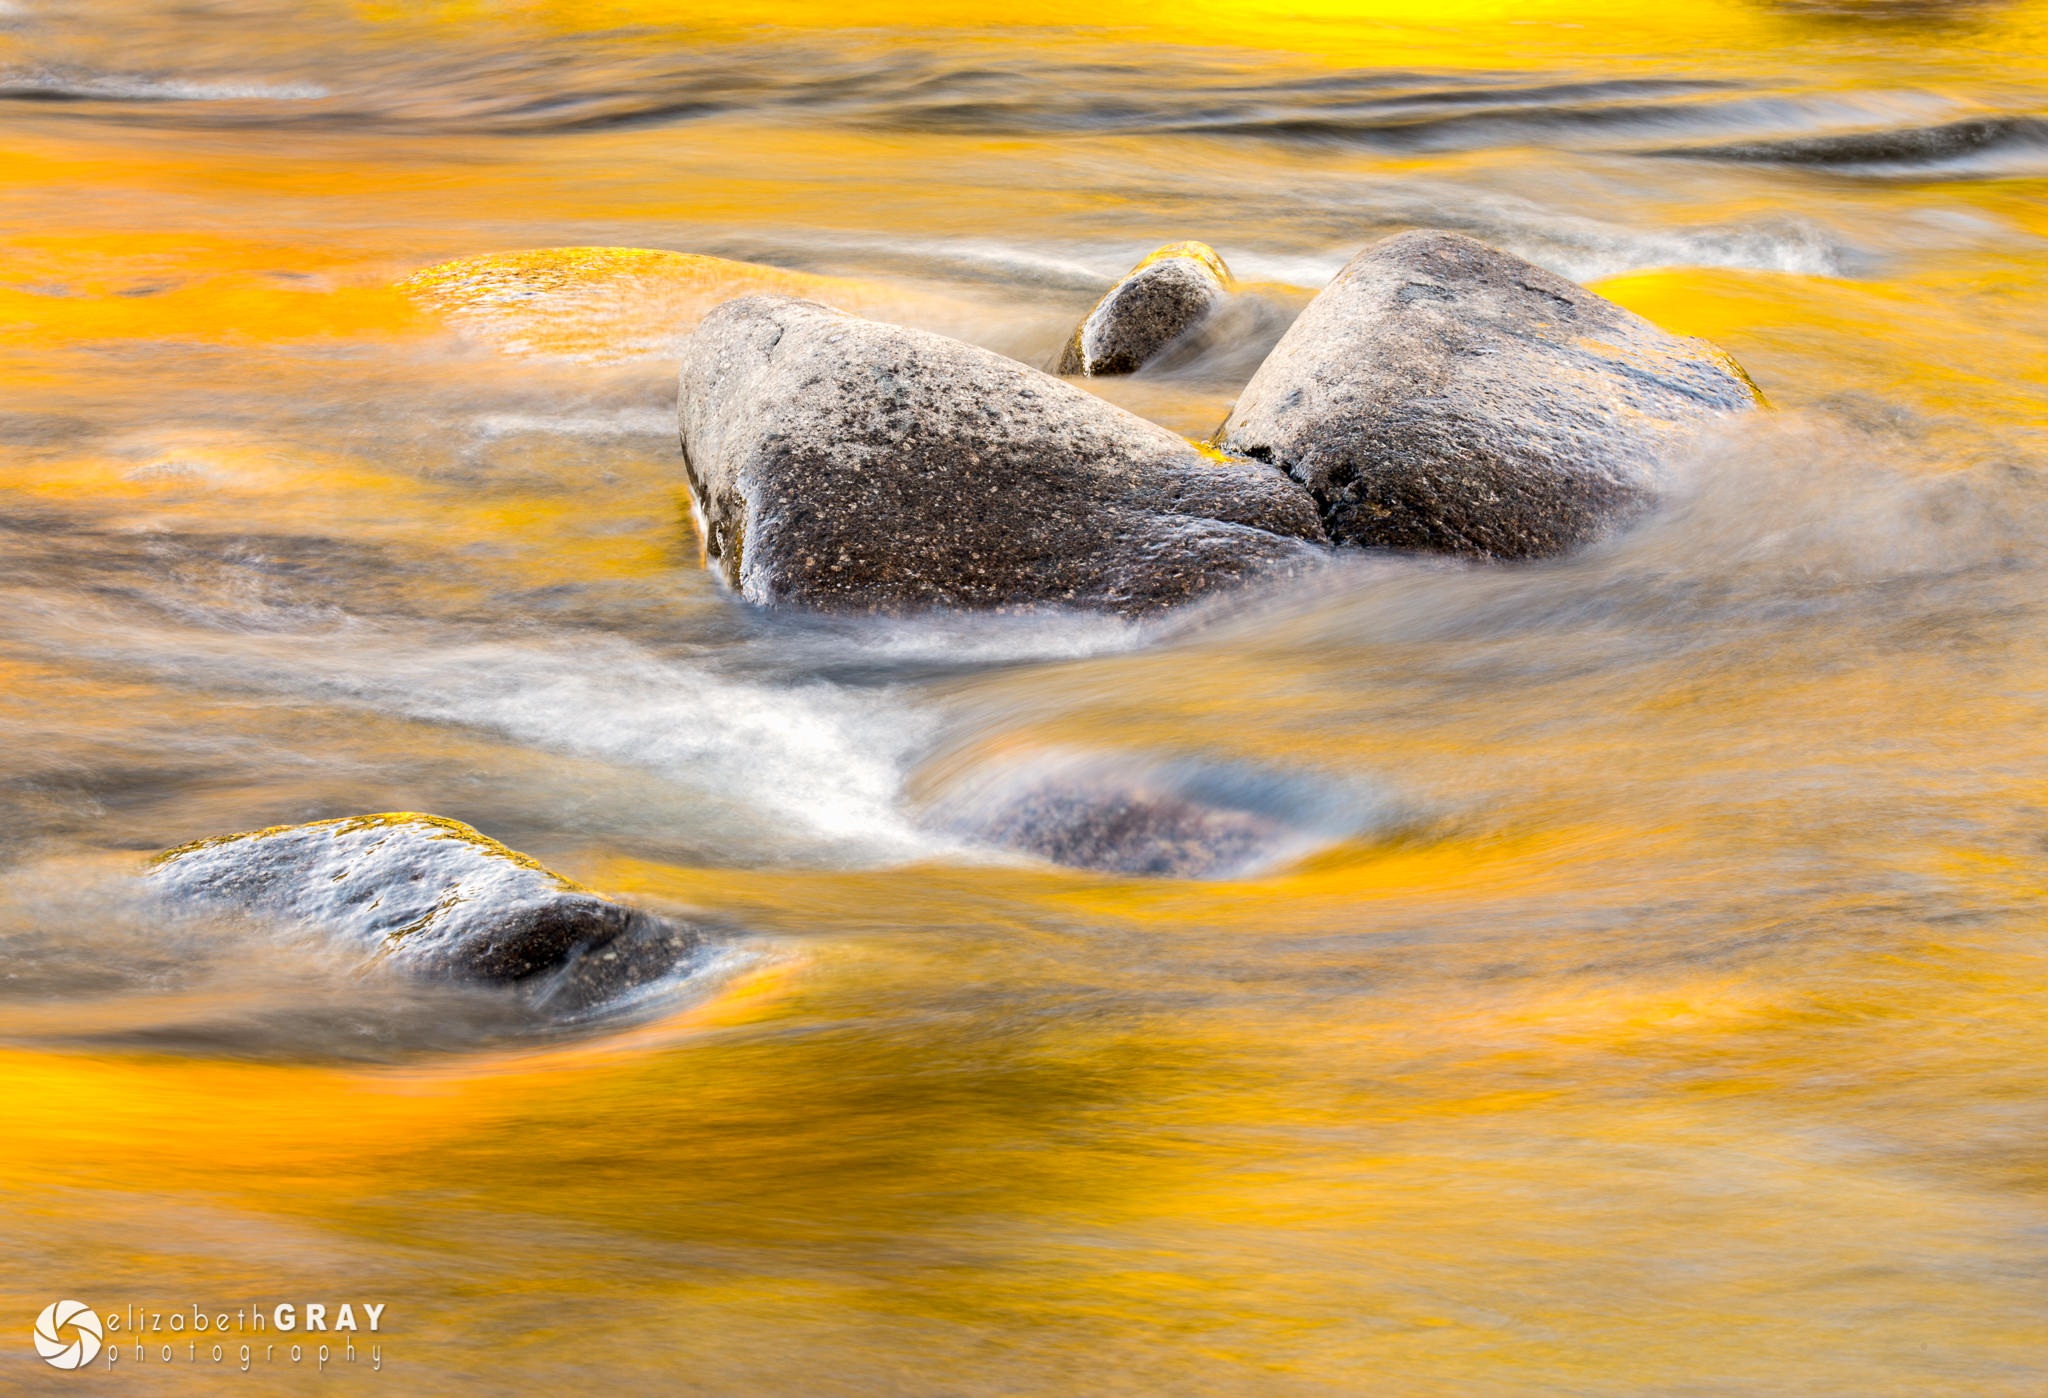
A narrow aperture will give you a much greater depth of field. Landscape photographers often use a small aperture to create images that are in focus from foreground to background.
Here are some examples. Notice how objects in the foreground are sharp as well as objects in the distance.

NIKON D7100 + 70-200mm f/2.8 @ 70mm, ISO 200, 1/250, f/11.0
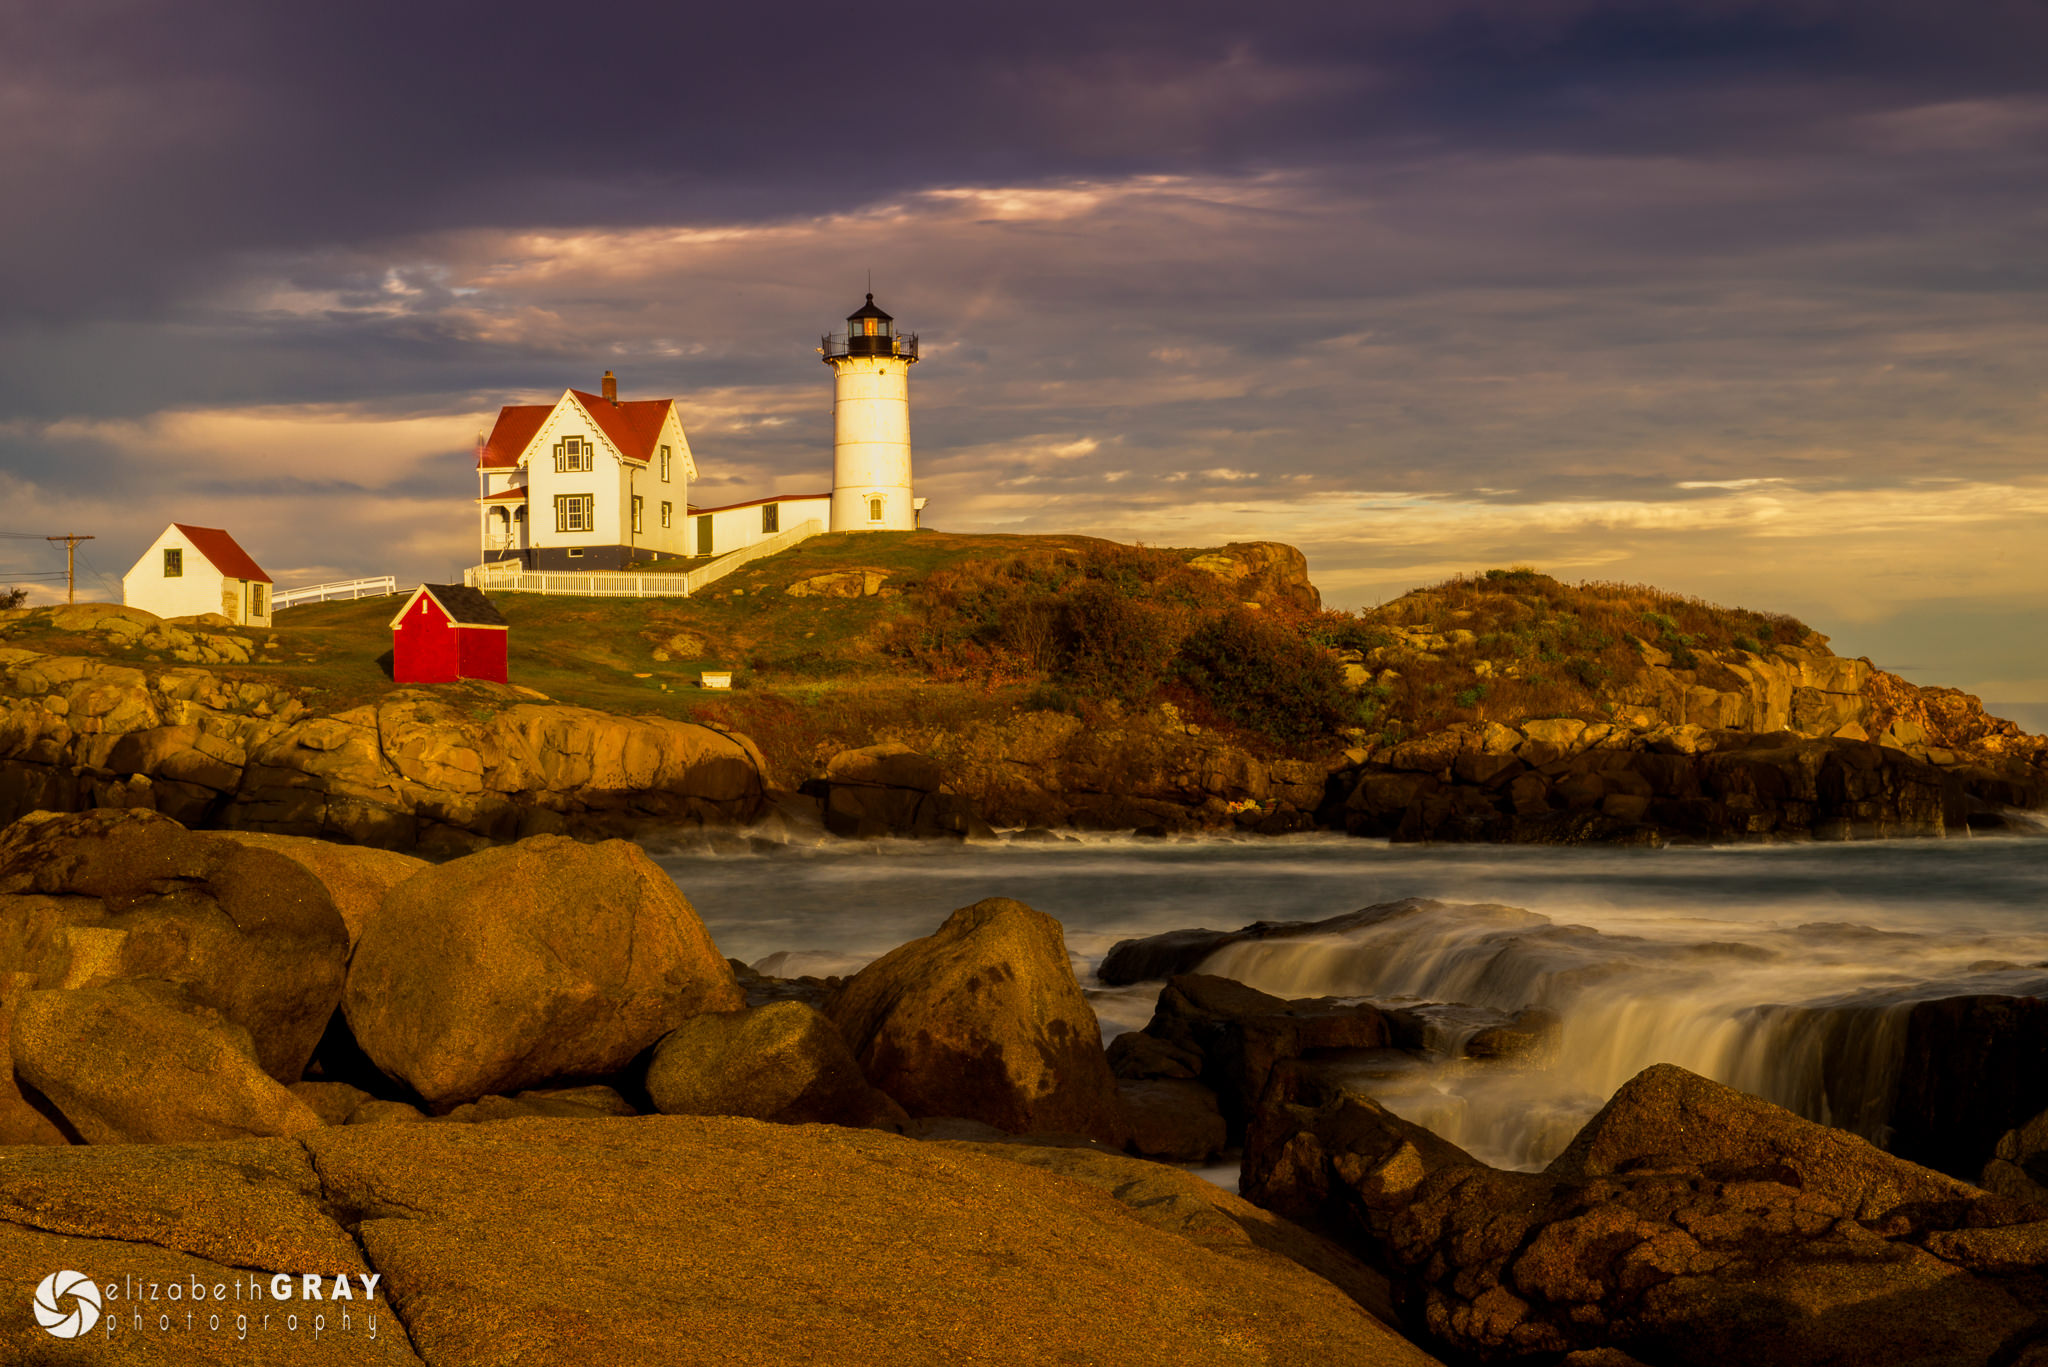
NIKON D800 + 24-70mm f/2.8 @ 62mm, ISO 200, 6/1, f/22.0
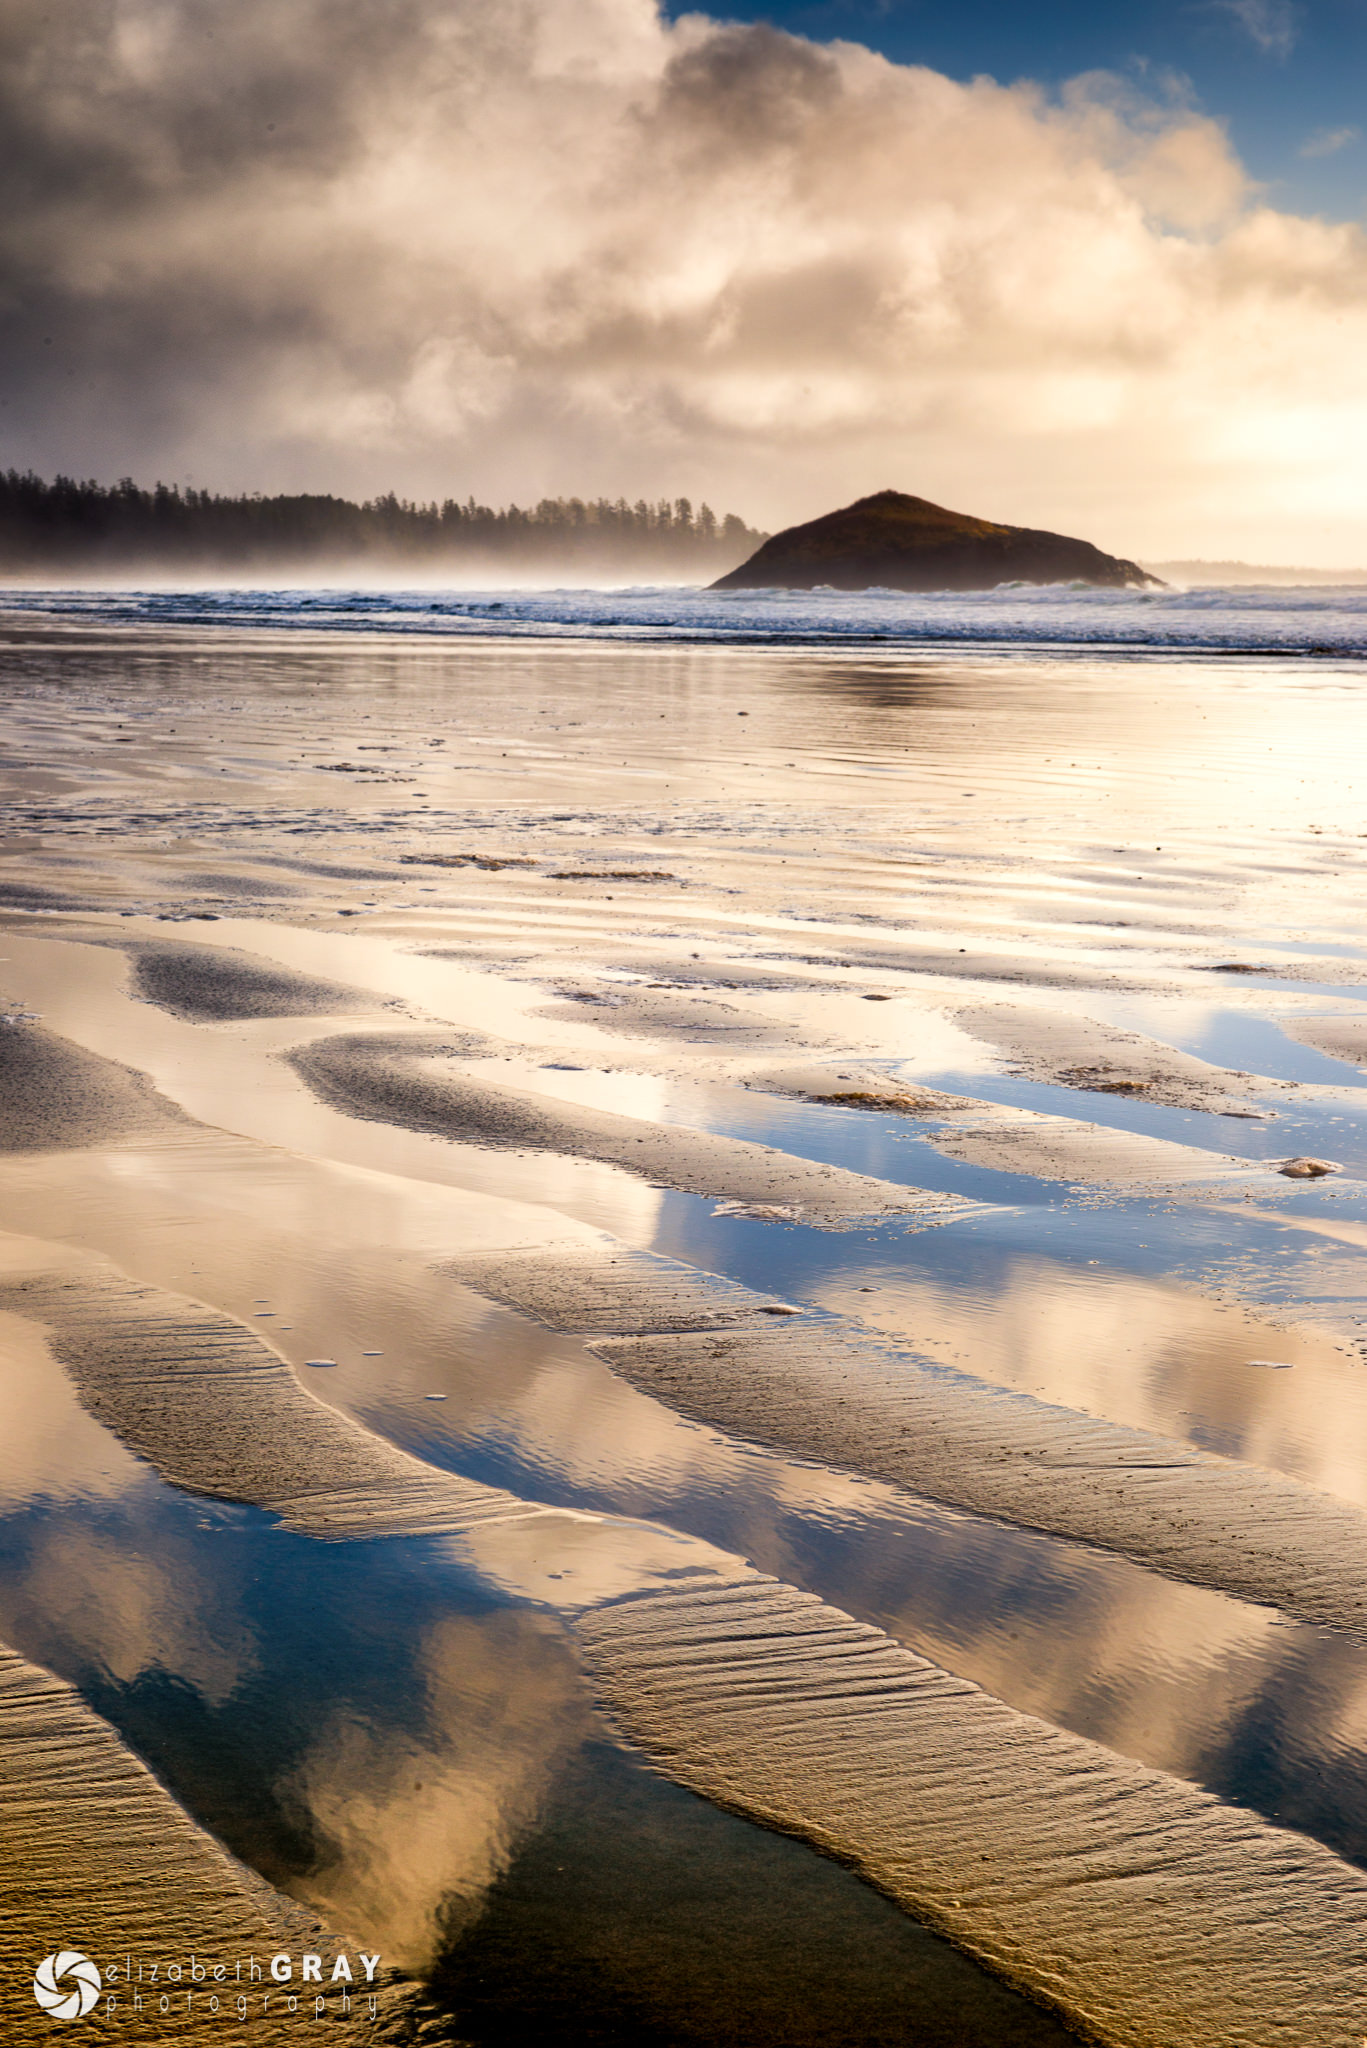
NIKON D800 + 24-70mm f/2.8 @ 66mm, ISO 100, 1/60, f/16.0
You may have heard some photographers talk about the sweet spot of a lens. The sweet spot is the aperture that produces the sharpest images. Do not confuse sharpness with depth of field, though. When you shoot wide open (at the largest aperture) you may notice that the corners of the image might appear quite blurry and potentially even much darker compared to the center. That’s because most lenses are not optimized to yield extremely sharp images at their widest apertures. In addition, you have all kinds of optical aberrations that show up in images, such as chromatic aberration, field curvature and vignetting, many of them as a result of spherical aberration we see in optics. Without getting into the nitty-gritty, all this causes some loss of sharpness towards the edges of an image. On the other end, if you stop the lens down to too small of an aperture, you can also see a loss of sharpness around the edges of an image, but this time due to diffraction. If you find yourself in a situation where you do not need to isolate your subject, or want a large depth of field, then choose the sweet spot of the lens. The sweet spot usually occurs 1-2 stops above the widest aperture of the lens. Every lens is different, but the sweet spot is often in the neighborhood of f/5.6 to f/8, especially on typical zoom lenses. If you really want to get into the details about what the sharpest aperture you should be picking is, I would recommend to read Spencer’s excellent how to choose the sharpest aperture article.
These next three images do not have much depth to them. The distance from the closest object to the farthest is small. Since I didn’t need a large depth of field, and because I wasn’t trying to isolate part of the image with a shallow depth of field, I chose apertures around the sweet spot of my lens.
NIKON D500 + 17-55mm f/2.8 @ 55mm, ISO 200, 1/2000, f/6.3
NIKON D500 + 17-55mm f/2.8 @ 55mm, ISO 200, 1/320, f/9.0

NIKON D500 + 17-55mm f/2.8 @ 30mm, ISO 200, 1/200, f/6.3
Stopping down far beyond the recommended range when diffraction kicks in (typically above f/8-f/11) can sometimes work in your favor. If you include a bright object in your image while using a small aperture, you will create a starburst. Although not to everyone’s taste, a starburst can add an interesting graphic element to a photo. Take care if you include the sun in your image, though. It can hurt your eyes and potentially even the internals of your camera if you are not careful.
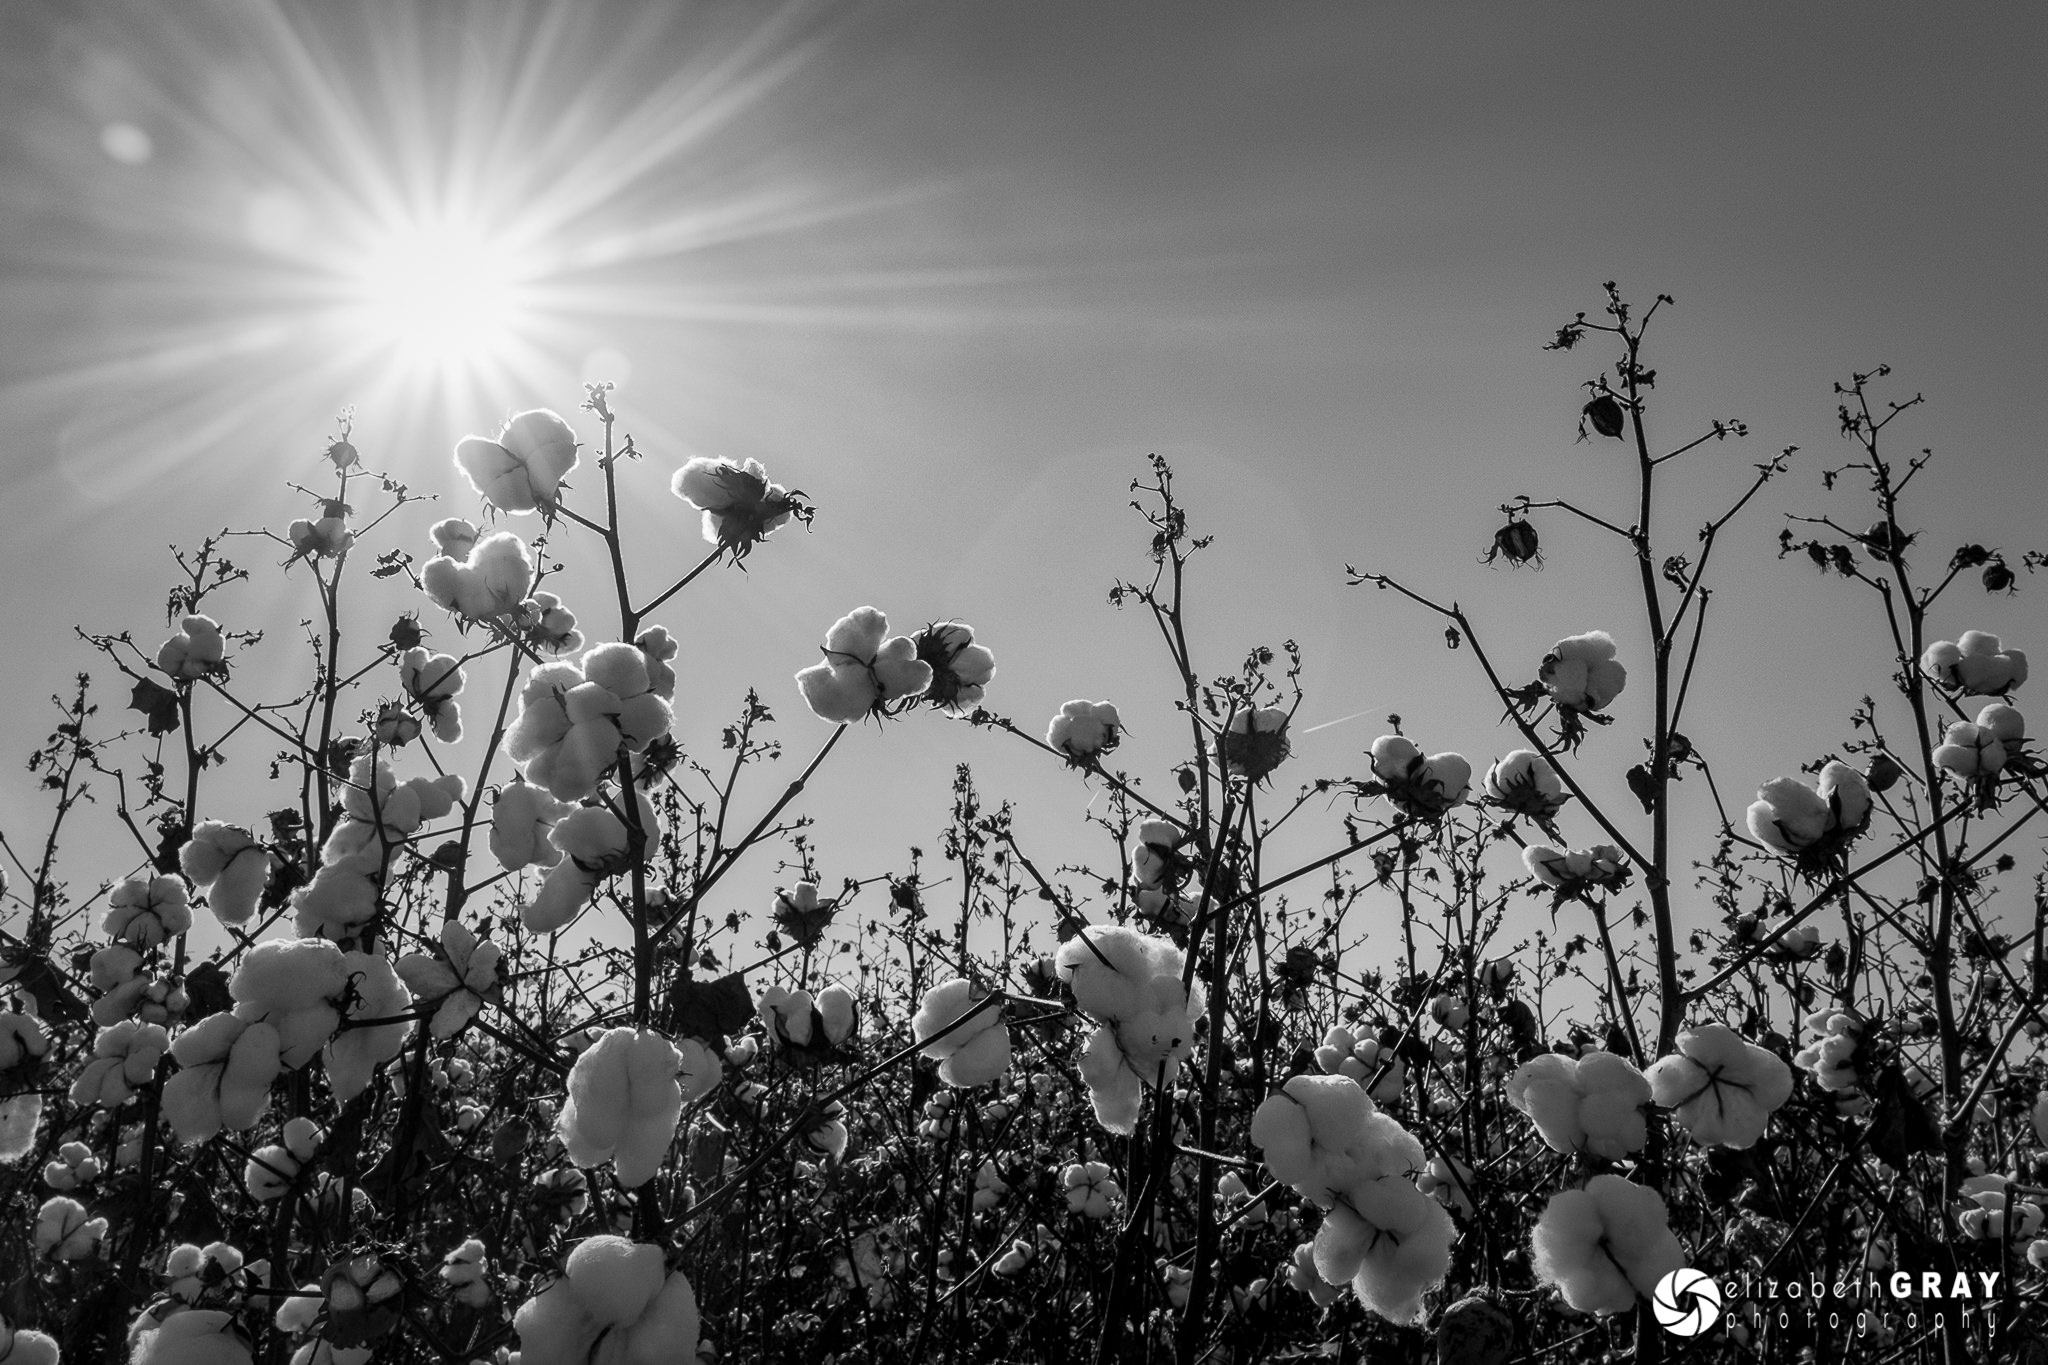
X100T @ 19mm, ISO 200, 1/250, f/14.0
X100T @ 19mm, ISO 1600, 1/15, f/5.6
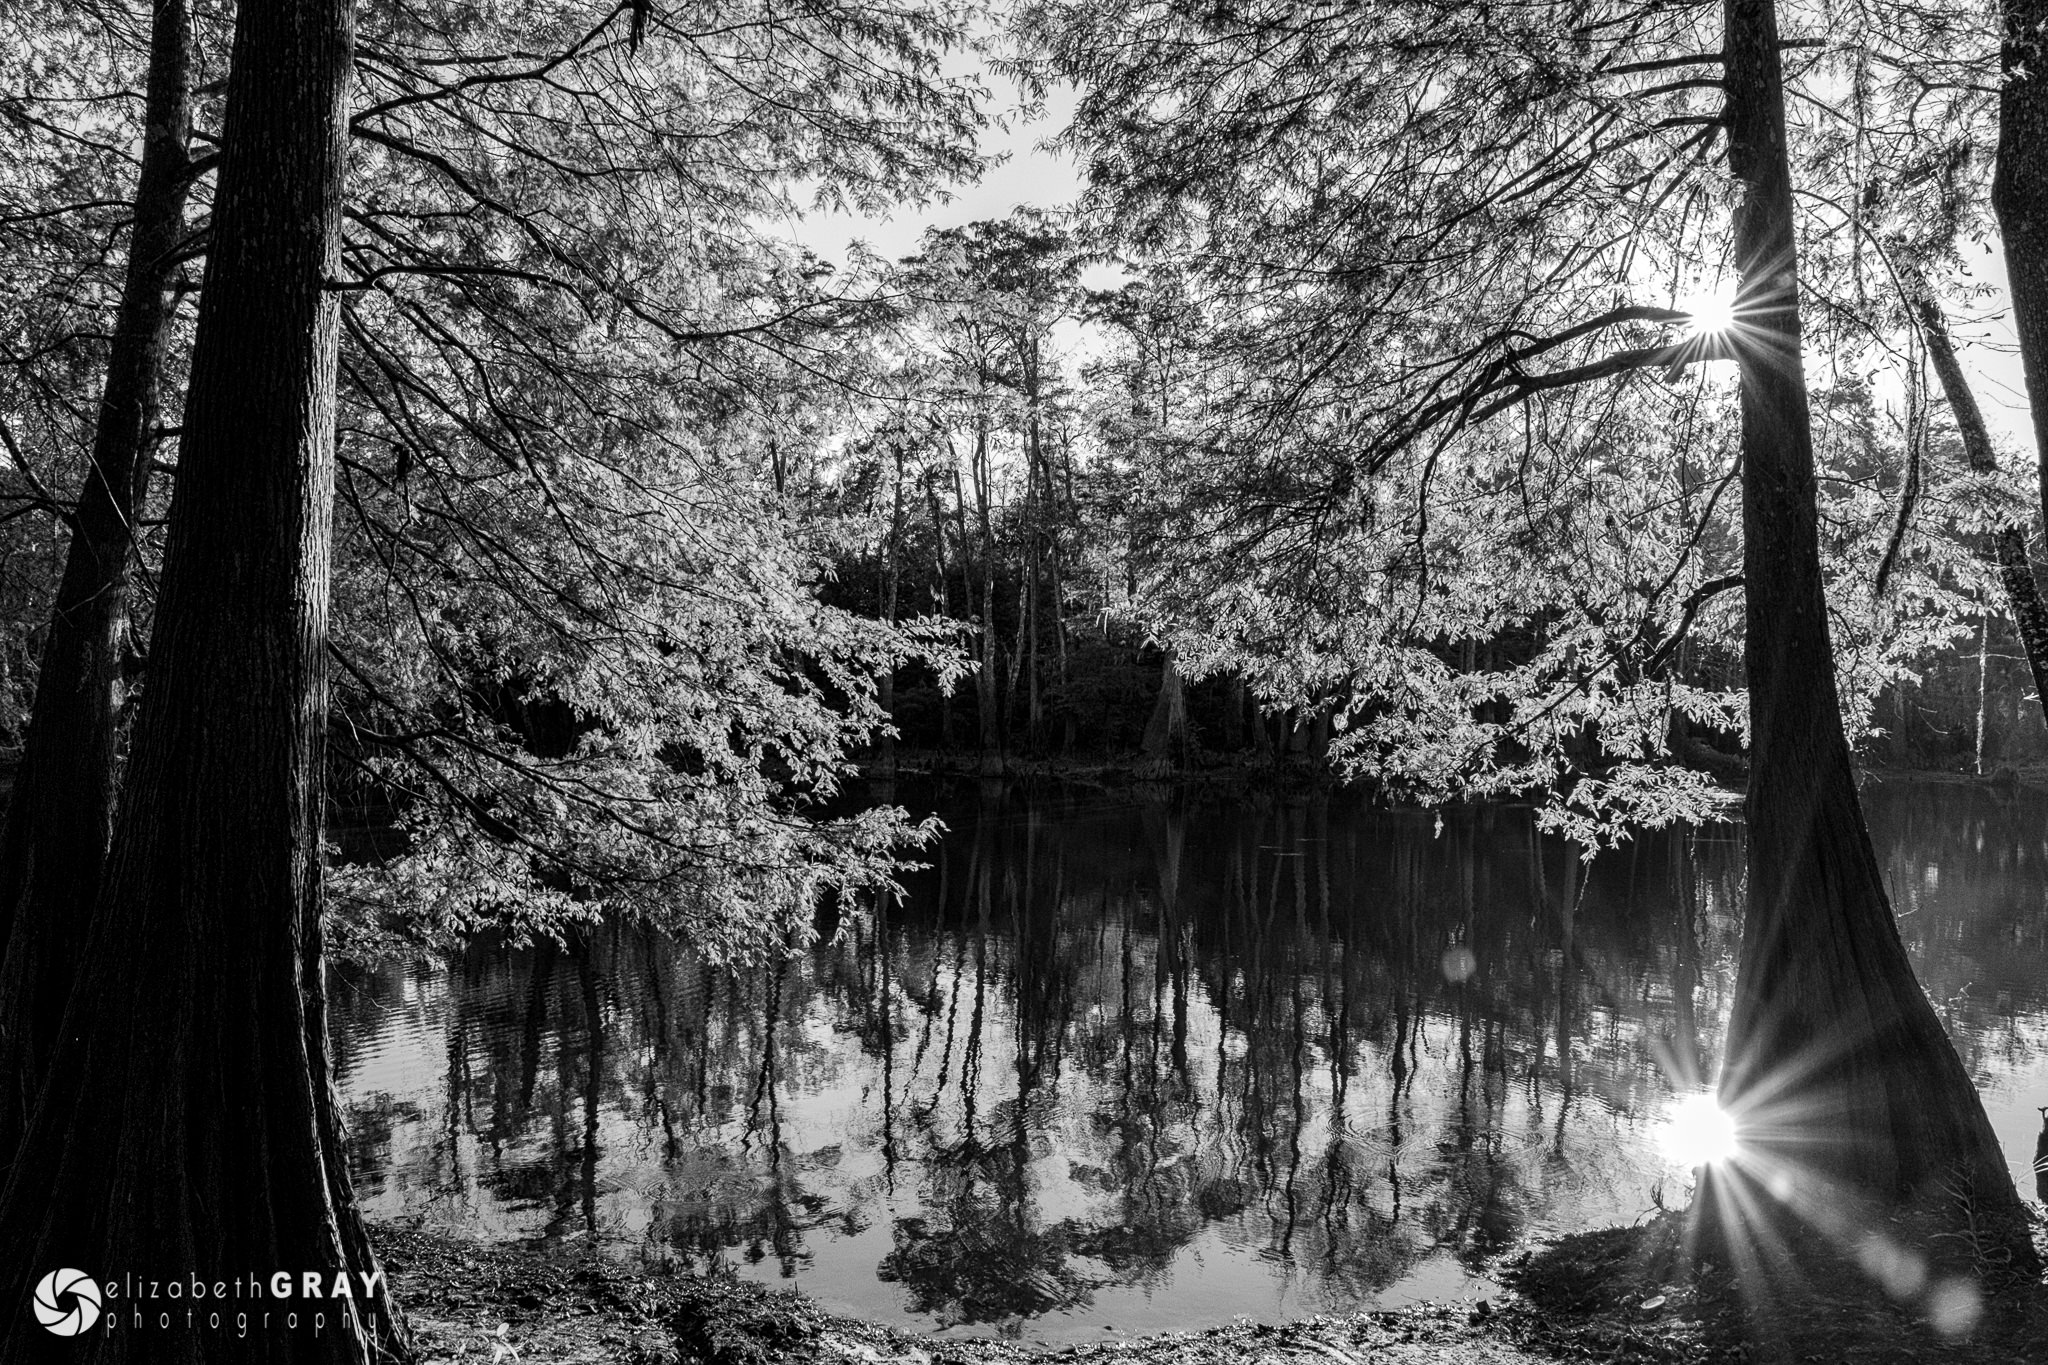
X100T @ 19mm, ISO 640, 1/100, f/16.0
3) Shutter Speed
Shutter speed is what controls the feeling of motion in an image. Depending on the shutter speed you select, you can either freeze moving subjects or blur their motion. You may not think that taking a blurry photo is a good thing, but it can add a very artistic look and feel to an image.
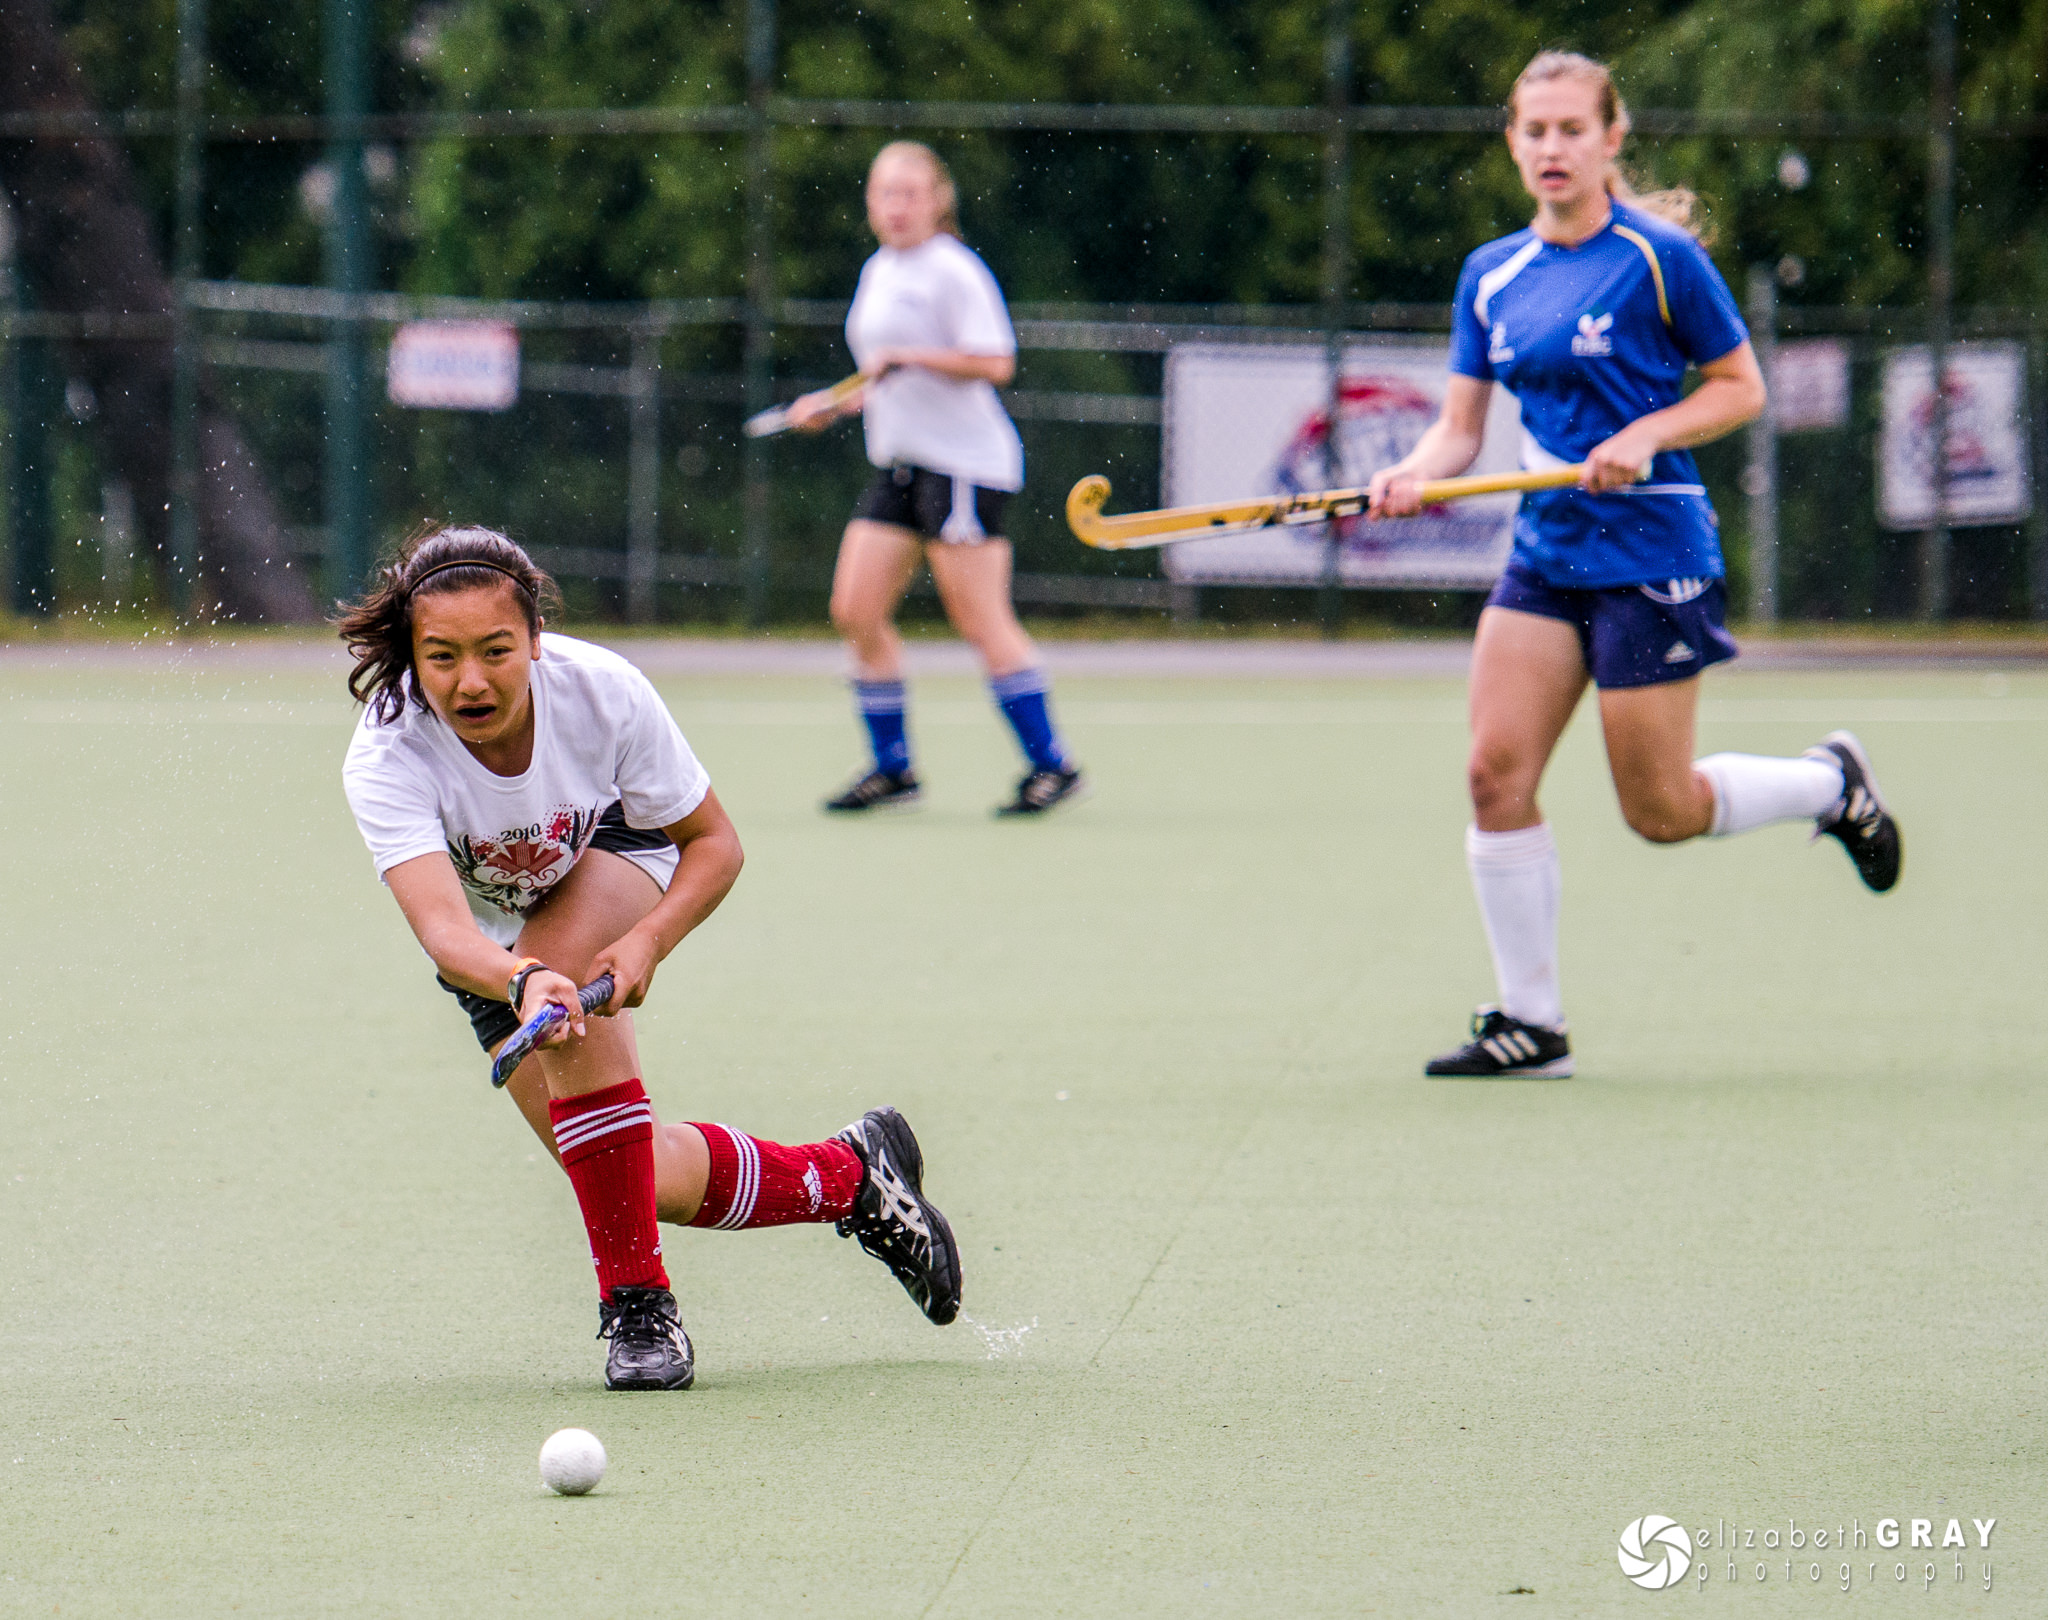
Very fast shutter speeds will freeze action. How fast a shutter speed do you need? Well, that depends on what you are trying to freeze. When I’m photographing birds in flight, I try and use a shutter speed of at least 1/1000 of a second. However, I will often shoot at 1/2000s or higher if the light is bright. Fast shutter speeds like these will help ensure that feathers and water drops are captured motionless.
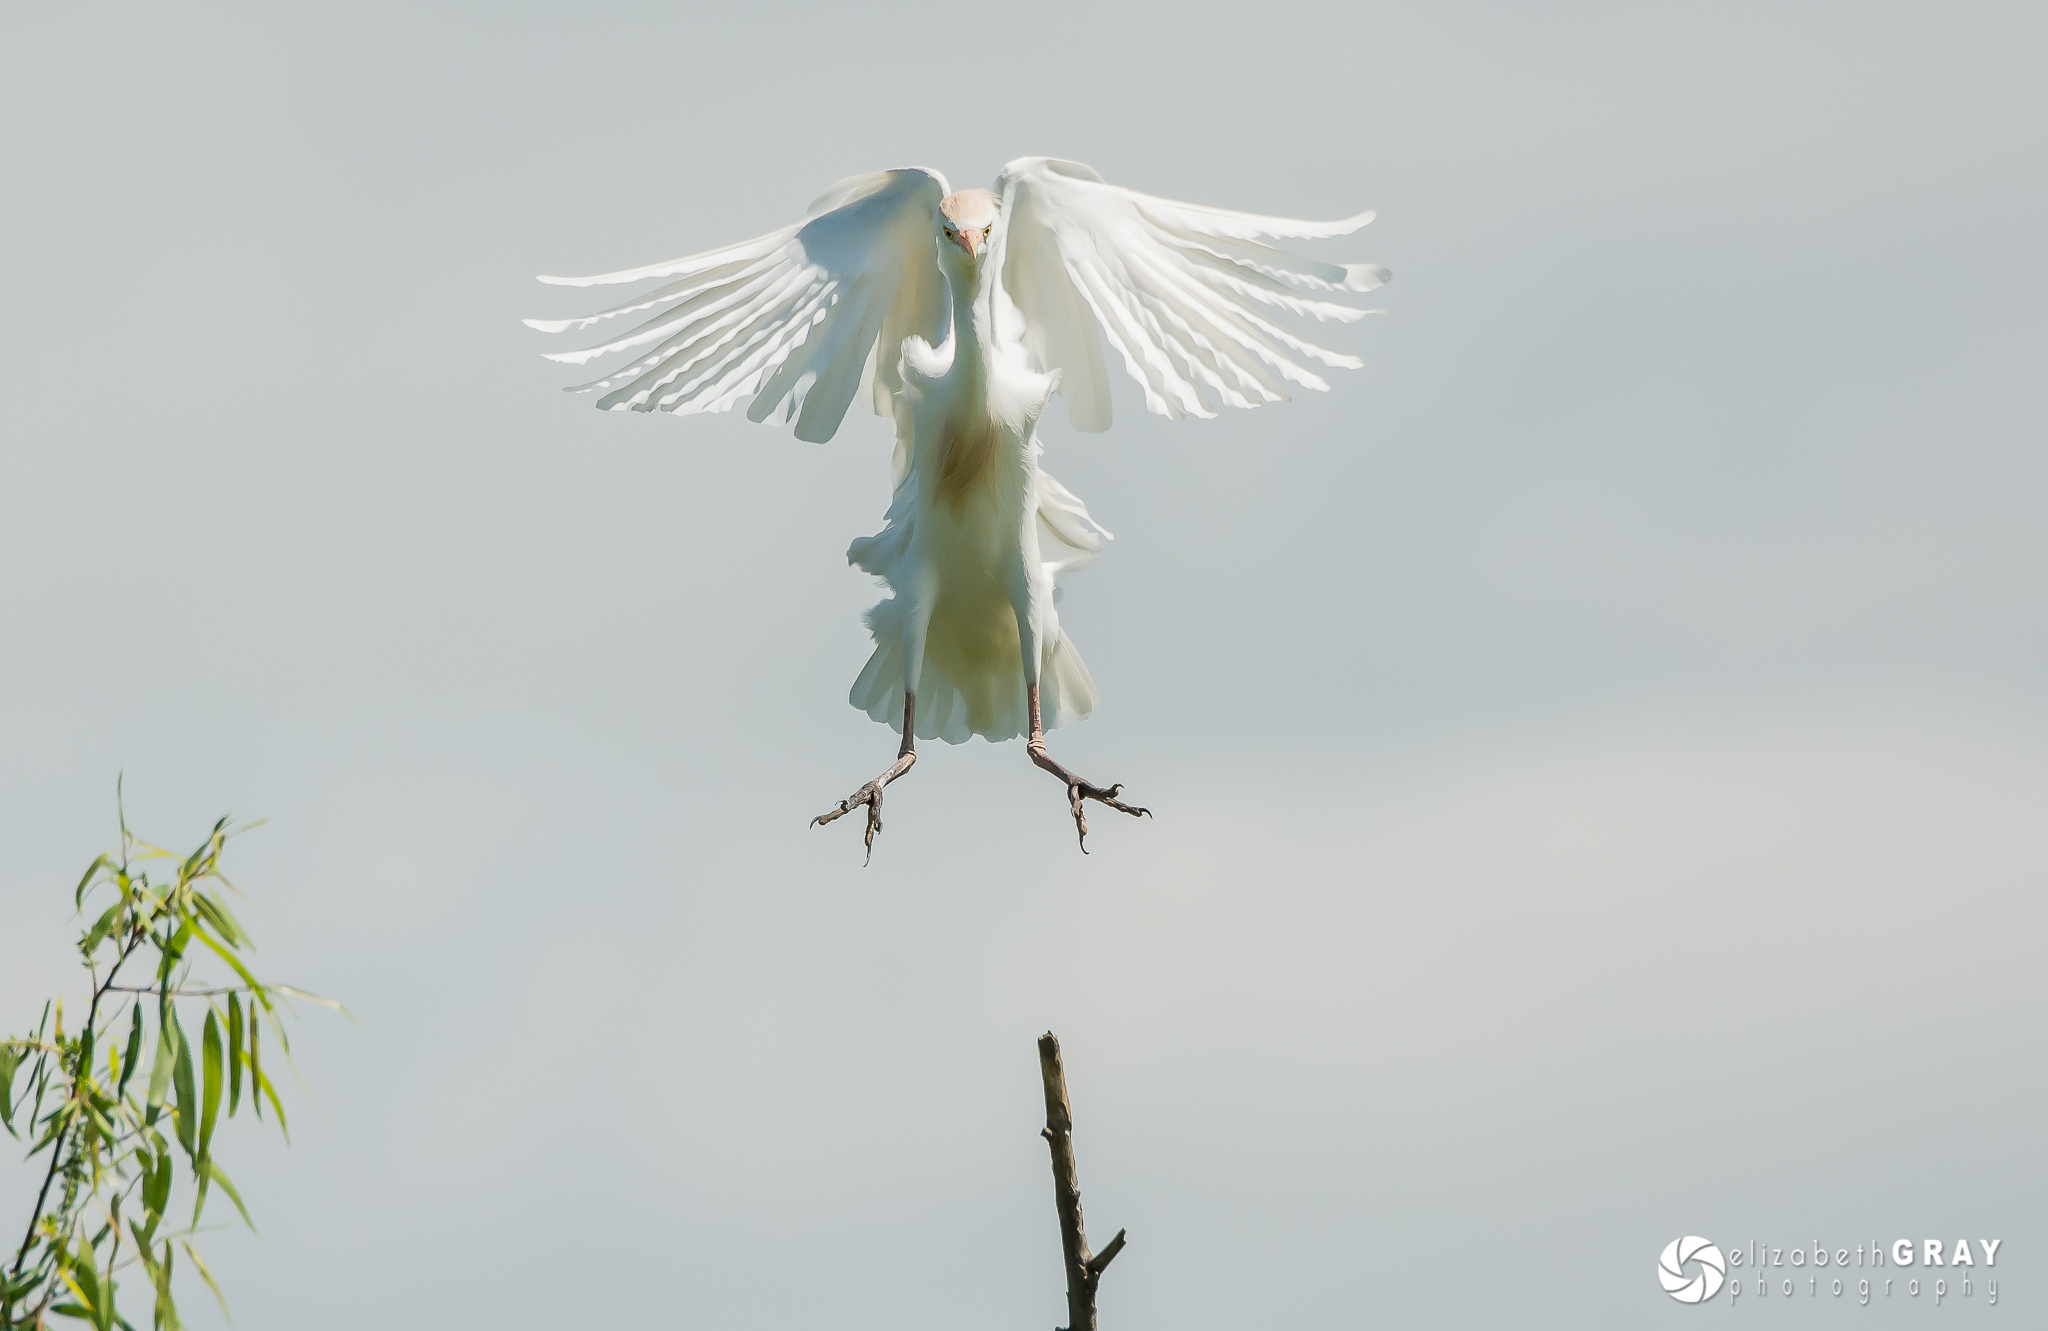
NIKON D7100 + 80-400mm f/4.5-5.6 @ 400mm, ISO 400, 1/3200, f/7.1
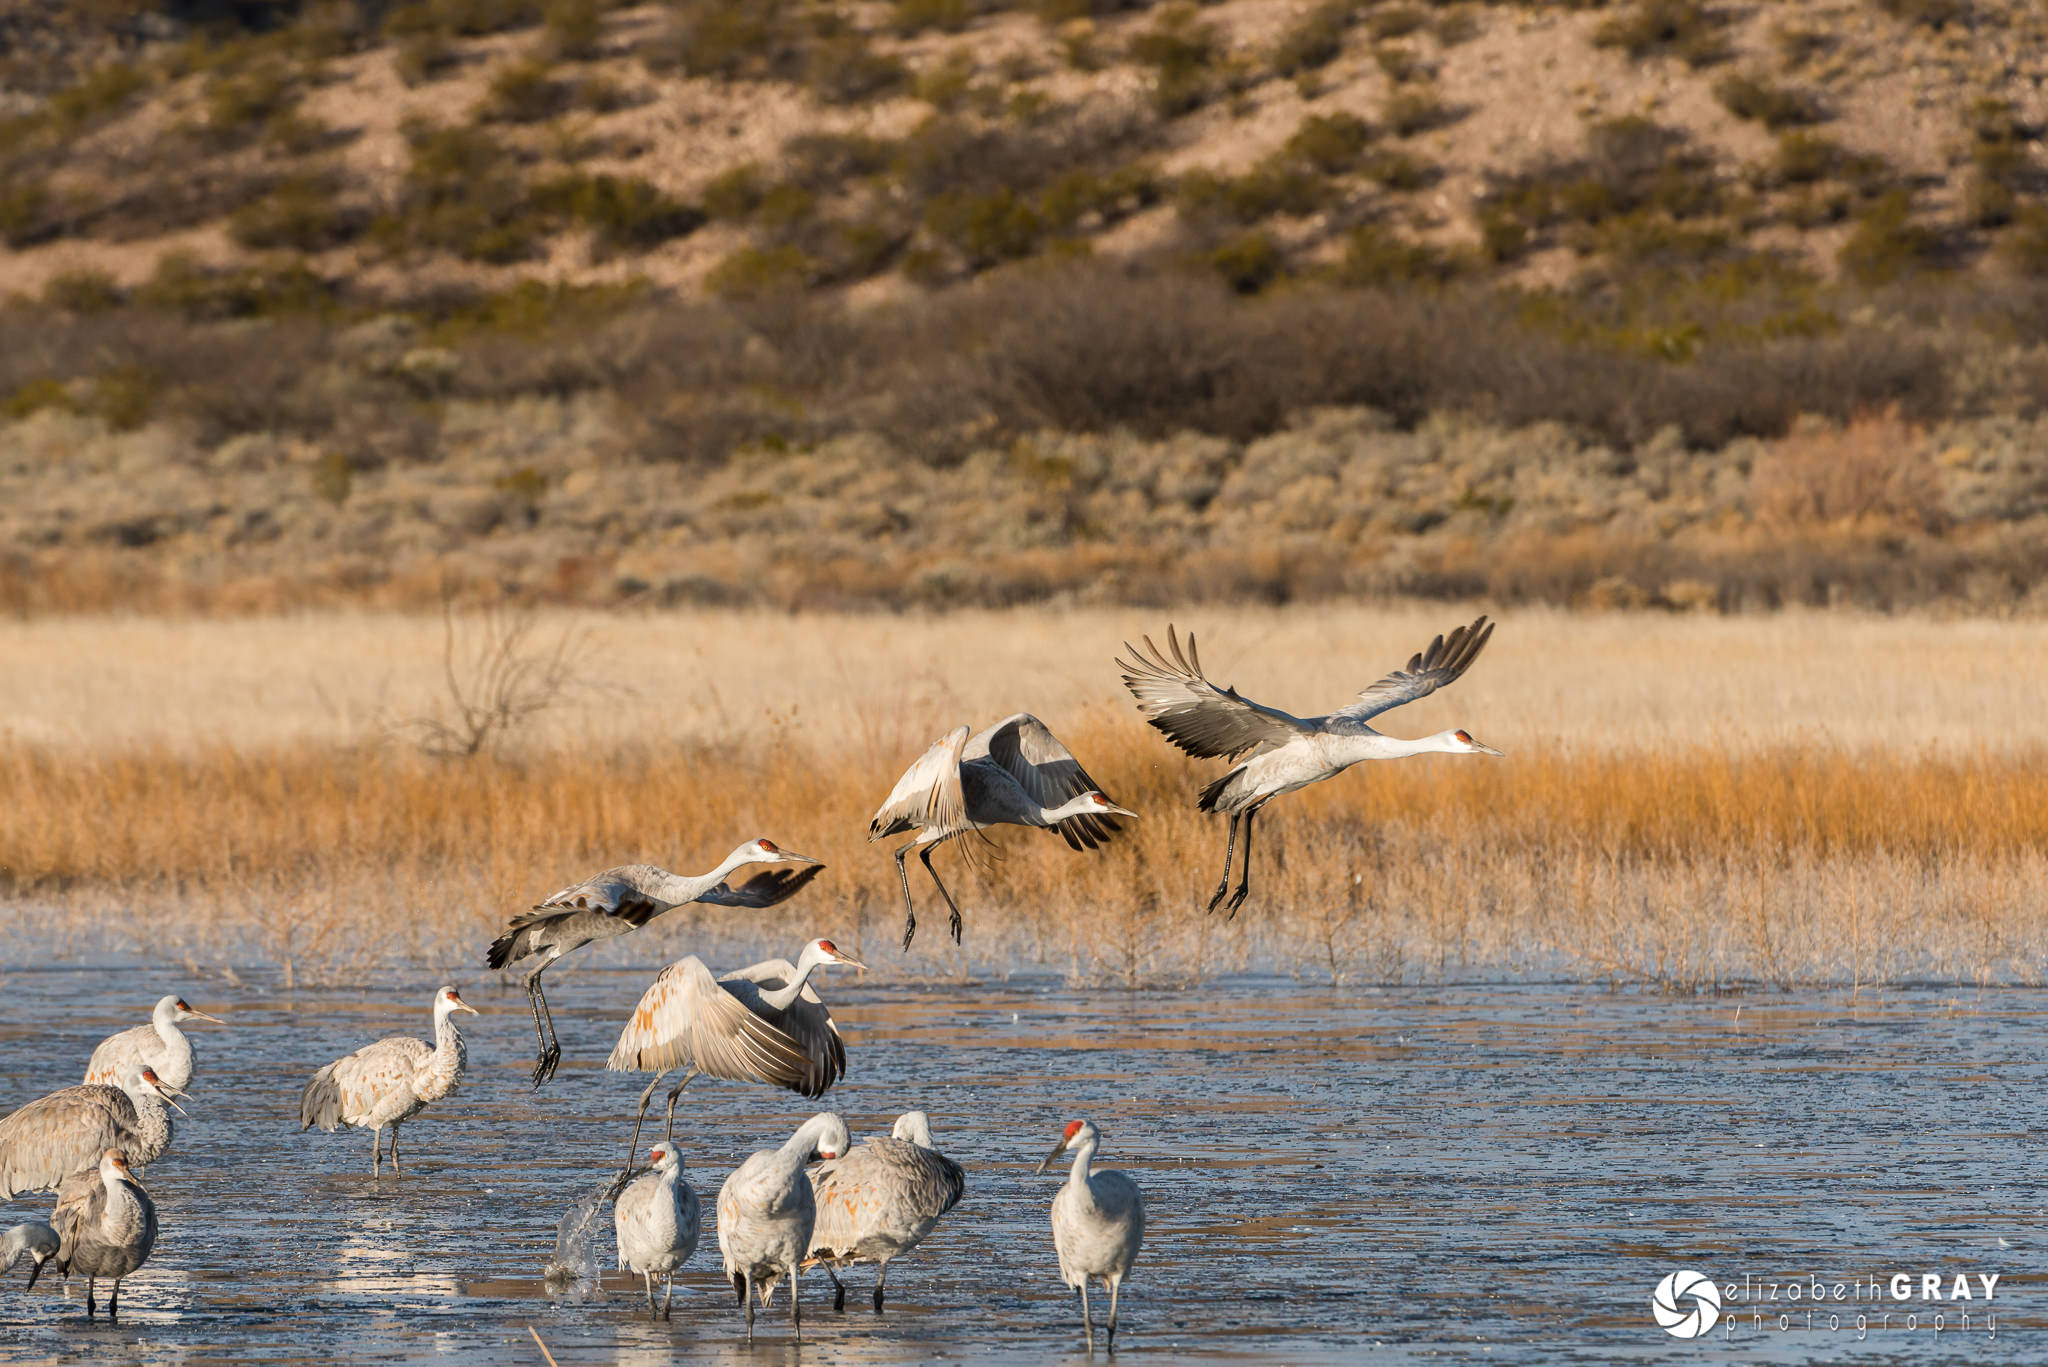
NIKON D800 + 200-400mm f/4 @ 400mm, ISO 800, 1/1250, f/8.0
NIKON D7000 + 200-400mm f/4 @ 390mm, ISO 200, 1/1000, f/5.6
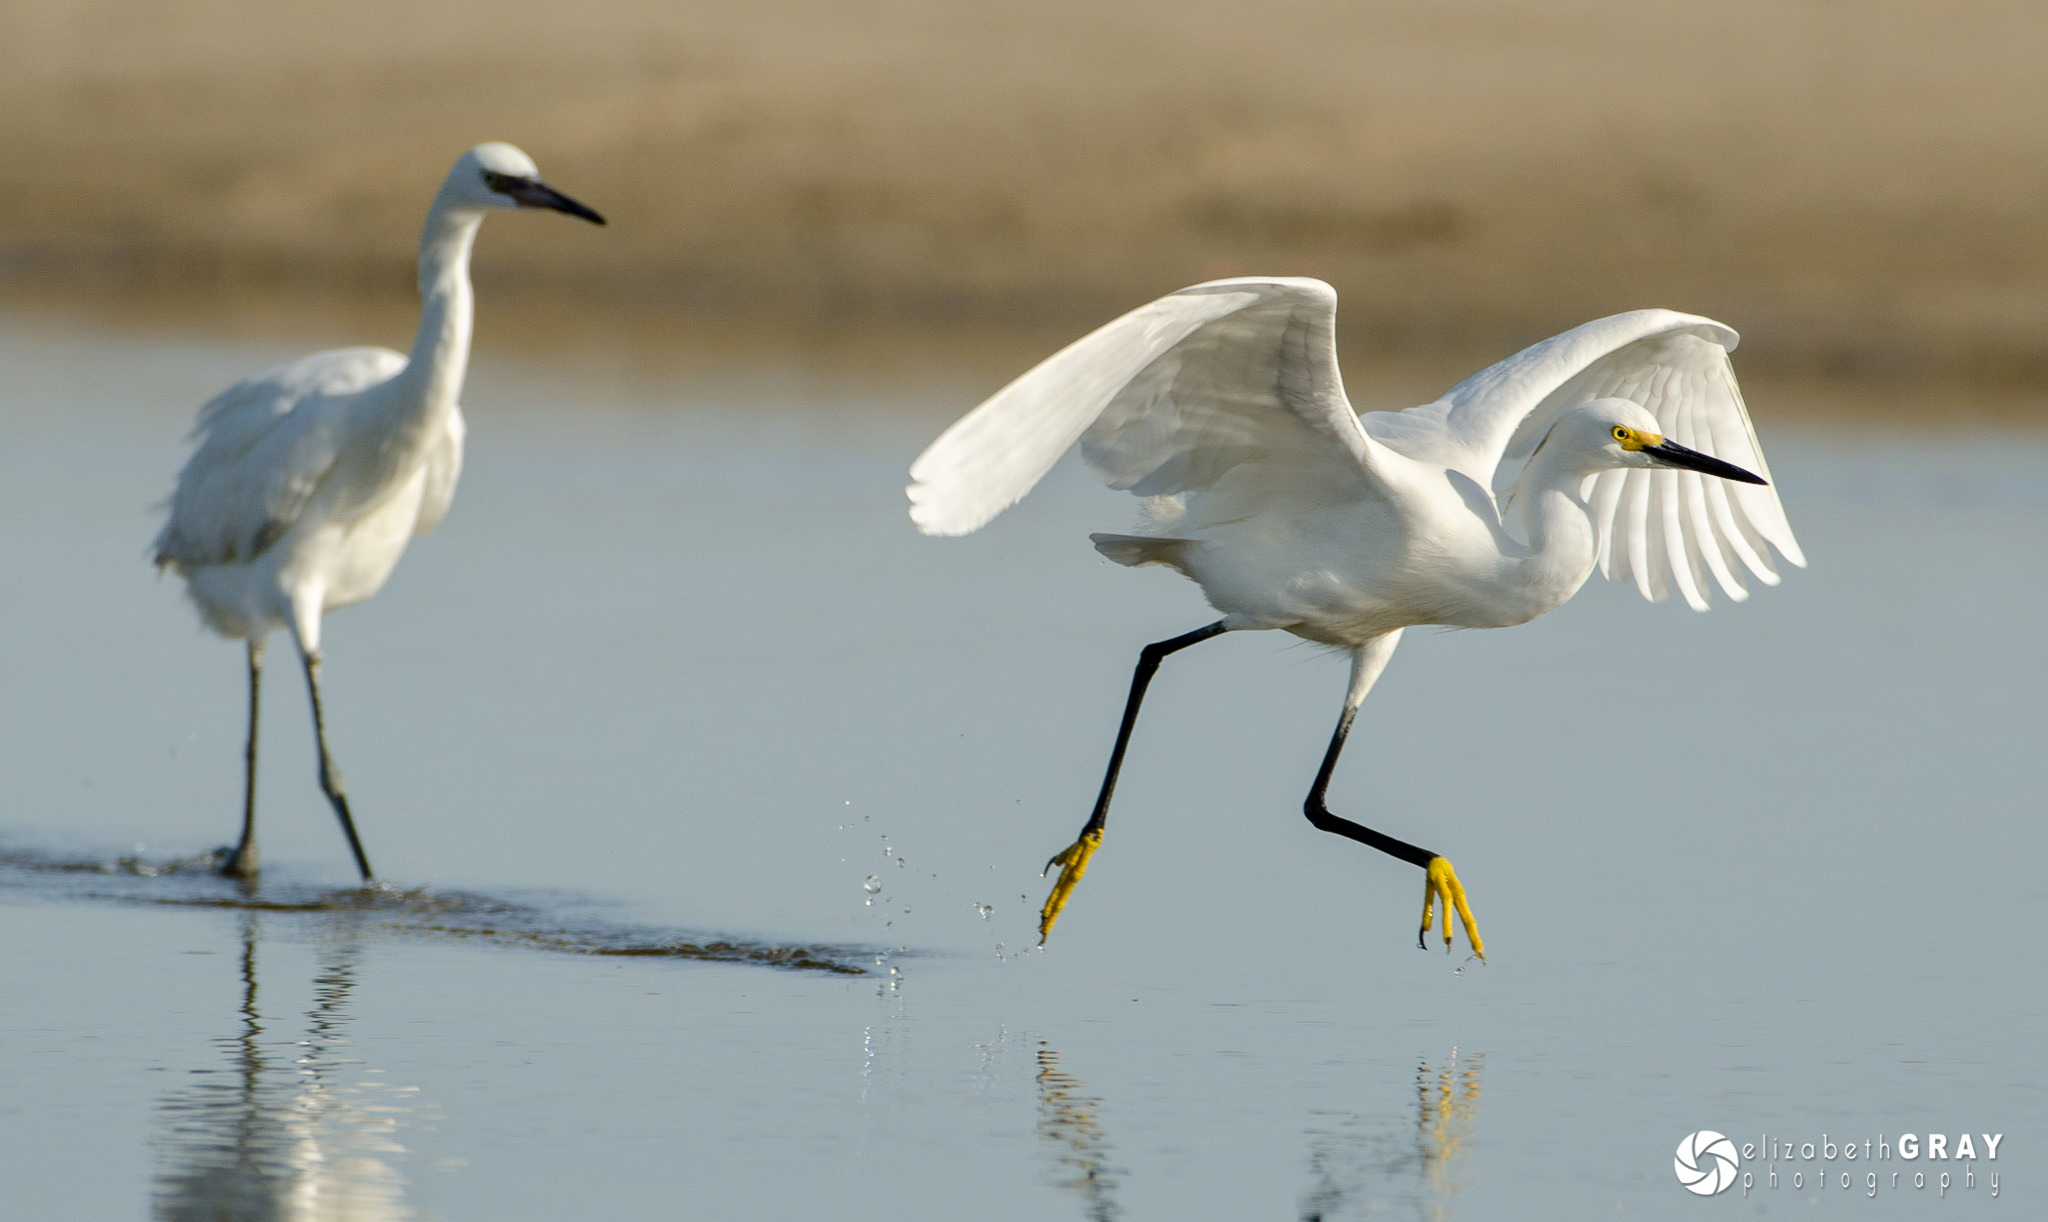
Here are three more images where I have chosen fast shutter speeds to freeze the action.

X100T @ 23mm, ISO 200, 1/3000, f/2.5
NIKON D500 + 17-55mm f/2.8 @ 35mm, ISO 400, 1/800, f/4.0
NIKON D7000 + 70-200mm f/2.8 @ 140mm, ISO 400, 1/1600, f/2.8
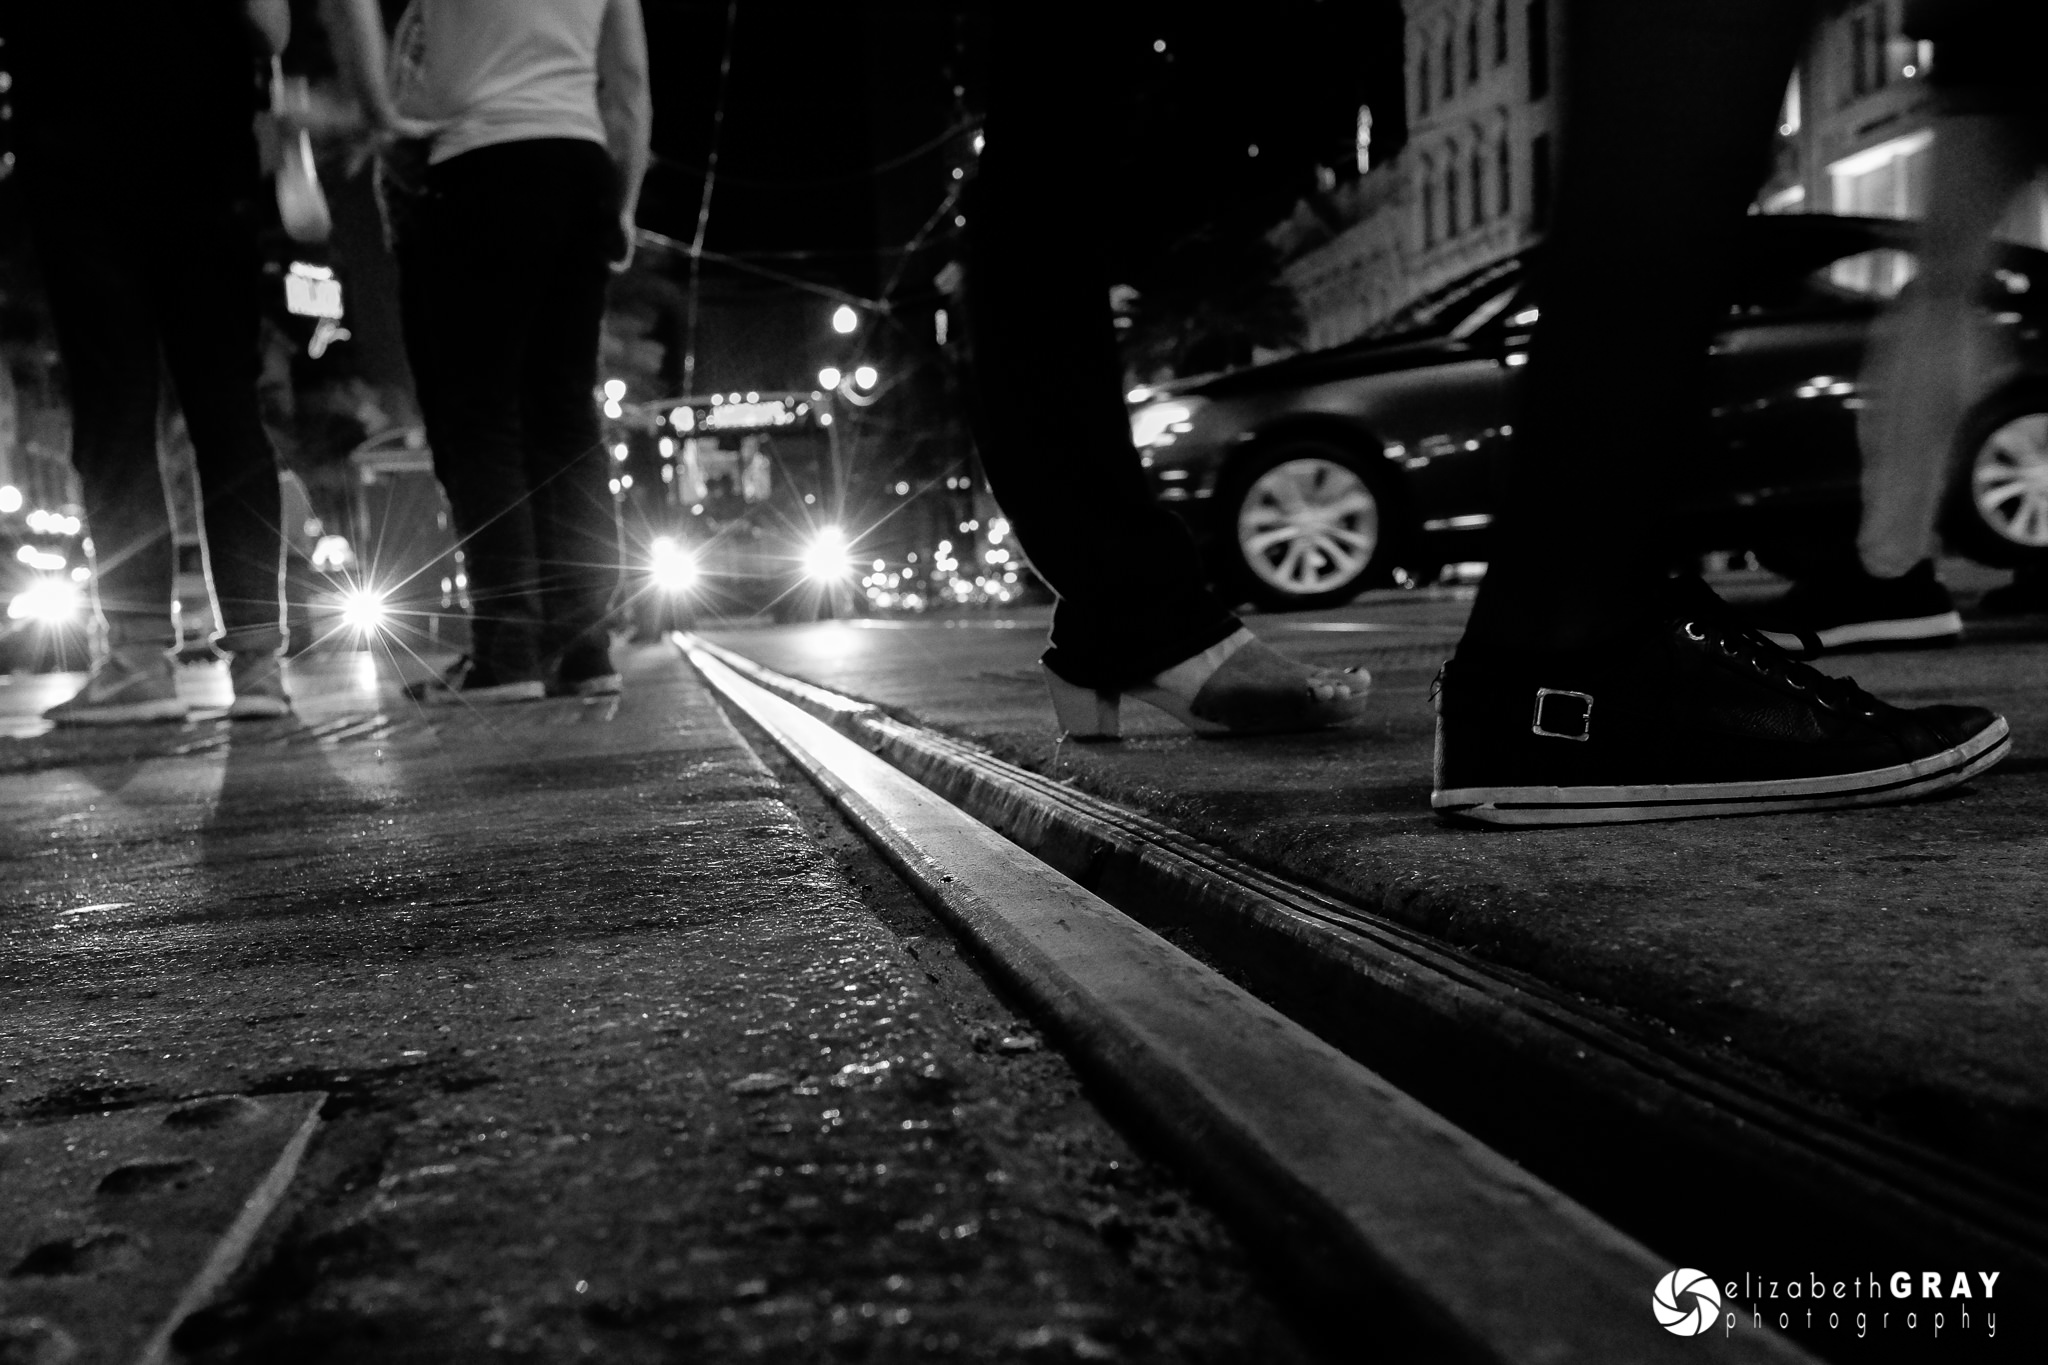
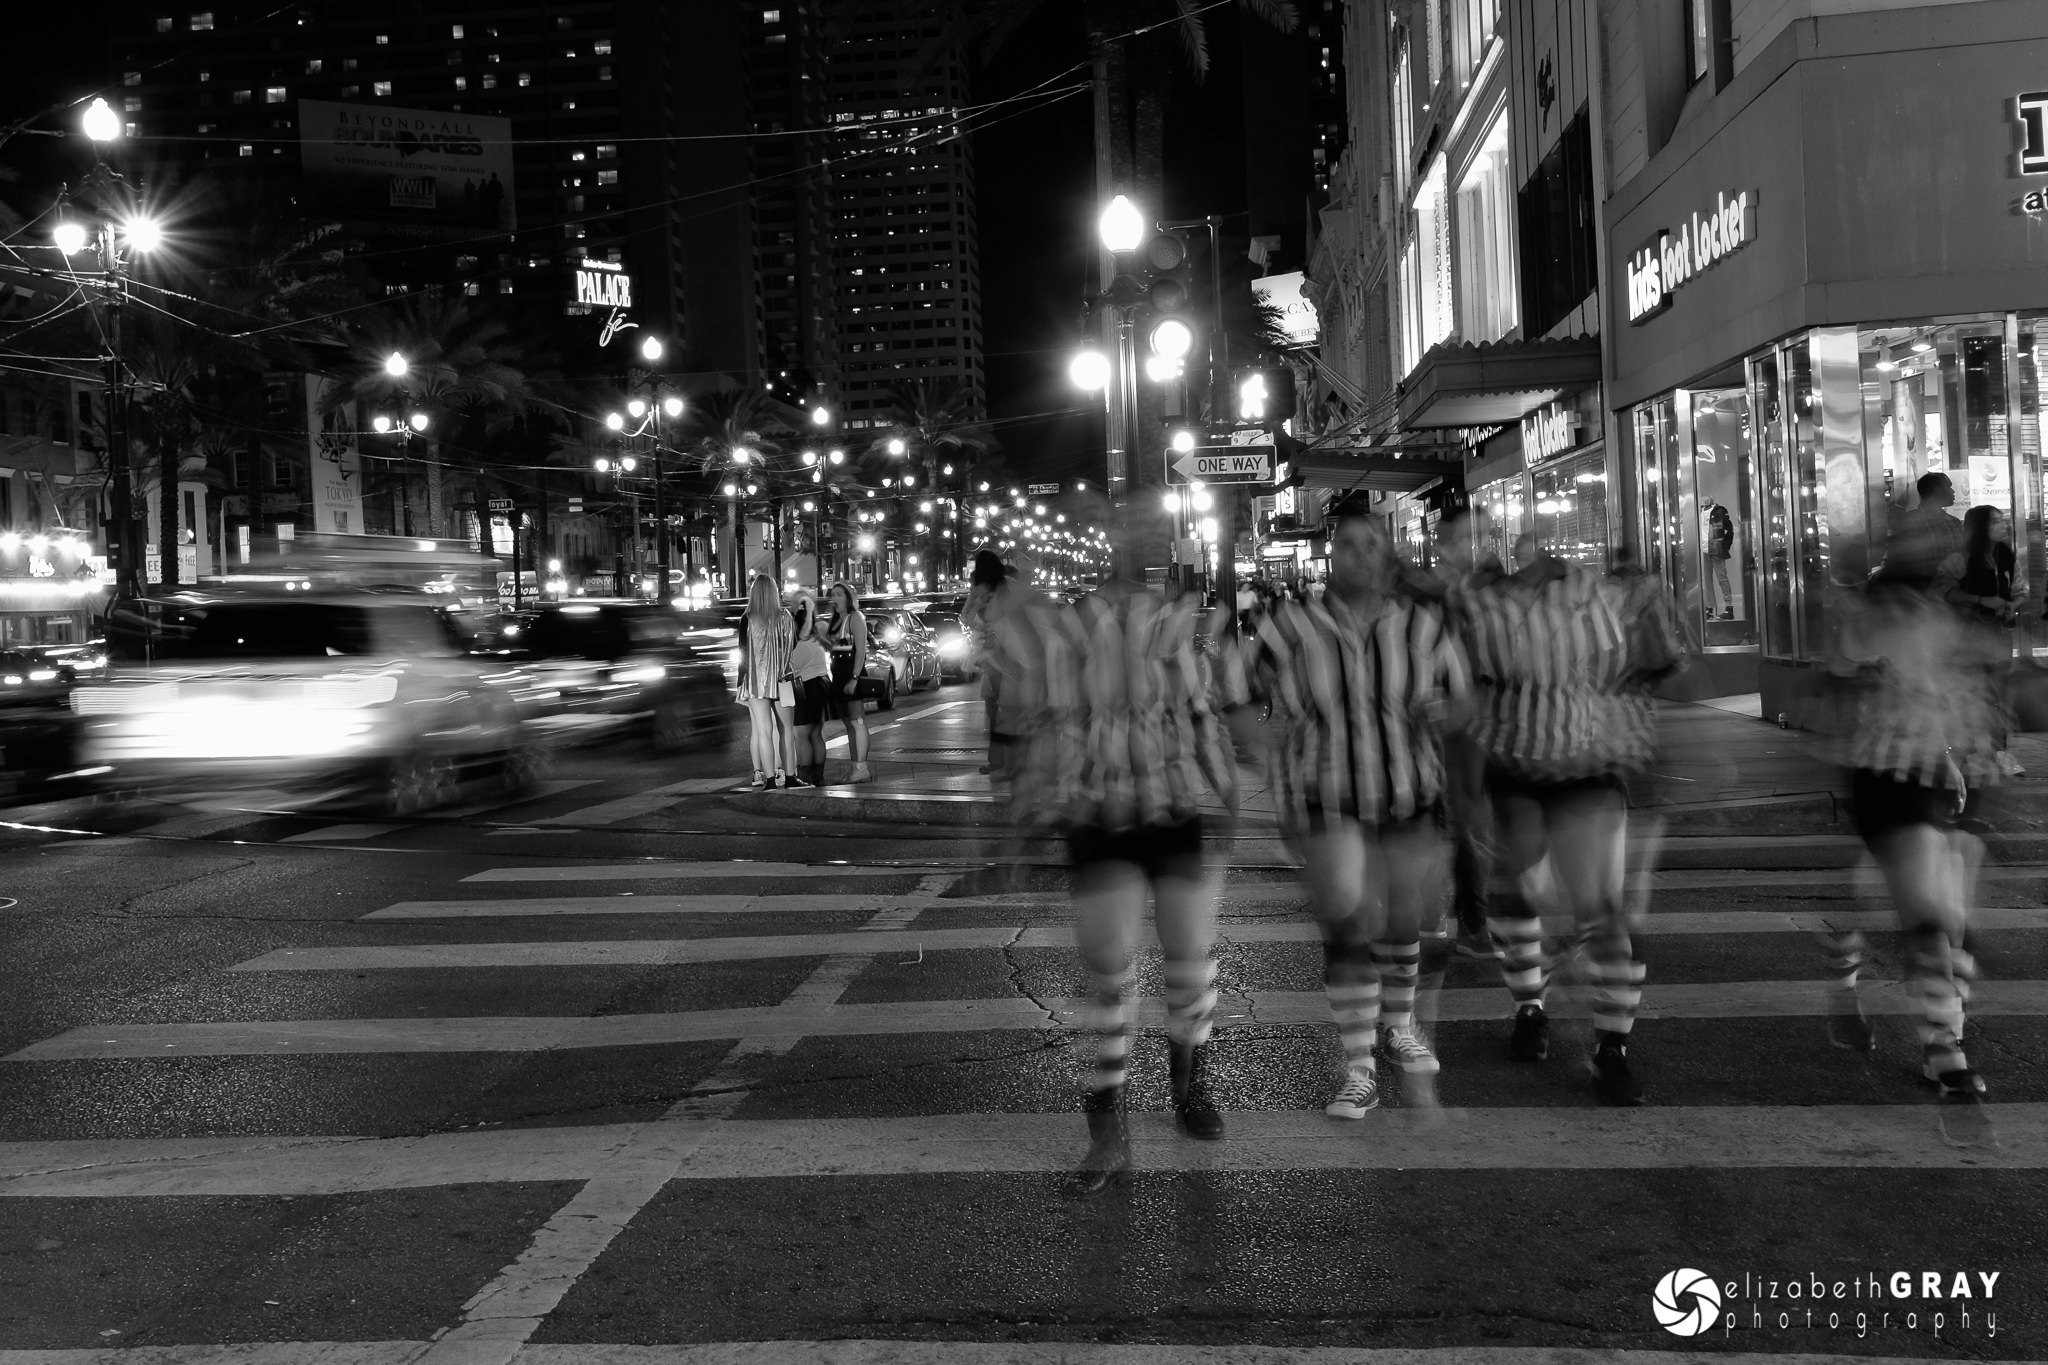
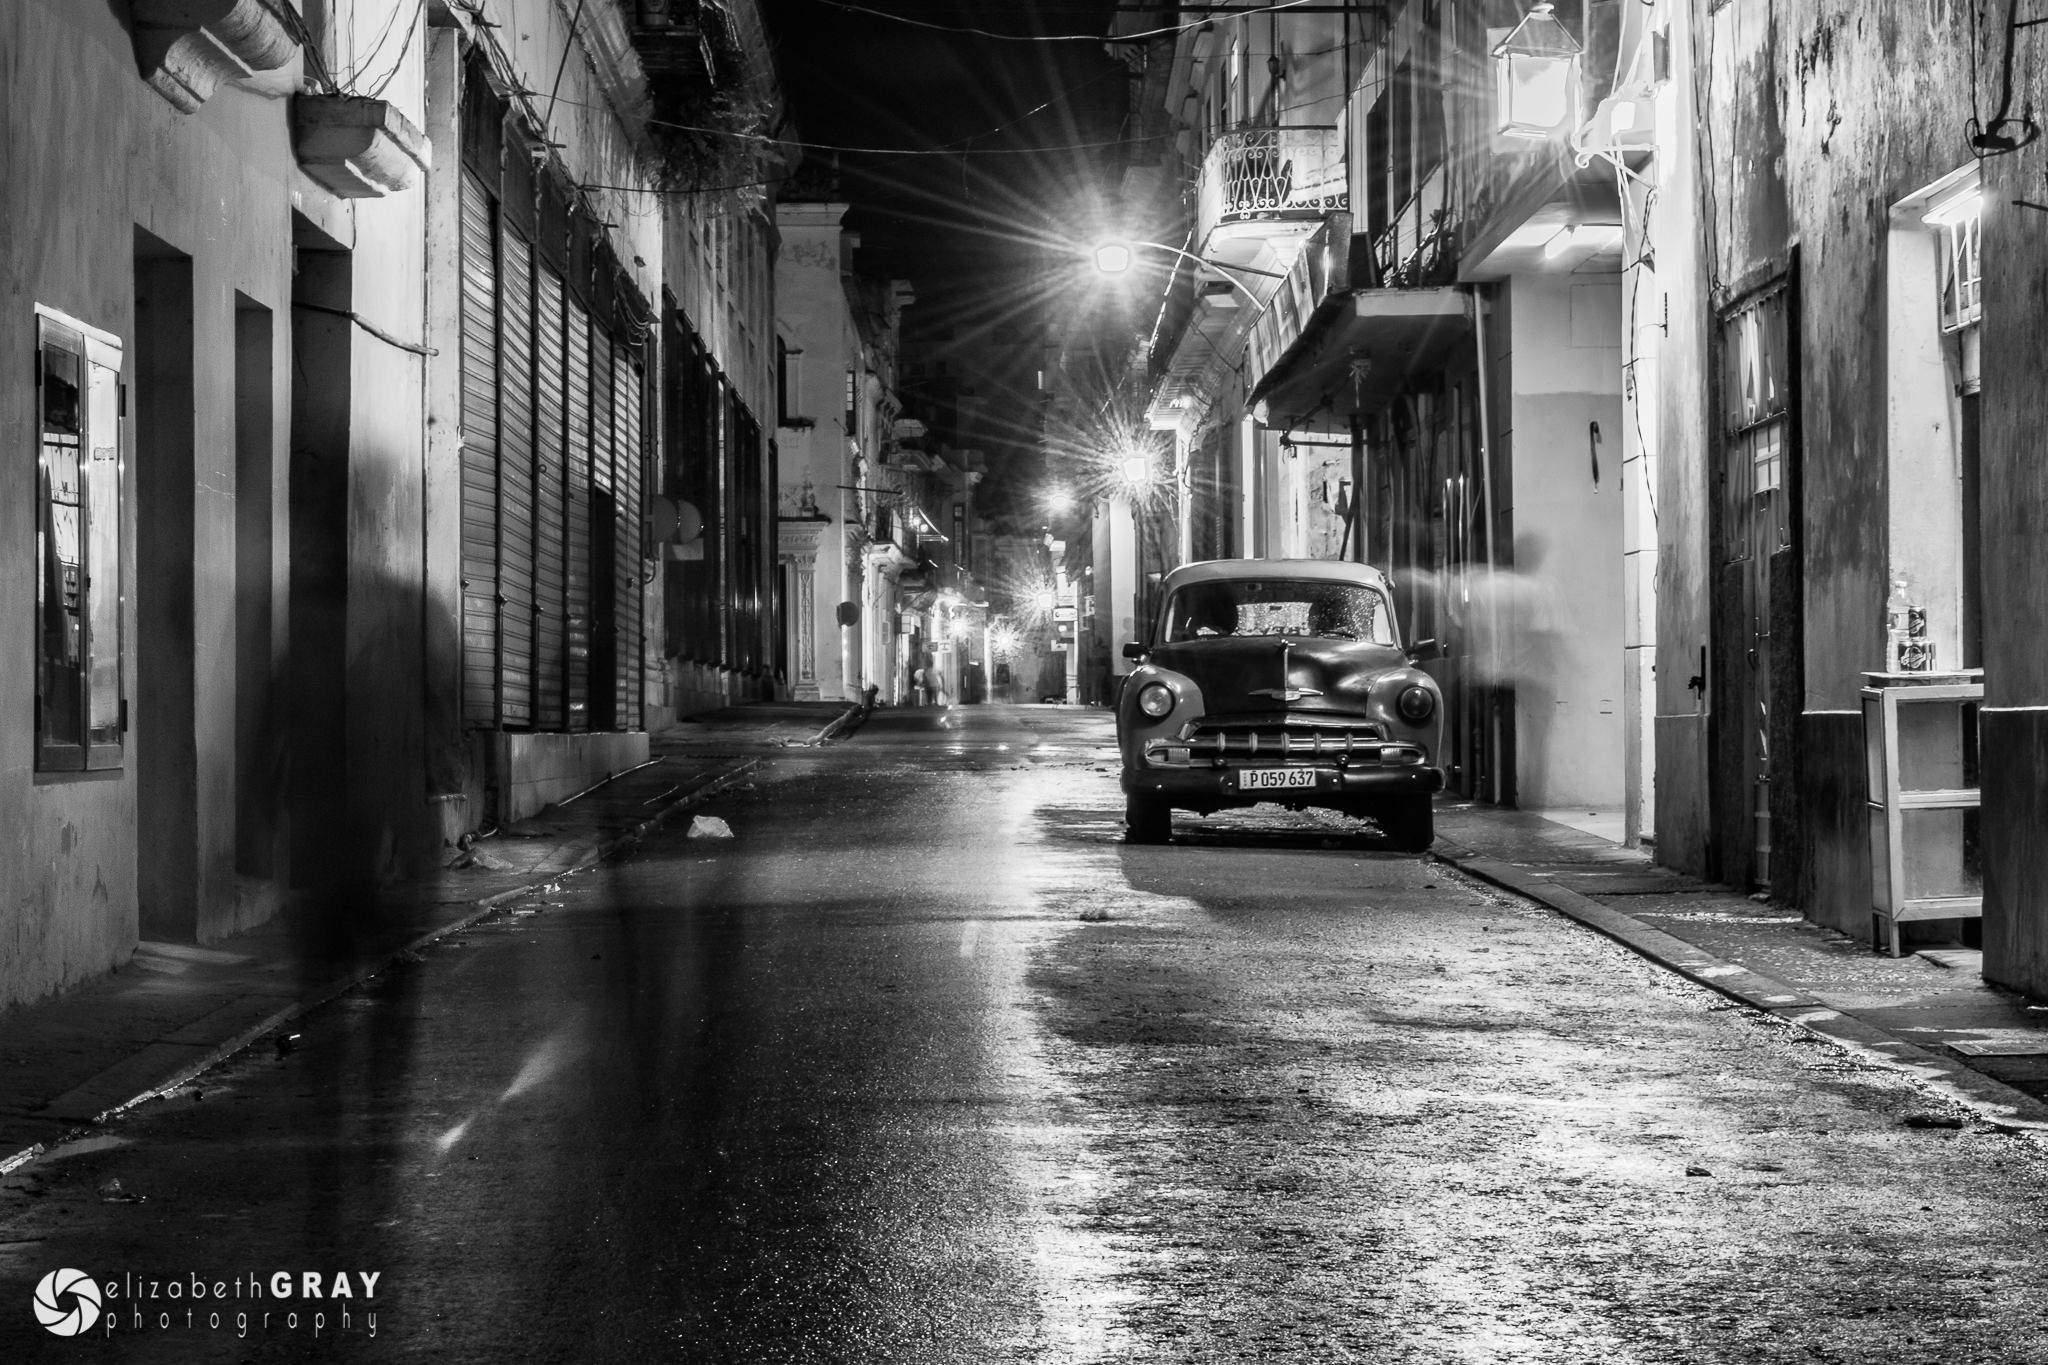
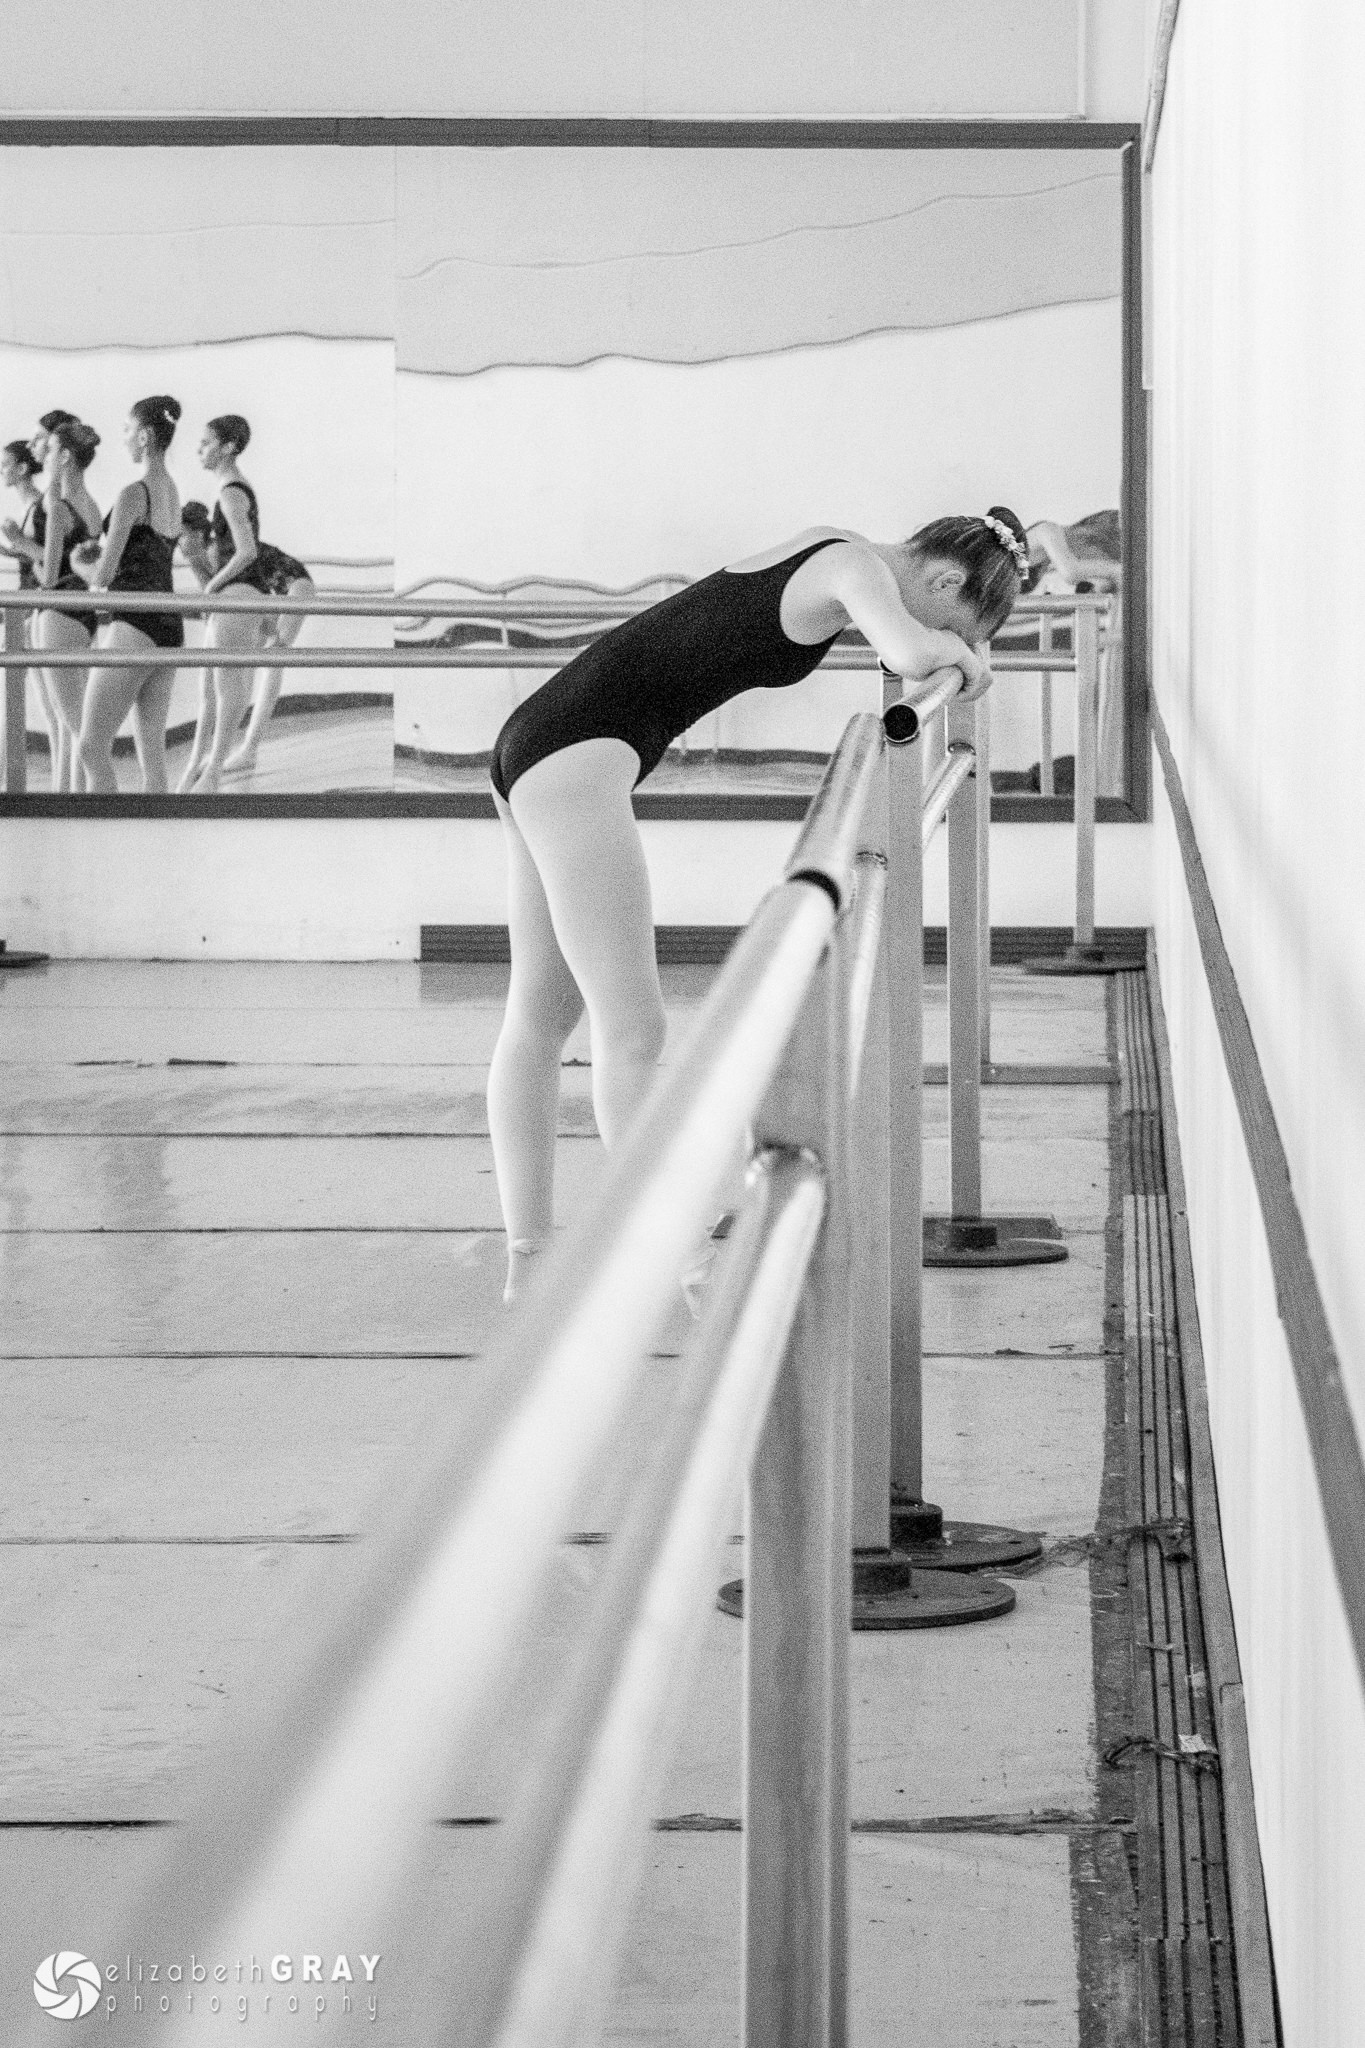
Slow shutter speeds, on the other hand, give more of an implied sense of motion by blurring the moving subject or the background. In each of these next four images, notice how the background is sharp, but the subject is blurred. In the second and third photograph, the shutter speed is so long that the people in the pictures appear ghosted. For the first image, I was hand-holding my camera. I took the last three on a tripod. With slow shutter speeds, camera technique is paramount. You will often need a tripod to prevent any unintentional blur.
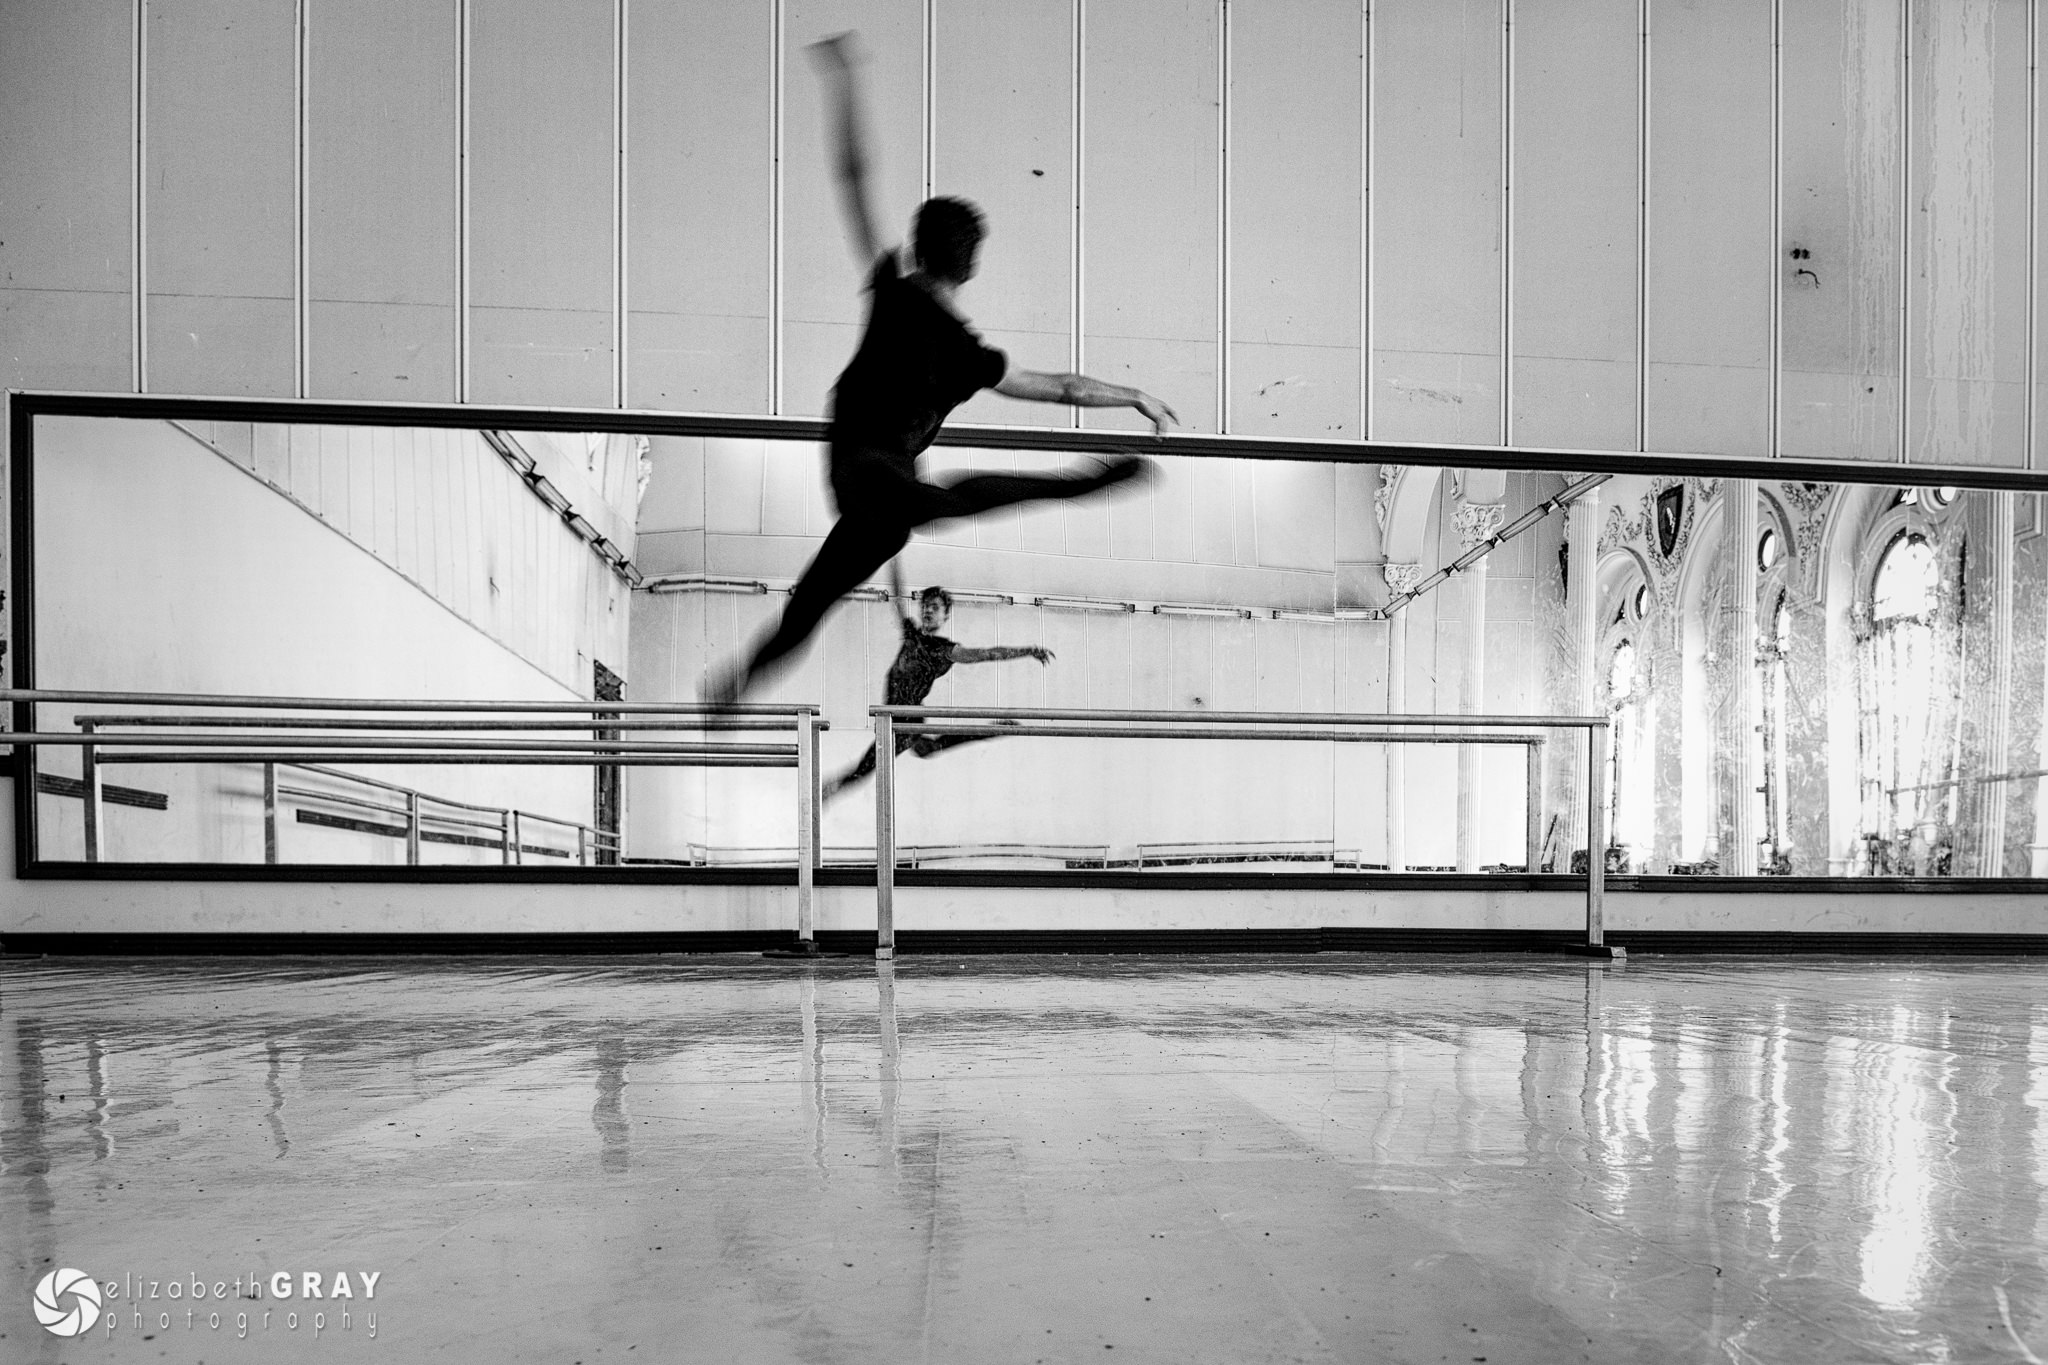
NIKON D500 + 17-55mm f/2.8 @ 17mm, ISO 200, 1/25, f/5.0
X100T @ 19mm, ISO 400, 1/1, f/11.0
NIKON D500 + 17-55mm f/2.8 @ 55mm, ISO 200, 8/1, f/16.0
NIKON D800 + 80-400mm f/4.5-5.6 @ 120mm, ISO 100, 1/1, f/22.0
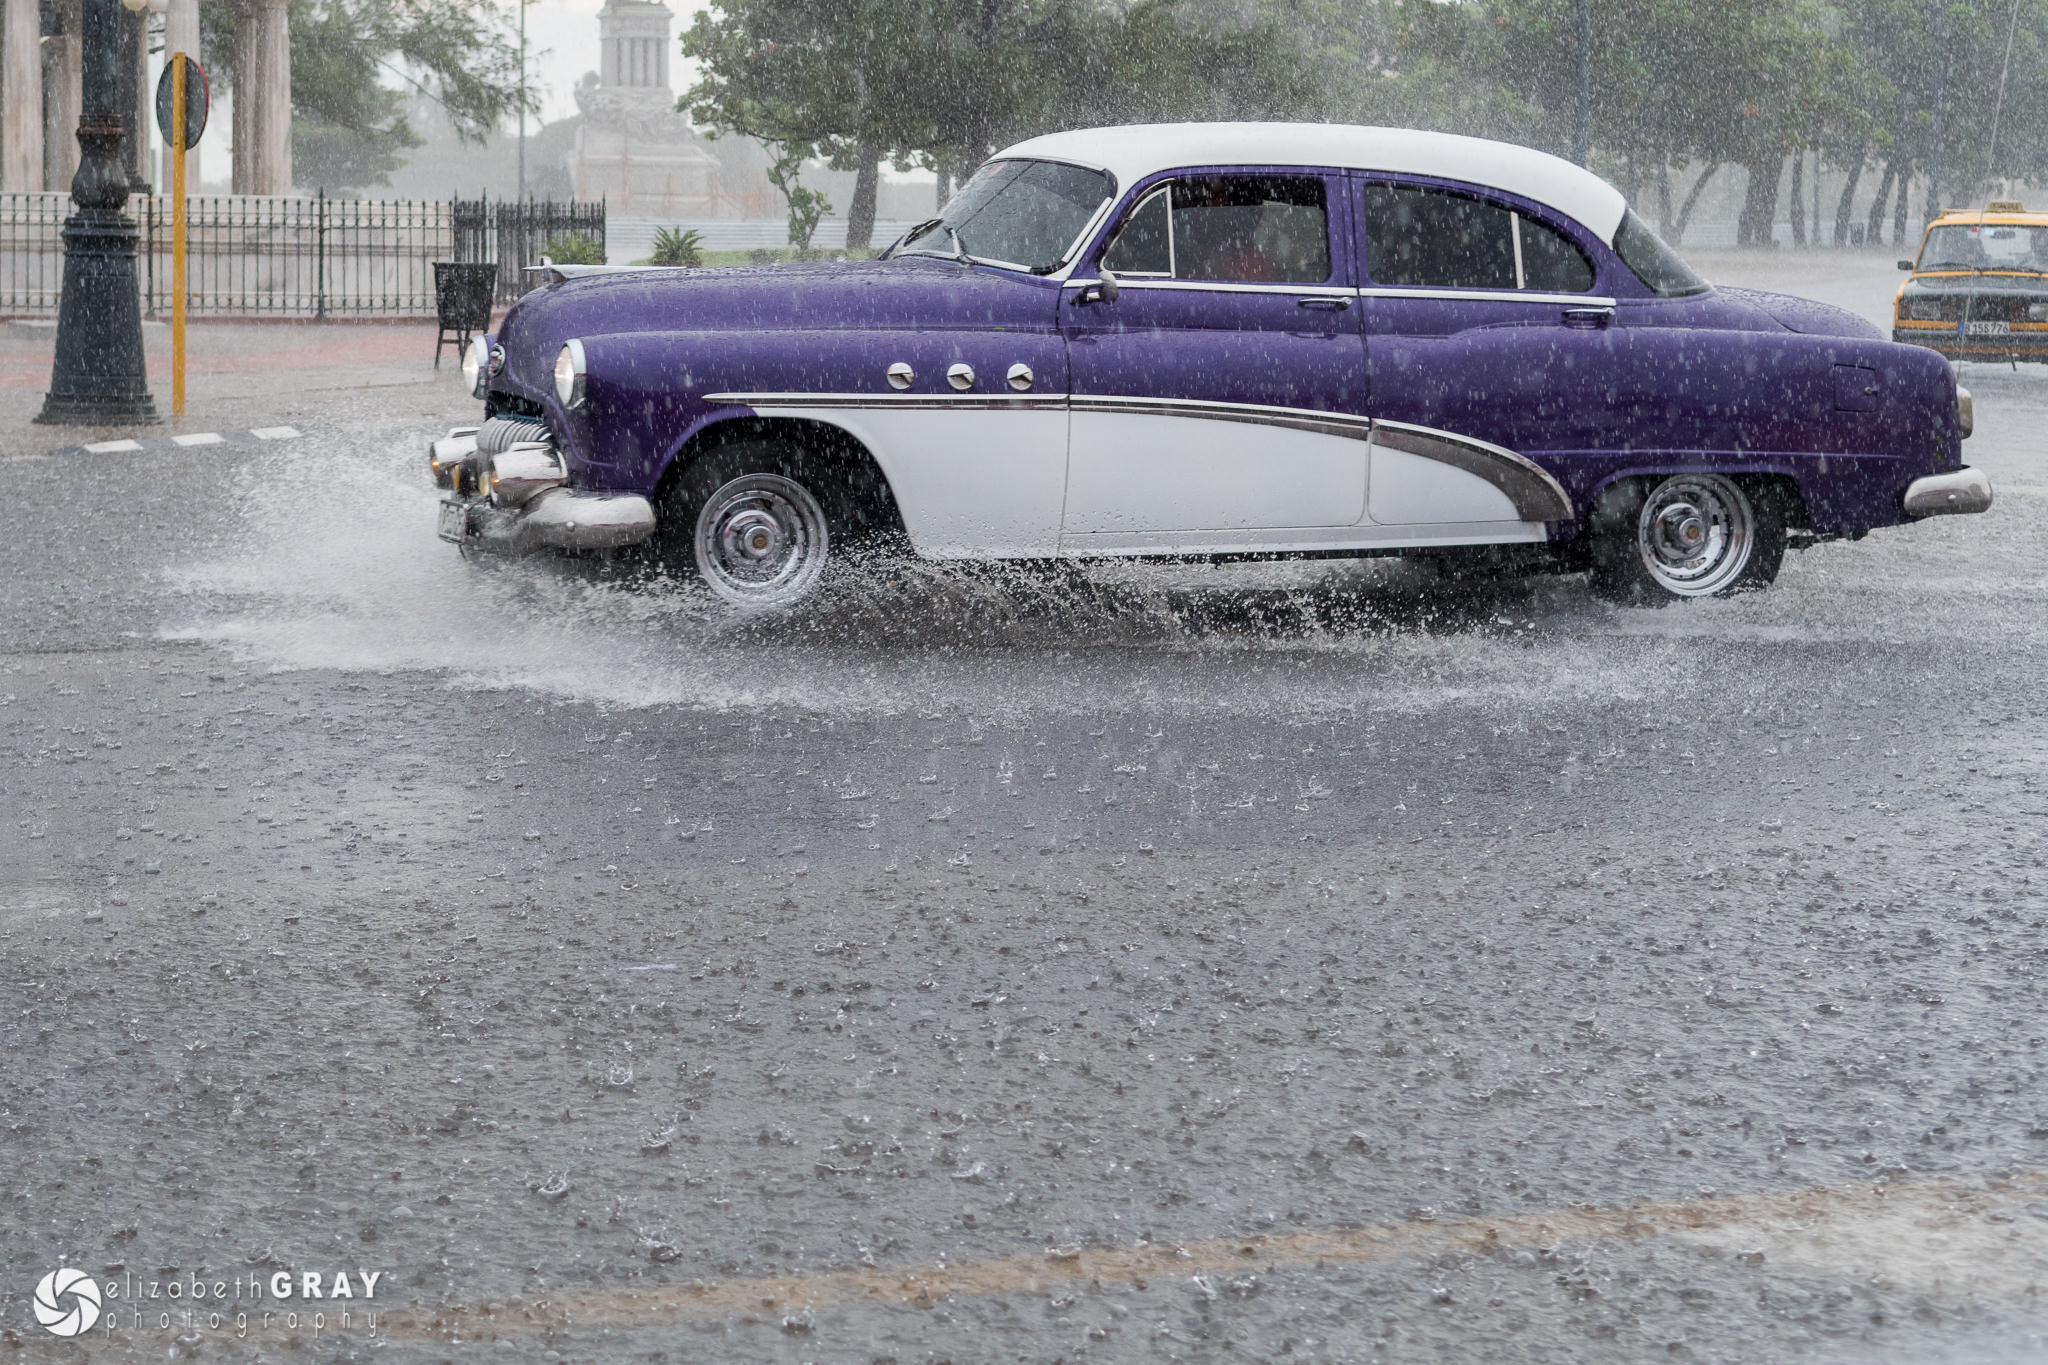
Panning is a technique that also uses a slow shutter speed. For this technique, you move the camera in time to the subject’s motion. In these two images, I set a relatively slow shutter speed and panned the camera in time with the subject. That is why the car and motorcycle are sharp, but the stationary background is blurred. This technique takes lots of practice and patience! To start, try practicing on cars or large birds to fine tune your technique.
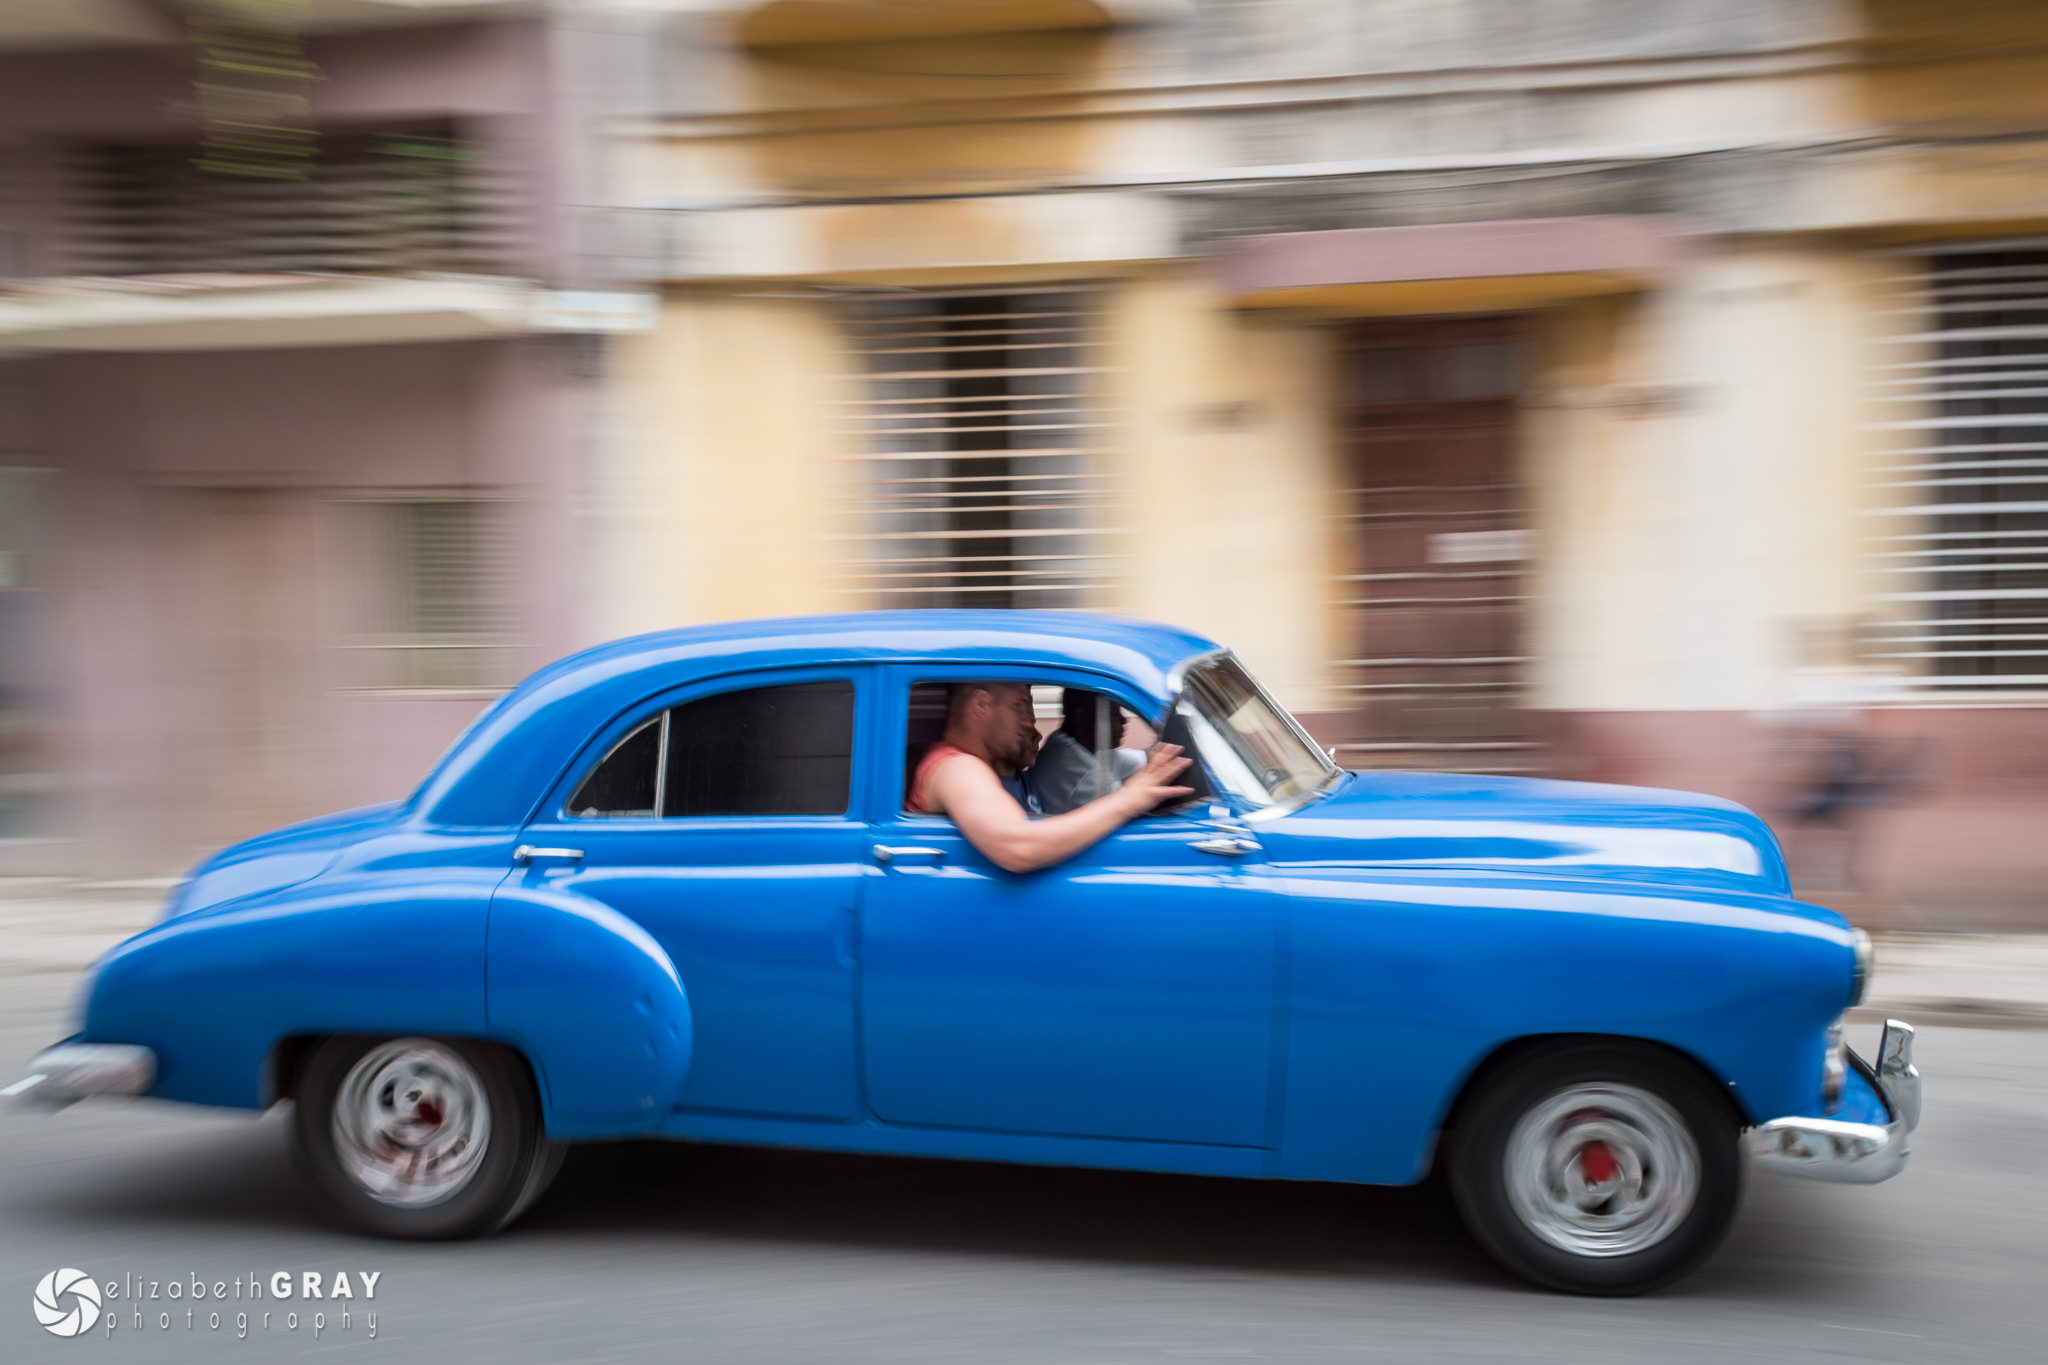
NIKON D500 + 17-55mm f/2.8 @ 17mm, ISO 100, 1/25, f/9.0
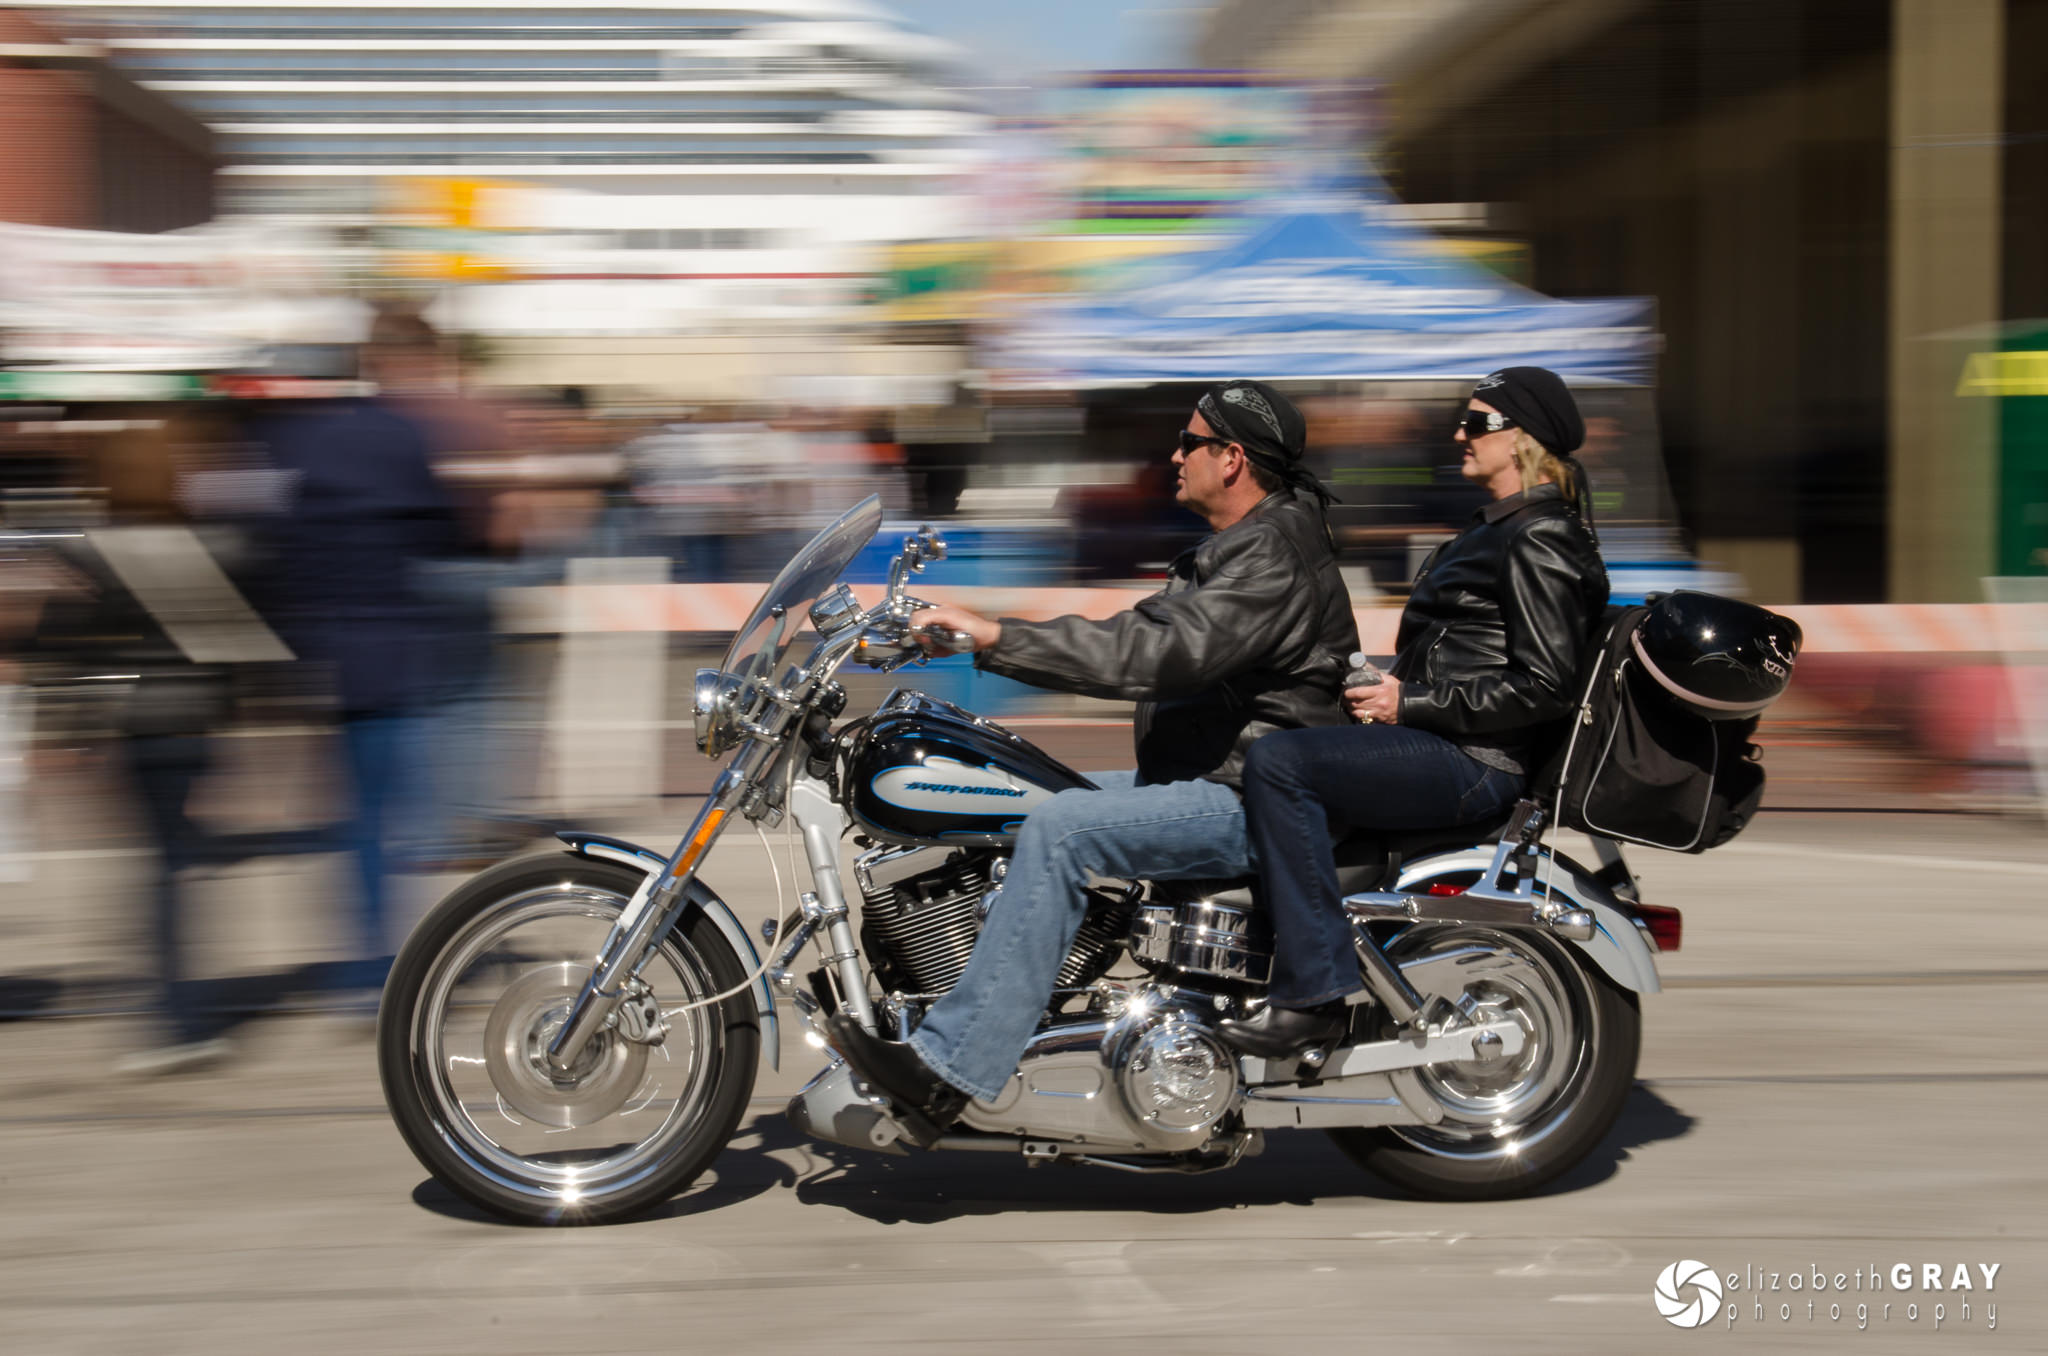
NIKON D7000 + 24-70mm f/2.8 @ 42mm, ISO 200, 1/25, f/20.0
In this last image, I was panning with the bufflehead but was using a relatively fast shutter speed of 1/500s. Notice how the birds head is comparatively sharp, but you still get a sense of movement with the blurred wings and water splashes.

NIKON D800 + 200-400mm f/4 @ 550mm, ISO 400, 1/500, f/9.0
Whether you are freezing motion or blurring it, you will need to experiment with different shutter speeds. There is no formula for what speed will give a particular effect. Your subject and its speed will dictate what works best. The beauty of digital is that it will allow you to experiment. If 1/60s doesn’t give a look you want, try 1/30s or 1/15s.
4) ISO
ISO is a very complicated topic, and I’m not going to get into details here. In simple terms, think of ISO as the sensitivity of the sensor (although it is not technically true, but it makes it easy to understand). I was recently listening to the podcast “Tips from the Top Floor”. In episode 753, Chris Marquardt, the host, gave a great analogy. He says to imagine every pixel as a bucket and light photons as raindrops. If a bucket is full, the pixel is pure white. If it is empty, it is pure black. Anything in between is a shade of gray. He goes on to describe this as native ISO. For most cameras, this is ISO 100, but on some, it may be as high as 200 or as low as 50. For the sake of argument, let’s say that ISO 100 is the native ISO of your camera.
Now if you double the ISO to 200 you double the sensitivity of the sensor. An empty bucket is still pure black, but it only takes half a bucket to represent a pure white pixel.
Double the ISO to 400, and now you only need to fill the bucket 1⁄4 full for the pixel to be pure white. And so on. 800 ISO, 1⁄8 full, 1600 ISO 1⁄1600 full for a pixel to be pure white. Empty buckets still represent black pixels. For very high ISO’s you only need to fill a small fraction of the bucket to get a white pixel. Or in other words, you need much less light to expose your image.
But there is always a cost. At higher ISO’s it is much harder to measure the rain in the buckets. At ISO 100, think of measuring the depth in inches. But at higher ISO’s it gets harder to measure accurately. Imagine trying to fill a bucket to only a fraction of an inch; you lose precision. This lack of accuracy manifests itself as digital noise. By increasing your ISO, you require less light to expose your image. Higher ISO’s allow you to shoot without a flash, use faster shutter speeds, or use smaller apertures in low light. However, the trade-off is an increase in noise.
So how high can you push your ISO? To me, it is a personal choice. It depends on what camera I’m using and how I will be viewing my photos. Whenever I get a new camera, I spend some time testing the ISO. I’m not talking high-tech scientific studies. I’m talking subjective tests. I take series of pictures in different lighting conditions, changing the ISO after each shot. I like to test my ISO in both daylight and darker conditions. I look at my images on the computer and compare them. I also print out test shots in a couple of sizes and look at them at various distances. I’m not as concerned with what the photograph looks like zoomed into 100% on my computer because that is not how I will be looking at them in the end. The amount of noise that I can tolerate may be different than what someone else accepts. With my Nikon D800, I don’t like to shoot above ISO 1600 when there is a lot of shade, or ISO 3200 if the light is bright and I want a faster shutter speed. If I know that I’m going to be converting to black and white, I will venture as high as ISO 6400. On the other hand, I’m very comfortable using ISO 6400 on my Fuji X100T in any lighting conditions. Again, this is what I am happy with; you may feel differently. What’s important is that you know how much noise you feel comfortable with, and at what ISO level that occurs within your camera.
ISO does not affect a photo in as dramatic a way as aperture or shutter speed. However, it allows you to have more flexibility when choosing your aperture and shutter speed. By increasing the ISO, I was able to achieve a fast enough shutter speed to capture sharp images handheld.
NIKON D500 + 17-55mm f/2.8 @ 48mm, ISO 6400, 1/60, f/2.8

X100T @ 19mm, ISO 6400, 1/90, f/2.0
NIKON D800 + 80-400mm f/4.5-5.6 @ 400mm, ISO 2000, 1/200, f/5.6
This image was shot at sunset from a moving canoe!
NIKON D500 + 17-55mm f/2.8 @ 55mm, ISO 6400, 1/160, f/5.6
In this picture of a white morph reddish egret, the light was good, but not bright enough for a shutter speed fast enough to freeze his dance. I increased my ISO so I could use a faster shutter speed.

NIKON D7100 + 200-400mm f/4 @ 440mm, ISO 800, 1/3200, f/6.3
5) Putting It All Together
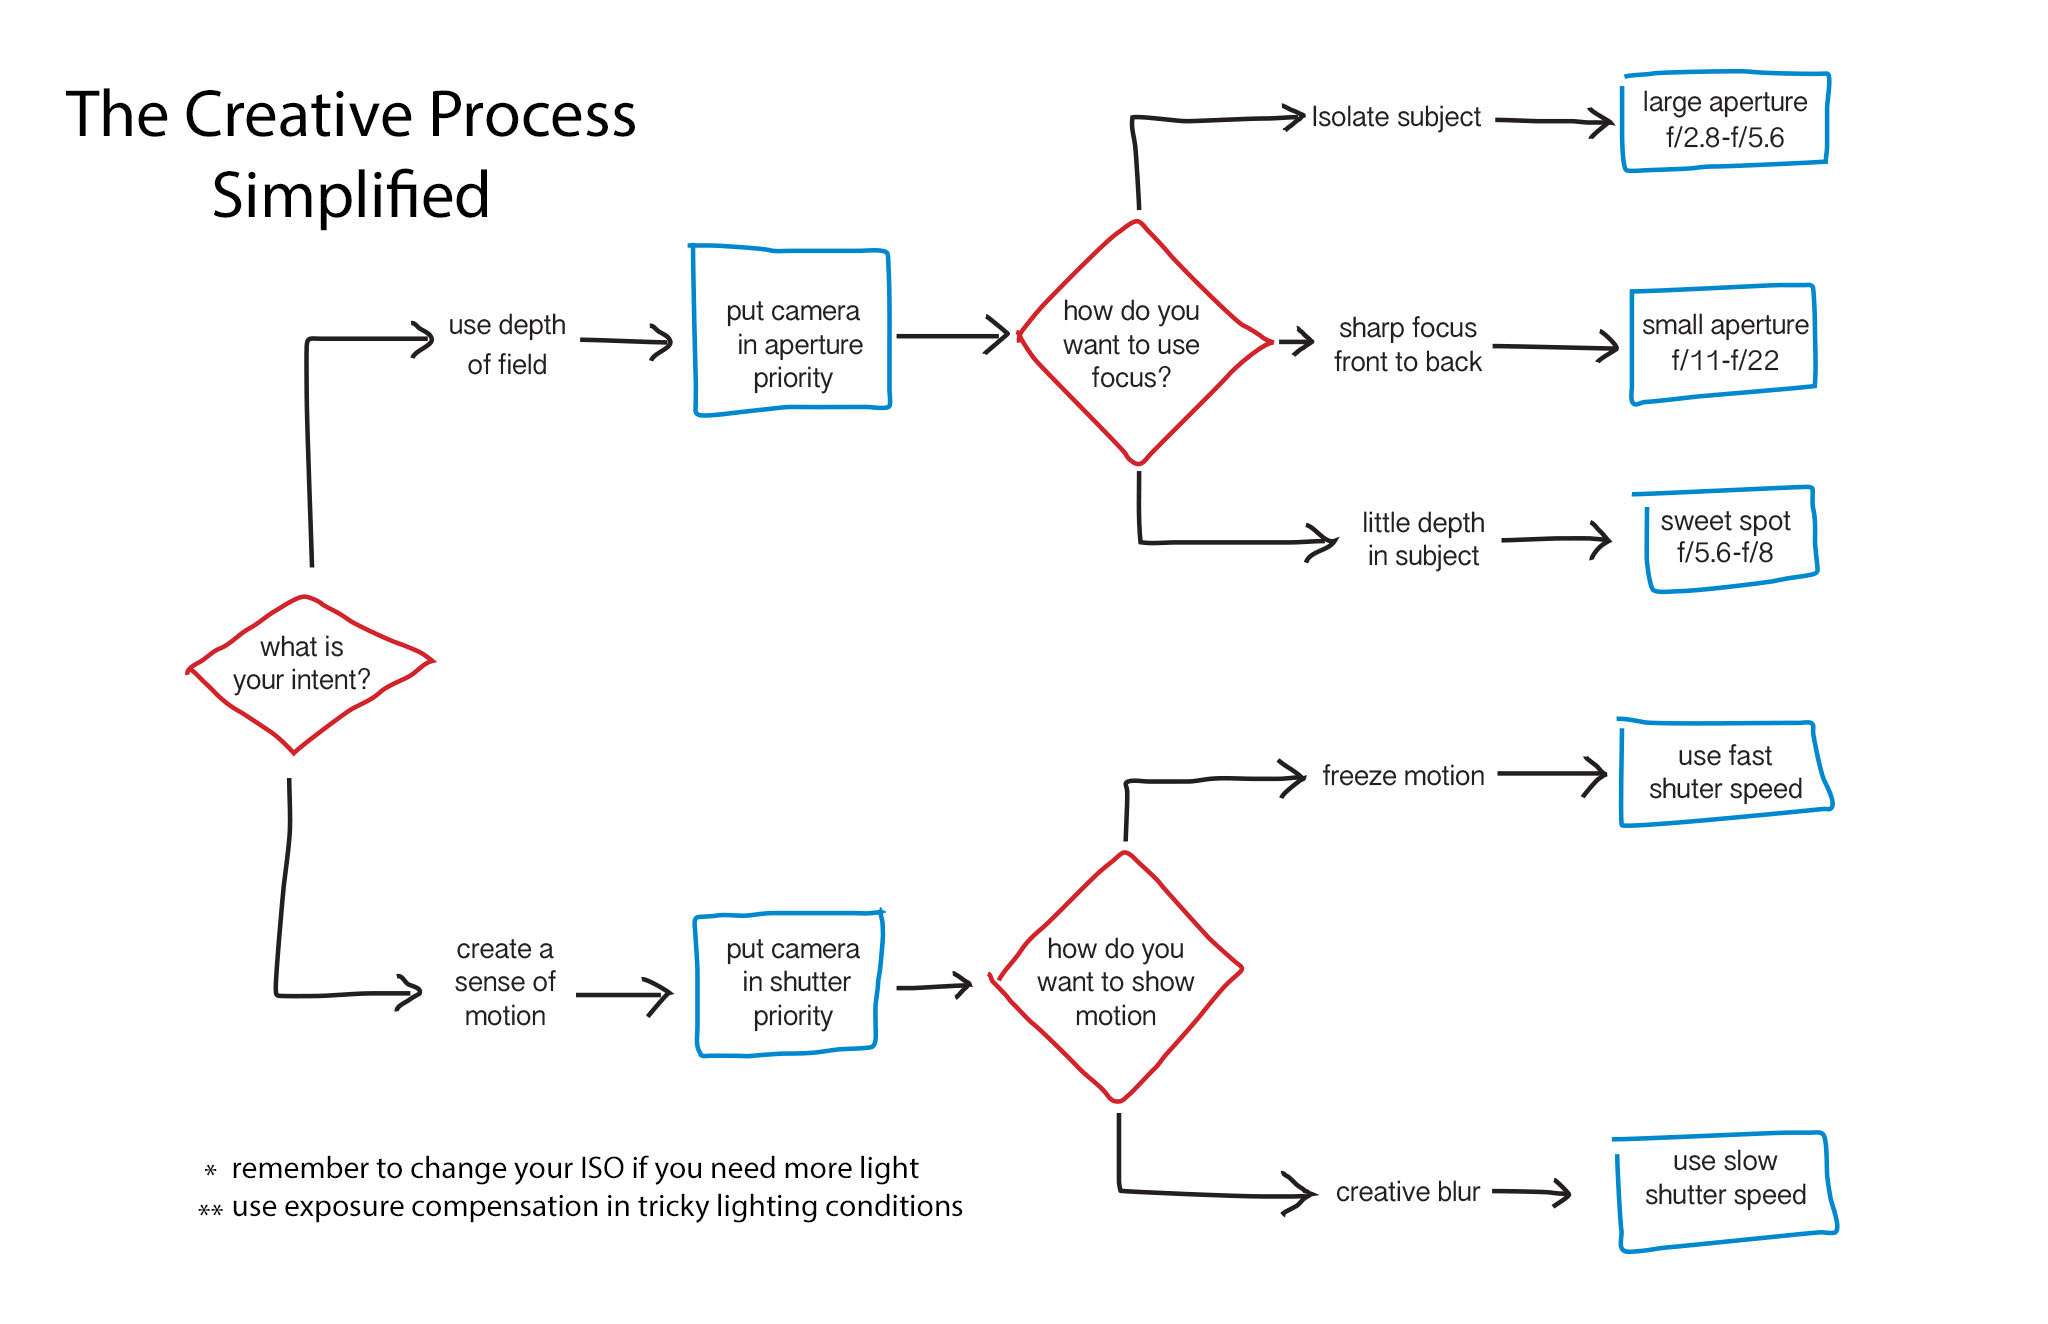
To create compelling images you have to shoot with intent. What do you want to portray in your image? Before you press the shutter, ask yourself what is important. Is depth of field going to allow you to capture the photograph you imagine, or do you want to evoke a feeling of movement? The answer to these questions will dictate what shooting mode to set on your camera.
If your answer is depth of field, then put your camera in Aperture Priority. In Aperture Priority, you select the aperture, and your camera will compute the required shutter speed. Next, ask yourself how much depth of field you want to capture. Are you trying to isolate your subject from the background? Do you want to have sharp focus from foreground to the background? Or, are you taking a relatively two-dimensional image without much depth? By answering these questions and setting your aperture appropriately, you are taking creative control of your image.
Don’t take the shot just yet, though. Press your shutter release half way to see what shutter speed the camera selects for your chosen aperture. If it is not fast enough, you will either have to bump up your ISO or place your camera on a tripod. This last step takes practice. It is important to pay attention to those numbers that appear in your viewfinder when you press the shutter, and more importantly to understand what they are telling you.
If you are trying to show motion, then set your camera to Shutter Speed Priority. In this mode, you select your shutter speed, and the camera computes the aperture.
Do you want to freeze motion or use creative blur? Depending on your answer, set a fast or slower shutter speed respectively. Make sure that you check the exposure before you shoot by pressing the shutter half way. If the light is low, you may need to bump up your ISO or risk an underexposed image. An underexposed image happens when the computed aperture is wider than the largest aperture of your lens. If you are paying attention, you will see a warning in your viewfinder, the exposure values will probably be flashing at you. This flashing is your warning to increase your ISO.
You may think this is a lot to remember, but it won’t take long before these questions and answers become second nature. Try to anticipate ahead of time what kind of shots you are going to be capturing and what kind of ISO’s you will need. The chances are that you won’t need to change the mode you are shooting in over the course of an outing.
6) Auto ISO
Most newer model cameras have a feature called “auto ISO”. In auto ISO, the camera will adjust the ISO for you. You start by selecting the highest ISO you are comfortable using. The camera will always use the lowest possible ISO to expose the image correctly. But when the light levels drop, the camera will automatically raise the ISO, up to your chosen ceiling. In some cameras, you can also set a shutter speed that you do not want the camera to fall below. For example, if you are comfortable hand holding your lens down to 1/30s, then set the shutter speed limit here. If you are shooting wildlife and want to freeze motion, adjust the limit to 1/500s.
Auto ISO works differently in each of the shooting modes. In Aperture Priority, you set the aperture, and the camera computes the shutter speed. If the camera determines that a longer shutter speed than the limit you set is required, then it will trigger the Auto ISO to bump up your sensitivity.
In Shutter Priority, you set a shutter speed, and the camera determines the aperture. If the camera requires an aperture wider than the range of your lens, it will bump up the ISO for you. Auto ISO will decrease your chances of getting underexposed shots.
You can also take advantage of Auto ISO in full Manual Mode. Here you set both the aperture and shutter speed. The camera will determine the ISO required to expose the image with those settings correctly.
7) Outsmarting Your Meter – Exposure Compensation
Sometimes, even with your guidance, the camera gets the exposure wrong. Incorrect metering tends to happen in tricky lighting conditions. That’s when exposure compensation comes to the rescue. With exposure compensation, you can add or subtract up to three stops of light (some cameras will let you adjust the exposure by five stops). Exposure Compensation is very helpful when the light fools the sensor.
In this image of two ospreys mating, I wanted to make sure the birds were correctly exposed. The sky, although gray, was bright and was fooling my camera. The result was an image correctly exposed for the background, but the birds were too dark. I added two stops of light using the exposure compensation dial. Although this did blow out the background, my subjects were correctly exposed.

NIKON D7100 + 80-400mm f/4.5-5.6 @ 400mm, ISO 400, 1/500, f/7.1
Here is another image where I did a similar thing. I added exposure using the compensation dial so that the bright background did not fool the meter. Adding exposure gave me the high key look that I wanted for this image.
NIKON D800 + 105mm f/2.8 @ 105mm, ISO 100, 1/30, f/5.0
Sunsets often benefit from using some exposure compensation, but this time in the opposite direction. If you notice that your picture looks washed out on the back of the camera, take away a stop or two of light. Decreasing the exposure will intensify the colors in the sky.

Canon PowerShot S95 + 6-22.5mm @ 22.5mm, ISO 250, 1/250, f/8.0
NIKON D500 + 16-80mm f/2.8-4 @ 80mm, ISO 400, 1/800, f/16.0
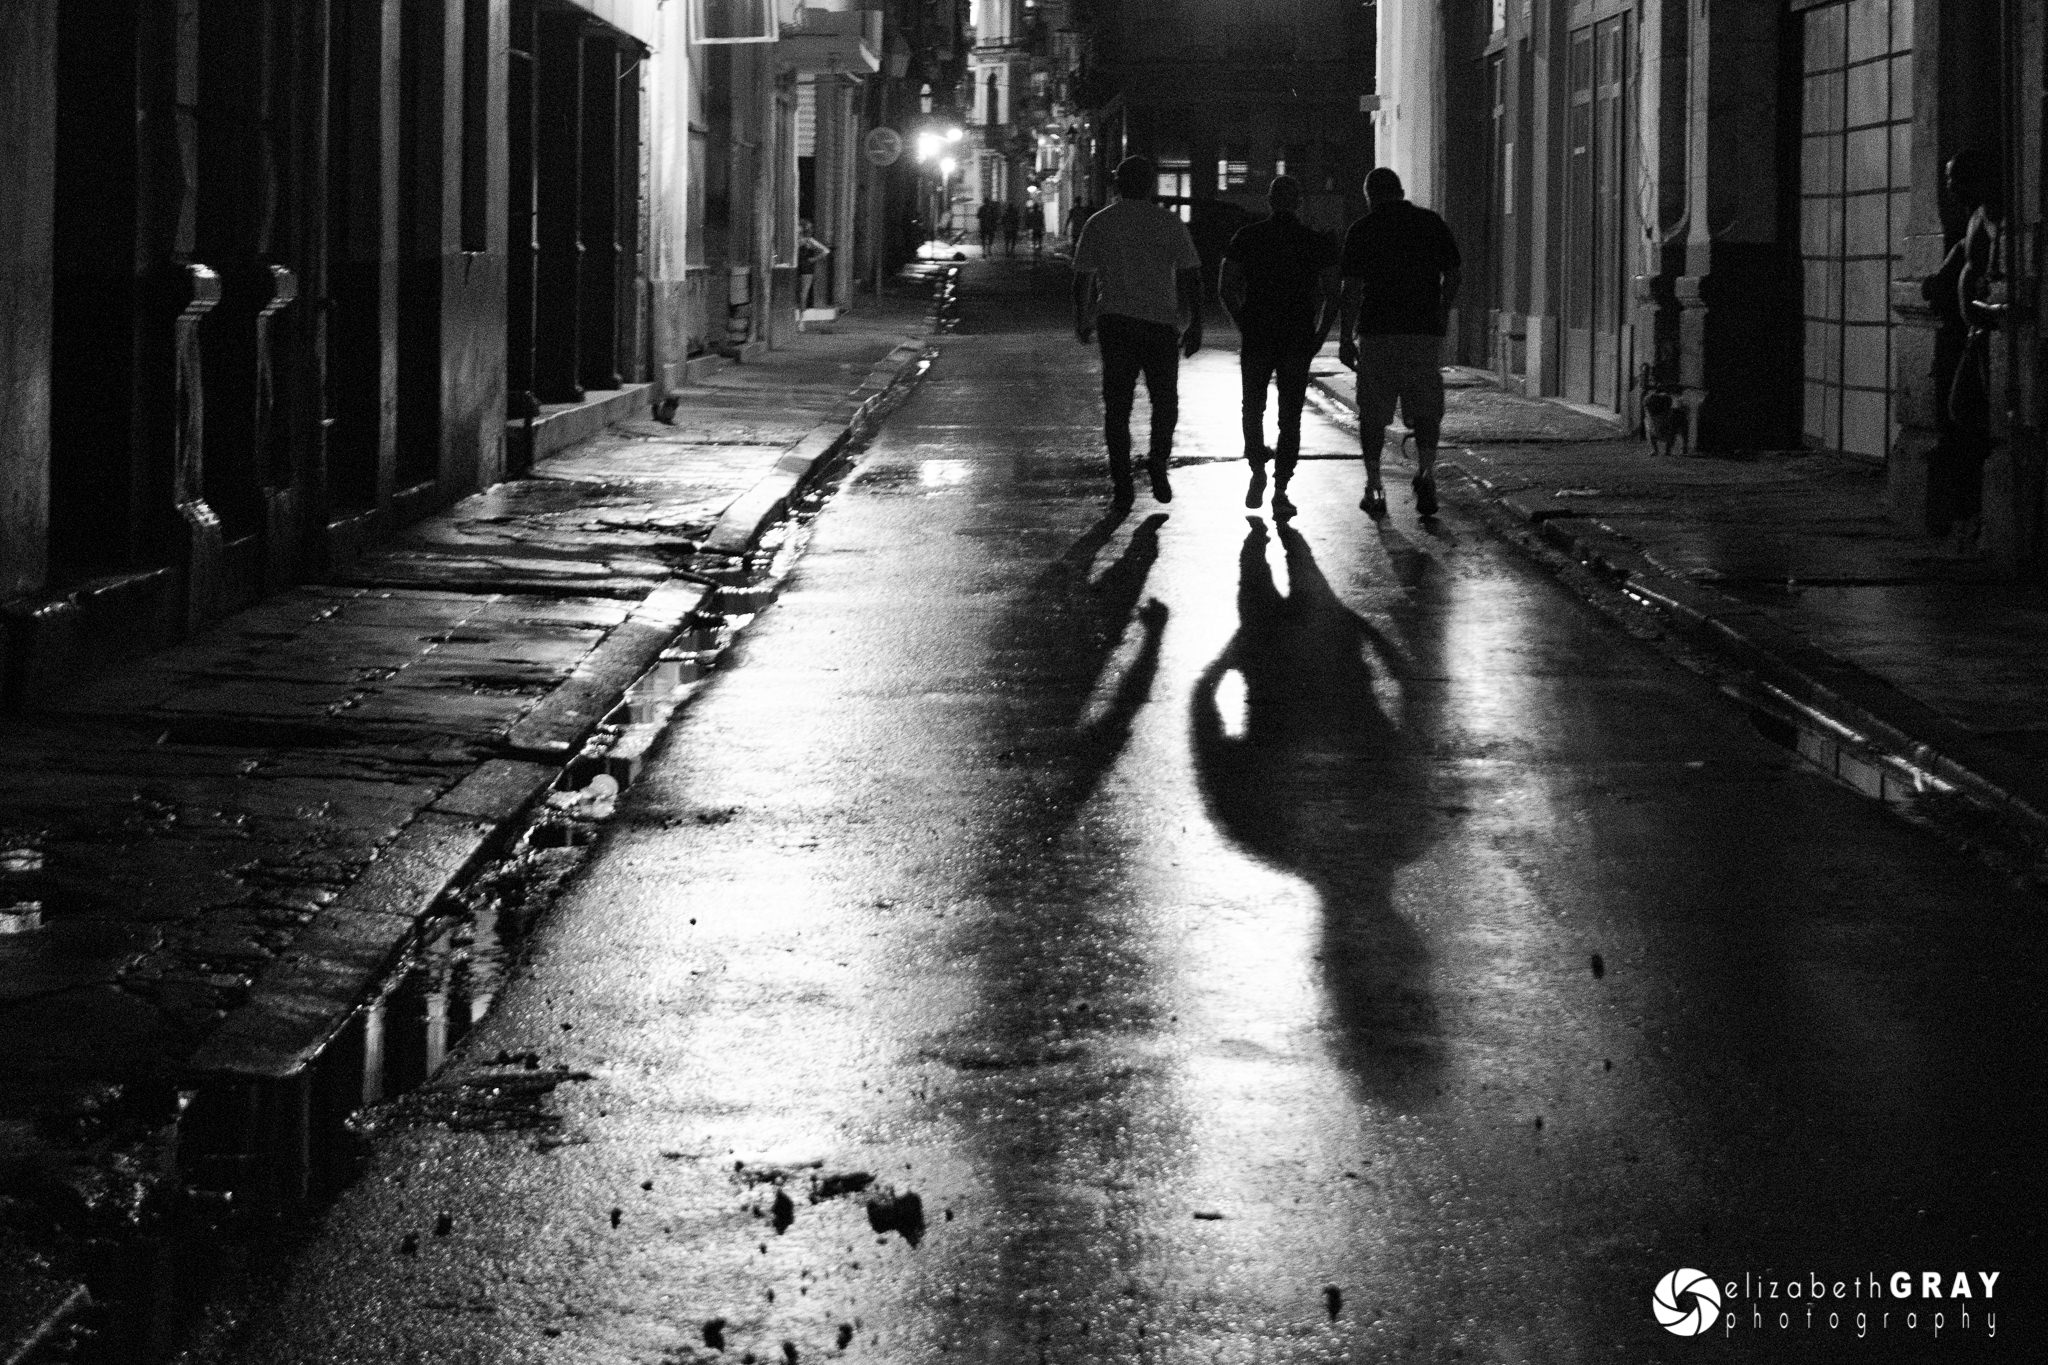
Silhouettes can make for some powerful and compelling images. For each of these photographs, I used my exposure compensation to dial back the exposure a stop. In Aperture Mode, negative compensation forced the camera to choose a faster shutter speed. Less light ensured that my subject ended up silhouetted against the background.
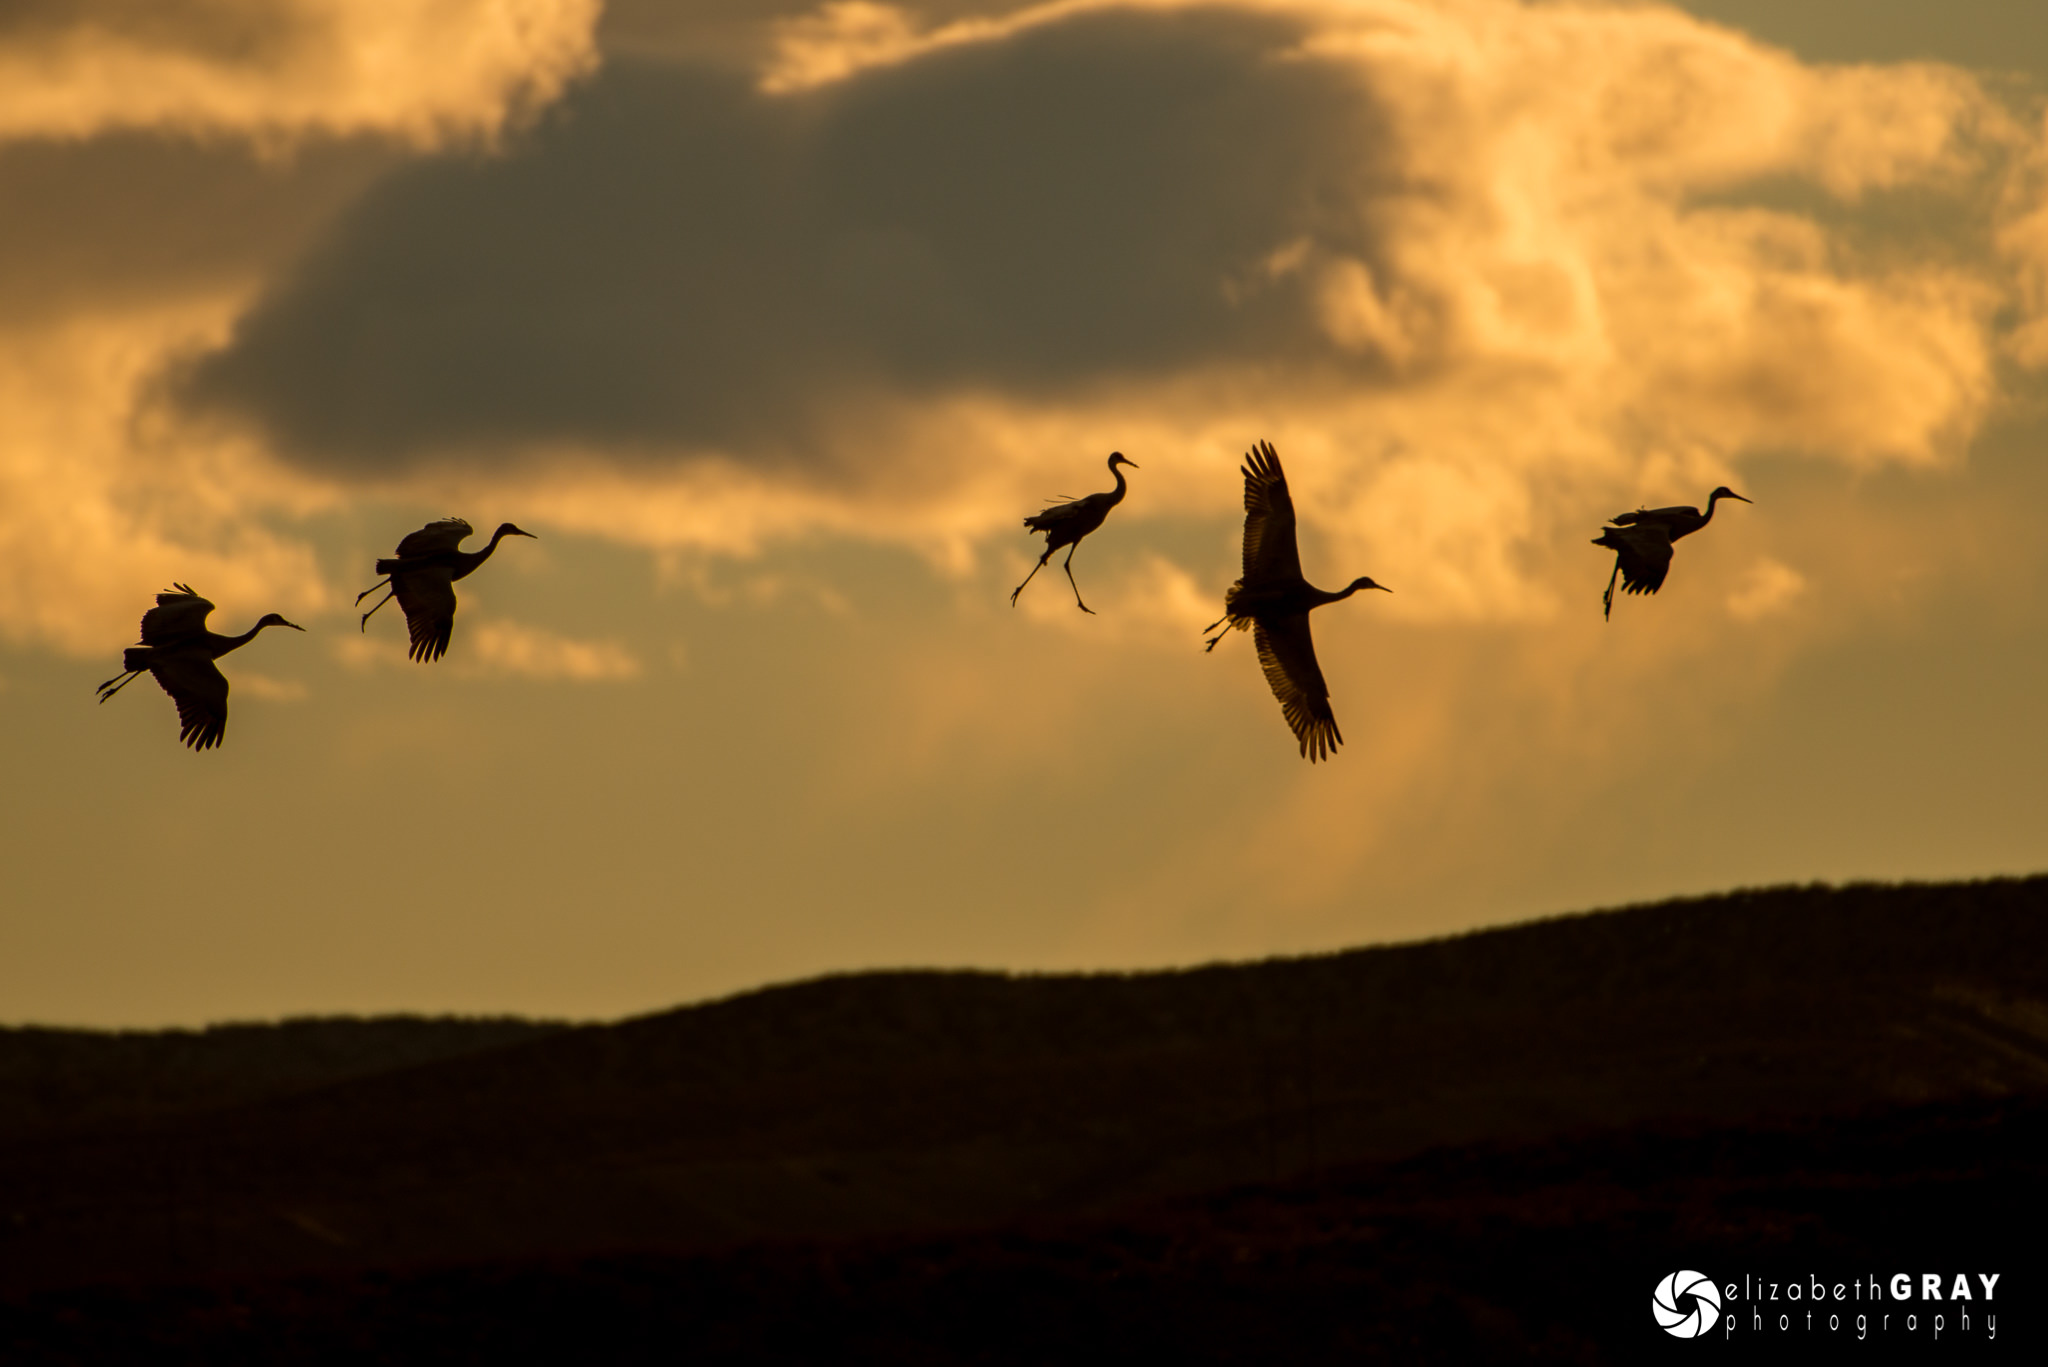
NIKON D800 + 200-400mm f/4 @ 550mm, ISO 400, 1/2500, f/5.6
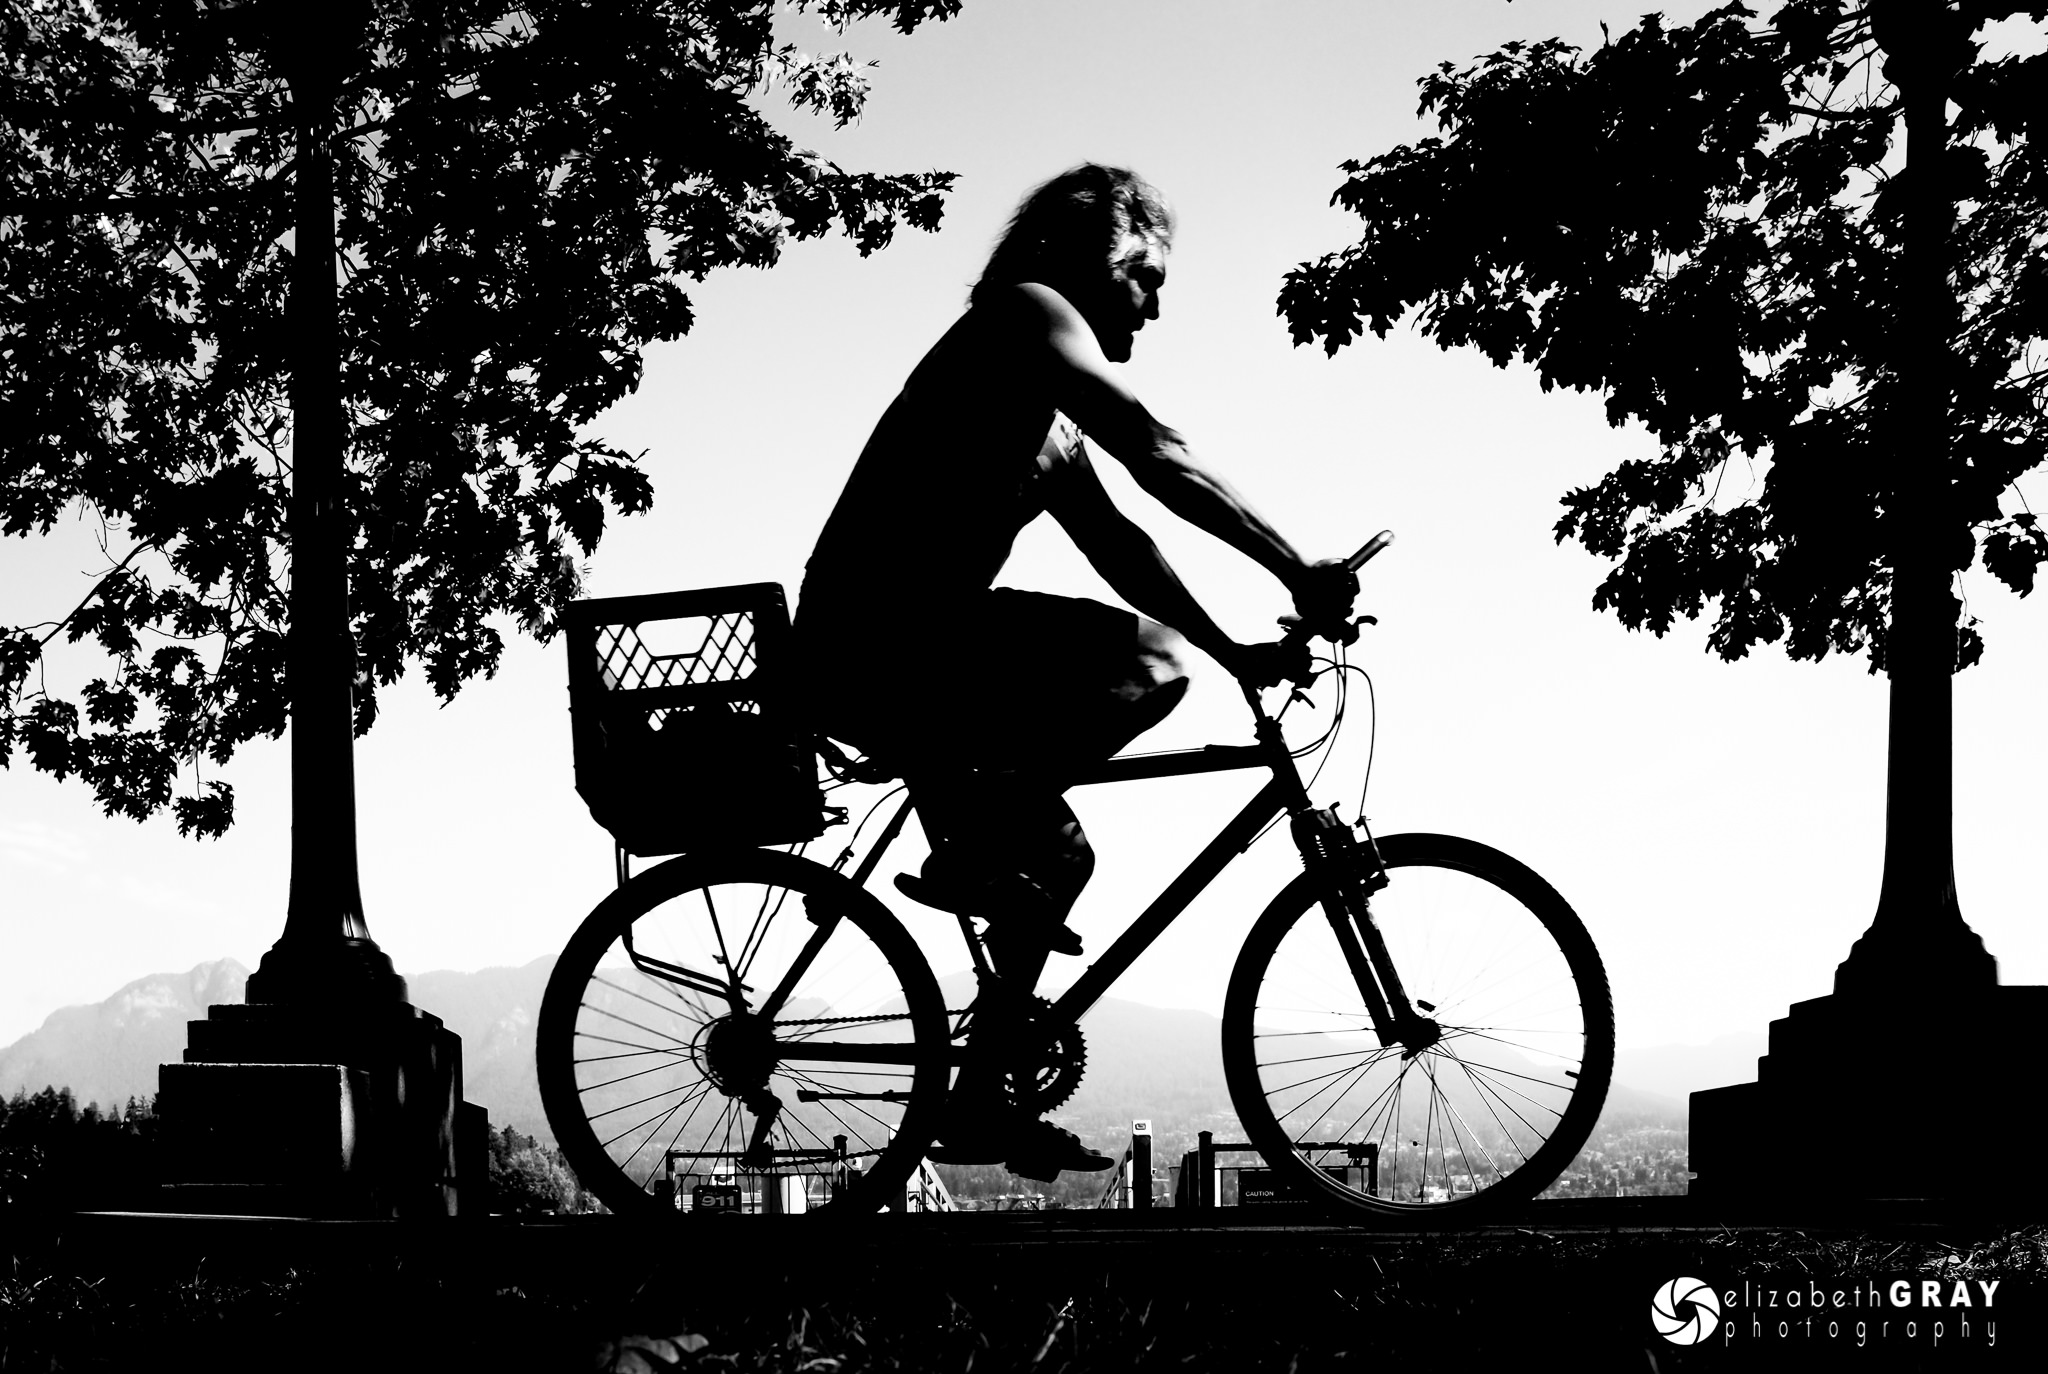
X100T @ 23mm, ISO 200, 1/500, f/9.0
X100T @ 23mm, ISO 200, 1/1000, f/5.6
8) Conclusion
Each and every photograph in this article was taken with intent. I thought about my settings before I took the shots. Don’t be afraid to experiment with different exposures and settings. Trial and error is the best way to learn. If you see an image you like, ask yourself why you like it and try to figure out what camera settings were used. Don’t just shoot without having a vision in mind first. You will end up with far more keepers this way, and they will be much more creative.
The post Choosing a Creative Exposure – A Beginner’s Guide appeared first on Photography Life.


